Category: healthy food

  • Soft Homemade Milk Bread:

    Soft Homemade Milk Bread:

    Soft Homemade Milk Bread:

    Table of Contents

    Ingredients:

    1 cup (200 ml) warm water
    1 cup (200 ml) warm milk
    1 tablespoon sugar
    10 g yeast (about 2 teaspoons)
    1 teaspoon salt
    30 g butter (about 2 tablespoons), softened
    600 g flour (about 4 ¾ cups)
    40 g butter (about 3 tablespoons), for brushing

    Directions:

    Prepare the dough:
    In a large mixing bowl, combine the warm water, warm milk, sugar, and yeast. Stir well and let it sit for 10 minutes until the yeast becomes frothy.
    Mix the dough:
    Add the salt, 30 g of softened butter, and flour to the yeast mixture. Mix well until the dough comes together.
    Knead the dough:
    Knead the dough for about 5-7 minutes until smooth and elastic. If it’s too sticky, add a little more flour.
    Let the dough rise:
    Place the dough in a greased bowl, cover with a towel, and leave it in a warm place for 45 minutes or until it doubles in size.
    Shape the dough:
    After the dough has risen, punch it down and let it rest for another 15 minutes. Sprinkle some flour on a surface, divide the dough into your desired shape (loaf or rolls), and place it in a greased baking tray.
    Bake the bread:
    Preheat your oven to 200°C (390°F). Bake the bread for 25 minutes until golden brown.
    Brush with butter:
    While the bread is still hot, brush the top with the 40 g of melted butter for extra flavor and softness.
    Cool and serve:
    Let the bread cool slightly before slicing and serving. Enjoy it warm with your favorite spread or as a side dish.
    Serving Suggestions:
    This soft milk bread is perfect for sandwiches, toasted with butter, or as a side to soups and salads.
    You can also serve it with honey, jam, or cheese for breakfast or as a snack.
    Cooking Tips:
    Make sure the milk and water are warm (not hot) to properly activate the yeast.
    Knead the dough well for a soft and fluffy texture.
    For a sweeter version, increase the sugar to 2 tablespoons.
    Nutritional Benefits:
    Homemade bread: Contains fewer preservatives than store-bought bread.
    Milk and butter: Provide calcium and healthy fats, which contribute to stronger bones and energy.
  • No-Bake Coconut Chocolate Balls with Peanuts

    No-Bake Coconut Chocolate Balls with Peanuts

    No-Bake Coconut Chocolate Balls with Peanuts

    Table of Contents

    Ingredients:

    330g (11.64 oz) biscuits, finely crushed
    90g (0.5 cup/3.17 oz) sugar
    30g (2.5 tablespoons/1 oz) cocoa powder
    150ml (0.75 cup/5 fl. oz) milk
    60g (2.11 oz) butter
    100g (1.4 cup/3.52 oz) coconut flakes
    100g (3.52 oz) white chocolate
    1 tablespoon vegetable oil
    50g (4 tablespoons/1.76 oz) peanuts, chopped

    Directions:

    Prepare the Biscuit Base:
    Place 330g of biscuits in a blender and chop them into fine crumbs.
    Combine Dry Ingredients:
    In a saucepan, combine 90g of sugar and 30g of cocoa powder. Stir well.
    Add Milk:
    Gradually add 150ml of milk to the sugar and cocoa mixture, stirring continuously.
    Heat and Mix:
    Heat the mixture over medium heat, stirring until the sugar is dissolved and the mixture is smooth.
    Add Butter:
    Stir in 60g of butter until fully melted and combined.
    Mix with Biscuit Crumbs:
    Pour the chocolate mixture over the crushed biscuits and stir until everything is well combined.
    Add Coconut Flakes:
    Add 100g of coconut flakes to the mixture and stir thoroughly until evenly distributed.
    Shape the Mixture:
    Let the mixture sit for a few minutes to cool slightly. Then, form it into small balls using your hands.
    Prepare Chocolate Coating:
    Melt 100g of white chocolate in a microwave or over a double boiler. Add 1 tablespoon of vegetable oil to make the coating smooth.
    Coat and Roll:
    Dip each ball into the melted chocolate, then roll it in chopped peanuts.
    Chill:
    Place the coated balls on a baking sheet and refrigerate for 1 hour to set.
    Serving Suggestions:
    Serve these chocolate balls as a sweet treat with coffee or tea.
    Package them in a decorative box for a homemade gift.
    Add a sprinkle of extra coconut flakes or a drizzle of dark chocolate for garnish.
    Cooking Tips:
    For a more intense chocolate flavor, use dark chocolate instead of white chocolate for the coating.
    If the mixture is too sticky to handle, refrigerate it for 10-15 minutes before shaping into balls.
    For a nut-free version, substitute peanuts with additional coconut flakes or sprinkles.
  • Bang Bang Chicken Recipe

    Bang Bang Chicken Recipe

    Bang Bang Chicken Recipe


    Bang Bang Chicken is a delicious dish that combines crispy chicken with a creamy, spicy sauce. It’s a popular choice for appetizers or as a main dish. Below is a detailed recipe that will guide you through each step, ensuring you create a delightful meal.


    #### Ingredients


    **For the Chicken:**

    – 1 pound (450g) boneless, skinless chicken breasts

    – 1 cup all-purpose flour

    – 1 teaspoon salt

    – 1/2 teaspoon black pepper

    – 1/2 teaspoon garlic powder

    – 1/2 teaspoon onion powder

    – 2 large eggs

    – 1 cup panko breadcrumbs

    – Vegetable oil (for frying)


    **For the Bang Bang Sauce:**

    – 1/2 cup mayonnaise

    – 1/4 cup sweet chili sauce

    – 1 tablespoon sriracha (adjust for spice preference)

    – 1 tablespoon honey (optional)

    – 1 teaspoon rice vinegar

    – Salt to taste


    **For Garnish:**

    – Chopped green onions

    – Sesame seeds

    – Lettuce leaves (for serving)


    #### Instructions


    ##### Step 1: Prepare the Chicken


    1. **Slice the Chicken**: Cut the chicken breasts into thin strips or bite-sized pieces. This allows for a quicker cooking time and better crispiness.


    2. **Season the Chicken**: In a bowl, combine the flour, salt, black pepper, garlic powder, and onion powder. Mix well. This seasoned flour will give the chicken a flavorful crust.


    ##### Step 2: Breading Station


    1. **Set Up a Breading Station**: You’ll need three shallow dishes: one with the seasoned flour, one with the beaten eggs, and one with panko breadcrumbs.


    2. **Coat the Chicken**:

    – First, dip each chicken piece in the seasoned flour, ensuring it is fully coated.

    – Next, dip it into the beaten eggs, letting any excess drip off.

    – Finally, coat the chicken in panko breadcrumbs, pressing gently to adhere. Repeat until all chicken pieces are coated.


    ##### Step 3: Prepare the Bang Bang Sauce


    1. **Mix the Sauce**: In a bowl, whisk together the mayonnaise, sweet chili sauce, sriracha, honey (if using), and rice vinegar until smooth. Adjust seasoning with salt to taste. Set aside.


    ##### Step 4: Fry the Chicken


    1. **Heat the Oil**: In a large skillet or deep fryer, heat about 1 inch of vegetable oil over medium-high heat. To test if the oil is ready, drop a small piece of bread into the oil; if it sizzles, it’s ready.


    2. **Fry the Chicken**: Carefully add the breaded chicken pieces in batches, making sure not to overcrowd the pan. Fry until golden brown and crispy, about 4-5 minutes per side. The internal temperature should reach 165°F (74°C).


    3. **Drain**: Remove the fried chicken from the oil and place it on a paper towel-lined plate to absorb excess oil.


    ##### Step 5: Assemble the Dish


    1. **Combine Chicken and Sauce**: In a large bowl, add the crispy chicken pieces. Drizzle the Bang Bang sauce over the chicken and toss gently to coat all pieces evenly.


    2. **Serve**: Arrange the coated chicken on a serving platter or individual plates. Garnish with chopped green onions and sesame seeds. You can serve the Bang Bang Chicken on a bed of lettuce leaves for a fresh touch.


    #### Tips for Success


    – **Chicken Variations**: You can substitute chicken with shrimp or tofu for different protein options. Adjust cooking time accordingly.

    – **Sauce Adjustments**: Modify the spiciness of the sauce by increasing or decreasing the amount of sriracha. You can also experiment with other sauces like teriyaki or barbecue.

    – **Baking Option**: If you prefer a healthier option, you can bake the breaded chicken at 400°F (200°C) for about 20-25 minutes, flipping halfway through until golden and cooked through.

    – **Storage**: Leftover Bang Bang Chicken can be stored in an airtight container in the refrigerator for up to 3 days. Reheat in the oven to maintain crispiness.


    #### Nutritional Information


    While the exact nutritional content will depend on portion sizes and specific ingredients used, here’s a general overview:


    – **Calories**: Approximately 450-600 calories per serving

    – **Protein**: High in protein due to chicken

    – **Fats**: Includes healthy fats from cooking oil and mayonnaise

    – **Carbohydrates**: Contains carbohydrates from flour and breadcrumbs


    #### Conclusion


    Bang Bang Chicken is a delightful dish that combines a crunchy texture with a creamy, spicy sauce. Perfect for gatherings, game days, or a delicious dinner, this recipe is sure to impress. With easy-to-follow steps and the flexibility to adapt, you can enjoy this dish tailored to your taste. Serve it as an appetizer or as a main dish with rice or noodles for a complete meal. Enjoy your culinary adventure with Bang Bang Chicken!

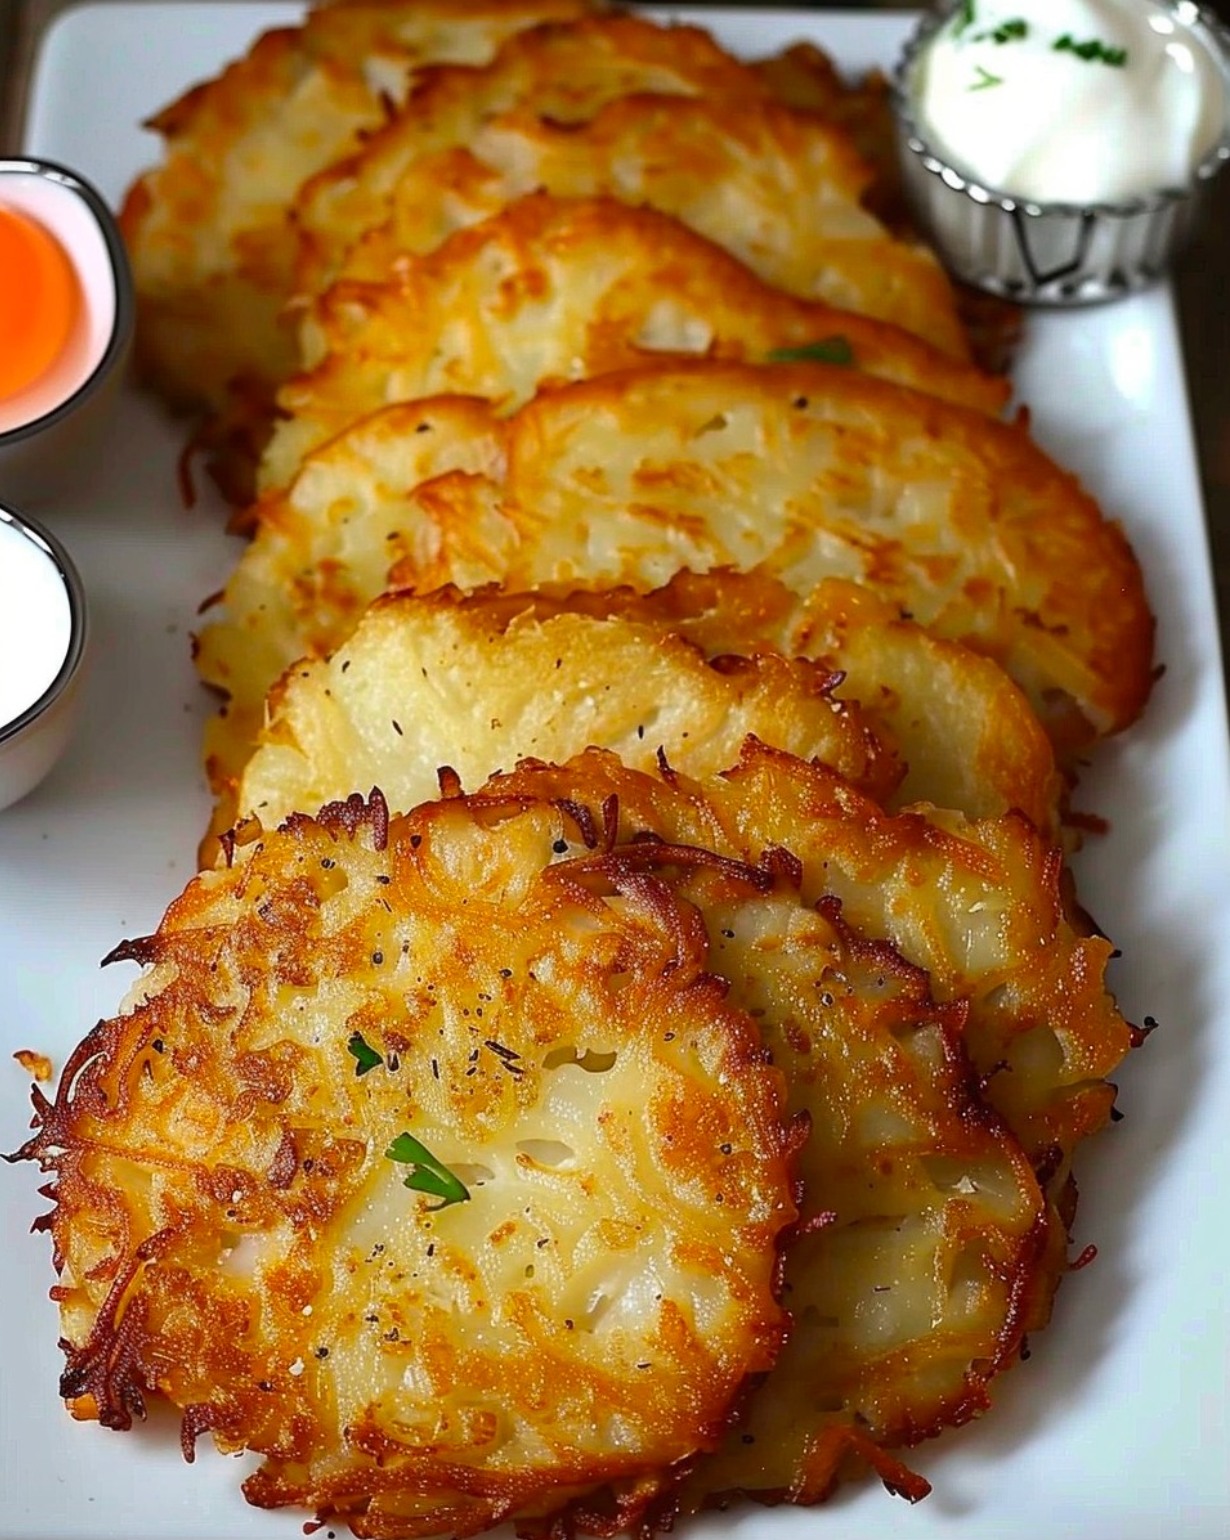
  • Crispy Potato Cakes – Fast and Easy Recipe

    Crispy Potato Cakes – Fast and Easy Recipe

    Crispy Potato Cakes – Fast and Easy Recipe

    Table of Contents

    Ingredients:

    • 2 potatoes (500 grams)
    • 2 pinches of salt
    • 1 teaspoon of paprika
    • Black pepper
    • Parsley
    • 2 tablespoons cornstarch
    • 1 egg
    • 1 tablespoon parmesan cheese
    • Basil
    • Breadcrumbs
    ‍ Instructions:
    1. Peel and grate the potatoes using a grater. Place the grated potatoes in a clean kitchen towel and squeeze out as much moisture as possible.
    2. In a mixing bowl, combine the grated potatoes, salt, paprika, black pepper, chopped parsley, cornstarch, egg, grated parmesan cheese, and chopped basil.
    3. Mix everything thoroughly to form a dough-like consistency.
    4. Shape the mixture into small, flat cakes or patties.
    5. Heat some oil in a pan over medium-high heat.
    6. Coat each potato cake in breadcrumbs to create a crispy outer layer.
    7. Place the potato cakes in the hot oil and cook until they are golden brown and crispy on both sides, about 3-4 minutes per side.
    8. Remove the potato cakes from the pan and place them on a plate lined with paper towels to remove excess oil.
    9. Serve the crispy potato cakes hot as a delicious side dish or snack.
    10. Enjoy these crispy potato cakes made with just 2 potatoes and 1 egg! They are a fast and easy treat you’ll wish you had tried sooner.
  • Oatmeal, Walnut, and Banana Bars with Chocolate

    Oatmeal, Walnut, and Banana Bars with Chocolate

    Oatmeal, Walnut, and Banana Bars with Chocolate

    Table of Contents

    Ingredients:

    160g oatmeal
    80g walnuts
    80g dried plums (optional)
    200g banana (2 bananas)
    100g chocolate (dark or milk)

    Instructions:

    1. Prepare the Oatmeal:
    Heat a pan over medium heat and add the oatmeal.
    Fry the oatmeal for about 5 minutes, stirring occasionally until lightly toasted and fragrant.

    2. Prepare the Nuts and Fruit:
    Grind the walnuts until finely chopped.
    If using dried plums, grind them as well into smaller pieces.
    Peel and mash the bananas until smooth.

    3. Combine Ingredients:
    In a mixing bowl, combine the toasted oatmeal, ground walnuts, ground plums (if using), and mashed bananas.
    Stir the mixture thoroughly until well combined and evenly distributed.

    4. Shape and Bake:
    Line a baking dish with parchment paper for easy removal.
    Press the mixture evenly into the prepared dish, smoothing the surface.
    Bake in a preheated oven at 180°C (350°F) for 15-20 minutes, or until golden and set.

    5. Prepare the Chocolate:
    While the oatmeal bars are baking, melt the chocolate in a double boiler or in a heatproof bowl over simmering water, stirring until smooth.

    6. Finish the Dessert:
    Once the baked oatmeal mixture is out of the oven and slightly cooled, pour the melted chocolate over the top, spreading it evenly.
    For extra crunch and flavor, sprinkle additional chopped walnuts on top (optional).
    Place the dish in the refrigerator to allow the chocolate to fully set.

    7. Serve:
    Once the chocolate has solidified, cut the mixture into bars and enjoy this delicious, healthy treat!

    See also  Just Grate 1 Zucchini and 1 Potato! A Delightful Twist on Pancakes

    Serving Suggestions:
    These bars are perfect for breakfast on-the-go or as a mid-day snack.
    Enjoy with a cup of coffee, tea, or a glass of milk for a wholesome snack.

    Storage:
    Refrigerate: Store in an airtight container in the refrigerator for up to 5 days.
    Freeze: You can also freeze the bars for up to 1 month. Thaw in the fridge or at room temperature before serving

  • Saltine Crackers with Green Onion

    Saltine Crackers with Green Onion

    Saltine Crackers with Green Onion

    Table of Contents

    Ingredients:

    1 ⅓ cups all-purpose flour, sifted (160 g)
    ½ tsp baking powder (2 g)
    ½ tsp yeast (2 g)
    ¼ tsp salt
    2 tbsp butter, melted (30 g)
    ¼ cup milk (70 ml)
    2 tbsp green onions, finely chopped (20 g)
    1 tbsp sesame seeds
    1 tbsp sugar for topping (optional)

    Directions:

    Prepare the Dough:
    Sift the flour into a large mixing bowl to remove any lumps.
    Add baking powder, yeast, and salt to the flour. Mix well.
    Pour in the melted butter and milk. Stir until the ingredients are combined into a dough.

    Knead the Dough:
    Knead the dough by hand for about 3-5 minutes until it is smooth and elastic.
    Cover the dough with a cloth or plastic wrap and let it rest for 15 minutes.

    Incorporate Green Onions and Sesame:
    Add the finely chopped green onions and sesame seeds to the rested dough.
    Knead again until the green onions and sesame seeds are well incorporated throughout the dough.

    Roll and Cut the Crackers:
    Roll the dough out on a lightly floured surface until it is very thin.
    Cut the rolled dough into small rectangles or squares, about 1.4 x 2 inches (3.5 x 5 cm).
    Use a fork to prick holes in the surface of each cracker.

    Bake:
    Place the crackers on a baking tray lined with parchment paper.
    Optionally, sprinkle sugar on top for a hint of sweetness.
    Bake in a preheated oven at 350°F (175°C) for 15 minutes or until the crackers are golden and crispy.

    See also  Caramel popcorn ready in minutes

    Serve:
    Let the crackers cool on a wire rack before serving. Enjoy as a savory snack or with your favorite dips.

    Serving Suggestions:
    Serve these saltine crackers with hummus, cheese, or your favorite savory spread. They also pair well with soups, stews, or salads.

    Cooking Tips:

    For a crisper cracker, roll the dough out as thin as possible.
    Ensure even baking by rotating the tray halfway through the cooking time.
    Customize with different toppings like poppy seeds, black sesame seeds, or a sprinkle of sea salt.

  • Depression Bread (Old fashion / old school)

    Depression Bread (Old fashion / old school)

    Depression Bread (Old fashion / old school)

    Table of Contents

    ingredients

    1. 4 cups flour
    2. 2 cups warm water
    3. 2 Tbsps. yeast

    Directions

    1. Pour flour into a large bowl and create a hole in the center.
    2. Pour the yeast and warm water in the center, then combine with the flour until you form a ball.
    3. Cover with a towel and allow to rise for 30 minutes, or until it’s doubled in size.
    4. Knead the dough and split into two loaves, then allow to rise one more time.
    5. Bake at 300 °F until golden.
  • Super Energy Dessert: No White Sugar, No Baking Required!

    Super Energy Dessert: No White Sugar, No Baking Required!

    Super Energy Dessert: No White Sugar, No Baking Required!

    Table of Contents

    In today’s health-conscious world, finding delicious treats that are both nutritious and satisfying can be a challenge. But fear not, because we have a delightful solution for you – a super energy dessert that contains no white sugar and requires no baking! This delectable treat is not only mouthwatering but also packed with natural goodness. Join us on this culinary journey as we explore the ingredients and preparation steps for this guilt-free indulgence.

    Ingredients You’ll Need:

    Before we dive into the preparation steps, let’s take a look at the wholesome ingredients that make up this super energy dessert:

    1. Dates: 100g (approx. 3.5 ounces)
    2. Apples: 70g (approx. 2.5 ounces)
    3. Dried Cranberries: 45g (approx. 1.6 ounces)
    4. Raisins: 50g (approx. 1.8 ounces)
    5. Dried Apricots: 80g (approx. 2.8 ounces)
    6. Pumpkin Seeds: 50g (approx. 1.8 ounces)
    7. Almonds: 70g (approx. 2.5 ounces)
    8. Roasted Cashews: 75g (approx. 2.6 ounces)
    9. Sesame Seeds (reserve some for garnishing): 35g (approx. 1.2 ounces)
    10. Pine Nuts: 20g (approx. 0.7 ounces)
    11. Flax Seeds: 20g (approx. 0.7 ounces)
    Preparation Steps:

    Now that you have all the ingredients ready, let’s embark on the journey of creating this delectable super energy dessert:

    Preparing the Dried Fruits
    • Start by rinsing the dried fruits in cold water to remove any preservatives and activate their nutrients. Soak them for 15-20 minutes.
    See also  CALIFORNIA SPAGHETTI SALAD
    Nuts and Seeds
    • While the fruits are soaking, slice the almonds and roughly chop the cashews.
    • Lightly roast the pumpkin seeds and pine nuts in a dry pan until fragrant to enhance their flavor.
    Fruit Blend
    • After soaking, pit the dates and chop them along with the dried apricots into small pieces.
    • In a blender, combine the soaked dates, apples, dried cranberries, raisins, and apricots. Blend until smooth.
    Texture and Crunch
    • Mix in the sliced almonds and roasted cashews to the fruit blend for added texture.
    • Stir in the sesame seeds, saving some for garnishing.
    • Add the pumpkin seeds, pine nuts, and flax seeds to the mixture, boosting its nutritional value and flavor.

    Combine and Shape

    • Thoroughly mix all the ingredients to achieve a well-combined texture.
    • Shape the mixture into a cylindrical log.
    • Roll the log in the remaining sesame seeds for an appealing outer texture.
    Chilling Time
    • Refrigerate the log for about 2 hours to set.
    Serving
    • After chilling, slice the log into bite-sized energy bars.
    • Wrap each bar in parchment paper for convenient storage and snacking.

    Now, you have a batch of these delicious and nutritious energy bars ready to enjoy anytime you need a quick energy boost!

    Conclusion

    This super energy dessert is a testament to the fact that healthy snacks can be incredibly tasty. With no white sugar and no baking required, it’s a guilt-free pleasure that you can indulge in without any reservations. Whether you’re looking for a post-workout snack or a wholesome treat for your kids, these energy bars have got you covered. So, give them a try, and you’ll be pleasantly surprised by the burst of flavors and energy they provide!

  • A Very Simple and Delicious Recipe for Cauliflower in the Oven

    A Very Simple and Delicious Recipe for Cauliflower in the Oven

    Table of Contents

    If you’re looking for a quick and delicious side dish or snack, look no further than this easy recipe for cauliflower in the oven. With just a few simple ingredients and minimal effort, you can create a flavorful and satisfying dish that will have everyone coming back for seconds. In this article, we’ll take you through the step-by-step process of making this mouthwatering cauliflower recipe.

    Ingredients You’ll Need:

    • Cauliflower – 600 g
    • Egg – 1 large
    • Sour cream – 150 g (or white yogurt)
    • Salt, to taste
    • Black pepper, to taste
    • Dried garlic
    • Cheese – 50 g
    • Olive oil
    Preparation:

    Now that you have all your ingredients ready, let’s get started with the preparation:

    Prepare the Cauliflower:

    Begin by separating the cauliflower into florets. You’ll want them to be bite-sized pieces, so they cook evenly.

    Boil the Cauliflower:

    Next, bring a pot of salted water to a boil. Add the cauliflower florets and let them cook for 1 to 2 minutes. This blanching step will help soften the cauliflower slightly.

    Prepare the Creamy Mixture:

    In a separate bowl, whisk together the egg, grated cheese, sour cream, a pinch of salt, a dash of black pepper, and some dried garlic. Mix until you have a smooth and creamy consistency.

    Combine Cauliflower and Creamy Mixture:

    Add the blanched cauliflower florets to the creamy mixture. Gently fold them in, ensuring that each piece of cauliflower is well-coated with the delicious mixture.

    See also  The Timeless Taste of Old German Bread: A Recipe for Nostalgia
    Grease the Baking Dish:

    Take a baking dish and generously grease it with olive oil. This will prevent the cauliflower from sticking to the dish during baking.

    Bake:

    Now, transfer the cauliflower and creamy mixture into the greased baking dish. Make sure to spread it out evenly.

    Baking Time:

    Preheat your oven to 200°C (392°F). Place the baking dish in the preheated oven and bake for 20 to 25 minutes. Keep an eye on it; you’ll know it’s ready when the cauliflower turns golden brown and the top becomes nicely crispy.

    Conclusion:

    In just a few simple steps, you’ve created a mouthwatering dish of oven-baked cauliflower that’s creamy, cheesy, and full of flavor. It’s the perfect side dish for any meal or a tasty snack on its own. Impress your family and friends with this easy recipe, and they’ll be asking for more!

  • Homemade potato French

    Homemade potato French

    How to Make Homemade potato French fries with 3 ingredients

    Easy homemade fries recipe with 3 ingredients, simple and quick to prepare. See below the list of all ingredients and required quantities. And then, a very complete preparation method with details of the recipe.

    Recipe Ingredients:

    • Vegetable oil for frying
    •  Potatoes (as many as you desire)
    • Salt and other seasonings (to taste)

    Instructions:

    Start by washing and cutting the potatoes into thin strips. Then, fry the potatoes in hot oil until they are golden brown.

    Next, drain and season the fried potatoes with salt and other seasonings. Finally, serve while still hot, and if desired, accompany them with homemade mayonnaise.

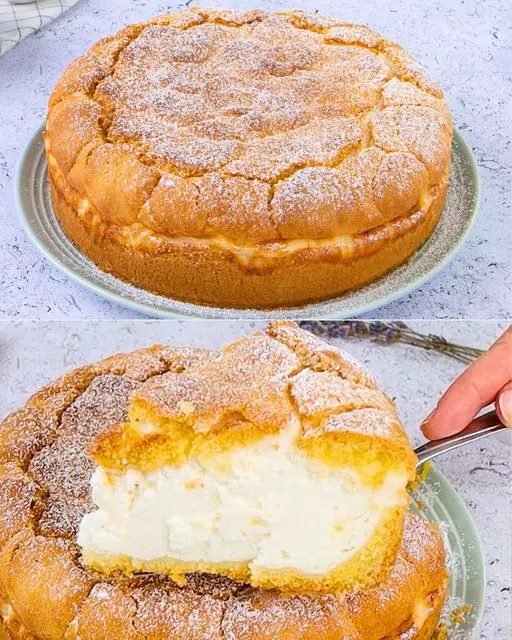
  • Cottage Cheese Creamy Cake

    Cottage Cheese Creamy Cake

    Cottage Cheese Creamy Cake
    Table of Contents
    INGREDIENTS:
    600g (3 cups) Cottage cheese

    250g (1.1 cups) cream cheese (+ 70g coating)
    4 eggs
    90g (0.4 cup) Sugar
    20g (4 tsp) Vanilla sugar
    30g (0.3 cup) Corn starch
    300g (1.2 cups) Raspberries
    1 pinch of salt

    METHOD:
    Whisk in cottage cheese, cream cheese, starch and egg yolks.
    Beat the egg whites with a pinch of salt, sugar, vanilla sugar until the meringue reaches a stiff peak.
    Pour the whipped egg whites into the cheese mixture and combine the two until they are well mixed and smooth.
    Pour the prepared mixture into a mold and bake in an oven preheated to 320F (160 C) for 45-50 minutes.
    Allow the cake to cool in the mold to room temperature, then cover the mould with foil and leave in the fridge
    for 2 hours.
    Serve the cake plain or top with whipped cream and raspberries of your favourite fruits.
    Enjoy your Cottage Cheese Creamy Cake.

  • Lemon Zucchini Heaven Bread

    Lemon Zucchini Heaven Bread

    Lemon Zucchini Heaven Bread
    Table of Contents
    Ingredients:
    1 1/2 cups all-purpose flour
    1/2 teaspoon baking powder
    1/2 teaspoon baking soda
    1/2 teaspoon salt
    2 large eggs
    1/2 cup vegetable oil
    3/4 cup granulated sugar
    1/2 cup buttermilk
    1 teaspoon vanilla extract
    1 cup grated zucchini
    Zest of 1 lemon
    Juice of 1 lemon
    For the Glaze:
    1 cup powdered sugar
    2 tablespoons lemon juice
    Zest of 1 lemon
    Directions:
    Preheat your oven to 350°F (175°C). Grease and flour a 9×5 inch loaf pan.
    In a medium bowl, whisk together the flour, baking powder, baking soda, and salt. Set aside.
    In a large bowl, beat the eggs, vegetable oil, and granulated sugar until well combined.
    Add the buttermilk, vanilla extract, grated zucchini, lemon zest, and lemon juice to the egg mixture and mix well.
    Gradually add the dry ingredients to the wet ingredients, mixing just until combined.
    Pour the batter into the prepared loaf pan and bake for 50-55 minutes, or until a toothpick inserted into the center comes out clean.
    Let the bread cool in the pan for 10 minutes, then transfer it to a wire rack to cool completely.
    For the glaze, whisk together the powdered sugar, lemon juice, and lemon zest in a small bowl until smooth.
    Drizzle the glaze over the cooled bread and let it set before slicing.
    Prep Time: 15 minutes | Cooking Time: 55 minutes | Total Time: 1 hour 10 minutes
    Kcal: 280 kcal | Servings: 10 slices

  • Mini meatloaf in a pan

    Mini meatloaf in a pan

    Mini meatloaf in a pan

    Table of Contents

    Ingredients:

    1 lb ground meat (beef, pork, or a combination)
    1 egg
    1/4 cup breadcrumbs
    1/4 cup grated cheese (Parmesan, pecorino, or your choice)
    1 medium onion, finely chopped
    2 cloves garlic, minced
    2 tablespoons chopped fresh parsley
    Salt and freshly ground black pepper, to taste
    Olive oil, for greasing the pan

    The Directions:

    In a large bowl, combine the ground meat, egg, breadcrumbs, grated cheese, chopped onion, minced garlic, and fresh parsley. Mix well until all ingredients are combined.

    Season the mixture:
    Add salt and freshly ground black pepper to taste. Mix again to distribute the spices evenly.

    Form the mini meatloaves:
    Take a portion of the mixture and form small meatballs, about the size of an apricot. You can shape them with slightly damp hands to prevent the dough from sticking.

    Cook the mini meatloaves:

    In a non-stick skillet, heat a little olive oil over medium-high heat. Arrange the mini meatloaves in the skillet in a single layer, taking care not to overlap them.
    Cook the mini meatloaves for about 5-7 minutes per side, or until golden brown and cooked through. You can gently flip them with a spatula to ensure even cooking.

    Serve:
    Once cooked, transfer the mini meatloaves to a serving platter and serve hot.
    You can accompany the mini meatloaves with a homemade tomato sauce, BBQ sauce or a sauce of your choice. They can be served as an appetizer, main course or as a snack.
    These pan-fried mini meatloaves are full of flavor and have a juicy and soft texture. They are perfect for satisfying your comfort food cravings in no time. Enjoy!

  • Perfect Homemade fluffy bread

    Perfect Homemade fluffy bread

    Ingredients:

    Bread flour: 2 ½ cups (320 grams)
    Water: ¾ cup + 2 tablespoons (210 ml), lukewarm
    Brewer’s yeast: 1 tsp. (3 grams) or dry yeast: ½ tsp. (2 grams)
    Sugar: 1 tsp.
    Salt: 1 tsp.

    Instructions:

    Activate the Yeast:
    In a small bowl, dissolve the sugar and yeast in the lukewarm water. Make sure the water is not too hot, as it can kill the yeast. Let this mixture sit for about 5-10 minutes until it becomes foamy, indicating that the yeast is activated.

    Prepare the Dough:
    In a large mixing bowl, combine the bread flour and salt. Create a well in the center of the flour and pour in the yeast mixture.
    Gradually mix the flour with the water, using a spatula or your hands, until a soft dough forms. The dough should be slightly sticky but manageable.

    Knead the Dough:
    Transfer the dough onto a lightly floured surface and knead it for about 8-10 minutes. The goal is to develop the gluten, which will give the bread its structure and elasticity.
    The dough should become smooth and elastic by the end of kneading.

    First Rise:
    Shape the dough into a ball and place it in a lightly oiled bowl. Cover it with a damp cloth or plastic wrap, and let it rise in a warm place for about 1-1.5 hours, or until it has doubled in size.

    Shape the Dough:
    After the dough has risen, punch it down gently to release the air. Turn it out onto a floured surface and shape it into a loaf.
    You can shape it into a round loaf, a baguette-style loaf, or even place it into a bread tin for a more uniform shape.

    See also  Garlic Flatbread: No-Yeast, No-Kneading Magic in 3 Minutes!

    Second Rise:
    Place the shaped dough onto a parchment-lined baking sheet or into a greased loaf tin. Cover it again with a damp cloth and let it rise for an additional 30-40 minutes, or until it has puffed up.

    Preheat the Oven:
    While the dough is doing its second rise, preheat your oven to 220°C (425°F). If you want a crispy crust, place a shallow pan of water on the bottom of the oven to create steam while the bread bakes.

    Bake the Bread:
    Once the dough has risen, make a few shallow slashes on the surface with a sharp knife or bread lame. This helps the bread expand while baking.
    Bake the bread in the preheated oven for 20-25 minutes, or until the crust is golden brown and the bread sounds hollow when tapped on the bottom.
    If using a bread tin, the baking time may extend slightly to ensure the bread is fully cooked through.

    Cool the Bread:
    Once baked, remove the bread from the oven and allow it to cool on a wire rack. It’s important to let the bread cool before slicing, as this allows the interior to set properly.

    Nutritional Facts (per slice, approximately 1/12th of the loaf):
    Calories: 80 kcal
    Carbohydrates: 16g
    Protein: 3g
    Fat: 0.5g
    Fiber: 1g
    Sugar: 1g
    Sodium: 150mg

    Storage Tips:
    Room Temperature: Store the bread in an airtight container or a bread bag at room temperature for up to 3-4 days. Avoid storing bread in the fridge, as it can dry out faster.
    Freezing: If you want to store the bread for longer, you can freeze it. Once cooled, slice the loaf and place the slices in a freezer-safe bag. Bread can be stored in the freezer for up to 3 months. To reheat, simply toast the slices or warm them in the oven.

    See also  No-Bake Protein-Free Energy Bars

    Cooking Tips:
    Use Lukewarm Water: The water should be warm to the touch but not hot, around 38°C (100°F), to help the yeast activate.
    Measure Ingredients Accurately: Use a kitchen scale to measure the flour for the best results, as too much flour can make the bread dense.
    Kneading the Dough: If the dough feels too sticky, add a bit more flour, but avoid adding too much as it can make the bread heavy.
    Crust Variations: For a softer crust, you can brush the bread with melted butter as soon as it comes out of the oven. For a crunchier crust, add the pan of water to the oven as mentioned earlier.
    Flavor Additions: This basic bread recipe can be easily customized. You can add herbs like rosemary, thyme, or garlic powder for extra flavor. Seeds like sesame, flax, or sunflower can also be sprinkled on top for added texture.

  • Baked Eggplant with Meat Filling and Cheese

    Baked Eggplant with Meat Filling and Cheese

    Baked Eggplant with Meat Filling and Cheese

    Table of Contents

    Ingredients:

    2 medium eggplants, sliced into 3 layers (about 500g or 1.1 lbs)
    30 ml (1 fl oz) olive oil
    1/2 tsp salt
    1/3 tsp black pepper
    1/2 tsp dried garlic powder
    1/2 tsp oregano
    1/2 tsp paprika

    Directions:

    Preheat oven to 180°C (356°F).
    Prepare the eggplants: Slice the eggplants into 3 layers each. Brush both sides with olive oil and season with salt, pepper, garlic powder, oregano, and paprika.
    Bake the eggplant: Place the slices on a lined baking tray and bake for 20 minutes until tender.
    Prepare the meat filling (optional): Cook ground meat of your choice (e.g., beef or turkey) with onions, garlic, salt, and your preferred spices. Add tomato sauce or diced tomatoes for flavor.
    Layer the eggplants: In a baking dish, layer the baked eggplant slices with the meat filling in between.
    Top with cheese of your choice (mozzarella or cheddar).
    Bake again: Return to the oven and bake for another 15-20 minutes until the cheese is melted and golden.
    Serve and enjoy!
    Serving Suggestions:
    Serve with a side of rice, quinoa, or a fresh green salad.
    Cooking Tips:
    If you prefer a vegetarian option, substitute the meat filling with lentils or a vegetable mixture like mushrooms and bell peppers.
    To reduce bitterness, sprinkle salt on eggplant slices and let them sit for 30 minutes before baking, then rinse and pat dry.
    Nutritional Benefits:
    Rich in fiber from eggplants.
    High in protein if using ground meat or a plant-based filling like lentils.
    Packed with antioxidants from eggplants and olive oil.