Category: healthy food

  • CINNAMON ROLLS with the egg and flour

    CINNAMON ROLLS with the egg and flour

    CINNAMON ROLLS with the egg and flour

    Table of Contents

    Ingredients:
    • 3 cups flour
    • 1 tsp Salt
    • ¾ cup sugar
    • 1 egg
    • 1 cup warm milk
    • ⅓ stick of butter
    • 2 tbsp instant dry yeast
    • ¼ cup melted butter
    • 3 tbsp brown sugar
    • 3 tbsp ground cinnamon
    Preparation:

    1. In a container add warm milk and yeast, mix well. Until it is dissolved. Add a tablespoon of sugar. Let rest
    2. Meanwhile, add the flour, salt and sugar in a separate container, and mix well. Place the dry mixture on a surface forming a little mountain. Make a hole in the center and add the egg and butter. With your hand start to integrate everything slowly.
    3. When the butter is already integrated with the egg and flour, we begin to gradually add the milk with the yeast. The milk and yeast mixture should look thick and foamy. The secret of this dough is to knead it very well. At first it will have a sticky consistency, so we will need to add more flour little by little until it has a consistency that no longer sticks to the hands. Once the dough is no longer sticky, we are going to put a little oil in a tall container, and we are going to cover the entire ball of dough with the oil. Then we put the dough to rest, at room temperature in a cool place, covered with kitchen plastic or a clean cloth. Let it rest for approximately 1 to 2 hours, until it has grown a lot.
    4. When it has grown, on a flat surface stretch with a roller until it is 1 cm thick. Cut the edges and form a rectangle. Brush with melted butter and sprinkle with cinnamon and brown sugar. Form a roll, and move it over itself so that it adheres better. Cut it into pieces of approximately 1.5 cm. Put them on a tray with waxed paper and let rest for another little while.
    5. Once they have grown a little more, take them to the AF with parchment or baking paper, at 180°C for 5 minutes, until they look golden. Turn around, and leave another 5 min. Take into account that the time may vary depending on the brand of the pot, and the amount to be prepared, so it is recommended to monitor the cooking from the second half of the time.

  • Russian Honey Cake

    Russian Honey Cake

    Russian Honey Cake

    Table of Contents

    INGREDIENTS:

    Eggless Honey Cake Layers
    (I used 7 inch ring cutter)
    360g [3¼ cups] all-purpose flour aka plain flour
    8g [2 tsp] baking powder
    170g [½ cup] honey
    30ml [2 tbsp] water
    150g [¾ cup] sugar
    113g [½ cup] unsated butter
    1 tsp baking soda
    ¼ tsp salt
    ½ tsp grd cinnamon
    15g [2 tbsp] cornstarch
    Yogurt Frosting:
    600g [2½ cups] whipping cream
    240g [1 cup] plain yogurt
    50g [⅓ cup] powdered sugar

    See also  Delicious Broccoli and Chickpeas Recipe

    60g [¼ cup] honey
    1 tsp vanilla extract (optional)
    syrup
    [1 tbsp honey + 2 tbsp hot water]

    METHOD:

    1. Eggless Honey Cake Layers
    2. Sift the flour and set aside.
    3. In a stainless steel pot, add honey. Bring it to a boil on low heat until the honey is further caramelised and
    4. slightly thickened. This will take a few seconds to a minute or so. Off the heat. Carefully add in the water. Move
    5. the pan to mix them.
    6. Add in the sugar. Give it a quick mix to combine. Put the heat back on low as you’re going to dissolve the sugar.
    7. Add in the butter. Cook until the butter is completely melted. The sauce is gradually thickened up and
    8. caramelised looking. The longer you cook, the darker the sauce will be. Off the heat. Immediately as in the
    9. baking soda. Be cautious as the volume will double up and frothy. Keep mixing. Remove the pot from the stove.
    10. Add in salt, cinnamon powder and cornstarch. Mix until combined respectively.
    11. Transfer the sauce into a large mixing bowl.
    12. Add the sifted ingredients in a few batches. Use you use a whisk to mix them to combine. Towards the end, it
    13. will become a wet dough. Whisk will be hard to move around, switch to a spatula to fold them together. The
    14. dough is soft and sticky, do not attempt to add more flour. Wrap the dough with cling film. Refrigerate for 1
    15. hour or just until it’s slightly firm up.
    16. After 1 hour, the dough is pretty much firmed up. Flour the work surface. Cut the dough into 8 pieces. Roll
    17. individually into a ball shape and set aside on a pan with a tea towel covering them to keep them moist.
    18. Sprinkle some flour on a non-stick parchment paper. Roll the dough out into a very thin layer of about 1mm.
    19. The thickness is just nice for the cake layers. Roll out to the size of your ring cutter. If you do not have a ring
    20. cutter, it’s totally fine. Just cut a piece of paper of the size you desire as a standard guide for all the layer. Once
    21. cut out the size, keep the excess of the sides for use later.
    22. Bake in preheated oven at 180°C/355°F for 4½ – 5 minutes. Do not over bake. I baked mine for 4½ minutes. The
    23. colour of the layers depends on your baking time.
    24. Let the layers completely cool before removing from the parchment paper. Once cooled, it will be easier to
    25. remove the paper.
    26. Set all the baked layers aside.
    27. For the remaining excess of the dough, line them on a pan. Bake them in preheated oven at 180°C/355°F for 6-7
    28. min or until they are dry and crispy. Let them cool completely.
    29. In a food processor, crush the baked excess fine. Set these aside for the deco part later.

    Honey Syrup:

    Mix honey and hot water until the honey dissolved.
    Set it aside to a cool completely before use.

    Yogurt Frosting:

    1. In a mixing bowl, add whipping cream. Whisk or mix it until it’s slightly thickened.
    2. In another bowl, add yogurt, powdered, honey and vanilla extract (optional). Mix until it’s softened and creamy.
    3. Add the yogurt mixture into the whipping cream. Mix until stiff (the mixer paddle is able to hold a lump of
    4. cream in it), do not over mix. It will give you a soft and smooth frosting.
    5. Enjoy your Russian Honey Cake.
  • HOMEMADE BREAD ROLLS

    HOMEMADE BREAD ROLLS

    HOMEMADE BREAD ROLLS

    Table of Contents

    INGREDIENTS:

    500 grams of flour allpurpose
    300 gr of water

    4 gr of brewer’s yeast – you can use active dry yeast if you cant find brewers yeast.
    1 tablespoon of honey
    8/10 gr of salt

    METHOD:

    1. Dissolve the yeast in the water with the honey.
    2. Add the mixture to the flour and start mixing.
    3. Then add the salt and form a soft and homogeneous dough.
    4. Let the dough rise for 12 hours in the fridge.
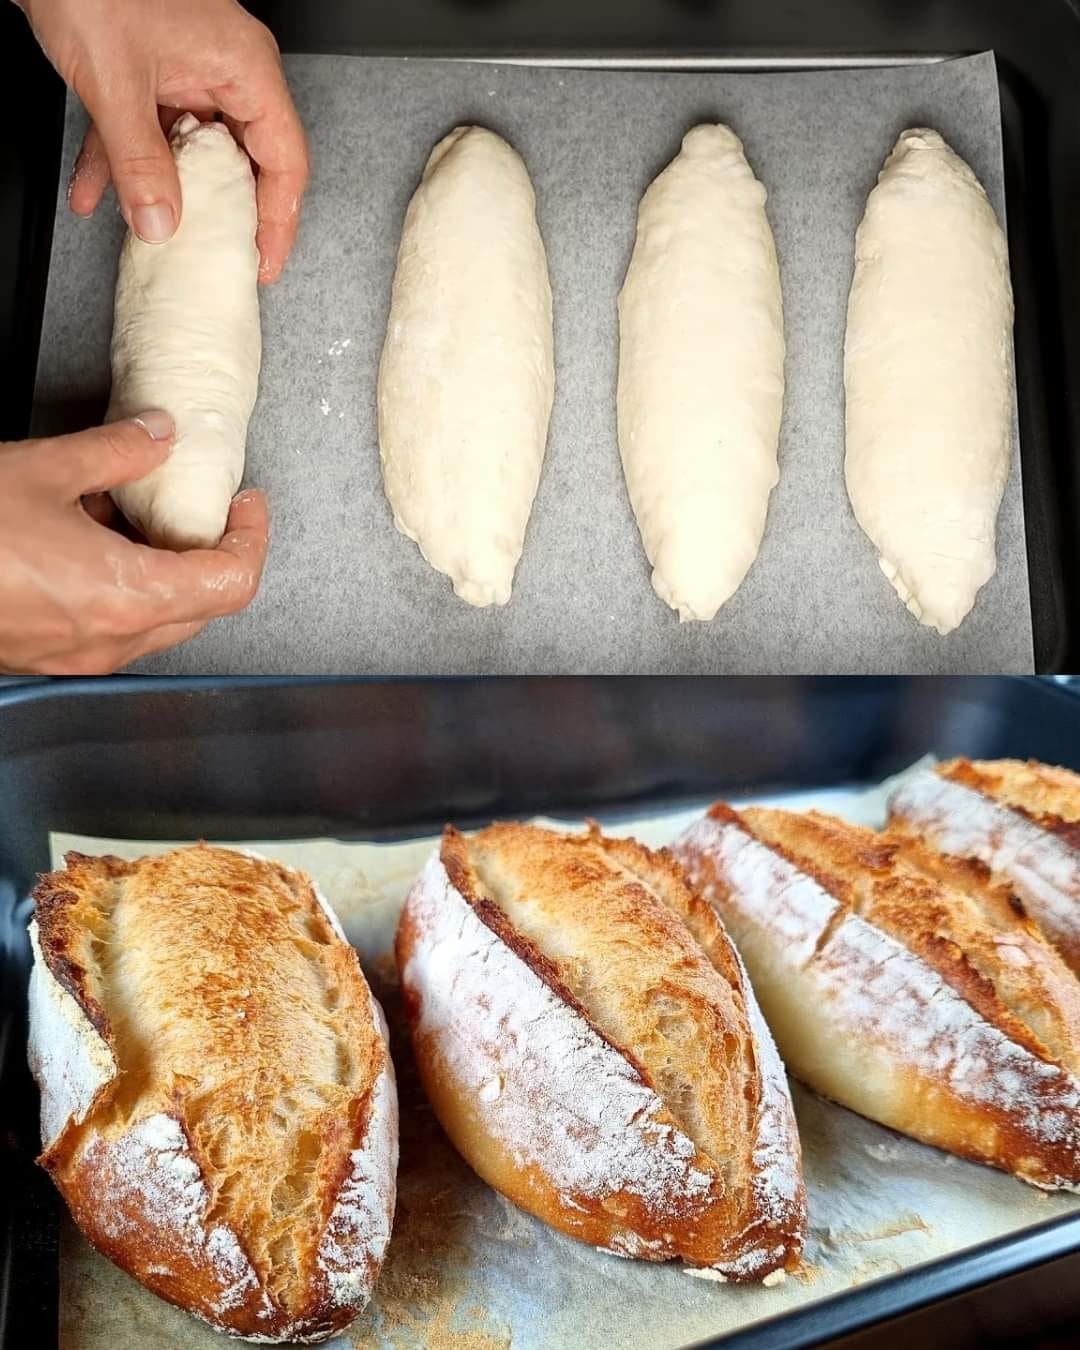
    5. Then divide it into equal pieces.

    6. Form the rolls and leave to rest for 1 hour.
    7. Make a side cut on each sandwich and sprinkle some flour.
    8. Bake at 230 ° for 10 minutes with a saucepan of water.
    9. Then remove the saucepan and cook until golden brown.
    10. Enjoy your HOMEMADE BREAD ROLLS.

  • The Famous Bread That Drives the Whole World Crazy! Recipe in 10 Minutes!

    The Famous Bread That Drives the Whole World Crazy! Recipe in 10 Minutes!

    The Famous Bread That Drives the Whole World Crazy! Recipe in 10 Minutes!

    Table of Contents

    Have you ever marveled at how a simple loaf of bread can bring people together, transcending cultures and borders? In this article, we’re diving into the world of breadmaking, uncovering a recipe that’s not only delicious but also incredibly easy to whip up. Get ready to embark on a culinary journey that will leave your taste buds singing with joy!

    Gathering Ingredients

    Let’s start by rounding up our key players. You’ll need:

    • 3.4 fluid ounces (about 100 ml) warm water
    • 3.4 fluid ounces (about 100 ml) warm milk
    • 2 tablespoons sugar
    • 8 grams dry yeast
    • 2 medium eggs
    • 17.6 ounces (about 500 grams) of wheat flour
    • 1 teaspoon salt
    • 20 ml vegetable oil
    • For a golden brown crust: 1 egg + milk
    Mixing the Magic

    Now that we have our ingredients, it’s time to work some magic. In a bowl, combine the warm water, warm milk, sugar, and dry yeast. Give it a good mix and let it sit for a few minutes until it becomes frothy.

    Kneading to Perfection

    Once your yeast mixture is ready, add in the eggs, wheat flour, salt, and vegetable oil. Using a spatula, begin kneading the dough until it starts to come together. Gradually add more flour until you have a smooth, elastic dough.

    See also  Cook the Broccoli This Way! The Result Will Surprise You: A Simple and Delicious Broccoli Recipe
    Letting it Rise

    Grease a bowl with some vegetable oil, then place your dough inside, covering it with a clean cloth. Let it rise in a warm place for about 50 minutes, or until it doubles in size. This is where the magic happens as the yeast works its wonders!

    Shaping and Resting

    After the dough has risen, punch it down and divide it into four equal parts. Shape each portion into a ball and let them rest for another 20 minutes, allowing the gluten to relax.

    Preparing for Baking

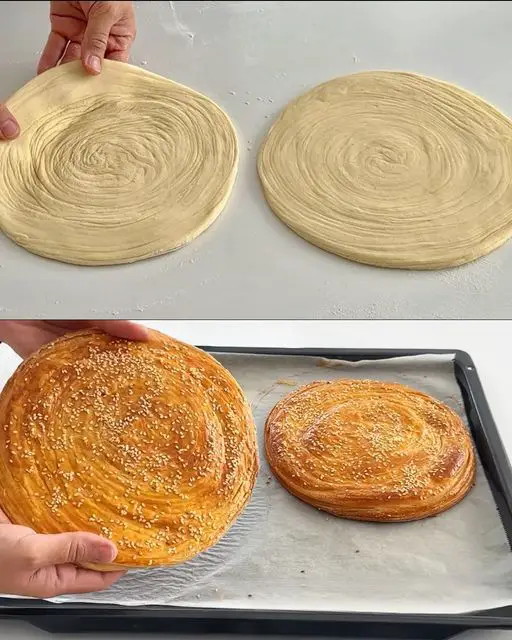
    Roll out each ball of dough into a flat circle using a rolling pin. Place them on a baking tray lined with parchment paper, leaving some space between each one. Now, it’s time to get creative!

    Adding the Final Touches

    Using a sushi stick or any other thin tool, make small holes in the dough. Fill each hole with a bit of butter for an extra burst of flavor. In a separate bowl, beat together an egg and a splash of milk, then brush this mixture over the dough. Sprinkle some sesame seeds on top for that perfect finishing touch.

    Baking to Perfection

    Preheat your oven to 180°C (356°F) and pop your bread into the oven. Bake for 20-25 minutes, or until the crust is beautifully golden brown and crisp. Your kitchen will be filled with the irresistible aroma of freshly baked bread!

    Serving and Enjoying

    Once your bread is out of the oven, resist the urge to dive right in (if you can!). Allow it to cool slightly before slicing into it. Serve it warm with some butter or your favorite spread, and watch as it disappears within minutes!

    See also  The Fastest Bread in Minutes! Healthy and Incredibly Delicious
    Conclusion

    In just 10 minutes of active preparation time, you’ve created a masterpiece that’s sure to impress even the toughest bread critics. With its golden-brown crust, soft interior, and irresistible flavor, this bread is bound to become a staple in your kitchen. So go ahead, unleash your inner baker and treat yourself to a slice of homemade goodness!

  • Keto Cheesecake Brownies – Sugar Free

    Keto Cheesecake Brownies – Sugar Free

    Keto Cheesecake Brownies – Sugar Free

    Table of Contents

    Duration:
    Prep Time: 15 minutes
    Cook Time: 35 minutes
    Total Time: 50 minutes
    Servings: 16 servings
    Calories: 135kcal
    Ingredients
    • 4 eggs
    • 1/4 cup butter softened
    • 1/2 cup sour cream
    • 2 tsp vanilla extract
    • 1 tsp chocolate liquid stevia
    • 1/2 cup unsweetened cocoa powder
    • 1 tsp instant espresso
    • 3/4 cup Swerve granular sweetener
    • 1/2 tsp baking powder
    • 1/4 tsp salt
    • 1/2 cup sugar free chocolate chips
    Cheesecake Topping
    • 8 ounces cream cheese softened
    • 1 egg
    • 1/4 cup Swerve Confectioners sweetener
    • 1/2 tsp vanilla extract
    • 1/2 tsp vanilla liquid stevia
    • optional topping: 2 ounces sugar free or 85% dark chocolate candy bar or chips
    Instructions
    • Preheat oven to 350 degrees F.
    • In a stand mixer, add the first 5 ingredients and blend on high until combined well.
    • In another bowl whisk together the next 5 dry ingredients.
    • Pour this into the wet ingredients and blend on high until combined.
    • Gently stir in the chocolate chips.
    • Grease an 8 by 8 baking dish.
    • Pour half the brownie batter into the pan. Set aside remaining batter.
    • Prepare the cheesecake topping using a stand or hand held mixer to blend until smooth.
    • Pour half the cheesecake topping onto the brownie batter in the pan.
    • Pour the remaining brownie batter over the the cheesecake topping.
    • Finish with remaining cheesecake topping.
    • Use a butter knife to swirl the batter and cheesecake topping together.
    • Decorate with optional  chocolate bar chunks or chips if desired before baking.
    • Bake 30-35 minutes until toothpick in center comes out clean.
    • Allow to cool for 15-20 minutes before slicing.
    Notes
    • Net Carbs: 3g
    See also  FRENCH TOAST BAKE – Easy too! Prepare the night before and pop in the oven in the morning
    Nutrition
    Serving: 1brownie | Calories: 135kcal | Carbohydrates: 4g | Protein: 3g | Fat: 12g | Saturated Fat: 7g | Polyunsaturated Fat: 1g | Monounsaturated Fat: 3g | Trans Fat: 1g | Cholesterol: 68mg | Sodium: 129mg | Potassium: 61mg | Fiber: 1g | Sugar: 1g | Vitamin A: 383IU | Vitamin C: 1mg | Calcium: 34mg | Iron: 1mg
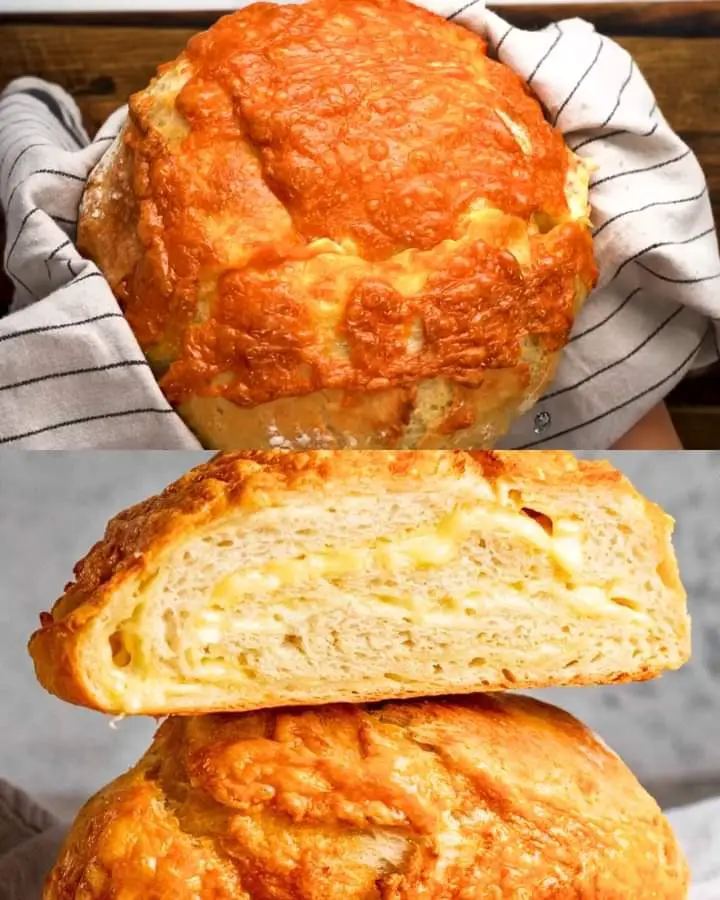
  • Stuffed cheese bread

    Stuffed cheese bread

    Stuffed cheese bread

    Table of Contents

    INGREDIENTS:
    Dough:

    300g (2 2/5 cup) flour
    100ml (2/5 cup) warm water
    100ml (2/5 cup) warm milk
    7g dry yeast
    5g (1 tsp) sugar
    2 g (½ tsp) salt
    16ml (2 tbsp) olive oil
    FILLING:
    450g (1 lb) potatoes
    2g (½ tsp) salt
    100g ham
    100g mozzarella cheese

    METHOD:

    1. Add warm water, yeast, and sugar to the bowl. Mix. Add flour, and milk and knead the dough. Add oil, knead a
    2. little more, and put the dough in an oiled bowl. Leave it to rest for 60 minutes.
    3. Cut the potatoes into pieces and put them in a baking dish. Cover with baking foil and place in the microwave.
    4. When the potatoes are cooked, add salt and mash.
    5. Divide into 8 parts and make balls in which you will add cheese and ham.
    6. When the dough has risen, divide it into 8 parts.
    7. Roll out the dough with rolling pin and fill with a potato ball.
    8. Fry in an oiled pan. Serve.
    9. Enjoy your Stuffed cheese bread.
  • Easy Beef and Noodles

    Easy Beef and Noodles

    On days when dinner feels like a chore, I often turn to two things — ground beef and pasta. There are about a million and one ways to combine them but on nights like that my main requirements are that it has to come together in under thirty minutes and in a single pot. In the case of this Easy Beef and Noodles, you need an extra pot to boil the pasta, but it’s delicious enough that I’ll let it slide. This dish checks all the other weeknight boxes — It’s tasty, it’s comforting, it’s uber quick. And the whole family will eat it. To me, it reminds a lot of the Hamburger Helper from my childhood, but you know, better. And from scratch.

    Easy Beef and Noodles Vertical 07

    In one pot, you’re going to boil your pasta. But in another you’re going to work on the beefy sauce by browning up some ground beef and onions.

    Easy Beef and Noodles Horizontal 01

    Once the beef is cooked through (and you’ve added some garlic and Worcestershire), stir in some flour and let it cook just a minute or so…

    Easy Beef and Noodles Horizontal 03

    … before you add some beef broth and let it simmer until thick.

    Easy Beef and Noodles Horizontal 05

    You can add cream here if you’d like a creamier consistency. I pretty much always do.

    Easy Beef and Noodles Vertical 05

    And then all that’s left to do is stir those egg noodles in to coat them with sauce.

    Easy Beef and Noodles Vertical 10

    And that sauce is totally approachable. It’s velvety and savory but basic enough that you could bump things up with some other herbs or seasoning whenever you’d like. It’s all about what works best for you and your family. (But I think a 20 minute dinner works pretty well for everyone.)

    Easy Beef and Noodles Vertical 08

    Yield(s): Serves 4

    5m prep time

    20m cook time

    4.6
    Rated by 53 reviewers
    hearts
    When you share or print a 12 Tomatoes recipe,
    you’re making mealtime meaningful.
    100% of the Share to Care sponsor fees fund meals for families in need. Learn More


    Ingredients
    • 2 cups uncooked egg noodles
    • 1 lb lean ground beef
    • 1 small yellow onion, chopped
    • 2 cloves garlic, minced
    • 1 tablespoon Worcestershire sauce
    • 1/2 teaspoon dried thyme
    • 1/4 cup all-purpose flour
    • 2 cups beef broth
    • 1/2 cup heavy cream (optional)
    • Kosher salt and freshly ground black pepper, to taste
    Preparation
    1. Bring a large pot of salted water to a boil and cook noodles according to package directions. Drain and set aside.
    2. Meanwhile, add ground beef to a skillet over medium-high heat and cook, breaking up the meat as it browns, until meat is partially cooked. Add onion and cook until soft and beef is no longer pink.
    3. Reduce heat to medium and add garlic, Worcestershire sauce, and thyme. Cook 1 minute.
    4. Stir in flour and cook 1 minute more. Stir in beef broth, scraping up any browned bits from the bottom of the pan.
    5. Let simmer until gravy has thickened, 5-10 minutes. If mixture gets too thick, thin with water or more broth.
    6. If desired, stir in heavy cream for a creamy finish. Season to taste with salt and pepper.
    7. Add drained noodles and toss to combine. Enjoy!
  • Congo Bars

    Congo Bars

    Do I know why these are called Congo Bars? I do not. But what I do know is that they’re an utterly irresistible thick and chewy bar loaded with two kinds of chocolate and plenty of brown sugar and butter flavor. Imagine if a blondie and a chocolate chip cookie had a baby and then you upped the chocolate a bit for good measure – you’d have these. They’re soft, they’re just gooey enough, and they’re an absolute classic.

    Congo Bars Vertical 9

    These bars have staying power but they’re actually a vintage recipe. Congo Bars were common in church cookbooks and grandmas’ kitchens for decades and they taste every bit as good today. That’s generally a good sign that they’re perfect for things like bake sales and potlucks and parties, but I certainly don’t mind just having a tray sitting out on my own kitchen counter as an afternoon pick-me-up. (No one else in my family has complained about that either.)

    Congo Bars Vertical 6

    Other pros? They’re easy to make. It’s a one-bowl batter where you simply cream together some butter and brown sugar before adding in eggs, vanilla, flour, etc, and then both milk chocolate chips and semi-sweet chocolate chunks. The two kinds of chocolate melt a bit differently and help ensure that you get a good hit of chocolate in every single bite but that it’s not just sweet, sweet, sweet.

    Congo Bars Vertical 10

    These are like everything you love about a chocolate chip cookie, but richer and with a thicker, chewier bite. They’re a go-to dessert bar – easy to love, easy to make, easy to rely on.

    Congo Bars Vertical 4

    Yield(s): Yield 24 bars

    10m prep time

    30m cook time

    4.5
    Rated by 364 reviewers

    Allergens: EggsMilk

    Diet: Vegetarian

    hearts
    When you share or print a 12 Tomatoes recipe,
    you’re making mealtime meaningful.
    100% of the Share to Care sponsor fees fund meals for families in need. Learn More


    Ingredients
    • 1 cup (2 sticks) butter, at room temperature
    • 2 cups brown sugar, packed
    • 3 large eggs, at room temperature
    • 1 tablespoon vanilla extract
    • 1 teaspoon Kosher salt
    • 2 teaspoons baking powder
    • 2 1/2 cups all-purpose flour
    • 1 1/2 cups semi-sweet chocolate chunks
    • 1 cup milk chocolate chips
    Preparation
    1. Preheat oven to 350°F. Line a 9×13-inch baking dish with parchment paper and grease with nonstick spray. Set aside.
    2. In a large mixing bowl, beat together the butter and brown sugar with an electric mixer on medium speed for 2 minutes.
    3. Add eggs, vanilla, salt, and baking powder and mix to combine, scraping down the sides of the bowl.
    4. Reduce mixer to low, then add flour. Mix until just combined.
    5. Stir in chocolate chunks and chocolate chips.
    6. Transfer dough to prepared pan and spread out with a rubber spatula. Bake until edges are set, about 30 minutes. Center will seem slightly underbaked and gooey.
    7. Let cool in pan 5 minutes before removing and allowing to cool completely. Once cool, slice and serve. Enjoy!
  • Corn Casserole by Susan Drees

    Corn Casserole by Susan Drees

    Susan Drees won third place in our “Sure Thing” Potluck Recipe Contest with her Corn Casserole recipe. She says, “This is the one casserole I always serve at potlucks and Thanksgiving. It’s quick to make, tastes great, and leftovers reheat wonderfully.” Now you can try it for yourself!

    3 corn casserole Vertical

    Susan’s recipe uses canned corn, cream-style corn, Jiffy corn muffin mix, sour cream, melted butter, and cheddar cheese. It’s a great side – both sweet and savory and very easy to enjoy!

    4.5
    Rated by 795 reviewers
    hearts
    When you share or print a 12 Tomatoes recipe,
    you’re making mealtime meaningful.
    100% of the Share to Care sponsor fees fund meals for families in need. Learn More


    Ingredients
    • 1 (15.25 oz) can corn, drained
    • 1 (14.75 oz) can cream-style corn
    • 1 (8 oz) package Jiffy corn muffin mix
    • 1 cup sour cream (can use light)
    • 6 tablespoons salted butter, melted
    • 1 to 1 1/2 cups shredded sharp cheddar cheese
    Preparation
    1. Preheat oven to 350°F.
    2. Grease a 2-quart casserole dish.
    3. In a large bowl stir together corn, cream-style corn, corn muffin mix, sour cream, and melted butter. Stir in cheese. Pour into casserole dish.
    4. Bake, uncovered, 1 hour and 10 minutes, or until set in middle and toothpick inserted in center comes out clean.
    5. Let stand 5 minutes before serving.
  • Fettucine Aglio e Olio (I Oy)

    Fettucine Aglio e Olio (I Oy)

    I know what you’re thinking. What is “I Oy” mean? It’s how my Italian family pronounced Aglio e olio pasta. A famous Italian pasta sauce consisting of good olive oil, toasted garlic, fresh herbs, and lemon. A delicious garlic pasta with a snappy name, “I Oy”. Now because my mom didn’t salt her pasta water much, she would sprinkle parmesan on it at the end to add a little extra seasoning. I wasn’t opposed to it when I was younger. Now we salt our water…liberally… no more pinches. This is a family staple at my mom’s house, especially with broccoli and chicken. You’re gonna love this one!

    Fettucine Aglio E Olio Horizontal6

    These are sophisticated buttered noodles. We all loved and grew up with noodles. It’s just a way of life. If you’ve never tried making I Oy, it’s definitely worth trying. Low cost and few ingredient recipes are my jam.

    Technically I Oy is a great way to learn how to properly cook, sauce, and season your pasta. Salt, fat, acid, and heat are the rules for flavor, as Samin Nosrat says. Salt in the pasta water, Fat in the olive oil, Acid in the lemon, and Heat in the garlic chili oil. We not only use the pasta water to stop the cooking process of the garlic and chili but also to help infuse some of those flavors like parmesan into the al dente pasta. That’s right, al dente. It’s fine if you like your pasta to be soft, but at least finish cooking it in the flavorful garlic chili oil water. Taste your pasta in the water, boil to al dente and reserve your pasta water.

    Fettucine Aglio E Olio Vertical 6

    We talked about how low cost and few ingredient recipes are my jam, but that’s only half true. I love few ingredient recipes, but I also splurge on high-quality ingredients for recipes that I want to put my time into. I love food too much. Don’t get me wrong, this recipe is totally great with Kraft sprinkle cheese and minced garlic from a jar. There’s just something about grating a fresh block of Parmigiano Reggiano or slicing your garlic paper thin for crispy, garlicky bites in this pasta. It’s very Italian to little, but great quality ingredients. Buy yourself that fresh pasta or fun pasta shape, you deserve it!

    Fettucine Aglio E Olio Vertical 4

    Yield(s): Serves 5

    10m prep time

    10m cook time

    4.7
    Rated by 650 reviewers

    Allergens: MilkGlutenCitrus

    Diet: Vegetarian

    hearts
    When you share or print a 12 Tomatoes recipe,
    you’re making mealtime meaningful.
    100% of the Share to Care sponsor fees fund meals for families in need. Learn More


    Ingredients:
    • 1 lb. Fettucine
    • 1/4 cup olive oil
    • 6 – 8 garlic cloves, sliced
    • 1/2 teaspoon crushed red pepper flakes
    • 3/4 cup reserved pasta water
    • 1/2 cup parmigiano reggiano, grated
    • 1 lemon, juiced
    • 1 tablespoon fresh parsley, minced
    • Freshly cracked black pepper, to taste
    Directions:
    1. In a large pot of boiling salted water, cooking fettuccine until al dente. Reserve 3/4 cup of salty pasta water and drain.
    2. Place empty pot over medium heat with olive oil, garlic and crushed red pepper flakes. When garlic starts to turn golden, add in cooked pasta, pasta water and parmigiana.
    3. Reduce heat to low, toss pasta until sauce comes together and coats each noodle.
    4. Finish with lemon juice, parsley and black pepper.
    5. Mangia!
  • Sticky Sesame Chicken Wings

    Sticky Sesame Chicken Wings

    Sticky Sesame Chicken Wings

    Table of Contents

    Ingredients

    1 clove Garlic

    ¾ tsp Salt

    2 tbsp Lee Kum Kee Soy Sauce

    2 tbsp Lee Kum Kee Hoisin Sauce

    2 tbsp Mild Honey

    1 tsp Lee Kum Kee Sesame Oil

    Pinch of Cayenne

    3 lb Chicken Wingettes or Chicken Wings

    1 ½ tbsp Sesame Seeds; lightly toasted

    1 Scallion; finely chopped

    Directions

    1. Put oven rack in upper third of oven and preheat oven to 425°F. Line a large shallow baking pan (17 by 12 inches) with foil and lightly oil foil.

    2. Mince garlic and mash to a paste with salt using a large heavy knife.

    Transfer garlic paste to a large bowl and stir in soy sauce, hoisin, honey, oil, and cayenne.

    Add wingettes to sauce, stirring to coat.

    3. Arrange wingettes in 1 layer in baking pan and roast, turning over once, until cooked through, about 35 minutes. Transfer wingettes to a large serving bowl and toss with sesame seeds and scallion.

    Makes 4 servings

  • Homemade Turkish Bread Recipe

    Homemade Turkish Bread Recipe

    Homemade Turkish Bread Recipe

    Table of Contents

    Ingredients:
    • 600 grams flour (Adjust if needed, approximately 140 grams more)
    • 500 ml warm water
    • 1 teaspoon salt
    • 1 teaspoon sugar
    • 1 tablespoon dry yeast

    For the Surface:

    • 1 egg yolk
    • 1 tablespoon yogurt
    • Sesame seeds

    Instructions:

    Preparing the Dough:

    1. In a large mixing bowl, combine the flour, salt, and sugar. Create a well in the center.
    2. Dissolve the dry yeast in warm water and pour it into the well in the flour mixture.

    Kneading the Dough:

    1. Mix the ingredients gradually, incorporating the flour from the sides of the well into the liquid. Knead until you form a soft, smooth dough. If the dough is too watery or sticky, add more flour gradually until it reaches the right consistency.

    Allowing the Dough to Rise:

    1. Cover the dough with a clean kitchen towel and let it rest in a warm, draft-free place for about 1-2 hours, or until it doubles in size.

    Preheating the Oven:

    1. Preheat the oven to 200°C (390°F).

    Preparing the Surface and Baking:

    1. In a small bowl, mix the egg yolk and yogurt to create the glaze.
    2. Divide the risen dough into equal-sized portions and shape them into oval or round loaves.
    3. Place the loaves onto a baking sheet lined with parchment paper.
    4. Brush the surface of the loaves with the egg yolk and yogurt glaze.
    5. Sprinkle sesame seeds over the glazed loaves.

    Baking the Bread:

    1. Put the baking sheet with the loaves into the preheated oven.
    2. Bake for about 20-25 minutes or until the bread turns golden brown and sounds hollow when tapped on the bottom.
    See also  Beyond Pizza: Crafting Irresistible Homemade Bread

    Cooling and Serving:

    1. Remove the bread from the oven and let it cool on a wire rack.
    2. Once cooled, slice and serve this delicious homemade Turkish bread with your favorite dishes! 1f956️
  • No-Bake Chocolate Cake in 5 Minutes

    No-Bake Chocolate Cake in 5 Minutes

    No-Bake Chocolate Cake in 5 Minutes

    Table of Contents

    Ingredients:

    • 500g biscuits
    • 120g sugar
    • 250ml milk
    • 2-3g vanilla sugar
    • 150g butter
    • 60g cocoa powder
    • 140g chocolate (chopped)
    • Toppings (as desired)
    ‍ Instructions:
    1. Crush biscuits into fine crumbs using a food processor or by placing them in a sealed bag and crushing with a rolling pin.
    2. In a saucepan, combine sugar, milk, vanilla sugar, butter, cocoa powder, and chopped chocolate. Heat gently, stirring until melted and smooth.
    3. Remove from heat, add crushed biscuits. Mix until well combined.
    4. Press the mixture firmly into a lined cake pan.
    5. Refrigerate for at least 3 hours or until set.
    6. Garnish with your favorite toppings before serving.
    7. 1f60d Dive into this quick and decadent chocolate delight! Share your joy with friends and savor every bite!
  • Weight Loss Breakfast Banana Pancakes

    Weight Loss Breakfast Banana Pancakes

    Weight Loss Breakfast Banana Pancakes

    Table of Contents

    Ingredients:

    1 banana
    100 grams Greek yogurt
    2 chicken eggs
    A pinch of salt
    3 tablespoons flour
    Olive oil, for frying

    See also  The heavenly taste of Pineapple Bliss Bars—tangy pineapple and creamy filling on a buttery crust!

    Directions:

    Prepare the Banana: In a blender, grind the banana until smooth.
    Mix the Batter: In a mixing bowl, combine the banana puree, Greek yogurt, eggs, and a pinch of salt.
    Add the Flour: Add the flour to the mixture and stir until well combined.

    Directions:

    Heat the Skillet:
    Heat a small amount of olive oil in a non-stick skillet over low heat.
    Cook the Pancakes:
    Pour small amounts of the batter into the skillet to form pancakes. Cover with a lid and cook over low heat until the pancakes are set and golden brown, about 3-4 minutes per side.
    Serve: Serve hot and enjoy as much as you want.
    Prep Time: 10 minutes | Cooking Time: 20 minutes | Total Time: 30 minutes
    Kcal: 120 kcal per serving | Servings: 4 pancakes
    Nutritional Benefits:
    These Banana Greek Yogurt Pancakes are a healthy and delicious breakfast option that can aid in weight loss:
    Banana: A good source of potassium, vitamin B6, and vitamin C, bananas help maintain heart health and provide a quick energy boost.
    Greek Yogurt: High in protein and probiotics, Greek yogurt aids in digestion and supports a healthy gut. It also provides calcium for bone health.
    Eggs: Rich in high-quality protein, eggs provide essential amino acids, vitamins, and minerals, contributing to muscle repair and growth.
    Olive Oil: A healthy fat, olive oil is rich in monounsaturated fats and antioxidants, supporting heart health and reducing inflammation.
    Incorporating these Banana Greek Yogurt Pancakes into your breakfast routine is a fantastic way to enjoy a healthy and delicious start to your day. Packed with protein, vitamins, and minerals, these pancakes are not only nutritious but also incredibly tasty.
    The combination of fresh ingredients and the absence of flour makes them a perfect choice for those looking to lose weight or maintain a healthy diet. Try this simple and tasty recipe, and enjoy the benefits of a wholesome breakfast every day!
  • Delicious Melt-in-Your-Mouth Cookies

    Delicious Melt-in-Your-Mouth Cookies

    Delicious Melt-in-Your-Mouth Cookies

    Table of Contents

    Ingredients:

    125 grams (½ cup) butter
    1 egg
    85 grams (½ cup) powdered sugar
    280 grams (2¼ cups) all-purpose flour
    0.5 teaspoon (2.5 g) vanilla sugar

    Directions:

    Preheat the Oven: Preheat your oven to 180°C (350°F) and line a baking sheet with parchment paper.

    Cream Butter and Sugar: In a mixing bowl, cream together the butter and powdered sugar until light and fluffy.
    Add Egg and Vanilla: Add the egg and vanilla sugar to the butter-sugar mixture. Mix until well combined.

    Form the Dough: Gradually add the flour to the mixture, stirring until a soft dough forms.

    Shape the Cookies: Roll the dough into small balls and place them on the prepared baking sheet, leaving space between each cookie. Flatten each ball slightly with a fork or your fingers.

    Bake: Bake in the preheated oven for about 10-12 minutes, or until the edges are lightly golden.

    Cool: Remove from the oven and let the cookies cool on the baking sheet for a few minutes before transferring them to a wire rack to cool completely.
    Serving Suggestions:

    Enjoy with a cup of tea or coffee for a delightful afternoon treat.
    Serve as a sweet snack for kids’ lunchboxes or parties.
    Store in an airtight container to keep them fresh for up to a week.
    Cooking Tips:

    Ensure butter is at room temperature for easier mixing.
    Do not overmix the dough; just combine until it forms.
    Keep an eye on the cookies as baking times can vary slightly depending on your oven.