Category: healthy food

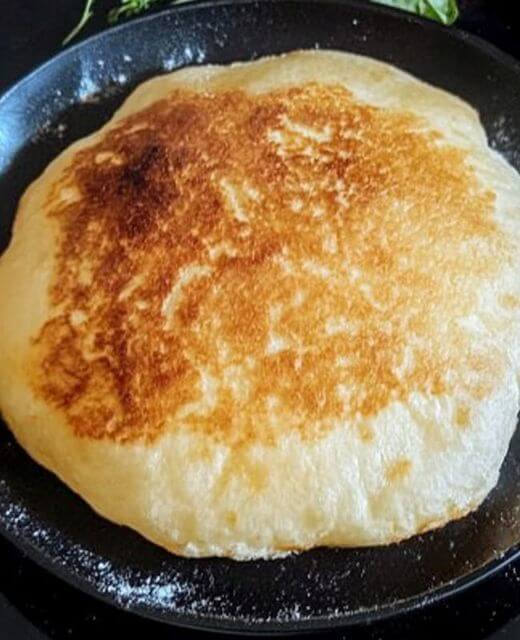
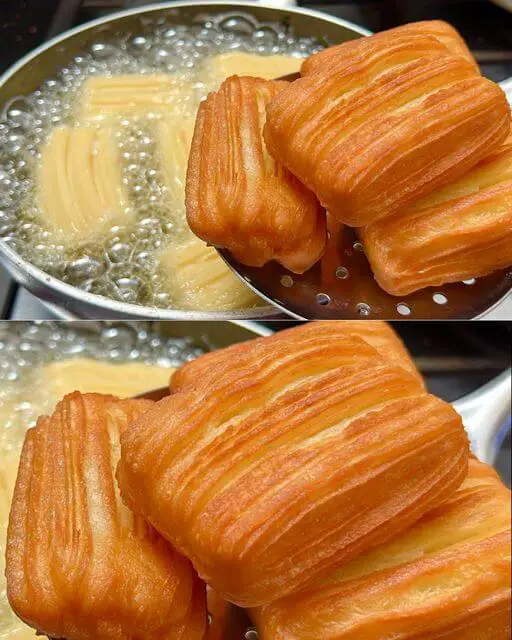
  • Balloon Bread Recipe: Flour and Water Magic!

    Balloon Bread Recipe: Flour and Water Magic!

    Balloon Bread Recipe: Flour and Water Magic!

    Table of Contents

    Ingredients

    • 500 ml (2 cups) water
    • 600 g (4 ¾ cups) flour (divided into two parts)
    • 1 tsp (5 g) salt
    • 1 tsp (5 g) sugar
    • Seed oil, for frying (as needed)

    Instructions

    1. Prepare the Dough Base

    Begin by placing 500 ml of water into a pan and adding 1 tsp of salt and 1 tsp of sugar. Bring the water to a boil over medium heat.

    Once the water is boiling, gradually add 300 g of flour (about half of the total amount). Stir the mixture continuously with a wooden spoon or spatula to combine the flour into the water. You’ll notice the dough becoming thick and sticky as the flour absorbs the liquid. Continue mixing until the dough is compact and smooth, and no lumps of dry flour remain.

    2. Cool and Knead

    Remove the dough from the heat and transfer it to a large bowl to cool slightly. Let it sit for a few minutes until it’s cool enough to handle.

    Once slightly cooled, start adding the remaining 300 g of flour to the dough, little by little, kneading it into the mixture. As you knead, the dough will gradually become less sticky and more manageable. Continue kneading until the dough is soft, smooth, and elastic. This step may take about 5-7 minutes.

    3. Shape the Dough

    After the dough is well-kneaded and pliable, transfer it onto a floured work surface. Divide the dough into 12 equal parts using a pasta cutter or knife. Roll each portion into a ball.

    See also  LOTUS BISCUIT CHEESECAKE

    Next, use a rolling pin to roll each ball of dough into a thin disc, about 2-3 millimeters thick. Make sure the discs are as even as possible for consistent frying results.

    4. Fry the Bread

    Prepare a large frying pan or deep skillet and pour in enough seed oil to cover the bottom generously (you’ll need enough oil to deep-fry the bread). Heat the oil over medium-high heat until very hot.

    Once the oil is hot, carefully lower one dough disc into the pan. The dough will begin to puff up quickly as it fries. Use a metal spoon to gently splash hot oil over the top of the bread to encourage even inflation.

    Once the bread is golden brown on one side, flip it over and continue frying until the other side is golden and the bread is fully puffed up like a balloon.

    Remove the balloon bread from the oil and drain on a plate lined with paper towels to absorb any excess oil.

    5. Repeat and Serve

    Continue frying the remaining discs, one at a time, following the same process. Once all the balloon bread is fried and golden, they are ready to serve!

    Enjoy your balloon  bread warm with a variety of dips, as a side to your favorite meal, or simply on their own.

    Notes:

    • Storage: Balloon bread keeps well for up to 2 days. Store it in an airtight container at room temperature.
    • Freezing: You can freeze the balloon bread in freezer bags. To reheat, take them out of the freezer and warm them up in a  pan to restore their light and crispy texture.
    See also  Zucchini-Potato Meatballs: Tastier Than Meat!

    Tips:

    1. Frying temperature: Ensure the oil is hot enough before frying to guarantee the bread puffs up quickly.
    2. Consistency: Make sure the dough is rolled out thinly and evenly for the best results.
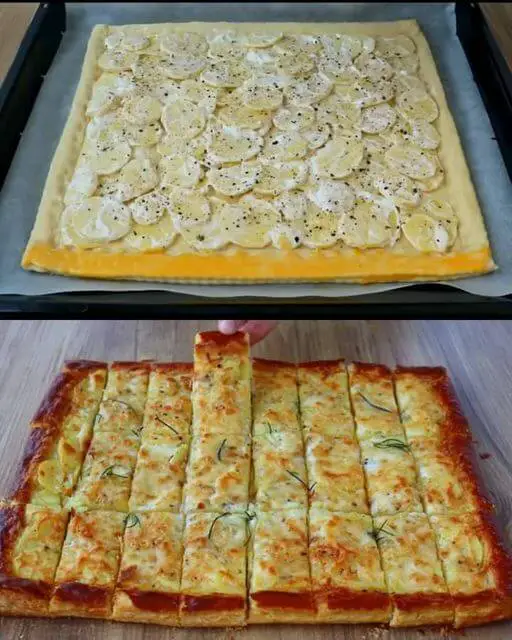
  • Flaky Potato and Cheese Pie

    Flaky Potato and Cheese Pie

    Flaky Potato and Cheese Pie

    Table of Contents

    Ingredients

      • For the Dough:
          • ½ teaspoon yeast (3 g)


          • 1 teaspoon sugar (5 g)
          • 2 cups warm milk (400 ml)
          • 5 cups all-purpose flour (530 g) (may vary)


        • 1 teaspoon salt (6 g)
        • 140 g softened butter at room temperature
    • For the Filling:
        • 7-8 small potatoes, thinly sliced
        • ½ cup cold raw cream (100 ml)
        • Salt, to taste


        • Black pepper, to taste
        • 1 egg yolk (for brushing)
        • 1 cup grated cheddar cheese (optional)


      • Fresh rosemary (optional, for garnish)

    Directions

      1. Prepare the Dough:
          • In a large bowl, combine yeast, sugar, and warm milk. Mix well.


          • Gradually add flour and salt. Knead to form a soft dough that slightly sticks to your hand.
          • Sprinkle plenty of flour on a surface and knead the dough for 6-7 minutes.
          • Cover the dough and let it rest for 10 minutes.


        • Divide the dough into 4 equal parts, cover, and let it rest for another 20 minutes.
      2. Roll and Layer the Dough:
          • Sprinkle plenty of flour on the surface and roll each piece of dough out thinly.


          • Spread softened butter over each rolled-out dough.
          • Fold the dough as shown in the video (or instructions) and lightly oil it.
          • Repeat with the second piece of dough, layering it over the first, and continue folding and oiling.


        • Cover and place the dough in the freezer to chill for 25 minutes.
      3. Prepare the Filling:
          • Slice the potatoes thinly and mix them with cold raw cream, salt, and black pepper.


      4. Assemble the Pie:
          • Preheat your oven to 190°C (375°F).
          • Roll out the chilled dough thinly and shape it as shown in the video.


        • Place the rolled dough on a baking tray and add the potato mixture in the center.
        • Sprinkle with additional salt and black pepper. Brush the edges of the dough with egg yolk.
      1. Bake:
          • Bake in the oven for 30-35 minutes until golden brown.
          • Remove from the oven, sprinkle grated cheddar cheese on top, and add fresh rosemary if desired.
          • Return to the oven and bake for another 8-10 minutes until the cheese is melted and bubbly.


      2. Serve:
        • Slice while hot and enjoy!

    Serving Suggestions

    • Serve with a side salad or roasted vegetables for a complete meal.
    • Add a dollop of sour cream or a sprinkle of chopped herbs on top for extra flavor.

    Cooking Tips

      • For a flakier crust, ensure the butter is soft but not melted when spreading.
    • Adjust the salt and pepper according to your taste preferences.
    • Use a sharp knife or mandoline to thinly slice the potatoes for even cooking.

    Nutritional Benefits

      • Potatoes: Provide potassium, vitamin C, and dietary fiber.
    • Cheddar Cheese: Adds protein and calcium.
    • Cream: Adds richness and enhances the flavor profile.

    Dietary Information

      • This recipe contains dairy and gluten.
    • To make it vegetarian, ensure that the cheese used does not contain animal rennet.

    Nutritional Facts (per serving)

      • Calories: 320
      • Protein: 8 g
    • Carbohydrates: 40 g
    • Fat: 15 g

    Storage Tips

      • Store leftovers in an airtight container in the refrigerator for up to 3 days.
    • Reheat in the oven at 180°C (350°F) for 10 minutes to retain crispiness.


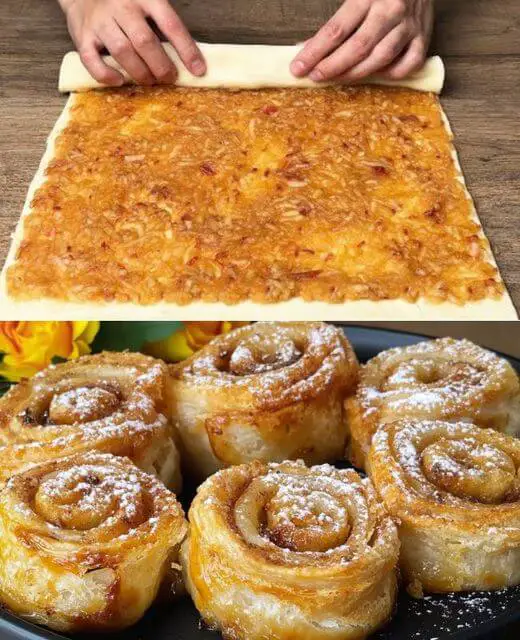
  • Quick Puff Pastry Apple Rolls Recipe

    Quick Puff Pastry Apple Rolls Recipe

    Quick Puff Pastry Apple Rolls Recipe

    Table of Contents

    Ingredients:

    • 500 g (17.6 oz) puff pastry
    • 2 apples, grated
    • 20 g (1 ½ tbsp) sugar
    • 5 g (1 tsp) cinnamon
    • 1 egg, for brushing

    Optional for Serving:

    • Strawberry puree
    • Black tea

    Instructions:

    1. Prepare the Filling

    Start by peeling the 2 apples and grating them into a medium-sized bowl. The grated apples will form the sweet, juicy filling for your pastry. Once grated, mix the apples with 20 g of sugar and 5 g of cinnamon, ensuring that the mixture is evenly combined. The sugar will bring out the natural sweetness of the apples, while the cinnamon adds a warm, spiced flavor.

    2. Roll the Dough

    On a clean, flat surface, roll out the 500 g puff pastry into a large rectangular shape. Aim for an even thickness so that the pastry bakes uniformly. Once rolled out, evenly spread the prepared apple mixture across the surface of the puff pastry, leaving a small border around the edges.

    3. Roll and Slice

    Carefully begin rolling the puff pastry from one edge, working slowly to create a tight roll or log shape. Once fully rolled, use a sharp knife to slice the log into small rolls, about 2 cm thick. Each slice should contain layers of pastry and apple filling.

    4. Egg Wash

    Preheat your oven to 180°C (350°F) and line a baking tray with parchment paper. Arrange the apple rolls on the tray, leaving some space between each roll for them to expand during baking. In a small bowl, beat 1 egg and brush the top of each roll with the egg wash to give them a golden, glossy finish once baked.

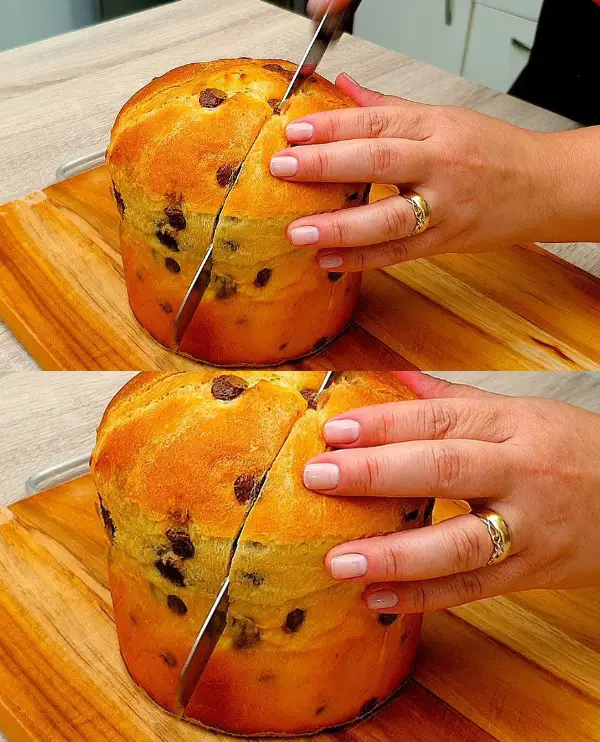
  • Homemade Panettone Recipe: Incredible Results

    Homemade Panettone Recipe: Incredible Results

    Homemade Panettone Recipe: Incredible Results

    Table of Contents

    Now you can make your own delicious Panettone at home with this incredible recipe. You’ll be amazed by the results!
    For the Sponge:
    Ingredients (cup size: 200ml)
    • 1 1/2 cups of bread flour (150g)
    • 1 tablespoon of instant yeast (10g)
    • 3/4 cup of water (150ml)
    Remaining Ingredients:

    Ingredients (cup size: 200ml)

    • 4 1/2 cups of bread flour (450g)
    • 1/2 cup of sugar (80g)
    • 4 egg yolks
    • 1 teaspoon of salt (5g)
    • 3 tablespoons of butter or margarine (75g)
    • 1/3 cup of water (70ml)
    • 1 tablespoon of Panettone aroma (12ml)
    • 1 tablespoon of honey (20g)
    • 1 1/2 cups of chocolate chips (210g)

    Instructions:

    For the Sponge:

    1. In a mixing bowl, combine 1 1/2 cups of bread flour, 1 tablespoon of instant yeast, and 3/4 cup of water. Mix until you have a smooth and sticky dough.
    2. Cover the bowl with a clean cloth and let the sponge rest for about 30 minutes until it becomes frothy and bubbly.

    For the Remaining Dough:

    1. To the sponge, add 4 1/2 cups of bread flour, 1/2 cup of sugar, 4 egg yolks, and 1 teaspoon of salt. Mix well to combine all the ingredients.
    2. Add 3 tablespoons of butter or margarine and 1/3 cup of water. Continue to mix until the dough comes together.
    3. Add 1 tablespoon of Panettone aroma and 1 tablespoon of honey to enhance the flavor. Mix until well incorporated.
    4. Finally, fold in 1 1/2 cups of chocolate chips into the dough. You can use a spatula or your hands for this step.
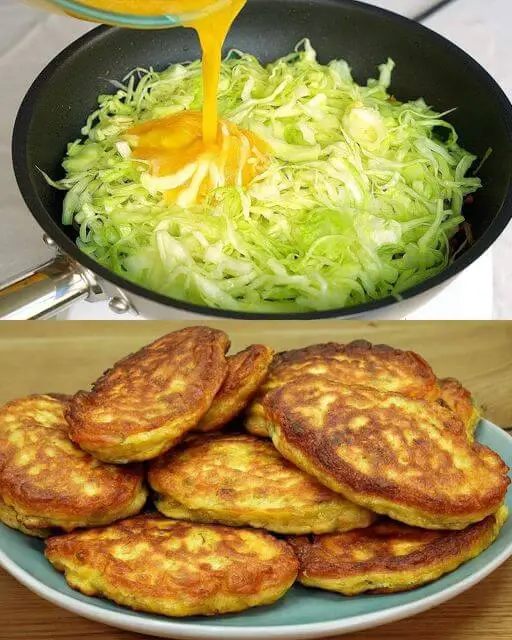
  • Savory Cabbage Pancakes

    Savory Cabbage Pancakes

    Savory Cabbage Pancakes

    Savory Cabbage Pancakes

    Table of Contents

    Ingredients:

      • 1/2 cabbage, finely shredded
      • 1 onion, finely chopped
      • 1 carrot, grated
      • 3 eggs
      • 500 ml kefir or thick yogurt (17 oz)
      • 300 g flour (10.6 oz)
      • 1 teaspoon baking soda or baking powder
      • Salt and black pepper, to taste
      • Vegetable oil for frying

    Directions:

      1. Prepare vegetables: Finely shred the cabbage, chop the onion, and grate the carrot.
      2. Mix wet ingredients: In a large bowl, beat 3 eggs, then stir in 500 ml kefir or thick yogurt.
      3. Add dry ingredients: Sift 300 g of flour and 1 teaspoon of baking soda (or baking powder) into the wet mixture. Stir until smooth.
      1. Combine with vegetables: Fold in the shredded cabbage, onion, and grated carrot. Season with salt and black pepper to taste.
      2. Fry the pancakes: Heat a little vegetable oil in a frying pan over medium heat. Drop spoonfuls of the mixture into the pan, flatten slightly, and fry for 2-3 minutes on each side until golden brown.
      3. Serve warm: Remove from the pan and drain on paper towels. Serve immediately.

    Serving Suggestions:

      • Serve with a dollop of sour cream or yogurt for extra creaminess.
      • Add a side of salad or some roasted vegetables for a complete meal.
      • Garnish with fresh herbs like parsley or dill.

    Cooking Tips:

      • For a healthier option, bake the pancakes on a greased baking sheet at 180°C (350°F) for about 15-20 minutes, flipping halfway through.
      • Add a handful of grated cheese for an extra savory flavor.
      • If you want a lighter texture, use sparkling water instead of kefir or yogurt.
    See also  Just Add Coca-Cola to the Flour and the Bread Is Ready

    Nutritional Benefits:

      • Cabbage is rich in vitamins C and K, supporting immune and bone health.
      • Eggs provide high-quality protein and essential nutrients.
      • Kefir or yogurt adds probiotics, which are great for gut health.

    Dietary Information:

      • Vegetarian.
      • Can be made gluten-free by substituting the flour with a gluten-free alternative.
      • Contains dairy and eggs.

    Nutritional Facts (per serving):

      • Calories: 220 kcal
      • Protein: 8 g
      • Fat: 9 g
    • Carbohydrates: 25 g
    • Fiber: 4 g

    Storage:

      • Store in an airtight container in the fridge for up to 3 days.
    • Reheat in a frying pan or oven before serving. These pancakes can also be frozen for up to 2 months.
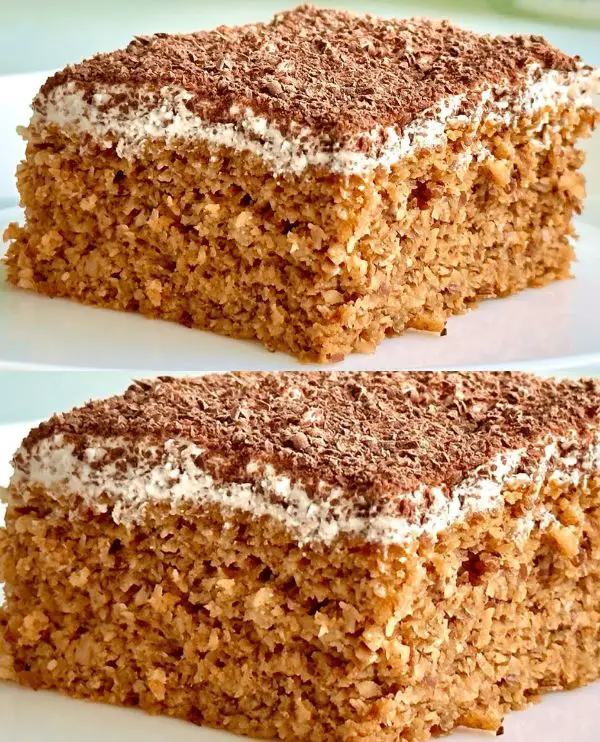
  • Flourless Carrot Cake Recipe: Indulgence Without Guilt

    Flourless Carrot Cake Recipe: Indulgence Without Guilt

    Flourless Carrot Cake Recipe: Indulgence Without Guilt

    Table of Contents

    Carrot cake has always been a beloved treat, but traditional recipes often come loaded with flour and sugar, making them less than ideal for those watching their carb intake. However, this flourless carrot cake recipe offers a healthier alternative without sacrificing taste or satisfaction. By using ground almonds instead of flour and natural sweeteners like honey, this cake is not only low in carbs but also packed with flavor and nutrients.

    Ingredients

    To whip up this delectable flourless carrot cake, you’ll need:

    • 7 ounces of carrots
    • 2 eggs
    • 2-3 tablespoons of honey
    • 1 teaspoon of baking soda
    • 2-3 drops of wine vinegar
    • 7 ounces of ground almonds
    • a pinch of cinnamon powder
    • pinch of salt

    For the cream:

    • 5.3 ounces of cottage cheese, at room temperature
    • 1 ounces of cow butter, at room temperature
    • 1 tablespoon of honey
    Preparation Method

    Let’s dive into the step-by-step process of making this delightful carrot cake:

    Step 1: Prepare the Carrots
    • Wash, peel, and cut the carrots into circles.
    • Put them in the bowl of a blender and grind until you get a smooth puree.
    Step 2: Mix the Ingredients
    • Separate the egg whites from the yolks.
    • Beat the egg yolks with honey until thick foam forms.
    • Mix ground almonds, cinnamon, and carrots with the egg mixture.
    • Dissolve baking soda in vinegar and add to the mixture.
    • In a separate bowl, beat egg whites with a pinch of salt until fluffy.
    • Gently fold egg whites into the carrot mixture.
    See also  Recipe: Oatmeal and Zucchini Bake – Better than Pizza
    4. Baking the Cake
    • Preheat the oven to 160 degrees Celsius.
    • Grease a baking dish and line it with parchment paper.
    • Pour the cake batter into the dish and spread it evenly.
    • Bake for 40-45 minutes or until a toothpick inserted into the center comes out clean.
    • Allow the cake to cool completely before removing it from the dish.
    5. Making the Cream
    • In a bowl, combine cottage cheese, butter, and honey.
    • Mix until smooth and creamy.
    6. Serving Suggestions
    • Once the cake has cooled, spread the cream over the top.
    • For added indulgence, sprinkle grated chocolate or ground nuts on top.
    • Slice and serve with a cup of your favorite hot beverage.
    7. Health Benefits
    • This flourless carrot cake is low in carbs and high in fiber, making it a healthier option for those watching their carb intake.
    • Carrots are rich in beta-carotene, which is converted into vitamin A in the body and supports vision health.
    • Almonds are a good source of healthy fats, protein, and antioxidants, promoting heart health and reducing inflammation.
    8. Tips and Tricks
    • For a vegan version of this cake, you can replace the eggs with flax eggs.
    • Feel free to adjust the sweetness by adding more or less honey according to your taste preference.
    • Get creative with toppings! Try adding shredded coconut, chopped nuts, or a drizzle of maple syrup for extra flavor.
    9. Variations
    • Experiment with different spices like nutmeg or ginger for a unique flavor twist.
    • Add grated zucchini or chopped nuts for added texture and nutrition.
    10. Conclusion

    In conclusion, this flourless carrot cake recipe is a game-changer for anyone looking to enjoy a delicious treat without the guilt. With simple ingredients, easy preparation, and incredible flavor, it’s a win-win for your taste buds and your health. So why wait? Get baking and indulge in a slice of pure bliss today!

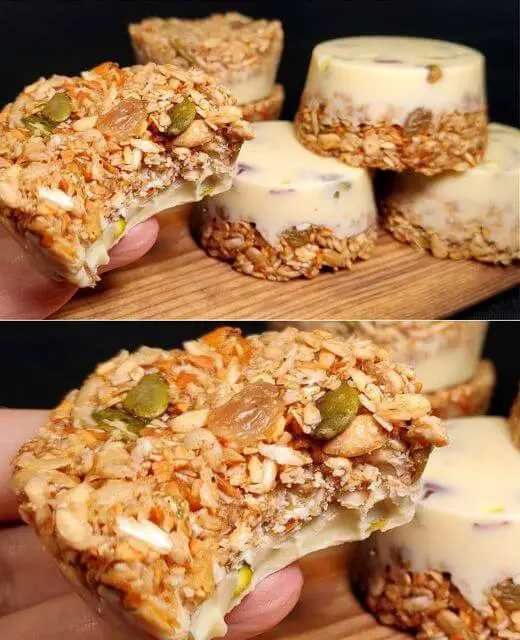
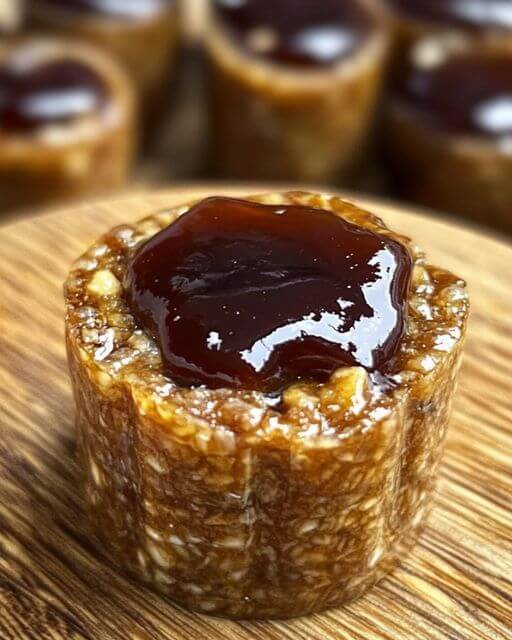
  • No-Bake and Baked Super Energy Dessert Recipe

    No-Bake and Baked Super Energy Dessert Recipe

    No-Bake and Baked Super Energy Dessert Recipe

    Ingredients:

    • 150 g oat flakes (5.3 oz)
    • 50 g walnuts (1.7 oz), chopped
    • 50 g cashews (1.7 oz), chopped
    • 30 g pumpkin seeds (1 oz)
    • 50 g raisins (1.7 oz)
    • 1 tbsp honey
    • Cinnamon, to taste
    • 150 g dried apricots (5.3 oz), chopped
    • 50 g white chocolate (1.7 oz), sugar-free
    • Pistachios, optional for garnish
    • 1 apple and 1 banana, optional for the baked version

    Instructions:

    No-Bake Version:

    1. Prepare the Nut and Oat Mixture

    In a large mixing bowl, combine the oat flakeschopped walnutscashewspumpkin seeds, and raisins. Add a pinch of cinnamon to taste for a touch of spice. Then, fold in the chopped dried apricots. This blend of oats, nuts, seeds, and dried fruits will give your dessert a hearty texture and rich flavor.

    2. Add Honey

    Drizzle 1 tablespoon of honey over the oat and nut mixture, stirring well to ensure everything is evenly coated. The honey helps bind the ingredients together while adding a natural sweetness to the dessert without refined sugar.

    3. Prepare the Chocolate Base

    Melt the white chocolate in a heatproof bowl either in the microwave (in 30-second intervals, stirring between each) or over a pot of simmering water. Be careful not to overheat it to avoid burning.

    See also  Quick and Simple Spanish Recipe: Fried Anise-Infused Doughnuts

    Once the chocolate is melted and smooth, pour a small amount into silicone molds or small muffin cups, just enough to cover the bottom of each mold. The white chocolate will act as the base layer, adding a smooth and  creamy finish to your dessert.

    4. Add the Oat Mixture

    Next, press the oat and nut mixture firmly into the molds on top of the melted chocolate. Make sure to press down well so that the mixture forms a compact layer. This helps the dessert hold together when set.

    5. Chill the Cups

    Place the filled molds in the refrigerator and let them chill for 1-2 hours, or until the chocolate has fully hardened and the oat mixture is firm. This cooling step is essential for achieving the right texture.

    6. Serve

    Once chilled, remove the energy cups from the molds. For an extra touch of flavor and crunch, garnish them with chopped pistachios if desired. Now, you have a healthy, no-bake dessert ready to enjoy! These energy cups are perfect for a quick  snack or as a nutritious dessert.

    Baked Version (Optional):

    1. Prepare the Fruit Base

    For a more decadent, baked variation, mash 1 apple and 1 banana together until smooth. Add this fruit mixture to the prepared oat and nut blend from the previous steps. The natural sugars in the fruit will caramelize slightly during baking, adding a delightful sweetness to the dessert.

    2. Bake

    Preheat your oven to 180°C (350°F). Line a baking tray with parchment paper to prevent sticking. Spoon the oat-fruit mixture onto the tray in small portions, shaping them into cookie-sized mounds.

    Bake for 15-20 minutes or until the cookies are golden brown and slightly crisp around the edges. Allow them to cool for a few minutes before serving.

    See also  Fluffy and Delicious French Toast: The Ultimate Recipe

    Nutritional Information (Per Serving, Approximate for No-Bake Version):

    • Calories: 180 kcal
    • Protein: 4 g
    • Fat: 10 g (primarily healthy fats from nuts and seeds)
    • Carbohydrates: 20 g
    • Fiber: 4 g
    • Sugar: 10 g (from natural sources and honey)
    • Sodium: 5 mg
    • Servings: 8-10 cups
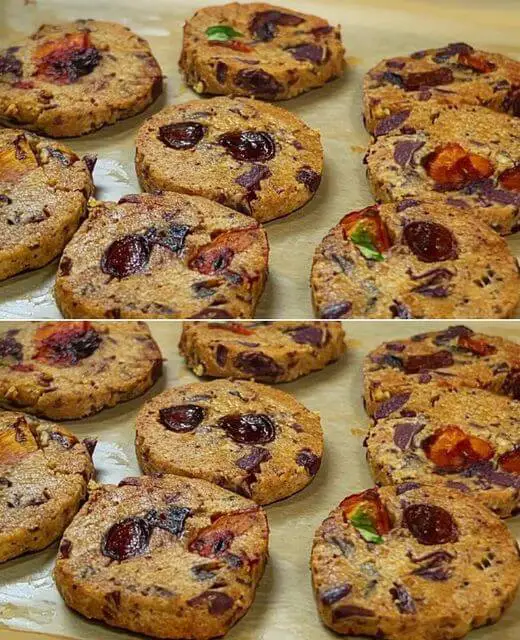
  • Nut and Dried Fruit Cookies Recipe

    Nut and Dried Fruit Cookies Recipe

    Nut and Dried Fruit Cookies Recipe

    Table of Contents

    Ingredients:

    • 50 g (1.8 oz) walnuts, chopped
    • 40 g (1.4 oz) dried cranberries (soaked in cold water for 15 minutes)
    • 25 g (0.9 oz) raisins (soaked in cold water for 15 minutes)
    • 25 g (0.9 oz) almonds, chopped
    • 50 g (½ cup) rolled oats
    • 2 apples, cut into pieces
    • 1 tsp (5 ml) lemon juice
    • 1 pinch of salt
    • 30 ml (2 tbsp) olive oil

    Instructions:

    1. Prepare the Dried Fruits:

    • Soak 40 g of dried cranberries and 25 g of raisins in cold water for 15 minutes. Drain them and set aside.

    2. Chop the Nuts:

    • Finely chop 50 g of walnuts and 25 g of almonds.
    • Mix the chopped nuts with the soaked cranberries and raisins, and add 50 g of rolled oats.

    3. Prepare the Apples:

    • Chop 2 apples into small pieces and blend them into a smooth applesauce using a blender or food processor.
    • Add 1 tsp of lemon juice to the applesauce to prevent it from browning and enhance the flavor.

    4. Combine Ingredients:

    • In a large bowl, mix the applesauce with the dried fruit, nut mixture, and a pinch of salt.
    • Add 30 ml of olive oil and stir until everything is well combined.

    5. Chill the Mixture:

    • Place the mixture in the refrigerator for 30 minutes to firm up, making it easier to shape into cookies.
    See also  How to Make Delicious Cookies in Minutes with Just One Egg!

    6. Shape and Bake:

    • Preheat the oven to 160°C (320°F).
    • Shape the chilled mixture into cookie-sized portions and place them on a baking tray lined with parchment paper. Lightly grease the paper with vegetable oil to prevent sticking.
    • Bake the cookies in the preheated oven for 40 minutes, or until they are golden brown.

    7. Serve:

    • Once baked, allow the cookies to cool on the tray.
    • Serve and enjoy your delicious and healthy Nut and Dried Fruit Cookies!

    Nutritional Information (per cookie, serves 8-10):

    • Calories: 120 kcal
    • Protein: 3 g
    • Carbohydrates: 14 g
    • Fat: 6 g
    • Fiber: 3 g
    • Sugar: 6 g (from natural dried fruits)
    • Sodium: 10 mg
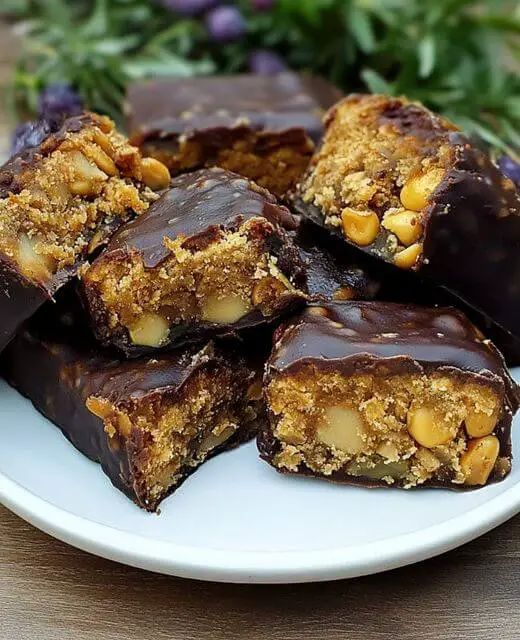
  • Tastier than Snickers: Sugar-Free, Healthy Dessert in 10 Minutes! October

    Tastier than Snickers: Sugar-Free, Healthy Dessert in 10 Minutes! October

    Tastier than Snickers: Sugar-Free, Healthy Dessert in 10 Minutes!

    Table of Contents

    Ingredients:

    • 170 g (6 oz) pitted dates
    • 2 tbsp (30 g) peanut butter
    • A pinch of salt
    • ~100 g (1 cup) oat flour (you can grind oats to make your own)
    • 60 g (2.1 oz) peanuts (fried and salted are great)
    • 100 g (3.5 oz) dark chocolate

    Instructions:

    1. Prepare the Dates:

    • Soak 170 g of pitted dates in hot water for 2-4 minutes to soften them.
    • After soaking, drain the water and place the softened dates in a blender or food processor.

    2. Make the Date-Peanut Butter Mix:

    • Add 2 tbsp of peanut butter and a pinch of salt to the dates.
    • Blend well until the mixture becomes smooth and creamy, forming a sticky paste.
    • Divide the mixture into two portions: 60% will remain in the blender, and 40% will be transferred to a bowl for later use.

    3. Add Oat Flour:

    • To the larger portion of the date-peanut butter mixture (left in the blender), gradually add 100 g of oat flour.
    • Blend until the mixture thickens and forms a dense, dough-like consistency.

    4. Layer the Date Mixture:

    • Take the smaller portion of the date mixture and press it into the bottom of a mold or tray to form a flat, even layer.
    • Spread the oat flour-date mixture on top to create a second layer, pressing it down evenly.
    See also  Key Lime Pie

    5. Add Peanuts:

    • Sprinkle 60 g of peanuts over the top of the layered mixture, pressing them gently into the surface to ensure they stick.

    6. Freeze:

    • Place the tray in the freezer for 30-40 minutes to firm up the layers.

    7. Melt the Chocolate:

    • While the layers are firming up, melt 100 g of dark chocolate using a double boiler or in the microwave in short bursts, stirring frequently to avoid burning.

    8. Cover with Chocolate:

    • Remove the tray from the freezer and pour or spread the melted chocolate over the top, covering the entire surface of the mixture.

    9. Chill:

    • Return the tray to the fridge for about 5 minutes, allowing the chocolate to harden.

    10. Serve:

    • Once the chocolate has set, remove the tray from the fridge.
    • Cut the mixture into bar shapes and enjoy your homemade, sugar-free Snickers bars!

    Nutritional Information (per bar, serves 8-10):

    • Calories: 210 kcal
    • Protein: 6 g
    • Carbohydrates: 20 g
    • Fat: 12 g
    • Fiber: 4 g
    • Sugar: 10 g (from natural dates)
    • Sodium: 120 mg
  • No-Bake Cashew and Chocolate Treats (Sugar-Free, No Flour)

    No-Bake Cashew and Chocolate Treats (Sugar-Free, No Flour)

    No-Bake Cashew and Chocolate Treats (Sugar-Free, No Flour)

    Table of Contents

    Ingredients:

    • 90g cashews (about 1/2 cup)
    • 10 dates
    • 2 tablespoons sugar-free apple syrup
    • 70g sugar-free dark chocolate (about 1/2 cup)
    • 1.5 tablespoons oat milk

    Step-by-Step Instructions:

    1. Prep the Dates:

    • Start by soaking 10 dates in cold water for about 15 minutes. This will soften the dates and make them easier to blend.
    • Once softened, remove the pits from the dates and discard them.

    2. Make the Cashew-Date Mixture:

    • In a blender or food processor, combine the soaked dates90g of cashews, and 2 tablespoons of sugar-free apple syrup.
    • Blend the ingredients until they form a smooth, sticky dough-like texture. This mixture will be the base of your treats.

    3. Shape the Mixture:

    • Take out an ice cube tray or a silicone mold with round cavities.
    • Press the cashew-date mixture into each cavity, filling it about 3/4 full. Make a small indentation in the middle of each portion, which will hold the chocolate filling.
    • Place the tray in the fridge for 10 minutes to firm up the mixture slightly.

    4. Prepare the Chocolate Filling:

    • While the cashew-date mixture is firming up, melt 70g of sugar-free dark chocolate using a double boiler (or place a heatproof bowl over simmering water).
    • Once the chocolate is melted, stir in 1.5 tablespoons of oat milk. Mix until the chocolate becomes smooth and glossy, ensuring it is evenly combined.
    See also  Discover the Ancient Delight: Turkish Chef’s Eggplant Recipe

    5. Fill the Indentations:

    • Remove the tray from the fridge.
    • Using a piping bag or a small spoon, carefully fill the indentations in the cashew-date mixture with the melted chocolate.

    6. Set the Treats:

    • Place the tray back in the fridge and let the treats set for 15 minutes, or until the chocolate hardens completely.

    7. Serve and Enjoy:

    • Once set, pop the treats out of the mold and enjoy! These No-Bake Cashew and Chocolate Treats are a healthy, sugar-free snack or dessert that’s both satisfying and indulgent.

    Nutritional Information (per treat, serves 8-10):

    • Calories: 120 kcal
    • Protein: 3 g
    • Carbohydrates: 14 g
    • Fat: 7 g
    • Fiber: 2 g
    • Sugar: 8 g (from natural dates)
    • Sodium: 10 mg
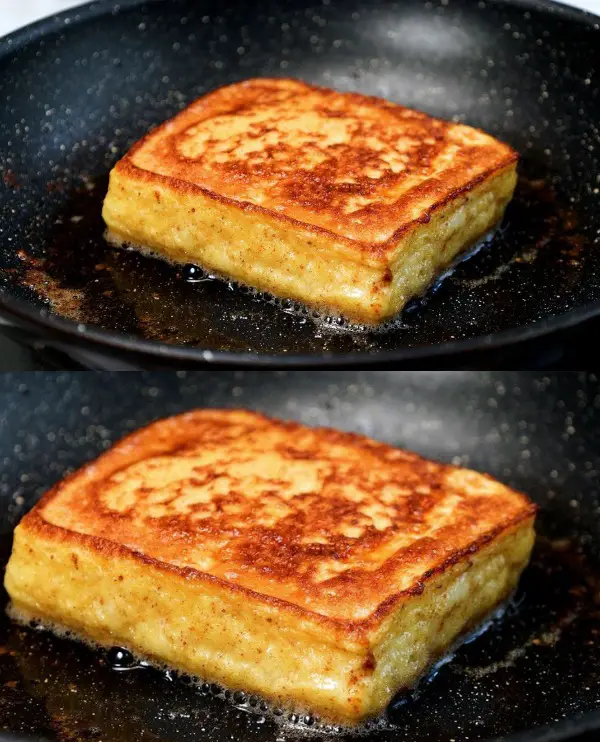
  • Fluffy and Delicious French Toast: The Ultimate Recipe

    Fluffy and Delicious French Toast: The Ultimate Recipe

    Fluffy and Delicious French Toast: The Ultimate Recipe

    Table of Contents

    Prepare to be amazed by the fluffiest and most delicious French toast you’ve ever had! It’s even better than cake! 1f370

    Ingredients:

    • 2 eggs
    • 60ml milk
    • 1 tablespoon white sugar
    • 1/4 teaspoon ground cinnamon
    • A pinch of salt
    • 2 slices of bread
    • Unsalted butter (1 tablespoon)
    • Maple syrup (for serving)

    Instructions:

    1. In a mixing bowl, crack open 2 eggs and add 60ml of milk, 1 tablespoon of white sugar, 1/4 teaspoon of ground cinnamon, and a pinch of salt. Mix the ingredients well to create your delicious egg mixture.
    2. If desired, cut off the crusts from the slices of bread. This step is optional and depends on your preference.
    3. Heat a frying pan over medium-low heat and add 1 tablespoon of unsalted butter. Allow the butter to melt and coat the bottom of the pan.
    4. Dip one of the bread slices into the egg mixture, ensuring that both sides are well-coated with the mixture.
    5. Carefully place the soaked bread slice in the heated pan. Cook until it turns golden brown and crispy on one side.
    6. Flip the bread slice over and pour more of the egg mixture over the top. Make sure to cover the bread evenly.
    7. Repeat this process with the second slice of bread, soaking it in the egg mixture and cooking it until both sides are golden brown and delicious.
    8. Pour any remaining egg mixture over the bread slices in the pan and allow it to soak into the bread.
    9. Use spatulas to shape the bread and make sure it’s evenly coated with the egg mixture.
    10. Flip the French toast slices over again and fry the sides until they are nicely browned and crispy.
    11. Once done, remove the French toast from the pan and serve immediately.
    See also  Mountain Dew Jelly Recipe

    To Serve:

    1. Drizzle your fluffy and delicious French toast with maple syrup for an extra touch of sweetness and enjoy! This is truly the best French toast recipe you’ll ever taste.
    2. Indulge in the delightful flavors and fluffy texture of this amazing French toast! 1f35e1f3731f95e
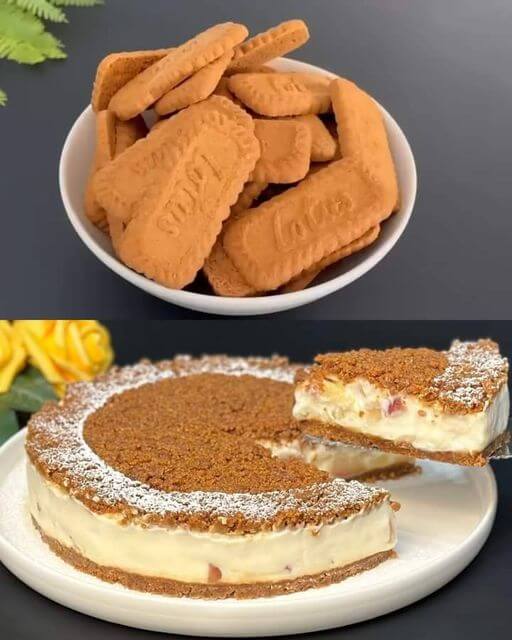
  • Creamy Apple and Lotus Biscuit Dessert: A No-Bake Delight

    Creamy Apple and Lotus Biscuit Dessert: A No-Bake Delight

    Creamy Apple and Lotus Biscuit Dessert: A No-Bake Delight

    Table of Contents

    Ingredients:

      • 250 g Lotus biscuits
      • 100 g melted butter
      • 40 ml milk
      • 2 apples, peeled and sliced
      • 2 tbsp butter
      • 2 tbsp sugar
      • 400 ml milk
      • 40 g sugar
      • 8 g vanilla sugar or vanillin
      • 1 egg yolk
      • 4 tbsp cornstarch (50 g)
      • 200 ml sweetened whipping cream
    • Powdered sugar for dusting

    Directions:

      • Prepare the base:
          • Crush 250 g of Lotus biscuits and combine with 100 g melted butter and 40 ml milk.
          • Press half the biscuit mixture into a 22 cm mold and refrigerate for a few minutes.


      • Cook the apples:
          • In a pan, melt 2 tbsp butter and add sliced apples with 2 tbsp sugar.
          • Cook on low heat for 5 minutes until softened. Set aside to cool.


      • Make the cream filling:
          • In a pot, heat 400 ml milk, 40 g sugar, 8 g vanilla sugar, and 1 egg yolk.
          • Stir in 4 tbsp cornstarch and cook until thickened.


        • Let the mixture cool, then fold in 200 ml sweetened whipping cream.
      • Assemble the dessert:
          • Pour the cooled cream over the biscuit base and layer with cooked apples.


        • Top with the remaining half of the biscuit mixture.
        • Chill in the fridge for 2-3 hours.
    • Finish:
      • Dust with powdered sugar before serving.

    Serving Suggestions:

      • Serve chilled with a drizzle of caramel sauce for extra sweetness.
    • Pair with a scoop of vanilla ice cream for a luxurious treat.
    • Add a sprinkle of cinnamon for a warm, spiced flavor.

    Cooking Tips:

      • Use cold milk when mixing the cornstarch to prevent lumps in the cream.
    • For added crunch, you can leave some larger chunks in the biscuit layer instead of crushing them finely.
    • If you prefer a more intense apple flavor, cook the apples with a pinch of cinnamon.

    Nutritional Benefits:

      • Apples provide fiber and antioxidants.
    • The milk and cream contribute calcium and protein.
    • Cornstarch adds some carbohydrates for energy.

    Dietary Information:

      • This recipe contains dairyeggs, and gluten.
    • It can be made vegetarian.
    • For a dairy-free version, substitute the butter, milk, and cream with plant-based alternatives.

    Nutritional Facts (per serving):

      • Calories: 300 kcal
      • Protein: 4 g
      • Fat: 16 g
      • Carbohydrates: 36 g
    • Sugars: 22 g

    Storage:

    • Store in the refrigerator for up to 3 days.
    • This dessert can be made a day in advance to allow the flavors to fully develop.
  • Easy Fried Dough Recipe with 2 Eggs and Flour (No Oven Required!)

    Easy Fried Dough Recipe with 2 Eggs and Flour (No Oven Required!)

    Easy Fried Dough Recipe with 2 Eggs and Flour (No Oven Required!)

    Table of Contents

    Ingredients:

    • 750 ml (3 ¼ cups) water
    • 10 g (1 tbsp) vanilla sugar
    • 1 tbsp (15 g) sugar
    • Pinch of salt
    • 50 g (3.5 tbsp) butter
    • 200 g (1 ⅔ cups) flour
    • 2 eggs
    • Honey, to taste (for drizzling)

    Preparation:

    1. Prepare the Liquid Base:

    • In a medium saucepan, pour 750 ml of water.
    • Add 10 g of vanilla sugar1 tbsp of sugar, a pinch of salt, and 50 g of butter.
    • Heat the mixture over medium heat, stirring occasionally until all the ingredients dissolve and the butter is melted.

    2. Add the Flour:

    • Without removing the saucepan from the heat, slowly add 200 g of flour to the mixture. Stir constantly with a wooden spoon to ensure the flour incorporates smoothly without lumps.
    • Continue stirring until the dough pulls away from the sides of the pan and forms a smooth, homogeneous mass.

    3. Add the Eggs:

    • Remove the dough from the heat and transfer it to a mixing bowl.
    • Allow it to cool for a few minutes so the eggs won’t cook immediately when added.
    • Once slightly cooled, add 2 eggs to the dough, one at a time, mixing thoroughly after each addition until the dough is smooth and well combined.

    4. Shape the Dough:

    • Place the dough into a pastry bag with a wide tip. If you don’t have a pastry bag, you can use a ziplock bag and cut off one corner to pipe the dough.
    • On a piece of parchment paper, pipe out 6 long strips of dough. Cut the edges cleanly if needed to ensure even pieces.
    See also  The best cake I’ve ever eaten! You will be amazed! Quick and easy recipe

    5. Fry the Dough:

    • Heat oil in a large pan over medium heat. Ensure there’s enough oil for shallow frying.
    • Carefully place the parchment paper with the dough strips into the hot oil, ensuring the dough doesn’t touch directly at first. Once the dough begins to fry and firm up, remove the parchment paper.
    • Fry the strips for 2-3 minutes on each side, or until they are golden brown and crisp.

    6. Serve:

    • Remove the fried dough strips from the pan and place them on a paper towel to drain excess oil.
    • Drizzle generously with honey while still warm for a delightful sweet finish.
    • Serve immediately and enjoy the incredible flavor of this easy fried dough recipe!

    Tips:

    • You can sprinkle cinnamonpowdered sugar, or even chocolate sauce on top for added flavor variations.
    • Ensure the oil is hot enough before frying, but not too hot, to prevent burning the dough.

    Nutritional Information (per serving, serves 6):

    • Calories: 260 kcal
    • Protein: 5 g
    • Carbohydrates: 36 g
    • Fat: 10 g
    • Sugar: 6 g
    • Sodium: 160 mg
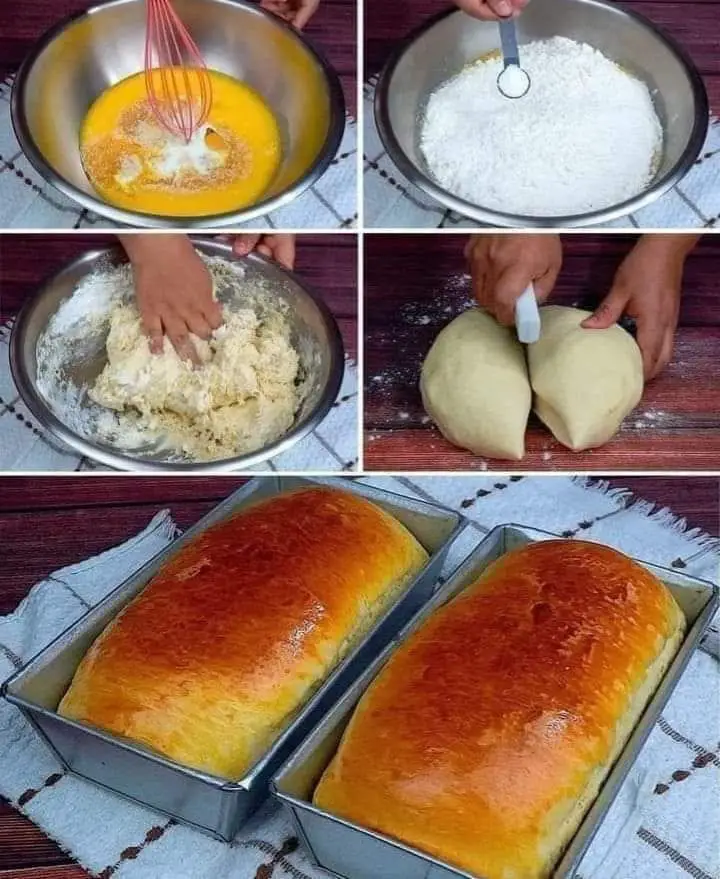
  • Homemade Bread with Mussels Recipe

    Homemade Bread with Mussels Recipe

    Homemade Bread with Mussels Recipe

    Table of Contents

    Ingredients:
    • 80 grams of melted butter
    • 400 milliliters of warm milk
    • 10 grams (1 tablespoon) of dry yeast
    • 10 grams (1 tablespoon) of sugar
    • 2 eggs
    • 850 grams of tender wheat flour
    • 6 grams (1 teaspoon) of salt

    Preparation:

    1. In a large bowl, combine the melted butter, warm milk, dry yeast, sugar, and one egg. Mix thoroughly.
    2. Gradually add the tender wheat flour in two portions, incorporating the salt with the second portion.
    3. Mix and knead the dough until it becomes smooth and homogenous. Cover the bowl and let the dough rise for about an hour or until it has doubled in size.
    4. Punch down the dough to release the air and divide it into two equal parts.
    5. Roll out each portion, then shape and place them in greased molds. Cover and let them rise for an additional 30 minutes or until they have tripled in volume.
    6. Brush the dough with an egg yolk mixed with a teaspoon of milk. Bake in a preheated oven at 200°C (392°F) for 25 minutes.

    Enjoy your freshly baked homemade bread!

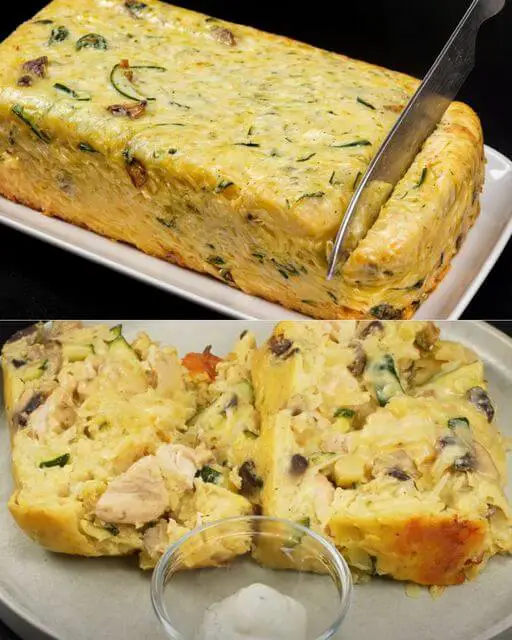
  • Baked Potato and Zucchini Casserole with Chicken and Mushrooms

    Baked Potato and Zucchini Casserole with Chicken and Mushrooms

    Baked Potato and Zucchini Casserole with Chicken and Mushrooms

    Table of Contents

    Ingredients

    For the Casserole:

    • 5 medium potatoes, grated or thinly sliced
    • 1 zucchini, grated
    • 4 eggs
    • 1 tsp salt
    • 1 tsp black pepper
    • 1 tsp oregano
    • 100 ml (3 fl oz) cream
    • 3 tbsp flour
    • 150 g (5 oz) Emmental cheese, grated
    • 1 onion, finely chopped
    • 2 cloves garlic, minced
    • 2 chicken fillets, diced
    • 150 g (5 oz) mushrooms, sliced
    • Olive oil, for cooking

    For the Yogurt Sauce:

    • Greek yogurt, as needed (about 1 cup)
    • 1 tsp mustard
    • 1 mini cucumber, grated
    • Juice of 1 lemon
    • Fresh parsley, chopped (for garnish)

    Step-by-Step Instructions

    1. Prepare the Chicken and Vegetables

    Start by cooking the chicken and sautéing the vegetables:

    • In a large pan, heat a small amount of olive oil over medium heat. Add the diced chicken fillets and cook until golden and fully cooked, which should take about 5–7 minutes.
    • Once the chicken is browned, add the sliced mushroomschopped onion, and minced garlic to the pan. Sauté the mixture until the vegetables are soft and the mushrooms release their moisture. This should take another 4–5 minutes.
    • Remove the pan from heat and set the sautéed chicken and vegetables aside.

    2. Prepare the Batter

    While the chicken and vegetables cool, prepare the egg mixture that will hold the casserole together:

    • In a large bowl, whisk together 4 eggs1 tsp salt1 tsp black pepper, and 1 tsp oregano. Make sure the eggs are well-beaten and seasoned.
    • Add the cream (100 ml) and whisk until smooth and fully combined.
    • Gradually stir in 3 tbsp flour, mixing continuously to avoid lumps. The mixture should form a smooth batter.
    See also  Delicious Turkish Style Eggplant Recipe: A Healthy Delight!

    3. Combine the Ingredients

    Now it’s time to bring all the components of the casserole together:

    • Add the grated potatoesgrated zucchini, and 150 g (5 oz) Emmental cheese into the egg mixture. Stir well until all the vegetables and cheese are fully coated with the egg batter.
    • Next, fold in the sautéed chicken, mushrooms, onions, and garlic. Mix thoroughly to evenly distribute the ingredients throughout the mixture.

    4. Bake the Casserole

    Preheat your oven to 375°F (190°C) while you prepare the baking dish.

    • Grease a baking dish with a small amount of olive oil to prevent sticking.
    • Pour the prepared mixture into the baking dish, spreading it out evenly with a spatula.
    • Bake the casserole in the preheated oven for 40–45 minutes, or until the top is golden brown and the center is set. You can test the doneness by inserting a knife or toothpick into the center—if it comes out clean, the  casserole is ready.

    5. Prepare the  Yogurt Sauce

    While the casserole is baking, make the refreshing yogurt sauce:

    • In a medium bowl, combine Greek yogurt (about 1 cup), 1 tsp mustardgrated mini cucumber, and the juice of 1 lemon. Stir until all the ingredients are well-blended.
    • Add a pinch of salt and black pepper to taste, and adjust the flavors as needed.
    • Garnish the sauce with chopped fresh parsley for a burst of color and freshness.
    • Place the sauce in the refrigerator to chill until serving.

    6. Serve

    Once the casserole is baked to golden perfection, remove it from the oven and let it rest for a few minutes to firm up slightly.

    • Slice the casserole into squares or portions, depending on your preference.
    • Serve each slice with a generous spoonful of the chilled Greek yogurt sauce on the side. The creamy, tangy sauce perfectly complements the hearty casserole.
    See also  Soft and Fluffy Bread Rolls Recipe

    Nutrition Information (Per Serving)

    • Serving Size: 1 portion (makes 6 servings)
    • Calories: 350 kcal
    • Protein: 25 g
    • Fat: 18 g
    • Carbohydrates: 28 g
    • Fiber: 3 g
    • Sugar: 5 g
    • Sodium: 500 mg
    • Cholesterol: 175 mg