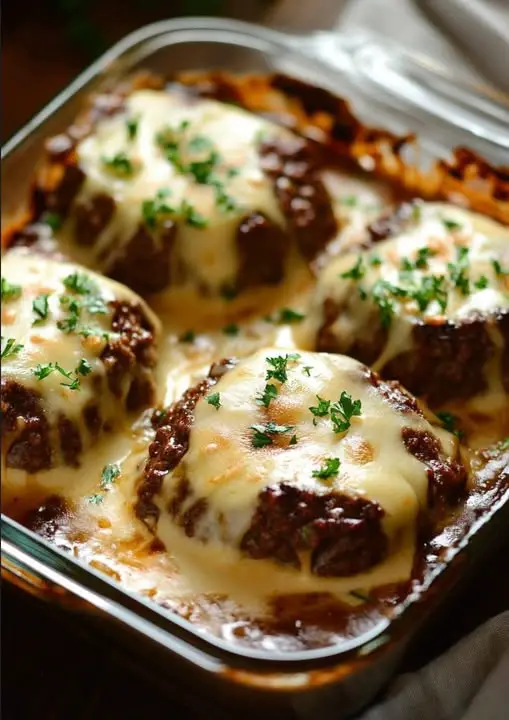
Category: healthy food

  • Hamburger Steak with Onion Gravy

    Hamburger Steak with Onion Gravy

    Total Time: 40 minutes
    Servings: 4
    Comfort food at its finest—juicy seasoned beef patties seared to perfection, then smothered in rich, savory onion gravy. It’s a skillet classic that’s hearty, budget-friendly, and incredibly satisfying.


    ❤️ Why You’ll Love This Hamburger Steak Recipe

    • Classic Flavor: Old-school diner vibes with homemade heart.

    • Budget-Friendly: Uses pantry staples and affordable ground beef.

    • One-Pan Wonder: Fewer dishes, more flavor.

    • Perfect Pairing: Serve with mashed potatoes, rice, or steamed veggies.


    Ingredients

    For the Patties

    Ingredient Quantity
    Ground beef (80/20) 1 lb
    Breadcrumbs 1/3 cup
    Egg 1
    Worcestershire sauce 1 tablespoon
    Ketchup 1 tablespoon
    Garlic powder 1 teaspoon
    Onion powder 1 teaspoon
    Salt and pepper To taste
    Olive oil 2 tablespoons

    For the Onion Gravy

    Ingredient Quantity
    Onion, thinly sliced 1 large
    Butter 2 tablespoons
    All-purpose flour 2 tablespoons
    Beef broth 2 cups
    Worcestershire sauce 1 tablespoon
    Ketchup 1 tablespoon
    Salt and pepper To taste

    Instructions

    1. Make the Patties

    In a large bowl, mix together:

    • Ground beef

    • Breadcrumbs

    • Egg

    • Worcestershire sauce

    • Ketchup

    • Garlic powder

    • Onion powder

    • Salt and pepper

    Gently mix until just combined. Divide into 4 equal portions and form into patties.

    Tip: Avoid over-mixing the meat to keep patties tender.


    2. Cook the Patties

    Heat olive oil in a large skillet over medium-high heat.

    • Sear the patties for 4–5 minutes per side, or until browned and cooked through.

    • Remove patties and set aside on a plate.


    3. Prepare the Onion Gravy

    Using the same skillet:

    • Melt butter over medium heat.

    • Add thinly sliced onions, sauté until soft and golden (about 8–10 minutes).

    • Sprinkle flour over the onions and stir constantly for 1 minute to cook out the raw taste.


    4. Add the Broth

    Gradually pour in beef broth, whisking to avoid lumps.

    • Stir in Worcestershire sauce and ketchup.

    • Simmer for 5–7 minutes, or until thickened.

    • Taste and season with salt and pepper.


    5. Simmer the Patties in Gravy

    Return the patties to the skillet. Nestle them into the onion gravy.

    • Simmer gently for 5 minutes, spooning gravy over the tops.

    • Remove from heat once heated through.


    ️ How to Serve It

    This savory hamburger steak with onion gravy begs to be paired with:

    • Mashed potatoes – the ultimate comfort side.

    • Steamed rice – classic and filling.

    • Egg noodles – to soak up that incredible gravy.

    • Green beans or roasted carrots – for a veggie balance.


    Storing & Reheating

    • Store leftovers in an airtight container in the fridge for up to 4 days.

    • Reheat on the stovetop over low heat or in the microwave in 30-second bursts, adding a splash of broth if needed.

    Freezer Friendly: Freeze cooked patties and gravy in separate containers for up to 2 months. Thaw in fridge overnight before reheating.


    ❓ FAQ

    Can I use ground turkey instead of beef?
    Yes, though it may be leaner. Add a touch more oil or a splash of broth to keep patties moist.

    What kind of breadcrumbs should I use?
    Plain or seasoned both work well. Panko will give a slightly different texture but still delicious.

    Is the ketchup necessary in the gravy?
    Yes! It adds a subtle tang and depth that balances the richness of the beef.


    ✅ Final Thoughts

    This Hamburger Steak with Onion Gravy is the definition of nostalgic comfort food. It’s quick enough for a weeknight but hearty and flavorful enough to feel like a Sunday dinner. Juicy beef, rich gravy, golden onions—what’s not to love?

    Perfect for cold nights, cozy dinners, or any time you’re craving something satisfying and simple.


    Pin & Save This Recipe

    Make it once, and you’ll want it in your regular rotation. ️

    #HamburgerSteak #ComfortFood #OnePanDinner #BeefRecipes #WeeknightMeals #EasyRecipes #OnionGravy #FamilyFavorite
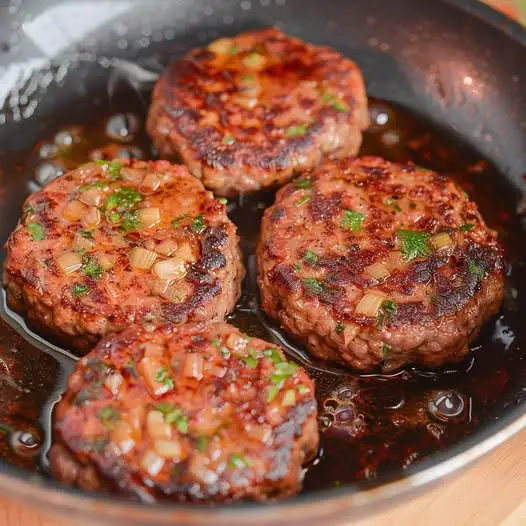

  • French Onion Baked Chicken: Your Ultimate One-Skillet Comfort Dinner

    French Onion Baked Chicken: Your Ultimate One-Skillet Comfort Dinner

    Total Time: 80 minutes
    Servings: 4
    Author: Mia Martinez
    Calories: ~450 per serving


    Jump to Recipe

    This French Onion Baked Chicken is more than just a weeknight dinner—it’s a warm hug in skillet form. Juicy chicken breasts seared golden, tucked into a rich, herby caramelized onion sauce, then crowned with gooey layers of provolone and Swiss. All baked to bubbly, melty perfection.

    Whether you’re craving something cozy or hosting dinner guests, this one-skillet wonder brings gourmet flavor without the stress.


    ️ Why You’ll Fall in Love with This Recipe

    • One-Skillet Wonder: Fewer dishes, more flavor.

    • Rich & Decadent: Think French onion soup… with chicken and cheese.

    • Meal-Prep Friendly: Even better the next day!

    • Crowd-Pleasing: Comfort food that works for everyone at the table.

    • Freezer-Friendly: Make ahead and enjoy later.


    Ingredients You’ll Need

    Ingredient Amount Notes
    Olive oil 2 tablespoons For sautéing onions and searing chicken
    Salted butter 4 tablespoons Adds richness
    Sweet onions 2 large, thinly sliced Yellow or white onions work well
    Granulated sugar 1 teaspoon Helps onions caramelize
    Coarse sea salt ½ teaspoon Balances sweetness
    Fresh thyme 2–3 sprigs (leaves only) For depth and garnish
    Bay leaf 1 For infusion
    Garlic 1–2 cloves, minced Adds aromatic flavor
    Chicken breasts 4 (6 oz each), boneless Pound to ½–¾ inch thick
    Black pepper ½ teaspoon Freshly ground for best flavor
    All-purpose flour 1 tablespoon Slightly thickens sauce
    Dry white wine ½ cup Optional—Sauvignon Blanc is perfect
    Beef stock 1 cup Adds savory depth
    Provolone cheese ¼ pound (about 1 cup) Grated for smooth melt
    Swiss cheese ¼ pound (about 1 cup) Balances provolone’s flavor

    No wine? Replace with more beef broth + 1 tablespoon white wine vinegar or lemon juice.


    Step-by-Step Instructions

    1. Caramelize the Onions

    This is the soul of the dish.

    • Heat olive oil and butter in a large cast-iron skillet over medium heat.

    • Add sliced onions. Stir occasionally for 10 minutes until softened.

    • Sprinkle in sugar, sea salt, thyme, and bay leaf.

    • Continue cooking for 15–20 minutes, stirring occasionally. Splash in wine or broth if they brown too quickly.

    • In the last 2 minutes, stir in garlic. Remove onions and bay leaf, set aside.

    Pro Tip: Low and slow is key—patience brings out the onions’ natural sweetness.


    2. Prep and Sear the Chicken

    • While onions caramelize, pat chicken dry.

    • Pound to even thickness (½–¾ inch) and season with black pepper.

    • After removing onions, increase skillet heat to medium-high.

    • Add oil if needed. Sear chicken 3–4 minutes per side until golden but not fully cooked.

    • Remove and set aside.


    3. Build the Sauce

    • Lower the heat to medium and return caramelized onions to skillet.

    • Sprinkle flour over onions, stir 1–2 minutes.

    • Add white wine (if using), scraping up flavorful bits.

    • Stir in beef stock. Simmer for 4–5 minutes until slightly thickened.

    Tip: Sauce should coat the back of a spoon, not run off like water.


    4. Assemble and Bake

    • Nestle seared chicken breasts into the onion mixture.

    • Top evenly with grated provolone and Swiss.

    • Transfer skillet to a preheated 350°F (175°C) oven.

    • Bake uncovered 20–25 minutes or until chicken reaches 165°F internal temp.

    Want a crispy cheese top? Broil for 2–3 minutes at the end.


    5. Garnish and Serve

    • Sprinkle with extra fresh thyme.

    • Spoon caramelized onions and sauce over chicken.

    • Serve hot—and don’t forget crusty bread to mop up every drop.


    What to Serve with French Onion Baked Chicken

    Hearty Sides

    • Garlic Mashed Potatoes

    • Buttered Egg Noodles

    • Crusty Artisan Bread

    Lighter Pairings

    • Steamed Green Beans

    • Simple Arugula Salad

    • Roasted Carrots


    Storage, Freezer & Make-Ahead Tips

    Make Ahead

    • Caramelize onions and sear chicken early.

    • Assemble and refrigerate. Bake when ready.

    To Store

    • Cool completely. Store in airtight container for up to 4 days.

    To Reheat

    • Oven: 300°F, covered, until warmed through.

    • Microwave: Add a splash of broth and heat in 30-second bursts.

    To Freeze

    • Assemble (without cheese), freeze up to 2 months.

    • Thaw overnight. Add cheese before baking.


    ❓ FAQ

    Can I use chicken thighs instead of breasts?
    Yes! Thighs are juicy and flavorful. Adjust baking time as needed.

    What if I don’t have provolone or Swiss?
    Use Gruyère or mozzarella. Monterey Jack + Parmesan also works.

    Can I use pre-cooked chicken?
    Not ideal, but possible. Add just before baking and reduce oven time slightly.


    Final Thoughts

    French Onion Baked Chicken is that rare dish that manages to be:

    • Homey but elegant

    • Simple yet impressive

    • Comforting without being heavy

    It’s the kind of meal that brings people together and reminds you that food doesn’t need to be complicated to be memorable.

  • Slow Cooker Cream Cheese Corn Casserole

    Slow Cooker Cream Cheese Corn Casserole

    This Slow Cooker Cream Cheese Corn Casserole is the ultimate comfort side dish that everyone will be asking for seconds (and thirds!) of! Creamy, cheesy, and so simple to make – just throw everything in your slow cooker and let it work its magic.

    Perfect for busy weeknights, holiday gatherings, or potluck dinners, this creamy corn casserole is always a crowd-pleaser. With just a handful of pantry ingredients and your trusty slow cooker, you’ll have the most delicious side dish ready with minimal effort!

    Love easy slow cooker sides? You’ll also enjoy my Slow Cooker Apricot Chicken and Creamy Chicken, Bacon and Rice Casserole – both family favourites that practically cook themselves!

    There’s something so comforting about creamy, cheesy corn that’s been slow-cooked to perfection. This recipe has become such a hit in our house that I honestly can’t believe how often I’m making it – it’s that good!

    “Can’t believe I’m making this for the third time this week!” – Georgia

    Why You’re Going To Love This Recipe
    Set and Forget! Just 5 minutes of prep time, then let your slow cooker do all the work while you focus on other things.

    Only 7 Ingredients! Made with simple pantry staples – no fancy shopping or complicated prep required.

    Crowd-Pleaser. Even the pickiest eaters love this creamy, comforting side dish. It’s the perfect balance of sweet and savoury.

    Perfect for Any Occasion. Whether it’s a weeknight dinner, holiday feast, or potluck gathering, this casserole fits right in.

    Budget-Friendly. Uses affordable ingredients that you probably already have on hand.

    Freezer-Friendly. Make ahead and freeze for up to 3 months – perfect for meal prep or busy weeks!

    Jump to:
    Why You’re Going To Love This Recipe
    Casserole Ingredients
    How To Make Cream Cheese Corn Casserole
    Recipe Tips
    Corn Casserole FAQs
    Related Recipes
    Casserole Ingredients
    This slow cooker cream cheese corn casserole uses simple, everyday ingredients that create the most amazing creamy texture!

    Note: Scroll to the recipe card at the bottom for the ingredients quantities and full detailed method.

    Corn Kernels – fresh or frozen both work perfectly. If using frozen, no need to thaw first.

    Cream Cheese – provides that rich, creamy base. Make sure to cube it for even melting.

    Butter – adds extra richness and helps create that silky texture.

    Milk – helps thin the mixture to the perfect consistency.

    Sugar – just a touch to balance the flavours and enhance the natural sweetness of the corn.

    Salt and Pepper – essential for seasoning and bringing all the flavours together.

    How To Make Cream Cheese Corn Casserole
    This couldn’t be easier – just layer everything in your slow cooker and let it do the work!

    Note: Scroll to the recipe card at the bottom for the ingredients quantities and full detailed method.

    Step 1: Add corn kernels to your slow cooker. Top with cubed cream cheese and sliced butter.

    Step 2: Pour milk over the mixture, then sprinkle with sugar, salt, and pepper.

    Step 3: Cover and cook on LOW for 3-4 hours, stirring occasionally until everything is melted and well combined.

    Step 4: Give it a final stir before serving to ensure it’s perfectly creamy and well distributed.

    Recipe Tips
    Cube the Cream Cheese: Cut cream cheese into small cubes for faster, more even melting.

    Stir Occasionally: Give it a stir every hour or so to help everything melt together smoothly.

    Don’t Skip the Sugar: That little bit of sugar really enhances the corn’s natural sweetness.

    Use Room Temperature Cream Cheese: If you remember, take the cream cheese out 30 minutes before cooking for easier mixing.

    Fresh vs Frozen Corn: Both work beautifully! Frozen corn can go straight from freezer to slow cooker.

    Make it Richer: Swap the milk for heavy cream for an even more indulgent version.

    Storage: Store leftovers in the fridge for up to 3 days. Reheat gently in the microwave, stirring frequently.

    Freezing: Cool completely, then freeze in portions for up to 3 months. Thaw overnight in the fridge before reheating.

    Double the Recipe: This recipe doubles easily if you’re feeding a crowd – just use a larger slow cooker.

    Corn Casserole FAQs
    Can I use canned corn instead? Yes! Drain the canned corn well before adding to the slow cooker. Fresh or frozen gives the best texture, but canned works in a pinch.

    How do I know when it’s done? The casserole is ready when the cream cheese and butter are completely melted and the mixture is creamy and well combined.

    Can I add other ingredients? Absolutely! Try adding crispy bacon bits, chopped jalapeños for heat, or a sprinkle of paprika for colour and flavour.

    What should I serve this with? This pairs beautifully with roasted turkey, honey-glazed ham, grilled chicken, or any main dish that needs a creamy, comforting side.

    Can I make this ahead? Yes! You can assemble everything in the slow cooker insert the night before, cover, and refrigerate. Just add an extra 30 minutes to the cooking time.

    Related Recipes
    Looking for more easy slow cooker sides and comfort foods? Try these family favourites:

    WANT EVEN MORE DELICIOUS RECIPES? Subscribe to my newsletter or follow along on Facebook or Instagram. And if you love baking, then please come and join my Facebook cooking club group or subscribe to my YouTube channel.

    Slow Cooker Apricot Chicken
    Creamy Chicken, Bacon and Rice Casserole
    Cheesy Broccoli and Cauliflower Bake
    Slow Cooker Chicken Korma Curry
    Slow Cooker Cream Cheese Corn Casserole
    The ultimate comfort side dish! This creamy, cheesy corn casserole is so easy to make in the slow cooker and always disappears fast at any gathering.

    Course: Side Dish
    Cuisine: American
    Prep Time: 5 minutes
    Cook Time: 3 hours 30 minutes
    Total Time: 3 hours 35 minutes
    Servings: 8-10
    Calories: 185kcal

    Ingredients
    4 cups fresh or frozen corn kernels
    1 (8 oz) package cream cheese, cubed
    1/2 cup butter, sliced
    1/4 cup milk
    2 tablespoons granulated sugar
    1/2 teaspoon salt
    1/4 teaspoon black pepper
    Instructions
    Place corn kernels in your slow cooker.
    Add cubed cream cheese and sliced butter on top of the corn.
    Pour milk over the mixture.
    Sprinkle sugar, salt, and black pepper evenly over all ingredients.
    Cover and cook on LOW for 3-4 hours, stirring occasionally until cream cheese and butter are completely melted and mixture is well combined.
    Stir thoroughly before serving to ensure everything is evenly distributed and creamy.
    Notes
    RECIPE NOTES & TIPS

    Cream Cheese Cubes: Cut cream cheese into small cubes for faster, more even melting.
    Stirring: Stir occasionally during cooking to help everything melt together smoothly.
    Corn Options: Fresh, frozen, or well-drained canned corn all work. Frozen can go straight from freezer to slow cooker.
    Make it Richer: Substitute heavy cream for the milk for an even more indulgent version.
    Add-ins: Try crispy bacon bits, chopped jalapeños, or a sprinkle of paprika for extra flavour.
    Make Ahead: Assemble in slow cooker insert the night before, refrigerate, then cook (add 30 minutes to cooking time).
    Serving: Perfect alongside roasted turkey, ham, grilled chicken, or any main dish.
    Storage: Store leftovers in fridge for up to 3 days. Reheat gently in microwave.
    Freezing: Cool completely, freeze in portions for up to 3 months. Thaw overnight before reheating.
    Nutrition
    Calories: 185kcal | Carbohydrates: 18g | Protein: 5g | Fat: 12g | Saturated Fat: 7g | Fiber: 2g | Sugar: 8g | Vitamin C: 6mg | Calcium: 65mg | Iron: 1mg

  • Homemade Lasagna

    Homemade Lasagna

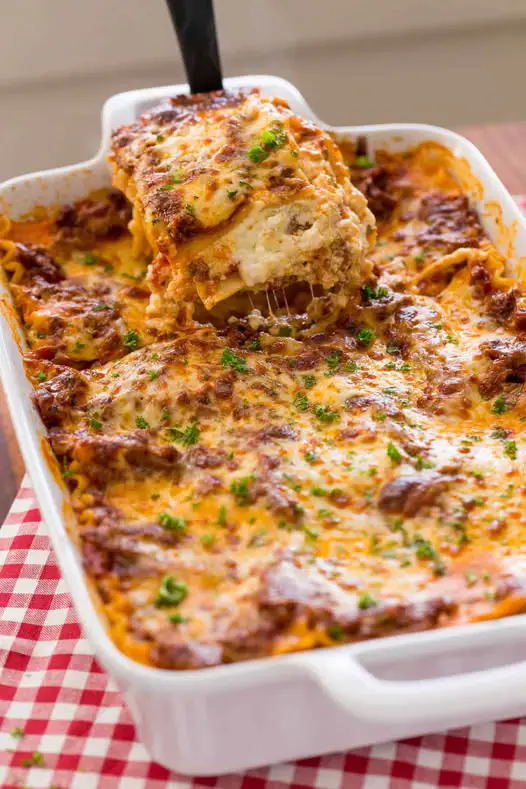
    With its rich meat sauce, three types of cheese, and perfectly cooked noodles, this classic lasagna is cheesy, saucy, and satisfying. Whether for a cozy family dinner or feeding a crowd, it’s a guaranteed hit!


    Ingredients

    Meat Sauce

    • 1 Tbsp olive oil

    • 1 lb ground beef (80/20 or lean)

    • 1 medium yellow onion, finely diced

    • 2 large garlic cloves, minced

    • 1/4 cup dry red wine (or beef broth)

    • 3 cups (24 oz) marinara sauce

    • 1/2 tsp sea salt

    • 1/4 tsp ground black pepper

    • 1/4 tsp dried thyme (or Italian seasoning)

    • 1/2 tsp granulated sugar

    • 2 Tbsp fresh parsley, chopped

    Cheese Mixture

    • 16 oz low-fat cottage cheese

    • 15 oz part-skim ricotta cheese

    • 1 large egg

    • 2 Tbsp fresh parsley, chopped

    • 1 cup shredded mozzarella (reserve 3 cups for layering)

    Other

    • 9 lasagna noodles, cooked al dente

    • 3 cups shredded mozzarella cheese (remaining from above)


    Instructions

    1. Make the Meat Sauce

    1. In a deep skillet or Dutch oven, heat 1 Tbsp olive oil over medium-high heat. Add ground beef and onions. Cook until beef is browned, about 5 minutes.

    2. Add minced garlic and sauté for 1 more minute.

    3. Stir in red wine and cook until nearly evaporated, about 2 minutes.

    4. Add marinara sauce, salt, pepper, thyme, sugar, and parsley. Bring to a simmer, cover, and cook for 5 minutes.

    2. Make the Cheese Mixture

    1. In a large bowl, combine cottage cheese, ricotta, 1 cup of the mozzarella, egg, and parsley. Mix well and set aside.

    3. Cook the Noodles

    1. Boil a large pot of salted water. Add lasagna noodles and cook until al dente.

    2. Drain and rinse with cold water to stop cooking and prevent sticking.

    4. Assemble the Lasagna

    1. Preheat oven to 375°F (190°C).

    2. In a 9×13-inch deep casserole dish, spread 1/2 cup meat sauce on the bottom.

    3. Layer 3 noodles over the sauce.

    4. Add 1/3 of the remaining meat sauce, 1 cup shredded mozzarella, and 1/2 of the cheese mixture.

    5. Repeat layers: noodles, meat sauce, mozzarella, cheese mixture.

    6. Finish with 3 noodles, the remaining meat sauce, and the final 2 cups of mozzarella.

    5. Bake

    1. (Optional but helpful) Insert 9–12 toothpicks halfway into the top of the lasagna to prevent foil from sticking to the cheese.

    2. Cover with foil and bake for 45 minutes.

    3. Remove foil and broil for 3–5 minutes until cheese is golden and bubbly.

    6. Rest & Serve

    1. Let lasagna rest for 30 minutes before slicing. This helps it set and hold its shape.


    Make-Ahead, Storage & Reheating

    • Make-Ahead: Assemble lasagna up to 2 days in advance and refrigerate before baking.

    • To Freeze: Wrap well and freeze baked or unbaked lasagna for up to 3 months.

    • To Reheat: Thaw overnight in the fridge. Reheat at 350°F, covered with foil, until warmed through.


    Serving Suggestions

    Pair your lasagna with:

    • Garlic Bread or Focaccia

    • Caesar or Caprese Salad

    • Roasted Veggies

    • A glass of red wine


    FAQs

    Can I use just ricotta or just cottage cheese?
    Yes. Use ricotta for a creamier, more traditional Italian lasagna. Cottage cheese adds moisture and is a bit lighter.

    What is “al dente”?
    Pasta that’s slightly firm when bitten, not mushy. Perfect for baking so noodles don’t over-soften.

    Can I use no-boil noodles?
    Yes, but add extra sauce and cover tightly to ensure they cook properly in the oven.

    Best store-bought marinara?
    Rao’s is a popular choice for quality and flavor, but any rich, flavorful marinara works.


    ❤️ Why You’ll Love It

    • Balanced layers of meat, cheese, and pasta

    • Perfect for leftovers or make-ahead meals

    • Freezes and reheats beautifully

    • A true crowd-pleaser!


    Nutrition (Per Serving)

    • Calories: 368

    • Protein: 29g

    • Carbs: 23g

    • Fat: 16g


    ⭐️ Recipe by Natasha Kravchuk

    This tried-and-true family favorite has 1,100+ 5-star reviews for a reason!

    Print This Recipe | Save to Pinterest | Subscribe for More Recipes

  • Deliciously Easy Appetizer

    Deliciously Easy Appetizer

    Introduction
    If you’re looking for a quick and tasty appetizer or snack, these Crispy Parmesan Artichoke Hearts are the perfect solution. With a simple mixture of breadcrumbs and Parmesan, these artichoke hearts are baked to crispy perfection, offering a crunchy, cheesy coating around tender artichoke centers. They’re easy to make and are perfect for serving at parties, gatherings, or simply as a snack to enjoy at home.

    ×
    Whether you’re a fan of artichokes or trying them for the first time, this recipe is a great way to introduce this versatile vegetable to your repertoire.

    Why You’ll Love This Recipe
    These Crispy Parmesan Artichoke Hearts are a flavorful, crunchy treat that’s quick and easy to prepare. The combination of garlic butter, Parmesan cheese, and breadcrumbs creates a delicious golden crust that contrasts beautifully with the soft, tender artichoke hearts inside. Since they’re baked rather than fried, you get all the crispiness without the added oil, making them a healthier alternative to many fried appetizers.

    Ingredients
    1 can (15 oz) quartered artichoke hearts, drained
    ¼ cup unsalted butter, melted
    ½ teaspoon garlic powder
    ¼ cup grated Parmesan cheese
    ¼ cup plain breadcrumbs

    video of: How to Make Vegan Mozzarella Sticks with Homemade Vegan Mozzarella CheesePlay Video
    How to Make Vegan Mozzarella Sticks with Homemade Vegan Mozzarella Cheese

    How to Make Vegan Mozzarella Sticks with Homemade Vegan Mozzarella Cheese
    Directions
    1. Preheat the Oven
    Preheat your oven to 400°F (200°C). Line a baking sheet with parchment paper and set it aside. This ensures your artichokes won’t stick and makes for easy cleanup later on.

    2. Prepare the Artichokes
    After draining the can of artichoke hearts, place them in a bowl and gently pat them dry with a paper towel. Removing the excess moisture is crucial to achieving a crispy coating when baked.

    3. Coat the Artichokes
    In one small bowl, mix the melted butter with ½ teaspoon of garlic powder. In a separate bowl, combine ¼ cup of grated Parmesan cheese and ¼ cup of plain breadcrumbs.

    4. Dip and Coat
    Take each quartered artichoke heart and dip it first into the melted butter and garlic mixture. Then, roll the artichoke in the Parmesan and breadcrumb mixture, ensuring it is fully coated. Place the coated artichokes on the prepared baking sheet in a single layer to ensure even baking.

    5. Bake
    Place the baking sheet in the preheated oven and bake the artichoke hearts for about 18 minutes. Halfway through the baking time, carefully turn each artichoke piece to promote even browning. When they’re golden and crispy, they’re ready to come out of the oven.

    6. Serve
    Let the crispy Parmesan artichoke hearts cool slightly before transferring them to a serving dish. Serve them with your favorite dipping sauce or enjoy them on their own as a crunchy, cheesy treat.

    Kitchen Equipment Needed
    Baking sheet lined with parchment paper
    Mixing bowls for butter and coating mixtures
    Tongs or a fork for dipping and coating the artichokes
    Tips for Perfect Crispy Artichoke Hearts
    Dry the Artichokes Well: Patting the artichokes dry is key to achieving a crispy texture. Too much moisture will prevent the coating from crisping up in the oven.
    Flip Halfway Through: Flipping the artichokes halfway through baking ensures that all sides get evenly browned and crispy.
    Grated Parmesan: Freshly grated Parmesan cheese will give the best flavor and texture, but store-bought grated Parmesan works as well.
    Recipe Swaps and Variations
    Panko Breadcrumbs: For extra crunch, substitute the plain breadcrumbs with panko breadcrumbs. Panko has a coarser texture, which creates a crispier coating.
    Herb-Infused Butter: Add fresh or dried herbs like thyme, rosemary, or parsley to the melted butter mixture for added flavor.
    Dipping Sauce: These crispy artichokes pair beautifully with a variety of dipping sauces like marinara, aioli, or a simple lemon-garlic yogurt dip.

    How to Store Leftovers
    If you have any leftovers, store them in an airtight container in the refrigerator for up to 2 days. To reheat, place them on a baking sheet in a 350°F (175°C) oven for about 10 minutes to regain their crispiness.

    Food and Drink Pairings
    These Crispy Parmesan Artichoke Hearts are a fantastic appetizer to serve with your favorite dipping sauces, or alongside a fresh salad. For drink pairings, a chilled glass of Sauvignon Blanc or a crisp sparkling water would complement the flavors nicely.

    Frequently Asked Questions (FAQ)
    Q: Can I use fresh artichokes instead of canned?
    A: Yes, you can use fresh artichokes, but they will need to be cooked and quartered before proceeding with the recipe. Canned artichokes are a quick and convenient option that’s perfect for this dish.

    Q: Can I make these artichoke hearts ahead of time?
    A: While they are best served fresh and crispy, you can prepare them in advance and reheat them in the oven just before serving.

    Q: What kind of dipping sauce goes best with these artichoke hearts?
    A: A garlic aioli, marinara sauce, or lemon-garlic yogurt dip are all great options for pairing with crispy artichoke hearts.

    Call to Action
    If you loved this recipe for Crispy Parmesan Artichoke Hearts, don’t forget to share it with your friends and family! Subscribe to our blog for more delicious and easy-to-make appetizers and snacks that will elevate any occasion. Happy cooking!

    Indulge in gourmet dining at home with our Filet Mignon with Shrimp and Lobster Cream Sauce recipe.

    Crispy Parmesan Artichoke Hearts: A Deliciously Easy Appetizer
    Author: Mia Martinez
    Print Recipe
    Pin Recipe
    Make these delicious Crispy Parmesan Artichoke Hearts for a quick, cheesy appetizer. Perfectly baked, golden
    Ingredients
    1 can (15 oz) quartered artichoke hearts, drained

    ¼ cup unsalted butter, melted

    ½ teaspoon garlic powder

    ¼ cup grated Parmesan cheese

    ¼ cup plain breadcrumbs

    Instructions
    Preheat the Oven

    Preheat your oven to 400°F (200°C). Line a baking

    sheet with parchment paper and set aside.

    Prepare the Artichokes

    Place the drained artichoke hearts in a bowl and gently

    pat them dry with a paper towel to remove excess

    moisture.

    Coat the Artichokes

    In one small bowl, mix the melted butter with garlic

    powder. In a separate bowl, combine the grated

    Parmesan cheese and breadcrumbs.

    Dip and Coat

    Dip each artichoke quarter into the butter mixture first,

    then roll it in the breadcrumb and Parmesan mixture,

    ensuring it’s well-coated. Place the coated artichokes

    on the prepared baking sheet.

    Bake

    Bake the artichokes for about 18 minutes, turning them

    halfway through the cooking time to ensure even

    browning. The artichokes are done when they’re golden

    and crispy.

    Serve

    Allow the artichokes to cool to room temperature before

    transferring them to a serving dish. Enjoy them as a

    tasty appetizer or snack!

  • Soft & Buttery Crescent Butter Rolls

    Soft & Buttery Crescent Butter Rolls

    Soft & Buttery Crescent Butter Rolls

    Fluffy, Golden, and Irresistibly Buttery

    Prep Time: 30 minutes (active)
    Proof Time: 2½ hours
    Bake Time: 12–15 minutes
    Total Time: ~3.5 hours
    Yield: 16 buttery rolls
    Difficulty: Moderate
    Category: Bread, Baked Goods
    Best For: Brunch, Snacks, Holiday Baking


    Why You’ll Love These Butter Rolls

    These soft, golden crescent-style butter rolls are everything you want in homemade bread: tender, slightly sweet, buttery, and incredibly fluffy. They’re shaped like croissants but without the lamination fuss, making them perfect for everyday baking.

    Enjoy them plain, with jam and butter, or stuffed with your favorite sandwich fillings. These rolls are so good, you might find yourself baking them weekly!

    “Soft as clouds, these butter rolls are the perfect balance of tender crumb and buttery flavor.”


    Ingredients

    Dough

    • 300g bread flour

    • 100g all-purpose flour (plain flour)

    • 2½ tsp instant yeast

    • 4 tbsp fine white sugar

    • ½ tsp salt

    • 250ml warm milk

    • 70g melted unsalted butter

    • 1 egg

    Egg Wash

    • 1 egg

    • 1 tbsp milk


    ‍ Instructions

    Step 1: Prepare the Dough

    1. In a large mixing bowl (or stand mixer bowl), combine:

      • Warm milk

      • Yeast

      • Sugar

      • Melted butter

      • Egg

    2. Add in the dry ingredients:

      • Bread flour, plain flour, and salt

    3. Using the dough hook attachment, mix until a dough forms.

    4. Set mixer to speed 4 and knead for 10 minutes, pausing as needed to avoid motor overheating.

    You’re looking for a smooth, elastic dough that pulls away from the sides of the bowl.


    Step 2: First Rise

    • Transfer dough to a lightly greased bowl, cover with plastic wrap or a towel, and let it rise in a warm place for 1 hour, or until doubled in size.


    Step 3: Shape the Rolls

    1. Once risen, punch down the dough to release air.

    2. Turn the dough out onto a lightly floured surface and roll it into a 20-inch round circle.

    3. Using a pizza cutter, cut the dough into 16 even triangles (like slicing a pizza).

    4. Starting from the wide end, roll each triangle toward the tip to form a crescent shape.

    5. Pinch the tip gently into the dough to secure the shape.


    Step 4: Second Proof

    • Arrange the shaped rolls on a greased or parchment-lined baking tray, leaving space between each.

    • Cover and let them proof for 1½ hours, or until puffy and nearly doubled.


    Step 5: Bake

    1. Preheat your oven to 350°F (180°C) or 160°C (fan-forced).

    2. In a small bowl, whisk together 1 egg + 1 tbsp milk for the egg wash.

    3. Gently brush the tops of the rolls with egg wash.

    4. Bake for 10–15 minutes, or until rolls are golden brown on top.


    Step 6: Cool & Serve

    • Let the rolls cool slightly on a wire rack before serving.

    • Enjoy them warm, plain, or with your favorite spreads, jam, or cheese.

    “Perfectly soft, subtly sweet, and buttery throughout—these crescent-style rolls are made for sharing.”


    Serving Suggestions

    • Spread with butter and fruit jam

    • Slice and fill with cheese or deli meats

    • Serve as a side for soups and stews

    • Turn into mini sandwiches or sliders

    • Drizzle with honey or chocolate for a sweet twist


    Tips for Success

    • Use warm milk (not hot!) to activate the yeast properly—around 100–110°F or 37–43°C.

    • Let your dough rest while mixing if your stand mixer begins to warm up.

    • For extra flavor, brush hot rolls with melted butter right out of the oven.

    • Want to prep ahead? Shape the rolls and refrigerate overnight, then let them proof before baking in the morning.


    Storage & Freezing

    • Room Temperature: Store in an airtight container for up to 2–3 days.

    • Freezer: Freeze baked and cooled rolls for up to 2 months. Thaw at room temperature and warm in the oven before serving.


    ❓ Frequently Asked Questions

    Can I make these without a stand mixer?
    Yes! Knead by hand for 10–12 minutes on a floured surface until dough is smooth and elastic.

    Can I make them sweet or savory?
    Absolutely! Add 1 tsp vanilla and a bit more sugar for a sweeter version, or fill with cheese, garlic butter, or ham for a savory roll.

    Can I use only all-purpose flour?
    Yes, though bread flour gives a slightly chewier and more structured texture. You can use all-purpose flour for a softer finish.


    Nutrition (Per Roll – Approximate)

    • Calories: 160

    • Carbohydrates: 22g

    • Protein: 4g

    • Fat: 6g

    • Sugar: 3g


    More Soft Breads to Try


    “One bite into these golden rolls, and you’ll know—this is the kind of bread you make again and again.”

  • Homemade Vanilla Butter Cake

    Homemade Vanilla Butter Cake

    Moist, Golden, and Perfectly Sweet

    Prep Time: 15 minutes
    Bake Time: 30–35 minutes
    Total Time: ~50 minutes
    Yield: 12 slices
    Difficulty: Easy
    Best For: Celebrations, Birthdays, Everyday Treats


    Why You’ll Love This Cake

    This vanilla butter cake is the definition of timeless. Rich, buttery, and moist with the warm aroma of real vanilla, it’s a go-to recipe for any occasion. Whether you serve it plain, dress it up with fresh berries and whipped cream, or layer it with buttercream frosting, this cake always impresses.

    “A vanilla butter cake so soft and flavorful, it melts in your mouth. Simple never tasted so good.”


    Ingredients

    • 2 cups all-purpose flour

    • 1½ teaspoons baking powder

    • ½ teaspoon salt

    • 1 cup (2 sticks) unsalted butter, softened

    • 1½ cups granulated sugar

    • 4 large eggs, room temperature

    • 2 tablespoons pure vanilla extract

    • 1 cup whole milk


    ‍ Instructions

    Step 1: Preheat & Prepare

    • Preheat your oven to 350°F (175°C).

    • Grease and flour two 9-inch round cake pans or a 9×13-inch rectangular pan. You can also line the bottom with parchment paper for easy release.

    Step 2: Mix Dry Ingredients

    • In a medium bowl, whisk together:

      • Flour

      • Baking powder

      • Salt

    Step 3: Cream Butter & Sugar

    • In a large bowl, beat butter and sugar together using a mixer on medium-high speed until light and fluffy, about 3–4 minutes.
      This step creates air for a soft, delicate crumb.

    Step 4: Add Eggs & Vanilla

    • Add eggs, one at a time, beating well after each addition.

    • Mix in vanilla extract until fully incorporated.

    Step 5: Combine Wet & Dry

    • Add the dry ingredients and milk to the butter mixture in three parts, starting and ending with the dry mixture.
      Mix until just combined—do not overmix, or the cake may become dense.

    Step 6: Bake

    • Divide the batter evenly into your prepared pans.

    • Smooth the tops with a spatula.

    • Bake for 30–35 minutes, or until a toothpick inserted in the center comes out clean.

    Step 7: Cool & Serve

    • Let the cakes cool in the pans for 10 minutes, then turn them out onto wire racks to cool completely.

    • Slice and serve as-is, or frost with your favorite icing.


    Serving Suggestions

    • Dust with powdered sugar and serve with fresh berries

    • Top with whipped cream and sliced strawberries

    • Add a glaze or buttercream frosting

    • Toast a slice and spread with fruit preserves for breakfast

    • Serve warm with a scoop of vanilla ice cream and caramel drizzle


    Tips for Success

    • Use room temperature ingredients for a smoother batter.

    • Cream butter and sugar thoroughly for a light texture.

    • Don’t overmix after adding flour—this keeps the cake tender.

    • A few extra minutes in the oven can overbake it—check early!


    Storage & Freezing

    • Room Temperature: Store in an airtight container for up to 3 days.

    • Refrigerator: Store covered for up to 1 week (best if frosted).

    • Freezer: Wrap cooled, unfrosted cake tightly in plastic + foil and freeze for up to 3 months. Thaw at room temperature.


    Nutrition Info (Per Slice – Approximate)

    • Calories: 340

    • Carbohydrates: 38g

    • Protein: 5g

    • Fat: 19g

    • Sugar: 22g


    ❓ Frequently Asked Questions

    Can I make this cake ahead of time?
    Yes! You can bake and cool the cake 1–2 days ahead. Wrap well and store at room temperature or freeze for longer storage.

    Can I use buttermilk instead of regular milk?
    Absolutely. Buttermilk adds a subtle tang and makes the crumb even more tender.

    Can I turn this into cupcakes?
    Yes! Divide batter between 24 cupcake liners and bake at 350°F for 18–22 minutes.

    What frosting pairs well?
    Vanilla buttercream, cream cheese frosting, chocolate ganache, or even lemon glaze work beautifully.


    More Classic Cakes to Try


    “This vanilla butter cake isn’t just a recipe—it’s a celebration in every bite. Whether dressed up or kept simple, it never disappoints.”

  • Homemade Lemon Powder: How to Make and Use This Versatile Seasoning in the Kitchen

    Homemade Lemon Powder: How to Make and Use This Versatile Seasoning in the Kitchen

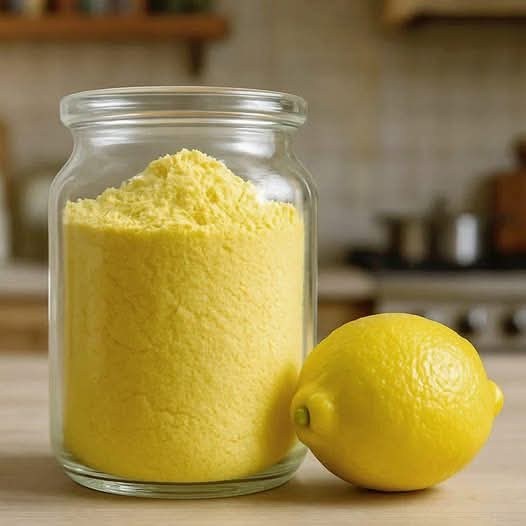
    Learn how to make lemon powder at home and discover why it is the sustainable ingredient that enhances sweets, savory treats and drinks.

    Lemon powder transforms simple discarded peels into an aromatic, economical and sustainable seasoning.

    It only takes a few steps to dry and grind the peel, creating a fine powder capable of enhancing the flavor of cakes, fish, salads and even drinks.

    In addition to reducing waste, this technique preserves citrus freshness for months, ensuring a touch of summer in your recipes all year round.

    Why adopt lemon powder in your kitchen?

    • Intense and fresh aroma that enhances sweet and savory dishes.
    • Intelligent waste management : uses the bark, a part rich in essential oils.
    • Versatility : fits in a small jar, yields small portions and lasts for months.

      How to Make Your Own Lemon Powder

      1. Choose organic lemons

      Choose fruits without pesticides to avoid chemical residues on the skin.

      2. Wash and peel

      Wash and dry the lemons thoroughly. Using a peeler, remove only the yellow part, avoiding the bitter white pith.

      3. Dry the shells

        • In the sun : spread on a clean cloth for 2–3 days, collecting at night.
      • In the oven : bake at 50°C, door ajar, for 2–3 hours.
      • In the dehydrator : dry at 45°C for about 5 hours.

      4. Grind and sieve

      Blend the crispy shells in a food processor or grinder until they form a fine powder. Sieve to make a uniform consistency.

      5. Store correctly

      Store in an airtight container, away from light and moisture. Lemon powder maintains its full aroma for several months.

      Creative usage ideas

      In sweets and desserts

      Sprinkle on cakes, cookies, muffins and custards for an elegant citrus touch.

      In savory dishes

      Season fish, risottos, marinades or roasted vegetables. A drizzle of olive oil and a pinch of lemon powder creates an instant Mediterranean flavor.

      In refreshing drinks

      Add to tea, ice water or mocktails for a refreshing boost.

      In salad dressings

      Combine with mustard, honey and olive oil: the subtle acidity balances the sauce and awakens palates.

      LIMAO

      Making lemon powder is simple, sustainable and promises an irresistible citrus scent in any dish.

      With a few lemons, gentle heat, and a grinder, you create a chef’s ingredient—made by you and always on hand in the pant

  • Classic Pound Cake Recipe

    Classic Pound Cake Recipe

    Rich, Buttery, and Timeless

    Prep Time: 15 minutes
    Bake Time: 55–65 minutes
    Total Time: 1 hour 15 minutes
    Servings: 10–12 slices
    Difficulty: Easy
    Category: Dessert, Cake
    Cuisine: American, Traditional


    Why You’ll Love This Recipe

    This classic pound cake is pure simplicity: rich, dense, buttery, and melt-in-your-mouth tender. The name comes from the traditional ratio—a pound each of butter, sugar, eggs, and flour—but this slightly updated version gives you all the texture and flavor you love in a more manageable quantity.

    Whether you serve it plain, with berries, a dusting of powdered sugar, or a drizzle of glaze, this cake never goes out of style.

    “Simple ingredients. Timeless flavor. This is your forever pound cake.”


    Ingredients

    • 1 cup (225g) unsalted butter, softened

    • 1 cup (200g) granulated sugar

    • 5 large eggs, room temperature

    • 2 cups (240g) all-purpose flour

    • 1 tsp baking powder

    • 1/4 tsp salt

    • 1/4 cup (60ml) milk

    • 1 tsp vanilla extract


    ‍ Step-by-Step Instructions

    Step 1: Preheat & Prepare

    • Preheat oven to 350°F (175°C).

    • Grease and flour a 9×5 inch loaf pan or line with parchment paper.

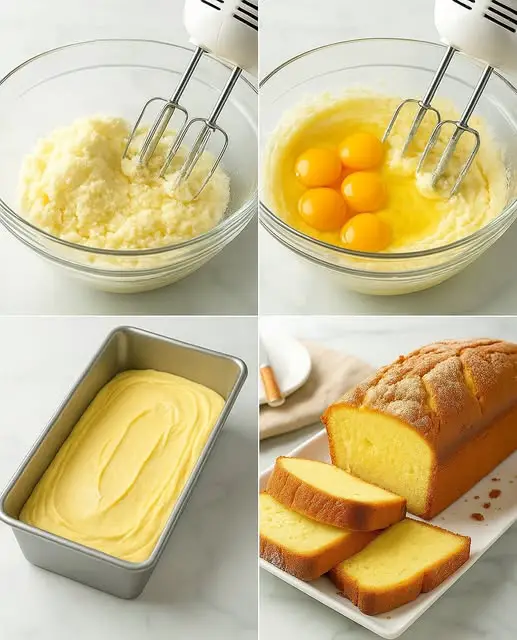
    Step 2: Cream the Butter & Sugar

    • In a large mixing bowl, beat butter and sugar together using a hand mixer or stand mixer on medium speed until light and fluffy (about 3–4 minutes).

    Step 3: Add Eggs

    • Add eggs one at a time, beating well after each addition.

    • Scrape down the sides of the bowl as needed.

    Step 4: Mix Dry Ingredients

    • In a separate bowl, whisk together the flour, baking powder, and salt.

    Step 5: Combine Wet & Dry

    • Add half of the dry mixture to the butter mixture. Mix until just combined.

    • Add the milk and vanilla, mix briefly.

    • Add remaining dry ingredients and mix until just combined. Do not overmix.

    Step 6: Bake

    • Pour the batter into the prepared loaf pan. Smooth the top with a spatula.

    • Bake for 55–65 minutes, or until a toothpick inserted into the center comes out clean or with a few moist crumbs.

    Step 7: Cool & Serve

    • Let the cake cool in the pan for 10 minutes, then transfer to a wire rack to cool completely.

    • Slice and enjoy plain or with your favorite toppings!


    Optional Toppings & Serving Ideas

    • Dust with powdered sugar

    • Top with fresh berries and whipped cream

    • Add a lemon or vanilla glaze

    • Serve with ice cream and caramel sauce

    • Toast a slice for breakfast and serve with butter or jam


    Baker’s Tips

    • Use room-temperature butter and eggs for the best texture.

    • Don’t overmix after adding the flour—this keeps your pound cake tender.

    • Use a metal loaf pan for even browning and a crisp crust.

    • For extra lemon flavor, add 1 tsp lemon zest to the batter.


    Storage & Freezing

    • Room Temp: Store tightly wrapped for up to 4 days.

    • Fridge: Store in an airtight container for up to 1 week.

    • Freezer: Wrap cooled slices or whole loaf in plastic wrap + foil. Freeze up to 3 months. Thaw at room temp.


    ❓ FAQ

    Can I make this in a bundt pan?
    Yes! Double the recipe and bake for 60–75 minutes in a well-greased 10- or 12-cup bundt pan.

    Can I add flavors like lemon or almond?
    Absolutely! Swap vanilla for almond extract or add zest of 1 lemon or orange to the batter.

    Why is my pound cake dense or dry?
    Make sure you cream the butter and sugar properly, and don’t overbake. Overmixing after adding flour can also make it tough.


    Nutrition (Per Slice — 12 Servings)

    • Calories: ~290

    • Carbohydrates: 24g

    • Fat: 20g

    • Protein: 4g

    • Sugar: 16g


    More Classic Cakes You’ll Love


    “The perfect pound cake is all about balance: richness, texture, and that deep buttery aroma that lingers in the air and your memory.”

  • Stuffed Cabbage Rolls with Garlic Tomato Sauce & Cheese

    Stuffed Cabbage Rolls with Garlic Tomato Sauce & Cheese

    Prep Time: 25 minutes
    Cook Time: 1 hour
    Total Time: 1 hour 25 minutes
    Servings: 4–6
    Cuisine: Eastern European-Inspired
    Category: Dinner, Comfort Food
    Difficulty: Medium


    About This Recipe

    These stuffed cabbage rolls are hearty, comforting, and packed with flavor. Made with tender cabbage leaves filled with a savory mixture of ground beef, rice, onion, and spices, then baked in a tangy, spicy chili garlic tomato sauce and topped with melty cheese—this dish is a family favorite with rustic charm.

    It’s the kind of meal that feels like home, and it’s perfect for batch cooking, dinner parties, or cozy weekends.

    “Soft cabbage. Savory filling. A touch of spice. This is comfort food wrapped in leaves.”


    Ingredients

    For the Filling

    • 8–10 cabbage leaves

    • 1 lb lean ground beef

    • 1 beaten egg

    • 1 cup cooked rice (precooked recommended)

    • 1/2 cup milk

    • 2 cloves garlic, crushed

    • 1/2 medium onion, finely chopped

    • 1 tsp salt

    • 1 1/2 tsp black pepper

    • Cheese of your choice, for topping (mozzarella, cheddar, or Parmesan)

    For the Sauce

    • 1 (8 oz) can tomato sauce

    • 1/2 tbsp sugar

    • 2–3 tbsp chili garlic sauce

    • 1/2 tsp lemon juice


    ‍ Instructions

    Step 1: Prepare the Cabbage Leaves

    1. Bring a large pot of salted water to a boil.

    2. Core the cabbage by cutting around the stem at a 45° angle, about 1 1/2 inches deep. Remove the core.

    3. Carefully place the whole cabbage into the boiling water.

    4. Boil for about 5 minutes, then use tongs to peel away 8–10 outer leaves.

    5. Set the leaves aside to cool. You may trim the thick stem of each leaf to make rolling easier.


    Step 2: Make the Filling

    1. In a mixing bowl, beat the egg with milk.

    2. Add ground beef, crushed garlic, chopped onion, salt, pepper, and cooked rice.

    3. Mix until well combined. This will be your savory stuffing.


    Step 3: Make the Sauce

    1. In a separate bowl, combine:

      • Tomato sauce

      • Sugar

      • Chili garlic sauce

      • Lemon juice

    2. Stir until fully incorporated. Taste and adjust spice level if needed.


    Step 4: Assemble the Rolls

    1. Take a cooled cabbage leaf and place about 1/4 cup of filling in the center.

    2. Fold in the sides, then roll it up like a burrito.

    3. Repeat until all filling is used.


    Step 5: Bake the Rolls

    1. Preheat your oven to 350°F (175°C).

    2. Spread a thin layer of sauce in the bottom of a casserole dish.

    3. Place cabbage rolls seam-side down, tightly packed together.

    4. Pour the remaining sauce over the rolls.

    5. Cover the dish with foil or a lid.

    6. Bake for 1 hour, until the meat is fully cooked and the flavors meld.


    Step 6: Add Cheese & Finish

    1. Remove from the oven.

    2. Sprinkle grated cheese over the hot rolls.

    3. Return to oven for 5–10 minutes, uncovered, until the cheese is melted and bubbly.


    ️ Serve & Enjoy

    Serve hot with:

    • A side of mashed potatoes or crusty bread

    • Sour cream or a dollop of plain yogurt

    • A crisp green salad or pickled vegetables

    “The kind of dish that brings people together—it’s warm, filling, and full of flavor.”


    Storage & Reheating

    • Fridge: Store leftovers in an airtight container for up to 4 days.

    • Freezer: Freeze tightly wrapped rolls before or after baking for up to 3 months. Thaw overnight in the fridge.

    • Reheat: Bake covered at 350°F until heated through or microwave individual portions.


    Variations & Tips

    Tip or Swap Try This
    No beef? Use ground turkey, chicken, or plant-based crumbles.
    Extra veggie? Add finely chopped carrots or spinach to the filling.
    More kick? Use hot sauce or red chili flakes in the sauce.
    Rice replacement Try quinoa or riced cauliflower for a low-carb twist.

    FAQ

    Can I use uncooked rice?
    It’s best to use precooked rice. Uncooked rice may not cook evenly inside the rolls.

    Can I make this ahead of time?
    Yes! Assemble the rolls and store them in the fridge (unbaked) for up to 24 hours before baking.

    Is it spicy?
    You can control the heat! Use less chili garlic sauce for a milder flavor.


    Nutrition (Per Roll – Approximate)

    • Calories: 240

    • Protein: 17g

    • Carbs: 14g

    • Fat: 12g

    • Fiber: 2g


    More Comfort Food Recipes You’ll Love


    “Stuffed cabbage rolls are like a warm hug from the kitchen—wholesome, filling, and made with love.”

  • 5-Minute Wheat-Free Oatmeal Pancake (Low-Carb, Diabetic-Friendly, Guilt-Free)

    5-Minute Wheat-Free Oatmeal Pancake (Low-Carb, Diabetic-Friendly, Guilt-Free)

    Prep Time: 2 minutes
    Cook Time: 3 minutes
    Total Time: 5 minutes
    Servings: 2–3 pancakes
    Dietary Tags: Wheat-Free, Low-Carb, Gluten-Free, Diabetic-Friendly, Dairy-Free


    ✨ Why You’ll Love This Recipe

    Forget the bread and embrace this light, fluffy, wheat-free pancake that’s ready in just 5 minutes! Whether you’re avoiding gluten, managing blood sugar, or just want a cleaner, healthier alternative to traditional bread, this recipe delivers.

    No wheat, no guilt
    Low in carbs & calories
    Ready in 5 minutes
    Versatile for sweet or savory fillings
    Perfect for diabetic, low-carb, and gluten-free diets

    “This healthy pancake is your new go-to bread substitute—fluffy, fast, and full of filling possibilities!”


    Ingredients

    For the Pancake Batter:

    • 1 cup water

    • 1/2 cup oat flour (or grind oats into flour)

    • 1 pinch salt

    Optional Filling Suggestions:

    • 2 eggs, beaten

    • Tomato slices, to taste

    • Shredded, seasoned chicken, to taste

    • Olive oil, for cooking

    • Salt, to taste


    ‍ How to Make It

    1. Blend the Batter

    Add water, oat flour, and a pinch of salt to a blender or mixing bowl.
    Blend or whisk until smooth and lump-free. The consistency should resemble thin pancake batter.

    2. Cook the Pancake

    • Heat a non-stick skillet over medium-low heat.

    • Add a drizzle of olive oil and spread it around the pan.

    • Pour in enough batter to cover the base thinly.

    • Let it cook for 1–2 minutes, until the top looks dry and the bottom is set.

    • Flip and cook for another minute on the other side.

    Repeat with remaining batter. This recipe yields about 2 to 3 pancakes, depending on size and thickness.


    Filling & Serving (Optional but Delicious!)

    Use the same pan for a quick, protein-packed filling:

    1. Make the Filling

    • Add another touch of olive oil over low heat.

    • Add tomato slices, then pour in the beaten eggs with a pinch of salt.

    • Let the eggs set slightly, then add shredded cooked chicken on top.

    2. Assemble & Toast

    • Place a cooked oatmeal pancake on top of the egg and chicken.

    • Let it warm through for 1–2 minutes.

    • Flip gently to toast the other side.

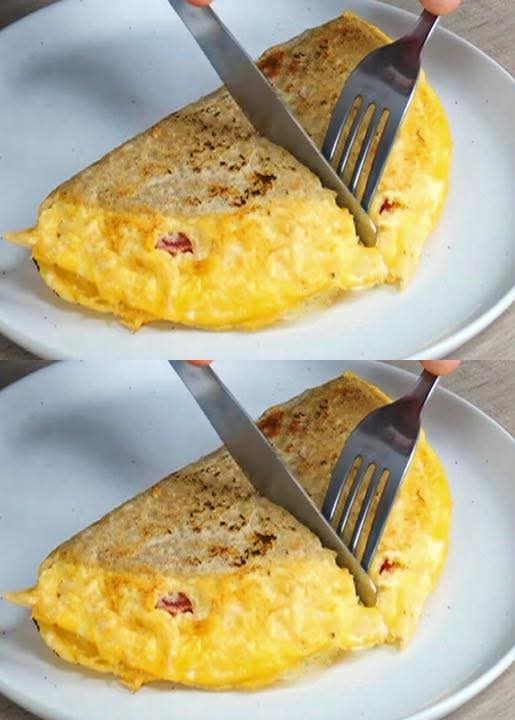
    Slice, serve, and enjoy immediately!

    “It’s light, golden, and loaded with flavor—no wheat, no worries.”


    Smart Substitutions & Variations

    This pancake is a blank canvas—feel free to experiment with different fillings or flavors.

    Ingredient Swap Try This
    Tomatoes Zucchini, spinach, bell peppers
    Chicken Ham, turkey, shredded tofu, sautéed mushrooms
    Eggs Egg whites, vegan egg replacer
    Oat flour Almond flour, chickpea flour, or flaxmeal (adjust liquid)

    Nutritional Benefits

    • Oat flour provides fiber and steady energy.

    • No refined carbs makes it suitable for diabetics and keto-lite eaters.

    • High in protein when filled with eggs or lean meats.

    • Heart-healthy when made with olive oil.


    Storage & Meal Prep

    • Make ahead: Cook and store pancakes in an airtight container in the fridge for up to 3 days.

    • Reheat: Toast in a dry skillet or microwave for 30 seconds.

    • Freeze-friendly: Stack with parchment and freeze in a zip-top bag for up to 1 month.


    Frequently Asked Questions

    Can I make this sweet instead of savory?
    Yes! Skip the salt and add a bit of cinnamon, vanilla, or honey to the batter. Fill with peanut butter and banana, or yogurt and berries.

    Is oat flour gluten-free?
    Yes, as long as you use certified gluten-free oats or oat flour.

    Can I use cooked oats instead of oat flour?
    No, this recipe needs flour-like texture for a pancake structure. You can grind oats in a blender to make oat flour.

    Can I add spices?
    Absolutely. Garlic powder, turmeric, chili flakes, or Italian herbs all work beautifully depending on your filling.


    Serve It With:

    • A side of fresh salad or steamed veggies

    • A dollop of Greek yogurt or hummus

    • A drizzle of garlic sauce or hot sauce

    • Avocado slices and lemon juice for a clean, light meal


    More Wheat-Free Quick Meals

    • Cornstarch Yogurt Cake (5-Minute, No Wheat!)

    • 10-Minute Blender Orange Cake

    • Cloud-Soft Condensed Milk Bread (No Kneading)

    • Savory Egg Muffins with Oats & Veggies


    “Forget bread—this oat pancake is faster, healthier, and so easy it becomes a habit.”

  • Soft and Moist Banana Bread Recipe Without a Mixer

    Soft and Moist Banana Bread Recipe Without a Mixer

    Sliced moist banana bread on a wooden board with ripe bananas in background
    This soft and moist banana bread recipe is the kind of effortless baking I adore no mixer, no fuss, and no compromise on flavor or texture. As a chef, I love returning to classics like this. With just one bowl and a wooden spoon, you’ll whip up a loaf so tender, sweet, and aromatic that it disappears within hours (sometimes minutes!) of slicing.

    Whether it’s breakfast, a mid-day snack, or a cozy evening treat with tea, this banana bread always fits the moment. And because it’s customizable, you can toss in chocolate chips, nuts, or even dried fruit to suit your craving or pantry stash. It’s humble, it’s nostalgic and it’s absolutely irresistible.

    “No mixer. No problem. This banana bread proves all you need is ripe bananas and a little love.” – @BowlAndSpoonBaker

    Why This Banana Bread Recipe Stands Out
    No mixer needed – Just a bowl, a fork, and a spoon to get started.
    Super moist texture – Thanks to overripe bananas, brown sugar, and oil or melted butter.
    Quick prep – Ready to bake in under 15 minutes.
    Versatile add-ins – Nuts, chocolate chips, cinnamon, or dried fruits can all join the party.
    One-bowl recipe – Easy cleanup and even easier to memorize.
    Craving more no mixer magic? Try our microwave banana condensed milk cake or the easy orange blender cake both just as low-effort and delicious.

    Ingredients
    3 overripe bananas, mashed
    2 large eggs, at room temperature
    1/2 cup vegetable oil or melted butter
    3/4 cup brown sugar
    1 teaspoon vanilla extract
    1 1/2 cups all-purpose flour
    1 teaspoon baking soda
    1/2 teaspoon salt
    1/2 teaspoon cinnamon (optional)
    1/2 cup chopped nuts or chocolate chips (optional)
    Step by Step Instructions
    1: Preheat and Prepare
    Preheat your oven to 350°F (175°C).
    Grease a 9×5-inch loaf pan with butter or oil, or line with parchment paper.
    2: Mix the Wet Ingredients
    In a large bowl, mash the bananas until smooth.
    Add the eggs, vegetable oil or melted butter, brown sugar, and vanilla extract. Mix well with a spoon or spatula.
    3: Add Dry Ingredients
    Sprinkle in the flour, baking soda, salt, and cinnamon if using.
    Gently stir until just combined. Do not overmix.
    4: Fold in Extras
    Fold in chopped nuts, chocolate chips, or dried fruit if desired.
    5: Bake
    Pour the batter into the prepared loaf pan and smooth the top.
    Bake for 50-60 minutes, or until a toothpick inserted in the center comes out clean.
    6: Cool and Serve
    Let the bread cool in the pan for 10 minutes, then transfer to a wire rack to cool completely.
    Slice, serve, and enjoy!
    “Banana bread is comfort baked into a loaf. Simple, satisfying, and soul-soothing.” – @BananaBreadBliss

    Banana Bread Recipe Prep
    No-mixer banana bread made with ripe bananas, brown sugar, and a touch of cinnamon—fluffy, moist, and easy!
    Tips for Extra Moist and Flavorful Banana Bread
    Use black-speckled bananas: The darker, the sweeter and softer your banana bread will be.
    Don’t overmix: This can make the bread dense and tough. Just stir until combined.
    Let it rest: Banana bread tastes even better the next day as the flavors settle.
    Add a sprinkle of cinnamon sugar: On top of the batter before baking for a sweet, fragrant crust.
    If you’re looking for more dreamy, soft bakes, check out our soft milk brioche or pineapple quick bread both pillowy and packed with flavor.

    Flavor Variations You’ll Love
    Banana chocolate swirl: Melt dark chocolate and swirl into the batter before baking.
    Peanut butter banana bread: Add 2-3 tablespoons of peanut butter to the batter.
    Banana coconut crunch: Add shredded coconut and top with a sprinkle of turbinado sugar.
    Glazed banana loaf: Drizzle cooled slices with a simple glaze of powdered sugar and milk.
    How to Perfect Banana Bread Texture and Flavor
    Secrets to the Softest Crumb
    When I make banana bread, I’m not just chasing flavor I’m after the perfect texture too. That signature moist and tender crumb, slightly sticky but never soggy, is what makes this bread unforgettable. Over the years, I’ve discovered a few kitchen-tested tips that make all the difference:

    ×
    Banana ripeness matters: The darker and spottier your bananas, the sweeter and more moist the loaf will be. Aim for bananas with black patches on the peel.
    Brown sugar over white: The molasses in brown sugar locks in moisture and deepens the flavor profile.
    Oil vs. butter: Oil makes the texture a bit denser and more moist, while butter adds a richer taste. I often blend the two for the best of both worlds.
    No overmixing: Stir just until the flour disappears extra mixing develops gluten and can make the bread chewy.
    “Banana bread is like a warm hug for your taste buds get the texture right, and they’ll never forget it.” – @BananaBreadWhisperer

    Want to master more soft and flavorful bakes? Try our cloud-soft condensed milk bread or the delicate texture of our Japanese cheesecake both have melt-in-your-mouth softness that rivals any bakery.

    Smart Add-Ins That Enhance Without Overpowering
    What makes banana bread even more exciting is how customizable it is. I love adding in ingredients that bring texture, richness, or a surprise pop of flavor. Just remember, too many add-ins can weigh down the loaf, so keep it balanced. Here’s a table of popular mix-ins and what they bring to the recipe:

    ×
    Chopped walnuts or pecans: Add crunch and earthiness. Toast them beforehand for more depth.
    Mini chocolate chips: Melt slightly as the bread bakes, giving little pools of sweetness.
    Dried cranberries or raisins: Add chew and a tangy contrast to the sweet banana.
    Toasted coconut flakes: Provide nuttiness and texture, especially on top.
    Orange zest: Brightens up the flavor with citrus notes great when paired with chocolate chips.
    Love building creative bread recipes from scratch? Explore our pineapple quick bread or cheese potato bread in a pan for more flavor-packed ideas that start with a simple batter.

    Banana Bread Presentation and Serving Ideas
    Make It Look as Good as It Tastes
    Banana bread doesn’t have to be plain. You can easily elevate it with simple presentation tricks and fun serving ideas. Here’s how I love to style and serve it, especially when I’m hosting brunch or gifting loaves during the holidays:

    Banana slice topping: Before baking, place thin slices of banana on top of the batter for a rustic and beautiful finish.
    Sprinkle with turbinado sugar: Adds a crunchy, caramelized crust to the top of the loaf.
    Serve with spreads: Pair slices with honey butter, whipped cream cheese, or chocolate hazelnut spread.
    Make it a dessert: Toast slices and top with vanilla ice cream and caramel sauce.
    Want more recipes that double as dessert or snack? Our Nutella doughnuts and Reese’s caramel cheesecake bring indulgence to any table, just like a dressed-up banana bread slice.

    ×
    “A beautiful banana bread loaf turns a simple kitchen moment into something worth sharing.” – @BakeToImpress

    How to Store and Reheat Banana Bread Like a Pro
    If you’re lucky enough to have leftovers, storing banana bread correctly will keep it moist and flavorful for days. Here’s my go-to storage method for best results:

    Room temperature: Wrap tightly in plastic wrap or foil and store in an airtight container for up to 4 days.
    Refrigerator: If your kitchen is warm, store in the fridge, but warm slices before serving for best texture.
    Freezer: Freeze whole loaves or slices wrapped tightly in plastic and foil for up to 3 months. Thaw overnight at room temp or microwave individual slices for 20 seconds.
    Need more freezer-friendly recipes? Our easy cinnamon rolls and 10-minute skillet bread freeze beautifully and reheat like a dream.

    “Good banana bread stays soft for days. Great banana bread gets devoured before the sun sets.” – @SliceOfHomeChef

    Nutrition Facts (Per Serving – Based on 12 Slices)
    Calories: 240
    Carbohydrates: 33g
    Protein: 3g
    Fat: 10g
    Sugar: 14g
    x
    Video Player is loading.
    Pause

    Unmute

    Fullscreen
    Now Playing


    x
    video of: Dad Cries When He's Surprised With New Truck | Happily TVPlay Video
    Dad Cries When He’s Surprised With New Truck | Happily TV

    Share
    Watch on
    Open.Video
    Dad Cries When He’s Surprised With New Truck | Happily TV
    Frequently Asked Questions
    Can I freeze banana bread?
    Yes! Wrap tightly in plastic wrap and foil or store in a freezer-safe bag. Freeze for up to 3 months. Thaw at room temperature or microwave for a quick slice of comfort.

    ×
    Can I make muffins instead?
    Absolutely. Divide the batter into a greased or lined muffin tin and bake at 350°F for 18-22 minutes.

    Can I reduce the sugar?
    Yes, you can reduce the brown sugar to ½ cup for a less sweet loaf. Ripe bananas already provide natural sweetness.

    What’s the best oil or fat to use?
    Melted butter gives a richer flavor, while vegetable oil makes the loaf a little moister. Coconut oil works well too!

    ×
    Can I make this gluten-free?
    Yes! Use a 1:1 gluten-free flour blend. Just make sure it includes xanthan gum or similar for structure.

    “Banana bread isn’t just a recipe it’s a mood. Warm, nostalgic, and better when shared.” – @LoafLoveBakes

    More Comforting Bakes to Try
    Easy Homemade Cinnamon Rolls
    Easy Vanilla Pound Cake
    Quick Banana Condensed Milk Cake
    Fluffy Homemade Doughnuts
    Easy Orange Blender Cake

  • Easy Chocolate Croissants Recipe

    Easy Chocolate Croissants Recipe

    Prep Time: 10 minutes
    Cook Time: 15–18 minutes
    Total Time: 25–30 minutes
    Servings: 6–8 croissants
    Category: Breakfast, Dessert
    Cuisine: French-inspired
    Difficulty: Easy

    Introduction

    Nothing says indulgent breakfast or effortless dessert like warm, flaky chocolate croissants! With just a handful of ingredients and no special skills required, these buttery treats can be made in under 30 minutes using store-bought puff pastry. Whether you’re serving them at brunch or sneaking one with your coffee, these croissants will become a go-to favorite.


    Ingredients

    • 1 sheet puff pastry, thawed

    • 1/2 cup chocolate chips or chocolate bar pieces (semi-sweet or dark chocolate)

    • 1 egg, beaten (for egg wash)

    • 1 tablespoon butter, cut into small cubes (optional, for brushing tops)


    ‍ Instructions

    Step 1: Preheat the Oven

    Preheat your oven to 200°C (400°F). Line a baking sheet with parchment paper or a silicone baking mat.

    Step 2: Cut the Puff Pastry

    Unroll the thawed puff pastry onto a lightly floured surface. Use a sharp knife or pizza cutter to divide it into triangles—like slicing a pizza. You should get about 6 to 8 triangles, depending on the size of your sheet.

    Step 3: Add the Chocolate

    Place a spoonful of chocolate chips or a piece of chocolate bar near the wide end of each triangle. You can adjust the amount based on how chocolatey you want your croissants.

    Step 4: Roll the Croissants

    Starting at the wide end, gently roll each triangle toward the pointed tip to form a crescent shape. Tuck the ends under slightly and place the croissants seam-side down on your prepared baking sheet.

    Step 5: Apply Egg Wash

    Brush each croissant with beaten egg. This helps give them that beautiful golden shine as they bake.

    Step 6: Optional Butter Topping

    Dot each croissant with a tiny cube of butter for added richness and bakery-style flavor. This step is optional but highly recommended.

    Step 7: Bake

    Place the baking sheet in the oven and bake for 15–18 minutes, or until the croissants are puffed up and golden brown.

    Step 8: Cool and Serve

    Allow to cool slightly before serving. Be careful—the chocolate inside will be hot and melty!


    Serving Suggestions

    • Dust with powdered sugar for a classic finish.

    • Serve alongside coffee, tea, or hot cocoa for a cozy breakfast.

    • Pair with fresh berries or a drizzle of caramel sauce for an elegant dessert.


    Storage & Reheating

    • Store: Leftover croissants can be stored in an airtight container at room temperature for up to 2 days.

    • Reheat: Warm in a 300°F (150°C) oven for 5 minutes or microwave for 15–20 seconds to revive the flakiness.


    Tips & Variations

    • Make it Nutella-style: Spread a teaspoon of hazelnut spread on each triangle before rolling.

    • Switch up the chocolate: Try white chocolate, dark chocolate, or caramel chips.

    • Add crunch: Sprinkle sliced almonds on top before baking.

    • Mini Croissants: Use smaller triangles for bite-sized party treats.


    ❓FAQs

    Can I make these ahead of time?
    Yes! Assemble the croissants and refrigerate them overnight on the baking tray. In the morning, bake as instructed.

    Can I freeze them?
    Yes. Bake and cool completely, then freeze in a ziplock bag. Reheat in the oven until warmed through.

    Can I use homemade puff pastry?
    Absolutely, if you prefer! Store-bought just saves time and still yields amazing results.

  • Cheesy Garlic Parmesan Chicken Pasta Skillet

    Cheesy Garlic Parmesan Chicken Pasta Skillet

    A creamy, cheesy one-skillet chicken pasta dish that’s packed with flavor and comes together in just 30 minutes. Perfect for busy weeknights!


    Ingredients

    • 2 tbsp olive oil

    • 1 lb boneless, skinless chicken breasts, cut into bite-sized pieces

    • Salt and pepper, to taste

    • 1 tsp garlic powder

    • 1 tsp Italian seasoning

    • 4 cloves garlic, minced

    • 2 cups chicken broth

    • 1 ½ cups milk

    • 8 oz penne pasta, uncooked

    • 1 cup grated Parmesan cheese

    • 1 ½ cups shredded mozzarella cheese

    • 2 tbsp butter

    • Chopped fresh parsley (optional, for garnish)


    Directions

    1. Heat Skillet
      In a large skillet over medium heat, heat the olive oil.

    2. Cook Chicken
      Add chicken pieces. Season with salt, pepper, garlic powder, and Italian seasoning.
      Cook for 5–7 minutes, until browned and fully cooked.

    3. Add Garlic
      Stir in the minced garlic and sauté for 1 more minute until fragrant.

    4. Add Liquids & Pasta
      Pour in the chicken broth and milk. Stir in the uncooked penne pasta.

    5. Simmer
      Bring to a boil, then reduce heat to low. Cover and simmer for 12–15 minutes, stirring occasionally, until pasta is tender.

    6. Add Cheese & Butter
      Stir in Parmesan cheese, mozzarella, and butter. Mix until melted, smooth, and creamy.

    7. Serve
      Garnish with chopped parsley if desired. Serve hot straight from the skillet!


    ⏱️ Quick Info

    • Prep Time: 10 minutes

    • Cook Time: 20 minutes

    • Total Time: 30 minutes

    • Servings: 4

    • Calories: Approx. 580 per serving


    Tips & Variations

    • Add veggies: Toss in spinach, broccoli, or sun-dried tomatoes during the simmering stage.

    • Spice it up: Add a pinch of red pepper flakes for a kick.

    • Make it extra creamy: Stir in 2 oz cream cheese along with the butter.

  • Amish Hamburger Steak Bake Recipe

    Amish Hamburger Steak Bake Recipe

    Amish Hamburger Steak Bake Recipe

    Servings: 6
    Prep Time: 20 minutes
    Cook Time: 45 minutes
    Total Time: 1 hour 5 minutes


    Ingredients

    For the Hamburger Steaks:

    • 2 lbs ground beef

    • 1 small onion, finely diced

    • 1/2 cup breadcrumbs

    • 1/4 cup milk

    • 2 large eggs

    • 2 tsp Worcestershire sauce

    • 1 tsp salt

    • 1/2 tsp black pepper

    • 1/2 tsp garlic powder

    For the Sauce:

    • 2 tbsp unsalted butter

    • 2 tbsp all-purpose flour

    • 1 1/2 cups beef broth

    • 1 can (10.5 oz) cream of mushroom soup

    • 1/2 cup heavy cream or sour cream

    • Salt & pepper to taste


    Instructions

    1. Prepare the Hamburger Steaks

    • Preheat your oven to 350°F (175°C).

    • In a large bowl, combine ground beef, onion, breadcrumbs, milk, eggs, Worcestershire sauce, salt, pepper, and garlic powder.

    • Mix until well combined, but don’t overmix.

    • Shape into 6–8 oval patties and place in a greased 9×13-inch baking dish.

    2. Make the Creamy Sauce

    • In a medium saucepan, melt butter over medium heat.

    • Stir in flour and cook for 1 minute to make a roux.

    • Gradually whisk in beef broth until smooth and thickened (about 3–5 minutes).

    • Stir in mushroom soup and cream or sour cream. Season with salt and pepper.

    3. Assemble & Bake

    • Pour the mushroom sauce evenly over the hamburger patties.

    • Cover the dish with foil and bake for 35 minutes.

    • Remove foil and bake uncovered for an additional 10 minutes, or until bubbling and the meat is fully cooked (internal temp of 160°F/71°C).

    4. Serve

    • Let rest for 5 minutes before serving.

    • Serve over mashed potatoes, buttered egg noodles, or Amish-style noodles for a classic comfort meal.


    Optional Additions

    • Add sautéed mushrooms or caramelized onions to the sauce for extra flavor.

    • A dash of paprika or thyme can give a herby warmth.

    • Use ground turkey or a mix of beef and pork for variety.


    Storage Tips

    • Fridge: Store leftovers in an airtight container for up to 4 days.

    • Freezer: Freeze individual portions for up to 3 months. Reheat in the oven or microwave.