Category: healthy food

  • Creamy Beetroot Soup Recipe

    Creamy Beetroot Soup Recipe

    Creamy Beetroot Soup Recipe

    Table of Contents

    Ingredients:


      • 1 Onion, chopped
      • 1 tablespoon Olive oil
      • 1 tablespoon Butter


      • 2 cloves Garlic, minced
      • 1 Chili pepper, chopped (optional)
      • 2 medium Potatoes, peeled and diced


      • 3 medium Beets, peeled and chopped
      • 4 cups (1 liter) Vegetable broth
      • 3 slices of Bread (preferably rustic or sourdough)


      • 2 tablespoons Sunflower oil
      • 3 Sticks of Celery, chopped
      • 1 Zucchini, chopped


      • Salt and black pepper, to taste
      • 1/4 cup Parsley, chopped (for garnish)
      • 1 Garlic clove (for bread)


    • 60 ml Cream (for the soup)
    • 1 teaspoon of Cream (for garnish)

    Directions:


      1. Prepare the bread: Preheat the oven to 180°C (350°F). Place the bread slices on a baking tray, drizzle with sunflower oil, and bake for about 10 minutes, or until crispy and golden. While the bread is baking, rub a garlic clove over the toasted slices for extra flavor.
      2. Cook the vegetables: In a large pot, heat the olive oil and butter over medium heat. Add the chopped onion and sauté until softened and golden brown, about 5 minutes. Add the minced garlic and chili pepper, then sauté for an additional minute.
      3. Add the root vegetables: Add the diced potatoes and chopped beets to the pot. Pour in the vegetable broth and bring to a boil. Cover with a lid and let the soup cook for about 20 minutes, or until the vegetables are tender.


      1. Prepare the other vegetables: While the soup cooks, heat olive oil in a separate pan. Add the celery and zucchini, seasoning with salt and pepper. Fry the vegetables until they are golden brown and softened, about 7-10 minutes.
      2. Blend the soup: Once the potatoes and beets are tender, use an immersion blender or a regular blender to puree the soup until smooth. Add the sautéed celery and zucchini to the soup and blend again until fully incorporated.
      3. Finish the soup: Stir in the cream and adjust seasoning with salt and black pepper to taste. Let the soup simmer for an additional 5 minutes to meld the flavors together.
    See also  Homemade Delights: Crafting Irresistible Oatmeal and Dried Fruit Sweets


    1. Serve: Serve the creamy beetroot soup in bowls. Drizzle with a teaspoon of cream and sprinkle with fresh parsley. Serve with the garlic-rubbed toasted bread on the side.

    Serving Suggestions:

      • Pair with a side salad for a complete meal.


      • Top with crumbled feta cheese or a dollop of sour cream for added creaminess.
      • Serve with crusty baguette or warm pita bread for dipping.
      • Add roasted seeds or nuts as a crunchy topping for extra texture.


    • Pair with a glass of white wine or a refreshing iced tea for a satisfying lunch.

    Cooking Tips:

      • For a smoother texture, you can strain the soup after blending to remove any remaining bits of vegetable.


      • If you prefer a less creamy version, you can reduce the amount of cream or use coconut milk for a dairy-free alternative.
      • If the soup is too thick, add a little more vegetable broth to reach your desired consistency.
      • For an added depth of flavor, roast the beets beforehand for a slightly caramelized taste.


    • You can freeze the soup for up to 3 months. Just let it cool completely before transferring to a freezer-safe container.

    Nutritional Benefits:

      • Beets are high in fiber, antioxidants, and vitamins such as folate and vitamin C.


      • The inclusion of zucchini, celery, and potatoes adds essential vitamins and minerals, including potassium and vitamin K.
      • The cream adds a rich texture, while still offering a good amount of healthy fats.
      • This soup is a great source of hydration due to the vegetable broth and the high water content in the beets and zucchini.

    Dietary Information:

      • Vegetarian
      • Gluten-Free (if using gluten-free bread)


    • Dairy Optional (can substitute cream with coconut cream for dairy-free)
    • Low-Calorie (if served in moderation)
    See also  Mini meatloaf in a pan

    Nutritional Facts (per serving):


      • Calories: 200
      • Protein: 4g
      • Fat: 10g


      • Carbohydrates: 28g
      • Fiber: 6g
      • Sugar: 10g


    • Sodium: 500mg

    Storage:

      • Store leftover soup in an airtight container in the refrigerator for up to 3-4 days.


    • For longer storage, freeze the soup for up to 3 months. To reheat, thaw in the fridge overnight and warm on the stovetop or in the microwave.
    • Store the toasted bread separately in an airtight container to keep it crispy.
  • Nutty Cinnamon Swirl Bread

    Nutty Cinnamon Swirl Bread

    Nutty Cinnamon Swirl Bread

    Table of Contents

    Ingredients:

    For the Dough:

      • Flour: 650 g (about 5 cups)
      • Sugar: 1/2 cup (100 g)


      • Dry Yeast: 1.5 tsp (6 g)
      • Salt: 1 tsp (4 g)
      • Lukewarm Milk: 300 ml


    • Vegetable Oil: 2 Tbsp (30 ml)
    • Egg White: 1, beaten

    For the Filling:

      • Crushed Walnuts: 200 g (about 2 cups)


      • Sugar: 80 g (about 1/3 cup)
      • Cinnamon: to taste (usually about 1 tsp)
      • Butter: 5 Tbsp, melted


    For the Glaze:

    Steps How to Make It:

    Step 1: Prepare the Dough

      1. Activate the Yeast: In a small bowl, combine the lukewarm milk (about 37-40°C or 98-104°F) with the dry yeast and a teaspoon of sugar. Let it sit for about 5-10 minutes, until it becomes frothy.


      1. Mix Dry Ingredients: In a large mixing bowl, combine the flour, the remaining sugar, and salt. Mix well to ensure the salt and sugar are evenly distributed throughout the flour.
      2. Combine Wet Ingredients: Once the yeast mixture is frothy, add it to the flour mixture along with the vegetable oil and the beaten egg white.
      3. Knead the Dough: Mix the ingredients until a shaggy dough forms, then transfer it to a floured surface. Knead the dough for about 10 minutes until it is smooth and elastic. If the dough is too sticky, you can add a little extra flour as needed.
    See also  AIR FRYER BLUEBERRY MUFFINS


    1. First Rise: Place the kneaded dough in a greased bowl, cover it with a clean kitchen towel or plastic wrap, and let it rise in a warm place for about 1 to 1.5 hours, or until it has doubled in size.

    Step 2: Prepare the Filling

    1. Mix Filling Ingredients: In a medium bowl, combine the crushed walnuts, sugar, and cinnamon. Stir in the melted butter until the mixture is well combined and crumbly.

    Step 3: Shape the Bread

      1. Roll Out the Dough: Once the dough has risen, punch it down to release the air. Turn it out onto a floured surface and roll it into a rectangle approximately 1 cm thick (about 0.4 inches).


      1. Add the Filling: Evenly sprinkle the walnut mixture over the rolled-out dough, leaving a small border around the edges.
      2. Roll the Dough: Starting from one of the long edges, carefully roll the dough tightly into a log. Pinch the seams to seal the dough.
      3. Shape the Loaf: Gently twist the dough log and tuck the ends under to fit into a greased loaf pan. You can also place the dough into a round baking pan for a more rustic look.


    Step 4: Second Rise

    1. Let it Rise Again: Cover the loaf with a towel or plastic wrap and let it rise for another 30-45 minutes, until it has risen slightly above the edge of the pan.

    Step 5: Prepare the Glaze

    1. Make the Egg Wash: In a small bowl, whisk together the egg yolk and milk. This will give the bread a beautiful golden color when baked.

    Step 6: Bake the Bread

      1. Preheat the Oven: Preheat your oven to 180°C (350°F) during the second rise.
    See also  Baked Vegetable Frittata


      1. Glaze the Loaf: Once the dough has risen, brush the top with the egg wash.
      2. Bake: Bake the bread in the preheated oven for about 30-35 minutes, or until the bread is golden brown and sounds hollow when tapped on the bottom.
      3. Cool: Remove the bread from the oven and allow it to cool in the pan for about 10 minutes, then transfer it to a wire rack to cool completely.


    Nutrition Facts (per serving, based on 12 servings):

      • Calories: 250 kcal
      • Protein: 5 g
      • Fat: 9 g


      • Carbohydrates: 40 g
      • Fiber: 1 g
      • Sugar: 9 g


    • Calcium: 30 mg
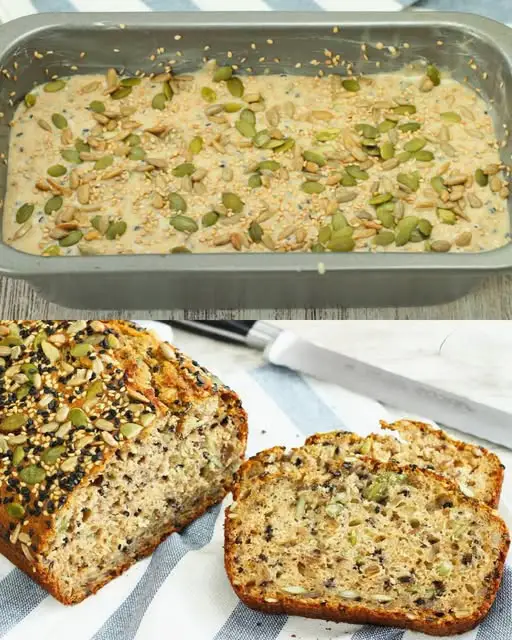
  • No-Knead Multi-Seed Bread Recipe

    No-Knead Multi-Seed Bread Recipe

    No-Knead Multi-Seed Bread Recipe

    Table of Contents

    Ingredients

    Dry Ingredients:

      • 1 ¼ cup (160 g) All-purpose flour


      • ¾ cup (100 g) Whole-wheat flour
      • ½ cup (65 g) Toasted sunflower seeds
      • ½ cup (75 g) Toasted pumpkin seeds


      • 1 tsp Salt
      • 1 tsp Sugar
      • ½ tsp Instant yeast

    Wet Ingredients:

    • 1 ¼ cups (300 ml) Water (room temperature)

    Directions

    Mix the Dough:

      1. In a large mixing bowl, combine the all-purpose flour, whole-wheat flour, sunflower seeds, pumpkin seeds, salt, sugar, and yeast.
      2. Add the water and mix with a wooden spoon or spatula until a shaggy dough forms.


    1. Cover the bowl with plastic wrap or a kitchen towel and let the dough rest at room temperature for 12-18 hours. The dough should double in size and become bubbly.

    Shape the Dough:
    4. Lightly flour a work surface and turn out the dough. Sprinkle a little flour on top and fold the dough over itself a few times to shape it into a round loaf.
    5. Place the dough on a sheet of parchment paper and cover with a kitchen towel. Let it rise for 30-60 minutes.

    Preheat the Oven:
    6. Place a Dutch oven or heavy oven-safe pot (with a lid) in the oven and preheat to 450°F (230°C) for at least 30 minutes.

    Bake the Bread:
    7. Carefully remove the preheated Dutch oven from the oven. Use the parchment paper to transfer the dough into the pot.
    8. Cover with the lid and bake for 30 minutes. Remove the lid and bake for an additional 5-10 minutes to achieve a golden, crusty top.

    Cool and Serve:
    9. Remove the bread from the Dutch oven and let it cool on a wire rack before slicing. Enjoy your homemade multi-seed bread!

    See also  okra stew with chicken, sausage, shrimp and crawfish tails, onion and green peppers

    Serving Suggestions


      • Slice and serve with butter, jam, or cream cheese.
      • Use for sandwiches or as a base for avocado toast.
      • Pair with soups, stews, or salads.

    Cooking Tips

      • For extra crunch, sprinkle additional seeds on top of the dough before baking.
      • Use a combination of other seeds like sesame, flax, or chia for added variety.


    • Ensure the Dutch oven is well-heated to create a perfect crust.

    Nutritional Benefits

      • Seeds: Provide healthy fats, fiber, and essential minerals.


    • Whole-wheat flour: Adds fiber and nutrients for a wholesome loaf.

    Dietary Information

      • Vegetarian.


    • Can be made vegan by ensuring no dairy-based toppings are used.

    Nutritional Facts (Per Slice, Approximate)

      • Calories: 180


      • Protein: 6 g
      • Fat: 8 g
      • Carbohydrates: 20 g


    • Fiber: 4 g
    • Sugar: 1 g
  • Lemon Mascarpone Tart Recipe

    Lemon Mascarpone Tart Recipe

    Lemon Mascarpone Tart Recipe

    Table of Contents

    Ingredients

    For the Lemon Filling:


      • 2 eggs
      • 120 g (4 oz) sugar
      • 10 g (0.35 oz) vanilla sugar


      • 60 g (2 oz) cornstarch
      • 500 ml (17 fl oz) milk
      • Grated peel of 1 lemon


    • Juice of 1 lemon
    • 90 g (3 oz) mascarpone cheese

    For the Crust:


      • 320 g (11.5 oz) flour
      • 140 g (5 oz) butter, at room temperature
      • 1 egg


      • 120 g (4 oz) sugar
      • Grated peel of 1 lemon
      • A pinch of salt

    For Decoration:

    • 1 teaspoon powdered sugar

    Directions

    1. Prepare the Lemon Filling:

      • In a medium saucepan, whisk together eggs, sugar, vanilla sugar, and cornstarch until smooth.
      • Gradually add the milk while stirring constantly.


      • Add the grated lemon peel and lemon juice to the mixture.
      • Cook over medium heat, stirring constantly, until the mixture thickens.
      • Remove from heat and allow to cool slightly. Stir in the mascarpone cheese until smooth and creamy.

    2. Prepare the Crust:

      • In a large mixing bowl, combine flour, butter, egg, sugar, grated lemon peel, and a pinch of salt.
      • Mix until a soft dough forms.


    • Divide the dough, reserving 1/3 for the topping. Wrap both portions in plastic wrap and refrigerate for 15 minutes.

    3. Assemble the Tart:

      • Preheat your oven to 180°C (355°F).


      • Roll out 2/3 of the dough and press it into a 24 cm (9.5-inch) tart mold, covering the bottom and sides evenly.
      • Pour the lemon filling into the prepared crust.
      • Roll out the reserved 1/3 of the dough and cut it into strips. Arrange the strips in a lattice pattern over the filling.
    See also  Apple Cinnamon Oatmeal Pancakes

    4. Bake the Tart:

      • Bake in the preheated oven for 35 minutes or until the crust is golden brown.
      • Remove from the oven and let cool completely.

    5. Decorate and Serve:

    • Dust the tart with powdered sugar before serving.

    Serving Suggestions


      • Serve chilled or at room temperature.
      • Pair with a cup of tea or coffee for a refreshing afternoon treat.
      • Add a dollop of whipped cream or a few fresh berries for extra indulgence.

    Cooking Tips

      • Stir the filling constantly while cooking to prevent lumps.
      • Chill the dough for easier handling and a flakier crust.


    • Use a springform pan for easier tart removal.

    Nutritional Benefits

      • Lemon adds vitamin C and antioxidants.


    • Mascarpone provides protein and a creamy texture.
    • Eggs and milk are excellent sources of calcium and protein.

    Dietary Information


    • Contains gluten, dairy, and eggs; not suitable for those with allergies.

    Nutritional Facts (Per Slice)

      • Calories: ~300


      • Protein: 5 g
      • Carbohydrates: 30 g
      • Fat: 16 g


    • Fiber: 1 g
    • Sugar: 18 g

    Storage


    • Refrigerate: Store in an airtight container for up to 3 days.
    • Freeze: Freeze individual slices for up to 1 month. Defrost in the refrigerator before serving.
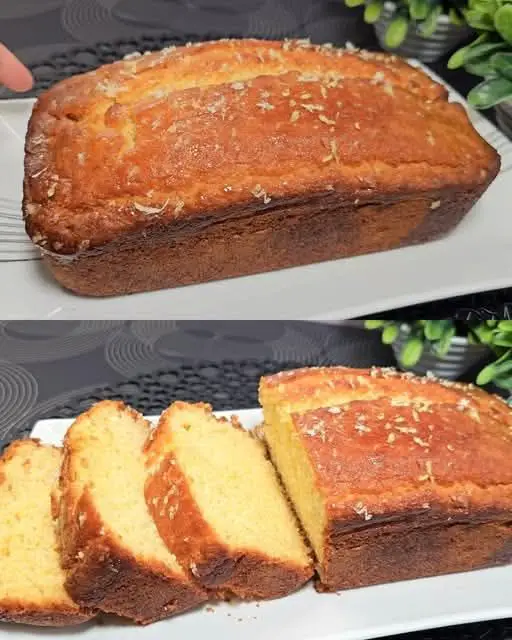
  • Moist Orange Coconut Cake

    Moist Orange Coconut Cake

    Moist Orange Coconut Cake

    Table of Contents

    Ingredients:

      • 1 medium orange (for zest and juice)


      • 1 cup of sugar (200g)
      • 2 medium eggs
      • ~ 1/2 cup of vegetable oil (120ml)


      • 3 tablespoons of desiccated coconut (20g)
      • ~ 1 and 3/4 cup of all-purpose flour (180-200g)
      • 1 tablespoon of baking powder (16g)


    • 1 cup of orange juice (250ml)

    Optional garnish:

      • Extra desiccated coconut for sprinkling


    • 1 orange slice for decoration

    How to Make It:

      1. Prepare the Orange: Start by washing the orange thoroughly, then zest it using a fine grater. Set the zest aside for later. Next, cut the orange in half and juice it to yield about 1 cup (250 ml) of fresh orange juice. If you don’t have enough juice from one orange, you can supplement with store-bought juice.


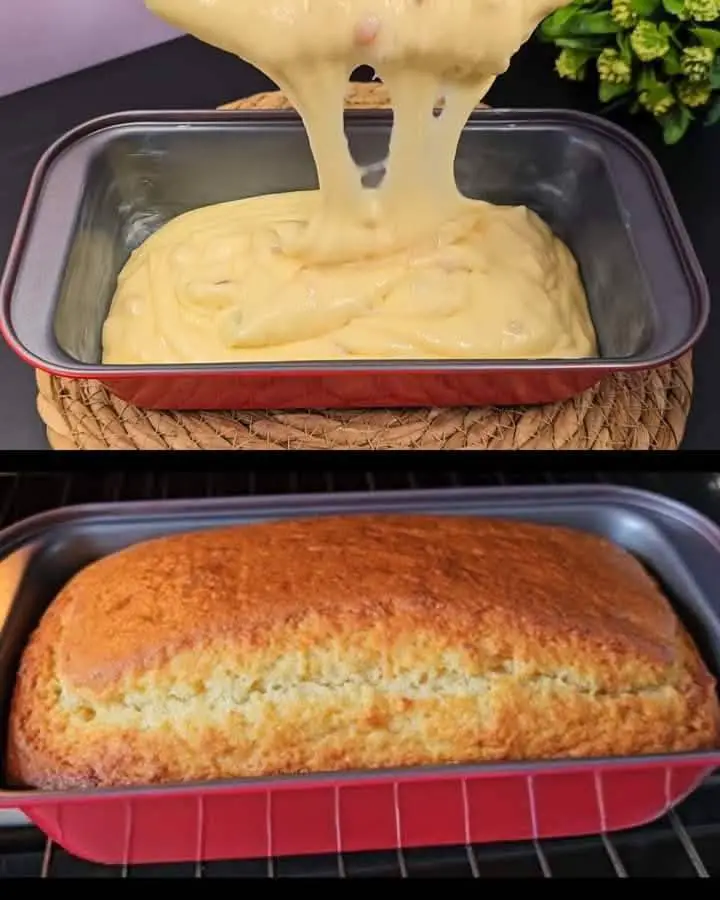
      1. Preheat the oven: Preheat your oven to 180°C (350°F). Grease and flour a cake pan (preferably a round or loaf pan, about 20-22 cm in diameter), or line it with parchment paper to prevent sticking.
      2. Mix the Wet Ingredients: In a large mixing bowl, beat the eggs and sugar together until light and fluffy, about 3-4 minutes. This step incorporates air into the mixture, giving the cake a lighter texture. Slowly add the vegetable oil while continuing to beat the mixture, followed by the orange zest. The orange zest will infuse the batter with a strong citrus aroma.
      3. Add the Coconut: Stir in the desiccated coconut, mixing well to distribute it evenly throughout the batter. The coconut adds a subtle tropical flavor and texture to the cake.


      1. Combine the Dry Ingredients: In a separate bowl, sift the all-purpose flour and baking powder together. This helps to remove any lumps and ensures even distribution of the baking powder in the batter. Gradually add the dry ingredients to the wet mixture, stirring gently with a spatula or whisk to avoid overmixing. You want the batter to remain light and airy.
      2. Incorporate the Orange Juice: Slowly pour the orange juice into the batter, stirring gently until fully combined. The orange juice not only enhances the flavor but also keeps the cake moist. The batter should be smooth and slightly thick.
      3. Bake the Cake: Pour the batter into the prepared cake pan, smoothing the top with a spatula. Place the cake in the preheated oven and bake for 35-40 minutes, or until a toothpick inserted into the center comes out clean. If the cake starts to brown too quickly, cover it loosely with aluminum foil during the last 10-15 minutes of baking.
    See also  Crispy Sesame Banana Cookies


    1. Cool and Garnish: Once the cake is fully baked, remove it from the oven and allow it to cool in the pan for 10-15 minutes. Transfer the cake to a wire rack to cool completely. For garnish, sprinkle some extra desiccated coconut over the top and place a slice of orange in the center for a decorative touch.
  • Vegetable and Cheese Casserole

    Vegetable and Cheese Casserole

    Vegetable and Cheese Casserole

    Table of Contents

    Ingredients

      • 400 g (14 oz) broccoli, cut into florets
      • 1 onion, chopped
      • 2 cloves of garlic, minced
      • 1 carrot, sliced
      • 200 g (7 oz) peppers, chopped
      • 200 g (7 oz) mushrooms, sliced
      • Salt, to taste
      • Pepper, to taste
      • Oregano, to taste
      • 4 eggs
      • 200 ml (3/4 cup) cream (20%)
      • 100 g (1 cup) mozzarella cheese, grated
      • Olive oil, for cooking


    Directions

          • Heat a little olive oil in a large skillet over medium heat.
          • Add chopped onion and sauté until translucent, about 3-4 minutes.
          • Stir in minced garlic and cook for 1 minute until fragrant
    • .Prepare the Vegetables:
      • Prepare the Egg Mixture:
          • In a mixing bowl, whisk together eggs and cream until smooth.
          • Stir in grated mozzarella cheese and season with a pinch of salt and pepper.


      • Assemble the Casserole:
          • Preheat your oven to 180°C (350°F).
          • Lightly grease a baking dish with olive oil.


        • Transfer the cooked vegetables to the prepared baking dish and spread them evenly.
        • Pour the egg and cream mixture over the vegetables, ensuring it covers them completely.
    • Bake the Casserole:
      • Place the dish in the preheated oven and bake for 20-25 minutes, or until the egg mixture is set and the top is golden and bubbly.
    • Serve:
        • Let the casserole cool for 5 minutes before serving.


      • Slice and serve warm as a main dish or side.

    5 Serving Suggestions

      • Pair with a fresh green salad for a light and balanced meal.


      • Serve alongside crusty bread or garlic toast.
      • Add a dollop of sour cream or Greek yogurt for a creamy complement.
      • Pair with grilled chicken or fish for a protein-rich meal.
    • Enjoy with a side of roasted potatoes or rice.

    Cooking Tips

      • Cut the vegetables into uniform sizes to ensure even cooking.
      • Use fresh mozzarella for a richer, creamier texture.


      • For added flavor, sprinkle Parmesan cheese on top before baking.
      • Substitute heavy cream with half-and-half for a lighter option.
      • Add a pinch of red pepper flakes for a touch of heat.


    Nutritional Benefits

      • Broccoli: High in fiber, vitamins C and K, and antioxidants.
      • Eggs: Provide high-quality protein and essential nutrients.
      • Mushrooms: Rich in B vitamins and low in calories.


    • Carrots: Packed with beta-carotene, supporting eye health.
    • Cheese and Cream: Add calcium and healthy fats.

    Dietary Information

      • Vegetarian-Friendly: Contains no meat products.
      • Low-Carb: Suitable for low-carb diets.
      • Gluten-Free: Naturally free of gluten without modifications.
      • Customizable: Easily adaptable with different vegetables or cheeses.

    Nutritional Facts (Per Serving)

      • Calories: ~240
      • Protein: 12 g
      • Carbohydrates: 10 g


      • Fat: 18 g
      • Fiber: 2 g
      • Sodium: ~300 mg


    Storage

      • Refrigeration: Store leftovers in an airtight container for up to 3 days.
      • Freezing: Freeze portions for up to 1 month. Thaw overnight in the fridge before reheating.
      • Reheating: Warm in the oven at 180°C (350°F) or microwave until heated through.
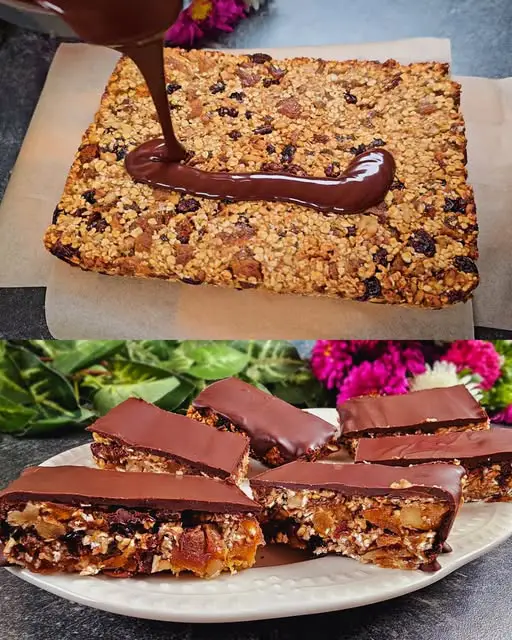
  • Indulgent Goodness: Homemade Sugar-Free Energy Bars

    Indulgent Goodness: Homemade Sugar-Free Energy Bars

    Sugar-Free Energy Bars

    Table of Contents

    Ingredients:

    • 1 cup (80g) rolled oats
    • 3/4 cup (100g) raisins
    • 3/4 cup (80g) walnuts, roughly chopped
    • 100g (3.5 oz) dried apricots, chopped
    • 1 medium ripe banana, mashed
    • 100g (3.5 oz) dark chocolate (without added sugar), chopped
    • 1 teaspoon coconut oil (or oil of your choice)

    Instructions:

    Preheat the Oven:

    1. Preheat your oven to 180°C (360°F). Line a baking dish or tray with parchment paper.

    Mix the Ingredients:

    1. In a large mixing bowl, combine the rolled oats, raisins, walnuts, and dried apricots.
    2. Stir in the mashed banana until everything is well mixed and the mixture starts to stick together.

    Form the Bars:

    1. Transfer the mixture to the prepared baking dish. Press it down firmly into an even layer to help the bars stick together after baking.

    Bake:

    1. Place the baking dish in the preheated oven and bake for 20 minutes, or until the edges start to turn golden brown.

    Prepare the Chocolate Topping:

    1. While the bars are baking, melt the dark chocolate with the coconut oil. You can do this in a microwave in short bursts of 20 seconds, stirring in between, or use a double boiler on the stove.

    Add Chocolate Layer:

    1. Once the bars are done, remove them from the oven and while still warm, pour the melted chocolate over the top, spreading it out to cover the surface evenly.

    Refrigerate:

    1. Allow the chocolate to set at room temperature, then place the bars in the refrigerator for 20-30 minutes to firm up the chocolate and make the bars easier to cut.
    See also  air fryer shrimp deviled eggs

    Cut and Serve:

    1. Once chilled, remove the bars from the refrigerator and lift them out of the dish using the edges of the parchment paper.
    2. Cut into desired sizes and shapes.

    Storage:

    1. Store the bars in an airtight container in the refrigerator. They can also be wrapped individually for on-the-go snacks.

    Tips:

    • Use ripe bananas for natural sweetness and proper binding.
    • Customize with your favorite nuts and dried fruits.
    • Toast oats and nuts for a crunchier texture if desired.

    Serving Suggestions:

    Enjoy these Homemade Sugar-Free Energy Bars as a quick breakfast option, a midday snack, or a post-workout refuel. Pair them with a cup of tea or coffee for a satisfying treat.

    Cooking Tips:

    • Ensure the banana is ripe for natural sweetness and better binding of the ingredients.
    • Customize the bars with your favorite nuts, dried fruits, or seeds for added texture and flavor.
    • Press the mixture firmly into the baking dish to create cohesive bars.
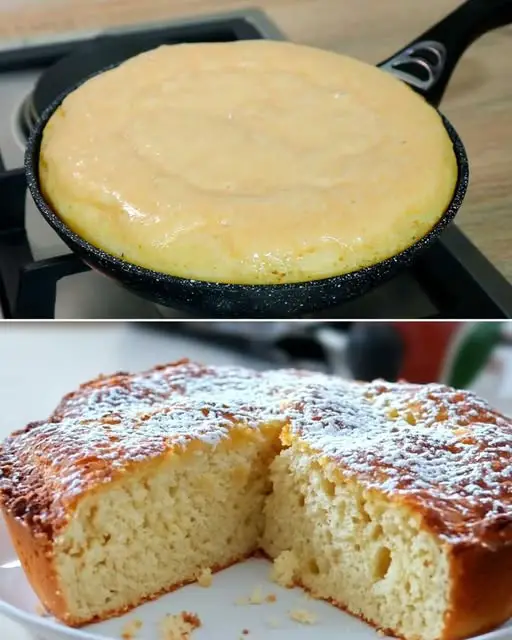
  • No-Oven Italian Pie: A 12-Spoon Miracle Recipe

    No-Oven Italian Pie: A 12-Spoon Miracle Recipe

    No-Oven Italian Pie: A 12-Spoon Miracle Recipe

    Table of Contents

    Ingredients

    For the Pie

    • Eggs: 3 large, room temperature
    • Sugar: 12 tablespoons (approximately 140g)
    • Milk: 12 tablespoons (100-120ml), room temperature
    • Vegetable oil: 12 tablespoons (100-120ml), refined
    • Flour: 12 tablespoons with a small heap (approximately 240g)
    • Baking powder: 1 tablespoon
    • Lemon: 1 (zest and juice of half)
    • Salt: 1 pinch

    For Finishing

    • Powdered sugar for dusting
    • Additional vegetable oil for greasing

    Step-by-Step Instructions

    Preparation (10 minutes)

    1. Prepare your pan:
    • Use a 22-24cm diameter frying pan (22cm preferred)
    • Cut parchment paper to fit bottom
    • Grease pan and parchment thoroughly
    1. Prepare lemon:
    • Grate zest (yellow part only)
    • Squeeze juice from half the lemon

    Making the Batter (15 minutes)

    1. Start with eggs:
    • Break 3 room temperature eggs into a bowl
    • Add pinch of salt
    • Add 12 tablespoons sugar (not heaping)
    • Whisk 3-5 minutes until light and fluffy
    1. Add wet ingredients:
    • Pour in 12 tablespoons room temperature milk
    • Add 12 tablespoons refined vegetable oil
    • Mix well after each addition
    • Add lemon zest and juice of half lemon
    • Whisk to combine
    1. Add dry ingredients:
    • Sift 12 slightly heaped tablespoons flour
    • Add baking powder
    • Whisk until smooth (batter should be flowing)

    Baking Process (30-40 minutes)

    1. Prepare pan:
    • Place parchment on bottom
    • Grease thoroughly
    • Pour in batter
    1. Cook on stovetop:
    • Use lowest heat setting
    • Place pan in center of burner
    • Cover with lid
    • Wipe condensation from lid occasionally
    • Cook 20-30 minutes
    1. Flip pie:
    • Cover with parchment and plate
    • Carefully flip
    • Return to pan with new parchment
    • Cook additional 7-10 minutes
    • Test with toothpick for doneness
    See also  Tropical Delight: Fruity Tapioca Jelly Drink

    Nutritional Information (per serving)

    • Calories: 285
    • Protein: 5g
    • Carbohydrates: 35g
    • Fat: 15g
    • Sugar: 18g
    • Fiber: 1g

    Pro Cooking Tips and Tricks

    1. Temperature Control:
    • Maintain lowest possible heat
    • Center pan on burner
    • Check bottom frequently for even browning
    1. Ingredient Temperature:
    • Room temperature eggs for more volume
    • Room temperature milk for better mixing
    • Consistent tablespoon measurements
    1. Texture Success:
    • Whisk eggs and sugar thoroughly
    • Sift dry ingredients
    • Don’t overmix after adding flour

    Variations and Substitutions

    1. Flavoring Options:
    • Replace lemon with vanilla sugar
    • Add orange zest instead of lemon
    • Include ground cinnamon
    • Add vanilla extract
    1. Serving Suggestions:
    • Dust with powdered sugar
    • Split and fill with cream
    • Serve with fresh berries
    • Add whipped cream
    1. Pan Options:
    • 22cm pan for taller pie
    • 24cm pan for thinner pie
    • Non-stick or well-seasoned regular pan
  • Lemon Crème Fraîche Cake with Lemon Syrup

    Lemon Crème Fraîche Cake with Lemon Syrup

    Lemon Crème Fraîche Cake with Lemon Syrup

    Table of Contents

    Ingredients

    For the Cake

      • Butter: 150 g (2/3 cup), softened
      • Salt: a pinch
      • Sugar: 150 g (3/4 cup)
      • Lemon Zest: from 2 lemons
      • Eggs: 3
      • Fluid Crème Fraîche: 150 ml (2/3 cup)
    • Flour: 250 g (2 cups)
    • Baking Powder: 11 g (approximately 2 1/4 tsp)

    For the Lemon Syrup

      • Water: 2 tbsp
    • Lemon Juice: 2 tbsp (from 1 lemon)
    • Sugar: 2 tbsp

    Directions

    Prepare the Cake Batter

    1. Cream Butter and Sugar:
        • In a mixing bowl, beat the softened butter with a pinch of salt until smooth.


      • Add the sugar and lemon zest, and mix until light and fluffy.
    2. Add Eggs and Crème Fraîche:
        • Add the eggs one at a time, mixing well after each addition.


      • Pour in the crème fraîche and mix until fully incorporated.
    3. Add Dry Ingredients:
        • Sift in the flour and baking powder, then fold gently into the wet mixture until just combined.


    Bake the Cake

    1. Prepare the Pan and Bake:
        • Preheat your oven to 180°C (350°F).
        • Grease a cake pan with butter and pour in the batter, spreading it evenly.


      • Bake in the preheated oven for 30-40 minutes, or until a toothpick inserted into the center comes out clean.

    Prepare the Lemon Syrup

    1. Make the Syrup:
        • In a small saucepan, combine 2 tbsp of water, 2 tbsp of lemon juice, and 2 tbsp of sugar.


      • Heat over low heat, stirring until the sugar dissolves. Remove from heat.

    Finish and Serve

    1. Add Syrup and Serve:
        • While the cake is still warm, drizzle the lemon syrup over the top, allowing it to soak in for extra moisture and flavor.


      • Allow the cake to cool before slicing and serving.

    Serving Suggestions

      • Serve with a dollop of whipped cream or a scoop of vanilla ice cream.
      • Garnish with lemon slices or a sprinkle of powdered sugar for a decorative touch.
      • Pair with a hot cup of tea or coffee.
      • Add fresh berries on the side for added color and flavor.
    • Serve as a light dessert or a refreshing snack.

    Cooking Tips

      • Use freshly grated lemon zest for the best flavor.
      • Ensure all ingredients are at room temperature for even mixing.
      • Be gentle when folding in the flour to avoid overmixing, which can make the cake dense.
      • Adjust the sweetness of the syrup to taste by adding more or less sugar.
      • For extra lemon flavor, add a bit of lemon zest to the syrup.

    Nutritional Benefits

      • Lemons: High in vitamin C and antioxidants.
      • Crème Fraîche: Adds calcium and a creamy texture.
      • Eggs: Provide protein and essential vitamins.

    Dietary Information

      • Vegetarian: Contains no meat or fish.
      • Nut-Free: Safe for those with nut allergies.
      • Dairy-Free Option: Substitute crème fraîche and butter with dairy-free alternatives.

    Nutritional Facts (Per Serving Estimate)

      • Calories: ~250 kcal
      • Carbohydrates: 30 g
      • Fat: 12 g
    • Protein: 4 g
    • Fiber: 1 g

    Storage

      • Store leftovers in an airtight container at room temperature for up to 2 days, or refrigerate for up to a week.
    • This cake also freezes well; wrap tightly and freeze for up to a month. Thaw at room temperature before serving.
  • Pineapple and Apple Puff Pastry Tart with Cinnamon and Pomegranate

    Pineapple and Apple Puff Pastry Tart with Cinnamon and Pomegranate

    Ingredients

    For the Puff Pastry Tart:

      • 500 g of puff pastry (store-bought or homemade)
      • 500 grams of canned pineapple (drained and chopped)
      • 1 apple (peeled, cored, and sliced thinly)
      • 3 tablespoons of sugar (for the filling)
      • 1 teaspoon of cinnamon (for that warm, comforting flavor)
    • 1 egg (for egg wash to give the pastry a golden finish)

    For Garnishing:

      • Pomegranate berries (for a colorful and refreshing burst)
      • Black loose leaf tea (optional, for serving to complement the tart)

    For Flavoring:

    • 1 tablespoon of sugar (for caramelizing the apples slightly)
    • 1 teaspoon of grated ginger (optional, for an extra kick of warmth)

    Step-by-Step Instructions

    1. Preheat the Oven

    Start by preheating your oven to 200°C (400°F). This will allow your puff pastry to bake perfectly, becoming golden and crisp.


    2. Prepare the Fruit Filling

      • Canned Pineapple: Open the can of pineapple, drain it well, and chop the pineapple into small, bite-sized chunks. If you prefer a smoother filling, you can blend the pineapple slightly, but chunky pieces will add more texture to the tart.
      • Apple: Peel and core the apple. Slice it thinly, ensuring the slices are uniform so that they cook evenly when baking.
    See also  Chocolate Sponge Cake with Buttercream Filling: A Decadent Delight

    3. Season the Fruit

    In a small bowl, combine the pineapple chunks, thin apple slices, sugar, and cinnamon. Stir gently to coat the fruits evenly. The sugar will help caramelize the fruit while baking, while the cinnamon adds a cozy, aromatic warmth.

    4. Prepare the Puff Pastry

    Roll out the puff pastry onto a piece of parchment paper or a lightly floured surface. If you’re using store-bought puff pastry, it should be rolled to a thickness of about 1/4 inch (0.6 cm). The pastry should be big enough to accommodate the fruit filling, so ensure the edges are slightly raised to form a border.


    5. Assemble the Tart

    Place the rolled puff pastry onto a baking sheet. Leave a small border around the edges to prevent the filling from spilling out during baking. Spread the cinnamon and sugar-seasoned fruit mixture evenly over the center of the pastry, leaving some space around the edges.

    6. Egg Wash the Pastry

    In a small bowl, whisk the egg. Using a pastry brush, lightly brush the edges of the puff pastry with the egg wash. This will help the pastry develop a golden, shiny finish as it bakes.


    7. Bake the Tart

    Place the tart into the preheated oven and bake for 30 to 35 minutes, or until the pastry is puffed and golden brown, and the fruit filling is bubbling and caramelized. You may want to check after 20 minutes and if necessary, cover the edges of the pastry with foil to prevent over-browning.

    8. Garnish with Pomegranate

    Once the tart is out of the oven, let it cool for a few minutes. While it’s still warm, sprinkle pomegranate seeds generously over the top for a burst of color and flavor. The pomegranate not only adds a lovely crunch but also provides a juicy, tangy contrast to the sweetness of the pineapple and apple.

  • Discover the Easy Homemade Puff Pastry Secret

    Discover the Easy Homemade Puff Pastry Secret

    Discover the Easy Homemade Puff Pastry Secret

    Table of Contents

    You won’t believe how simple and delicious making your own puff pastry can be with this quick method, and no eggs needed!

    1f4dd Ingredients:

    • 100 grams of unsalted butter 1f9c8
    • 1 and 1/2 tsp salt 1f9c2
    • 500 grams of bread flour 1f35e
    • 200 grams of water 1f4a7
    • 250 grams of margarine or special butter for making puff pastry (available online) 1f9c8

    ‍ Instructions:

    1. Mix unsalted butter and salt with the bread flour.
    2. Gradually add water to the mixture while kneading until you have a smooth dough.
    3. Roll out the dough into a rectangle shape, about 1/4 inch thick.
    4. Spread a layer of margarine or special puff pastry butter evenly over two-thirds of the dough.
    5. Fold the uncovered third of the dough over the buttered section, then fold the remaining third over the top (similar to folding a letter).
    6. Roll out the folded dough into a rectangle again.
    7. Repeat the folding process and then chill the dough in the refrigerator for about 30 minutes.
    8. Roll and fold the dough twice more, chilling for 30 minutes between each fold.
    9. Your puff pastry is now ready to be used in your favorite pastry recipes!
    10. Enjoy your homemade puff pastry, and you’ll wonder why you didn’t try this method sooner!
  • Lemon Yogurt Cake with Candied Fruit

    Lemon Yogurt Cake with Candied Fruit

    Lemon Yogurt Cake with Candied Fruit

    Table of Contents

    Ingredients:

      • 2 eggs


      • Pinch of salt
      • 100g sugar (½ cup)
      • 120ml oil (½ cup)


      • 125g yogurt (½ cup)
      • Zest and juice of half a lemon
      • 180g flour (1½ cups)


    • 2 teaspoons (10g) baking powder
    • 3 tablespoons candied fruit

    Directions:

      1. Preheat the oven to 175°C (350°F) and grease a 25x13cm (9×5 inches) loaf pan or line it with parchment paper.


      1. In a large bowl, beat the eggs with a pinch of salt until slightly frothy.
      2. Add the sugaroilyogurtlemon zest, and lemon juice to the eggs. Whisk until smooth and well combined.
      3. Sift in the flour and baking powder, then gently fold the dry ingredients into the wet mixture using a spatula or whisk. Be careful not to overmix.


      1. Stir in the candied fruit, ensuring they are evenly distributed throughout the batter.
      2. Pour the batter into the prepared loaf pan and smooth the top with a spatula.
      3. Bake for 30-35 minutes, or until a toothpick inserted into the center comes out clean.


    1. Allow the cake to cool in the pan for 10 minutes, then transfer it to a wire rack to cool completely.
    2. Slice and enjoy with a dusting of powdered sugar or a drizzle of lemon glaze, if desired.

    Serving Suggestions:

      • Serve the cake warm or at room temperature with a side of fresh whipped cream or vanilla ice cream.


    • For a citrusy burst, drizzle the cake with a lemon glaze made from powdered sugar and lemon juice.
    • Pair with a cup of tea or coffee for a refreshing afternoon snack.
    See also  Creamy Coffee Delight with Whipped Cream and Vanilla

    Cooking Tips:

      • To prevent the candied fruit from sinking to the bottom, lightly toss them in flour before adding them to the batter.


    • You can substitute Greek yogurt for a thicker texture and richer flavor.
    • For an extra lemony flavor, add more lemon zest or a dash of lemon extract to the batter.

    Nutritional Benefits:

      • Eggs provide high-quality protein and essential vitamins.


      • Yogurt offers a good source of calcium and probiotics for gut health.
      • Lemon juice and zest are rich in vitamin C, boosting immunity and offering antioxidant benefits.
      • The oil used in this recipe helps maintain the cake’s moist texture without adding butter.


    Dietary Information:

      • This recipe is vegetarian.
      • Can be made dairy-free by substituting regular yogurt with plant-based yogurt.
      • You can substitute whole wheat flour for a higher-fiber option, but it may change the texture slightly.


    Nutritional Facts (per slice):

      • Calories: ~220
      • Carbohydrates: 28g
      • Protein: 3g


      • Fat: 10g
      • Sugar: 12g
      • Fiber: 1g


    Storage:

      • Room temperature: Store in an airtight container for up to 3 days.
      • Refrigerator: The cake will stay fresh for up to 5 days.
      • Freezer: Wrap tightly and freeze for up to 2 months. Defrost at room temperature before serving.


    Why You’ll Love This Recipe:

      • The yogurt keeps the cake incredibly moist and light.
      • The bright lemon flavor pairs wonderfully with the sweetness of the candied fruit.
      • It’s easy to make and perfect for casual gatherings or special occasions.


    • It’s a versatile cake that can be adapted with different fruits or glazes.
  • Moist Date Cake

    Moist Date Cake

    Moist Date Cake

    Table of Contents

    Ingredients:


      • 1 cup (150 g) pitted dates, chopped
      • 1 cup (250 ml) hot water
      • 1 teaspoon baking soda


      • 1/2 cup (115 g) unsalted butter, softened
      • 3/4 cup (150 g) sugar
      • 2 large eggs


      • 1 teaspoon vanilla extract
      • 1 1/2 cups (190 g) all-purpose flour
      • 1 teaspoon baking powder


      • 1/2 teaspoon ground cinnamon
      • 1/4 teaspoon ground nutmeg (optional)
      • A pinch of salt


    Directions:

    • Prepare the Date Mixture:
        • Place the chopped dates in a bowl and pour the hot water over them.
        • Stir in the baking soda and let it sit for 10 minutes to soften the dates.


    • Preheat the Oven and Prepare the Pan:
        • Preheat your oven to 350°F (175°C).
        • Grease and flour an 8-inch (20 cm) round or square baking pan.


    • Make the Batter:
        • In a mixing bowl, cream the butter and sugar until light and fluffy.
        • Add the eggs one at a time, beating well after each addition.


        • Mix in the vanilla extract.
        • Sift together the flour, baking powder, cinnamon, nutmeg (if using), and salt in a separate bowl.
        • Gradually add the dry ingredients to the wet mixture, alternating with the date mixture, starting and ending with the dry ingredients. Mix until just combined.


    • Bake the Cake:
        • Pour the batter into the prepared baking pan and smooth the top.
        • Bake in the preheated oven for 35-40 minutes, or until a toothpick inserted into the center comes out clean.


    • Cool and Serve:
        • Allow the cake to cool in the pan for 10 minutes, then transfer it to a wire rack to cool completely.
        • Serve plain, with powdered sugar, or drizzled with caramel sauce.


    Serving Suggestions:

      • Serve with a dollop of whipped cream or a scoop of vanilla ice cream.


      • Pair with a cup of tea or coffee for a cozy snack.
      • Drizzle with homemade caramel or toffee sauce for an indulgent dessert.
      • Add a sprinkle of chopped walnuts or pecans for extra crunch.


    • Serve warm with a side of cream cheese frosting for a decadent treat.

    Cooking Tips:

      • Ensure the dates are finely chopped for even distribution throughout the cake.


      • For extra richness, substitute brown sugar for part of the granulated sugar.
      • Add a handful of chopped nuts or chocolate chips to the batter for variety.
      • If using dried dates, soak them in hot water for an additional 5 minutes.


    • Let the cake cool slightly before slicing to retain its shape.

    Nutritional Benefits:

      • Dates are rich in natural sugars, fiber, and antioxidants.


    • A good source of energy and perfect for satisfying sweet cravings naturally.

    Dietary Information:

      • Contains gluten, dairy, and eggs.


    • Can be made dairy-free by substituting butter with a plant-based alternative.

    Nutritional Facts (Per Slice, Based on 10 Slices):


      • Calories: 220


      • Protein: 3g
      • Carbohydrates: 34g
      • Fat: 8g


    • Fiber: 2g

    Storage:

      • Store the cake in an airtight container at room temperature for up to 3 days.


    • Refrigerate for up to a week or freeze slices for up to 3 months. Thaw at room temperature before serving.
  • Decadent Chocolate Cookie Cream Cake

    Decadent Chocolate Cookie Cream Cake

    Decadent Chocolate Cookie Cream Cake

    Table of Contents

    Ingredients

    For the Cake Base:

      • Butter: 100 g (softened)
      • Cookies: 300 g (crushed into fine crumbs)
      • Walnuts: 30 g (chopped, optional for crunch)


    For the Cream Layer:

      • Cream: 500 ml (whipping cream or heavy cream)
      • Condensed milk: 200 g
      • Cocoa powder: 20 g


    For the Chocolate Glaze:

    • Dark chocolate: 100 g (melted)
    • Butter: 20 g (for shine and smoothness)

    Steps

    Step 1: Prepare the Cookie Base

      1. Crush the cookies into fine crumbs using a food processor or by placing them in a ziplock bag and crushing with a rolling pin.
      2. In a mixing bowl, combine the cookie crumbs, softened butter, and chopped walnuts. Mix until the texture resembles wet sand.


    1. Press this mixture evenly into the base of a springform pan or a lined baking dish to create a firm crust. Refrigerate while you prepare the cream layer.

    Step 2: Whip the Cream Layer

      1. In a large bowl, whip the cream until soft peaks form.
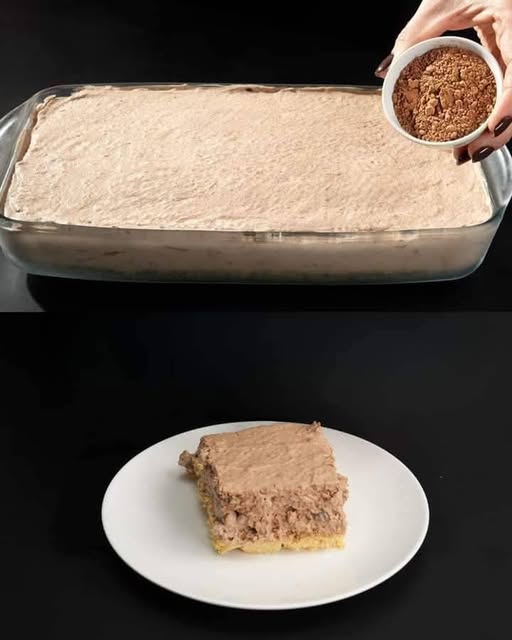
      2. Add the condensed milk and sifted cocoa powder into the whipped cream. Gently fold until smooth and well combined.


    1. Spread the cream mixture evenly over the cookie base. Smooth the top with a spatula for an even finish.

    Step 3: Make the Chocolate Glaze

      1. Melt the dark chocolate with the butter in a heatproof bowl over simmering water (double boiler method) or in the microwave in 20-second intervals. Stir until smooth and glossy.
      2. Allow the glaze to cool slightly before pouring it over the cream layer. Spread it evenly using a spatula or tilt the pan gently to cover the surface.
    See also  Vanilla Cake


    Step 4: Chill the Cake

    1. Cover the cake with plastic wrap and refrigerate for at least 2-3 hours, or until fully set. For best results, chill overnight.

    Step 5: Garnish and Serve

    1. Before serving, optionally garnish with extra chopped walnuts, cookie crumbs, or chocolate shavings for added flair.
    2. Slice with a warm knife for clean cuts and serve chilled.
  • Pineapple Coconut Cake with Coconut Lemon Icing

    Pineapple Coconut Cake with Coconut Lemon Icing

    Pineapple Coconut Cake with Coconut Lemon Icing

    Table of Contents

    Ingredients

    Dry Ingredients:

    • 1 cup (160 g) rice flour
    • 1 cup (90 g) oat flour (gluten-free if needed)
    • ½ scant cup (50 g) cornstarch
    • ¾ cup (75 g) shredded unsweetened coconut
    • 2 Tbsp (10 g) ground flax seeds
    • 1½ tsp baking powder
    • ½ tsp baking soda

    Wet Ingredients:

    • ½ small/medium fresh pineapple (350 g) (see instructions)
    • ¼ cup (60 g) canned coconut milk
    • ⅓ cup (110 g) maple syrup
    • 1 tsp vanilla extract

    Icing:

    • ⅓ heaped cup (50 g) powdered erythritol or icing sugar
    • 1 Tbsp canned coconut milk
    • ½ Tbsp lemon juice

    Instructions

    1. Prepare Pineapple Purée: Chop 1/2 of a small/medium pineapple (peeled) into chunks, then blend in a high-speed blender until smooth. You’ll need 1 1/2 cups (350 grams) of purée for this recipe. Set aside.
    2. Preheat Oven: Preheat the oven to 350°F (180°C) and line a 9-inch (23 cm) cake pan with parchment paper. Note: I used an 8-inch (20 cm) pan and had some leftover batter, which I used for muffins.
    3. Process Dry Ingredients: In a food processor or blender, process all dry ingredients (rice flour, oat flour, cornstarch, shredded coconut, ground flax seeds, baking powder, and baking soda).
    4. Combine Wet and Dry Ingredients: Add the wet ingredients (pineapple purée, coconut milk, maple syrup, and vanilla extract) to the dry ingredients and pulse again until just combined.
    5. Bake: Pour the mixture into the prepared cake pan and bake in the preheated oven for about 45-50 minutes, or until a toothpick inserted into the center of the cake comes out clean.
    6. Cool: Let the cake cool in the pan for 10-15 minutes, then transfer it to a cooling rack to cool completely.
    7. Prepare Icing: In a small bowl, mix the ingredients for the icing (powdered erythritol, coconut milk, and lemon juice) with a whisk until smooth.
    8. Drizzle Icing: Once the cake is fully cooled, drizzle the icing over the top. Let the icing set before serving.
    See also  The Eggplant Craze: Mastering the Easy Eggplant Casserole Recipe

    Notes

    • Flour: You can use regular flour instead of rice flour if the recipe doesn’t need to be gluten-free.
    • Cornstarch: Potato flour should work as a substitute.
    • Shredded Coconut: You can use 75 grams of ground, blanched almonds (almond flour) instead. Any other ground nuts should be fine too.
    • Maple Syrup: Any other liquid sweetener can be used.

    Serving Suggestions

    • Serve slices of the cake with a cup of tea or coffee.
    • Enjoy it as a dessert or a sweet snack.

    Storage

    • Store leftovers in an airtight container at room temperature for up to 2 days.
    • For longer storage, keep the cake in the refrigerator for up to a week. Bring to room temperature before serving.

    Cooking Tips

    • Measure the ingredients in grams for the most accurate results.
    • Ensure the pineapple purée is smooth to avoid chunks in the cake.

    Nutritional Benefits

    • Pineapple adds a boost of vitamin C and natural sweetness.
    • Coconut provides healthy fats and a delicious flavor.

    Dietary Information

    • This recipe is gluten-free and can be made vegan by ensuring all ingredients used are plant-based.