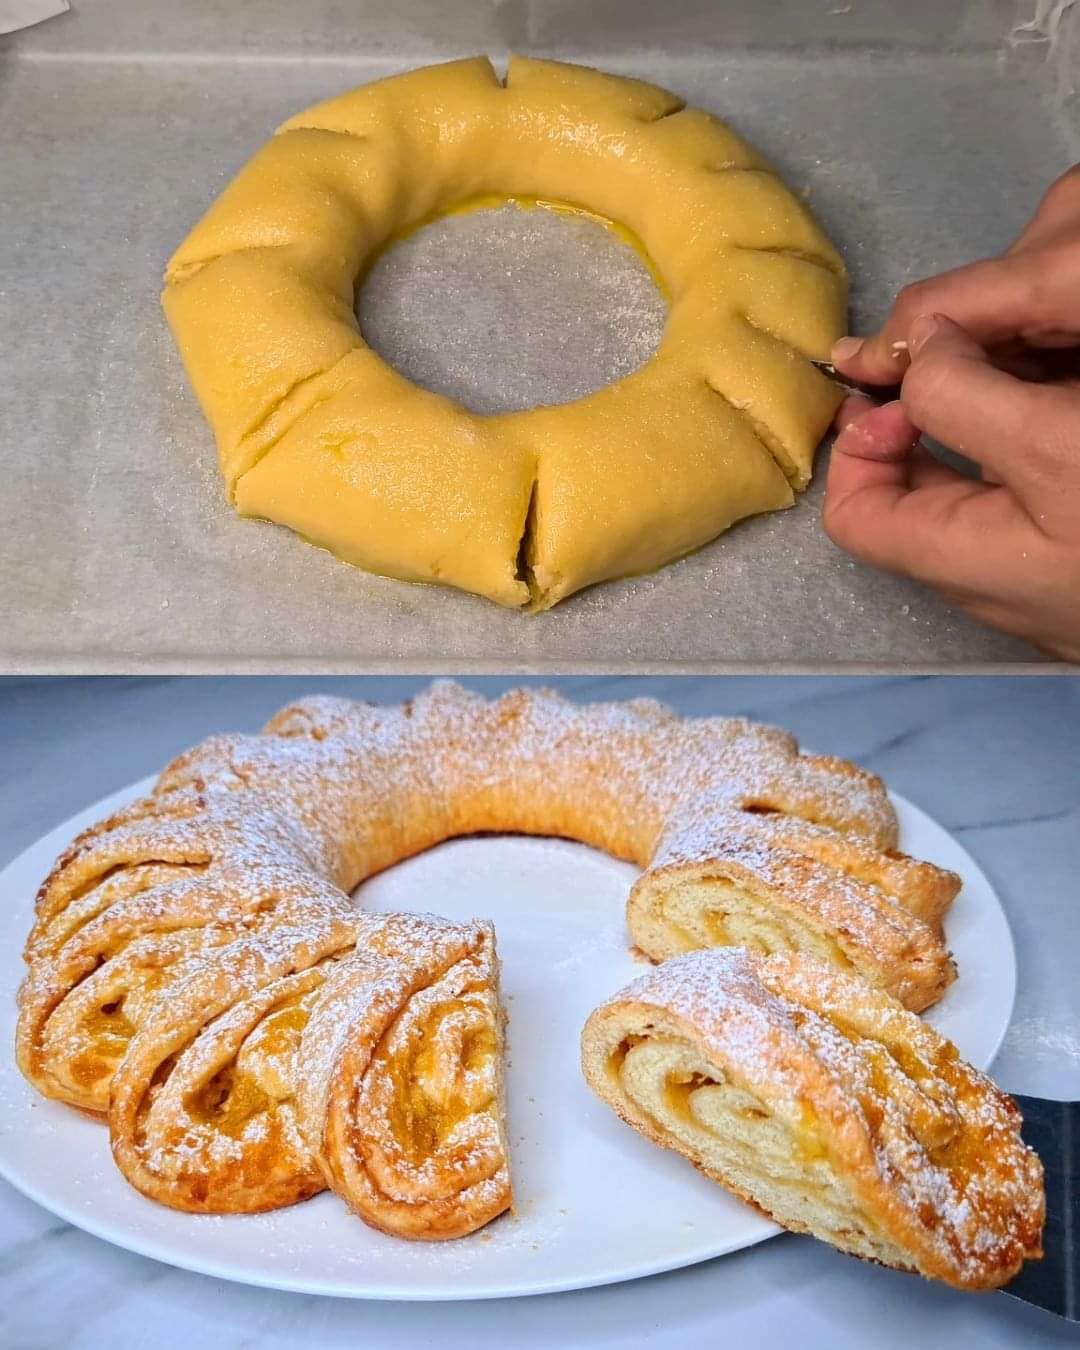
Category: healthy food

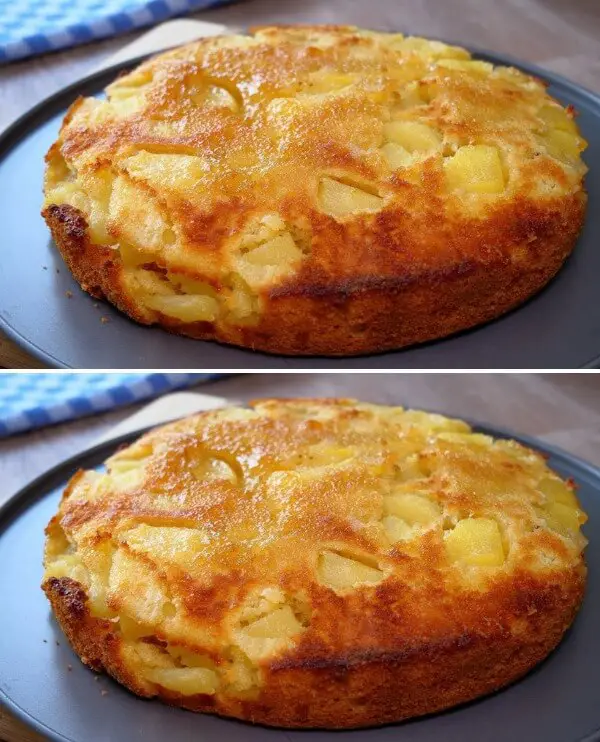
  • Lemon and Jam Cake Recipe

    Lemon and Jam Cake Recipe

    Lemon and Jam Cake Recipe

    Table of Contents

    Ingredients:


      • For the Batter:
          • 2 eggs
          • 1/2 cup (100g) sugar
          • 1 packet vanilla (vanillina)


          • Juice of 1 lemon
          • 1/4 cup (50ml) vegetable oil
          • 1/4 cup (50ml) milk


        • 1 1/3 cups (200g) all-purpose flour
        • 2 tsp (10g) baking powder


      • For Topping:
        • Jam (any flavor you like)
        • Shredded coconut


    Directions:

      • Prepare the Batter:
          • In a bowl, beat the eggs and sugar until light and fluffy. Add the vanilla, lemon juice, vegetable oil, and milk, mixing well.
          • Gradually incorporate the flour and baking powder, stirring until smooth.


      • Bake the Cake (Part 1):
        • Pour half of the batter into a greased 24 cm (9.5-inch) cake pan. Bake at 180°C (356°F) for 10 minutes.


    • Bake the Cake (Part 2):
      • Remove the pan from the oven and pour the remaining batter on top. Increase the temperature to 190°C (374°F) and bake for an additional 30 minutes.
    • Add Toppings:
        • Once cooled, brush the top with jam and sprinkle with shredded coconut.


    Serving Suggestions:

      • Serve with a cup of tea or coffee.


      • Perfect for dessert at family gatherings.
      • Enjoy as a light breakfast or afternoon snack.
      • Pairs well with a fresh fruit salad.

    Cooking Tips:

      • Ensure the cake is fully cooled before adding the jam to prevent it from melting.
      • Use a toothpick to check for doneness—insert into the center; it should come out clean.


    • For a richer flavor, use homemade jam or fruit preserves.
    • Grease the pan well to ensure the cake releases easily.
  • No-Bake Chocolate Custard Delight

    No-Bake Chocolate Custard Delight

    No-Bake Chocolate Custard Delight

    Table of Contents

    Ingredients

      • 5 chicken eggs
      • 200 g sugar
      • 1 l milk
      • 70 g corn starch
      • 200 g cookies
      • 40 g cocoa powder
      • 100 g dark chocolate
      • 50 ml cream

    Instructions

      1. In a large mixing bowl, whisk together the eggs and sugar until well combined.
      2. In a saucepan, heat the milk over medium heat until warm, then gradually add the corn starch, stirring constantly to avoid lumps.
      3. Slowly pour the egg mixture into the milk, continuing to stir until it thickens to a custard-like consistency.
      1. Remove from heat and add the cocoa powder, stirring until fully incorporated.
      2. Crush the cookies into small pieces and distribute them evenly into serving bowls or glasses.
      3. Pour the chocolate custard over the cookies, filling the bowls or glasses.
    1. Melt the dark chocolate with the cream in a microwave or over a double boiler, then drizzle over the top of the desserts.
    2. Allow to cool slightly before serving.

    Cooking Tips

      • Use a whisk to ensure a smooth custard without lumps.
    • For a richer flavor, use high-quality dark chocolate.
    • Customize with your favorite cookies or add a splash of vanilla extract for extra depth.

    Nutritional Benefits

    This dessert provides a good source of protein from the eggs and milk, while the dark chocolate adds antioxidants. It’s a delightful way to enjoy a sweet treat with some nutritional benefits.

    Why You’ll Love This Recipe

    You’ll love this No-Bake Chocolate Custard Delight because it’s incredibly easy to make, requires no baking, and is ready in just 5 minutes. The combination of creamy custard, crunchy cookies, and rich chocolate makes it an irresistible dessert for any occasion.

    Dietary Information

      • Contains eggs, dairy, and gluten (from the cookies).
      • Not suitable for those with egg or dairy allergies.
    • Can be adapted for gluten-free diets by using gluten-free cookies.
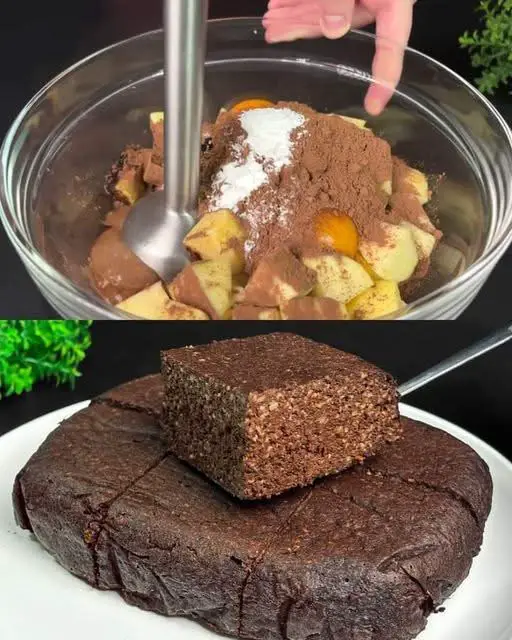
  • Cocoa Banana Oatmeal Bake

    Cocoa Banana Oatmeal Bake

    Cocoa Banana Oatmeal Bake

    Table of Contents

    Ingredients

      • 1 cup oatmeal
      • 1 tablespoon cocoa powder
      • 30g walnuts, chopped
      • 1 teaspoon vanilla sugar
      • 30g ground almonds
      • 30g oat flakes
      • 1 banana, mashed
      • 160ml water

    Directions

    Preheat the Oven:

    • Preheat your oven to 180°C (360°F) to ensure it’s ready for baking.

    Mix Dry Ingredients:

    • In a large bowl, combine the oatmeal, cocoa powder, chopped walnuts, vanilla sugar, ground almonds, and oat flakes. Mix well to evenly distribute the ingredients.

    Add Wet Ingredients:

      • Add the mashed banana and water to the dry mixture. Stir thoroughly until all ingredients are well combined.

    Prepare the Baking Dish:

    • Lightly grease a baking dish with oil to prevent sticking. Pour the oatmeal mixture into the prepared dish and spread it evenly.

    Bake:

    • Place the dish in the preheated oven and bake for 25 minutes, or until the top is set and a toothpick inserted into the center comes out clean.

    Cool and Serve:

      • Allow the bake to cool slightly before serving. Enjoy warm for a comforting dessert or at room temperature for a quick snack.

    Serving Suggestions

      • Serve warm with a dollop of Greek yogurt or a scoop of vanilla ice cream for an indulgent treat.
      • Pair with a hot cup of coffee or tea for a satisfying snack.
      • Enjoy with fresh berries or a drizzle of honey for added sweetness.

    Cooking Tips

      • For a richer flavor, add a handful of dark chocolate chips to the mixture.
      • Substitute the walnuts with pecans or hazelnuts for a different nutty flavor.
      • Use almond milk instead of water for a creamier texture.
    See also  Don’t Cook Dinner Until You See These Recipes! Incredibly Delicious, Quick, and Easy!

    Nutritional Benefits

      • Oatmeal: Provides fiber, vitamins, and minerals, promoting digestive health and sustained energy.
      • Banana: Adds natural sweetness and is rich in potassium and vitamins B6 and C.
      • Walnuts: Offer healthy fats, protein, and essential nutrients for heart health and brain function.
    • Cocoa Powder: Contains antioxidants and can boost mood and cognitive function.
    • Ground Almonds: Provide protein, healthy fats, and essential nutrients like vitamin E and magnesium.

    Dietary Information

      • Gluten-Free: Ensure all ingredients are certified gluten-free if you are sensitive to gluten.
      • No Refined Sugar: Sweetened naturally with banana and a small amount of vanilla sugar.
      • Vegetarian: Contains no meat or fish products.
      • High in Fiber: Oats and bananas provide a good amount of dietary fiber.

    Storage Tips

    • Store any leftovers in an airtight container at room temperature for up to 2 days.
    • For longer storage, keep it in the refrigerator for up to a week.
    • The bake can also be frozen for up to a month. Thaw at room temperature before serving.
  • Authentic Italian Bread

    Authentic Italian Bread

    Skip to content

    Home
    Easy Recipes
    Air Fryer Recipes
    Contact
    Disclaimer
    Authentic Italian Bread
    Authentic Italian Bread
    October 31, 2024 by Healthy Recipes
    Authentic Italian Bread
    Table of Contents
    Ingredients
    For the Starter:
    Warm Water: 100 ml
    Purpose: Activates the yeast, providing the necessary environment for the fermentation process.
    Sugar: 1 teaspoon
    Purpose: Feeds the yeast, helping it to activate quickly.
    Dry Yeast: 8 g
    Purpose: The key ingredient for leavening, giving the bread its rise and airy texture.

    Wheat Flour: 3 tablespoons (full)
    Purpose: Provides structure to the starter, creating a smooth base for the dough.
    For the Dough:
    Wheat Flour: 500 g (sifted)
    Purpose: The main component of the dough, providing the necessary gluten structure for the bread.
    Salt: 1.5 teaspoons
    Purpose: Enhances the flavor of the bread and strengthens the gluten network.

    Warm Water: 350 ml
    Purpose: Hydrates the flour, helping to form the dough and activate the yeast.
    Vegetable Oil: 30 ml
    Purpose: Adds moisture and helps achieve a soft crumb in the finished bread.
    Instructions
    1. Prepare the Starter:
    Combine Ingredients: In a small bowl, combine 100 ml of warm water, 1 teaspoon of sugar, 8 g of dry yeast, and 3 tablespoons of wheat flour.
    Tip: Ensure the water is warm (not hot) to activate the yeast without killing it.

    Mix: Stir the mixture well until it’s smooth and free of lumps.
    Cover and Let Rise: Cover the bowl with cling film and place it in a warm spot. Let the starter rise for about 15-20 minutes, or until it becomes bubbly and frothy.
    Tip: The rise time may vary depending on the temperature of your kitchen.

    2. Prepare the Dough:
    Sift the Flour: In a large mixing bowl, sift 500 g of wheat flour to remove any lumps and ensure a light, airy texture in the finished bread.
    Tip: Sifting the flour also helps in evenly distributing the ingredients.
    Add Salt: Add 1.5 teaspoons of salt to the sifted flour and mix well to distribute evenly.
    Tip: Mixing the salt into the flour first ensures that it is evenly distributed and doesn’t come into direct contact with the yeast, which can inhibit its activity.
    Create an Indentation: Make a small well or indentation in the center of the flour mixture.
    Pour in Water: Pour 350 ml of warm water into the well.
    Tip: The warm water helps in dissolving the flour and activating the yeast further.
    Add the Starter: Add the risen starter to the flour mixture.
    Tip: The starter should be frothy and bubbly, indicating that the yeast is active.

    Mix the Dough: Using a wooden spoon or spatula, mix the ingredients together until a shaggy, sticky dough forms.
    Tip: The dough will be quite loose and sticky, which is exactly what you want for this type of bread.
    Incorporate the Oil: Add 30 ml of vegetable oil to the dough and mix thoroughly until the dough absorbs all the oil.
    Tip: The oil will make the dough more manageable and contribute to a tender crumb in the final product.
    3. First Rise:
    Cover and Let Rise: Cover the bowl with cling film and place it in a warm spot. Let the dough rise for 15-20 minutes.
    Tip: The dough will start to puff up slightly during this time.

    4. Turn the Dough:
    Fold the Dough: After the first rise, turn the dough over as shown in the video (or simply fold it over itself a few times in the bowl).
    Tip: Wet your hands slightly to prevent the dough from sticking too much.
    Cover and Let Rise Again: Cover with cling film and let the dough rise for another 15-20 minutes.
    Tip: This folding process helps to strengthen the dough’s structure, giving the bread a better rise.
    5. Second Turn:
    Fold Again: Wet your hands with water to prevent sticking, and turn the dough over again, folding it as before.
    Tip: This step helps to build gluten and distribute the yeast evenly throughout the dough.

    Final Rise: Cover the bowl with cling film and let the dough rise for 50-60 minutes, or until it has doubled in size.
    Tip: The longer rise allows for more flavor development and a lighter, airier crumb.
    6. Shape the Dough:
    Flour the Work Surface: Generously sprinkle your work surface with flour.
    Tip: This helps prevent the dough from sticking and makes it easier to shape.
    Turn Out the Dough: Carefully turn the dough out onto the floured surface. The dough will be quite liquid and sticky.
    Flatten and Fold: Gently flatten the dough and fold it several times to form a rough shape.
    Tip: Dust the dough and your hands with flour as needed to make handling easier.
    Divide the Dough: Dust the top of the dough generously with flour, then divide it into 4 equal parts using a bench scraper or knife.
    Tip: For an authentic look, shape the pieces into rustic, oval shapes reminiscent of ciabatta loaves.

    Prepare for Baking: Place the divided dough pieces onto a baking sheet lined with parchment paper.
    Tip: Leave enough space between the pieces to allow them to expand during baking.
    7. Final Rise:
    Cover and Let Rise: Cover the dough pieces with a clean kitchen cloth and let them rise for another 30 minutes.
    Tip: This final rise will give the bread a light, airy texture and ensure a good oven spring.
    8. Bake the Bread:
    Preheat the Oven: Preheat your oven to 200°C (392°F).
    Tip: A hot oven is key to getting a good crust on the bread.

    Create Steam: Place a bowl of boiling water in the oven to create steam. This helps in forming a nice, crusty exterior on the bread.
    Tip: Alternatively, you can spray the oven walls with water just before baking to create steam.
    Bake: Place the baking sheet in the preheated oven and bake the bread for 30-35 minutes, or until the tops are golden brown and crusty.
    Tip: The bread should sound hollow when tapped on the bottom, indicating it is fully baked.
    9. Cool the Bread:
    Cool on a Rack: Once baked, remove the bread from the oven and transfer it to a wire rack to cool completely.
    Tip: Letting the bread cool on a rack prevents the bottom from becoming soggy and ensures a nice, crisp crust

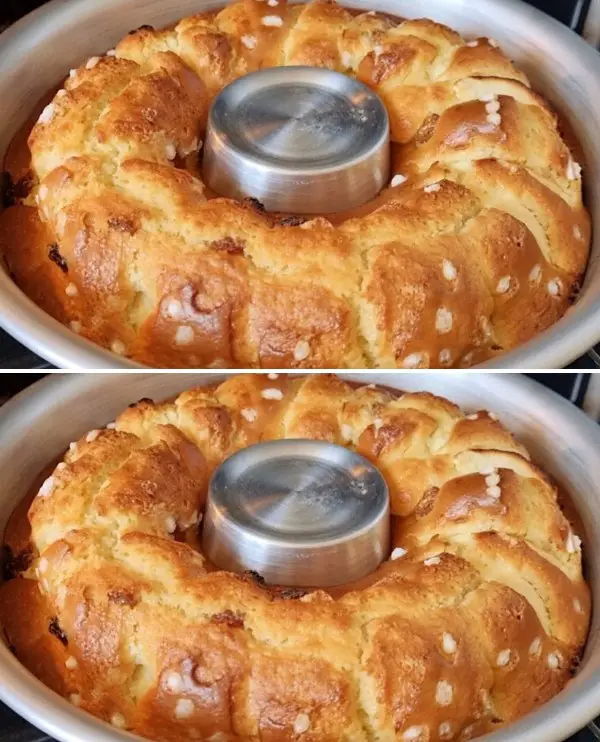
  • Vanilla Yogurt Cake with Jam and Coconut

    Vanilla Yogurt Cake with Jam and Coconut

    Vanilla Yogurt Cake with Jam and Coconut

    Table of Contents

    Ingredients:

    Wet Ingredients:

      • 2 eggs
      • 100g (½ cup) sugar
      • 8g (1 tablespoon) vanilla sugar
      • 100g (½ cup) yogurt
      • 100ml (⅓ cup + 1 tablespoon) milk
    • 80ml (⅓ cup) vegetable oil
    • A pinch of salt

    Dry Ingredients:

      • 180g (1½ cups) 00 flour
    • 12g (1 tablespoon) baking powder
    • 50g (⅓ cup) raisins

    For Topping:

      • Jam of your choice (strawberry, apricot, raspberry, etc.)
    • Coconut flour (for sprinkling)

    Directions:

      1. Prepare the Batter:
          • Preheat your oven to 180°C (350°F).
          • Grease and line a 24 cm (9.5-inch) baking dish with parchment paper.


          • In a mixing bowl, beat 2 eggs with 100g sugar and 8g vanilla sugar until light and fluffy.
          • Add 100g yogurt, 100ml milk, and 80ml vegetable oil. Mix well.
          • Add a pinch of salt and mix again until fully combined.


      2. Incorporate the Dry Ingredients:
          • In a separate bowl, sift together 180g 00 flour and 12g baking powder.
          • Gradually add the dry ingredients to the wet ingredients, mixing until a smooth batter forms.


        • Fold in 50g raisins.
      3. Bake the Cake:
          • Pour the batter into the prepared baking dish and smooth the top.


        • Bake in the preheated oven for 35-40 minutes, or until a toothpick inserted into the center comes out clean.
      4. Finish with Topping:
          • Once baked, let the cake cool in the dish for 10 minutes.


        • Spread a layer of your favorite jam over the top of the cake.
        • Sprinkle coconut flour over the jam layer for a lovely finish.
    1. Serve:
      • Slice and serve warm or at room temperature.

    Serving Suggestions:

      • Enjoy with a cup of tea or coffee for a delightful afternoon treat.
      • Serve with whipped cream or a scoop of ice cream for a more decadent dessert.
      • Garnish with fresh berries for a pop of color and flavor.
      • Pair with a warm mug of hot chocolate during cold weather.
    • Serve as a light breakfast cake with a side of yogurt.

    Cooking Tips:

      • Room Temperature Ingredients: Ensure all wet ingredients are at room temperature for a smooth batter.
      • Avoid Overmixing: Mix the batter until just combined to prevent a dense texture.
      • Flour the Raisins: Toss the raisins in a bit of flour before adding them to the batter to prevent sinking.
      • Jam Variations: Experiment with different jam flavors to change up the taste.
      • Check for Doneness: Use a toothpick to test if the cake is fully baked; it should come out clean.

    Nutritional Benefits:

      • Yogurt: Rich in calcium and protein, it contributes to the cake’s moisture.
      • Raisins: Natural sweetness and fiber make them a healthier choice for a sweet add-in.
      • Eggs: Provide essential protein and nutrients to the cake.

    Dietary Information:

      • Vegetarian: Yes
      • Dairy-Free: Can be made dairy-free by using plant-based yogurt and milk substitutes.
      • Nut-Free: Yes, as long as no nuts are added.

    Nutritional Facts (per serving, based on 10 servings):

      • Calories: 200 kcal
      • Protein: 4g
      • Carbohydrates: 28g
      • Dietary Fiber: 1g
      • Sugars: 14g
      • Fat: 8g
      • Saturated Fat: 1g
      • Cholesterol: 30mg
      • Sodium: 100mg

    Storage Tips:

    • Store leftovers in an airtight container at room temperature for up to 3 days.
    • To keep it longer, freeze the cake in a sealed container for up to 1 month. Thaw before serving.
  • Unbelievably Fluffy Chickpea Yeast Bread

    Unbelievably Fluffy Chickpea Yeast Bread

    Unbelievably Fluffy Chickpea Yeast Bread

    Table of Contents

    Ingredients

    For one loaf:

    • 4 cups (480g) bread flour
    • 3 tablespoons (37g) sugar
    • 2 teaspoons (6g) instant yeast
    • 1½ teaspoons (9g) salt
    • 1 can (15.5 oz/440g) chickpeas, drained and rinsed (or 1½ cups/255g cooked chickpeas)
    • 1 cup (240ml) warm water

    Instructions

    1. Prepare the Dry Mix
    • In a stand mixer bowl, combine bread flour, sugar, instant yeast, and salt.
    • Whisk together to ensure even distribution of ingredients.
    1. Prepare the Chickpeas
    • Drain and thoroughly rinse the chickpeas
    • Place in a microwave-safe bowl
    • Heat for 60 seconds until hot and slightly mushy
    1. Make the Dough
    • Add the warm chickpeas and water to the dry ingredients
    • Mix at low speed (speed 2) for about 1 minute until combined
    • Continue kneading for 8-10 minutes until the dough becomes smooth and pulls away from the bowl
    • Adjust consistency with 1-2 tablespoons of water or flour if needed
    1. First Rise
    • Cover the bowl with a damp cloth or plastic wrap
    • Let rise in a warm place for 80-100 minutes until doubled in size
    1. Shape the Loaf
    • Turn dough onto a floured surface
    • Divide into 4 equal pieces
    • Roll each piece into a 6×9 inch rectangle
    • Fold into thirds, then roll tightly from the long side
    • Pinch ends to seal
    • Place all rolls in a greased bread pan
    1. Second Rise and Bake
    • Let rise for 60-80 minutes until puffy
    • Preheat oven to 350°F (180°C)
    • Optional: Brush with non-dairy milk mixed with maple syrup
    • Bake for 15 minutes
    • Cover with foil and bake additional 15 minutes
    • Bread is done when internal temperature reaches 190°F (88°C)
    See also  Chocolate Cream-Filled Pastry with a Golden Crust

    Nutritional Information (per slice, based on 12 slices)

    • Calories: 180
    • Protein: 7g
    • Carbohydrates: 35g
    • Fiber: 3g
    • Fat: 1g
    • Sodium: 295mg

    Pro Tips and Tricks

    • Use room temperature ingredients for optimal yeast activation
    • The dough should be slightly sticky but manageable – resist adding too much flour
    • Create a warm environment for rising by placing the dough in an oven with just the light on
    • Test doneness with a thermometer for perfect results every time
    • Let the bread cool completely before slicing for clean cuts

    Variations and Substitutions

    • Replace bread flour with all-purpose flour (texture will be slightly less chewy)
    • Use honey or maple syrup instead of sugar
    • Add herbs like rosemary or thyme for savory variations
    • Incorporate whole wheat flour (up to 25%) for added nutrition
    • Add seeds (sunflower, pumpkin, sesame) for extra crunch
  • Oatmeal and Banana Breakfast Bake Recipe: A Nutritious Start to Your Day

    Oatmeal and Banana Breakfast Bake Recipe: A Nutritious Start to Your Day

    Oatmeal and Banana Breakfast Bake Recipe: A Nutritious Start to Your Day

    Table of Contents

    Ingredients

    • 2 eggs
    • 1/3 cup plain white yogurt (80g)
    • 1/2 cup oatmeal (60g)
    • 1 ripe banana
    • 1 tbsp flour (8g)
    • Olive oil (for frying)
    • Honey (to taste)

    Preparation

    Step 1: Beat the Eggs

    1. Crack the Eggs: Crack the eggs into a large mixing bowl.
    2. Beat Until Smooth: Whisk the eggs until they are smooth and well-beaten.

    Step 2: Add Yogurt and Oatmeal

    1. Mix in Yogurt: Add the plain white yogurt to the beaten eggs and mix until fully incorporated.
    2. Add Oatmeal: Gradually stir in the oatmeal, ensuring it is evenly distributed throughout the mixture.

    Step 3: Incorporate Mashed Banana

    1. Mash the Banana: Mash the ripe banana until it reaches a smooth consistency.
    2. Combine with the Mixture: Add the mashed banana to the egg, yogurt, and oatmeal mixture. Stir until all ingredients are well combined.

    Step 4: Sprinkle Flour

    1. Add Flour: Sprinkle 1 tablespoon of flour over the mixture.
    2. Mix Thoroughly: Stir the mixture until the flour is fully incorporated, resulting in a uniform batter.

    Step 5: Shaping and Frying

    1. Prepare the Pan: Heat a small amount of olive oil in a frying pan over medium heat.
    2. Shape the Patties: Use a spoon to scoop out portions of the batter and shape them into small patties.
    3. Fry Until Golden: Place the patties in the heated pan and fry them on low heat, flipping occasionally, until they are golden brown and crispy on the outside.
    See also  Heavenly Turkish Manti Recipe Very Delicious

    Step 6: Drizzling with Honey

    1. Transfer to Plate: Once the patties are cooked, transfer them to a plate.
    2. Add Honey: Drizzle honey over the warm patties to add a delightful touch of sweetness.

    Step 7: Serving with Love

    1. Serve Warm: Serve the oatmeal patties warm, accompanied by a drizzle of honey or your favorite toppings.
    2. Enjoy: Whether as a breakfast treat or a quick snack, these oatmeal patties are sure to be a hit.

    Step 8: Health Benefits

    • Oatmeal: Rich in fiber, oatmeal promotes heart health and aids in digestion.
    • Yogurt: Provides probiotics that support gut health and boost immunity.
    • Bananas: Packed with potassium and vitamins, bananas offer a natural energy boost.

    Step 9: Tips for Success

    • Use Ripe Bananas: For enhanced sweetness and flavor, make sure your bananas are ripe.
    • Cook on Low Heat: To ensure the patties cook through without burning, fry them on low heat.
    • Experiment with Toppings: Add variety by topping your patties with fresh berries, sliced almonds, or other favorites.

    Nutrition Information

    • Servings: 4 patties
    • Calories per serving: 150 kcal
    • Total Fat: 7g
    • Saturated Fat: 2g
    • Cholesterol: 70mg
    • Sodium: 50mg
    • Total Carbohydrates: 18g
    • Dietary Fiber: 2g
    • Sugars: 8g
    • Protein: 5g
  • Elegant puff pastry roses with chicken and cheese

    Elegant puff pastry roses with chicken and cheese

    Elegant puff pastry roses with chicken and cheese

    Ingredients
    1 sheet puff pastry (thawed, if frozen)
    1 cup cooked chicken breast, shredded or finely diced
    1/2 cup shredded cheese (mozzarella, cheddar, or gouda work well)
    1/4 cup cream cheese or ricotta (optional, for creaminess)
    1 small onion, finely chopped
    1 garlic clove, minced
    2 tbsp olive oil or butter
    1 tsp dried herbs (oregano, thyme, or Italian seasoning)
    Salt and black pepper to taste
    1 egg (for egg wash)
    Sesame seeds or grated Parmesan (optional, for garnish)
    Instructions1. Preheat the Oven:
    Preheat your oven to 375°F (190°C). Line a baking tray with parchment paper.
    2. Prepare the Chicken Filling:
    Heat 2 tablespoons of olive oil (or butter) in a pan over medium heat.
    Sauté the chopped onion until soft and translucent (about 3 minutes). Add the minced garlic and cook for another 30 seconds.
    Stir in the shredded chicken, season with salt, pepper, and dried herbs. Mix well and cook for 2-3 minutes. Remove from heat.
    Allow the mixture to cool slightly, then stir in the shredded cheese and cream cheese (if using). Set aside.
    3. Prepare the Puff Pastry:
    Roll out the puff pastry sheet on a lightly floured surface. Cut it into 6 equal strips (about 2 inches wide).
    Spread a thin layer of the chicken and cheese filling along one long edge of each strip.4. Shape the Roses:
    Gently roll up each strip of puff pastry with the filling to create a spiral or “rose” shape.
    Make sure the edge is sealed underneath to hold the rose together.
    5. Add Egg Wash and Toppings:
    Beat the egg and brush it lightly over the surface of each pastry rose for a golden finish. Sprinkle with sesame seeds or Parmesan, if desired.
    6. Bake:
    Place the roses on the prepared baking tray. Bake in the preheated oven for 20-25 minutes, or until the puff pastry is golden brown and fully cooked.
    7. Serve:
    Remove from the oven and allow to cool slightly. Serve warm as an elegant appetizer or side dish.
    Tips & Variations
    Cheese Options: Try Swiss, feta, or even blue cheese for a different flavor twist.
    Add Veggies: Thin slices of zucchini, spinach, or mushrooms can be added with the chicken filling for extra flavor and nutrients.Spicy Kick: Add a pinch of chili flakes or a drizzle of hot sauce to the chicken mixture.
    Make-Ahead: Assemble the roses ahead of time and refrigerate for a few hours until ready to bake.
    Why You’ll Love This Recipe
    Elegant Presentation: These pastry roses are a feast for the eyes and the taste buds!
    Easy to Prepare: Simple steps with minimal effort for an impressive result.
    Versatile: Perfect for parties, dinners, or even brunch gatherings.

  • Brownie Bites

    Brownie Bites

    Brownie bites are bite-sized bundles of chocolatey perfection that combine the best parts of a classic brownie: chewy edges and a soft, fudgy centre. They’re perfect for any occasion, whether it’s a casual snack, a party dessert, or a holiday treat.

    Their small size makes them easy to share, but trust me—you’ll want to keep a few for yourself. With rich flavours from cocoa and melted chocolate, these brownie bites are deeply satisfying. They are simple to make using ingredients you probably already have in your pantry. Start by preheating your oven to 175°C (350°F). This ensures the oven is ready when your batter is.

    brownies1 1

    Use a mini muffin pan for this recipe. Grease it lightly with non-stick spray or butter, or line it with mini paper liners for easy cleanup and serving. In a microwave-safe bowl or a heatproof bowl over a pot of simmering water, melt 115g (1/2 cup) unsalted butter and 100g (3.5 oz) dark chocolate together.

    This creates a smooth and glossy base for your brownies. Dark chocolate gives the bites a rich, deep flavour. Stir the mixture until smooth, then set it aside to cool for 5–10 minutes. Cooling is essential to prevent the eggs from scrambling when mixed later.

    Sift Dry Ingredients: In a separate bowl, sift together: 100g all-purpose flour, 30g unsweetened cocoa powder, and 1/4 tsp salt. Sifting ensures there are no lumps, which helps create a smooth batter. The salt enhances the chocolate flavour. In a large mixing bowl, whisk 2 large eggs and 200g (1 cup) granulated sugar together. Whisk until the mixture is pale and slightly thickened (about 2–3 minutes).

    Beating the eggs and sugar incorporates air, giving your brownie bites a slight lift and a crackly top. Slowly pour the cooled butter and chocolate mixture into the egg and sugar mixture. Stir until fully combined. Mix in 1 tsp pure vanilla extract for added depth of flavour.

    Gradually add the dry ingredients to the wet mixture. Use a spatula to fold it in gently. Avoid overmixing. Stir just until there are no dry streaks. Overmixing can make the bites tough. Use a small spoon or cookie scoop to fill each cavity of the mini muffin pan about three-quarters full.

    brownies2 1

    The batter will rise slightly during baking, so leave room to prevent overflow. Place the pan in your preheated oven and bake for 12–15 minutes. Check for doneness by inserting a toothpick into the centre of a brownie bite. It should come out with a few moist crumbs (not wet batter).

    Let the brownie bites cool in the pan for about 5 minutes. Then transfer them to a wire rack to cool completely.

    Expert Tips for Success;

    Choosing Chocolate: Use high-quality dark chocolate for a richer taste. If you like your brownies on the sweeter side, opt for semi-sweet chocolate.
    Don’t Overbake: Brownie bites can go from fudgy to dry in minutes, so keep an eye on them. It’s better to underbake slightly than to overbake.
    Greasing the Pan: If you’re not using liners, make sure the pan is greased thoroughly to prevent sticking.
    Cooling Matters: Let the bites cool completely before removing them from the pan to avoid crumbling.

    Customization Ideas and Variations;

    Mix-Ins: Add mini chocolate chips, chopped nuts, or crushed candies to the batter for extra texture.
    Flavor Twists:
    Add 1 tsp of espresso powder to the batter for a mocha flavour.
    Replace vanilla extract with peppermint extract for a holiday twist.
    Gluten-Free Option: Swap the all-purpose flour for a gluten-free flour blend.
    Dairy-Free Option: Use coconut oil instead of butter and dairy-free chocolate.
    Toppings: Dust the brownie bites with powdered sugar or drizzle with melted white or dark chocolate once cooled.

    Serving Suggestions;

    Classic Pairing: Serve with a cold glass of milk or a hot cup of coffee.
    Dessert Boards: Arrange on a platter with fresh berries, cookies, and truffles for a beautiful presentation.
    Sundae Topping: Crumble brownie bites over ice cream and top with whipped cream for an indulgent sundae.

    Storage, Reheating, and Make-Ahead Tips;

    Storage: Store brownie bites in an airtight container at room temperature for up to 3 days. For longer storage, refrigerate for up to a week.
    Freezing: Freeze individually wrapped brownie bites for up to 2 months. Thaw at room temperature when ready to enjoy.
    Reheating: Warm a brownie bite in the microwave for 10 seconds for that fresh-baked feel.
    Make-Ahead Batter: Prepare the batter up to 24 hours in advance and refrigerate. Let it come to room temperature before baking.

    These brownie bites are the perfect treat for any occasion. With their fudgy centres and rich chocolate flavour, they’re sure to become a favourite in your household.

    They’re easy to customize, fun to share, and just as enjoyable to make as they are to eat. Try this recipe today and savour the joy of homemade goodness—one bite at a time!

    Ingredients;

    • 115g (1/2 cup) unsalted butter
    • 100g (3.5 oz) dark chocolate, chopped
    • 100g (3/4 cup) all-purpose flour
    • 30g (1/4 cup) unsweetened cocoa powder
    • 1/4 tsp salt
    • 2 large eggs
    • 200g (1 cup) granulated sugar
    • 1 tsp pure vanilla extract
  • Easy and Budget-Friendly Ciabatta Bread

    Easy and Budget-Friendly Ciabatta Bread

    Easy and Budget-Friendly Ciabatta Bread

    Table of Contents

    Ingredients

      • 500 g (3 + 1/3 cups) bread flour


      • 5 g (1 tsp) salt
      • 5 g (2 tsp) active dry yeast
      • 375-400 ml water (start with 375 ml and add more if needed)


    • 30 g (2 tbsp) olive oil

    Directions

    Activate the Yeast:

    1. In a small bowl, dissolve the active dry yeast in 100 ml of warm water (from the 375-400 ml total) and let it sit for about 5 minutes until it becomes frothy.

    Mix the Dough:

      1. In a large mixing bowl, combine the bread flour and salt.


    1. Add the yeast mixture, the remaining water, and olive oil to the flour mixture.
    2. Mix until a sticky dough forms. If the dough is too dry, add a bit more water until the desired consistency is reached.

    First Rise:

      1. Cover the bowl with a clean towel or plastic wrap and let the dough rise in a warm place for 1-2 hours, or until it has doubled in size.


    Shape the Dough:

      1. Preheat your oven to 220°C (430°F).
      2. Flour a work surface generously and gently transfer the dough onto it. Be careful not to deflate the dough too much.
      3. Shape the dough into a rough rectangle by folding it over itself a few times.


    1. Transfer the dough onto a baking sheet lined with parchment paper or a floured cloth, cover it again, and let it rest for about 30 minutes.

    Bake:

      1. Bake in the preheated oven for 20 minutes, or until the bread is golden brown and has a crispy crust.
      2. To ensure a crispy crust, you can place a small pan of water at the bottom of the oven to create steam while baking.
    See also  2-Ingredient Creamy Custard: Delightfully Simple and Easy


    Cool and Serve:

    1. Remove the ciabatta bread from the oven and let it cool on a wire rack before slicing and serving.

    Serving Suggestions

      • Serve with olive oil and balsamic vinegar for dipping.
      • Use for sandwiches or paninis.


    • Pair with soups or salads for a complete meal.
  • Baked Cauliflower with Creamy Cheese Sauce and Tomato-Anchovy Sauce

    Baked Cauliflower with Creamy Cheese Sauce and Tomato-Anchovy Sauce

    Baked Cauliflower with Creamy Cheese Sauce and Tomato-Anchovy Sauce

    Baked Cauliflower with Creamy Cheese Sauce and Tomato-Anchovy Sauce

    Table of Contents

    Ingredients:

    For the Cauliflower:
      • 1 cauliflower
      • 3 lemon slices


    • Sprigs of dill
    • Salt to taste
    For the Creamy Cheese Sauce:
      • 3 cloves of garlic, minced


      • 2 tablespoons flour
      • 250 ml milk
      • Salt to taste


      • Black pepper to taste
      • Nutmeg to taste
      • Parmesan cheese (amount depending on taste)


    • Rosemary (to taste)
    • Mozzarella cheese (150-200 grams)
    For the Tomato-Anchovy Sauce:
      • 1 tomato, finely chopped


      • 1 clove of garlic, minced
      • Canned anchovies (3-4)
      • Several sprigs of dill


      • 1 pepper, finely chopped
      • 2 tablespoons sour cream
      • Black pepper to taste


    • A little bit of salt

    Instructions:

      1. Cook the Cauliflower:
          • Cut the cauliflower into florets.
          • In a large pot, bring water to a boil. Add lemon slices, sprigs of dill, and salt to taste.


        • Add the cauliflower florets and cook for 5 minutes. Drain and set aside.
      2. Prepare the Creamy Cheese Sauce:
          • In a saucepan, melt a bit of butter over medium heat. Add the minced garlic and sauté until fragrant.


          • Add 2 tablespoons of flour and stir constantly to form a roux.
          • Gradually add 250 ml of milk, stirring continuously to avoid lumps.
          • Season with salt, black pepper, and nutmeg to taste.


        • Add grated Parmesan cheese and chopped rosemary to taste, stirring until the cheese melts and the sauce thickens.
      3. Assemble the Cauliflower Bake:
          • Preheat the oven to 200°C (350°F).


          • Place the cooked cauliflower florets in a baking dish.
          • Pour the creamy cheese sauce over the cauliflower.
          • Sprinkle with 150-200 grams of shredded mozzarella cheese.


        • Bake in the preheated oven for 15 minutes or until the cheese is melted and golden brown.
      4. Prepare the Tomato-Anchovy Sauce:
          • In a bowl, combine the finely chopped tomato, minced garlic, canned anchovies, chopped dill, and finely chopped pepper.


        • Add 2 tablespoons of sour cream, black pepper, and a little bit of salt.
        • Mix well until all ingredients are combined.


  • Delicious Date Cake Recipe

    Delicious Date Cake Recipe

    Delicious Date Cake Recipe

    Table of Contents

    Ingredients

      • 250g dates (use soft, juicy dates, not dry ones)
      • 1/4 cup (60ml) milk


      • 1/3 cup (80g) sugar
      • 1/2 cup (120ml) oil
      • 2 eggs


      • 3/4 cup (90g) flour
      • 1 teaspoon baking powder
      • 1 teaspoon vanilla extract


    • Walnuts or almonds for decoration

    Directions

    Prepare the Dates

    1. Prepare the Dates:
        • Take 250g of dates, remove the pits, and chop them into quarters. Ensure the dates are soft and juicy.
        • Place the chopped dates in a frying pan with 1/4 cup of warm milk. Heat it on medium flame until the milk warms up. Let the dates soak in the milk for 20-25 minutes.


    Blend the Mixture

    1. Blend the Mixture:
        • Add 1/2 cup oil and 1/3 cup sugar to a blender. Blend well until the sugar dissolves.
        • Add the soaked dates and milk mixture to the blender. Blend for about 2 minutes until smooth.


    Add the Eggs

      1. Add the Eggs:
        • Add the eggs to the blender one at a time, blending well after each addition to ensure they are well incorporated.


    Prepare the Batter

    1. Prepare the Batter:
        • Pour the blended mixture into a large bowl.
        • Sift 3/4 cup flour and 1 teaspoon baking powder together, then gently fold into the date mixture.
        • Add 1 teaspoon vanilla extract and mix gently to ensure everything is well combined.


    Prepare the Baking Pan

    1. Prepare the Baking Pan:
        • Grease a baking pan with oil and line it with butter paper. Pour the batter into the prepared pan.
        • Decorate with walnuts or almonds on top.


    Bake the Cake

    1. Bake the Cake:
        • Preheat your oven to 180°C (350°F).
        • Bake the cake for 20-25 minutes. Check with a toothpick; if it comes out clean, the cake is done.


      • If you don’t have an oven, you can use a heavy-bottomed pan on a stove. Preheat the pan, place a trivet, and put the baking pan on top. Cover and bake for 25-30 minutes on low flame.

    Cool and Serve

    1. Cool and Serve:
        • Let the cake cool in the pan before transferring it to a wire rack.


      • Slice and serve the cake once it has cooled.

    Serving Suggestions

      • Serve warm with a scoop of vanilla ice cream.


    • Enjoy a slice with a cup of tea or coffee.
    • Dust with powdered sugar for an extra touch of sweetness.

    Cooking Tips

      • Use soft, juicy dates for the best texture and flavor.


    • Ensure the eggs are at room temperature for better blending.
    • Don’t overmix the batter to keep the cake light and fluffy.

    Nutritional Benefits

      • Dates: Rich in fiber, vitamins, and minerals.


    • Natural Sweetness: This cake uses natural sweetness from dates, reducing the need for added sugar.
    • Nuts: Walnuts or almonds provide healthy fats and additional nutrients.

    Dietary Information

      • Vegetarian: This recipe is vegetarian.


    • Dairy-Free Option: Substitute milk with a plant-based alternative.
    • Gluten-Free Option: Can be made gluten-free by using a gluten-free flour blend.
  • Apple and Raisin Cake

    Apple and Raisin Cake

    Apple and Raisin Cake

    Table of Contents

    Ingredients

      • 3 eggs
      • 150 grams sugar


      • 200 ml milk
      • 370 grams flour
      • 20 grams baking powder


      • 1 apple (peeled and sliced)
      • Juice of 1 lemon
      • 50 grams raisins


    • Butter (for greasing the cake mold)

    Instructions

    Prepare the Batter

      1. Preheat the Oven: Preheat your oven to 170°C (340°F).
      2. Mix Eggs and Sugar: In a mixing bowl, beat 3 eggs with 150 grams of sugar until well combined.


    1. Add Milk: Add 200 ml of milk and mix well.

    Add Dry Ingredients

      1. Combine Flour and Baking Powder: Gradually add 370 grams of flour and 20 grams of baking powder to the mixture, stirring continuously.
      2. Add Lemon Juice: Add the juice of 1 lemon and mix until the batter is smooth.


    Prepare the Apple and Raisins

      1. Peel and Slice Apple: Peel and slice 1 apple.
      2. Grease the Cake Mold: Grease the cake mold with butter.
      3. Arrange Apple Slices: Place the apple slices on the bottom of the cake mold.


    1. Pour Batter: Pour the batter over the apple slices.
    2. Add Raisins: Sprinkle 50 grams of raisins on top of the batter.

    Bake the Cake

      1. Bake: Place the cake mold in the preheated oven. Bake at 170°C (340°F) for 30 minutes.


    Serve

    1. Cool and Serve: Remove the cake from the oven and let it cool slightly before serving. Enjoy this delicious apple and raisin cake warm or at room temperature.

    Serving Suggestions

      • With Ice Cream: Serve with a scoop of vanilla ice cream or a dollop of whipped cream.
      • With Beverages: Enjoy with a cup of hot tea or coffee for a delightful treat.
    See also  Sugar-Free Banana Oat Loaf with Cocoa


    Cooking Tips

    • Even Apple Distribution: Ensure the apple slices are evenly distributed on the bottom of the cake mold for even baking.
    • Plumper Raisins: Soak the raisins in warm water for a few minutes before adding to the batter for a plumper texture.
  • Almond Butter Cake Recipe

    Almond Butter Cake Recipe

    Almond Butter Cake Recipe

    Table of Contents

    Ingredients:

    Dough:
    100 ml (3.4 fl oz) milk
    25 g (0.9 oz) sugar
    4 g (0.14 oz) yeast
    20 ml (0.7 fl oz) melted butter
    1 egg
    10 g (0.35 oz) vanilla sugar
    250 g (8.8 oz) flour
    Topping:
    150 g (5.3 oz) butter
    50 g (1.76 oz) almond flakes
    80 g (2.82 oz) sugar
    Optional Coffee Mixture:
    20 ml hot water
    10 g instant coffee
    10 g sugar
    300 ml hot milk

    Directions:

    Prepare the Dough:
    In a bowl, combine 4 g yeast, 10 g vanilla sugar, 25 g sugar, 20 ml melted butter, and 100 ml milk.
    Add 1 egg and 250 g flour to the mixture.
    Mix until a dough forms.

    Microwave the Dough:
    Place the dough in a microwave-safe bag.
    Put the bag with the dough into the microwave oven.
    Microwave on high for 2 minutes.

    First Leavening:

    Let the dough leaven for 30 minutes.

    Prepare the Tray:
    Grease a baking tray (25 cm x 15 cm) with 20 g of soft butter.

    Second Leavening:
    Place the dough in the greased baking tray.
    Let it leaven for another 10 minutes.

    Prepare the Topping:
    In a saucepan, melt 150 g butter.
    Add 80 g sugar and 50 g almond flakes to the melted butter.

    Bake:
    Preheat the oven to 180°C (356°F).
    Pour the butter, sugar, and almond mixture over the leavened dough.
    Bake in the oven for 40 minutes until golden brown.

    Optional Coffee Mixture:
    In a cup, mix 20 ml hot water, 10 g instant coffee, and 10 g sugar.
    Add 300 ml hot milk to the mixture for a delicious drink to accompany your pastry.

    See also  Crispy Rice Patties with Vegetables and Eggs

    Serving Suggestions:
    Serve warm or at room temperature.
    Enjoy with a cup of coffee or tea.
    Add a dusting of powdered sugar for extra sweetness.
    Pair with fresh fruit for a complete dessert.

    Cooking Tips:
    Ensure the butter for the topping is well melted for a smooth mixture.
    For a crispier topping, bake a few minutes longer, but watch closely to avoid burning.
    If the dough feels too sticky, add a bit more flour as needed.

    Nutritional Benefits:
    Provides a good source of energy from carbohydrates and fats.
    Almonds offer healthy fats and vitamin E.
    The cake is rich in flavor and satisfying with each bite.