Category: healthy food

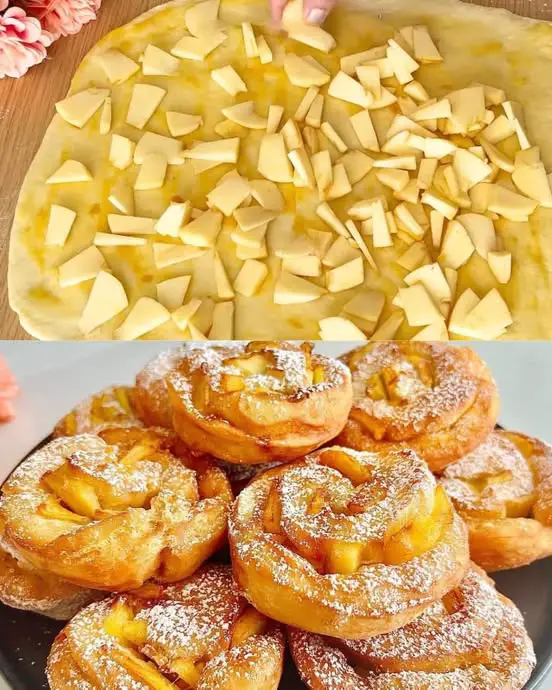
  • Quick and Easy Apple Fritters Recipe: Delicious Dessert in Just 5 Minutes!

    Quick and Easy Apple Fritters Recipe: Delicious Dessert in Just 5 Minutes!

    Quick and Easy Apple Fritters Recipe: Delicious Dessert in Just 5 Minutes!

    Table of Contents

    Ingredients

      • 1 apple, peeled and chopped into small pieces
      • 1 egg
      • 50g sugar (about 1/4 cup)
      • 60ml sunflower oil (plus extra for frying)
      • 400g flour (approximately 3 1/4 cups)
      • 1 pinch of salt
      • 200ml milk (about 3/4 cup plus 1 tablespoon)
      • 10g instant baking yeast (about 1 tablespoon)
    • Vanillin (optional, for extra flavor)
    • For decoration: Sugar and cinnamon mixture

    Instructions

    1. Prepare the Batter:

      • Whisk the Egg and Sugar: Start by cracking the egg into a large mixing bowl. Add the sugar, and whisk them together until the mixture is well combined and slightly frothy. The sugar should begin to dissolve into the egg, creating a smooth base for your batter.
      • Incorporate the Wet Ingredients: Gradually pour in the milk and sunflower oil, continuing to whisk as you add each ingredient. This step ensures that the liquids are evenly distributed throughout the batter, which will help your fritters turn out light and airy.
      • Add the Dry Ingredients: Next, sprinkle in the instant baking yeast, a pinch of salt, and vanillin (if using). Stir these into the mixture until they’re fully incorporated. The yeast will help the fritters puff up as they cook, giving them a nice, fluffy texture.
    • Mix in the Flour: Slowly begin to add the flour to the wet mixture, stirring constantly to prevent lumps from forming. Keep adding flour until you have a thick, smooth batter. The exact amount of flour you need may vary, so add it gradually and stop when the batter is just thick enough to hold together without being too stiff.
    See also  Lemon Peach Cake with Vanilla Custard Filling

    2. Prepare the Apple:

      • Peel and Chop the Apple: Peel your apple and cut it into small, bite-sized pieces. The smaller you chop the apple, the more evenly it will cook within the fritters. This also helps to distribute the apple flavor throughout the batter.
    • Incorporate the Apple: Once your apple is chopped, fold the pieces into the batter. Stir gently until the apple chunks are evenly distributed. This will ensure that every fritter is packed with sweet, juicy apple in every bite.

    3. Fry the Fritters:

      • Heat the Oil: Pour some sunflower oil into a frying pan, enough to cover the bottom with a thin layer. Heat the oil over medium heat until it’s hot but not smoking. To test if the oil is ready, you can drop a small bit of batter into the pan – it should sizzle and start to cook immediately.
    • Cook the Fritters: Using a spoon or small scoop, carefully drop portions of the batter into the hot oil. Each fritter should be about a tablespoon of batter. Fry the fritters in batches, making sure not to overcrowd the pan. This allows them to cook evenly and get crispy. Cook each fritter for about 2-3 minutes per side, or until they are golden brown and cooked through.
    • Drain the Fritters: Once the fritters are golden and crispy, use a slotted spoon to remove them from the oil. Place the fritters on a paper towel-lined plate to drain off any excess oil. This step will help keep them from being greasy.

    4. Decorate and Serve:

    • Add the Finishing Touches: While the fritters are still warm, sprinkle them with a mixture of sugar and cinnamon. The sugar will melt slightly into the fritters, adding a delicious sweet and spicy coating.
    • Serve: These apple fritters are best enjoyed fresh and warm. Serve them as they are, or with a side of whipped cream or vanilla ice cream for an extra indulgent treat.
    See also  No-Bake Cheesecake Recipe

    Serving Suggestions

    These apple fritters are incredibly versatile and can be enjoyed in a variety of ways:

      • Breakfast Treat: Pair them with a cup of coffee or tea for a delightful morning snack.
      • Dessert: Serve them with a scoop of vanilla ice cream or a dollop of whipped cream for a simple yet satisfying dessert.
      • Snack: These fritters make a great afternoon pick-me-up or snack to share with friends and family.

    Tips and Variations

    • Flavor Variations: You can experiment with different flavors by adding spices like cinnamon, nutmeg, or ginger directly into the batter. For a more indulgent version, try adding a handful of chocolate chips or chopped nuts.
    • Adjusting the Sweetness: If you prefer a less sweet fritter, reduce the amount of sugar in the batter. Alternatively, you can skip the sugar-cinnamon coating if you want a more savory version.
    • Apple Alternatives: While this recipe calls for apples, you can substitute with other fruits like pears or bananas. Just be mindful of the moisture content of the fruit, as it might affect the texture of the batter.
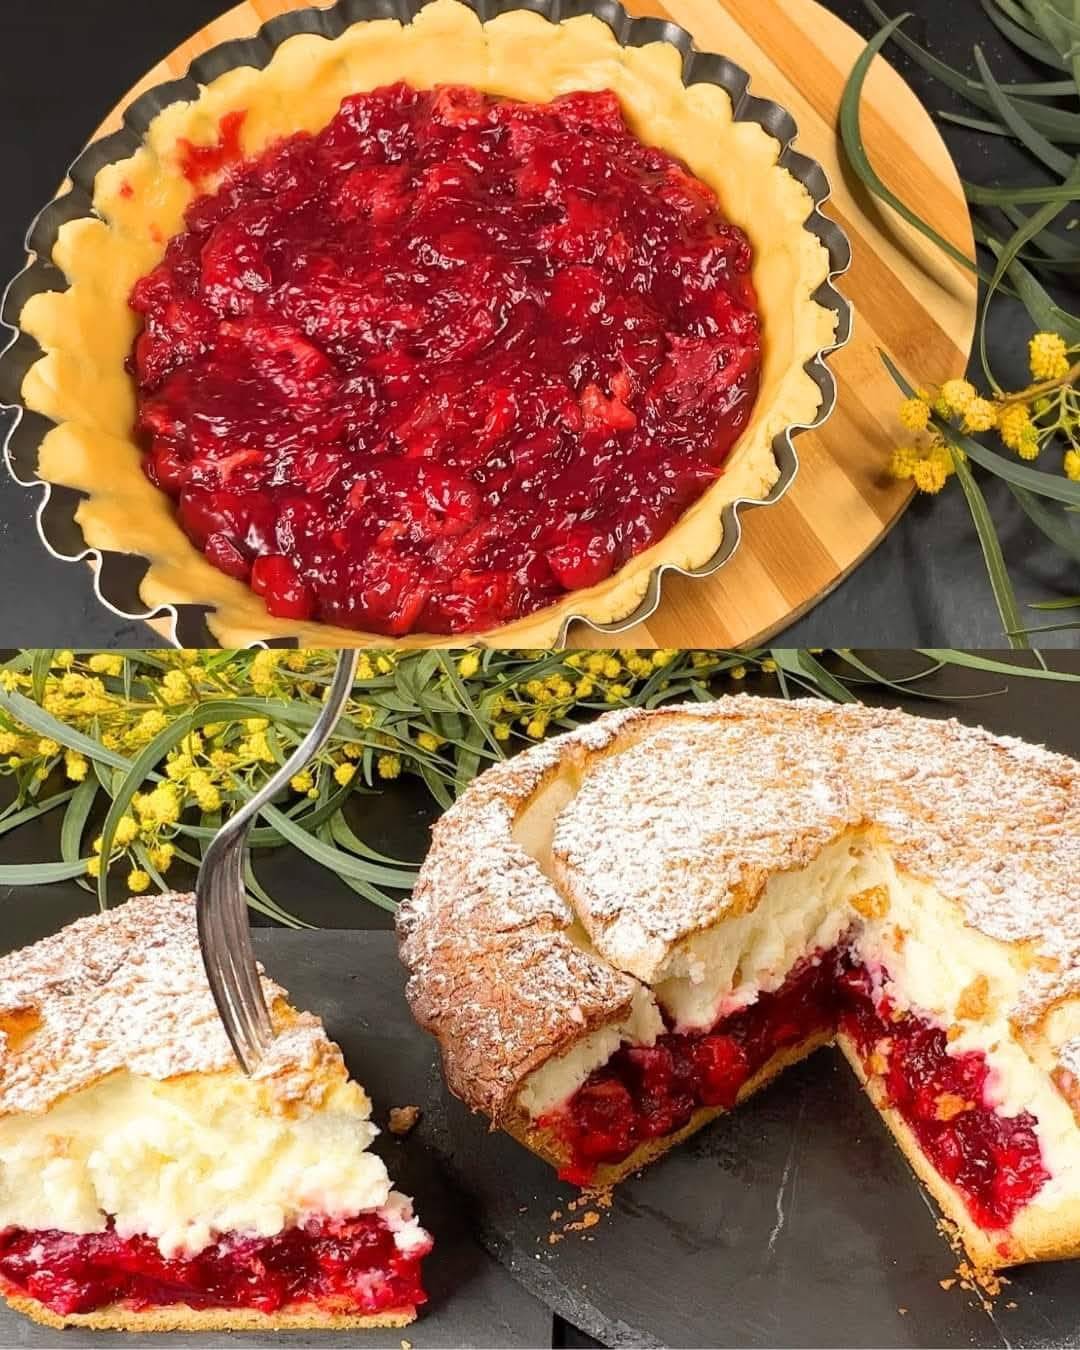
  • The Famous Yogurt Cake That Drives the World Crazy! Heavenly Delicious Cake!

    The Famous Yogurt Cake That Drives the World Crazy! Heavenly Delicious Cake!

    The Famous Yogurt Cake That Drives the World Crazy! Heavenly Delicious Cake!

    Table of Contents

    Ingredients

    For the Cherry Jam:

      • 500 g frozen cherries


      • 70 g (6 tablespoons / 2.5 oz) cornstarch
      • 150 g (0.8 cups / 5 oz) sugar
      • 150 ml (0.7 cups / 5 oz) water

    For the Cake Batter:

      • 3 egg yolks
      • A pinch of salt


      • 80 g (6 tablespoons / 2.8 oz) powdered sugar
      • 80 g (1 stick) melted butter
      • 1 teaspoon vanilla extract


    • 200 g flour
    • 1 teaspoon baking powder

    Instructions

    Preparing the Cherry Jam
      1. Combine Ingredients:
          • In a medium saucepan, combine the frozen cherries, sugar, and water. Stir well to dissolve the sugar.


      2. Cook the Mixture:
        • Place the saucepan over medium heat. Cook the mixture, stirring occasionally, until the cherries have released their juices and the sugar has dissolved completely.


      1. Thicken the Jam:
        • In a small bowl, dissolve the cornstarch in a little cold water to make a slurry. Gradually add this slurry to the cherry mixture, stirring constantly.
        • Continue to cook, stirring frequently, until the mixture thickens to a jam-like consistency. This should take about 5-7 minutes.


    1. Cool the Jam:
      • Remove the saucepan from the heat and let the cherry jam cool to room temperature. It will continue to thicken as it cools.
    Making the Cake Batter
      1. Prepare the Egg Yolks:
          • In a large mixing bowl, beat the egg yolks with a pinch of salt until they become pale and creamy.


      2. Add Sugar and Butter:
          • Gradually add the powdered sugar to the egg yolks, continuing to beat until fully incorporated and smooth.
          • Slowly pour in the melted butter and vanilla extract, mixing well to combine.


      3. Combine Dry Ingredients:
        • In a separate bowl, sift together the flour and baking powder.


    1. Mix the Batter:
      • Gradually add the dry ingredients to the wet mixture, stirring until just combined. Be careful not to overmix, as this can make the cake dense.
    Assembling and Baking the Cake
      1. Preheat the Oven:
          • Preheat your oven to 180°C (350°F). Grease and line a round cake tin with parchment paper.


      2. Layer the Batter and Jam:
          • Pour half of the cake batter into the prepared tin and spread it evenly.
          • Spoon the cooled cherry jam over the batter, spreading it evenly but leaving a small border around the edges.


        • Top with the remaining cake batter, spreading it gently to cover the jam layer completely.
      3. Bake the Cake:
          • Bake in the preheated oven for about 30-35 minutes, or until a toothpick inserted into the center comes out clean.


      4. Cool the Cake:
        • Allow the cake to cool in the tin for about 10 minutes, then transfer it to a wire rack to cool completely.


    Finishing Touches
    1. Optional Decoration:
      • Dust the top of the cake with powdered sugar for a simple yet elegant finish. Alternatively, you can drizzle with a glaze made from powdered sugar and a little lemon juice for added flavor.

    Cooking Tips

      1. Cherries: If fresh cherries are in season, feel free to use them instead of frozen. Just pit them first.


      1. Jam Consistency: Ensure the cherry jam is thickened properly; otherwise, it can make the cake soggy.
      2. Butter: Use unsalted butter to control the salt content in the recipe.
      3. Batter Spreading: Be gentle when spreading the top layer of batter to avoid mixing it with the jam.


    Nutritional Benefits

    • Cherries: Rich in antioxidants and vitamins, cherries provide a tart flavor and numerous health benefits, including reducing inflammation.
    • Yogurt: Adding yogurt to desserts boosts their protein and calcium content while keeping them moist.
    • Egg Yolks: A good source of fat-soluble vitamins like A, D, E, and K, along with essential fatty acids.
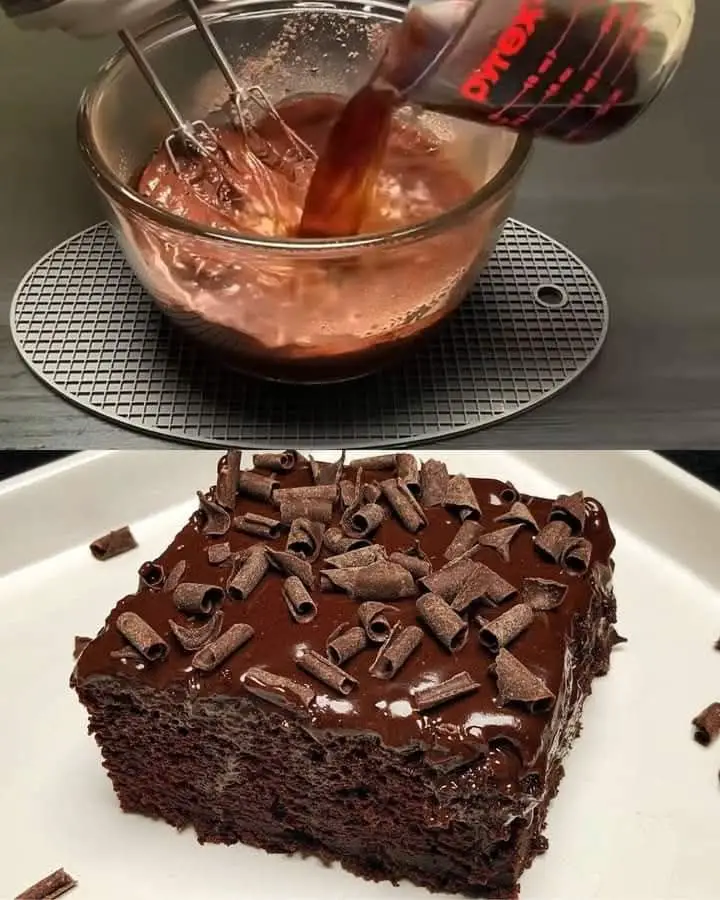
  • Chocolate Coffee Cake with Chocolate Ganache

    Chocolate Coffee Cake with Chocolate Ganache

    Chocolate Coffee Cake with Chocolate Ganache

    Table of Contents

    Ingredients:

    For the Cake:

      • 1 1/2 cups all-purpose flour (180g)
      • 1/2 cup cocoa powder (60g)
      • 1 cup sugar (200g)
      • 1/2 teaspoon salt
      • 1 teaspoon baking powder
      • 1/2 teaspoon baking soda
      • 1/2 cup oil (108g) – vegetable or canola oil works best
      • 1/2 cup milk (123g) – whole milk preferred for richness
      • 2 teaspoons vanilla extract
      • 2 eggs (or 1/2 cup yogurt as an alternative for a more moist cake)
    • 1 cup hot coffee (82g) – enhances the chocolate flavor

    For the Chocolate Ganache:

      • 1 cup semi-sweet chocolate (170g) – chopped or chips
    • 3/4 cup heavy cream (180g)

    Directions:

    1. Prepare the Cake Batter:

      • Preheat your oven to 350°F (175°C). Grease and flour a 9-inch round cake pan or line it with parchment paper for easy removal.
      • In a large mixing bowl, sift together the flour, cocoa powder, sugar, salt, baking powder, and baking soda. Sifting helps to remove any lumps and ensures the ingredients are well combined.
      • In a separate bowl, whisk together the oil, milk, vanilla extract, and eggs (or yogurt if using as an alternative). The eggs or yogurt add moisture and richness to the cake.
      • Gradually add the wet ingredients to the dry ingredients, mixing until just combined. Avoid overmixing, as it can result in a dense cake.
    • Slowly pour in the hot coffee while stirring. The coffee should be hot but not boiling. It will thin out the batter, which is normal. The coffee intensifies the chocolate flavor without making the cake taste like coffee.
    See also  Vegan Banana Bread

    2. Bake the Cake:

      • Pour the batter into the prepared cake pan, spreading it evenly.
    • Bake in the preheated oven for 30-35 minutes, or until a toothpick inserted into the center comes out clean. Baking times can vary, so start checking at the 30-minute mark.
    • Once baked, remove the cake from the oven and allow it to cool in the pan for about 10 minutes before transferring it to a wire rack to cool completely.

    3. Prepare the Chocolate Ganache:

      • While the cake cools, make the ganache. Place the chopped chocolate in a heatproof bowl.
      • Heat the heavy cream in a small saucepan over medium heat until it just begins to simmer. Be careful not to let it boil.
      • Pour the hot cream over the chocolate and let it sit for a minute to melt the chocolate. Stir until smooth and glossy. If the ganache is too thick, you can add a bit more warm cream to reach your desired consistency.

    4. Assemble the Cake:

      • Once the cake is completely cooled, pour the ganache over the top, allowing it to drip down the sides. Use a spatula to spread it evenly if needed.
      • Let the ganache set for about 15 minutes at room temperature before serving. This will give it a smooth, shiny finish.

    5. Serve and Enjoy:

    • Slice the cake and enjoy it as is, or serve with a dollop of whipped cream or a scoop of vanilla ice cream for an extra indulgent treat.

    Tips:

    • Make-Ahead Option: You can prepare the cake a day in advance. Store it at room temperature, covered tightly with plastic wrap. Add the ganache just before serving.
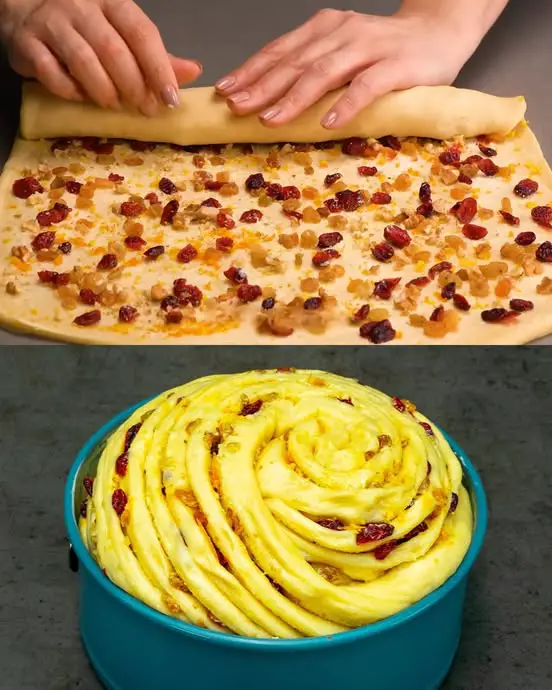
  • Sweet Bread with Raisins and Lingonberries

    Sweet Bread with Raisins and Lingonberries

    Sweet Bread with Raisins and Lingonberries

    Table of Contents

    Preparation Time:

    • Total Preparation Time: 30 minutes
    • Rising Time: 1 hour 30 minutes
    • Cooking Time: 25-30 minutes

    Ingredients:

    Filling:

    • 200 g (7.1 oz) soft butter
    • 30 g (1.1 oz) sugar
    • 20 g (0.7 oz) orange peel, finely grated
    • 100 g (3.5 oz) raisins
    • 100 g (3.5 oz) dried lingonberries
    • 50 g (1.8 oz) walnuts, chopped

    Dough:

    • 2 eggs
    • 40 g (1.4 oz) sugar
    • 400 ml (14 fl oz) milk, warm
    • 7 g (0.2 oz) dried yeast
    • 100 ml (3.4 fl oz) vegetable oil
    • 750 g (26 oz) flour
    • 5 g (0.2 oz) salt
    • 15 ml (0.5 fl oz) vegetable oil (for greasing)

    Directions:

    Prepare the Dough:

    1. In a large bowl, whisk the eggs with 40 g (1.4 oz) of sugar until well combined.
    2. Add the warm milk and stir in the dried yeast. Let it sit for 10 minutes until frothy.
    3. Mix in 100 ml (3.4 fl oz) of vegetable oil.
    4. Gradually add the flour and salt, mixing until a soft dough forms. Knead the dough for about 10 minutes until smooth and elastic.
    5. Place the dough in a greased bowl, cover with a damp cloth, and let it rise in a warm place for about 1 hour or until doubled in size.

    Prepare the Filling:

    1. In a medium bowl, combine the soft butter, 30 g (1.1 oz) of sugar, and grated orange peel.
    2. Mix in the raisins, dried lingonberries, and chopped walnuts until well combined.

    Assemble the Bread:

    1. Preheat the oven to 180°C (350°F).
    2. Punch down the risen dough and turn it out onto a lightly floured surface. Roll the dough into a large rectangle.
    3. Spread the filling evenly over the dough.
    4. Starting from one of the long edges, roll the dough tightly into a log. Slice the log into even pieces.
    5. Place the slices in a greased baking dish or on a baking sheet, leaving some space between them for expansion.
    6. Cover and let the slices rise for another 20-30 minutes.
    See also  Quinoa Crepes Recipe

    Bake:

    1. Bake in the preheated oven for 25-30 minutes or until the bread is golden brown and cooked through.
    2. Remove from the oven and let cool slightly before serving.

    Serve:

    1. Serve warm or at room temperature. Enjoy this delicious, traditional sweet bread with your family and friends.

    Serving Suggestions:

    • Serve this sweet bread with a cup of hot tea or coffee.
    • Enjoy it as a dessert or a sweet snack during the day.
    • Pair it with a dollop of whipped cream or a scoop of vanilla ice cream for an indulgent treat.
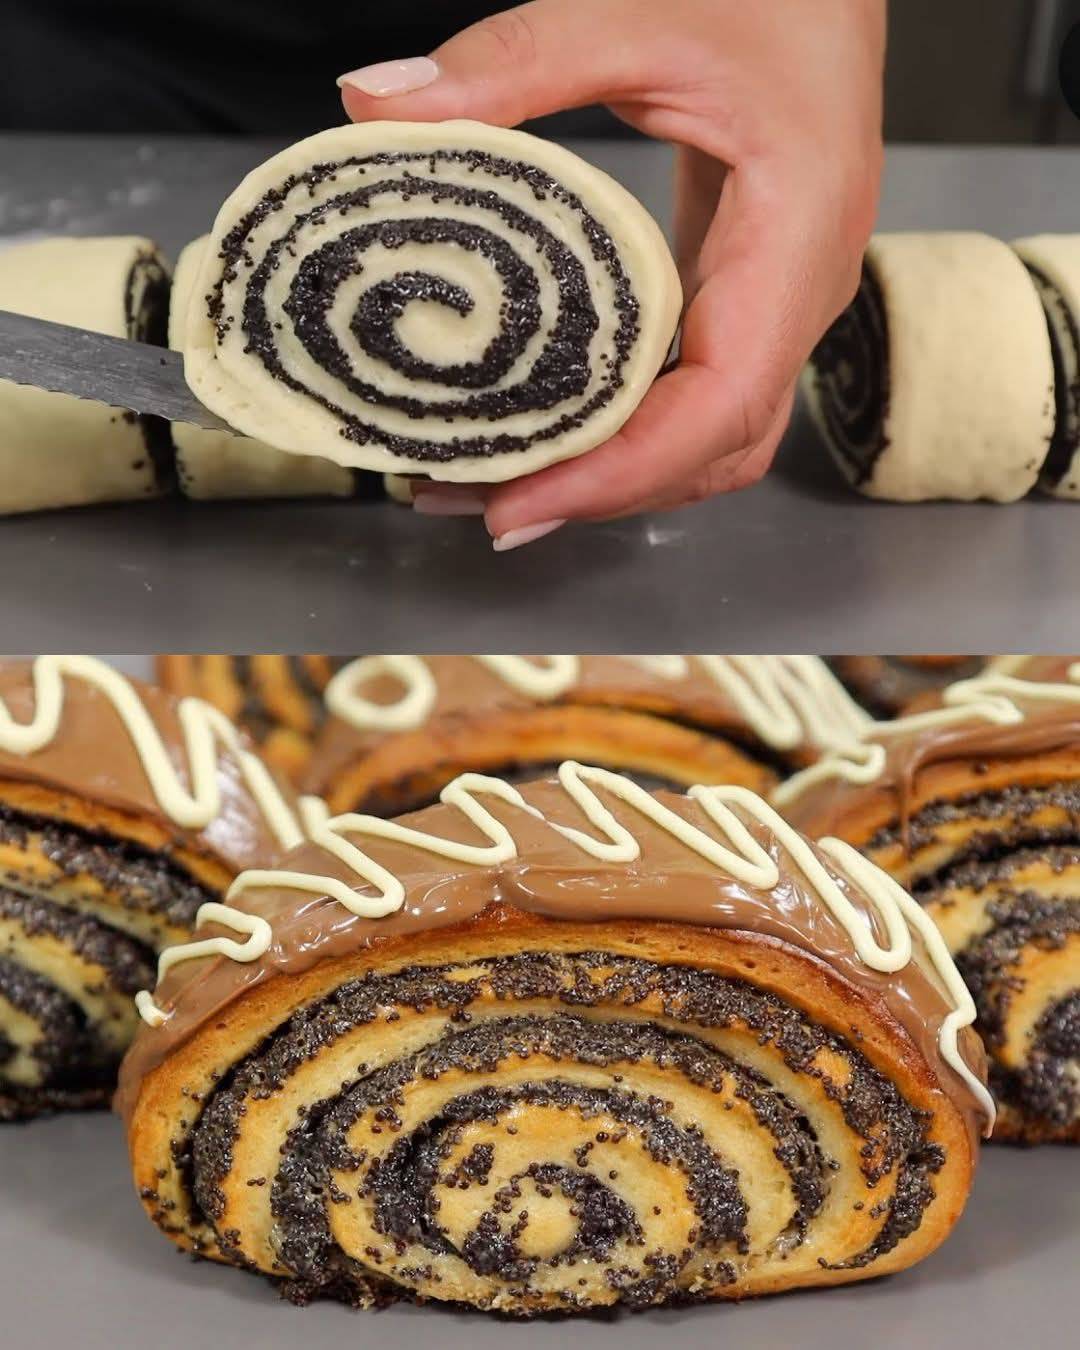
  • Poppy Seed Roll with Honey and Chocolate Drizzle

    Poppy Seed Roll with Honey and Chocolate Drizzle

    Poppy Seed Roll with Honey and Chocolate Drizzle

    Table of Contents

    Ingredients

    For the Yeast Dough:
      • 300 ml warm milk
      • 50 g sugar


      • 6 g dry yeast (about 1 ½ tsp)
      • 50 g honey
      • 50 ml vegetable oil


    • ¼ tsp salt
    • 550 g all-purpose flour
    For the Filling:
      • 200 g poppy seeds


      • 350 ml milk
      • 150 g sugar
      • 50 g unsalted butter


    For Brushing the Dough:
    • 30 g unsalted butter (melted)
    For the Egg Wash:
      • 1 egg yolk
      • 1 tbsp milk


    For Decoration:
    • Milk and white chocolate (melted for drizzling)

    Steps to Make the Poppy Seed Roll

      1. Prepare the Yeast Dough:
          • In a large bowl, combine the warm milk (make sure it’s not too hot or it will kill the yeast), 50 g of sugar, and the dry yeast. Stir the mixture and let it sit for about 5-10 minutes, or until it becomes foamy. This indicates that the yeast is activated.
          • Once the yeast mixture is ready, add the honey, vegetable oil, and salt. Stir to combine.


        • Gradually add the flour, 1 cup at a time, stirring with a wooden spoon or using a stand mixer with a dough hook attachment. Once the dough starts to come together, knead it for about 8-10 minutes until smooth and elastic. If the dough is too sticky, add more flour (a tablespoon at a time) until it reaches the desired consistency.
        • Place the dough in a lightly greased bowl, cover with a clean kitchen towel or plastic wrap, and let it rise in a warm place for 1-1.5 hours, or until doubled in size.
    See also  The Sweet Sensation: No-Oven Dessert Delight!


      1. Prepare the Poppy Seed Filling:
        • While the dough is rising, make the poppy seed filling. Place the poppy seeds in a saucepan and add the milk. Cook over medium heat, stirring occasionally, until the milk is mostly absorbed and the poppy seeds soften (this takes about 10-15 minutes).
        • Add the sugar and butter to the poppy seed mixture and cook for an additional 5 minutes, stirring constantly, until the filling thickens. Remove from heat and allow the mixture to cool to room temperature.


      1. Assemble the Poppy Seed Roll:
          • Once the dough has risen, punch it down to release the air. Transfer it to a lightly floured surface and roll it out into a large rectangular shape (about 1 cm thick).
          • Brush the surface of the rolled-out dough with the melted butter (30 g) to add extra richness and moisture.
          • Spread the cooled poppy seed filling evenly over the dough, leaving a small border around the edges.


        • Roll the dough up tightly, starting from one of the longer sides, to form a log. Pinch the seam to seal the roll and tuck in the ends.
        • Place the roll on a baking sheet lined with parchment paper, seam side down.


    1. Egg Wash and Baking:
        • Preheat your oven to 180°C (350°F) in the upper-lower heating mode (no convection).
        • In a small bowl, whisk together the egg yolk and 1 tablespoon of milk. Brush the egg wash generously over the top and sides of the poppy seed roll.
        • Bake the roll in the preheated oven for 25-30 minutes, or until it turns golden brown on top and sounds hollow when tapped. If the top is browning too quickly, cover it loosely with foil during the last 10 minutes of baking.


    2. Decorating the Roll:
        • Once the roll has finished baking, let it cool completely on a wire rack.
        • Melt the milk and white chocolate separately in the microwave or using a double boiler. Drizzle both chocolates over the top of the cooled roll for a decorative and delicious finish.


    3. Serve and Enjoy:
      • Slice the roll into thick pieces and serve. It’s delicious on its own or with a cup of tea or coffee.
  • Instantly Removes Nail Fungus Like an Eraser! The Best Natural Remedy!

    Instantly Removes Nail Fungus Like an Eraser! The Best Natural Remedy!

    Instantly Removes Nail Fungus Like an Eraser! The Best Natural Remedy!

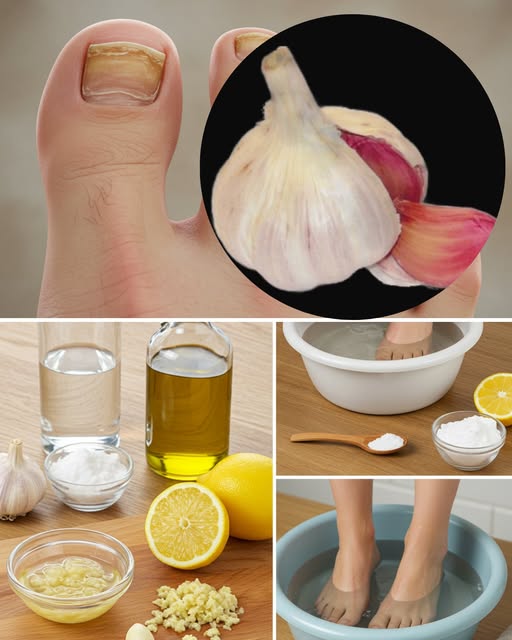
    Nail fungus is a stubborn and unsightly condition that affects many people worldwide. It can lead to thick, discolored, brittle nails and discomfort. If you’re looking for a powerful, natural remedy that eliminates nail fungus quickly and effectively, you’ve come to the right place. This homemade treatment harnesses the power of garlic, lemon, and other natural ingredients to combat fungal infections and restore healthy nails.

    Why This Natural Remedy Works

    This remedy is packed with antifungal and antimicrobial properties, making it highly effective in treating nail fungus. Here’s how each ingredient contributes to fighting the infection:

    Garlic and Garlic Peels

    Garlic is a well-known natural antibiotic, and its peels contain allicin, a powerful compound with strong antifungal and antibacterial properties. Allicin helps eliminate fungus, bacteria, and infections from the nails.

    Lemon Juice

    Lemon juice creates an acidic environment, preventing the fungus from multiplying. Over time, the fungus weakens and eventually dies, allowing the nails to heal naturally.

    Vod*ka

    Alc*ohol has antiseptic and antifungal properties, helping to disinfect and kill harmful microbes present on the nails.

    Baking Soda

    Baking soda neutralizes acidity, prevents moisture build-up (which fungi thrive on), and helps maintain a healthy nail environment.

    Sea Salt and Olive Oil

    Sea salt acts as a natural disinfectant, while olive oil nourishes and strengthens the nails, ensuring they grow back healthy and strong.


    Step-by-Step Guide to Eliminate Nail Fungus Naturally

    Step 1: Prepare the Garlic Infusion

    1. Take one whole garlic and separate the cloves.
    2. Do not throw away the peels! The peels contain allicin, which is essential for fighting infections.
    3. Grate the garlic and divide it into two equal portions.
    4. Take the first half and squeeze out the garlic juice.
    5. Mix 1 tablespoon of vod*ka and 1 tablespoon of water with the garlic juice.
    6. Stir well and let the mixture sit overnight.

    Step 2: Prepare a Foot Bath

    A foot bath helps soften the nails, making the treatment more effective.

    1. In 2 glasses of water, bring to a boil and cook for 10 minutes.
    2. Let the water cool slightly.
    3. Add 1 tablespoon of baking soda and the juice of half a lemon.
    4. Pour in 1 liter of cold water.
    5. Soak your feet in this mixture for 15-20 minutes before bed.
    6. Dry your feet thoroughly with a towel to prevent the fungus from spreading.

    Repeat this process every night until the infection is gone.


    Step 3: Apply the Garlic Ointment

    After soaking your feet, it’s time to apply the garlic treatment.

    1. Take the second half of the grated garlic.
    2. Add 1 tablespoon of sea salt and 1 tablespoon of olive oil.
    3. Mix well until it forms a paste.
    4. Apply the paste to the affected nails.
    5. Cover with a cotton pad and secure with a bandage.
    6. Leave the compress on overnight.

    In the morning:

    • Remove the compress and wash your feet with soap and warm water.
    • Apply the garlic infusion (prepared in Step 1) twice a day using a cotton swab.

    How Long Until You See Results?

    For best results, continue this treatment daily until the nail fungus is completely gone. Depending on the severity of the infection, this can take a few weeks to a couple of months. Healthy nail growth will start to appear, and the discoloration and thickness will gradually improve.


    Additional Tips to Prevent Nail Fungus

    • Keep your feet dry and clean.
    • Avoid wearing tight, non-breathable shoes.
    • Change socks daily and wear cotton socks to reduce moisture.
    • Trim nails regularly and avoid sharing nail clippers.
    • Use antifungal powders if you have sweaty feet.
    • Avoid walking barefoot in public showers, pools, or gyms.

    Final Thoughts

    This powerful, all-natural remedy harnesses the antimicrobial effects of garlic, lemon, baking soda, and sea salt to effectively eliminate nail fungus. Unlike harsh chemical treatments, this method is gentle, safe, and free of side effects. If you’re tired of dealing with fungal infections, give this home remedy a try and enjoy healthy, beautiful nails again!

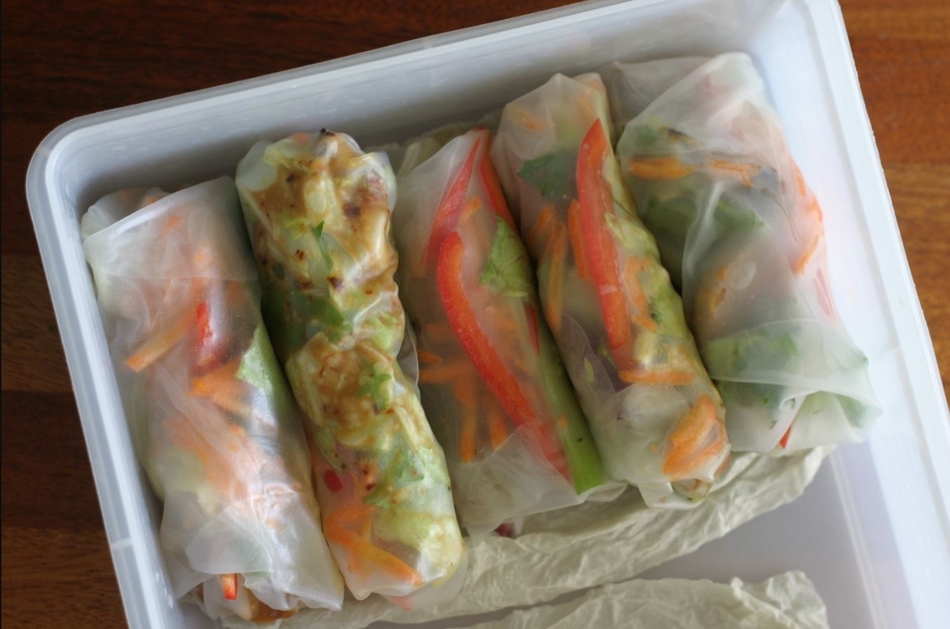
  • Crispy Vegetable Spring Rolls

    Crispy Vegetable Spring Rolls

    Crispy Vegetable Spring Rolls

    The spring rolls are crispy, not greasy and light, these delicious veg spring rolls are crunchy from the outside, with a spiced vegetable filling from the inside. You can serve vegetable spring rolls hot with red chilli sauce or red chilli garlic chutney or tomato ketchup. You will start by making the dipping sauce: In a small mixing bowl, combine all the ingredients and set aside until ready to serve.


    In a large skillet or wok over medium-high heat, add the oil. When the oil begins to shimmer, add the garlic, ginger, and green onions, and cook, stirring often, until fragrant, 30 to 40 seconds. Add the mushrooms, cabbage, and bamboo shoots. Season with salt.

    spring2


    Sauté, shaking the pan often until the vegetables start to soften, 3 minutes. Increase the heat to high, then add the snow peas, soy sauce and sesame oil, and season with salt. Sauté for 1 more minute until the vegetables are crisp-tender. Stir in the cilantro.


    Drain the filling to remove any excess moisture, then spread the vegetables on a rimmed baking sheet and let them cool to room temperature for about 10 minutes. Working with one wrapper, place the wrapper so that a corner is facing you, then spoon 2 tablespoons of the cooled filling onto the bottom third of the wrapper that is closest to you.


    Lift the bottom of the wrapper and fold over the filling, flattening the wrapper around the filling so that no air bubbles form. Tuck it back. Begin folding the wrapper away from you. Fold in the sides to form an envelope-like shape. Continue to cinch and fold. Brush the top inside corner lightly with the egg white. The spring roll should measure 1-by-3½ inches. Place the spring roll on a parchment-lined sheet tray; cover with a damp paper towel.

    Repeat with the remaining wrappers and filling. You can freeze the spring rolls in a single layer on a parchment-lined baking sheet, making sure they do not touch. Once frozen, place the spring rolls in a plastic bag and store them for up to 1 month. Add 1 additional minute to the frying time for frozen spring rolls.

    Fill a wok or a medium heavy-bottomed pot with 2 inches of oil and heat to 350°. Working in batches of 4, fry the spring rolls, turning occasionally, until golden brown and crisp, 1½ to 2 minutes. Remove using a slotted spoon and transfer to a wire rack to cool. Serve the spring rolls with the dipping sauce.


    Ingredients;

    • 1 tablespoon cooking oil for stir-frying
    • 2 teaspoons grated fresh ginger grated
    • 2 cloves garlic finely minced
    • 1 stalk green onion minced
    • 8 fresh shiitake mushroom caps or Chinese dried mushroom caps very thinly julienned
    • 3 cups cabbage shredded (about 1/2 small cabbage)
    • 1/2 cup julienned carrots (about 2 med carrots)
    • 4 ounces canned bamboo shoots drained and julienned
    • 1 cup fresh bean sprouts
    • 1 tablespoon soy sauce
    • 1 teaspoon Asian sesame oil
    • 1 tablespoon cornstarch
    • 50 spring roll wrappers defrosted
    • cooking oil for deep frying (about 3 cups)

    Instructions;

      1. In a large saute pan or wok, swirl in 1 tablespoon of the cooking oil.


      1. Turn on the heat to medium-high and immediately add garlic, ginger, and green onion, stirring frequently. By the time the oil is hot, add the mushrooms, cabbage, carrots, and bamboo shoots.
      2. Turn heat to high and stir-fry the vegetables for about 2 minutes. and then toss in the bean sprouts. Add in the soy sauce and sesame oil.
      3. Cook for another minute then spread the filling out onto a large baking sheet. Prop the baking sheet up on one side to allow any juices to accumulate at the bottom.
      4. In a small bowl, whisk together the cornstarch and 1/4 cup of cool water to form a slurry.
      5. Place a wonton or spring roll wrapper on a flat surface, add 1 tablespoon of the vegetable mixture into a corner of the wrapper, and then roll the edge of the wrapper tightly around the mixture.
      6. Fold the two side corners towards the middle of the wrapper while continuing to roll up.
      7. Paint the top edge with the cornstarch slurry mixture and wrap tightly the rest of the way. Make sure all edges are tightly sealed. Place seam side down. Cover with plastic wrap to avoid drying out.
      8. In a large wok or medium saucepan over high heat, add about 1-2 inches of cooking oil.
      9. Slide several egg rolls into the oil and allow them to cook for 2-3 minutes, turning them over a couple of times, or until the wonton wrappers are golden brown.


    1. Remove the egg rolls to a cooling rack or paper-towel-covered plate to allow them to drain. Serve hot.
  • Yogurt Butter Cake

    Yogurt Butter Cake

    Yogurt Butter Cake

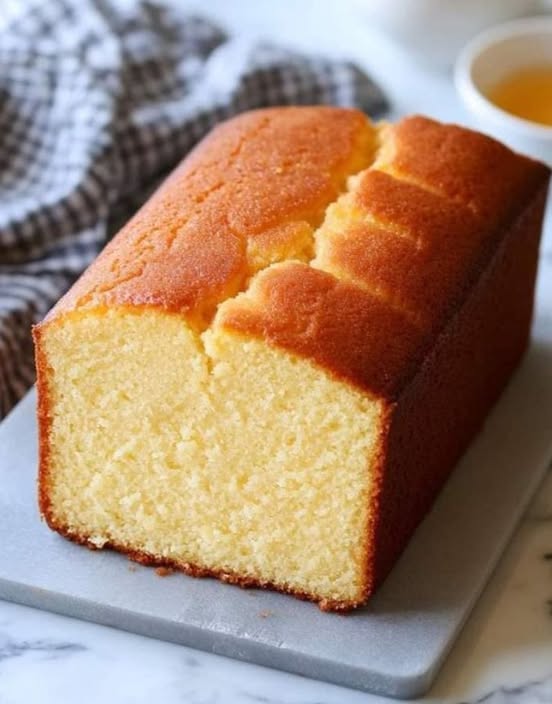
    This Yogurt butter Cake is delicious. It’s perfectly sweet, but not overly sweet. It gets slightly crisp on the outside while being super soft on the inside. The recipe starts with one jar of yoghurt. The rest of the ingredients are measured in that same jar: two jars of sugar, 3 jars of flour, and one jar of oil. The cake transforms a few common ingredients into a sweet but not-too-sweet dessert.

    It’s a bit like a pound cake but slightly healthier, almost cutting the calories in half. There are also many ways to play with the recipe and dress it up, though it’s fabulous. It’s a great option for afternoon tea, brunch, or as a light dinner dessert. You can also have it around for a few days and enjoy it as a snack. All ingredients must be at room temperature before you start, line and grease the tins well.

    yogbuttercake2

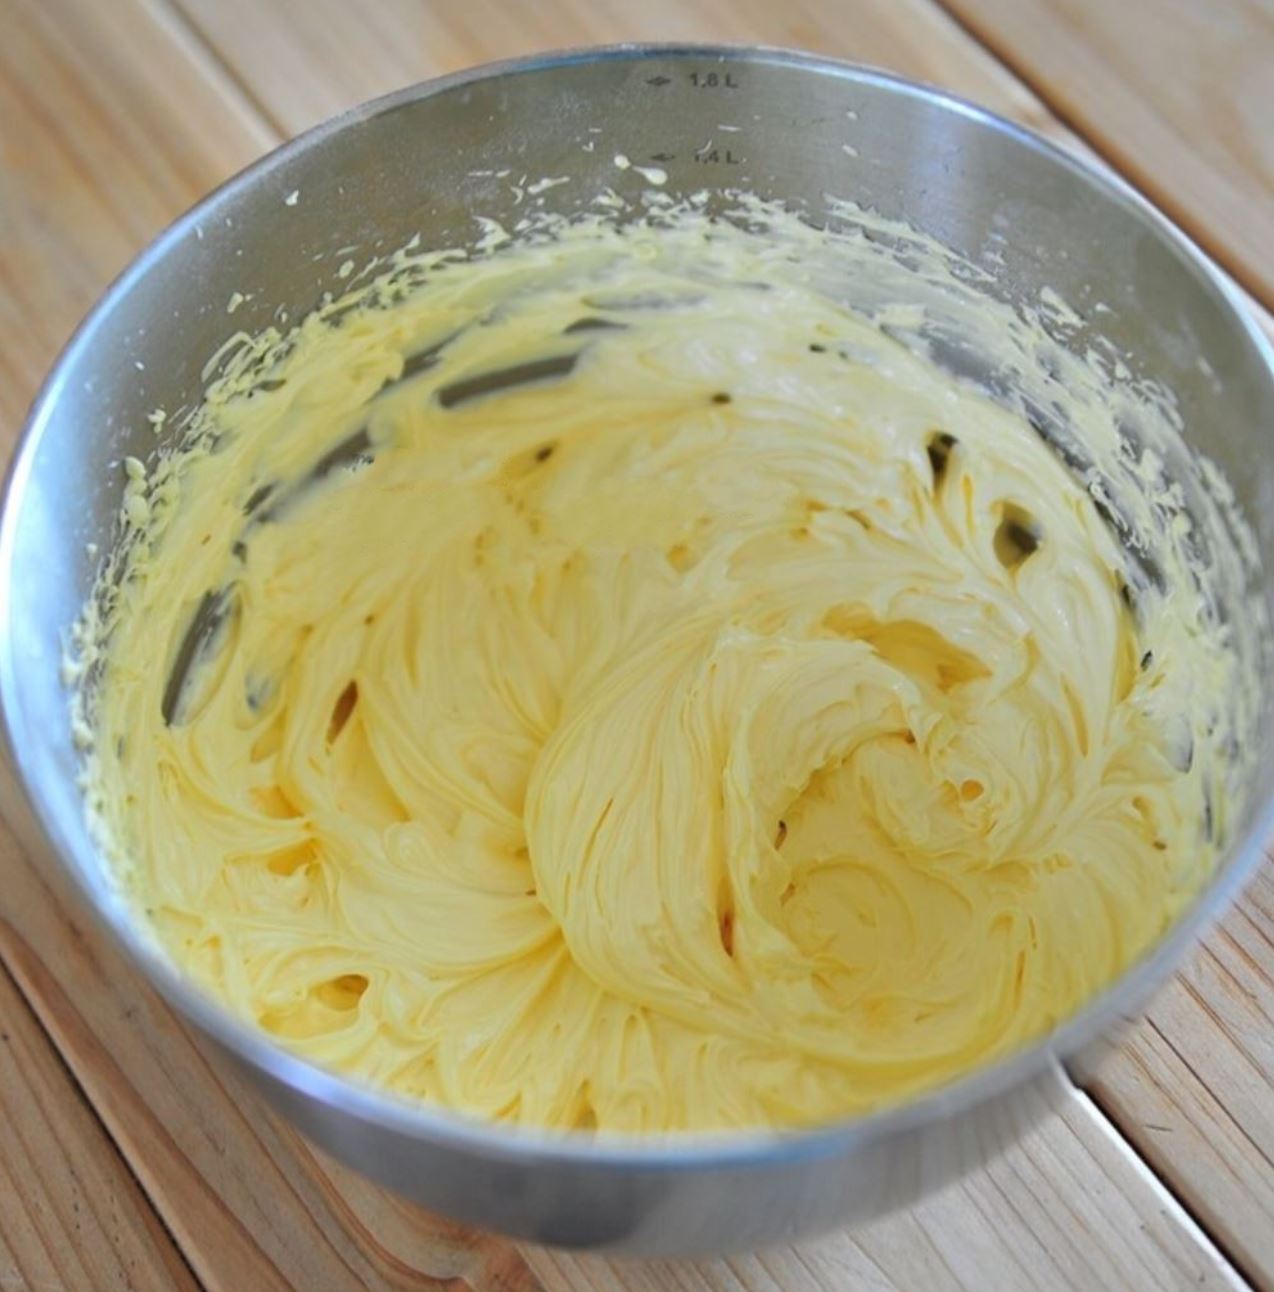
    Cream the butter and sugar for 10 full minutes in your food mixer or with electric hand beaters – scrape down whenever it starts climbing up the bowl. Sift your flours and raising agents together at least twice – it’s a bit messy but you need to ensure they are well mixed and no lumps are allowed. Add an egg and a spoonful of the sifted flour and whip it in until pale, light and fluffy – this stops it from curdling.

    Stop when all ingredients are combined and do not over-mix. Be gentle lowering the bowl to just over the prepared tins so you don’t knock all the masses of air you have creamed, sifted and whipped into the batter. The cake is so easy to make and though it takes a pretty long time to bake in the oven, the texture is still soft and tender. It has a pretty tight crumb so it doesn’t crumble easily when cut.

    It’s denser than a regular sponge/chiffon cake but much lighter than a butter cake. The cake is super moist and a simple lemon syrup that’s brushed on while still warm yields an amazingly delicious, crisp, citrus-glazed crust.

    Ingredients;

    • 245 grams/ 8.6Oz (2 cups) plain flour
    • 1 ½ tsp baking powder
    • 175grams/ 6.2Oz butter(3/4 cup), room temperature
    • 130g/ 4.6Oz Caster Sugar (2/3cup)
    • 3 large eggs
    • 4 tbsp plain yoghurt
    • 1/4 tsp salt

    Instructions;

    1. Preheat oven to 180°C. Line a loaf tin with baking paper.
    2. Sift flour and baking powder and set aside.
    3. Using a stand mixer with the paddle attachment, cream butter, and caster sugar at medium-high speed until pale and fluffy. Add in the pinch of salt in the middle of the beating.
    4. Add in eggs, one at a time and beat well after each addition. If necessary scrape mixture off the side of the mixing bowl to make sure all are well beaten.
    5. Fold in sifted flour mixture in 3 batches.
    6. Next yoghurt and fold thoroughly till combined.
    7. Pour the batter into the prepared loaf tin.
    8. Bake at 180C for about 35 to 40 minutes or when the skewer inserts in the centre and comes out clean.
    9. Remove cake from the oven and allow to cool in the pan for 10 minutes.
    10. Transfer the cake to a rack and cool completely before cutting it.
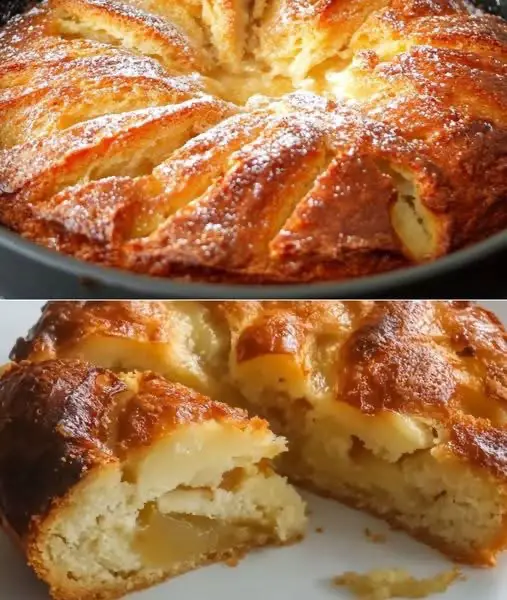
  • Irresistible 10-Minute Apple Cake: A Speedy Delight for Busy Gourmets

    Irresistible 10-Minute Apple Cake: A Speedy Delight for Busy Gourmets

    Irresistible 10-Minute Apple Cake: A Speedy Delight for Busy Gourmets

    Ingredients

    For this speedy yet sophisticated cake, you’ll need:

    For the Cake Batter:

    • 200g (7.05 oz) all-purpose flour
    • 10g (2 teaspoons) baking powder
    • 125g (4.4 oz) granulated sugar
    • 8g (1 pack) vanilla sugar
    • A pinch of salt
    • 125g (4.4 oz) unsalted butter, softened
    • 3 large eggs, at room temperature
    • 45ml (3 tablespoons) milk

    For the Topping:

    • 4 medium apples (about 600g or 21 oz total)
    • 30g (1.05 oz) frozen butter
    • 5g (1 teaspoon) cinnamon sugar

    Step-by-Step Instructions

    1. Preparing the Batter (5 minutes)

    I begin by preheating the oven to 180°C (356°F) with both top and bottom heat. This ensures our oven is at the perfect temperature when our cake is ready to bake.

    In a large mixing bowl, I sift together the flour and baking powder. Sifting is crucial as it aerates the flour, leading to a lighter, fluffier cake texture. To this, I add the sugar, vanilla sugar, and a pinch of salt.

    Next, I add the softened butter and eggs to the dry ingredients. Using an electric mixer, I beat the mixture on medium speed for 2 minutes. This step is crucial – it not only combines the ingredients but also incorporates air into the batter, which will help our cake rise beautifully.

    The result is a smooth, creamy batter that’s rich in flavor and primed for baking. I transfer about two-thirds of this batter into a greased 26cm (10-inch) springform pan, spreading it evenly to create a smooth base for our apples.

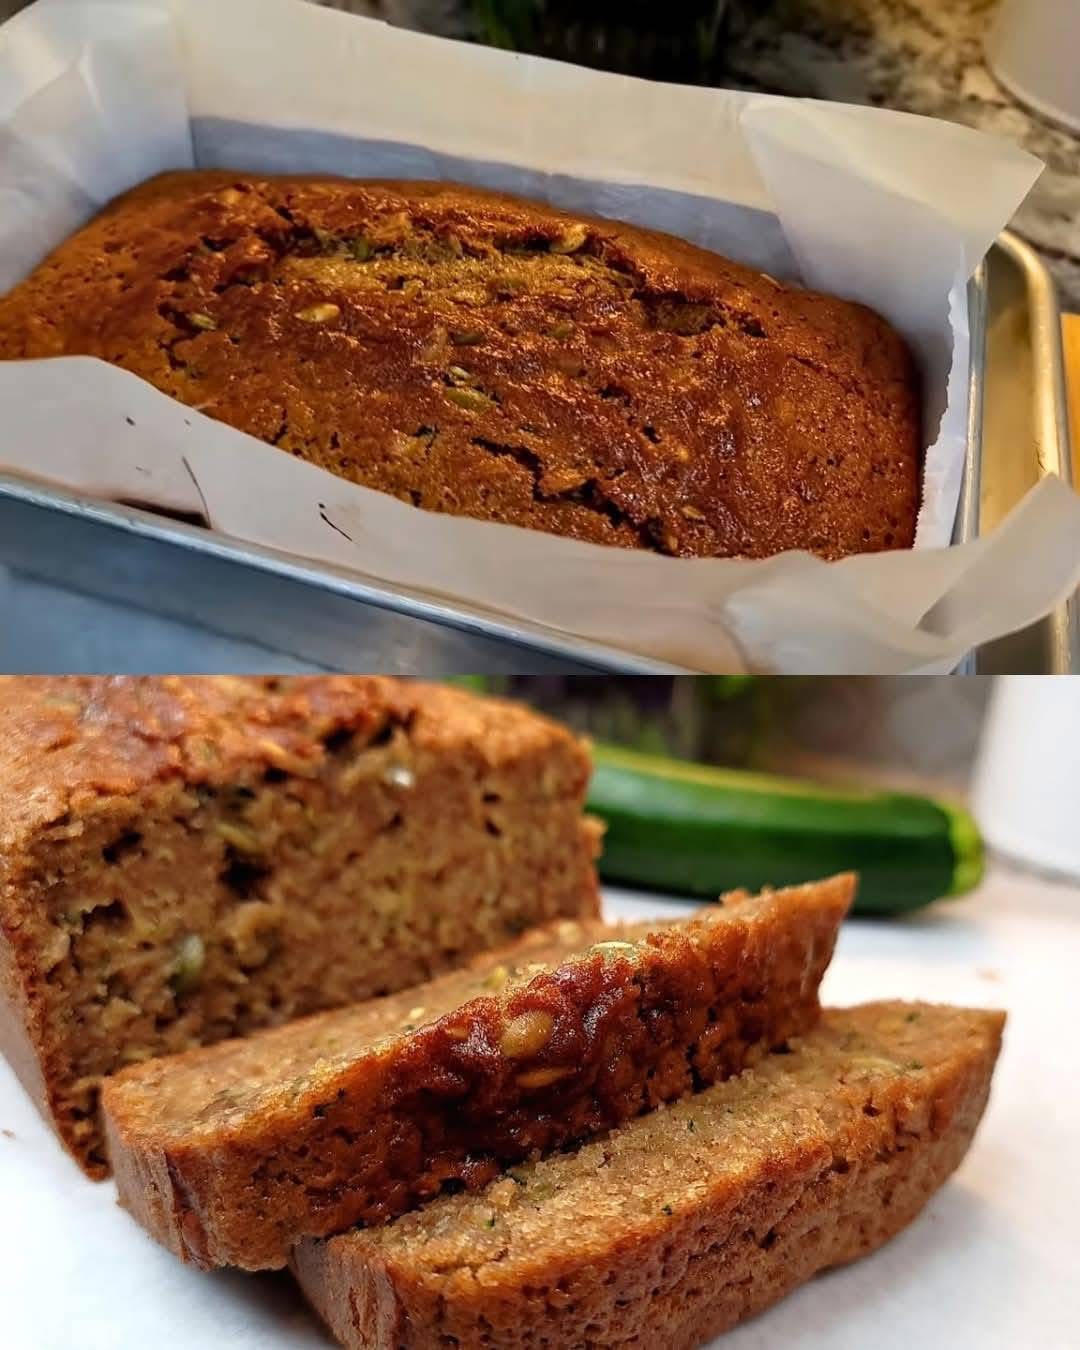
  • Moist Zucchini Bread

    Moist Zucchini Bread


    Moist Zucchini Bread

    This Moist Zucchini Bread is soft, flavorful, and perfectly spiced with cinnamon and brown sugar. The addition of grated zucchini keeps it extra moist, while walnuts or pecans add a delicious crunch. It’s a great way to use fresh zucchini and makes a perfect breakfast, snack, or dessert.

    Preparation Time

      • Prep Time: 15 minutes


      • Baking Time: 45-60 minutes
      • Total Time: 1 hour 10 minutes
      • Servings: 8-10 slices


    Ingredients

      • 2 cups (260 g) all-purpose flour
      • 1½ tsp baking powder


      • ½ tsp baking soda
      • 1 tsp coarse salt (or ½ tsp fine salt)
      • 1⅓ cups (265 g) light brown sugar, packed


      • 1½ tsp ground cinnamon
      • 2 cups (305 g) zucchini, grated
      • ½ cup walnuts or pecans, chopped (optional)


      • 2 large eggs
      • ½ cup (118 ml) cooking oil
      • ½ cup (118 ml) milk


    • 1½ tsp vanilla extract

    Directions

    1. Prepare the Batter


      • Preheat oven to 350ºF (176ºC).
      • Grease and line a 9×5-inch loaf pan with parchment paper.
      • In a large bowl, whisk together flour, baking powder, baking soda, salt, brown sugar, and cinnamon.


    • Stir in the grated zucchini and chopped nuts (if using).

    2. Mix the Wet Ingredients

      • In another bowl, whisk eggs, oil, milk, and vanilla extract until well combined.


    • Pour the wet mixture into the dry ingredients and stir until just combined.

    3. Bake the Bread

      • Pour the batter into the prepared loaf pan.


    • Bake for 45-50 minutes (for a 9×5-inch pan) or 55-60 minutes (for an 8×4-inch pan) until a toothpick inserted in the center comes out clean.

    4. Cool and Serve

      • Let the bread cool in the pan for 10 minutes, then transfer to a wire rack to cool completely.


    • Slice and enjoy warm or at room temperature!

    Serving Suggestions

      • Spread with butter or cream cheese.


    • Serve with a cup of coffee or tea.
    • Drizzle with honey or maple syrup for extra sweetness.

    Cooking Tips


      • For extra moisture, do not squeeze the liquid out of the zucchini.
      • For a richer flavor, replace half of the oil with melted butter.
      • For added texture, mix in chocolate chips or dried fruit.

    Nutritional Benefits

      • Rich in fiber and vitamins from zucchini.
      • Good source of healthy fats from nuts.


    • Lower in refined sugar with brown sugar instead of white sugar.

    Dietary Information

      • Vegetarian-friendly


    • Can be made dairy-free by using almond or oat milk.
    • Can be made gluten-free with a 1:1 gluten-free flour substitute.

    Nutritional Facts (Per Slice, Approx.)


      • Calories: 250
      • Protein: 4g
      • Carbohydrates: 34g


    • Fat: 11g

    Storage

      • Refrigeration: Store in an airtight container for up to 5 days.


    • Freezing: Wrap slices and freeze for up to 3 months; thaw before serving.
    • Reheating: Warm in the microwave for 10-15 seconds before serving.

    Why You’ll Love This Recipe


      • Moist, soft, and flavorful
      • Easy to make with simple ingredients
      • Great for meal prep and freezing


    • A delicious way to eat more vegetables
  • One Pan Chicken Thigh Dinner

    One Pan Chicken Thigh Dinner

    One Pan Chicken Thigh Dinner

    Introduction

    Savor the flavors of a One Pan Chicken Thigh Dinner, a delightful and hearty meal that’s perfect for busy weeknights. This recipe features tender chicken thighs, perfectly roasted vegetables, and a mouthwatering honey lemon sauce that brings everything together beautifully. With minimal cleanup and maximum flavor, it’s a dish you’ll want to make every day!

    Ingredients

    • 5 chicken thighs
    • 1 tsp oregano (5g)
    • Salt (to taste)
    • Black pepper (to taste)
    • 4-5 potatoes, roughly chopped
    • 7-8 small carrots, sliced into ¼-inch thick pieces
    • 2 tbsp olive oil (30ml)
    • Butter (as needed)
    • 1 white onion, chopped
    • 4 large garlic cloves, chopped
    • A handful of parsley, chopped

    Honey Lemon Sauce

    • 90ml honey (6 tbsp)
    • 100ml sweet chili sauce (approx. ½ cup), or to taste
    • 2 tbsp lemon juice (30ml)
    • 3 tbsp soy sauce (45ml)
    • ¾ tbsp Dijon mustard (11g)

    Nutrition Information

    • Serving Size: 1 portion (1/5 of the recipe)
    • Number of Servings: 5
    • Calories: 420
    • Total Fat: 22g
    • Saturated Fat: 6g
    • Cholesterol: 100mg
    • Sodium: 950mg
    • Total Carbohydrates: 40g
    • Dietary Fiber: 5g
    • Sugars: 18g
    • Protein: 18g

    Directions

    Step 1: Prepare and Sear the Chicken

    1. Preheat your oven to 200°C (400°F).
    2. Season the chicken thighs with salt, pepper, and oregano. Flip and season the other side. Rub the seasonings into the chicken thighs and set them aside.
    3. Roughly chop the potatoes and slice the carrots to about a quarter-inch thick.
    4. Chop the garlic, parsley, and white onion.
    5. Heat up a skillet pan, then add the olive oil followed by the butter. Let the butter melt before adding the chicken thighs.
    6. Sear the chicken thighs nicely on both sides until lightly browned and crispy. Remove the chicken thighs from the pan once done cooking and set them aside.

    Step 2: Prepare the Vegetables and Sauce

    1. In the same pan with the oil, add the chopped onion and sauté until translucent.
    2. Add the potatoes, carrots, garlic, and parsley. Toss until all the ingredients are well combined. Let them cook while preparing the sauce.

    Step 3: Make the Honey Lemon Sauce

    1. In a separate pan, add the honey, lemon juice, sweet chili sauce, soy sauce, and mustard. Stir well.
    2. Cook the sauce until it becomes bubbly and thickens to a desirable consistency.

    Step 4: Assemble and Bake

    1. Put the chicken back into the pan of veggies.
    2. Drizzle the honey lemon sauce all over the chicken and vegetables.
    3. Transfer the pan to the preheated oven and bake for about 25 to 35 minutes, or until the chicken is cooked through and the vegetables are tender.

    Step 5: Serve and Enjoy

    1. Remove the pan from the oven and let it cool slightly.
    2. Serve hot, garnished with additional fresh parsley if desired.

    Tips

    • For extra flavor, marinate the chicken thighs in the seasonings for at least 30 minutes before cooking.
    • Add more vegetables like bell peppers, zucchini, or green beans for added variety and nutrition.
    • Adjust the sauce to your taste by adding more or less of the sweet chili sauce and lemon juice.

    Conclusion

    This One Pan Chicken Thigh Dinner is a perfect example of how simple ingredients can come together to create a flavorful and satisfying meal. The combination of tender chicken, roasted vegetables, and a delectable honey lemon sauce makes this dish a standout. Enjoy the ease of preparation and the minimal cleanup, making it an ideal choice for any night of the week. Happy cooking!

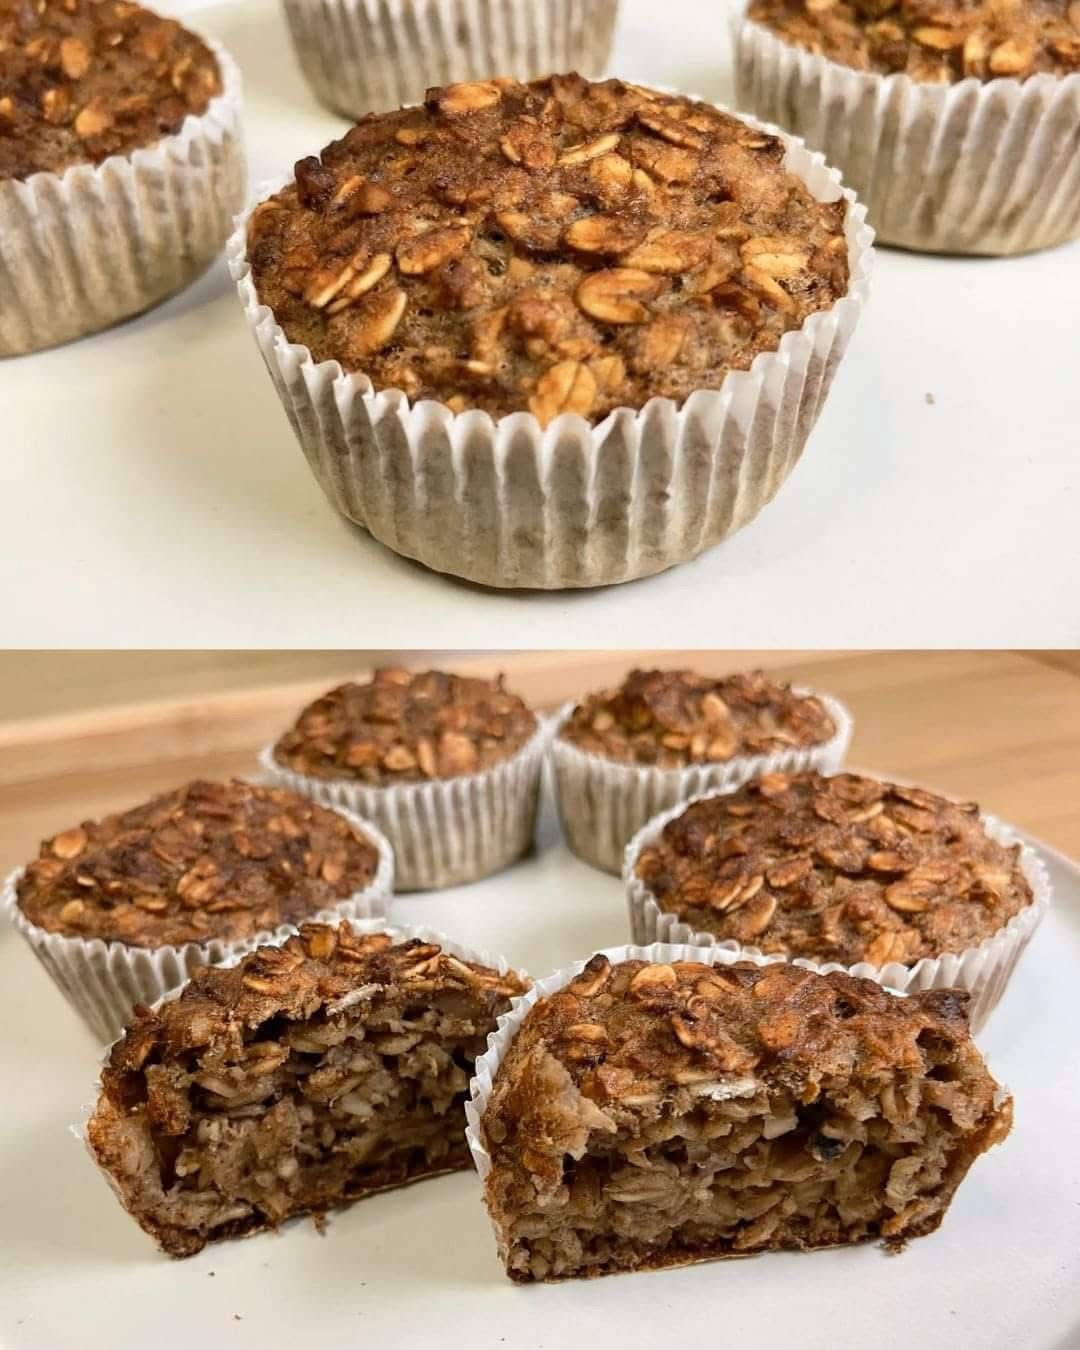
  • Flourless Banana Oatmeal Cake (Gluten-Free)

    Flourless Banana Oatmeal Cake (Gluten-Free)

    Flourless Banana Oatmeal Cake (Gluten-Free)

    Table of Contents

    Ingredients

      • 1 ripe banana, mashed
      • 1 egg
      • 50 ml milk (dairy or plant-based)
      • 70 g oatmeal (use gluten-free if necessary)
      • 5 g baking powder
      • 1 g salt
      • 2 g cinnamon
      • 20 g walnuts, chopped

    Steps to Make Flourless Banana Oatmeal Cake

      1. Prepare the Oats:
        • Preheat your oven to 180°C (350°F) and line a small baking dish or loaf pan with parchment paper or lightly grease it.
        • In a blender or food processor, pulse the oats until they reach a flour-like consistency. This will create a smoother cake texture.
      1. Mix the Wet Ingredients:
        • In a mixing bowl, mash the banana until smooth. Add the egg and milk, and whisk until well combined.
      2. Combine the Dry Ingredients:
          • In a separate bowl, combine the ground oats, baking powder, salt, and cinnamon. Mix well to distribute the baking powder evenly.


      3. Combine Wet and Dry Ingredients:
        • Add the dry ingredients to the wet ingredients, stirring until just combined. Avoid over-mixing, as this can make the cake dense.
      1. Add Walnuts:
        • Fold in the chopped walnuts, reserving a few to sprinkle on top if desired.
      2. Bake the Cake:
          • Pour the batter into the prepared baking dish, spreading it evenly.


        • Sprinkle the reserved walnuts on top.
        • Bake in the preheated oven for 20-25 minutes, or until a toothpick inserted into the center comes out clean.
      1. Cool and Serve:
        • Let the cake cool for a few minutes in the pan before transferring it to a wire rack to cool completely.
        • Slice and serve as is, or top with a dollop of yogurt or a drizzle of honey for extra flavor.

    Nutrition Facts (Per Serving, Approximate)

      • Calories: 140 kcal
      • Carbohydrates: 19 g
      • Protein: 4 g
      • Fat: 5 g
      • Saturated Fat: 1 g
      • Fiber: 2 g
    • Sodium: 80 mg
    • Sugar: 4 g
  • Homemade Pizza Dough Recipe

    Homemade Pizza Dough Recipe

    Ingredients:

    2 1/4 teaspoons (1 packet) active dry yeast
    1 teaspoon sugar
    1 cup warm water
    2 1/2 cups all-purpose flour
    2 tablespoons olive oil
    1 teaspoon salt

    Directions:

    1. In a small bowl, combine the active dry yeast, sugar, and warm water. Stir gently and let it sit for about 5 minutes until the mixture becomes frothy.
    2. In a large mixing bowl, combine the all-purpose flour and salt. Make a well in the center.
    3. Pour the yeast mixture and olive oil into the well. Stir together with a spoon until the dough starts to come together.
    4. Transfer the dough to a lightly floured surface and knead for about 5-7 minutes until it becomes smooth and elastic.
    5. Place the dough in a greased bowl and cover it with a clean kitchen towel. Allow it to rise in a warm place for about 1-2 hours or until it doubles in size.
    6. Once the dough has risen, punch it down to release any air bubbles. Divide the dough in half if you prefer thin crust or use the entire dough for a thicker crust.
    7. Roll out the dough on a floured surface into your desired thickness and shape.
    8. Transfer the dough to a baking sheet or pizza stone lined with parchment paper.
    9. Preheat the oven to 475°F (245°C) and let the dough rest for about 10 minutes.
    10. Add your favorite pizza toppings and bake for 12-15 minutes, or until the crust is golden brown and the cheese is melted and bubbly.
    11. Prep Time: 15 minutes | Rising Time: 1-2 hours | Cooking Time: 12-15 minutes | Total Time: 1 hour 30 minutes
    12. Kcal: Varies depending on pizza toppings | Servings: 2 medium-sized pizzas .
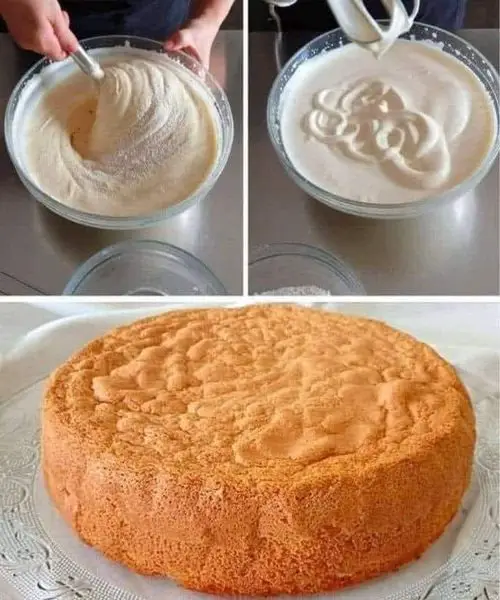
  • 3-INGREDIENT SPONGE CAKE

    3-INGREDIENT SPONGE CAKE

    3-INGREDIENT SPONGE CAKE

    Table of Contents

    3-INGREDIENT SPONGE CAKE

    1f31f INGREDIENTS:

    – 4 eggs
    – 1 cup (200g) granulated sugar
    – 1 cup (120g) all-purpose flour

    1f31f INSTRUCTIONS:

    1. Preheat your oven to 350°F (175°C). Grease and line the bottom of a round cake pan with parchment paper.
    2. In a large mixing bowl, crack the eggs and add the sugar.
    3. Using an electric mixer, beat the eggs and sugar together on medium-high speed for about 8-10 minutes until the mixture is thick, pale, and has tripled in volume.
    4. Sift the flour into the egg mixture in small batches. Gently fold the flour into the batter using a spatula, making sure not to overmix. Be careful to fold in the flour thoroughly but gently to maintain the airiness of the batter.
    5. Once the flour is fully incorporated, pour the batter into the prepared cake pan.
    6. Bake in the preheated oven for approximately 25-30 minutes or until the top is golden brown and a toothpick inserted into the center comes out clean.
    7. Remove the cake from the oven and let it cool in the pan for 5 minutes. Then transfer it to a wire rack to cool completely.
    8. Once cooled, you can serve the sponge cake as is or frost it with whipped cream, fresh fruit, or your favorite frosting.
    Enjoy your homemade three-ingredient sponge cake! It’s a simple and versatile dessert that can be enjoyed on its own or with various toppings.
    I love you all ❤️1f4951f970
  • Quick and Delicious: Easy Breakfast Recipe in 5 Minutes

    Quick and Delicious: Easy Breakfast Recipe in 5 Minutes

    Ingredients for Easy Breakfast Recipe in 5 Minutes:
    1. 3 eggs
    2. 50 grams of white cheese (approximately 1/4 cup)
    3. 50 grams grated cheddar cheese (approximately 1/2 cup)
    4. 1 glass of milk (approximately 1 cup)
    5. 6 sprigs of parsley
    6. 1 hot pepper
    7. 1 teaspoon red pepper flakes
    8. 1 teaspoon of salt
    9. 1 packet of baking powder
    10. 4.5 cups of flour For Frying:
    11. Liquid oil
    How to Make an Easy Breakfast Recipe in 5 Minutes:
    1. Mixing the Ingredients:
      • Take the eggs into the kneading bowl and mix them thoroughly.
      • Add grated cheddar cheese and white cheese to the bowl and mix well.
      • Incorporate grated capia pepper, green pepper, finely chopped parsley, salt, chili pepper, baking powder, and milk into the mixture. Mix until well combined.
    2. Kneading the Dough:
      • Slowly add flour to the mixture while kneading.
      • Continue kneading until you achieve a soft dough that slightly sticks to your hands.
    3. Dividing and Shaping the Dough:
      • Divide the dough into two equal pieces.
      • Sprinkle some flour on the table and gently press the dough to form meringues.
      • Use a cutting card to cut the dough into triangular pieces.
    4. Frying the Breakfast Delights:
      • Pour liquid oil into a pan and heat it.
      • Once the oil is hot, place the dough pieces into the pan.
      • Cook until both sides are golden brown, ensuring the dough is cooked through.
    5. Serve and Enjoy:
      • Once cooked, remove the breakfast delights from the pan.
      • Serve hot and enjoy with your favorite beverage!