• About WordPress
    • WordPress.org
    • Documentation
    • Learn WordPress
    • Support
    • Feedback
  • Log In

PST-Algerie

  • Mobile Phone
    • XiaomiXiaomi Smartphones
    • iPhoneiPhone-Related Articles!
    • OPPO
    • Samsung
  • About Us
  • Contact Us
  • Privacy Policy
    • Disclaimer
    • Terms and Conditions
    • Cookie Policy

Category: cake

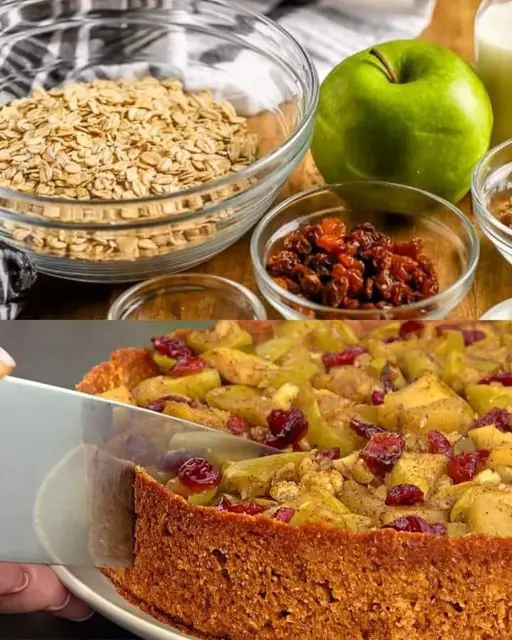
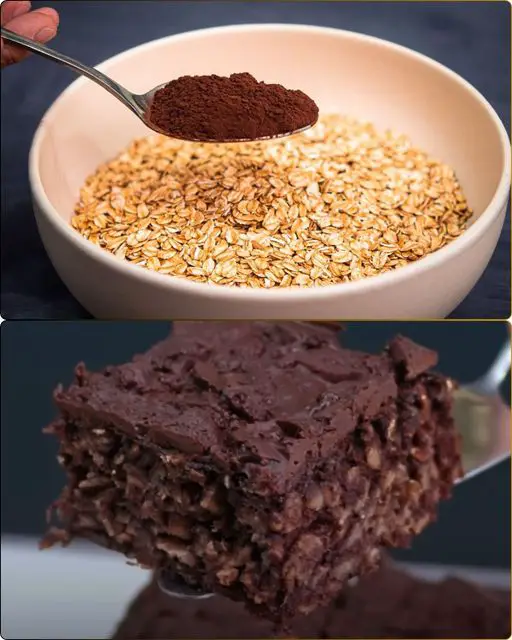
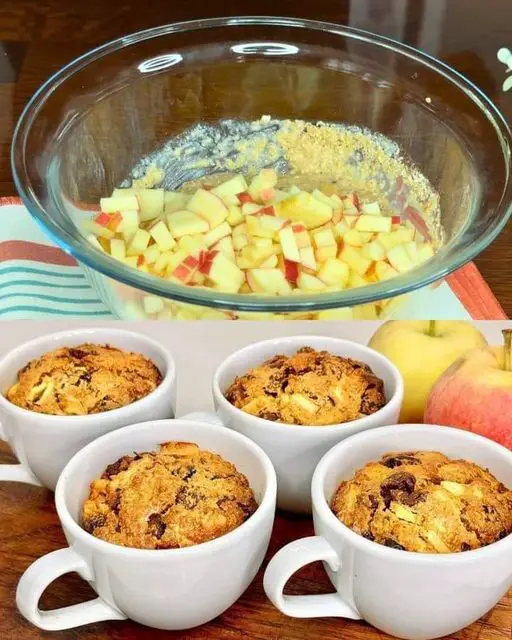
  • How to Make a Flourless Oatmeal and Carrot Pie

    How to Make a Flourless Oatmeal and Carrot Pie

    How to Make a Flourless Oatmeal and Carrot Pie 

    Table of Contents

    Are you looking for a delicious and healthy dessert option that doesn’t require flour, white sugar, or butter? Look no further! In this article, we will guide you through the steps to create a mouthwatering Flourless Oatmeal and Carrot Pie that’s both nutritious and satisfying. This recipe is perfect for those who want to indulge their sweet tooth while maintaining a wholesome diet.

    Ingredients

    1. 1 cup of Oats (approximately 130 g): Oats are rich in fiber and provide a hearty base for our pie.
    2. 1 cup of natural yogurt (250 ml): Natural yogurt adds creaminess and a tangy flavor to the pie.
    3. 2 units of Egg: Eggs act as a binding agent and contribute to the pie’s structure.
    4. 2 tablespoons of honey or syrup (about 50 g): Sweeten your pie naturally with honey or syrup for that irresistible taste.
    5. 2 units of Carrots (approximately 300 g): Carrots not only add a beautiful orange hue but also provide vitamins and antioxidants.
    6. 2 units of Apples (approximately 320 g): Apples bring a hint of sweetness and additional nutrients to the mix.
    7. Walnuts (amount to taste to decorate): Walnuts will be used to decorate and add a delightful crunch to your pie.

    Procedure

    Prepare the Oat and Yogurt Mixture

    In a bowl, combine the oats and natural yogurt, allowing them to rest together for about 5 minutes. This will help soften the oats and create a creamy base.

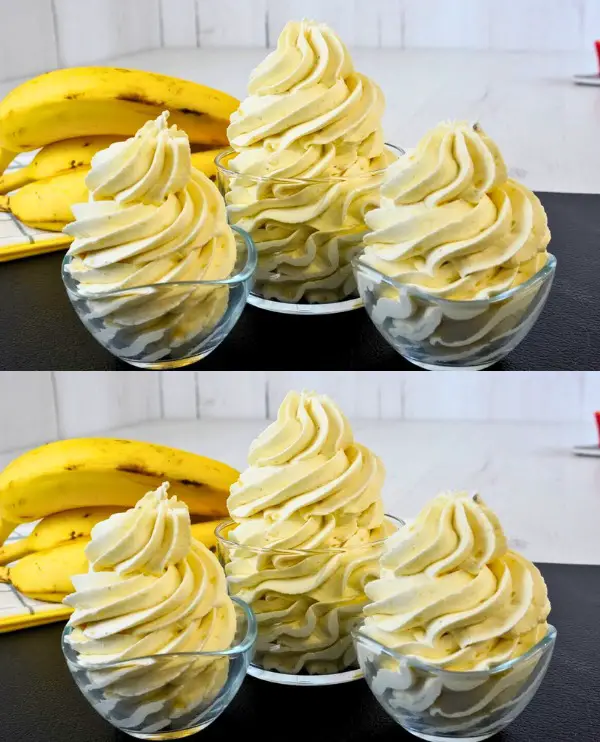
    See also  Banana Mousse in Just 5 Minutes: A Heavenly Dessert
    Add the Eggs and Sweetener

    Next, add the eggs and your chosen sweetener (honey or syrup) to the oat and yogurt mixture. Ensure thorough mixing to incorporate all the ingredients.

    Grate the Carrots

    Finely grate the carrots and add them to the mixture. Carrots bring a natural sweetness and a pop of color to the pie.

    Peel and Grate the Apples

    Peel and grate the apples, then add them to the mixture. Apples contribute moisture and a fruity flavor to our pie.

    Pour the Mixture into a Mold

    Grease a pie mold or line it with parchment paper. Pour the prepared mixture into the mold, spreading it evenly.

    Decorate with Walnuts

    To add an extra layer of flavor and texture, sprinkle some walnuts on top of the pie. This will create a delightful crunch when you bite into it.

    Bake to Perfection

    Preheat your oven to 180°C (350°F) and bake the pie for approximately 40 to 45 minutes. You’ll know it’s done when a toothpick inserted into the pie comes out clean.

    Let It Cool

    Allow the pie to cool before serving. This will ensure that it sets properly and is easier to slice.

    Conclusion

    Congratulations! You’ve just created a scrumptious Flourless Oatmeal and Carrot Pie that’s both nutritious and indulgent. This dessert is perfect for those with dietary restrictions and anyone who appreciates a guilt-free treat.

    September 14, 2024
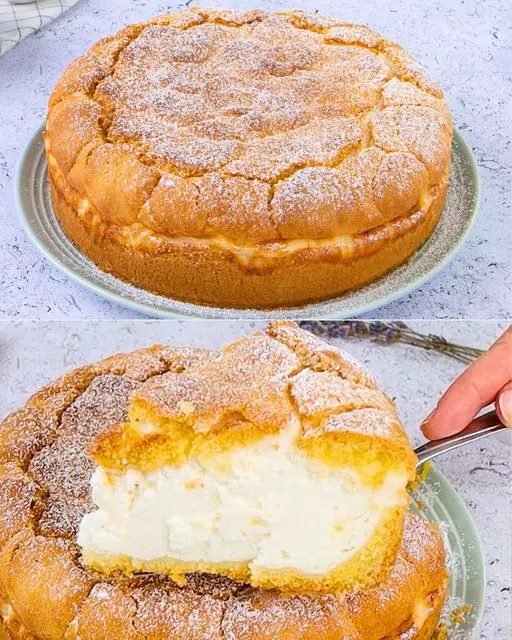
  • Indulge in this heavenly Apple Pie with Soufflé Cream – a simple and incredibly tasty treat!

    Indulge in this heavenly Apple Pie with Soufflé Cream – a simple and incredibly tasty treat!

    Indulge in this heavenly Apple Pie with Soufflé Cream – a simple and incredibly tasty treat!

    Table of Contents

    Apple Pie Dough (20 cm diameter):
    – 250g Flour
    – 1 tsp Baking Powder
    – 90g Butter
    – A pinch of Salt
    – 2 Egg yolks
    – 40g Sugar

    1f34f Apple Layer:
    – 3 Apples (~500g)
    – 40g Sugar
    – 4-5 tbsp Lemon Juice

    1f368 Soufflé Cream:
    – 2 Egg whites
    – 40g Sugar
    – 1 tsp Vanilla Sugar
    – 400g Natural Yogurt (or sour cream)
    – 30g Corn Starch


    ‍ Instructions:

    1. For the dough, mix flour, baking powder, butter, a pinch of salt, egg yolks, and 40g of sugar until a smooth dough forms. Press into a 20 cm pie pan.
    2. For the apple layer, slice the apples and mix them with 40g of sugar and lemon juice. Arrange them on the dough.
    3. Bake at 170°C (338°F) for 40-45 minutes or until the apples are tender.
    4. For the soufflé cream, beat 2 egg whites with 40g sugar and vanilla sugar until stiff peaks form.
    5. Mix natural yogurt (or sour cream) with cornstarch and gently fold in the beaten egg whites.
    6. Spread the soufflé cream over the baked apple pie.
    7. Chill and enjoy your melt-in-your-mouth dessert!

    See also  Grandma’s Roast Recipe Stunned Everyone! Easy Hearty Dinner!
    September 14, 2024
  • Snickers Cake Recipe – A Heavenly Delight!

    Snickers Cake Recipe – A Heavenly Delight!

    Snickers Cake Recipe – A Heavenly Delight! 

    Table of Contents

    Ingredients for the Cake:

    For the Biscuit:

    • 3 Eggs
    • 80 grams Sugar
    • 80 grams Flour
    • 20 grams Cocoa powder
    • 50 ml Milk
    • 30 ml Vegetable oil
    • A pinch of Salt
    • 1 tsp Baking powder

    For the Caramel:

    • 150 ml Cream (33%)
    • 150 grams Sugar
    • 50 grams Butter
    • A pinch of Salt
    • 100 grams Peanuts

    For the Cream:

    • 400 grams Cream cheese
    • 150 ml Cream (33%)
    • 1 tsp Vanilla sugar
    • 25 grams Powdered sugar

    For the Glaze:

    • 130 grams Chocolate
    • 50 ml Cream (33%)
    • 40 grams Peanuts

    Instructions:

    Baking the Biscuit:
    1. Preheat the oven to 180°C (356°F).
    2. Whisk eggs and sugar until fluffy. Gradually add flour, cocoa powder, milk, vegetable oil, salt, and baking powder. Mix until well combined.
    3. Pour the batter into a greased 20 cm diameter cake mold.
    4. Bake in the preheated oven for about 25-30 minutes or until a toothpick inserted into the center comes out clean.
    5. Let the cake cool completely.

    Preparing the Caramel:

    1. In a saucepan, heat cream, sugar, butter, and a pinch of salt over medium heat. Stir continuously until the mixture thickens and gets a caramel color.
    2. Add peanuts to the caramel, mix, and let it cool slightly.

    Making the Cream:

    1. Beat cream cheese, cream, vanilla sugar, and powdered sugar until smooth and well combined.

    Assembling the Cake:

    1. Cut the cooled cake horizontally into two layers.
    2. Place one cake layer on a serving plate. Spread half of the cream over this layer.
    3. Spread the prepared caramel with peanuts over the cream layer.
    4. Place the second cake layer on top and cover it with the remaining cream.
    See also  Quick & Healthy Oatmeal Cake in Just Minutes!

    Preparing the Glaze:

    1. Melt chocolate with cream in a microwave or using a double boiler until smooth.
    2. Spread the chocolate glaze evenly over the top of the cake.
    3. Garnish with peanuts.

    Chilling and Serving:

    1. Chill the cake in the refrigerator for at least 2-3 hours before serving to allow the flavors to meld.
    2. Slice and serve this divine Snickers cake, savoring every delightful bite
    September 14, 2024
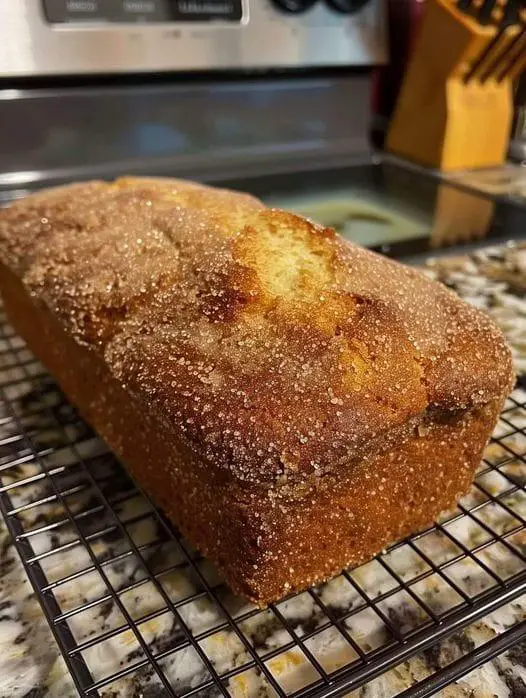
  • Here’s a super simple butter cake recipe for you:

    Here’s a super simple butter cake recipe for you:

    Here’s a super simple butter cake recipe for you:

    Table of Contents

    Hey everyone! 1f604
    Here’s a super simple butter cake recipe for you:

    Ingredients:

    2 cups all-purpose flour
    1 cup caster sugar
    7 oz unsalted butter (softened)
    3 eggs
    1.5 tsp vanilla essence
    1.25 tsp baking powder

    Directions:

    1. Preheat your oven to 350°F (180°C). Grease and line a 20 cm cake tin.
    2. Beat the butter and sugar together until fluffy (about 3-5 minutes).
    3. Add eggs one at a time, mixing well after each, then add vanilla.
    4. Sift flour and baking powder together.
    5. Gradually mix dry ingredients into the butter mixture until just combined.
    6. Pour batter into the tin and smooth the top.
    7. Bake for 45-50 minutes, or until a toothpick comes out clean.
    8. Cool in the tin for 10 minutes, then transfer to a wire rack.
    9. Enjoy your cake with tea or coffee! ☕1f370
    September 13, 2024
  • FLUFFY CAKE IN BLENDER

    FLUFFY CAKE IN BLENDER

    FLUFFY CAKE IN BLENDER

    Table of Contents

    INGREDIENTS
    • 500 grams of wheat flour
    • 1 teaspoon baking powder
    • 1 teaspoon cinnamon powder
    • 150 grams of milk cream
    • 350 grams of white sugar
    • 200 milliliters of milk
    • 4 small eggs
    • 1 spoon of vanilla
    • 1 pinch of salt

      Table of Contents

    STEP BY STEP PREPARATION

    1. For this cake, I am going to start by adding 4 small eggs to the blender.

    2. Then I will add a teaspoon of cinnamon powder, a pinch of salt that will give a special touch to our cake.

    3. Next, 150 grams of heavy cream, 350 grams of white sugar, 200 milliliters of milk, which should be at room temperature.

    4.A tablespoon and a half of butter, although it can also be margarine, a tablespoon of vanilla. Cover and mix all the ingredients very well for 3 minutes.

    5. After this time, I will add 500 grams of all-purpose flour, but the idea is to add little by little so as not to force the blender.

    6. Also a tablespoon of baking powder, cover. I turn the mixer on again until I get a homogeneous mixture.

    7. Next, I will grease a cake pan with a little butter and flour it very well with a little flour. We do this step so that our cake is easier to unmold.

    8. Finally, I add the entire mixture from the blender and put the mold in the oven preheated to 180 degrees Celsius for forty-five minutes.

    9. After forty-five minutes, our super moist cake is ready. We prepare a delicious cake in the blender.

    September 10, 2024
  • Just Milk and Chocolate: A Delicious No-Bake Dessert Recipe

    Just Milk and Chocolate: A Delicious No-Bake Dessert Recipe

    Just Milk and Chocolate: A Delicious No-Bake Dessert Recipe

    Table of Contents

    In a world where dessert lovers are always on the lookout for simple yet scrumptious recipes, the combination of milk and chocolate offers a delightful treat that requires no baking. This easy-to-follow recipe for Dark Chocolate Mousse promises a rich and indulgent experience in just a matter of minutes.

    Ingredients
    • 130g dark chocolate (approximately 4.6 ounces)
    • 80 grams of sugar (approximately 1/3 cup)
    • 50 grams of cocoa powder (approximately 1/2 cup)
    • 10 g of agar (approximately 2 teaspoons)
    • 350 grams of milk (approximately 1 1/2 cups)
    • 450g fresh cream (approximately 2 cups)
    • 50 grams of fresh cream (for the topping) (approximately 1/4 cup)
    • 2 grams of gelatin (approximately 1/2 teaspoon)
    • 100 grams of dark chocolate (for the topping) (approximately 3.5 ounces)
    Method of Preparation
    1. Prepare the Chocolate: Start by grinding the 130g of dark chocolate into small pieces. Melt the dark chocolate in a bain-marie or in the microwave until smooth.
    2. Mix Dry Ingredients: In a saucepan, combine the sugar, cocoa powder, and agar.
    3. Add Milk and Cream: Gradually add the milk and cream to the sugar, cocoa, and agar mixture, stirring well to combine.
    4. Heat the Mixture: Place the mixture over medium heat, stirring constantly until it starts to boil. Continue stirring for an additional 2 minutes after boiling.
    5. Incorporate Dark Chocolate: Remove the pan from the heat and add the melted dark chocolate to the mixture. Stir until the chocolate is completely melted and all ingredients are well incorporated.
    6. Pour into Mold: Pour the mixture into a prepared plastic bottle and cover the open part with cling film. Place in the fridge to firm up for at least 2 hours.
    See also  Cake in 5 Minutes – You Will Make This Cake Every Day! Easy Quick Recipe
    Preparation of the Topping
    1. Prepare Gelatin: In a pot, melt 2 grams of gelatin in 50 grams of cream, either in the microwave or in a bain-marie.
    2. Add Dark Chocolate: Once the gelatin is melted, add the 100g of dark chocolate. Stir until smooth.
    3. Apply Topping: Let the frosting cool slightly, then cover each portion of mousse with a generous layer of chocolate frosting.
    4. Chill Again: Return the mousses to the fridge for another hour, or until the topping is firm.
    Serving

    Once firm, remove the mousses from the fridge, slice if desired, and serve. This recipe yields approximately 6 servings.

    Conclusion

    Indulging in a decadent dessert doesn’t have to be complicated. With just a few ingredients and simple steps, you can create a delectable Dark Chocolate Mousse that is sure to impress. Whether it’s for a special occasion or a sweet treat any day of the week, this no-bake dessert is bound to become a favorite.

    September 9, 2024
  • Italian Ricotta and Kefir Cake

    Italian Ricotta and Kefir Cake

    Italian Ricotta and Kefir Cake

    Table of Contents

    Ingredients

    • 5 eggs
    • 200 g sugar (7 oz)
    • 120 ml vegetable oil (4 fl oz)
    • 120 ml kefir (4 fl oz)
    • 300 g flour (10.6 oz)
    • 8 g baking powder (0.28 oz)
    • 300 g ricotta (10.6 oz)
    • 3 tablespoons icing sugar

    Nutrition Information

    • Servings: 10 slices
    • Calories per serving: Approximately 280 kcal
    • Fat: 14g
    • Carbohydrates: 30g
    • Protein: 7g

    Instructions

    1. Prepare the Egg Mixture

    Begin by whisking 4 eggs with a pinch of salt in a large mixing bowl. Use an electric whisk to beat the eggs until they become light and frothy. This step is crucial for incorporating air into the mixture, which will give the cake its light texture.

    2. Add Sugar and Continue Mixing

    Next, add 200 g of sugar to the whisked eggs. Continue whisking until the mixture becomes even lighter and frothier. The sugar should dissolve completely, resulting in a smooth, pale batter.

    3. Incorporate the Oil and Kefir

    Once the sugar is fully incorporated, gradually add 120 ml of vegetable oil and 120 ml of kefir to the mixture. Continue mixing as you pour in the liquids. The oil adds moisture and richness, while the kefir introduces a slight tanginess that balances the sweetness of the cake.

    4. Mix the Dry Ingredients

    In a separate bowl, combine 300 g of flour with 8 g of baking powder. Sift the flour mixture to remove any lumps and to aerate it, which helps create a light, fluffy cake.

    5. Combine Wet and Dry Ingredients

    Gradually add the sifted flour mixture to the egg, sugar, oil, and kefir mixture. It’s best to add the flour in three stages, folding it in gently with a spatula after each addition. This method ensures that the batter remains light and airy without overmixing, which could make the cake dense.

    6. Prepare the Baking Pan

    Line a cake mold with baking paper to prevent sticking. Pour the batter into the prepared mold, ensuring that it is spread evenly across the surface and smoothed out at the edges. This step ensures even baking and a uniform shape.

    7. Prepare the Ricotta Filling

    In a small bowl, combine 300 g of ricotta with 1 egg and 3 tablespoons of icing sugar. Mix until smooth. Transfer the ricotta mixture to a piping bag. If you don’t have a piping bag, you can use a plastic bag with a small corner snipped off.

    8. Garnish the Cake

    Using the piping bag, garnish the surface of the cake with the ricotta mixture. You can create a lattice pattern, swirls, or any design of your choice. This adds not only flavor but also an attractive visual element to the  cake.

    9. Bake the Cake

    Preheat your oven to 180°C (350°F). Place the cake in the preheated oven and bake for 45 minutes, or until a toothpick inserted into the center comes out clean. The cake should rise nicely, with a golden-brown top.

    10. Cool and Serve

    Once baked, remove the cake from the oven and allow it to cool slightly in the pan for about 10 minutes. Then, transfer it to a wire rack to cool completely. Before serving, sprinkle the top with a dusting of icing sugar for an extra touch of sweetness.

    only 120 Kcal. Eat it often!

    11. Enjoy

    This Ricotta and Kefir Cake is best served slightly warm or at room temperature. It pairs wonderfully with a cup of coffee, tea, or a glass of sweet wine. The cake’s light, airy texture combined with the creamy, tangy filling makes it an irresistible treat that captures the essence of Italian dessert-making.

    Baking Tips

    • Ricotta: Make sure to use fresh, high-quality ricotta for the best texture and flavor.
    • Kefir: If you don’t have kefir, you can substitute it with plain yogurt or buttermilk.
    • Decorating: Get creative with the ricotta filling designs on the cake for a beautiful presentation.

    This recipe brings a taste of Italy right into your kitchen, offering a delicious and elegant dessert that’s surprisingly simple to make. Enjoy this gourmet pleasure and savor every bite of this delightful Ricotta and Kefir Cake!

    August 28, 2024
  • Zucchini Oatmeal Bread Recipe

    Zucchini Oatmeal Bread Recipe

    Zucchini Oatmeal Bread Recipe

    Table of Contents

    Ingredients

    For the Bread:

    • 300 g zucchini (1 medium zucchini)
    • 200 ml water (about 7 fl oz)
    • 5 g dry yeast (about 1 teaspoon)
    • 150 g oatmeal (first portion, about 1 1/4 cups)
    • 150-200 g oatmeal (second portion, about 1 1/4 to 1 3/4 cups)
    • Salt, to taste
    • Black pepper, to taste
    • Favorite spices (such as curry), to taste
    • Dry garlic, to taste
    • 1 teaspoon dried tomatoes, finely chopped
    • 30 ml olive oil (about 2 tablespoons)
    • 20 g pumpkin seeds (about 2 tablespoons)
    • 20 g sunflower seeds (about 2 tablespoons)
    • A handful of cumin seeds, for sprinkling on top

    Nutrition Information

    • Servings: 10 slices
    • Calories per serving: Approximately 180 kcal
    • Fat: 8g
    • Carbohydrates: 23g
    • Protein: 5g

    Instructions

    1. Prepare the Zucchini

    Start by grating the zucchini using a medium grater. Place the grated zucchini in a large mixing bowl. Zucchini adds moisture to the bread, keeping it tender while contributing a mild, earthy flavor.

    2. Activate the Yeast

    In a small bowl, mix 5 g of dry yeast with 200 ml of warm water. Make sure the water is warm but not hot, as too high a temperature can kill the yeast. Let the mixture sit for about 5-10 minutes, until it becomes frothy. This indicates that the yeast is active and ready to be used.

    3. Mix the Dry Ingredients

    In the bowl with the grated zucchini, add 150 g of oatmeal (about 1 1/4 cups), salt, black pepper, your favorite spices (such as curry), dry garlic, and 1 teaspoon of finely chopped dried tomatoes. Stir the ingredients together until well combined. The dried tomatoes and spices add depth and complexity to the bread, enhancing its flavor.

    4. Add the Wet Ingredients

    Pour the activated yeast mixture and 30 ml of olive oil into the zucchini mixture. Stir well to ensure all ingredients are fully incorporated. The olive oil adds richness and helps bind the dough together.

    5. Incorporate the Seeds

    Add 20 g of pumpkin seeds and 20 g of sunflower seeds to the mixture. Stir to distribute the seeds evenly throughout the dough. These seeds not only add a pleasant crunch but also boost the nutritional value of the bread.

    6. Add More Oatmeal

    Gradually add another 150-200 g of oatmeal (about 1 1/4 to 1 3/4 cups) to the mixture. Stir as you go, adding enough oatmeal until the dough comes together and is not too sticky. The amount of oatmeal needed may vary depending on the moisture content of the zucchini, so add it slowly until the dough reaches a manageable consistency.

    7. Let the Dough Rise

    Cover the mixing bowl with a clean kitchen towel and let the dough rise in a warm place for about 1 hour, or until it has doubled in size. This step is crucial for developing the bread’s texture, making it light and airy.

    8. Prepare the Bread

    Preheat your oven to 180°C (350°F). Grease a loaf pan with a little olive oil or line it with parchment paper to prevent the bread from sticking.

    Once the dough has risen, transfer it to the prepared loaf pan, smoothing the top with a spatula. Sprinkle a handful of cumin seeds on top of the dough for added flavor and texture. The cumin seeds provide a subtle, aromatic touch that complements the bread’s savory profile.

    9. Bake the Bread

    Place the loaf pan in the preheated oven and bake for 40-50 minutes. The bread is done when the top is golden brown and a toothpick inserted into the center comes out clean. Baking at this temperature allows the bread to cook through evenly without becoming too dry.

    10. Cool and Serve

    Once the bread is baked, remove it from the oven and let it cool in the pan for about 10 minutes. This resting time allows the bread to firm up slightly, making it easier to slice. Afterward, transfer the bread to a wire rack to cool completely.

    Serving Suggestions

    • On its Own: This zucchini oatmeal bread is delicious on its own, offering a wholesome snack with a satisfying texture.
    • With Spreads: Spread with a bit of butter, vegan margarine, or your favorite nut butter for a quick and tasty treat.
    • As a Base for Sandwiches: Use it as a base for sandwiches, pairing well with fresh  vegetables, hummus, or slices of avocado.

    Cooking Tips

    • Oatmeal Variation: You can use rolled oats or quick oats depending on your preference. Rolled oats will give a slightly chewier texture, while quick oats will result in a finer crumb.
    • Spice Customization: Feel free to customize the spices based on your taste. Add a pinch of chili flakes for heat or rosemary for an herbal note.
    • Storage: Store the bread in an airtight container at room temperature for up to three days, or refrigerate it to extend its freshness. It also freezes well; slice the bread before freezing so you can thaw individual portions as needed.

    This Zucchini Oatmeal Bread is a versatile and nutritious addition to your baking repertoire. Whether you’re looking for a healthy snack or a flavorful base for sandwiches, this bread offers the perfect balance of taste and texture, making it a go-to recipe for any occasion.

    CategoriesEasy Recipes
    August 28, 2024
  • Kentucky Butter Cake

    Kentucky Butter Cake

    Kentucky Butter Cake

    Table of Contents

    INGREDIENTS

    1 cup of melted butter
    °2 cups of glucose
    chilled four big eggs
    °2 tablespoons puréed vanilla
    3-quarts measuring cup of all-purpose flour
    *One teaspoon of baking soda
    +/- half a teaspoon of baking soda
    “A half teaspoon of salt”
    one cup of buttermilk and one cup of butter sauce:
    One cup of sugar
    haLf a cup of cubed butter
    °One-fourth cup water
    1/4 teaspoon of vanilla extract

    Getting Ready

    Beat the sugar and spread in a bowl until fluffy and light. After each choice, add eggs one at a time while beating well thereafter. The vanilla beats. Before adding the flour, baking powder, baking soda, and salt to the cream mixture, mix well. Add the buttermilk and continue mixing after each addition. Stuff a dusted and oiled 10-inch baking dish to the brim. After 55 to 70 minutes in the oven at 350°, a toothpick inserted in the center should come out clean. Ten minutes to cool. Slash the form’s perimeter and the container that serves as its focal point. Place the cake on a rack set over a sheet of waxed paper. Combine the sugar, spread, and water in a small saucepan to make the sauce. Melt the margarine and break up the sugar in a medium saucepan. Keep away from flames; combine the components. After the cake has cooled, poke holes in it and pour 1/4 cup of sauce on top. You need to let it stand for the sauce to absorb.


    August 28, 2024
  • Cake in Minutes! You’ll Make This Cake Every Day! Simple and Delicious!

    Cake in Minutes! You’ll Make This Cake Every Day! Simple and Delicious!

    Cake in Minutes! You’ll Make This Cake Every Day! Simple and Delicious!

    Table of Contents

    Ingredients:
    • 2 eggs
    • 90g (7 tablespoons) sugar
    • 70ml (1/3 cup) oil
    • 100ml (1/2 cup) milk
    • 160g (1 1/4 cups) flour
    • 10g (2 teaspoons) baking powder
    • Vanillin to taste

    🥣 Necessary Kitchen Equipment:

    • Bowl
    • Spatula
    • 20cm baking tray
    • Baking paper
    • Oven

    ⏲️ Preparation and Cooking Time:

    • Preparation time: 10-15 minutes
    • Cooking time: 25-30 minutes
    • Total time: 35-45 minutes
     Preparation Steps:

    Preparation of the Dough:

    1. In a bowl, beat the eggs with the sugar and vanillin until the mixture becomes frothy and light.
    2. Add the oil and milk to the egg mixture and mix well.
    3. Sift the flour and baking powder directly into the bowl and mix gently until the dough is smooth and homogeneous.

    Cooking:

    1. Butter and flour a 20cm baking pan.
    2. Pour the mixture into the prepared pan and level it with a spatula.
    3. Bake in a preheated oven at 180°C (350°F) for 25-30 minutes, or until the cake is golden and cooked through.

    🍽️ Serving:

    1. Once cooked, let the cake cool slightly before serving. Cut into slices and enjoy this simple and delicious dessert alone or with a sprinkling of icing sugar or a scoop of vanilla ice cream.

    Save this recipe and make it a daily delight!

    August 28, 2024
  • Orange Sour Cream Rolls

    Orange Sour Cream Rolls

    My house is fairly divided on the sweet versus savory breakfast debate (I am pretty much always Team Sweet). But, if there’s one dish that united us all it is these Orange Sour Cream Rolls. They’re loaded up with zesty orange flavor, stuffed with cream cheese, and drenched in a rich sour cream glaze. Heaven in breakfast form! I’ve never met a soul who didn’t love them. If you’re looking for a special occasion breakfast treat then this recipe is just the thing.Start out by mixing up some sugar, fresh orange zest, and almond extract. The crescent roll dough is brushed with melted butter and then coated with the orange sugar mixture. A small cube of cream cheese is placed at the wide end of the triangle and then it gets wrapped up in one tasty package. Arrange the rolls in a baking dish and pour the leftover butter off top. Pop those babies in the oven for about half an hour and get started on the glaze.

    You’ll mix together sour cream, melted butter, orange juice, almond extract, and a pinch of salt until it’s nice and smooth. Once the rolls are done baking, allow them to cool for 5 minutes then pour that delicious glaze over the top. Sprinkle some orange zest on each roll and they’re ready to serve. Be ready for everyone to want seconds!

    Ingredients
    • 2 cans crescent roll dough
    • 1/4 cup granulated sugar
    • 1/2 tsp. almond extract
    • 1 tablespoon fresh orange zest
    • 1 (8 oz) package cream cheese, cubed
    • 1/2 cup butter, melted
    • ¼ cup brown sugar
    Glaze
    • ¾ C sugar
    • ½ C sour cream
    • ½ C butter, melted and warm
    • 1 teaspoon almond extract
    • 2 tablespoon fresh orange juice
    • ¼ teaspoon salt
    • Additional orange zest for garnish
    Preparation
    1. Preheat oven to 350 degrees and grease a 9×13-inch pan.
    2. Unroll and separate dough on a large cutting board.
    3. In a small bowl, mix together 1/4 cup sugar, almond extract, and orange zest.
    4. Brush each dough triangle with melted butter. Spread orange zest/sugar mixture onto buttered dough and place a cube of cream cheese at the wide end of each triangle
    5. Starting at the wide end, roll each triangle, then place point side down in the greased pan. Pour remaining butter over the rolls and sprinkle with brown sugar.
    6. Bake rolls for 30-35 minutes. Start glaze as rolls bake.
    7. Glaze: whisk together sugar, sour cream, butter, orange juice, almond extract, and pinch of salt in a small bowl.
    8. Remove rolls from oven and let cool about 5 minutes, then pour glaze over top and sprinkle with orange zest.
    August 27, 2024
  • Donut Doughnuts: How to make them irresistible !

    Donut Doughnuts: How to make them irresistible !

    Donut Doughnuts: How to make them irresistible !

    Table of Contents

    ingredients:

    °140 g (1 cup) all-purpose flour
    °240 ml (1 cup) of water
    °3 eggs
    °75 g (half a cup) butter
    °a pinch of salt
    °Half a teaspoon of vanilla extract

    *Methods :

    1. Put the water and butter over medium heat and boil until the butter melts.
    2. Add salt and flour and mix with a spoon until a dough forms.
    3. Add the vanilla extract to the batter, then crack 3 eggs, one at a time, while working the batter with the hand mixer.
    4. Transfer the mixture to a piping bag and roll out 12 circles on parchment paper.
    5. Cook each donut in the preheated oil for 3-4 minutes or until golden brown on both sides.
    6. Enjoy !
    August 27, 2024
  • dessert in 10 minutes, a real lightning recipe

    dessert in 10 minutes, a real lightning recipe

    dessert in 10 minutes, a real lightning recipe

    Table of Contents

    Everyone is obsessed with biscoff and this no-bake biscoff layered cheesecake cup
    Easy 6-Ingredient Dessert Cups

    Ingredients:

    Lotus Biscoff Cookies: 7 oz for crumbs, 5 for garnish
    Milk: 1 ¾ cups
    Custard Powder: 1 ½ tablespoons
    Sugar: 2 tablespoons total
    Whipping Cream: 1 ¾ cups
    Vanilla Powder/Essence: A pinch

    Instructions:

    Prepare the Crumbs: Grind the Lotus Biscoff cookies in a food processor until fine.
    Mix the Custard: In a bowl, combine ¼ cup of milk with the custard powder, whisking until smooth.
    Cook the Custard: In a pan, heat the remaining milk with the sugar. Gradually add the custard mixture, whisking constantly until it thickens. Remove from heat and allow to cool.
    Whip the Cream: In a separate bowl, whip the cream, remaining sugar, and vanilla until stiff peaks form.
    Assemble the Cups: In 5 glasses, layer the cookie crumbs, custard, and whipped cream.
    Garnish and Serve: Top each dessert cup with a Biscoff cookie and additional crumbs. Enjoy!

    Tips:

    Substitutions: Regular biscuits can replace Lotus Biscoff cookies.
    Make-Ahead: Prepare the components in advance and assemble just before serving.
    Storage: Store any leftover cups in the fridge for up to 24 hours (note that the texture may change).
    Vanilla Variations: Substitute vanilla extract for vanilla powder or essence.
    Toppings: Enhance with chocolate shavings, caramel sauce, or your favorite fruits.

    August 27, 2024
  • Simple Italian Cake with 12 Tablespoons

    Simple Italian Cake with 12 Tablespoons

    Simple Italian Cake with 12 Tablespoons

    Table of Contents

    Ingredients:
    3 eggs
    12 tablespoons of sugar
    12 tablespoons of oil
    12 tablespoons of milk
    12 tablespoons of flour
    Zest and juice of half a lemon
    11g baking powder
    20cm cake pan

    Instructions:

    Preheat your oven to 180°C (356°F).
    In a mixing bowl, crack open 3 eggs.
    Add 12 tablespoons of sugar to the eggs.
    Mix the eggs and sugar together until they are well combined and have a creamy consistency.
    Pour in 12 tablespoons of oil and mix it into the egg and sugar mixture.
    Add 12 tablespoons of milk to the mixture and continue mixing.
    Sift in 12 tablespoons of flour gradually while stirring to avoid lumps.
    Zest and juice half a lemon and add them to the batter for a lovely citrus flavor.
    Finally, add 11g of baking powder and mix it in thoroughly.
    Grease a 20cm cake pan and pour the batter into it.
    Bake in the preheated oven at 180°C (356°F) for approximately 25-30 minutes or until the cake is golden brown and a toothpick inserted into the center comes out clean.
    Once the cake is done, remove it from the oven and let it cool.
    You can optionally dust the top with powdered sugar or add a lemon glaze for extra flavor.
    Slice and enjoy your simple and delicious Italian Cake with 12 Tablespoons!
    August 27, 2024
  • ORIGINAL BAGUETTE BREAD

    ORIGINAL BAGUETTE BREAD

    ORIGINAL BAGUETTE BREAD 

    Table of Contents

    Ingredients:

    500 g of common wheat flour
    330 ml of water
    5 g dry baker’s yeast or 15 g fresh yeast
    10g of salt

    Preparation:

    1. Start by mixing the water with the yeast in a bowl. I recommend that the water be lukewarm, so the yeast will dissolve sooner and better.
    2. Once this is done, mix the flour with the salt and add it to the water. You must knead it well for a few minutes. To know when it is is when the dough is smooth and does not stick to the hands easily. At first something may stick to you but you’ll see how later it won’t.
    3. After the first kneading you must cover the dough with film and put it in the fridge for an hour. During this time the dough will rest and will be ready to work with.
    4. After resting, cut four equal balls and form the elongated bars. Put them on a baking tray separated from each other and make two superficial cuts in each one. Before baking let them ferment for about 30 minutes or so.
    5. When they have grown they will have the definitive baguette shape. If they are too fat, stretch the dough more with a little flour.
    6. Finally, put them in the preheated oven at 180ºC for 15 minutes and you will have them ready.
    A piece of advice is that before putting them in, spray a little water on top so that it does not make the crust so quickly and you get that bakery result. If you don’t have a spray bottle, you can also wet your fingertips and gently brush them over the bread before baking.
    August 27, 2024
←Previous Page
1 … 211 212 213 214 215 … 219
Next Page→
PST-Algerie

PST-Algerie

Get to Know About Tech; Smartphones

  • Blog
  • About
  • FAQs
  • Authors
  • Events
  • Shop
  • Patterns
  • Themes

Twenty Twenty-Five

Designed with WordPress