Ingredients:
For the crust:
– 1 1/2 cups graham cracker crumbs
– 1/4 cup sugar
– 1/2 cup unsalted butter, melted
For the filling:
– 24 oz (680g) cream cheese, softened
– 1 cup sugar
– 1 cup mango puree
– 1 cup coconut milk
– 3 large eggs
– 1 teaspoon vanilla extract
For the passion fruit glaze:
– 1/2 cup passion fruit pulp
– 1/4 cup sugar
– 1 tablespoon cornstarch
– 1/4 cup water
For decoration:
– Fresh mango slices
– Toasted coconut flakes
Instructions:
1. Preheat oven to 325°F (163°C). Grease a 9-inch springform pan.
2. For the crust: In a bowl, mix graham cracker crumbs, sugar, and melted butter. Press the mixture into the bottom of the prepared pan. Bake for 10 minutes, then let it cool.
3. For the filling: In a large bowl, beat cream cheese and sugar until smooth. Add mango puree, coconut milk, eggs, and vanilla extract. Mix until well combined.
4. Pour the filling over the crust and smooth the top.
5. Bake for 50-60 minutes, or until the center is set. Turn off the oven and let the cheesecake cool inside with the door slightly open for 1 hour.
6. Refrigerate the cheesecake for at least 4 hours or overnight.
7. For the passion fruit glaze: In a saucepan, combine passion fruit pulp, sugar, cornstarch, and water. Cook over medium heat, stirring constantly until thickened. Let it cool slightly.
8. Pour the passion fruit glaze over the chilled cheesecake.
9. Decorate with fresh mango slices and toasted coconut flakes.
10. Slice and serve chilled.
Prep Time: 30 minutes | Baking Time: 50-60 minutes | Total Time: Approximately 5 hours | Servings: 12 slices
Author: Admin
-
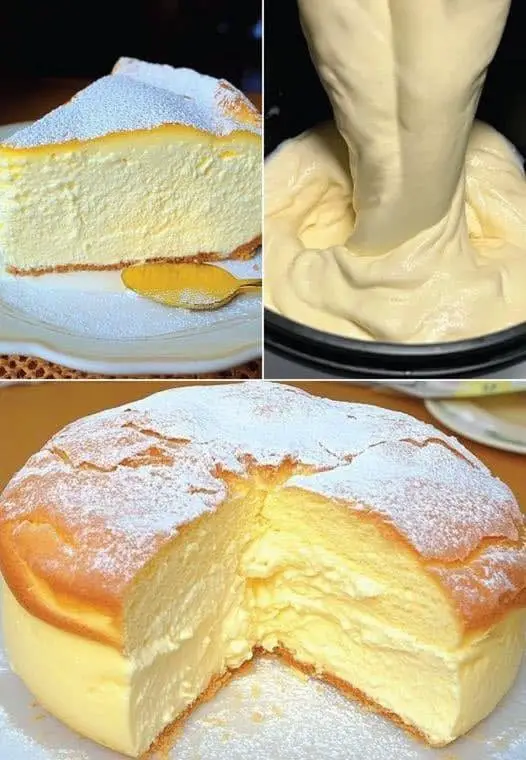
Mango Coconut Cheesecake with Passion Fruit Glaze
-
Battered Fish Fingers with Crispy Chips
A classic comfort meal with a crispy twist! These homemade battered fish fingers, paired with golden, crispy chips, are the ultimate treat for any seafood lover.
Ingredients:
For the Fish Fingers:
1 lb white fish fillets (cod or haddock), cut into strips
1 cup all-purpose flour
1/4 cup cornstarch
1 tsp baking powder
1/2 tsp paprika
Salt and pepper, to taste
1 cup cold sparkling water
Oil for frying
For the Chips:
3 large potatoes, cut into thick strips
2 tbsp olive oil
Salt, to taste
Optional: garlic powder, paprika, or herbs for extra flavor
Instructions:Prepare the Chips:
Preheat your oven to 425°F (220°C). Toss the potato strips in olive oil, salt, and optional seasonings. Spread them in a single layer on a baking sheet and bake for 25-30 minutes, flipping halfway through until golden and crispy.Make the Batter for Fish Fingers:
In a medium bowl, whisk together flour, cornstarch, baking powder, paprika, salt, and pepper. Gradually whisk in the cold sparkling water until smooth and well combined.Batter and Fry the Fish Fingers:
Heat oil in a deep skillet or pot to 350°F (175°C). Dip each fish strip into the batter, letting excess drip off, and carefully place it in the hot oil. Fry for 3-4 minutes on each side until golden brown and crispy. Remove and drain on paper towels.Serve:
Arrange the crispy fish fingers and chips on a serving plate. Serve with tartar sauce, ketchup, or malt vinegar for dipping.
Helpful Tips:Extra Crunch: Ensure the sparkling water is very cold for an airy batter.
Flavor Boost: Add a pinch of cayenne pepper or garlic powder to the batter for an extra kick.
This crispy fish and chips combo will satisfy your cravings for a comforting homemade meal! -
CORN FLAKES WITH BANANAS
CORN FLAKES WITH BANANAS A blend of banana and cinnamon, all in a bowl of yummy cornflakes will leave you longing for more.
Ingredients: 2 c wheat flour 1 teaspoon baking powder Half a teaspoon of baking soda Half a teaspoon of salt 1 cup mashed ripe banana 2 cups ½ cup whipped butter or ghee 3/4 cups sugar 2 eggs ½ cup coarsely chopped cashews.
Instructions:
Directions:
1. Mixing flour,/baking powder,/baking pop/salt. Sit away. 2-In a bowl, blend in with the Kellogg banana/corn. Leave for 5 minutes or until the beans are fragile. Additionally he won. 3. In a gigantic bowl, whisk together the margarine and sugar until solidified. Add eggs. Additionally he won. Combine with mix oats and nuts. Blending in flour, use 4 cooking sprinkles to carefully scatter 9 x 5 x 3 inch baking formula. Get ready at around 350 degrees Fahrenheit for 1 hour or until center is great. Permit it cool for 10 min preceding killing it from compartment. Cool preceding cutting and encase by plastic Enjoy!!
-
Creamy Cauliflower and Cheddar Soup
This comforting Cauliflower and Cheddar Soup is the perfect balance of creamy, cheesy goodness and nutritious vegetables. With cauliflower florets, carrots, and celery cooked in a savory broth, and finished with a rich cheddar cheese base, it’s an ideal dish for cool evenings. This easy-to-make recipe is family-friendly, filling, and can be served as a light meal or a delicious starter.
Preparation Time
Prep time: 15 minutes
Cook time: 25 minutes
Total time: 40 minutes
Ingredients
1 medium head cauliflower, broken into florets
1 carrot, shredded
1/4 cup celery, chopped into small pieces
2 1/2 cups water
2 teaspoons chicken bouillon
3 tablespoons butter
3 tablespoons all-purpose flour
3/4 teaspoon salt
1/8 teaspoon pepper
2 cups milk
1 cup shredded cheddar cheeseInstructions:
In a heavy-bottom pot, combine cauliflower florets, shredded carrots, and chopped celery.
Add 2 1/2 cups water and 2 teaspoons chicken bouillon to the pot, and bring the mixture to a boil.
Once boiling, reduce the heat to medium, and let the mixture simmer for 10-15 minutes, until the vegetables are tender.
Meanwhile, in a separate saucepan, melt 3 tablespoons butter over medium heat. Stir in 3 tablespoons all-purpose flour, 3/4 teaspoon salt, and 1/8 teaspoon pepper until smooth and well combined.
Gradually add 2 cups of milk, stirring constantly to prevent lumps. Continue cooking the mixture over medium heat for about 2 minutes until it thickens.
Add 1 cup shredded cheddar cheese to the milk mixture, stirring until the cheese is fully melted and the sauce is smooth.
Pour the cheesy milk mixture into the pot with the cooked vegetables, stirring to combine well.
Taste and adjust seasoning as needed. Garnish with freshly chopped parsley or a sprinkle of chili powder if desired.
Serve the creamy cauliflower and cheddar soup hot, and enjoy!
Serving Suggestions
Serve with warm crusty bread or a side of garlic toast for a heartier meal.
Top with crispy bacon bits or croutons for added texture and flavor.
Pair with a fresh green salad for a balanced lunch or light dinner.
Cooking Tips
For a smoother texture, you can partially blend the soup using an immersion blender, leaving some chunks of cauliflower for a chunky consistency.
Feel free to swap chicken bouillon with vegetable bouillon for a vegetarian version of the soup.
Use sharp cheddar cheese for a more intense cheesy flavor.
Nutritional Benefits
Cauliflower is rich in fiber, vitamins C and K, and antioxidants that support overall health and digestion.
Carrots are high in beta-carotene, which promotes good vision and skin health.
Cheddar cheese provides calcium and protein, contributing to bone health and muscle repair.
Dietary Information
This recipe can easily be made vegetarian by using vegetable bouillon.
It’s a gluten-containing recipe due to the flour but can be made gluten-free by substituting with gluten-free flour.
Nutritional Facts (per serving, approx.)
Calories: 270
Carbohydrates: 18 g
Protein: 10 g
Fat: 18 g
Fiber: 3 g
Sugar: 6 g
Storage
Store leftovers in an airtight container in the refrigerator for up to 3 days.
Reheat gently over low heat, adding a little extra milk or broth if the soup becomes too thick.
The soup can also be frozen for up to 2 months, but the texture of the cheese may change slightly after thawing.
Why You’ll Love This Recipe
This soup is incredibly creamy and cheesy, with the perfect balance of flavors.
It’s a great way to incorporate more vegetables into your diet without sacrificing comfort food vibes.
The recipe is easy to customize, allowing you to add your favorite toppings or swap ingredients based on your preferences.
This soup is perfect for meal prepping since it stores well and reheats beautifully.
Conclusion
If you’re looking for a cozy, creamy, and wholesome soup to satisfy your hunger, this Cauliflower and Cheddar Soup is the answer. It’s packed with healthy veggies and rich cheddar cheese, creating a velvety texture that’s sure to please both kids and adults alike. Simple to make, versatile, and filling, this soup is perfect for those cold days when you need a little comfort in a bowl. Serve it with your favorite bread or enjoy it on its own, and you’ll have a go-to recipe that the whole family will love!Frequently Asked Questions
Can I use frozen cauliflower instead of fresh?
Yes, frozen cauliflower works well in this recipe. You can add it directly to the pot without thawing.
Can I substitute another type of cheese?
Absolutely! While cheddar is ideal for its sharp flavor, you can use mozzarella, gouda, or even a combination of cheeses.
Can I make this soup vegan?
Yes, substitute the butter with vegan butter, use a plant-based milk (like almond or oat), and replace the cheddar with a dairy-free cheese alternative.
Can I add more vegetables?
Definitely! Broccoli, peas, or even spinach would be great additions to this soup for extra nutrition.
Is there a way to make this soup thicker?
If you prefer a thicker soup, reduce the amount of water slightly or add an extra tablespoon of flour to the cheesy milk mixture.
Can I use whole wheat flour instead of all-purpose flour?
Yes, you can substitute with whole wheat flour, but the texture might be slightly denser.
What’s a good substitute for chicken bouillon?
Vegetable bouillon or broth works just as well, especially for a vegetarian version.
Can I make this soup ahead of time?
Yes, this soup stores well and can be made a day in advance. Just reheat it gently before serving.
Can I use almond milk in place of regular milk?
Yes, unsweetened almond milk is a good substitute, though the soup may have a slightly different flavor and texture.
How can I make the soup less rich?
To make the soup lighter, use low-fat milk and reduce the amount of cheese slightly. -
Golden Crispy Chicken with Parmesan Mushroom Sauce
Introduction:
Elevate your chicken dinner with this Golden Crispy Chicken paired with a rich and creamy Parmesan Mushroom Sauce. The chicken is coated in a golden crust that’s crispy on the outside and tender on the inside, while the sauce brings a luxurious blend of earthy mushrooms and savory Parmesan cheese. This dish is perfect for date nights, special occasions, or any evening you want to indulge in restaurant-quality comfort food at home.
Ingredients and Quantities
For the Chicken:
- 4 medium chicken breasts, pounded to an even thickness
- 1 cup all-purpose flour
- 2 large eggs, beaten
- 1 1/2 cups breadcrumbs (or panko for extra crispiness)
- 1/2 cup grated Parmesan cheese
- 1 tsp garlic powder
- 1 tsp paprika
- Salt and pepper, to taste
- 2-3 tbsp olive oil or butter (for frying)
For the Parmesan Mushroom Sauce:
- 2 tbsp unsalted butter
- 2 cups cremini or button mushrooms, sliced
- 3 cloves garlic, minced
- 1 cup heavy cream
- 1/2 cup chicken broth
- 1/2 cup grated Parmesan cheese
- 1/4 tsp thyme (optional)
- Salt and pepper, to taste
Tips for Success
- Pound the chicken: Pound the chicken breasts to an even thickness to ensure they cook evenly.
- Crispy crust: For maximum crispiness, use panko breadcrumbs and make sure the oil is hot before frying.
- Thick sauce: Let the Parmesan Mushroom Sauce simmer to thicken naturally, and stir frequently to prevent lumps.
How to Make and Instructions
- Prepare the Chicken
- Season the chicken breasts with salt and pepper.
- Set up a breading station: one bowl with flour, one with beaten eggs, and one with breadcrumbs mixed with Parmesan, garlic powder, and paprika.
- Dredge each chicken breast in flour, dip in egg, and coat in the breadcrumb mixture, pressing to adhere.
- Cook the Chicken
- Heat olive oil or butter in a large skillet over medium heat. Fry the chicken breasts for 3-4 minutes per side until golden brown and cooked through (internal temperature of 165°F/74°C). Remove and keep warm.
- Make the Mushroom Sauce
- In the same skillet, melt butter over medium heat. Add mushrooms and cook until softened, about 5 minutes.
- Stir in garlic and cook for 1 minute. Add heavy cream and chicken broth, bringing to a gentle simmer.
- Stir in Parmesan cheese and thyme (if using), cooking until the sauce thickens slightly. Season with salt and pepper to taste.
- Serve
- Plate the crispy chicken and generously spoon the Parmesan Mushroom Sauce over the top. Garnish with fresh parsley or extra Parmesan if desired.
Description
Golden Crispy Chicken with Parmesan Mushroom Sauce is a decadent dish that balances texture and flavor. The chicken’s golden crust adds crunch, while the creamy mushroom sauce provides a rich, savory contrast. It’s a crowd-pleasing meal that feels indulgent but is surprisingly easy to make.
Nutritional Information
(per serving, approximate)
- Calories: 600 kcal
- Carbohydrates: 25g
- Protein: 40g
- Fat: 38g
- Fiber: 2g
- Sugar: 2g
Conclusion and Recommendation
Golden Crispy Chicken with Parmesan Mushroom Sauce is an irresistible recipe that’s as comforting as it is delicious. Serve it with mashed potatoes, pasta, or roasted vegetables to complete the meal. Whether you’re cooking for a special occasion or a family dinner, this dish is sure to impress. Add it to your menu today and savor every bite!
-
Biscuits and Gravy with Sausage and Egg Breakfast Casserole
Biscuits and Gravy with Sausage and Egg Breakfast Casserole- This breakfast casserole is a must make for any occasion, from large holiday gatherings or brunch to a simple Sunday morning breakfast.
This is one of my and hubby’s favorite meals. Even with homemade gravy, this casserole comes together quickly and easily, making it doable for even the novice cook.
Ingredients
- 8 ct. Tube of refrigerated biscuits
1 lb. Ground breakfast sausage
2 Packs of country gravy mix
1 Can of evaporated milk
12 Large eggs
Salt and pepper to taste
How To Make Biscuits and Gravy with Sausage and Egg Breakfast Casserole
Preheat the oven to 350 degrees.
Brown the sausage in a skillet until completely cooked through. Drain any excess grease.
Reduce the heat to medium and sprinkle the gravy mix over the meat along with a cup of evaporated milk and a cup of water.
Mix, and saute until thickenedIn a bowl, mix together the eggs and 5 oz. of the evaporated milk along with salt and pepper to taste.
Scramble the eggs lightly in a skillet over medium heat.Layer ⅓ of the meat and gravy in the bottom of a well-greased 9×13 baking dish and top with half of the eggs.
Add another layer of gravy mix, eggs and then top with the remaining gravy mixture.Place the biscuits on top of the casserole and bake for 20-25 minutes until the biscuits are cooked through.
Enjoy! - 8 ct. Tube of refrigerated biscuits
-
Decadent Chocolate Cookie Cream Cake
Table of Contents
Ingredients
For the Cake Base:
-
- Butter: 100 g (softened)
- Cookies: 300 g (crushed into fine crumbs)
- Walnuts: 30 g (chopped, optional for crunch)
For the Cream Layer:
-
- Cream: 500 ml (whipping cream or heavy cream)
- Condensed milk: 200 g
- Cocoa powder: 20 g
For the Chocolate Glaze:
- Dark chocolate: 100 g (melted)
- Butter: 20 g (for shine and smoothness)
Steps
Step 1: Prepare the Cookie Base
-
- Crush the cookies into fine crumbs using a food processor or by placing them in a ziplock bag and crushing with a rolling pin.
- In a mixing bowl, combine the cookie crumbs, softened butter, and chopped walnuts. Mix until the texture resembles wet sand.
- Press this mixture evenly into the base of a springform pan or a lined baking dish to create a firm crust. Refrigerate while you prepare the cream layer.
Step 2: Whip the Cream Layer
-
- In a large bowl, whip the cream until soft peaks form.
- Add the condensed milk and sifted cocoa powder into the whipped cream. Gently fold until smooth and well combined.
- Spread the cream mixture evenly over the cookie base. Smooth the top with a spatula for an even finish.
Step 3: Make the Chocolate Glaze
-
- Melt the dark chocolate with the butter in a heatproof bowl over simmering water (double boiler method) or in the microwave in 20-second intervals. Stir until smooth and glossy.
- Allow the glaze to cool slightly before pouring it over the cream layer. Spread it evenly using a spatula or tilt the pan gently to cover the surface.
See also What happens to your body when you add cardamom to your food every day.Step 4: Chill the Cake
- Cover the cake with plastic wrap and refrigerate for at least 2-3 hours, or until fully set. For best results, chill overnight.
Step 5: Garnish and Serve
- Before serving, optionally garnish with extra chopped walnuts, cookie crumbs, or chocolate shavings for added flair.
- Slice with a warm knife for clean cuts and serve chilled.
-
-
Polish Baked Paczki (Donuts)
Ingredients:Dough: 1½ cups flour, ¼ cup sugar, ¼ tsp salt, 2 tsp yeast, ¾ cup warm milk, 3 Tbsp oil, 2 egg yolks, 1 tsp vanilla, extra flour as needed.For Coating: 3 Tbsp melted butter, ½ cup sugarCustard Filling: ¼ cup sugar, 2 Tbsp cornstarch, 1 cup milk, 1 egg yolkSteps:Dough: Combine warm milk, sugar, and yeast; let sit until bubbly. Add oil, yolks, vanilla, flour, and salt; mix until smooth. Knead on floured surface for 5 mins. Cover and let rest 10-15 mins.Custard Filling: In a saucepan, combine sugar and cornstarch, add milk and yolk. Boil for 1½ mins while stirring, then chill.Shape & Bake: Roll dough ½-inch thick, cut circles, place on greased sheet, and let rise 1 hour. Bake at 350°F for 10-12 mins.Coat & Fill: Brush warm donuts with melted butter, roll in sugar, then fill with custard or jam.Enjoy your paczki!
-
Fresh Carrot-Infused Homemade Cheese
Table of Contents
Ingredients:
-
- 1 liter of milk
- 2 large carrots
-
- 200 g sour cream
- 2 eggs
- 1 tsp salt
- 1 tbsp chopped carrots
Directions:
-
- Heat the milk over medium heat until it’s hot but not boiling.
-
- Grate or blend the carrots, then squeeze out the juice.
- Mix the sour cream, eggs, and salt in a bowl.
- Once the milk is hot, slowly pour in the carrot juice.
-
- As the milk begins to boil, add the sour cream mixture and 1 tbsp of the chopped carrots.
- Continue cooking for about 10 minutes until the milk curdles and the whey separates.
- Prepare a strainer lined with cheesecloth, and pour the mixture into it, allowing the whey to drain.
- Transfer the cheese curds into a mold, place a weight on top, and let it set for 3-4 hours.
- Once the time is up, your fresh carrot-infused cheese is ready to enjoy!
Prep Time: 10 minutes | Cooking Time: 10 minutes | Total Time: 20 minutes
Kcal: 150 kcal | Servings: 6 servings
Additional Information
Nutrition Facts:
This carrot-infused homemade cheese is a nutritious and balanced treat, combining the richness of dairy with the natural sweetness of carrots. Here’s a quick breakdown of the nutritional content per serving:
-
- Calories: 150 kcal
- Protein: 8g
-
- Fat: 10g
- Carbohydrates: 8g
- Fiber: 1g
- Sugar: 5g
- Calcium: 25% DV
- Vitamin A: 90% DV
-
-
No Flour! Sugar-free! 3 Ingredient Apple Pie: A Simple and Healthy Recipe
Table of Contents
Ingredients
To whip up this delicious apple pie, you’ll need:
- 2 3/4 cups of oat flakes
- 2 apples
- 3 eggs
- 1 tablespoon baking powder
- 1 teaspoon of cinnamon
- A few drops of vanilla extract
- Cranberries (to taste)
- Nuts (for decoration, to taste)
Preparation
Let’s get started on this delightful journey of baking bliss! Here’s how to prepare your sugar-free apple pie:
Mixing it Up
Once you’ve gathered all your ingredients, it’s time to work some magic in the kitchen:
1. Grinding Oat Flakes: Begin by adding oat flakes and a spoonful of baking powder into an electric mixer. Pulse until the oat flakes are finely chopped, but be cautious not to overdo it.
2. Apple Puree: Peel and core the apples, then chop them into pieces. Using a food processor, blitz the apples until they form a smooth puree.
3. Flavor Infusion: Transfer the apple puree into a large bowl and add a dash of cinnamon and a few drops of vanilla extract. Give it a good mix with a spatula until well combined.
Baking Brilliance
Now, let’s turn up the heat and bake up some goodness:
4. Mixing it Together: Crack the eggs into the bowl with the apple mixture and whisk until you achieve a smooth consistency.
5. Incorporating Oat Flour: Gradually add the ground oat flakes into the bowl, mixing well with a spatula until fully incorporated.
6. Preparing the Pan: Line an 18-centimeter diameter mold with baking paper and pour the batter into it, ensuring an even layer.
See also Carrot, Apple, and Beetroot Salad7. Adding Finishing Touches: Sprinkle a handful of cranberries and chopped nuts on top of the batter, gently pressing them into the mixture.
Final Flourish
It’s time to let the oven work its magic:
8. Baking Bliss: Preheat your oven to 180 degrees Celsius and bake the apple pie for approximately three-quarters of an hour, or until golden brown and fragrant.
9. Sweet Sensations: Once baked, remove the pie from the oven and let it cool slightly. Finish it off with a dusting of icing sugar for that perfect, Instagram-worthy touch.
Health Benefits
Indulging in this sugar-free apple pie isn’t just a treat for your taste buds—it’s also packed with health benefits:
- Oats: Rich in fiber, oats help promote digestive health and keep you feeling full for longer.
- Apples: Packed with vitamins and antioxidants, apples support immune function and aid in weight management.
- Eggs: A good source of protein, eggs help build and repair tissues, making them an essential component of any balanced diet.
-
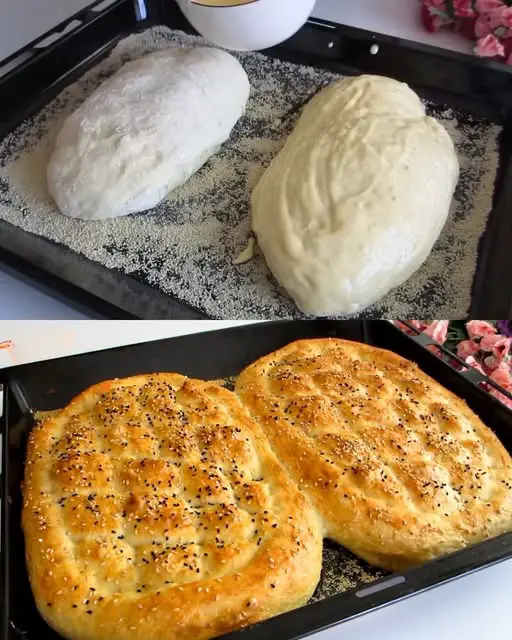
Fresh, Homemade Ciabatta Bread Recipe: Chewy, and Perfectly Irresistible
Making fresh homemade ciabatta bread is one of the most rewarding baking experiences. Known for its chewy interior, rustic crust, and distinct airy texture, ciabatta bread is a favorite for sandwiches, dipping into soups, or enjoying plain with a drizzle of olive oil. With just a few simple ingredients, you can recreate this Italian classic in your kitchen. This recipe uses a slow fermentation process to develop its signature flavor and texture, making it well worth the wait.
Homemade ciabatta bread is a testament to the beauty of baking: simple ingredients transformed into a rustic, flavorful loaf. While it may take a bit of time and patience, the result is a chewy, airy, and crusty bread that’s well worth the effort. Once you master this recipe, you’ll never look at store-bought ciabatta the same way again. Give it a try and enjoy the art of breadmaking!!
Ingredients
For the Dough:
- 4 cups (500g) all-purpose flour
- 1 1/2 teaspoons salt
- 1 teaspoon sugar
- 1 1/2 teaspoons instant yeast
- 1 3/4 cups (400ml) warm water
- 2 tablespoons olive oil
For Dusting:
- Semolina flour or all-purpose flour
INSTRUCTIONS:
Step-by-Step Instructions
Step 1: Prepare the Dough
- In a large mixing bowl, combine the flour, salt, sugar, and instant yeast. Mix well to distribute the dry ingredients evenly.
- Gradually add the warm water and olive oil to the dry ingredients, stirring with a wooden spoon or spatula until a sticky dough forms.
- Tip: The dough should be wet and shaggy—this is what gives ciabatta its airy texture.
Step 2: Knead and Rest
- Transfer the sticky dough to a clean, lightly oiled surface. Knead the dough for about 8-10 minutes, stretching and folding it repeatedly. Alternatively, you can use a stand mixer with a dough hook on medium speed for about 6-8 minutes.
- Place the kneaded dough in a lightly oiled bowl and cover it with plastic wrap or a clean kitchen towel. Let it rise in a warm place for 1-2 hours, or until it doubles in size.
Step 3: Stretch and Fold
- Once the dough has risen, lightly flour your work surface. Turn the dough out and gently stretch it into a rectangle. Fold it into thirds, like a letter.
- Return the dough to the bowl, cover it, and let it rest for another 30 minutes. Repeat this stretch-and-fold process twice more at 30-minute intervals.
Step 4: Shape the Loaves
- After the final rest, transfer the dough to a floured surface and divide it into 2-3 equal portions. Gently shape each portion into a rustic, oblong loaf. Be careful not to deflate the dough too much.
- Place the loaves on a baking sheet lined with parchment paper and dusted with semolina or flour. Cover them with a kitchen towel and let them rise for 45-60 minutes.
Step 5: Preheat the Oven
- Preheat your oven to 450°F (230°C). Place a baking stone or inverted baking sheet inside to heat up. Place a shallow pan of water on the lower rack to create steam, which helps achieve a crispy crust.
Step 6: Bake the Ciabatta
- Carefully slide the risen loaves onto the hot baking stone or baking sheet. Bake for 20-25 minutes, or until the loaves are golden brown with a hollow sound when tapped.
- Remove the bread from the oven and let it cool on a wire rack for at least 15 minutes before slicing.
Tips for Success
- High Hydration Dough: Ciabatta dough is very wet and sticky—don’t be tempted to add more flour. The high hydration is key to its airy texture.
- Stretch and Fold: This technique strengthens the dough without overworking it, creating the open crumb structure.
- Steam in the Oven: Adding steam during baking helps create the rustic, crackly crust ciabatta is known for.
- Use a Baking Stone: A hot stone or baking steel helps mimic the conditions of a professional oven, giving the bread an excellent rise and crust.
- Patience is Key: The slow fermentation and resting periods develop flavor and texture, so don’t rush the process.
Why You’ll Love This Recipe
- Simple Ingredients: With just flour, water, yeast, and a touch of olive oil, this recipe showcases how basic pantry staples can create something magical.
- Versatile Use: Ciabatta is perfect for sandwiches, dipping in olive oil and balsamic vinegar, or as a base for bruschetta.
- Rustic Charm: Its irregular shape and artisan look add a homemade touch to your table.
Serving Suggestions
Pair this ciabatta bread with a hearty soup like minestrone or creamy tomato bisque. It’s also an excellent base for paninis, avocado toast, or served alongside pasta dishes like spaghetti Bolognese or fettuccine Alfredo.
-
Pumpkin and Banana Jelly Dessert
Table of Contents
Ingredients
- Pumpkin: 500 g (about 2½ cups), peeled and diced
- Bananas: 2 medium, mashed
- Sugar: 120 g (½ cup)
- Water: ½ cup (optional, for blending)
- Milk: 600 ml (2½ cups)
- Agar-Agar: 25 g (about 3 tablespoons)
Directions
- Cook the Pumpkin:
- Peel and dice the pumpkin into small cubes.
- Place the pumpkin in a pot with a little water and cook over medium heat for 10 minutes, or until soft. Mash the cooked pumpkin or blend it into a smooth puree.
- Prepare the Banana Mixture:
- Mash the bananas in a bowl until smooth. Combine them with the pumpkin puree.
- Cook with Agar-Agar:
- In a separate pot, combine the milk, sugar, and agar-agar. Stir well to dissolve.
- Bring the mixture to a gentle boil over medium heat, stirring constantly. Let it simmer for 5 minutes to activate the agar-agar.
- Combine and Set:
- Gradually mix the pumpkin-banana puree into the agar-agar milk mixture, ensuring it’s well combined.
- Pour the mixture into a mold or serving glasses. Let it cool to room temperature before placing it in the refrigerator.
- Chill and Serve:
- Allow the jelly to set in the fridge for at least 5 hours. Once set, slice or scoop and serve chilled.
5 Serving Suggestions
- Garnish with a dollop of whipped cream and a sprinkle of cinnamon for added flavor.
- Top with chopped nuts, such as walnuts or pecans, for a crunchy texture.
- Add fresh fruit slices like berries or kiwi for a colorful presentation.
- Drizzle with honey or caramel sauce for extra sweetness.
- Serve with a scoop of vanilla ice cream for a decadent dessert.
See also Vanilla Custard Apple Cake5 Cooking Tips
- Use ripe bananas for a naturally sweeter flavor.
- Stir constantly while cooking with agar-agar to prevent clumping.
- Blend the pumpkin puree until smooth for the best texture.
- Adjust the sugar amount based on the sweetness of your pumpkin and bananas.
- Ensure the agar-agar is fully dissolved and activated by simmering it for at least 5 minutes.
Nutritional Benefits
- Pumpkin: Rich in vitamin A, fiber, and antioxidants, supporting eye health and immunity.
- Bananas: Provide potassium, vitamin C, and natural sweetness.
- Agar-Agar: A plant-based gelatin alternative, high in fiber and low in calories.
Dietary Information
- Vegetarian: Yes
- Vegan: Substitute milk with plant-based milk.
- Gluten-Free: Yes
- Dairy-Free: Use a non-dairy milk alternative like almond or oat milk.
Nutritional Facts (Per Serving)
- Calories: 150 kcal
- Protein: 3g
- Fat: 2g
- Carbohydrates: 32g
- Fiber: 2g
- Sugar: 18g
Storage
- Refrigeration: Store in an airtight container in the fridge for up to 3 days.
- Freezing: Not recommended as the texture may change upon thawing.
-
Cream-Filled Apple Cake Recipe
Table of Contents
Ingredients
Cream Filling
2 egg yolks
1/4 cup sugar (60 g)
1 teaspoon vanilla essence (optional)
1 cup milk (240 ml / 8 fl oz)
1 tablespoon cornstarch (15 g)
Cake Batter
2 egg whites (saved from the cream filling)
2 eggs
A pinch of salt
1/2 cup milk (120 ml / 4 fl oz)
Grated peel of 1 lemon
Juice of half a lemon
2 cups flour (260 g)
1 teaspoon baking powder
3 apples
Decoration
1 teaspoon powdered sugar (optional)Directions
Cream Filling
Prepare the Cream:In a saucepan, whisk together the egg yolks and 1/4 cup sugar until well combined.
Add the vanilla essence, milk, and cornstarch, and stir until smooth.
Cook over medium heat, stirring constantly, until the mixture thickens.
Cover the cream with plastic wrap, ensuring the wrap touches the surface to prevent a skin from forming. Set aside to cool to room temperature.Cake Batter
Prepare the Egg Whites:In a large mixing bowl, beat the 2 egg whites until stiff peaks form. Set aside.
Combine Wet Ingredients:
In another bowl, beat the 2 whole eggs with a pinch of salt.
Add 1/2 cup milk, grated lemon peel, and lemon juice. Mix well.Combine Dry Ingredients:
In a separate bowl, sift together the flour and baking powder.
Prepare the Apples:
Peel, core, and chop the apples into small pieces.
See also Million Dollar Spaghetti CasseroleCombine Ingredients:
Gradually add the dry ingredients to the wet mixture, stirring until just combined.
Gently fold in the beaten egg whites.
Fold in the chopped apples.Prepare the Baking Pan:
Preheat the oven to 180°C (356°F).
Grease and line a 25 cm tall baking mold with moistened baking paper to help it adapt better to the mold.Assemble the Cake:
Pour half of the cake batter into the prepared pan.
Add the cooled cream in a spiral shape over the batter.
Pour the remaining batter on top of the cream.Bake the Cake:
Bake in the preheated oven for 45-50 minutes, or until a toothpick inserted into the center comes out clean.
Decoration
Decorate the Cake:
Allow the cake to cool completely.
Dust with powdered sugar for a vintage texture (optional).Serving Suggestions
Serve the cake warm or at room temperature.
Enjoy with a cup of tea or coffee for a delightful treat. -
Carrot and Apple Oatmeal Cake with White Chocolate Nut Topping
Table of Contents
-
Protein Bars: A Tastier and Healthier Snickers Alternative in Just 5 Minutes
Table of Contents
In today’s fast-paced world, finding a nutritious yet delicious snack can be quite a challenge. Most of the readily available options are loaded with sugar and unhealthy additives. However, there’s a fantastic alternative that you can make at home in just five minutes – protein bars! These bars not only satisfy your sweet cravings but also provide a healthy dose of protein without the guilt. In this article, we’ll show you how to create your own protein bars that are not only tastier than Snickers but also free from sugar and baking. Let’s dive into the details.Ingredients You’ll Need:
For the Base:8.8 ounces (250 grams) of peanut butter
3.5-5.3 ounces (100-150 grams) of coconut flour (depending on the desired consistency)
1.8 ounces (50 grams) of sweetener (choose from honey, maple syrup, or stevia)
For the Glazing:1.8 ounces (50 grams) of cocoa powder
Coconut milk and sweetener to taste
The Simple Preparation Process:
Mixing the Dough
Start by taking a bowl and adding 250 grams of peanut paste (butter) into it. You can easily make peanut paste at home if you prefer the homemade touch.
Gradually add 100 grams of coconut flour into the bowl and mix it with the peanut paste. Depending on the desired consistency of your mixture, you can add the remaining 50 grams of coconut flour if necessary.
Now, it’s time to sweeten the mixture. You have options here – you can use honey, stevia, or maple syrup as a natural sweetener. Add it to the bowl and mix everything thoroughly. The mixture should be thick but still easy to pour into a mold.
See also Puff Pastry with Homemade Custard and Chocolate DrizzleMolding and Chilling
Take a mold with a flexible rim; it should be smaller in size since this recipe makes a smaller batch. If you desire more, simply double the ingredients.
Pour the prepared mixture into the mold and use a spatula to pat it down and level it nicely.
Cover the mold with cling film and place it in the refrigerator for 2-3 hours to let it cool.
Preparing the Glaze
While your protein bar mixture is cooling in the fridge, you can prepare the glaze. Take 50 grams of cocoa and gradually add a little coconut milk until it forms a runny glaze.
Adjust the sweetness of the glaze to your liking by adding sweetener. Mix it well.
The Final Touch
Once the protein bar mixture has cooled, remove it from the refrigerator.
Pour the prepared glaze evenly over the top of the mixture.
Cut the bars into cubes, and they are ready to be served immediately.
These homemade protein bars not only taste amazing but also provide you with a nutritious snack option. Some even say they are tastier than Snickers! Plus, they are sugar-free and require no baking. What more could you ask for?Conclusion
In a world filled with unhealthy snacking options, making your own protein bars is a game-changer. They are easy to prepare, healthier than traditional candy bars, and customizable to your taste preferences. Next time you’re craving a sweet treat, whip up a batch of these protein bars and enjoy guilt-free snacking.