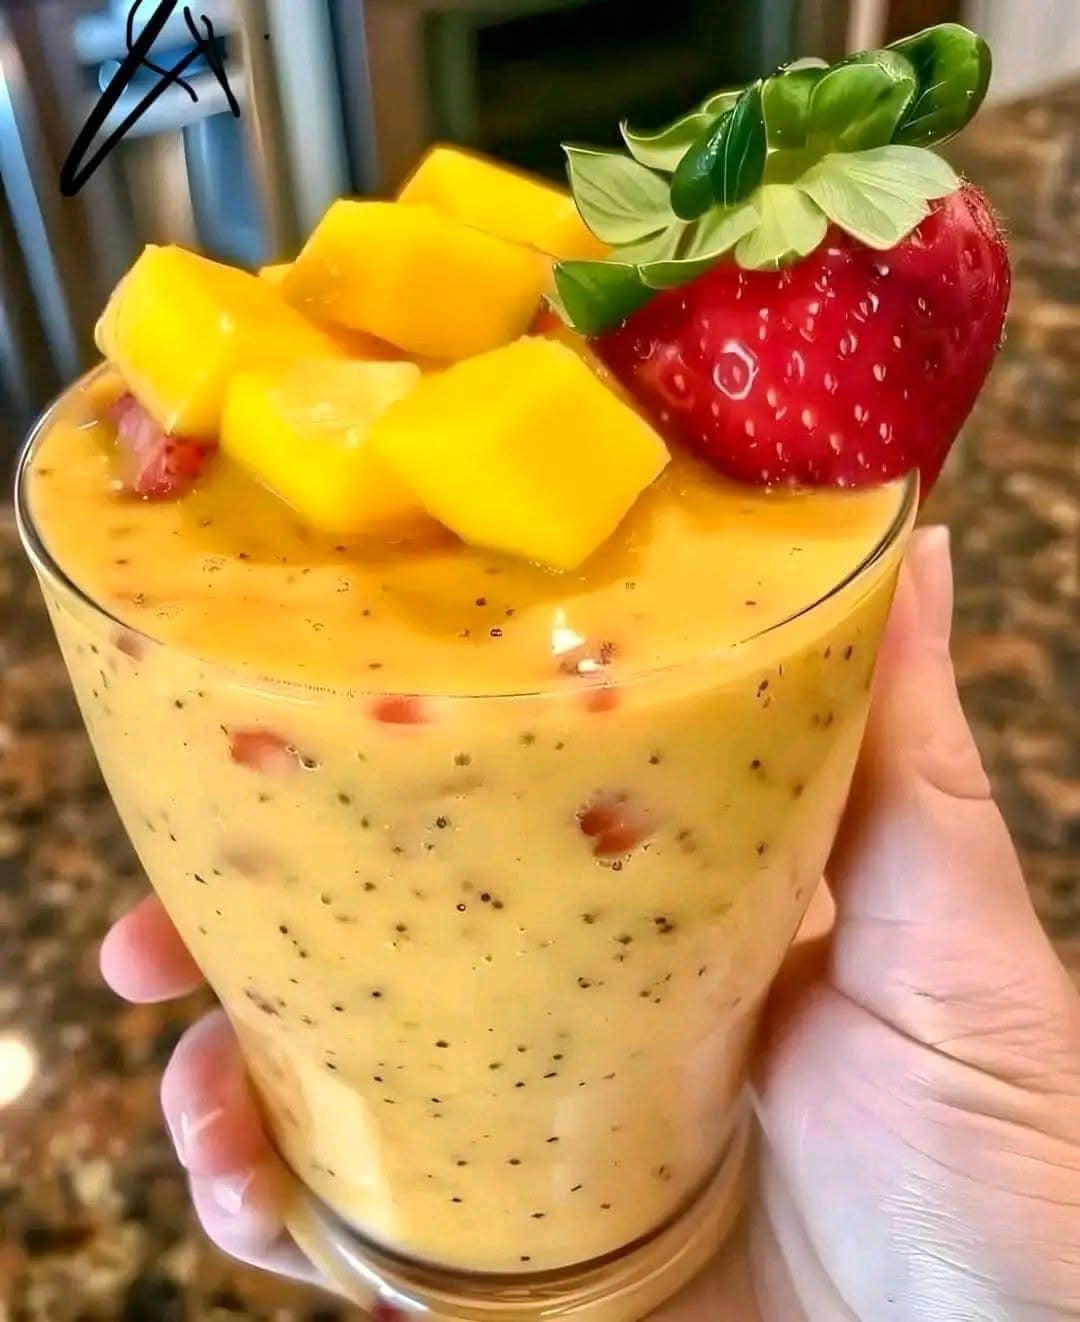
Author: Admin

  • Cheesy Herb Quick Bread – A Savory, Easy-to-Make Delight!

    Cheesy Herb Quick Bread – A Savory, Easy-to-Make Delight!

    This soft, flavorful bread is packed with melty cheddar and aromatic herbs, perfect as a side or enjoyed on its own. Ready in under an hour!

    Ingredients:
    2 cups all-purpose flour

    1 tbsp sugar

    1 tbsp baking powder

    1 tsp salt

    1 cup shredded cheddar cheese

    2 tbsp fresh parsley, chopped

    1 tbsp fresh thyme (or 1 tsp dried)

    1 tbsp fresh rosemary (or 1 tsp dried)

    1 cup milk

    ¼ cup melted butter

    2 large eggs

    Instructions:

    Prep: Preheat oven to 355°F (176°C). Grease a 9×5-inch loaf pan or line it with parchment paper.

    Dry Mix: In a large bowl, whisk together flour, sugar, baking powder, and salt. Stir in cheddar cheese, parsley, thyme, and rosemary.

    Wet Mix: In another bowl, whisk milk, melted butter, and eggs until smooth.

    Combine: Pour the wet ingredients into the dry mix. Gently fold until just combined (a few lumps are fine—overmixing makes dense bread!).

    Bake: Transfer batter to the prepared pan. Bake for 45–50 minutes, or until a toothpick inserted comes out clean.

    Serve: Let cool in the pan for 10 minutes, then transfer to a wire rack. Slice and enjoy warm with butter, soup, or as a snack!

    Tip: For extra flavor, sprinkle the top with more cheese and herbs before baking! �

  • Caramel Chocolate Crunch Bars

    Caramel Chocolate Crunch Bars

    Caramel Chocolate Crunch Bars

    If you’re searching for the perfect easy dessert recipe that’s loaded with sweet and crunchy goodness, look no further than Caramel Chocolate Crunch Bars. These irresistible layered bars combine smooth caramel, rich chocolate, and a crispy base, creating a treat that’s as satisfying as it is simple to make. Whether you need a quick party dessert, a holiday favorite, or an indulgent snack, these bars are guaranteed to impress!

    Ingredients:

    • 2 cups all-purpose flour
    • 1/2 cup brown sugar
    • 1 cup unsalted butter, melted
    • 1 cup caramel sauce
    • 1 cup chocolate chunks
    • 1/2 cup chopped nuts (optional)
    • 1/2 cup chocolate chips

    How to Make Caramel Chocolate Crunch Bars:

    1. Preheat the oven to 350°F (175°C).
    2. In a bowl, mix together the flour, brown sugar, and melted butter until well combined.
    3. Press the mixture into the bottom of a greased baking dish to form the crust.
    4. Bake the crust for 10-12 minutes or until lightly golden.
    5. Remove the crust from the oven and immediately pour the caramel sauce over the hot crust.
    6. Sprinkle the chocolate chunks and chopped nuts (if using) evenly over the caramel layer.
    7. Return to the oven and bake for an additional 10 minutes until the caramel is bubbly and the chocolate is melted.
    8. Remove from the oven and sprinkle the chocolate chips over the top. Let them melt slightly and spread with a spatula if desired.
    9. Allow the bars to cool completely before cutting into squares.

    Prep Time: 15 minutes | Cooking Time: 22 minutes | Total Time: 37 minutes

    Kcal: 320 kcal | Servings: 12 bars

    Final Thoughts

    Caramel Chocolate Crunch Bars are the ultimate dessert bar recipe for anyone who loves decadent, layered treats. With minimal effort and maximum flavor, these bars are bound to become a go-to favorite. Whether you’re hosting a gathering or just need a sweet fix, these bars deliver every time.

  • Avocado Banana Smoothie with Almond Topping

    Avocado Banana Smoothie with Almond Topping

    Avocado Banana Smoothie with Almond Topping

    This smoothie is creamy, nutritious, and incredibly satisfying. The combination of avocado and banana provides a rich texture and natural sweetness, while the almonds add a delightful crunch and extra nutrients.

    Yields: 1 serving Prep time: 5 minutes

    Ingredients:

    • 1/2 ripe avocado, peeled and pitted
    • 1 ripe banana, peeled and sliced
    • 1/2 to 3/4 cup milk (dairy or non-dairy like almond milk, soy milk, or oat milk) – adjust for desired consistency
    • 1-2 tablespoons honey, maple syrup, or your preferred sweetener (optional, depending on ripeness of fruit and sweetness preference)
    • 1/4 teaspoon vanilla extract (optional, for added flavor)
    • A pinch of cinnamon or cardamom (optional, for warmth)
    • Ice cubes (optional, for a colder and thicker smoothie)
    • 2 tablespoons chopped almonds or slivered almonds, for topping

    Equipment:

    • Blender
    • Measuring cups and spoons
    • Serving glass or cup

    Instructions:

    1. Prepare the Fruit: Ensure your avocado and banana are ripe. Ripe avocados will be slightly soft to the touch, and ripe bananas will have some brown spots.
    2. Combine in Blender: Add the peeled and pitted avocado and sliced banana into your blender.
    3. Add Liquids and Sweetener: Pour in 1/2 cup of your chosen milk. If you’re using a sweetener, add 1 tablespoon of honey or maple syrup now. If using vanilla extract or spices, add them as well.
    4. Blend Until Smooth: Secure the lid on your blender and blend on high speed until the mixture is completely smooth and creamy. Scrape down the sides of the blender with a spatula if needed to ensure everything is incorporated.
    5. Adjust Consistency and Sweetness:
      • If the smoothie is too thick, add more milk, a tablespoon at a time, and blend again until you reach your desired consistency.
      • Taste the smoothie. If it’s not sweet enough for your liking, add another tablespoon of sweetener and blend briefly to combine.
      • If you prefer a colder or thicker smoothie, add a few ice cubes and blend until smooth.
    6. Pour and Garnish: Pour the prepared avocado banana smoothie into your serving glass or cup.
    7. Add Topping: Sprinkle the chopped or slivered almonds generously over the top of the smoothie.
    8. Serve Immediately: Enjoy your delicious and nutritious avocado banana smoothie right away!

    Tips and Variations:

    • Make it Colder: Freeze your banana slices before blending for an extra cold and thick smoothie without diluting the flavor with too much ice.
    • Add Protein: Boost the protein content by adding a scoop of your favorite protein powder (vanilla or unflavored work well).
    • Boost Nutrients:
      • Add a handful of spinach or kale for an extra dose of greens (the avocado and banana will mask the flavor).
      • Include 1-2 tablespoons of chia seeds or flax seeds for added fiber and omega-3s.
    • Different Toppings: Instead of or in addition to almonds, try other nuts like walnuts or cashews, shredded coconut, a drizzle of chocolate sauce, or a sprinkle of granola.
    • Spices: Experiment with a tiny pinch of nutmeg or ginger for different flavor profiles.
    • For a Dessert Smoothie: Add a tablespoon of cocoa powder for a chocolate avocado banana smoothie.
  • Strawberry Banana Chia Smoothie

    Strawberry Banana Chia Smoothie

    Strawberry Banana Chia Smoothie

    This vibrant and nutritious smoothie is packed with flavor and healthy omega-3 fatty acids. It’s naturally sweet, dairy-free, and a great way to start your day or enjoy as a refreshing snack.

    Yields: 1 large serving or 2 smaller servings Prep time: 5 minutes

    Ingredients:

    • 1 cup (about 150g) frozen strawberries: Using frozen strawberries is key for a thick, cold smoothie without needing ice, which can dilute the flavor.
    • 1 ripe banana: Fresh or frozen. If using fresh, you might want to add a few ice cubes for extra chill. A ripe banana adds natural sweetness and creaminess.
    • 1/2 cup (120ml) liquid:
      • Water: For a simple, light smoothie.
      • Coconut water: Adds a subtle sweetness and electrolytes.
      • Orange juice: For a brighter, more citrusy flavor.
      • Almond milk (unsweetened): If you prefer a slightly creamier texture, although the image suggests a dairy-free smoothie without traditional milk.
    • 1 tablespoon chia seeds: These are the little black specks you see in the smoothie and on top. They absorb liquid and create a thicker texture, while also being a powerhouse of fiber and omega-3s.
    • Optional additions (for extra flavor, nutrition, or sweetness):
      • 1-2 tablespoons maple syrup or honey: If you prefer a sweeter smoothie, especially if your fruit isn’t very ripe.
      • 1/2 teaspoon vanilla extract: Enhances the overall flavor.
      • Handful of spinach or kale: (You won’t taste it much, but it adds a significant nutritional boost, though it might change the color slightly).
      • 1 tablespoon protein powder (vanilla or unflavored): For an added protein boost.
      • 1/4 cup rolled oats: Adds thickness and makes it more filling.

    Instructions:

    1. Combine ingredients in blender: Add the liquid (water, coconut water, etc.), frozen strawberries, banana, and chia seeds to your blender.
    2. Add optional ingredients: If using any optional additions like sweetener, vanilla, spinach, or protein powder, add them to the blender now.
    3. Blend until smooth: Secure the lid on your blender and blend on high speed until the mixture is completely smooth and creamy. You might need to pause and scrape down the sides with a spatula a few times to ensure everything is incorporated. If it’s too thick, add a splash more liquid until it reaches your desired consistency.
    4. Taste and adjust: Taste the smoothie and adjust sweetness if needed. Add more sweetener if desired, or a squeeze of lemon/lime juice for a bit of tang.
    5. Pour and garnish: Pour the smoothie into a tall glass.
    6. Garnish (as pictured): Top with a sprinkle of additional chia seeds and a few fresh whole or sliced strawberries for a beautiful presentation and extra texture.
    7. Serve immediately: Enjoy your delicious and healthy Strawberry Banana Chia Smoothie right away!

    Tips for Success:

    • For a thicker smoothie: Use more frozen fruit, less liquid, or add a few more chia seeds (let it sit for 5 minutes after blending to allow the chia seeds to absorb liquid).
    • For a thinner smoothie: Add more liquid gradually until desired consistency is reached.
    • Meal Prep Tip: You can pre-portion the frozen strawberries, banana (if frozen), and chia seeds into freezer-safe bags. When you’re ready for a smoothie, just dump the contents into your blender with the liquid.
    • Experiment with fruit: While this recipe focuses on strawberry and banana, feel free to add other frozen fruits like raspberries, blueberries, or mango for different flavor profiles.
  • Watermelon and Cucumber Smoothie

    Watermelon and Cucumber Smoothie

    Watermelon and Cucumber Smoothie

    This refreshing smoothie is perfect for a hot day, offering a hydrating and subtly sweet flavor.

    Yields: 1-2 servings Prep time: 5-10 minutes

    Ingredients:

    • 2 cups diced watermelon, seeds removed (approximately 1/4 of a medium watermelon) – For best results, chill the watermelon beforehand or freeze some of the cubes for a thicker, colder smoothie.
    • 1/2 cup chopped cucumber, peeled or unpeeled (about 1/2 of a medium cucumber) – Peeling is optional; leaving the skin on adds fiber and a slightly greener color.
    • 1-2 tablespoons fresh lime juice (from 1/2 to 1 lime) – Enhances the flavors and adds a bright tang.
    • Optional sweeteners (adjust to taste):
      • 1-2 teaspoons honey, agave nectar, or maple syrup
      • 1-4 fresh mint leaves – Adds a cool, aromatic touch.
      • Small pinch of salt – A tiny bit of salt can surprisingly enhance the sweetness of the watermelon.
    • Optional additions for texture/nutrition:
      • 1/4 cup ice cubes (if watermelon isn’t chilled or frozen enough)
      • 1/4 cup plain Greek yogurt or coconut water (for creaminess or thinner consistency)

    Equipment:

    • Blender
    • Measuring cups and spoons
    • Knife and cutting board

    Instructions:

    1. Prepare the Ingredients:

      • Cut the watermelon into cubes, making sure to remove any seeds.
      • Wash and chop the cucumber. You can peel it or leave the skin on, depending on your preference.
      • Juice the lime.
    2. Combine in Blender:

      • Add the diced watermelon, chopped cucumber, and fresh lime juice to your blender.
      • If using any optional sweeteners (honey, agave, maple syrup), mint leaves, or a pinch of salt, add them now.
      • If your watermelon isn’t very cold or you prefer a thicker, icier smoothie, add 1/4 cup of ice cubes.
    3. Blend Until Smooth:

      • Secure the lid on your blender.
      • Start blending on a low speed, then gradually increase to high. Blend until the mixture is completely smooth and no chunks remain. This usually takes 30-60 seconds, depending on your blender.
      • If the smoothie is too thick, you can add a tablespoon or two of water or coconut water to reach your desired consistency.
    4. Taste and Adjust:

      • Pour a small amount into a spoon and taste.
      • Adjust sweetness as needed by adding more honey, agave, or maple syrup.
      • If it needs more tang, add a bit more lime juice.
      • If you want a stronger mint flavor, blend in a few more mint leaves.
    5. Serve:

      • Pour the watermelon and cucumber smoothie into a glass.
      • Garnish with a slice of cucumber on the rim or a small piece of watermelon, as shown in the image.
      • Serve immediately and enjoy!

    Tips and Variations:

    • For a creamier smoothie: Add 1/4 cup of plain Greek yogurt or a small frozen banana.
    • For a tropical twist: Add a few pieces of fresh pineapple or mango.
    • Make it spicy: Add a tiny slice of fresh jalapeño (remove seeds for less heat) for a surprising kick.
    • Herbal additions: Besides mint, you could try a few sprigs of fresh basil for an earthy aroma.
    • Storage: This smoothie is best enjoyed fresh. If you have leftovers, store them in an airtight container in the refrigerator for up to 24 hours. The color and freshness might diminish slightly over time.

    Enjoy your delicious and hydrating watermelon and cucumber smoothie!

  • Carrot Banana Smoothie:

    Carrot Banana Smoothie:

    This smoothie is a great way to combine the sweetness of bananas with the nutritional benefits of carrots. It’s perfect for a quick breakfast, a healthy snack, or a post-workout refuel.

    Yields: 1-2 servings Prep time: 5-10 minutes

    Ingredients:

    • Carrots:
      • 2-3 medium carrots (about 1 cup chopped)
      • Tip: Choose firm, bright orange carrots. Organic is great if available.
    • Banana:
      • 1 large ripe banana (or 2 small)
      • Tip: A frozen banana will make the smoothie thicker and colder without needing ice. If using fresh, you might want to add a few ice cubes.
    • Liquid Base:
      • 1/2 to 1 cup liquid (water, almond milk, oat milk, coconut water, or even orange juice for extra sweetness and vitamin C)
      • Tip: Start with 1/2 cup and add more until you reach your desired consistency.
    • Optional Enhancements (for added flavor and nutrition):
      • Sweetener: 1-2 dates (pitted), 1-2 teaspoons honey, maple syrup, or agave nectar (adjust to your sweetness preference)
      • Spice: 1/4 teaspoon ground ginger, 1/4 teaspoon ground cinnamon, or a tiny pinch of nutmeg (these pair wonderfully with carrots)
      • Healthy Fats/Protein: 1 tablespoon chia seeds, flax seeds, hemp seeds, a spoonful of almond butter, or a scoop of protein powder (vanilla or unflavored works well)
      • Citrus: A squeeze of fresh orange or lemon juice (brightens the flavor)
      • Yogurt: 1/4 cup plain Greek yogurt or regular yogurt (adds creaminess and protein)

    Equipment:

    • Blender (high-speed is best for a smooth consistency)
    • Vegetable peeler
    • Knife
    • Cutting board

    Instructions:

    1. Prepare the Carrots:
      • Wash the carrots thoroughly under cold running water.
      • Peel the carrots using a vegetable peeler.
      • Trim off the ends.
      • Chop the carrots into small pieces (about 1/2-inch to 1-inch chunks). Smaller pieces will blend more easily, especially if you don’t have a high-speed blender.
    2. Prepare the Banana:
      • Peel the banana.
      • If using a fresh banana, you can break it into a few pieces.
      • If using a frozen banana, you might want to slice it into smaller pieces before freezing for easier blending, or break it into chunks.
    3. Combine Ingredients in Blender:
      • Add the chopped carrots to your blender.
      • Add the banana (fresh or frozen).
      • Pour in your chosen liquid base (start with 1/2 cup).
      • Add any optional enhancements you’re using (sweetener, spices, seeds, etc.).
    4. Blend:
      • Secure the lid on your blender.
      • Start blending on a low speed, gradually increasing to high.
      • Blend until the smoothie is completely smooth and creamy. You might need to pause and scrape down the sides with a spatula to ensure everything is incorporated.
      • If the smoothie is too thick, add more liquid (1-2 tablespoons at a time) and blend again until you reach your desired consistency. If it’s too thin, you can add a few ice cubes (if not using frozen banana) or a bit more frozen banana/chia seeds.
    5. Taste and Adjust:
      • Pour a small amount into a spoon and taste.
      • Adjust sweetness if needed by adding more sweetener.
      • Adjust flavor with more spices or a squeeze of citrus.
    6. Serve:
      • Pour the freshly blended carrot banana smoothie into a glass.
      • Serve immediately for the best taste and nutrient retention.
      • Optional: Garnish with a sprinkle of cinnamon, a tiny piece of carrot, or a banana slice.

    Tips for Success:

    • For a colder smoothie: Use a frozen banana and/or add a few ice cubes.
    • For a thinner smoothie: Add more liquid.
    • For a thicker smoothie: Use less liquid, more frozen banana, or add a tablespoon of chia seeds (which will absorb liquid and thicken over time).
    • Don’t over-blend: While you want it smooth, excessive blending can warm the smoothie slightly and potentially diminish some delicate nutrients.
    • Experiment with liquids: Each liquid base will give a slightly different flavor profile. Almond milk adds a subtle nutty flavor, coconut water is refreshing, and orange juice makes it sweeter and more citrusy.
    • Pre-prep: Chop and freeze carrots in advance for quicker smoothie making.

    Enjoy your delicious and nutritious homemade carrot banana smoothie!

  • Kiwi-Ginger Zinger Protein Smoothie

    Kiwi-Ginger Zinger Protein Smoothie

    Kiwi-Ginger Zinger Protein Smoothie

    This smoothie is packed with vitamins, fiber, and protein, and has a refreshing zing from the ginger.

    Yields: 1 serving Prep time: 5 minutes

    Ingredients:

    • 2 ripe kiwis, peeled and roughly chopped
    • 1/2 ripe banana (frozen is ideal for a thicker, colder smoothie)
    • 1 scoop vanilla or unflavored protein powder (whey, casein, or plant-based)
    • 1/2 inch fresh ginger, peeled and roughly chopped (add more or less to taste)
    • 1/2 cup unsweetened almond milk (or your preferred milk)
    • 1/2 cup ice cubes (if not using frozen banana)
    • Optional: 1-2 teaspoons honey or maple syrup for added sweetness (adjust to taste)
    • Optional: a handful of spinach (for extra nutrients, the flavor will be masked)

    Instructions:

    1. Combine Ingredients: Add all ingredients (kiwis, banana, protein powder, ginger, almond milk, and ice cubes if using) to a high-speed blender.
    2. Blend: Blend on high until completely smooth and creamy. If the smoothie is too thick, add a splash more almond milk. If it’s too thin, add a few more ice cubes or a bit more frozen banana.
    3. Taste and Adjust: Taste the smoothie and adjust sweetness (add honey/maple syrup), ginger intensity, or thickness as desired.
    4. Serve: Pour into a glass, add a straw, and enjoy immediately!

    Tips and Variations:

    • For a colder smoothie: Freeze your banana slices ahead of time.
    • Boost of greens: A handful of spinach or kale blends in seamlessly and adds extra nutrients without significantly altering the flavor.
    • Spice it up: A tiny pinch of cayenne pepper can add a surprising and invigorating kick.
    • Creamier texture: For an even creamier smoothie, add 1-2 tablespoons of Greek yogurt or a quarter of an avocado.
    • Make it vegan: Ensure your protein powder is plant-based and use a non-dairy milk.

    Enjoy your delicious and energizing Kiwi-Ginger Zinger Protein Smoothie!

  • Here’s a simple recipe for 0-point Almond Joy Cookies:

    Here’s a simple recipe for 0-point Almond Joy Cookies:

    Here’s a simple recipe for 0-point Almond Joy Cookies:
    Ingredients:
    1 ripe banana, mashed
    1 cup old-fashioned oats
    1/4 cup unsweetened shredded coconut
    1/4 cup unsweetened cocoa powder
    1/4 cup unsweetened almond milk
    1/4 cup chopped almonds
    1/4 cup mini chocolate chips (optional)
    1/2 teaspoon vanilla extract
    Pinch of salt
    Instructions:
    Preheat your oven to 350°F (175°C). Line a baking sheet with parchment paper or lightly coat it with cooking spray.
    In a large mixing bowl, combine the mashed banana, oats, shredded coconut, cocoa powder, almond milk, chopped almonds, mini chocolate chips (if using), vanilla extract, and a pinch of salt. Stir until well combined and the mixture holds together.
    Using a spoon or cookie scoop, portion out the dough and drop it onto the prepared baking sheet, spacing the cookies about 2 inches apart.
    Use the back of the spoon or your fingers to flatten and shape each cookie into a round disc.
    Bake in the preheated oven for 12-15 minutes, or until the cookies are set and slightly firm to the touch.
    Remove the cookies from the oven and let them cool on the baking sheet for a few minutes before transferring them to a wire rack to cool completely.
    Once cooled, store the cookies in an airtight container at room temperature for up to 3-4 days.
    Enjoy these delicious 0-point Almond Joy Cookies as a guilt-free snack or dessert option on your Weight Watchers journey. With their satisfying blend of flavors and wholesome ingredients, they’re sure to become a new favorite treat!

  • best Deli-Style Chicken Salad recipe

    best Deli-Style Chicken Salad recipe

    best Deli-Style Chicken Salad recipe


    When it comes to making the best chicken salad, the star of the show should always be the chicken. With that being said there are many additions you can make to this classic recipe that will make it just the way you like it.

    This homemade chicken salad is the perfect deli-style recipe to make at home. Learn how to make a flavorful and easy chicken salad recipe!

    Chicken salad is the most typical warm-weather picnic food, isn’t it? I have it every summer, and everyone else I know does, too. In fact, I think I’ve been eating it since I was a kid! It’s THAT much of a staple. I feel like if you live here in the States, you’re into chicken salad, no matter who you are!

    Ingredients

    500 grams.Of chicken breast boneless – diced.

    300 grams.Of chicken thigh boneless – diced.

    2 Tbsp.Of olive oil.

    ½ Tsp.Of sea salt.

    ¼ Tsp.Of black pepper.

    ½ Tsp.Of granulated onion.

    ⅔ Cup.Of mayonnaise.

    3 stalks.Of celery – diced.

    Sea salt and black pepper.

    How To Make Deli-Style Chicken Salad?

    Step 1:

    Prepare the chicken breasts and thighs by lightly coating them in oil. Add some granulated onion, cracked black pepper, and salt from the sea.

    Step 2:

    Put in a baking dish and cover with aluminum foil in a loose manner. Bake at 350 degrees Fahrenheit for 25 to 30 minutes, or until the internal temperature of the breast, as measured in the thickest portion, reaches at least 165 degrees.

    Step 3:

    The chicken should be allowed to cool for at least ten minutes before being placed in the refrigerator for at least an hour. When the chicken has had time to cool, dice the breasts and thighs into pieces that are 1/4 of an inch long and approximately 1/2 an inch wide. Place the diced chicken, celery, and mayonnaise in a large bowl and stir well.

    Step 4:

    Make sure that all of the ingredients are well combined, then cover and place them in the refrigerator for at least one to two hours, or perhaps overnight. Since all of the flavors will have had more time to combine, the chicken salad will taste far better the next day.

    Step 5:

    To adjust the seasoning, taste the dish and add more salt and pepper as necessary. Serve and enjoy!

  • Light and Fluffy Japanese Cheesecake

    Light and Fluffy Japanese Cheesecake

    Here’s a delightful recipe for Light and Fluffy Japanese Cheesecake, known for its airy texture and delicate flavor!

    Light and Fluffy Japanese Cheesecake


    Ingredients:

    • For the Cheesecake:
      • 8 oz (225g) cream cheese, softened
      • 1/4 cup (60ml) whole milk
      • 1/4 cup (50g) granulated sugar
      • 3 large eggs, separated
      • 1 tablespoon lemon juice
      • 1 teaspoon vanilla extract
      • 1/2 cup (65g) cake flour
      • 1/4 teaspoon salt
      • 1/4 teaspoon cream of tartar (optional)

    Instructions:

    1. Preheat the Oven:

    • Preheat your oven to 320°F (160°C). Prepare an 8-inch (20 cm) round cake pan by lining the bottom with parchment paper and wrapping the outside with aluminum foil to prevent water from seeping in.

    2. Prepare the Batter:

    • Melt Cream Cheese: In a double boiler or microwave, melt the cream cheese with the milk until smooth. Allow it to cool slightly.
    • Mix Yolks: In a bowl, whisk together the egg yolks, sugar, lemon juice, and vanilla extract until well combined. Add the melted cream cheese mixture and mix until smooth.
    • Sift in Flour: Sift in the cake flour and salt, gently folding until combined.

    3. Whip Egg Whites:

    • In a separate bowl, beat the egg whites until frothy. If using, add cream of tartar and continue beating until soft peaks form. Gradually add 2 tablespoons of sugar, continuing to beat until stiff peaks form.

    4. Combine Mixtures:

    • Gently fold one-third of the whipped egg whites into the cream cheese mixture to lighten it. Then, carefully fold in the remaining egg whites until no white streaks remain. Be gentle to keep the batter airy.

    5. Bake:

    • Pour the batter into the prepared cake pan. Place the pan in a larger baking dish and fill the dish with hot water (about halfway up the sides of the cake pan) to create a water bath.
    • Bake for about 50-60 minutes, or until the top is lightly golden and a toothpick inserted in the center comes out clean. The cheesecake should have a slight jiggle but not be wet.

    6. Cool:

    • Turn off the oven and crack the door open, allowing the cheesecake to cool slowly in the oven for about 30 minutes. Then, remove it from the oven and let it cool to room temperature before transferring to the refrigerator to chill for at least 4 hours or overnight.

    7. Serve:

    • Carefully remove the cheesecake from the pan, slice, and serve plain or with a dusting of powdered sugar or fresh fruit.

    Enjoy this light and fluffy Japanese cheesecake! It’s a perfect treat for any occasion.

  • Quick Pickled Red Onions

    Quick Pickled Red Onions

    Bright, Zesty, and Addictively Delicious – A Must-Have Pantry Staple


    Introduction

    Pickled red onions are a vibrant, tangy, and sweet condiment that elevates almost any dish. With their bold magenta hue and crunchy texture, they add not just flavor but color and contrast to your meals. This classic preparation is easy, requires just a few basic ingredients, and takes only minutes to prepare.

    Whether you’re topping tacos, burgers, grilled meats, or fresh salads, these pickled onions are the perfect zesty touch. They also make excellent gifts when packed in mason jars!


    Ingredients – Makes One 16 oz (500 ml) Jar

    Ingredient Amount Notes
    Red onion 1 large Thinly sliced into rings or half-moons
    Vinegar 1 cup (240 ml) White vinegar, apple cider, or red wine vinegar work well
    Water 1 cup (240 ml) Helps mellow the sharpness of the vinegar
    Sugar 1–2 tbsp (15–30 ml) Use less for tangier, more for sweeter
    Salt 1½ tsp (7.5 ml) Kosher or sea salt preferred

    Optional Add-ins:

    • ½ tsp black peppercorns

    • ½ tsp mustard seeds

    • 1 garlic clove, smashed

    • Few sprigs of thyme, dill, or rosemary

    • 1 dried chili or pinch of red pepper flakes (for heat)


    Preparation Instructions – Step by Step

    Step 1: Make the Pickling Brine

    • In a small saucepan, combine vinegar, water, sugar, and salt.

    • Bring to a gentle simmer over medium heat, stirring until the sugar and salt fully dissolve (about 2–3 minutes).

    • Optional: Add peppercorns, mustard seeds, or herbs for additional flavor.

    • Turn off the heat and set the brine aside while you prepare the onions.


    Step 2: Slice the Onions

    • Peel and thinly slice the red onion into rings or half-moons, depending on your preference.

    • A mandoline slicer can help achieve even thickness, but a sharp knife works fine.

    • Place the sliced onions into a clean glass jar or heatproof bowl.


    Step 3: Combine and Cool

    • Carefully pour the hot brine over the onions, making sure all pieces are submerged.

    • If needed, press down the onions with a spoon or fork.

    • Let the mixture sit uncovered at room temperature for about 30–60 minutes, allowing the onions to soften and take on the beautiful pink color.


    ❄️ Step 4: Refrigerate and Store

    • Once cooled, seal the jar with a tight-fitting lid and refrigerate.

    • The pickled onions will keep well for up to 2 weeks in the fridge.

    • The flavor deepens after the first few hours and is best after 1–2 days.


    Tips & Variations

    • For Sugar-Free Option: Substitute sugar with stevia or skip it entirely for a tart, savory version.

    • Vinegar Choices: Each vinegar brings its own flavor. Try rice vinegar for a mild version or malt vinegar for a richer taste.

    • Color Enhancement: Red wine vinegar enhances the magenta hue; white vinegar gives a lighter pink tone.

    • Make It Spicy: Add jalapeño slices or a pinch of chili flakes to give the onions a kick.


    ️ Serving Suggestions

    • Tacos & Burritos – The tang cuts through rich meats beautifully.

    • Burgers & Sandwiches – Adds crunch and brightness.

    • Grain Bowls & Salads – Perfect for Mediterranean or Middle Eastern-style dishes.

    • Charcuterie Boards – Pairs well with cheeses and cured meats.

    • Egg Dishes – Try with scrambled eggs or shakshuka.


    Storage & Shelf Life

    • Store in the refrigerator in a tightly sealed jar.

    • Best used within 2 weeks for maximum flavor and crunch.

    • Avoid storing at room temperature long-term, as this is a quick pickle and not shelf-stable.


    ❓ FAQ

    Q: Can I use white onions or yellow onions?

    A: Yes, but red onions are preferred for their color and natural sweetness. White onions result in a sharper flavor, while yellow onions give a deeper, more mellow note.

    Q: Is it safe to can these?

    A: No. This recipe is for refrigerator pickles only. It’s not intended for shelf-stable canning. For long-term storage, follow USDA-approved canning methods.

    Q: Can I reuse the brine?

    A: You can reuse the brine once more, but its flavor and acidity will be milder. Always refrigerate reused brine and use within a week.


    Final Thoughts

    Pickled red onions are one of those simple pleasures in the kitchen. They’re quick to make, endlessly adaptable, and deliver a powerful burst of flavor and color to any dish. Once you start making them at home, you’ll never go back to store-bought.

  • Ribs with Honey Garlic

    Ribs with Honey Garlic

    Ribs with Honey Garlic

    Ingredients :

    Four pounds of spareribs made of pork

    Half a cup of honey

    Half a cup of soy sauce

    1/4 cup of pure white vinegar

    Two tsp of brown sugar

    two minced garlic cloves

    One tsp baking soda

    One tsp of salt with garlic

    Préparations :

    Set the oven’s temperature to 375°F, or 190°C.

    Cut ribs into separate halves. In a large bowl, combine honey, soy sauce, vinegar, brown sugar, and garlic. whisk until sugar and honey are well dissolved, and then whisk in baking soda. The mixture is going to start foaming. After transferring the ribs to the dish, coat them.

    Place the ribs on a prepared cookie sheet, meat side up, after covering it with foil. Drizzle more sauce over the ribs and season with garlic powder.

    Bake, rotating every 20 minutes, for one hour in a preheated oven.

    Have fun

  • Healthy Oat Pancakes Recipe in 5 Minutes

    Healthy Oat Pancakes Recipe in 5 Minutes

    When I need something quick, filling, and healthy to kickstart my day, I turn to this Healthy Oat Pancake Recipe. It’s my go to when I want pancakes without the guilt no sugar, no refined flour, and absolutely no fuss. Just blend, pour, flip, and enjoy. As a chef who believes in wholesome comfort food, these oat pancakes tick all the boxes without sacrificing texture or flavor.

    ×
    “Five minutes. One blender. Zero guilt. That’s how healthy pancakes should be.” – @CleanPlatePro

    No
    video of: Top 5 Air Fryers for Busy WeeknightsPlay Video
    Top 5 Air Fryers for Busy Weeknights

    Share
    Watch onHumix
    Top 5 Air Fryers for Busy Weeknights
    Why These Oat Pancakes Are My Weekday Hero
    These pancakes are fast, flexible, and made entirely from pantry staples. They’re naturally gluten friendly if you use certified gluten free oats, and they’re incredibly forgiving no whipping, folding, or special tools required. I make them often after morning workouts or when I need breakfast on the table before the coffee’s done brewing.

    No flour needed: Oats give you a hearty base without the crash of white flour.
    No sugar added: You control the sweetness with natural toppings like fruit or yogurt.
    Only one blender: Toss it all in and blitz no mixing bowls, no extra dishes.
    Ready in 5 minutes: From blend to bite, these are as fast as it gets.
    If you’re a fan of simple, wholesome breakfasts, you’ll also love our no sugar energy bits and oats and milk breakfast cups for easy, nourishing options.

    Step by Step to Make These 5 Minute Oat Pancakes
    Ingredients
    2 cups oatmeal (220g)
    ½ tsp salt (3g)
    4 eggs
    1 cup warm milk (250ml)
    3½ tbsp butter, melted (50g)
    1 tbsp vanilla extract or vanillin
    1 cup water (250ml)
    Instructions
    1. Blend the Batter
    Add oatmeal, salt, eggs, warm milk, melted butter, vanilla, and water to a blender.
    Blend until completely smooth. The batter will look pourable and creamy.
    2. Let It Sit
    Let the batter rest for a few minutes while you heat your pan. This thickens the texture slightly.
    3. Cook the Pancakes
    Heat a nonstick skillet over medium heat. Lightly grease if needed.
    Pour a ladleful of batter into the skillet and tilt to spread evenly.
    Cook for 2-3 minutes per side, or until golden and firm in the center.
    4. Serve and Enjoy
    Serve warm with toppings like fruit, yogurt, nut butter, or maple syrup.
    “Oats, eggs, and a blender the breakfast trinity for a better morning.” – @FuelFastKitchen

    Stack of healthy oat pancakes topped with fresh berries and yogurt on a white plate
    Quick and easy oat pancakes made without flour or sugar, ready in 5 minutes
    Flavor Variations for Every Mood
    Sweet Pancake Twists
    Because this oat pancake base is neutral, I often adjust the batter to suit my mood sometimes I want warm, cinnamon comfort and other days I need a bright fruity twist. These ideas below are some of my go to variations when I want a fresh spin on the same reliable recipe.

    Banana cinnamon: Blend in ½ a ripe banana and ½ tsp cinnamon for a naturally sweet, warming flavor.
    Berry burst: Fold in a handful of blueberries or chopped strawberries into the blended batter right before cooking.
    Choco oat: Add 1 tbsp unsweetened cocoa powder and a few sugar free chocolate chips on top while cooking.
    Apple spice: Stir in ½ tsp apple pie spice and serve with sautéed apples on top.
    If you love flexible recipes like this, you’ll probably also enjoy our fluffy Japanese pancakes or condensed milk cake both of which adapt beautifully to seasonal flavors.

    ×
    Ezoic
    Savory Twists for Brunch or Dinner
    Not every pancake needs syrup. In fact, I often lean toward savory oat pancakes when I want a higher protein meal or something to serve with soup or salad. These savory add ins give the batter an entirely new personality:

    Herb garlic: Add 1 tsp garlic powder and 1 tbsp chopped parsley or dill to the blender mix.
    Cheddar onion: Stir in ¼ cup shredded cheese and finely diced green onions before cooking.
    Smoked paprika: Add ½ tsp for a smoky flavor, great with eggs on top.
    Zucchini blend: Grate and drain ½ cup zucchini and stir into the batter adds moisture and nutrition.
    “Oat pancakes don’t just belong at breakfast fill them, fold them, and turn them into full meals.” – @OatGeniusChef

    Freezing, Reheating, and Meal Prepping
    These pancakes freeze like a dream. And when I’m prepping for a busy week, I double the batch on Sunday, freeze the extras, and reheat them in minutes all week long. They’re soft, never dry, and retain their texture beautifully even from frozen.

    ×
    Ezoic
    Cool completely: Before storing, let the pancakes cool on a wire rack so moisture doesn’t make them soggy.
    Freeze in layers: Stack pancakes with parchment paper between and seal in a freezer safe zip bag.
    Label and date: Always mark the batch so you know when they were made.
    To reheat: Microwave for 30 seconds or reheat in a pan on low heat with a lid to keep moisture in.
    This method works for other freezer friendly recipes too I do the same with our homemade naan and fluffy bread loaf both thaw and toast like they were fresh.

    Oat Pancake Troubleshooting Table
    Despite how simple this recipe is, there are a few things that can go wrong if you rush the process or tweak the ingredients too much. Here’s a quick table to help you spot and solve common issues based on my kitchen tests.

    Problem Likely Cause Fix
    Pancakes too dry Batter too thick or pan too hot Add 1-2 tbsp extra water or reduce heat slightly
    Pancakes fall apart Batter too thin or not rested Let the batter sit for 5-10 minutes before cooking
    Undercooked inside Flipped too soon or heat too high Wait for bubbles to appear before flipping and lower heat
    Bitter taste Too much baking powder or low quality oats Stick to the recipe’s balance and use rolled or instant oats
    Blender struggles Oats clumping or blades stuck Add liquid first, then oats and pause to stir halfway through
    “If your pancakes aren’t working, it’s rarely the oats it’s usually the pan, the rest, or the rush.” – @FixYourFlapjack

    Perfect Toppings and Pairings
    The best part about oat pancakes is the blank canvas they give you. You can top them for energy, flavor, or indulgence and they hold their shape well under fruit, syrup, sauces, or spreads. Below are my go to combinations that I serve for different moods and meals.

    ×
    Ezoic
    Nutty breakfast: Top with almond butter, chia seeds, and fresh banana slices.
    High protein: Spread with Greek yogurt, a drizzle of honey, and hemp seeds.
    Brunch ready: Stack with cottage cheese and sautéed spinach for a savory spin.
    Indulgent weekend: Top with whipped coconut cream, berries, and shaved dark chocolate.
    Want more creative breakfast pairings? Try them with a side of zucchini patties or spinach quiche to round out your plate with protein and veggies.

    “What you put on top of pancakes says a lot about your day. Choose wisely, stack kindly.” – @ToppingMoodChef

    Chef Tips for Consistently Great Oat Pancakes
    My Daily Prep Routine
    Over the years, I’ve made this recipe hundreds of times for early shoots, retreats, family mornings, and solo breakfasts. What I’ve learned is that consistency comes down to just a few small details that most home cooks overlook. If you want perfect oat pancakes every single time, here’s exactly how I prep mine behind the scenes.

    Warm ingredients blend better: I let the milk and melted butter sit at room temperature for 5 minutes. Cold dairy straight from the fridge thickens the batter too quickly in the blender.
    Oats matter: Rolled oats blend into a creamier batter than steel cut or quick oats. If you want uniformity, go for rolled or instant oats only.
    Let the batter rest: I never skip the 5-10 minute rest after blending. It allows the oats to hydrate and gives the batter a better pour and cook.
    Thin with water last: If the batter is too thick, I thin it after resting not before. This avoids a watery result or uneven cooking.
    Signs Your Batter Is Just Right
    Even with measuring, every batch reacts slightly differently depending on humidity, oat grind, and even blender strength. Here’s how I know when the batter is ready to go:

    ×
    Ezoic
    Consistency: It should pour like pancake batter, not like smoothie or yogurt. If it flows slowly but smoothly from a ladle, it’s ready.
    Texture: It should look slightly creamy but not gritty. You shouldn’t see whole oat pieces after blending.
    Rested feel: After resting, it thickens just a bit like thick cake batter which makes it easy to control in the pan.
    “Your blender isn’t just mixing it’s unlocking the oats. Get the texture right, and the pancakes flip themselves.” – @BatterWhisperer

    Visual Clues for Cooking the Perfect Flip
    Even with the right batter, oat pancakes cook a little differently than flour based ones. They don’t bubble as aggressively, and their edges take slightly longer to set. Here’s what I look for to flip them with confidence and avoid breaking or tearing:

    Edge lift: The edge of the pancake should begin to slightly lift or curl away from the pan after 2-3 minutes.
    Steam release: You’ll see small bursts of steam escaping a sign that the interior is cooking through.
    Firm surface: Gently press the top it should feel set and not leave batter on your finger.
    I always use a thin silicone spatula to flip. Metal tools are too harsh and often damage the pancake’s edges. One clean motion, low and slow, does the trick.

    Balanced Serving Ideas for Any Time of Day
    One of the reasons I always recommend this oat pancake recipe is because of its adaptability. It’s naturally nutritious, and with the right pairings, it works beautifully for breakfast, lunch, or even post workout meals. Here are my top combos for different needs:

    ×
    Ezoic
    Power breakfast: Stack pancakes with peanut butter, chia seeds, and banana slices for protein, fat, and fiber.
    Light lunch: Serve savory oat pancakes with a poached egg and sautéed spinach on top.
    Snack plate: Pair 2 mini pancakes with cottage cheese and cucumber slices for a quick, refreshing snack.
    Sweet craving: Top with date syrup, crushed nuts, and cinnamon for a naturally sweet, refined sugar free treat.
    These pancakes even work well as a base for “pancake sandwiches” I’ve filled them with egg salad, herbed cream cheese, and thinly sliced cucumbers for picnic style lunches. If you want more light and wholesome pairings, you can match them with our egg muffins or crispy lentil patties.

    Quick Reference for Cooking and Adjusting
    This table below summarizes key decision points you can refer to if your batter or cooking feels off. I use these markers to adapt on the fly, especially when making larger batches for events or clients.

    Scenario Visual Sign Adjustment Needed
    Batter too thick Clumps in the blender or won’t pour easily Add 1-2 tbsp water and reblend lightly
    Won’t hold shape Spreads too far or breaks when flipped Let batter rest longer and reduce water slightly
    Edges burn before center sets Dark ring but soft middle Lower heat and cover pan with lid for even cooking
    Pancakes taste bland Flat flavor, especially if eaten plain Add cinnamon, nutmeg, or a pinch of cardamom to batter
    Too eggy texture Feels spongy or custard like Reduce eggs by one and increase oats slightly
    “Every great pancake teaches you something even the ones that stick to the pan.” – @StackAndLearnChef

    Frequently Asked Questions About Healthy Oat Pancakes
    Can I make the batter ahead of time?
    Yes! You can blend the batter and refrigerate it for up to 24 hours. Stir before using as it may thicken while resting.

    ×
    Ezoic
    Can I replace the milk with a non dairy option?
    Absolutely. Almond milk, oat milk, or soy milk all work well in this recipe.

    Are these pancakes gluten free?
    If you use certified gluten free oats, then yes this recipe is completely gluten free.

    Can I use quick oats or steel cut oats?
    Quick oats work, but steel cut oats won’t blend smoothly and are not recommended.

    ×
    Ezoic
    What can I use instead of butter?
    You can substitute melted coconut oil, avocado oil, or even unsweetened applesauce for a lighter version.

    Can I freeze these pancakes?
    Yes. Freeze them in a single layer with parchment between each, then reheat in a toaster or microwave.

    Why is my batter too thick or too thin?
    Batter thickness depends on oat type and resting time. Adjust with water or let it rest longer as needed.

    ×
    Ezoic
    How do I get evenly round pancakes?
    Use a ladle or measuring cup and pour slowly into the center of the pan, allowing it to spread naturally.

    Can I make these eggless?
    This recipe relies on eggs for structure, but you can try flax eggs or mashed banana results may vary.

    What’s the best topping for oat pancakes?
    Try Greek yogurt, fresh fruit, nut butters, or even savory toppings like hummus and avocado.

  • Homemade Vegetarian Pizza

    Homemade Vegetarian Pizza

    Homemade Vegetarian Pizza

    Ingredients (for 1 large pizza)
    For the pizza dough (or use ready-made dough):

    250 g flour

    150 ml warm water

    1/2 sachet dry yeast

    1 tbsp olive oil

    1/2 tsp 1/2 teaspoon salt

    Filling:

    150g tomato sauce (homemade or ready-made)

    1/2 green bell pepper, cut into strips

    1/2 red bell pepper, cut into strips

    1/2 red onion, sliced

    5 to 6 button mushrooms, sliced

    100g grated mozzarella cheese (or sliced)

    1 handful pitted black olives

    1 drizzle olive oil

    Herbs de Provence or dried oregano

    Fresh basil (optional)

    Salt and pepper

    Preparation
    1. Prepare the dough:

    Mix the yeast in warm water and let rest for 10 minutes.

    In a bowl, combine the flour, salt, olive oil, and yeast-infused water. Knead for 5 to 10 minutes.

    Cover and let rise for 1 hour in a warm place. 2. Prepare the vegetables:

    In a pan or in the oven, lightly sauté (or roast) the peppers and mushrooms with a little olive oil, salt, pepper, and herbs.

    This prevents them from releasing too much moisture onto the pizza.

    3. Assembly:

    Preheat the oven to 220°C (428°F).

    Roll out the dough on a baking sheet.

    Spread the tomato sauce over the dough.

    Add the mozzarella cheese, then arrange the vegetables harmoniously.

    Sprinkle with olives, red onion, and a drizzle of olive oil. Sprinkle with oregano.

    4. Bake:

    Bake for 12 to 15 minutes, until the dough is golden brown and the cheese melts.

    Finishing:

    Add a few fresh basil leaves as soon as the pizza comes out of the oven.

    Variations:

    Add artichokes, goat cheese, or fresh spinach.

    For a vegan version, use a dough without eggs or milk, and replace the cheese with a plant-based alternative.

  • GRILLED STEAK WITH ROASTED GARLIC BUTTER

    GRILLED STEAK WITH ROASTED GARLIC BUTTER

    GRILLED STEAK WITH ROASTED GARLIC BUTTER 1f3561f9c4

    Ingredients:
    For the Roasted Garlic Butter:

    1 head of garlic
    30 ml olive oil
    120 g unsalted butter, softened
    10 g fresh parsley, chopped (about 1 tbsp)
    1 g fresh thyme, chopped (about 1 tsp)
    1 g fresh rosemary, chopped (about 1 tsp)
    Salt and pepper to taste
    For the Steak:

    2 ribeye steaks (about 300 g each, 2.5 cm thick)
    30 ml olive oil
    Salt and pepper to taste
    Fresh rosemary sprigs (optional)
    Instructions:
    Step 1: Roast the Garlic

    Preheat your oven to 200°C. Cut off the top of the garlic head to expose the cloves. Drizzle with 1 tablespoon (15 ml) of olive oil and wrap in aluminum foil.
    Roast in a preheated oven for 30-35 minutes, until the cloves are tender and golden. Let cool, then squeeze the roasted garlic out of its skins into a bowl.
    Step 2: Prepare the Roasted Garlic Butter

    To the bowl with the roasted garlic, add the softened butter, parsley, thyme, rosemary, salt, and pepper.
    Mix well until smooth.
    Transfer the mixture to a piece of plastic wrap and form it into a log. Wrap tightly and refrigerate to firm up. Step 3: Prepare the Steaks

    Preheat a grill or grill pan to medium-high heat.
    Brush the steaks with olive oil and season generously with salt and pepper.
    Step 4: Grill the Steaks

    Place the steaks on the hot grill and cook for 4-5 minutes per side for medium-rare, or to your preferred doneness.
    During the last minute of grilling, add a few sprigs of fresh rosemary to the grill for extra flavor.
    Step 5: Let the Steaks Rest

    Remove the steaks from the grill and let them rest for 5 minutes to redistribute the juices.
    Step 6: Serve

    Slice the roasted garlic butter into rounds and place a few on each steak. The butter will melt over the hot steaks, adding a rich flavor. Serve with your favorite sides. Preparation time: 10 minutes
    Cooking time: 40 minutes
    Total time: 50 minutes
    Servings: 2

    Enjoy your meal! 1f60a