Author: Admin

  • German Potato Pancakes

    German Potato Pancakes

    German Potato Pancakes: A Crispy, Golden Delight

    Few dishes are as universally comforting as German Potato Pancakes, known in Germany as “Kartoffelpuffer.” These crispy, golden-brown potato pancakes are a beloved treat, enjoyed as both a savory snack and a sweet delight. Whether served with sour cream, applesauce, or even smoked salmon, these pancakes bring a taste of traditional German cuisine to your table.

    If you’re looking for a simple yet delicious recipe, you’re in the right place! Let’s explore how to make authentic German Potato Pancakes step by step.


    Ingredients You’ll Need

    • 4 medium potatoes (about 2 lbs), starchy variety like Russet
    • 1 small onion
    • 2 large eggs
    • ¼ cup all-purpose flour
    • 1 tsp salt
    • ½ tsp black pepper
    • ½ tsp garlic powder (optional)
    • ½ tsp nutmeg (optional, for traditional flavor)
    • Vegetable oil (for frying)

    For Serving:

    • Applesauce (traditional sweet option)
    • Sour cream (classic savory topping)
    • Chopped chives or smoked salmon (optional, for a gourmet touch)

    Step-by-Step Instructions

    Step 1: Prepare the Potatoes and Onion

    1. Peel the potatoes and grate them using the large holes of a box grater or a food processor.
    2. Peel and grate the onion in the same way. The onion adds moisture and flavor while preventing the potatoes from turning brown.

    Step 2: Remove Excess Moisture

    1. Place the grated potatoes and onion in a clean kitchen towel or cheesecloth.
    2. Gather the towel and squeeze out as much liquid as possible over a bowl. The drier the mixture, the crispier the pancakes will be.
    3. Let the liquid sit in the bowl for a minute. You’ll notice that a layer of starchy sediment forms at the bottom—keep this and discard the excess liquid.

    Step 3: Mix the Batter

    1. Transfer the drained potatoes and onion to a large mixing bowl.
    2. Add the eggs, flour, salt, pepper, and optional seasonings (nutmeg and garlic powder).
    3. Mix well until all ingredients are evenly combined.

    Step 4: Fry the Pancakes

    1. Heat about ¼ inch of vegetable oil in a large frying pan over medium heat.
    2. Once the oil is hot (about 350°F or 175°C), scoop about 2 tablespoons of the potato mixture into the pan and flatten it with the back of a spoon to form a round pancake.
    3. Fry for about 3-4 minutes per side, or until golden brown and crispy. Adjust heat if necessary to prevent burning.
    4. Remove the pancakes and place them on a paper towel-lined plate to drain excess oil.

    Step 5: Serve and Enjoy!

    1. Serve the potato pancakes warm with applesauce (for a sweet contrast) or sour cream (for a creamy, tangy taste).
    2. Sprinkle with fresh chopped chives for extra flavor.
    3. For a gourmet touch, top with smoked salmon and crème fraîche.

    Why You’ll Love These German Potato Pancakes

    ✅ Crispy & Flavorful – The perfect combination of crunchy edges and soft centers.
    ✅ Easy to Make – Simple ingredients, quick preparation, and minimal effort.
    ✅ Versatile – Enjoy as a snack, side dish, or even breakfast!
    ✅ Traditional & Comforting – A taste of Germany in every bite.

    Whether you’re making these for Oktoberfest, a holiday breakfast, or just a cozy meal, Kartoffelpuffer is sure to be a hit! Try them today and experience the magic of homemade German Potato Pancakes.

    Would you prefer them sweet or savory? Let me know! 

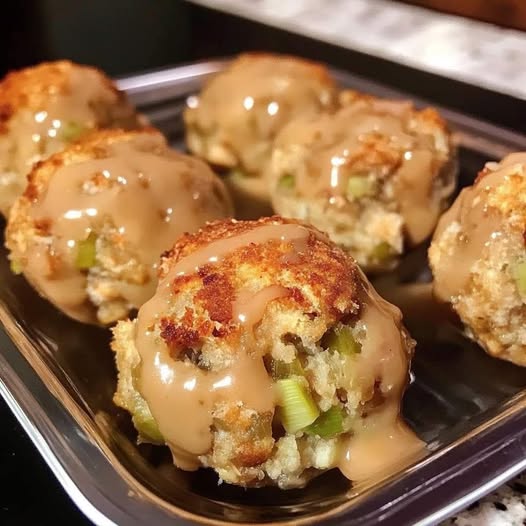
  • Balls made of leftover turkey and stuffing

    Balls made of leftover turkey and stuffing

    Sure! Here’s a detailed, unique article on how to make Balls Made of Leftover Turkey and Stuffing, a delicious and practical way to breathe new life into holiday leftovers.


    Balls Made of Leftover Turkey and Stuffing: A Creative Comfort Food

    The days following a holiday feast often come with an abundance of leftovers—especially turkey and stuffing. Instead of reheating the same plate for days, why not transform those remnants into something completely new and crave-worthy? Balls made of leftover turkey and stuffing are the perfect answer. These bite-sized delights are crisp on the outside, warm and savory on the inside, and perfect for snacks, appetizers, or even a fun twist on dinner.

    In this article, we’ll take you step-by-step through the process of making these golden, crispy morsels from scratch using your leftovers.


    Ingredients

    To make about 12–15 turkey stuffing balls, you’ll need:

    • 2 cups cooked turkey, finely chopped or shredded
    • 2 cups leftover stuffing
    • 1/4 cup mayonnaise or sour cream (to help bind the mixture; optional depending on moisture level)
    • 1 egg, beaten
    • 1/2 teaspoon garlic powder
    • 1/2 teaspoon onion powder
    • Salt and pepper to taste
    • 1 cup breadcrumbs (panko or regular)
    • 1/2 cup grated Parmesan cheese (optional, for added flavor)
    • Oil for frying or baking spray (if baking)

    Step-by-Step Method

    Step 1: Prep the Turkey and Stuffing

    Start by finely chopping your cooked turkey. You want the pieces small enough to blend well with the stuffing and bind easily. If the stuffing is clumpy or very dry, break it up slightly with a fork.

    Step 2: Combine the Ingredients

    In a large mixing bowl, combine the turkey, stuffing, garlic powder, onion powder, and Parmesan cheese (if using). Mix well. Add the beaten egg to help bind the ingredients. If the mixture seems dry or crumbly, mix in a bit of mayo or sour cream, a tablespoon at a time, until the mixture holds together when pressed.

    Step 3: Form the Balls

    Scoop out small portions of the mixture (about the size of a golf ball) and roll them between your hands to form compact balls. You can use a cookie scoop to keep the size consistent.

    Step 4: Coat in Breadcrumbs

    Pour the breadcrumbs onto a plate. Roll each ball in the breadcrumbs until evenly coated. This adds a lovely crunch when cooked.

    Step 5: Choose Your Cooking Method

    Option A: Frying (for crispy texture)

    • Heat about 1–2 inches of oil in a skillet over medium heat.
    • Once the oil is hot (around 350°F/175°C), carefully add the balls in batches.
    • Fry for 2–3 minutes per side or until golden brown.
    • Remove and drain on paper towels.

    Option B: Baking (healthier version)

    • Preheat your oven to 400°F (200°C).
    • Place the balls on a parchment-lined baking sheet.
    • Lightly spray them with cooking oil for crispiness.
    • Bake for 20–25 minutes, flipping once halfway through, until golden brown and heated through.

    Option C: Air Frying (crispy and healthier)

    • Preheat the air fryer to 375°F (190°C).
    • Place the balls in the basket, not touching.
    • Air fry for 10–12 minutes, shaking halfway through.

    Serving Suggestions

    Serve your turkey stuffing balls with a dipping sauce like cranberry sauce, gravy, ranch, or even a spicy aioli for a modern twist. They’re great as:

    • A party appetizer
    • A side dish with salad
    • A snack or lunchbox item

    Tips and Variations

    • Add cheese inside: Stuff the center of each ball with a small cube of mozzarella or cheddar for a gooey surprise.
    • Spice it up: Add chopped jalapeños or a pinch of cayenne for heat.
    • Use other leftovers: Mix in leftover mashed potatoes or roasted vegetables for added flavor and moisture.
    • Freeze for later: These freeze beautifully! Just form the balls, freeze on a tray, then transfer to a bag. Fry or bake straight from frozen, adding a few extra minutes.

    Final Thoughts

    Balls made of leftover turkey and stuffing are a fun and practical way to reduce waste and keep your post-holiday meals exciting. Crispy, savory, and endlessly customizable, they’re the perfect way to reinvent what’s in your fridge. Next time you’re staring down a container of cold stuffing and turkey, turn it into something that feels brand new—delicious little bites of holiday magic.


    Let me know if you’d like a printable recipe card or a visual guide to go along with this!

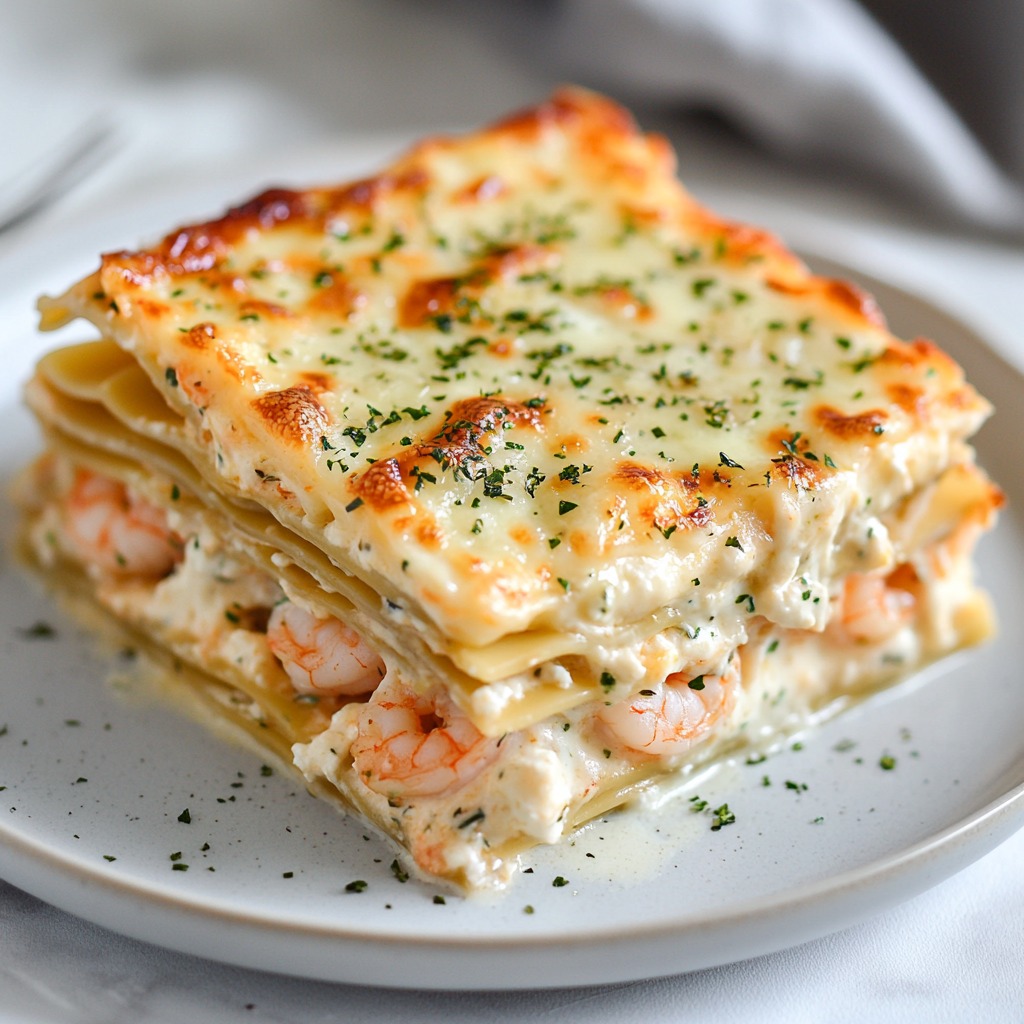
  • Shrimp Lasagna with White Sauce and Cheese

    Shrimp Lasagna with White Sauce and Cheese

    Shrimp Lasagna with White Sauce and Cheese

    Serves 4 to 6
    Ingredients:
    For the lasagna:

    12 to 15 lasagna sheets (ready-to-cook or blanch)

    500g shrimp, peeled and cut into pieces (or whole if small)

    1 tbsp olive oil

    1 onion, chopped

    2 garlic cloves, minced

    1 tsp paprika (optional)

    1 tbsp 1 tbsp chopped fresh parsley

    Salt and pepper to taste

    For the white sauce:

    40 g butter

    40 g flour

    500 ml whole milk

    150 g grated cheese (Gruyere, mozzarella, or a blend of melted cheeses)

    1 pinch of nutmeg (optional)

    Salt and pepper to taste

    Preparation:

    1. Prepare the white sauce:

    In a saucepan, melt the butter over medium heat.

    Add the flour and cook for 1 to 2 minutes, stirring constantly to form a roux (no browning).

    Slowly pour in the milk while whisking to avoid lumps. Cook for 5 to 7 minutes, until the sauce thickens.

    Stir in the grated cheese, then season with salt, pepper, and a pinch of nutmeg.

    Remove the sauce from the heat once it is smooth and creamy.

    2. Prepare the shrimp:

    In a skillet, heat the olive oil over medium heat.

    Add the chopped onion and minced garlic, then sauté until softened.

    Add the shrimp and sauté for 3 to 4 minutes, until pink. Season with salt, pepper, and paprika.

    Remove from the heat and add the chopped fresh parsley.

    3. Assemble the lasagna:

    Preheat the oven to 180°C (350°F).

    In a gratin dish, spread a little white sauce on the bottom.

    Arrange a layer of lasagna sheets, then a layer of shrimp and a layer of white sauce.

    Repeat the layers until you run out of ingredients, finishing with a layer of white sauce.

    Cover the dish with aluminum foil and bake for 20 minutes.

    Remove the foil and add a generous layer of grated cheese on top. Return to the oven for 10 to 15 minutes, until the cheese is golden brown and bubbly.

    4. Finishing:

    Let the lasagna rest for 5 to 10 minutes before serving; this allows for easier cutting and allows you to enjoy its creamy texture.

    Serving Suggestions:

    A crisp green salad with a light vinaigrette or grilled vegetables would be perfect with this dish.

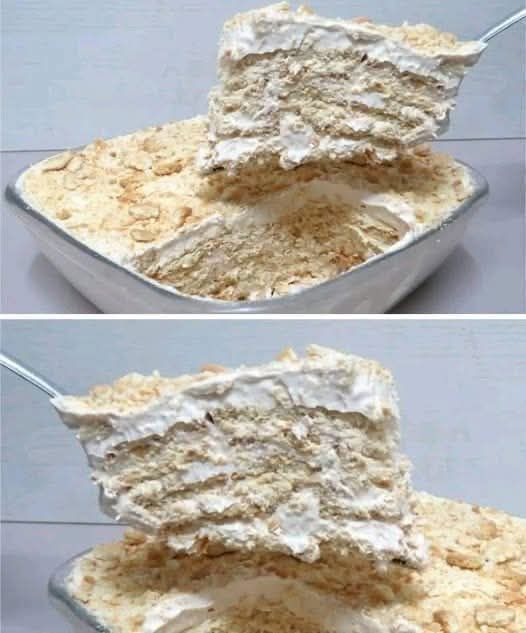
  • Maria Cookie and Dulce de Leche Layered Dessert

    Maria Cookie and Dulce de Leche Layered Dessert

    Maria Cookie and Dulce de Leche Layered Dessert

    Ingredients

    • 1 ¾ cups (400 ml) heavy whipping cream (very cold)
    • 2 packs of Maria cookies
    • 14 oz (400 g) dulce de leche

    ★Instructions

    Whip the Cream:
    Beat the cold heavy cream in a mixer until firm but without forming peaks.

    Combine with Dulce de Leche:
    Add the dulce de leche to the whipped cream and continue beating until the mixture forms firm peaks.

    Layer the Dessert:

    In a dish, start with a layer of the whipped cream mixture.

    Add a layer of Maria cookies on top.

    Repeat alternating layers of cream and cookies, ending with cream.

    Decorate:
    Sprinkle crushed Maria cookies over the top layer for decoration.

    Chill:
    Refrigerate for at least 3 hours to set and blend the flavors.

    Serving Tip

    Serve chilled for a creamy, rich, and indulgent dessert!

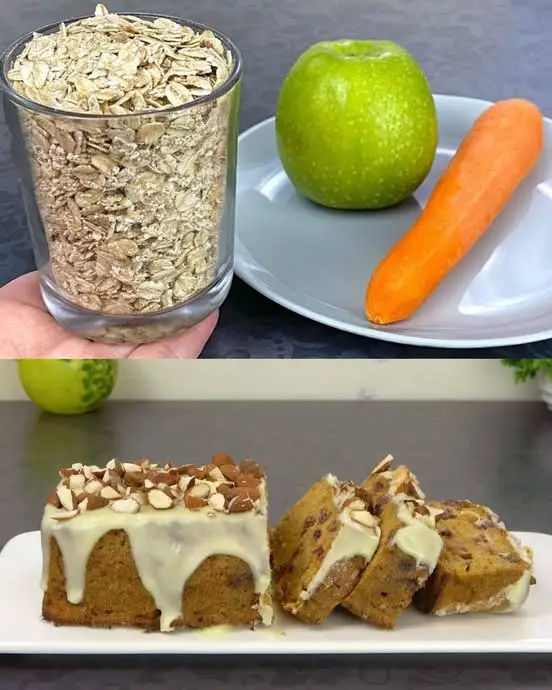
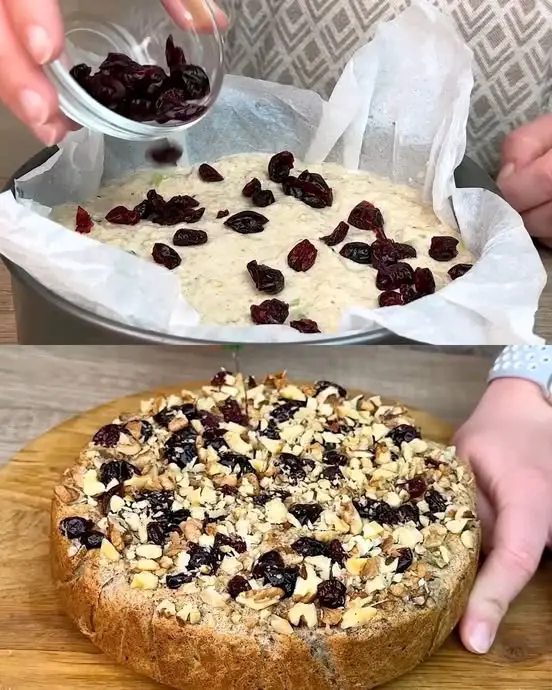
  • Sugar-Free Apple and Carrot Oatmeal Cake: A Healthy Delight

    Sugar-Free Apple and Carrot Oatmeal Cake: A Healthy Delight

    Sugar-Free Apple and Carrot Oatmeal Cake: A Healthy Delight
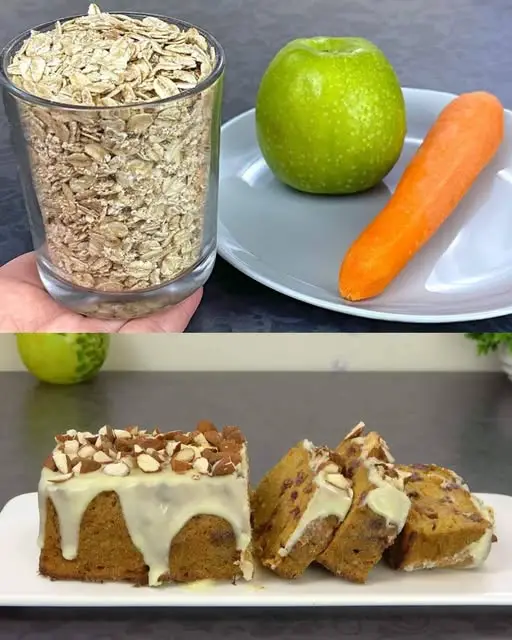
    Discover a delicious way to enjoy a healthy treat with this Sugar-Free Apple and Carrot Oatmeal Cake. Perfect for those who have eliminated sugar from their diet, this cake combines the natural sweetness of apples, carrots, and bananas with the wholesome goodness of oats. Packed with dried fruits and topped with a sugar-free white chocolate and almond glaze, this cake is both nutritious and delightful. It’s an ideal option for a guilt-free dessert or a healthy snack that everyone will love.

    Ingredients
    For the Cake:
    100 g (3.5 oz) oatmeal, ground in a blender
    1 carrot, grated
    2 medium apples, grated
    90 ml water
    1 banana, mashed
    40 g (1.4 oz) raisins
    100 g (3.5 oz) dried cranberries
    2 eggs
    Sweetener to taste (e.g., stevia)
    10 g (0.4 oz) baking powder
    1 teaspoon vanilla extract
    Olive or vegetable oil for greasing
    For the Topping:
    30 g (1 oz) almonds, ground
    30 g (1 oz) sugar-free white chocolate
    1.5 tablespoons sugar-free yogurt
    Instructions
    Prepare the Dried Fruits:
    Place the raisins and dried cranberries in a bowl. Pour cold water over them and let them soak for 15 minutes to remove preservatives and activate beneficial substances. Drain well.
    Prepare the Batter:
    Preheat your oven to 180°C (360°F).
    In a large bowl, mix the ground oatmeal, grated carrot, grated apples, mashed banana, and water. Blend until smooth.
    Add the eggs, sweetener, baking powder, and vanilla extract to the mixture. Stir until well combined.

    Fold in the soaked and drained raisins and cranberries. Mix thoroughly.
    Bake the Cake:
    Grease a 20 x 7 cm (8 x 3 inch) mold with olive or vegetable oil.

    Pour the batter into the prepared mold, spreading it evenly.
    Bake in the preheated oven for 35-40 minutes, or until a toothpick inserted into the center comes out clean.
    Allow the cake to cool in the mold before removing.

    Prepare the Topping:
    In a small bowl, melt the sugar-free white chocolate in a water bath until smooth.
    Add the ground almonds and sugar-free yogurt to the melted chocolate. Mix well to combine.

    Decorate the Cake:
    Once the cake is cooled, spread the white chocolate and almond mixture over the top.
    Sprinkle with additional ground almonds or other nuts if desired.

    Serve:
    Slice the cake and enjoy as a healthy snack or dessert.
    More Information
    This Sugar-Free Apple and Carrot Oatmeal Cake is a nutritious and delicious treat that fits perfectly into a healthy diet. Here’s why this recipe is beneficial and how you can enjoy it to the fullest:

    Nutritional Highlights:

    Oatmeal: Provides dietary fiber, essential minerals, and a slow release of energy, keeping you full and satisfied.

    Apples and Carrots: Rich in vitamins, antioxidants, and fiber, promoting overall health and well-being.
    Banana: Adds natural sweetness and moisture, along with potassium and vitamins.
    Dried Fruits: Raisins and cranberries add extra fiber, vitamins, and antioxidants.

    Almonds: Packed with healthy fats, protein, and vitamin E, contributing to heart health and skin health.
    Storage Tips:

    Sugar-free and gluten-free apple cake recipe, perfect for those who can’t eat sweets
    Sugar-free and gluten-free apple cake recipe, perfect for those who can’t eat sweets
    Refrigeration: Store the cake in an airtight container in the refrigerator for up to five days. Enjoy it cold or reheat slices in the microwave.

    Freezing: The cake can be frozen for up to a month. Wrap individual slices in plastic wrap and store them in a freezer-safe bag. Thaw in the refrigerator overnight before eating.
    Serving Suggestions:

    Dessert: Enjoy a slice of this cake as a guilt-free dessert after dinner. Pair it with a cup of herbal tea or coffee.

    Snack: This cake makes an excellent mid-morning or afternoon snack. It’s perfect for packing in lunchboxes for a nutritious treat.
    Breakfast: Start your day with a slice of this cake and a dollop of Greek yogurt or a spread of almond butter.
    Customization Ideas:

    Add-ins: Enhance the flavor and texture by adding nuts, seeds, or other dried fruits such as chopped dates or apricots.
    Spices: Add a pinch of nutmeg, ginger, or cardamom to the batter for a spiced variation.
    Milk Options: Use any type of milk, such as almond milk or coconut milk, to suit your dietary preferences.

    Dietary Adaptations:

    Gluten-Free: Ensure you use certified gluten-free oats to make this recipe suitable for those with gluten sensitivities.
    Dairy-Free: Use dairy-free yogurt and chocolate for the topping to keep the recipe dairy-free.

    Banana Kiwi Oatmeal Protein Bake
    Banana Kiwi Oatmeal Protein Bake
    Vegan: Replace the eggs with flaxseed or chia seed eggs (1 tablespoon of ground flaxseed or chia seeds mixed with 3 tablespoons of water per egg) for a vegan version.
    Health Benefits: This cake offers a balanced mix of carbohydrates, proteins, and healthy fats. The fiber from the oats, apples, and carrots supports digestive health, while the protein from the eggs and almonds helps maintain muscle mass and energy levels. The use of natural sweeteners like stevia makes this cake a healthier option for those avoiding refined sugars.

    Why You’ll Love This Recipe
    Healthy and Delicious: This cake is packed with nutritious ingredients that offer great taste without the need for added sugars.

    Easy to Make: With simple steps and readily available ingredients, this recipe is perfect for both novice and experienced bakers.
    Versatile: Enjoy it as a dessert, snack, or even breakfast. Its wholesome ingredients make it suitable for any time of day.
    Customizable: Easily adapt the recipe to suit your dietary needs and flavor preferences.

    Conclusion
    This Sugar-Free Apple and Carrot Oatmeal Cake is a delightful way to enjoy a healthy, flavorful treat. With its combination of natural sweetness from fruits, the wholesome goodness of oats, and the crunch of nuts, this cake is perfect for anyone looking to enjoy a nutritious dessert or snack. Try this recipe today and indulge in a delicious, guilt-free delight that supports your health and satisfies your taste buds.

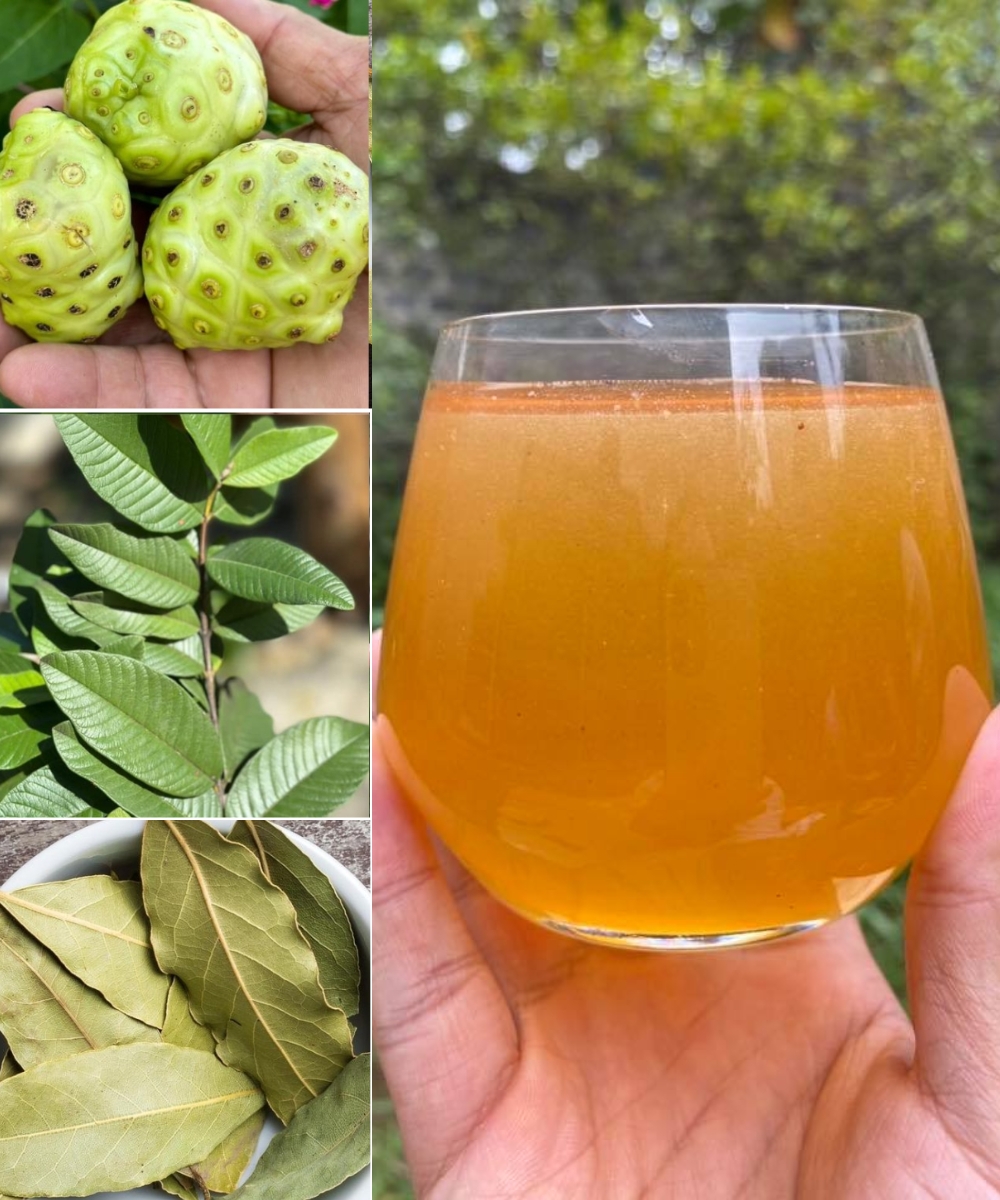
  • Say Goodbye to Cancer, Swollen Feet, Diabetes & Poor Circulation with This Natural Remedy

    Say Goodbye to Cancer, Swollen Feet, Diabetes & Poor Circulation with This Natural Remedy

    Why This Natural Remedy Is Gaining Global Attention

    Nature has been our greatest healer for centuries. Now, people are returning to these roots—literally—with a potent homemade blend that supports circulation, immunity, and metabolic health.

    This remedy is made from five anti-inflammatory powerhouses—each selected for its scientifically-backed healing properties. The result? A soothing drink that helps your body detox, repair, and energize.


    What You’ll Need

    To get started, grab the following natural ingredients:

    • 3 Noni fruits (chopped into chunks)

    • 6 bay leaves (dried or fresh)

    • 8 guava leaves (young and green are best)

    • 3 cups of water

    • ½ teaspoon turmeric powder


    How to Prepare It: Step-by-Step

    1. Chop the Noni Fruit
      Slice into small pieces to unlock its antioxidants and cancer-fighting enzymes.

    2. Add the Bay Leaves
      These leaves are known to reduce inflammation and boost blood flow.

    3. Toss in Guava Leaves
      Rich in plant-based compounds that help regulate blood sugar and insulin resistance.

    4. Boil with Water
      Combine all ingredients in a pot with 3 cups of clean water.

    5. Mix in the Turmeric
      Stir in turmeric for a boost of curcumin—the golden compound known to fight cancer cells and chronic inflammation.

    6. Simmer for 15 Minutes
      Let it boil gently to release all the active compounds.

    7. Strain and Serve
      Use a fine mesh sieve to filter out the pulp. Sip warm or store in a glass bottle.


    How to Use for Best Results

    Drink one cup every night about 30 minutes before bedtime.
    Repeat daily for 14 consecutive days, then take a break for 7 days.
    You’ll feel lighter, more energized—and you might just be amazed by your bloodwork.


    ✅ What People Are Reporting After 2 Weeks

    •  Swelling reduction in legs, ankles, and feet

    • ❤️ Improved circulation and warmer extremities

    •  Balanced blood sugar and better energy after meals

    • ️ Boosted immunity and fewer seasonal illnesses

    •  Full-body detox—less brain fog, more clarity


    Pro Tips for Faster Results

    • Avoid sugar, dairy, and fried foods while detoxing.

    • Drink plenty of water to help flush out toxins.

    • Pair with light stretching or walking for circulation boost.


    Real Feedback from Real People

    “I’ve had diabetes for years and couldn’t believe how stable my blood sugar was after just 10 days. This is a game-changer!”
    — Janelle P., 47

    “The swelling in my feet used to keep me up at night. After a week of this tea? It’s almost gone.”
    — Tony R., 62

    “Doctors told me I had poor circulation. Now, my hands and feet are warm again. I feel 10 years younger.”
    — Diana V., 53


    One Cup a Night Could Change Your Life

    Why wait for things to get worse? Your body was designed to heal—it just needs the right tools. This ancient-meets-modern remedy may be the nudge your system has been craving.

    ✨ Reclaim your health, one cup at a time.
     Try it. Feel it. Share your results.


    Bookmark this recipe or share it with someone struggling with chronic conditions. It might be the best thing they read today.

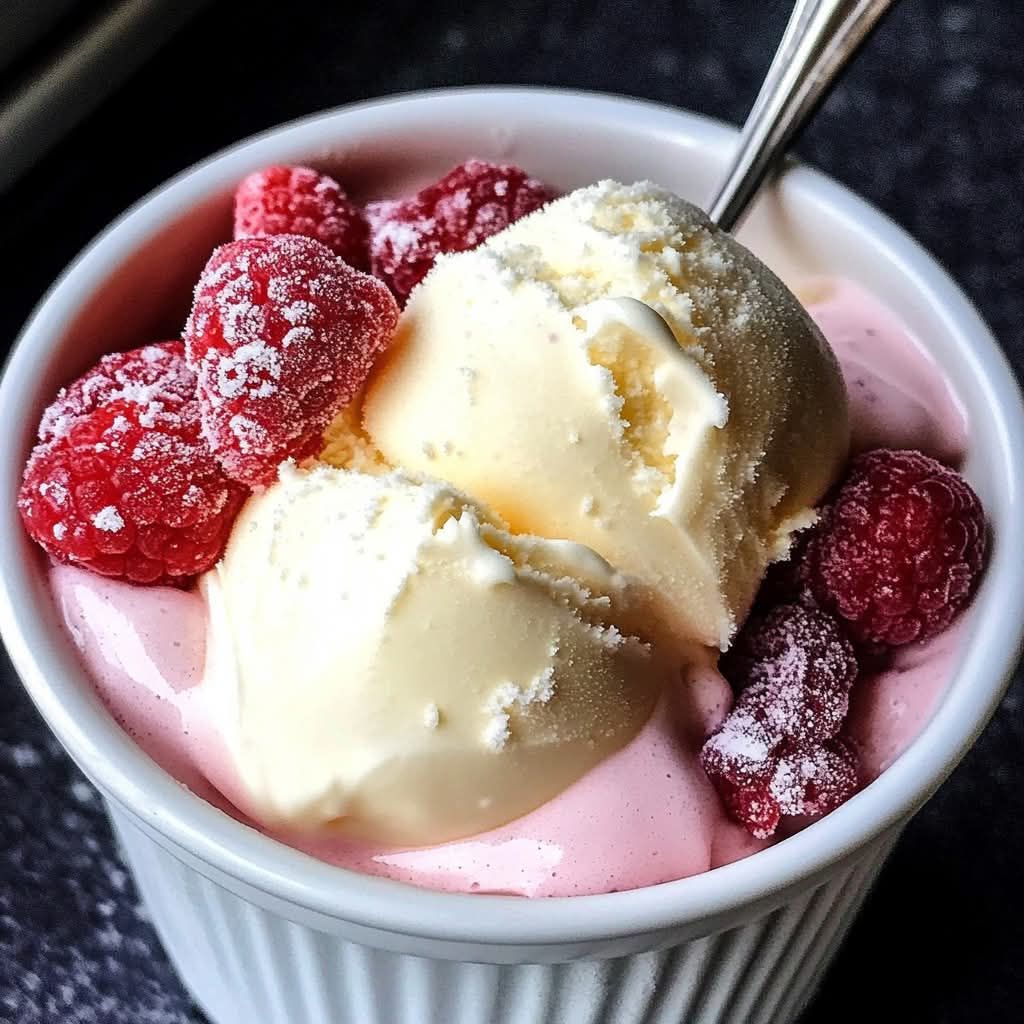
  • Sweet Cream Ice Cream

    Sweet Cream Ice Cream

    Sweet Cream Ice Cream 1f366

    Ingredients:
    – 2 cups heavy cream
    – 1 cup whole milk
    – 3/4 cup granulated sugar
    – 1 teaspoon vanilla extract
    – 1/4 teaspoon salt

    Directions:
    1. In a mixing bowl, combine the heavy cream, whole milk, sugar, vanilla extract, and salt.
    2. Whisk until the sugar is dissolved.
    3. Pour the mixture into an ice cream maker and churn according to the manufacturer’s instructions.
    4. Transfer the churned ice cream to a lidded container and freeze for at least 4 hours before serving. Enjoy your delicious homemade ice cream!

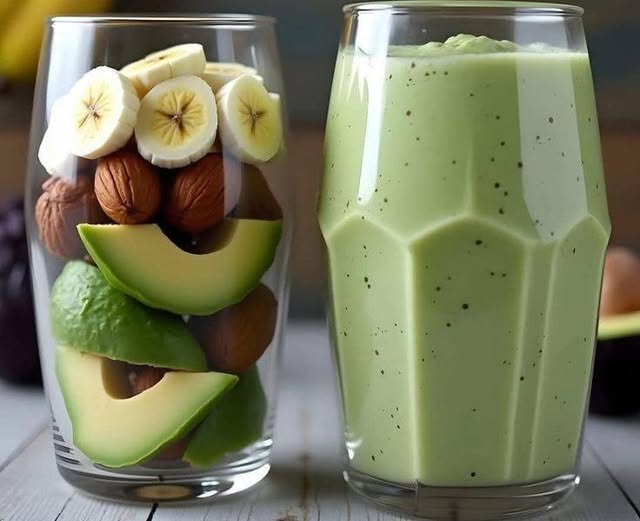
  • Almond Banana Avocado Smoothie: A Power Boost for Men

    Almond Banana Avocado Smoothie: A Power Boost for Men

    Almond Banana Avocado Smoothie: A Power Boost for Men

    Why This Smoothie is a Must-Try

    This smoothie combines the power of almonds, bananas, and avocados to create a creamy, satisfying drink loaded with essential nutrients. Plus, it’s quick and easy to prepare, making it ideal for busy individuals looking for a healthy and convenient option.

    Ingredients You’ll Need

    • 1/2 avocado  (Rich in healthy fats and fiber)
    • 1 ripe banana  (Great source of natural sugars and potassium)
    • 1 cup almond milk  (Low in calories and high in vitamin E)
    • 1 tablespoon honey (optional)  (Adds natural sweetness and antibacterial benefits)
    • Ice cubes (optional)  (For a refreshing texture)

    Thank you for reading the article.

    Step-by-Step Instructions

    1. Prepare the Ingredients

    Scoop out the avocado and peel the banana. Using ripe ingredients ensures a naturally sweet and creamy smoothie.

    2. Blend to Perfection

    Add the avocado, banana, almond milk, and honey (if using) into a blender. Blend until smooth and creamy.

    3. Customize the Texture

    If you prefer a chilled smoothie, add ice cubes and blend again until you reach your desired consistency.

    4. Serve and Enjoy

    Pour the smoothie into a glass, take a sip, and relish the creamy goodness packed with health benefits.

    The Power-Packed Benefits of This Smoothie

    1. Boosts Energy and Stamina

    Bananas provide an instant energy boost with natural sugars, while avocados offer long-lasting fuel with healthy fats. This makes the smoothie perfect for morning energy or post-workout recovery.

    2. Supports Heart Health

    Almond milk is an excellent source of vitamin E, which promotes cardiovascular health. Avocados also help maintain good cholesterol levels, keeping your heart in top shape.

    3. Enhances Muscle Recovery

    Bananas are rich in magnesium, aiding in muscle relaxation and recovery. For an extra protein kick, consider adding almond butter or a scoop of protein powder.

    4. Boosts Testosterone Levels

    Almonds are known to support testosterone production, essential for men’s vitality and overall well-being. The healthy fats in avocados also promote balanced hormone levels.

    5. Aids Digestion and Metabolism

    This smoothie is packed with fiber from bananas and avocados, promoting smooth digestion and gut health. Honey also has antibacterial properties that support a healthy digestive system.

    Pro Tips for a Better Smoothie

    • For extra protein, add a tablespoon of almond butter or a scoop of protein powder to support muscle growth and recovery.
    • Use frozen banana slices instead of fresh ones for a thicker, creamier texture.
    • Enhance the nutrition by sprinkling chia seeds or crushed nuts on top for added fiber and crunch.

    Thank you for reading the article.

    Where to Buy High-Quality Ingredients


    To get the best results from your smoothie, choose organic and high-quality ingredients. Purchase fresh avocados, bananas, and premium almond milk from trusted health stores or online marketplaces. Opting for raw honey and natural almond butter ensures you get maximum health benefits.

  • Banana Kiwi Oatmeal Protein Bake

    Banana Kiwi Oatmeal Protein Bake

    Banana Kiwi Oatmeal Protein Bake
    This Banana Kiwi Oatmeal Protein Bake is a nourishing, gluten-reduced breakfast or snack option that combines the natural sweetness of ripe bananas and tart kiwis with the hearty texture of blended oats, walnuts, and dried cranberries. Enhanced by a touch of baking powder for lift and enriched with egg whites for added protein, this bake emerges from the oven as a golden, custardy loaf studded with vibrant fruit and crunchy nuts. Perfect for meal prep, it slices beautifully and pairs seamlessly with coffee, yogurt, or a scoop of nut butter. Whether you’re fueling an early morning workout, packing a lunchbox treat, or simply craving a comforting, wholesome bite, this recipe delivers balanced energy and flavor in every slice.

    Cooking Time
    Preparation & Blending: 15 minutes

    Mixing & Assembly: 10 minutes

    Baking: 40 minutes

    Cooling: 15 minutes

    Total Active Time: 25 minutes

    Total Time: Approximately 1 hour 15 minutes

    Ingredients
    Dry Base & Leavening

    200 g (≈2 cups) rolled oats, finely ground in a blender until flour-like

    ¼ tsp fine salt

    1 tsp baking powder

    Fruit & Liquid

    2 medium ripe bananas, peeled


    50 g water (≈3 Tbsp)

    2 kiwis, peeled and roughly chopped

    Protein & Binding

    2 large eggs, whites separated from yolks

    Add-Ins

    50 g (≈½ cup) chopped walnuts


    2 Tbsp dried cranberries

    Equipment & Finish

    Parchment paper, to line the baking pan

    Step-by-Step Cooking Directions
    Preheat & Prepare Pan
    Preheat your oven to 180 °C (360 °F). Line a standard loaf pan (≈9×5 inches) with parchment paper, leaving an overhang for easy removal.

    Blend the Oats
    Place 200 g rolled oats in a high-speed blender. Process until a fine oat flour forms. Transfer to a large mixing bowl.

    Add Leavening & Salt
    Stir 1 tsp baking powder and ¼ tsp salt into the oat flour, ensuring even distribution of the dry ingredients.

    Process Bananas & Water
    In the same (unwashed) blender, combine the two bananas and 50 g water. Blend into a smooth purée. Pour into the oat-flour mixture.

    Incorporate Kiwi
    Fold in the roughly chopped kiwis, allowing bursts of color and tartness throughout the batter.

    Whip Egg Whites
    In a separate bowl, whip the two egg whites with a clean whisk or electric mixer until stiff peaks form. This aerates the bake, creating a lighter crumb.


    Christmas Cake
    Combine Yolks & Batter
    In another small bowl, beat the two egg yolks lightly, then stir into the main batter until uniformly colored.


    Fold in Egg Whites
    Gently fold the whipped egg whites into the batter in three additions, preserving as much volume as possible.

    Add Nuts & Cranberries
    Fold in 50 g chopped walnuts and 2 Tbsp dried cranberries for crunch and sweetness.

    Bake
    Pour the batter into the prepared pan, smoothing the top. Bake for 40 minutes, or until a toothpick inserted into the center comes out clean and the top is lightly golden.

    Cool & Slice
    Allow the bake to cool in the pan for 10 minutes, then lift out via the parchment overhang. Cool on a rack for another 5 minutes before slicing.

    Serve
    Enjoy warm or at room temperature, plain or with a smear of nut butter, Greek yogurt, or a drizzle of honey.

    Nutritional Information (per slice; yields 8 slices)
    Calories: 180 kcal

    Protein: 6 g

    Carbohydrates: 24 g

    Fiber: 4 g

    Sugars: 8 g

    Fat: 7 g

    Saturated Fat: 1 g

    Sodium: 150 mg

    The Origins and Popularity of the Recipe
    Oat-based bakes trace back to traditional porridge dishes across northern Europe, where oats provided affordable sustenance. Sweet loaves incorporating fruit, nuts, and eggs evolved as a portable, shelf-stable comfort food. In recent years, the health-food movement has embraced oat flour and fruit-sweetened loaves for their gluten-free potential, fiber content, and natural sweetness. The addition of protein via egg whites and nuts caters to contemporary interest in balanced macronutrients. Social-media trends around “healthy loaf cakes” and “breakfast bakes” have further propelled recipes like this into mainstream kitchens worldwide.

    Reasons Why You’ll Love the Recipe
    Naturally Sweetened: No added refined sugar—bananas and cranberries provide sweetness.

    High Fiber & Protein: Oat flour, egg whites, and walnuts promote fullness and sustained energy.

    Gluten-Reduced: While not strictly gluten-free, oat flour is a lower-gluten alternative to wheat.

    Make-Ahead Friendly: Bakes keep 3–4 days refrigerated, and slices freeze well.

    Kid-Friendly: Mild sweetness and familiar textures appeal to younger eaters.

    Health Benefits
    Oats: Rich in beta-glucan soluble fiber, which helps lower cholesterol and regulate blood sugar.


    Bananas & Kiwis: Provide potassium, vitamin C, and antioxidants for immune support and heart health.

    Egg Whites: Offer lean protein without extra fat.

    Walnuts: Supply omega-3 fatty acids, promoting brain and cardiovascular health.

    Dried Cranberries: Contain phenolic compounds that support urinary tract health.

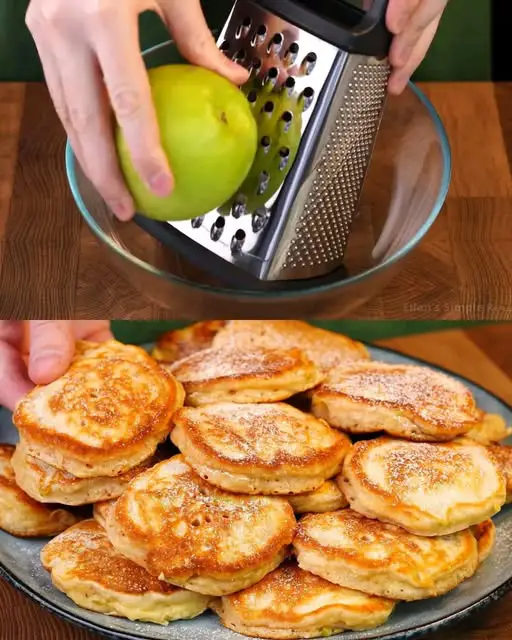
  • Fluffy Apple Cinnamon Pancakes

    Fluffy Apple Cinnamon Pancakes

    Fluffy Apple Cinnamon Pancakes

    These Fluffy Apple Cinnamon Pancakes are light, airy, and packed with sweet apple flavor. Made with kefir (or yogurt/buttermilk), cinnamon, and simple pantry ingredients, these pancakes are soft on the inside and slightly crispy on the outside. Perfect for breakfast or a cozy snack, they pair wonderfully with honey, maple syrup, or powdered sugar.

    Preparation Time

      • Prep Time: 10 minutes
      • Cooking Time: 15 minutes
      • Total Time: 25 minutes
      • Servings: 8-10 pancakes

    Ingredients

      • 1 apple, grated
      • 2 eggs
      • A pinch of salt
      • 5 tbsp sugar
      • ½ tsp cinnamon
      • 250ml (1 cup) kefir, yogurt, or buttermilk
      • 3 tbsp sunflower oil
      • 300g (2½ cups) all-purpose flour
      • 1 tsp baking soda

    Directions

    1. Prepare the Batter

      • In a large bowl, whisk together eggs, salt, sugar, and cinnamon until fluffy.
      • Add kefir (or yogurt/buttermilk) and sunflower oil, stirring until combined.
      • Gradually sift in flour and baking soda, mixing gently until a smooth batter forms.
    • Fold in the grated apple for natural sweetness and moisture.

    2. Cook the Pancakes

      • Heat a non-stick pan over medium heat and grease with a little oil.
      • Pour small ladles of batter into the pan.
    • Cook for 2-3 minutes on one side until bubbles appear, then flip and cook for another 1-2 minutes until golden brown.

    3. Serve

      • Enjoy warm with honey, maple syrup, or powdered sugar.
      • Serve with yogurt or fresh fruit for a balanced meal.

    Serving Suggestions

      • Top with chopped nuts and honey for extra crunch.
      • Drizzle with caramel sauce for a dessert-like treat.
      • Serve with whipped cream or Greek yogurt for a creamy contrast.

    Cooking Tips

      • For extra fluffiness, let the batter rest for 5 minutes before cooking.
      • For a spicier kick, add a pinch of nutmeg or ginger.
      • For a richer flavor, replace sunflower oil with melted butter.

    Nutritional Benefits

      • Rich in fiber from apples and cinnamon.
      • Good source of protein from eggs and yogurt.
      • Naturally sweetened, reducing the need for extra sugar.

    Dietary Information

      • Vegetarian-friendly
      • Can be made dairy-free using plant-based yogurt and milk
      • Can be made gluten-free using gluten-free flour

    Nutritional Facts (Per Pancake, Approx.)

      • Calories: 160
      • Protein: 4g
      • Carbohydrates: 25g
    • Fat: 5g

    Storage

      • Refrigeration: Store in an airtight container for up to 3 days.
      • Freezing: Freeze in a single layer for up to 1 month; reheat in a pan or microwave.
    • Reheating: Warm in a pan over low heat or microwave for 20 seconds.

    Why You’ll Love This Recipe

    ✔ Soft, fluffy, and naturally sweet
    ✔ Quick and easy to make
    ✔ Perfect for breakfast or a snack
    ✔ Customizable with different spices and toppings

    Conclusion

    These Fluffy Apple Cinnamon Pancakes are a perfect combination of warmth, sweetness, and comfort. Whether enjoyed with syrup, fruit, or a dusting of powdered sugar, they’re a treat that everyone will loveTry them today and enjoy a delicious, homemade breakfast!

    Frequently Asked Questions

      • Can I use another fruit instead of apples? Yes! Try grated pear, banana, or zucchini.
      • Can I make these without sugar? Yes! Use honey or mashed banana for natural sweetness.
      • Can I use baking powder instead of baking soda? Yes, use 1½ tsp baking powder instead.
      • How do I make these crispier? Cook on medium-high heat and use a little extra oil.
      • Can I make them egg-free? Yes! Use flaxseed or chia seed eggs as a replacement.
      • Can I make waffles with this batter? Yes! Just use a waffle iron instead of a pan.
      • Can I add nuts or raisins? Absolutely! Mix in chopped walnuts or raisins for extra texture.
      • How do I prevent the batter from being too thick? Add a little extra milk or yogurt if needed.
      • Can I make mini pancakes? Yes! Simply pour smaller amounts of batter onto the pan.
    • What’s the best way to serve leftovers? Toast them in a pan for a crispy texture before serving.
  • Honey Almond & Walnut Bars

    Honey Almond & Walnut Bars

    Honey Almond & Walnut Bars

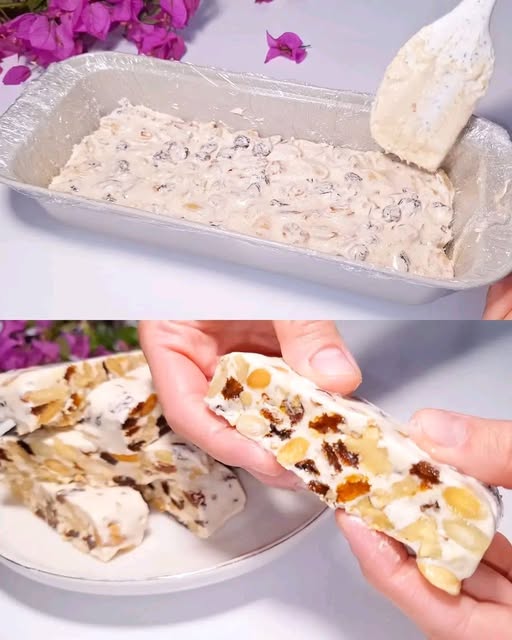
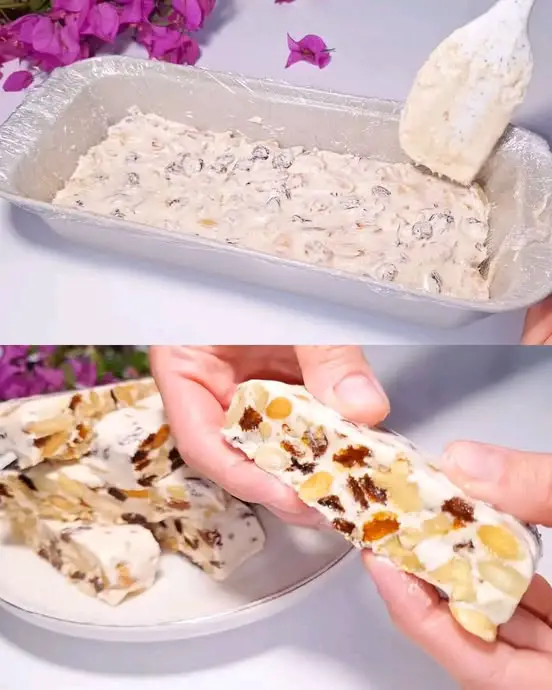
    These Honey Almond & Walnut Bars are an irresistible fusion of nutty crunch, natural sweetness, and chewy raisins, bound together by a glossy honey–egg-white syrup. With just a handful of pantry staples—almonds, walnuts, egg white, sugar, honey, and raisins—you can create a snack that feels both indulgent and wholesome. Unlike many store-bought energy bars laden with preservatives, this homemade version relies on simple, real ingredients. The process involves blanching and shelling the almonds, gently roasting both nuts to deepen their flavor, and then coating everything in a heated mixture of sugar and honey whisked into stiffened egg white. After pressing into a loaf pan and refrigerating, you’ll slice out bars that hold their shape beautifully and deliver a satisfying contrast of textures: a delicate crispness up front, a soft chew from the raisins in the middle, and a melt-in-your-mouth finish.

    Whether you’re fueling a morning workout, packing lunchboxes for school or work, or simply craving a sweet-but-nutritious bite in the afternoon, these bars fit the bill. In this comprehensive guide, you’ll find not only the exact measurements and step-by-step directions but also the recipe’s fascinating history, the health benefits of each component, expert tips for flawless execution, delicious serving ideas, and answers to all frequently asked questions. Let’s dive in!

    Cooking Time

    Preparation & Blanching: 20 minutes
    Roasting Nuts: 10 minutes
    Syrup & Assembly: 15 minutes
    Chilling Time: 10 hours (overnight)
    Total Active Time: approx. 45 minutes
    Total Time Including Chill: approx. 10 hours 45 minutes

    Ingredients

      • 100 g (0.8 cup / 3.5 oz) whole almonds

      • 80 g (0.8 cup / 2.8 oz) walnut halves or pieces

      • 1 large egg white

      • 125 g (0.7 cup / 4.4 oz) granulated sugar

      • 125 g (0.4 cup / 4.4 oz) liquid honey

      • 100 g (0.6 cup / 3.5 oz) raisins

    • 1 loaf pan, 26 × 11 cm (10 × 3.5 inch), lined with cling film

    Step-by-Step Cooking Directions

      1. Blanch & Shell the Almonds
        Bring a small pot of water to a rolling boil. Add the almonds and let them simmer for 2–3 minutes—just long enough to loosen their skins. Drain in a colander and, once cool enough to handle, pinch each almond between your fingers; the shell will slip off easily. Discard the skins.

      2. Roast the Nuts
        Preheat your oven to 160 °C (320 °F). Spread the blanched almonds and the walnuts in a single layer on a baking sheet. Roast for 8–10 minutes, watching carefully to prevent burning. Remove when they’re lightly golden and fragrant, then let them cool. Roughly chop both nuts into uniform bite-sized pieces and transfer to a large mixing bowl.

      1. Whip the Egg White
        In a clean, grease-free bowl, whisk the egg white by hand or with a mixer until it thickens and forms soft peaks—this aeration helps the syrup cling evenly to the nuts and raisins.

      2. Prepare the Honey–Sugar Syrup
        In a small saucepan over low heat, combine the granulated sugar and honey. Stir constantly until the sugar fully dissolves and the mixture simmers gently. Remove from the heat—avoid cooking it to the hard-crack stage.

      3. Incorporate Whipped Egg White
        Immediately pour the hot syrup into the beaten egg white in a thin stream, whisking continuously. The heat will partially cook and stabilize the egg white, creating a glossy, thickened syrup that binds the nuts.

      1. Combine with Raisins and Nuts
        Add the raisins to the bowl of chopped nuts. Pour the honey–egg-white syrup over the mixture. Using a silicone spatula, gently fold until every nut and raisin is fully coated.

      2. Press into the Pan
        Line a 26 × 11 cm loaf pan with cling film, leaving an overhang for easy removal later. Transfer the sticky mixture into the prepared pan. Lay another piece of cling film on top and firmly press down with your hands or the bottom of a measuring cup, creating an even, compact layer about 2 cm (¾ in) thick.

      3. Chill to Set
        Cover and refrigerate for at least 10 hours, or overnight. During this time, the syrup solidifies, and the bars become firm enough to slice without crumbling.

    1. Slice and Store
      Lift the set slab out using the cling-film overhang. Place on a cutting board and slice into 12 equal bars with a sharp knife. Store in an airtight container in the refrigerator for up to one week, or freeze individually wrapped for up to two months.

    Nutritional Information

    Per bar (1 of 12):

      • Calories: ~200 kcal

      • Fat: 12 g (of which saturated: 1.5 g)

      • Carbohydrates: 18 g (of which sugars: 12 g)

      • Protein: 4 g

      • Fiber: 2 g

      • Sodium: 15 mg

    The Origins and Popularity of the Recipe

    Homemade nut bars have roots in early health-food movements of the late 19th and early 20th centuries, when cereal, nut, and syrup combos were championed for their sustaining energy—ideal fuel for athletes and outdoor workers. Variations appeared across Europe and North America, evolving into granola bars and nougat-inspired treats. Using egg white to bind a honey-sugar mixture harkens back to classic European confections like “mendiants” and Italian torrone, which rely on the same protein-heat chemistry. Today, DIY versions offer clean-label alternatives to commercial energy bars, celebrated for their customizable flavors, minimal ingredients, and satisfying texture.

    Reasons Why You’ll Love the Recipe

      • Simple Pantry Staples: You likely have these ingredients on hand.

      • Customizable Flavor: Swap in different dried fruits or spices as you like.

      • Texture Contrast: Roasted nuts provide crunch, raisins add chew, and the honey-egg binder delivers a glossy finish.

      • Make-Ahead Convenience: Prep in under an hour; enjoy all week.

    • Healthy Indulgence: Balances natural sugars with nutrient-dense nuts and protein.

    Health Benefits

      • Almonds & Walnuts: Offer heart-healthy monounsaturated and polyunsaturated fats, vitamin E, magnesium, and plant-based omega-3 fatty acids.

      • Egg White: A lean protein source that helps bind the bars without adding fat.

      • Honey: Rich in antioxidants and has antibacterial properties; a more nutrient-dense sweetener than refined sugar alone.

      • Raisins: Provide dietary fiber, iron, and potassium, supporting digestive health and blood pressure regulation.

      • Controlled Sugar: Though sweet, the bars rely on natural honey and minimal added sugar, offering sustained energy without a rapid insulin spike.

    Serving Suggestions

      • Breakfast Boost: Pair one bar with a bowl of Greek yogurt and fresh berries.

      • Office Snack: Enjoy alongside herbal tea or black coffee for a midday pick-me-up.

      • Pre-Workout Fuel: Eat a bar 30 minutes before exercise for quick carbs and lasting protein.

    • Kids’ Lunchbox: A wholesome alternative to candy bars.

    • Dessert Topping: Crumble over vanilla ice cream or chia seed pudding for added texture.

    Common Mistakes to Avoid

      • Skipping Blanching: Unblanched almonds retain skins, yielding a bitter taste and compromised texture.

      • Overheating the Syrup: Cooking beyond a light simmer can crystallize the sugar or curdle the egg white.

      • Insufficient Pressing: Loose mixture leads to crumbly bars; press firmly for a compact slab.

      • Slicing Too Soon: Cutting before full chilling causes sticking and uneven edges.

    Pairing Recommendations

      • Beverages: Ginger tea, matcha latte, or light beer (for an adult snack).

      • Cheese: Creamy ricotta or mild goat cheese with a drizzle of honey.

      • Fruit: Fresh apple slices, orange segments, or figs for a bright contrast.

    • Spreads: A thin layer of almond or peanut butter for extra protein and flavor.

    Cooking Tips

      • Uniform Nut Size: Chop nuts to similar dimensions for consistent texture.

      • Room Temperature Honey: Warm honey blends more smoothly with sugar and egg white.

    • Cling-Film Overhang: Ensures easy removal—no need to scrape bars out.

    • Gentle Folding: Preserve some air in the whipped egg white by folding rather than stirring too vigorously.

    Similar Recipes to Try

      • Peanut & Cranberry Granola Bars – A classic combination of peanuts, oats, and tart cranberries.

    • Seed & Date Energy Bites – No-bake balls loaded with sunflower seeds, chia, and sweet dates.

    • Maple-Pecan Oat Bars – Warm maple syrup with crunchy pecans and oats.

    Variations to Try

      • Cinnamon Orange: Add ½ tsp ground cinnamon and 1 tsp orange zest.

      • Coconut Crunch: Stir in 30 g shredded, toasted coconut with the nuts.

      • Chocolate Drizzle: After chilling, melt dark chocolate and drizzle over bars.

      • Berry Medley: Replace raisins with dried cranberries, blueberries, or cherries.

    Ingredient Spotlight

    Egg White: Beyond its role as a lean protein, egg white’s albumin proteins coagulate when heated, creating a natural, glossy binder for syrups and confections. This technique—found in nougat and Italian torrone—yields a light, airy texture that keeps these bars from becoming dense or cloying.

    Conclusion

    These Honey Almond & Walnut Bars epitomize the charm of homemade snacks: straightforward to prepare, endlessly adaptable, and far more nourishing than their store-bought counterparts. By blanching and roasting the nuts, whisking egg white into a honey-sugar syrup, and allowing a long chill time, you’ll achieve bars that are firm yet tender, sweet yet balanced. Keep a batch on hand for breakfast, snack time, or even a quick dessert—and feel good about what you’re eating.

  • Sugar-Free Apple and Carrot Oatmeal Cake: A Healthy Delight

    Sugar-Free Apple and Carrot Oatmeal Cake: A Healthy Delight

    Sugar-Free Apple and Carrot Oatmeal Cake: A Healthy Delight


    Ingredients

    For the Cake:

      • 100 g (3.5 oz) oatmeal, ground in a blender
      • 1 carrot, grated
      • 2 medium apples, grated
      • 90 ml water
      • 1 banana, mashed
      • 40 g (1.4 oz) raisins
      • 100 g (3.5 oz) dried cranberries
      • 2 eggs
      • Sweetener to taste (e.g., stevia)
      • 10 g (0.4 oz) baking powder
      • 1 teaspoon vanilla extract
    • Olive or vegetable oil for greasing

    For the Topping:

      • 30 g (1 oz) almonds, ground
      • 30 g (1 oz) sugar-free white chocolate
    • 1.5 tablespoons sugar-free yogurt

    Instructions

      1. Prepare the Dried Fruits:
        • Place the raisins and dried cranberries in a bowl. Pour cold water over them and let them soak for 15 minutes to remove preservatives and activate beneficial substances. Drain well.
      1. Prepare the Batter:
          • Preheat your oven to 180°C (360°F).
          • In a large bowl, mix the ground oatmeal, grated carrot, grated apples, mashed banana, and water. Blend until smooth.
          • Add the eggs, sweetener, baking powder, and vanilla extract to the mixture. Stir until well combined.


        • Fold in the soaked and drained raisins and cranberries. Mix thoroughly.
      2. Bake the Cake:
          • Grease a 20 x 7 cm (8 x 3 inch) mold with olive or vegetable oil.


          • Pour the batter into the prepared mold, spreading it evenly.
          • Bake in the preheated oven for 35-40 minutes, or until a toothpick inserted into the center comes out clean.
          • Allow the cake to cool in the mold before removing.


      3. Prepare the Topping:
          • In a small bowl, melt the sugar-free white chocolate in a water bath until smooth.
          • Add the ground almonds and sugar-free yogurt to the melted chocolate. Mix well to combine.


      4. Decorate the Cake:
          • Once the cake is cooled, spread the white chocolate and almond mixture over the top.
          • Sprinkle with additional ground almonds or other nuts if desired.


      5. Serve:
        • Slice the cake and enjoy as a healthy snack or dessert.

    More Information

    This Sugar-Free Apple and Carrot Oatmeal Cake is a nutritious and delicious treat that fits perfectly into a healthy diet. Here’s why this recipe is beneficial and how you can enjoy it to the fullest:

    Nutritional Highlights:

      • Oatmeal: Provides dietary fiber, essential minerals, and a slow release of energy, keeping you full and satisfied.


      • Apples and Carrots: Rich in vitamins, antioxidants, and fiber, promoting overall health and well-being.
      • Banana: Adds natural sweetness and moisture, along with potassium and vitamins.
      • Dried Fruits: Raisins and cranberries add extra fiber, vitamins, and antioxidants.


    • Almonds: Packed with healthy fats, protein, and vitamin E, contributing to heart health and skin health.

    Storage Tips:

      • Refrigeration: Store the cake in an airtight container in the refrigerator for up to five days. Enjoy it cold or reheat slices in the microwave.


    • Freezing: The cake can be frozen for up to a month. Wrap individual slices in plastic wrap and store them in a freezer-safe bag. Thaw in the refrigerator overnight before eating.

    Serving Suggestions:

      • Dessert: Enjoy a slice of this cake as a guilt-free dessert after dinner. Pair it with a cup of herbal tea or coffee.


    • Snack: This cake makes an excellent mid-morning or afternoon snack. It’s perfect for packing in lunchboxes for a nutritious treat.
    • Breakfast: Start your day with a slice of this cake and a dollop of Greek yogurt or a spread of almond butter.

    Customization Ideas:


      • Add-ins: Enhance the flavor and texture by adding nuts, seeds, or other dried fruits such as chopped dates or apricots.
      • Spices: Add a pinch of nutmeg, ginger, or cardamom to the batter for a spiced variation.
      • Milk Options: Use any type of milk, such as almond milk or coconut milk, to suit your dietary preferences.


    Dietary Adaptations:

      • Gluten-Free: Ensure you use certified gluten-free oats to make this recipe suitable for those with gluten sensitivities.
      • Dairy-Free: Use dairy-free yogurt and chocolate for the topping to keep the recipe dairy-free.


    • Vegan: Replace the eggs with flaxseed or chia seed eggs (1 tablespoon of ground flaxseed or chia seeds mixed with 3 tablespoons of water per egg) for a vegan version.

    Health Benefits: This cake offers a balanced mix of carbohydrates, proteins, and healthy fats. The fiber from the oats, apples, and carrots supports digestive health, while the protein from the eggs and almonds helps maintain muscle mass and energy levels. The use of natural sweeteners like stevia makes this cake a healthier option for those avoiding refined sugars.


    Why You’ll Love This Recipe

      • Healthy and Delicious: This cake is packed with nutritious ingredients that offer great taste without the need for added sugars.


      • Easy to Make: With simple steps and readily available ingredients, this recipe is perfect for both novice and experienced bakers.
      • Versatile: Enjoy it as a dessert, snack, or even breakfast. Its wholesome ingredients make it suitable for any time of day.
      • Customizable: Easily adapt the recipe to suit your dietary needs and flavor preferences.


    Conclusion

    This Sugar-Free Apple and Carrot Oatmeal Cake is a delightful way to enjoy a healthy, flavorful treat. With its combination of natural sweetness from fruits, the wholesome goodness of oats, and the crunch of nuts, this cake is perfect for anyone looking to enjoy a nutritious dessert or snack. Try this recipe today and indulge in a delicious, guilt-free delight that supports your health and satisfies your taste buds.

  • Cheesy Beef & Veggie Pasta Casserole

    Cheesy Beef & Veggie Pasta Casserole

    Cheesy Beef & Veggie Pasta Casserole

    Cheesy Beef & Veggie Pasta Casserole
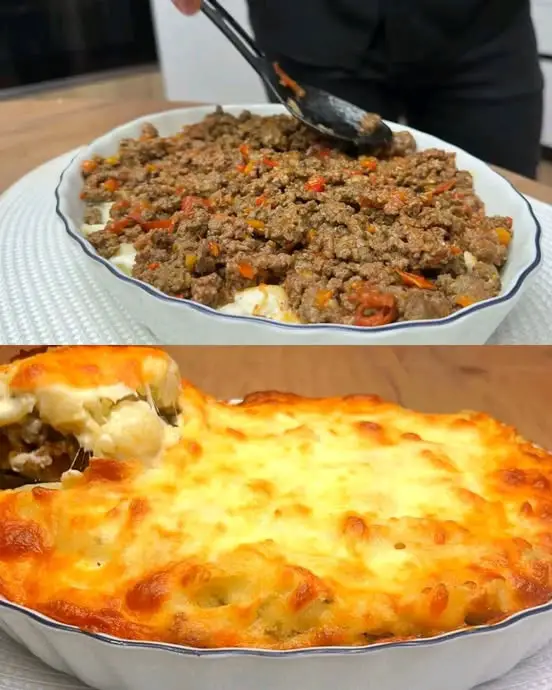
    This Cheesy Beef & Veggie Pasta Casserole is a comforting, crowd-pleasing dish that layers al dente pasta with savory ground beef simmered in aromatic seasonings, sweet peppers, and tomatoes, all bound together with a creamy leek–sour-cream sauce and topped with gooey mozzarella. Inspired by Italian-American baked pasta traditions, it brings pantry staples to life in one easy casserole. Perfect for weeknight dinners, potlucks, or meal prep, it delivers bold flavors, satisfying textures, and effortless assembly.

    Cooking Time
    Preparation: 20 minutes
    Pasta & Veggie Sauté: 15 minutes
    Meat Sauce & Sauce Simmer: 20 minutes
    Assembly & Baking: 25 minutes
    Total Active Time: 1 hour
    Total Time: Approximately 1 hour 15 minutes

    Ingredients
    Pasta & Boiling:
    200 g (7 oz) pasta of choice (penne, fusilli, or rigatoni)

    Water to cover
    1 Tbsp olive oil
    Salt to taste

    Veggie Sauté:
    1 Tbsp vegetable oil
    1 medium onion, diced

    1 red bell pepper, diced
    2 cloves garlic, minced
    1 leek (white part), thinly sliced

    20 g (0.7 oz) butter
    Salt and pepper, to taste
    1 Tbsp smoked paprika
    2 medium tomatoes, chopped
    500 g (17.6 oz) ground beef
    Beef Sauce:
    100 ml (3.5 fl oz) water
    1 tsp Italian herb blen

    200 g (7 oz) sour cream
    20 g (0.7 oz) all-purpose flour
    Salt and pepper, to tasteCreamy Binder:

    Topping:
    100 g (3.5 oz) mozzarella cheese, grate

    Step-by-Step Cooking Directions
    Boil the Pasta: In a large pot, combine water, 1 Tbsp olive oil, and salt. Bring to a rolling boil, then add 200 g pasta and cook until al dente. Drain and set aside.
    Sauté Aromatics: In the same pot or a large skillet, heat 1 Tbsp vegetable oil. Add diced onion and cook until translucent (2–3 minutes).
    Add Peppers & Garlic: Stir in diced red pepper and minced garlic; sauté until fragrant and slightly softened (2–3 minutes)

    Wilt the Leek & Butter: Add sliced leek and 20 g butter. Cook until leek is tender, stirring frequently.
    Brown the Beef: Push vegetables to one side, add ground beef. Season with salt, pepper, and paprika. Cook until no pink remains (7–10 minutes).
    Incorporate Tomatoes: Stir in chopped tomatoes and 100 ml water. Simmer 5 minutes until tomatoes break down and liquid reduces slightly.

    Christmas Cake
    Make the Creamy Binder: In a small bowl, whisk together sour cream, flour, salt, pepper, and Italian herbs until smooth.
    Combine & Simmer: Pour the creamy binder into the beef–vegetable mixture. Stir constantly and cook 5 minutes until sauce thickens and coats the back of a spoon.
    Preheat & Assemble: Preheat oven to 180 °C (356 °F). In a greased casserole dish, layer cooked pasta and beef mixture

    Top with Cheese: Evenly sprinkle grated mozzarella over the top.
    Bake: Bake 20–25 minutes until cheese is melted, bubbly, and golden brown.
    Rest & Serve: Let stand 5 minutes before serving to allow the casserole to set

    Nutritional Information
    Per Serving (serves 6):

    Calories: 480 kcal
    Protein: 25 g

    Carbohydrates: 42 g
    Fat: 24 g
    Fiber: 4 g

    Sodium: 520 mg
    The Origins and Popularity of the Recipe
    Baked pasta dishes such as this trace back to Italy’s al forno traditions, where leftover pasta is combined with sauce and cheese, then baked. Ground beef and creamy binders reflect Italian-American innovations like baked ziti and lasagna. Incorporating leeks and peppers is a nod to French and Mediterranean gratins. Its comfort-food appeal has made it popular worldwide, especially as a make-ahead casserole perfect for family meals.

    Reasons You’ll Love the Recipe
    One-Pan Simplicity: Combines pasta, meat, and sauce in a single dish.

    Rich Flavors: Smoky paprika, sweet peppers, and tangy sour cream.
    Cheesy Goodness: Golden mozzarella melts beautifully on top.
    Kid-Friendly: Mild seasoning and familiar ingredients.

    Make-Ahead: Assemble and refrigerate before baking.
    Health Benefits
    Lean Protein: Ground beef supplies iron and B-vitamins.
    Vegetables: Onion, pepper, leek, and tomato deliver fiber and micronutrients.

    Sugar-Free Apple and Carrot Oatmeal Cake: A Healthy Delight
    Sugar-Free Apple and Carrot Oatmeal Cake: A Healthy Delight
    Controlled Fat: Creamy binder uses sour cream, balancing flavor and richness.
    Serving Suggestions
    Serve with a crisp green salad tossed in vinaigrette.
    Offer crusty garlic bread for mopping up sauce.

    Pair with pickled vegetables to cut through richness.
    Common Mistakes to Avoid
    Overcooking Pasta: Undercook by 1 minute; it will finish cooking in the oven.
    Lumpy Binder: Whisk sour cream and flour thoroughly before adding.

    Dry Casserole: Ensure enough sauce by not skimping on sour cream or water.
    Pairing Recommendations
    Wine: A bold red like Chianti or Sangiovese.
    Beer: Amber ale or lager.

    Non-Alcoholic: Sparkling water with a lemon wedge.
    Cooking Tips
    Even Cheese Distribution: Let cheese sit at room temperature for faster melting.
    Spice Variations: Add chili flakes for heat or Italian seasoning for herbs.

    Dairy-Free Option: Substitute sour cream with coconut cream and use vegan cheese.
    Similar Recipes to Try
    Baked Ziti with Sausage
    Cheesy Vegetable Gratin

    Lasagna Roll-Ups
    Variations to Try
    Spinach & Mushroom: Stir in wilted spinach and sliced mushrooms.
    Chicken & Pesto: Swap beef for shredded chicken and stir in pesto.

    Seafood Twist: Use cooked shrimp and smoked salmon instead of beef.
    Ingredient Spotlight
    Leek: A milder relative of onion, leeks add subtle onion flavor without overpowering. They soften beautifully in sautés, lending sweetness and depth.

    Conclusion
    This Cheesy Beef & Veggie Pasta Casserole brings together classic baked-pasta comfort with the freshness of garden produce and the creaminess of a sour-cream–leek sauce. Easy to customize and perfect for weeknight dinners or gatherings, it’s sure to become a go-to favorite. Gather your ingredients, assemble in minutes, bake, and enjoy a hearty, flavor-packed meal that warms both body and soul.

  • Rustic Beef & Potato Casserole

    Rustic Beef & Potato Casserole

    Rustic Beef & Potato Casserole
    This Rustic Beef & Potato Casserole with Fresh Vegetable Salad is a hearty, homestyle meal perfect for family dinners. Juicy ground beef, seasoned with warm Georgian khmeli-suneli spices, smoked paprika, and dried chile, is layered over tender-sliced potatoes and baked to golden perfection. A creamy dill-enriched potato mash crowns the bake, lending brightness and binding the flavors together. Served alongside a fresh red bell pepper, cucumber, tomato & marinated mushroom salad dressed in olive oil, French herbs, and mayonnaise, this dish balances warming comfort with cool, crisp accompaniments.

    Cooking Time
    Preparation: 20 minutes

    Beef Layer Sauté: 10 minutes

    Potato Layer Prep & Mash: 20 minutes

    Assembly & Baking: 25–30 minutes

    Salad Prep: 10 minutes (concurrent)

    Total Active Time: 55 minutes

    Total Time: Approximately 1 hour 15 minutes

    Ingredients
    For the Beef Layer

    500 g (17.6 oz) ground beef

    1 large egg, beaten

    1 tsp fine salt

    ½ tsp freshly ground black pepper

    1 tsp khmeli-suneli (Georgian spice blend)

    1 tsp smoked paprika

    1 tsp dried chili flakes

    1 small onion, finely chopped

    1 Tbsp olive oil

    For the Potato Layer & Mash

    600 g (≈4 medium) potatoes, peeled and sliced thinly

    1 tsp salt

    2 Tbsp butter

    1 egg, beaten

    2 Tbsp chopped fresh dill

    1 Tbsp olive oil

    For the Fresh Vegetable Salad

    1 fresh red bell pepper, chopped

    Tall and Fluffy Sponge Cake
    1 medium cucumber, chopped

    1 large tomato, chopped

    100 g jarred marinated mushrooms, drained

    1 tsp fine salt

    2 Tbsp olive oil

    1 tsp French herb seasoning

    2 Tbsp mayonnaise

    For the Final Topping

    100 g fresh mozzarella, shredded

    2 Tbsp chopped fresh parsley

    Step-by-Step Cooking Directions
    Preheat & Prep
    Preheat your oven to 180 °C (356 °F). Lightly grease a 9×13-inch (23×33 cm) baking dish with olive oil.

    Season & Sauté the Beef
    Heat 1 Tbsp olive oil in a skillet over medium heat. Add chopped onion and sauté 2–3 minutes until translucent.
    Stir in ground beef, breaking it up with a spatula. Cook until no pink remains and juices evaporate—about 6–7 minutes.
    Season with salt, pepper, khmeli-suneli, smoked paprika, and chili flakes. Cook 1 minute more, then remove from heat. Let cool slightly.
    Stir in the beaten egg to bind the mixture.

    Prepare the Potatoes
    While the beef cools, place potato slices in a large pot, cover with water, add 1 tsp salt, and bring to a boil. Simmer 10 minutes until just tender. Drain thoroughly and return to the pot.
    Mash with butter until smooth, then stir in beaten egg and chopped dill. Season lightly with salt and pepper.

    Assemble the Casserole
    Spread the seasoned beef mixture evenly across the bottom of the prepared dish. Layer the mashed potatoes over the beef, smoothing the top with a spatula. Drizzle 1 Tbsp olive oil over the potato layer to encourage browning.

    Top with Cheese & Bake
    Sprinkle shredded mozzarella over the potato top. Bake in the preheated oven 25–30 minutes, until the cheese melts and browns and the edges bubble.

    Prepare the Fresh Salad
    In a large bowl, combine red bell pepper, cucumber, tomato, and marinated mushrooms. Season with salt, French herbs, and toss with olive oil and mayonnaise until evenly coated.

    Finish & Serve
    Remove casserole from oven and let rest 5 minutes. Sprinkle chopped parsley over the top. Serve warm, scooping generous portions alongside the chilled fresh vegetable salad.

    Nutritional Information (per serving; serves 6)
    Calories: 520 kcal

    Protein: 27 g

    Carbohydrates: 38 g

    Fat: 28 g

    Fiber: 4 g

    Sodium: 710 mg

    The Origins and Popularity of the Recipe
    Layered meat-and-potato bakes are found in cuisines worldwide—from French hachis Parmentier to Cornish pasties. Georgian khmeli-suneli spices lend a Caucasus twist, while the fresh vegetable salad references Mediterranean meze traditions. This fusion of hearty comfort and bright salad elements reflects modern cooking’s love of balanced plates: warming, spiced mains coupled with crisp, cooling sides.

    Reasons Why You’ll Love the Recipe
    Flavor Depth: Smoky, spiced beef under creamy, herb-infused mash.

    Textural Contrast: Gooey cheese, soft potatoes, and fresh salad crunch.

    Make-Ahead Friendly: Beef can be cooked and potatoes mashed in advance.

    TALL AND FLUFFY SPONGE
    Crowd-Pleaser: Appeals to fans of comfort food and light salad eaters alike.

    Health Benefits
    Lean Protein: Ground beef provides iron, B-vitamins, and satiety.

    Potatoes: A good source of potassium and vitamin C.

    Fresh Veggies: Hydrating cucumber, vitamin-rich pepper and tomato.

    Herbs & Spices: Dill, khmeli-suneli, and paprika offer antioxidants and anti-inflammatory compounds.

    Serving Suggestions
    Bread on the Side: Crusty baguette to mop up any juices.

    Additional Dip: Serve the salad with extra mayonnaise or yogurt-based dressing.

    Wine Pairing: A medium-bodied red (Merlot, Grenache) complements spiced beef.

    Common Mistakes to Avoid
    Watery Potatoes: Drain thoroughly; excess moisture makes mash runny.

    Under-Seasoned Beef: Taste and adjust seasonings before assembling.

    Unrested Casserole: Let it rest briefly; cutting too soon can cause layers to slide.

    Pairing Recommendations
    Beer: A malty amber ale to stand up to rich beef.

    Non-Alcoholic: Sparkling water with a squeeze of lemon to cleanse the palate.

    Cooking Tips
    Uniform Potato Slices: Slice ¼ cm thick for even boiling and layering.

    Spice Adjustments: Increase chili flakes for heat; reduce for milder flavor.

    Cheese Variations: Swap mozzarella for cheddar for more sharpness.

    Similar Recipes to Try
    Shepherd’s Pie: Lamb and vegetables under mashed potato.

    Moussaka: Layers of eggplant, beef, and béchamel sauce.

    Hachis Parmentier: Classic French minced beef and potato bake.

    Variations to Try
    Vegetarian: Replace beef with cooked lentils or plant-based mince.

    Cheesy Potato Top: Mix grated cheddar into mash for extra flavor.

    Herb Mash: Swap dill for chives or parsley in the potato layer.

    Ingredient Spotlight: Khmeli-Suneli
    Khmeli-suneli is a fragrant Georgian spice blend featuring fenugreek, coriander, and more. It adds warming complexity to meats, complementing paprika’s smokiness and bringing a unique regional twist to this comforting casserole.

    Conclusion
    This Rustic Beef & Potato Casserole with Fresh Vegetable Salad combines the best of hearty and healthy elements in one dish. Layered flavors, contrasting textures, and straightforward prep make it a versatile centerpiece for any meal. Embrace the fusion of Georgian spices, creamy mash, and Mediterranean salad for a truly memorable dining experience.

  • Honey Almond & Walnut Bars

    Honey Almond & Walnut Bars

    Honey Almond & Walnut Bars
    These Honey Almond & Walnut Bars are an irresistible fusion of nutty crunch, natural sweetness, and chewy raisins, bound together by a glossy honey–egg-white syrup. With just a handful of pantry staples—almonds, walnuts, egg white, sugar, honey, and raisins—you can create a snack that feels both indulgent and wholesome. Unlike many store-bought energy bars laden with preservatives, this homemade version relies on simple, real ingredients. The process involves blanching and shelling the almonds, gently roasting both nuts to deepen their flavor, and then coating everything in a heated mixture of sugar and honey whisked into stiffened egg white. After pressing into a loaf pan and refrigerating, you’ll slice out bars that hold their shape beautifully and deliver a satisfying contrast of textures: a delicate crispness up front, a soft chew from the raisins in the middle, and a melt-in-your-mouth finish.

    Whether you’re fueling a morning workout, packing lunchboxes for school or work, or simply craving a sweet-but-nutritious bite in the afternoon, these bars fit the bill. In this comprehensive guide, you’ll find not only the exact measurements and step-by-step directions but also the recipe’s fascinating history, the health benefits of each component, expert tips for flawless execution, delicious serving ideas, and answers to all frequently asked questions. Let’s dive in!

    Cooking Time
    Preparation & Blanching: 20 minutes
    Roasting Nuts: 10 minutes
    Syrup & Assembly: 15 minutes
    Chilling Time: 10 hours (overnight)
    Total Active Time: approx. 45 minutes
    Total Time Including Chill: approx. 10 hours 45 minutes

    Ingredients
    100 g (0.8 cup / 3.5 oz) whole almonds

    80 g (0.8 cup / 2.8 oz) walnut halves or pieces

    1 large egg white

    125 g (0.7 cup / 4.4 oz) granulated sugar

    125 g (0.4 cup / 4.4 oz) liquid honey

    100 g (0.6 cup / 3.5 oz) raisins

    1 loaf pan, 26 × 11 cm (10 × 3.5 inch), lined with cling film

    Step-by-Step Cooking Directions
    Blanch & Shell the Almonds
    Bring a small pot of water to a rolling boil. Add the almonds and let them simmer for 2–3 minutes—just long enough to loosen their skins. Drain in a colander and, once cool enough to handle, pinch each almond between your fingers; the shell will slip off easily. Discard the skins.

    Roast the Nuts
    Preheat your oven to 160 °C (320 °F). Spread the blanched almonds and the walnuts in a single layer on a baking sheet. Roast for 8–10 minutes, watching carefully to prevent burning. Remove when they’re lightly golden and fragrant, then let them cool. Roughly chop both nuts into uniform bite-sized pieces and transfer to a large mixing bowl.

    Whip the Egg White
    In a clean, grease-free bowl, whisk the egg white by hand or with a mixer until it thickens and forms soft peaks—this aeration helps the syrup cling evenly to the nuts and raisins.

    Prepare the Honey–Sugar Syrup
    In a small saucepan over low heat, combine the granulated sugar and honey. Stir constantly until the sugar fully dissolves and the mixture simmers gently. Remove from the heat—avoid cooking it to the hard-crack stage.

    Incorporate Whipped Egg White
    Immediately pour the hot syrup into the beaten egg white in a thin stream, whisking continuously. The heat will partially cook and stabilize the egg white, creating a glossy, thickened syrup that binds the nuts.

    Combine with Raisins and Nuts
    Add the raisins to the bowl of chopped nuts. Pour the honey–egg-white syrup over the mixture. Using a silicone spatula, gently fold until every nut and raisin is fully coated.

    Press into the Pan
    Line a 26 × 11 cm loaf pan with cling film, leaving an overhang for easy removal later. Transfer the sticky mixture into the prepared pan. Lay another piece of cling film on top and firmly press down with your hands or the bottom of a measuring cup, creating an even, compact layer about 2 cm (¾ in) thick.

    Chill to Set
    Cover and refrigerate for at least 10 hours, or overnight. During this time, the syrup solidifies, and the bars become firm enough to slice without crumbling.

    Slice and Store
    Lift the set slab out using the cling-film overhang. Place on a cutting board and slice into 12 equal bars with a sharp knife. Store in an airtight container in the refrigerator for up to one week, or freeze individually wrapped for up to two months.

    Nutritional Information
    Per bar (1 of 12):

    Calories: ~200 kcal

    Fat: 12 g (of which saturated: 1.5 g)

    Twisted Homemade Bread with Raisins
    Twisted Homemade Bread with Raisins
    Carbohydrates: 18 g (of which sugars: 12 g)

    Protein: 4 g

    Fiber: 2 g

    Sodium: 15 mg

    The Origins and Popularity of the Recipe
    Homemade nut bars have roots in early health-food movements of the late 19th and early 20th centuries, when cereal, nut, and syrup combos were championed for their sustaining energy—ideal fuel for athletes and outdoor workers. Variations appeared across Europe and North America, evolving into granola bars and nougat-inspired treats. Using egg white to bind a honey-sugar mixture harkens back to classic European confections like “mendiants” and Italian torrone, which rely on the same protein-heat chemistry. Today, DIY versions offer clean-label alternatives to commercial energy bars, celebrated for their customizable flavors, minimal ingredients, and satisfying texture.

    Reasons Why You’ll Love the Recipe
    Simple Pantry Staples: You likely have these ingredients on hand.

    Customizable Flavor: Swap in different dried fruits or spices as you like.

    Texture Contrast: Roasted nuts provide crunch, raisins add chew, and the honey-egg binder delivers a glossy finish.

    Make-Ahead Convenience: Prep in under an hour; enjoy all week.

    Healthy Indulgence: Balances natural sugars with nutrient-dense nuts and protein.

    Health Benefits
    Almonds & Walnuts: Offer heart-healthy monounsaturated and polyunsaturated fats, vitamin E, magnesium, and plant-based omega-3 fatty acids.

    Egg White: A lean protein source that helps bind the bars without adding fat.

    Honey: Rich in antioxidants and has antibacterial properties; a more nutrient-dense sweetener than refined sugar alone.

    Raisins: Provide dietary fiber, iron, and potassium, supporting digestive health and blood pressure regulation.

    Controlled Sugar: Though sweet, the bars rely on natural honey and minimal added sugar, offering sustained energy without a rapid insulin spike.

    Serving Suggestions
    Breakfast Boost: Pair one bar with a bowl of Greek yogurt and fresh berries.

    Office Snack: Enjoy alongside herbal tea or black coffee for a midday pick-me-up.

    Pre-Workout Fuel: Eat a bar 30 minutes before exercise for quick carbs and lasting protein.

    Kids’ Lunchbox: A wholesome alternative to candy bars.

    Dessert Topping: Crumble over vanilla ice cream or chia seed pudding for added texture.

    Common Mistakes to Avoid
    Skipping Blanching: Unblanched almonds retain skins, yielding a bitter taste and compromised texture.

    Overheating the Syrup: Cooking beyond a light simmer can crystallize the sugar or curdle the egg white.

    Homemade Panettone in a Blender
    Insufficient Pressing: Loose mixture leads to crumbly bars; press firmly for a compact slab.

    Slicing Too Soon: Cutting before full chilling causes sticking and uneven edges.

    Pairing Recommendations
    Beverages: Ginger tea, matcha latte, or light beer (for an adult snack).

    Cheese: Creamy ricotta or mild goat cheese with a drizzle of honey.

    Fruit: Fresh apple slices, orange segments, or figs for a bright contrast.

    Spreads: A thin layer of almond or peanut butter for extra protein and flavor.

    Cooking Tips
    Uniform Nut Size: Chop nuts to similar dimensions for consistent texture.

    Room Temperature Honey: Warm honey blends more smoothly with sugar and egg white.

    Cling-Film Overhang: Ensures easy removal—no need to scrape bars out.

    Gentle Folding: Preserve some air in the whipped egg white by folding rather than stirring too vigorously.

    Similar Recipes to Try
    Peanut & Cranberry Granola Bars – A classic combination of peanuts, oats, and tart cranberries.

    Seed & Date Energy Bites – No-bake balls loaded with sunflower seeds, chia, and sweet dates.

    Maple-Pecan Oat Bars – Warm maple syrup with crunchy pecans and oats.

    Variations to Try
    Cinnamon Orange: Add ½ tsp ground cinnamon and 1 tsp orange zest.

    Coconut Crunch: Stir in 30 g shredded, toasted coconut with the nuts.

    Chocolate Drizzle: After chilling, melt dark chocolate and drizzle over bars.

    Berry Medley: Replace raisins with dried cranberries, blueberries, or cherries.

    Ingredient Spotlight
    Egg White: Beyond its role as a lean protein, egg white’s albumin proteins coagulate when heated, creating a natural, glossy binder for syrups and confections. This technique—found in nougat and Italian torrone—yields a light, airy texture that keeps these bars from becoming dense or cloying.

    Conclusion
    These Honey Almond & Walnut Bars epitomize the charm of homemade snacks: straightforward to prepare, endlessly adaptable, and far more nourishing than their store-bought counterparts. By blanching and roasting the nuts, whisking egg white into a honey-sugar syrup, and allowing a long chill time, you’ll achieve bars that are firm yet tender, sweet yet balanced. Keep a batch on hand for breakfast, snack time, or even a quick dessert—and feel good about what you’re eating.