Author: Admin

  • Homemade Crazy Chicken

    Homemade Crazy Chicken

    Homemade Crazy Chicken

    Ingredients:

    – 2 chicken breasts (boneless, skinless)

    – 2 tablespoons olive oil

    – 1 tablespoon chili powder

    – 1 tablespoon paprika

    – 1/2 teaspoon cumin

    – 1 teaspoon garlic powder

    – Salt and pepper to taste

    – Juice of 1 lime

    – Fresh cilantro for garnish


    Directions:

    Start by preheating your grill or skillet over medium heat. While it’s warming up, mix together the chili powder, paprika, cumin, garlic powder, salt, and pepper in a small bowl. This will be your flavorful spice mix!


    Next, rub this aromatic blend over both sides of the chicken breasts, making sure every bit is covered with this wonderful mixture. Drizzle some olive oil over the chicken and top it all off with a good squeeze of fresh lime juice to add a little zest.

    Now, it’s time to grill or cook those chicken breasts. Place them on the grill for about 6 to 7 minutes on each side. You’re looking for a fully cooked, juicy interior with a lovely golden-brown crust on the outside.

    Once done, sprinkle on some fresh cilantro for a bit of freshness before serving. This dish pairs beautifully with a side of rice, a fresh salad, or some warm tortillas. Enjoy your delicious meal!

  • Crab and Shrimp Stuffed Salmon Recipe

    Crab and Shrimp Stuffed Salmon Recipe

    Crab and Shrimp Stuffed Salmon Recipe

    Treat yourself and your guests to this rich and elegant Crab and Shrimp Stuffed Salmon! Succulent salmon fillets are filled with a creamy, flavorful seafood stuffing, making it the perfect dish for special dinners, holidays, or even a cozy night in. Easy to prepare yet impressive on the plate!

    Ingredients:


    • 4 thick salmon fillets (skin-on or skinless)
    • 1 cup lump crab meat, drained and picked over
    • ¾ cup cooked shrimp, chopped
    • 4 oz cream cheese, softened
    • 2 tablespoons mayonnaise
    • 1 teaspoon Dijon mustard
    • 1 teaspoon lemon zest
    • 1 clove garlic, minced
    • 2 tablespoons chopped fresh parsley
    • 1 tablespoon chopped dill (optional)
    • ½ teaspoon Old Bay seasoning (optional)
    • Salt and pepper to taste
    • Lemon slices for topping


    Instructions:


    Preheat oven to 375°F (190°C). Lightly grease a baking dish.

    In a large bowl, mix crab meat, chopped shrimp, cream cheese, mayonnaise, Dijon mustard, lemon zest, garlic, parsley, dill, Old Bay seasoning, salt, and pepper.

    Cut a slit or pocket into each salmon fillet without cutting all the way through.

    Season the salmon lightly with salt and pepper.

    Gently stuff each fillet with the seafood mixture. Secure with toothpicks if necessary.

    Place stuffed fillets into the baking dish and top with a lemon slice.

    Bake for 20–25 minutes or until the salmon flakes easily and reaches an internal temperature of 125°F (52°C).

    (Optional) Broil for the last 2 minutes for a golden, bubbly top.

    Let rest for 5 minutes before serving. Enjoy!


    Notes:


    Use fresh crab and shrimp if available for the best flavor.

    If using canned crab meat, drain it thoroughly and pick out any shell fragments.

    Feel free to add finely chopped spinach or bell peppers for extra color and nutrients.

    This dish can be prepped ahead — stuff the salmon, cover, and refrigerate for up to 8 hours before baking.

    Store leftovers in an airtight container and reheat gently in the oven.


    Prep Time: 20 minutes

    Cook Time: 25 minutes

    Total Time: 45 minutes

    Servings: 4

    Calories: 420 kcal

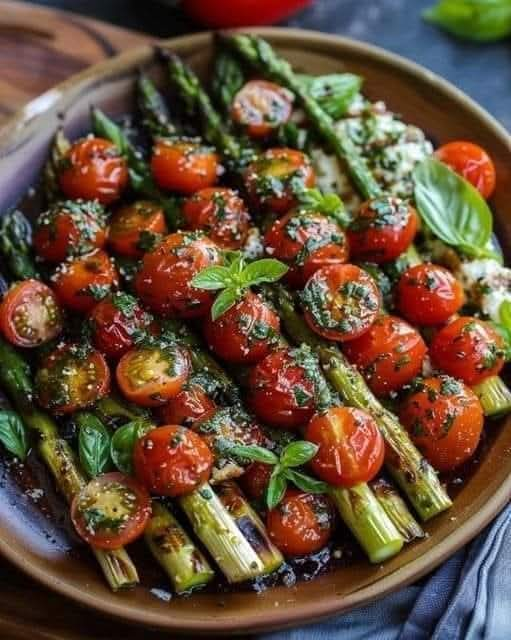
  • Caprese Roasted Asparagus!!

    Caprese Roasted Asparagus!!

    Caprese Roasted Asparagus!!

    Ingredients:

    • 1 lb Asparagus, trimmed
    • 2 tbsp Olive oil, for drizzling
    • Kosher salt and pepper to taste
    • 2 cups Shredded mozzarella cheese
    • 2 cups Cherry tomatoes, halved
    • Fresh chopped basil, for garnish
    • Bottled balsamic glaze, for garnish

    Instructions :

    Preheat an oven to 400 degrees. Line a baking sheet with foil and spray with non-stick cooking spray.

    Place the asaragus on one side of the baking sheet in a row while place the tomatoes on the other side in a row. Drizzle the top of the asparagus with 1 tbsp of olive oil, salt and pepper. Repeat process with tomatoes.

    Place the veggies in the oven and cook for 10 minutes. With 5 minutes left remove the baking sheet and top the asparagus with mozzarella. Place back in the oven and continue to cook until the cheese has melted and slightly golden.

    Remove the baking sheet from the oven and place the asparagus on a serving plate. Top the asparagus with tomatoes and fresh basil. Drizzle the balsamic glaze on top and serve.

  • Creamy Garlic Chicken with Roasted Baby Potatoes

    Creamy Garlic Chicken with Roasted Baby Potatoes

    Creamy Garlic Chicken with Roasted Baby Potatoes


    Ingredients:

    For the Roasted Baby Potatoes:

    • 1.5 lbs baby potatoes, halved
    • 2 tbsp olive oil
    • 1/2 tsp garlic powder
    • 1/2 tsp dried thyme
    • Salt and pepper to taste

    For the Creamy Garlic Chicken:

    • 2 large boneless, skinless chicken breasts, halved horizontally
    • 1 tbsp olive oil
    • 2 tbsp butter
    • 4 garlic cloves, minced
    • 1/2 cup chicken broth
    • 3/4 cup heavy cream
    • 1/4 cup grated Parmesan cheese
    • 1/2 tsp Italian seasoning
    • Salt and pepper to taste
    • 1 tbsp fresh parsley, chopped (for garnish)


    Directions:

    Preheat oven to 425°F (220°C). Toss baby potatoes with olive oil, garlic powder, thyme, salt, and pepper. Spread on a baking sheet and roast for 25–30 minutes, flipping halfway through, until golden and tender.


    Meanwhile, season chicken with salt and pepper. Heat olive oil in a skillet over medium-high heat and sear chicken for 4–5 minutes per side until golden brown and cooked through. Remove and set aside.


    In the same skillet, reduce heat to medium and melt butter. Add minced garlic and sauté for 1 minute until fragrant.


    Pour in chicken broth and simmer for 2–3 minutes. Stir in cream, Parmesan, and Italian seasoning. Simmer until sauce thickens slightly.


    Return chicken to skillet, spoon sauce over the top, and cook for another 2–3 minutes until heated through.


    Serve creamy garlic chicken alongside the roasted baby potatoes, garnished with fresh parsley.


    Prep Time: 10 minutes Cooking Time: 30 minutes Total Time: 40 minutes Kcal: 520 per serving Servings: 4 servings

  • Healthy and Delicious Street Corn Chicken Rice Bowl

    Healthy and Delicious Street Corn Chicken Rice Bowl

    Healthy and Delicious Street Corn Chicken Rice Bowl


    Ingredients:

    – 1 lb boneless, skinless chicken breast, diced

    – 1 tablespoon olive oil

    – 1 teaspoon smoked paprika

    – 1/2 teaspoon cumin

    – 1/2 teaspoon garlic powder

    – Salt and pepper to taste


    For the Street Corn Mixture:

    – 2 cups corn kernels (fresh, canned, or frozen)

    – 1/4 cup mayonnaise or Greek yogurt

    – 1/2 teaspoon chili powder

    – 1/2 teaspoon lime zest

    – 1 tablespoon lime juice

    – 1/4 cup crumbled cotija cheese (or feta)

    – 2 tablespoons chopped fresh cilantro


    For the Bowl:

    – 2 cups cooked brown rice or white rice

    – 1 avocado, sliced

    – 1/4 cup diced red onion

    – Fresh lime wedges for garnish

    – Additional cilantro and cotija for topping (optional)


    Directions:

    1. In a bowl, mix the diced chicken with olive oil, paprika, cumin, garlic powder, salt, and pepper.

    2. Cook the seasoned chicken in a skillet over medium-high heat for 6–8 minutes until fully cooked and golden brown. Set aside.

    3. In a separate bowl, combine corn, mayo or Greek yogurt, chili powder, lime zest, lime juice, cotija, and cilantro until well mixed.

    4. Assemble the bowls: Start with a base of rice, then add the cooked chicken, street corn mixture, avocado slices, diced red onion, and garnish with lime wedges and extra cheese or cilantro if desired.


    Preparation Time: 15 minutes | Cooking Time: 15 minutes | Total Time: 30 minutes | Calories: 350 kcal per serving | Servings: 4 servings

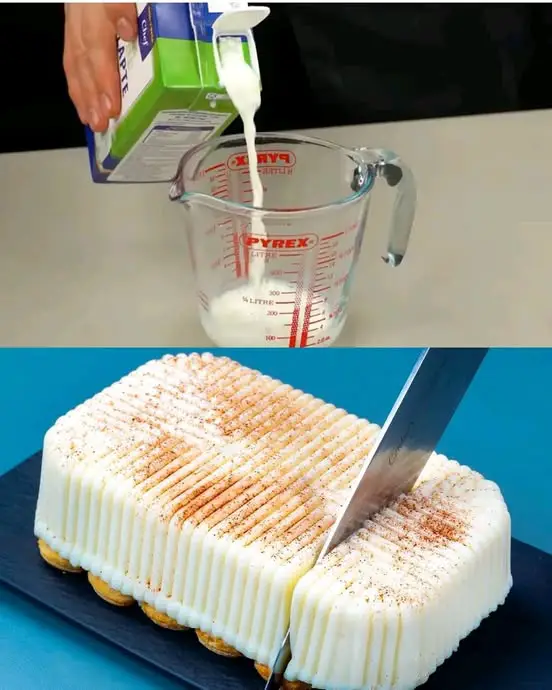
  • Coffee-Infused Creamy Sponge Cake Delight

    Coffee-Infused Creamy Sponge Cake Delight

    Coffee-Infused Creamy Sponge Cake Delight

    If you’re in search of a dessert that combines the richness of creamy textures with the deep, bold flavors of coffee, then look no further than this Coffee-Infused Creamy Sponge Cake Delight. This dessert is an indulgent treat that is as simple to make as it is satisfying. Whether you’re preparing it for a special occasion or just a casual family gathering, this dessert will impress everyone with its smooth, velvety cream layers and the aromatic kick of coffee.

    Inspired by the classic coffee-flavored desserts that have won hearts worldwide, this recipe takes the concept to a whole new level. The rich and indulgent cream mixture, made with whipping cream, milk, and powdered sugar, creates the perfect base. The sponge fingers—light and airy—serve as the perfect vessel to absorb the fragrant coffee mixture, transforming into a delightful texture that balances the creaminess.

    What makes this dessert truly timeless is its ability to balance the simplicity of sponge cake with the complex flavor profile of coffee, making it an excellent choice for coffee lovers. Additionally, this dessert is incredibly easy to prepare with minimal ingredients, and it can be made in advance, allowing the flavors to meld perfectly. With just a few basic ingredients and steps, you can enjoy a luxurious, restaurant-quality dessert in the comfort of your own home.

    Not only is it a treat for the palate, but this Coffee-Infused Creamy Sponge Cake Delight also looks elegant and refined, making it the perfect centerpiece for any dessert table. The smooth and decadent layers can be topped with a dusting of cocoa powder or chocolate shavings, if desired, for an extra touch of sophistication. This timeless dessert will quickly become a favorite for anyone who loves coffee-flavored treats, and it’s sure to have people coming back for seconds.

    Full Recipe:

    Ingredients

    Cream Mixture:

      • 300 ml (10 fl oz) whipping cream
      • 300 ml (10 fl oz) milk
      • 100 g (3.5 oz) powdered sugar
      • 20 g (0.7 oz) vanilla sugar
      • 80 g (2.8 oz) vanilla-flavored cream mix

    Coffee Mixture:

    • 8 g (0.3 oz) instant coffee
    • 100 ml (3.4 fl oz) water

    Layering:

      • 100 g (3.5 oz) sponge fingers

    Step-by-Step Instructions

    Preparation Time: 20 minutes

    Cooking Time: 0 minutes (no-bake dessert)

    Total Time: 20 minutes

    Servings: 6 servings

    Step 1: Prepare the Coffee Mixture

    1. Dissolve the instant coffee in 100 ml of hot water. Allow it to cool to room temperature.
    2. Pour the cooled coffee mixture into a shallow dish; this will be used for soaking the sponge fingers.

    Step 2: Make the Cream Mixture

      1. In a mixing bowl, combine the whipping cream and powdered sugar. Beat with an electric mixer on medium-high speed until soft peaks form.
    1. Slowly add the milk, vanilla sugar, and vanilla-flavored cream mix. Continue beating until the mixture is thick and smooth.

    Step 3: Layer the Tiramisu

      1. Dip each sponge finger briefly into the coffee mixture, ensuring they absorb some liquid without becoming overly soggy.
      2. Arrange a single layer of coffee-soaked sponge fingers in the bottom of your serving dish or individual cups.
      1. Spread a generous layer of the cream mixture over the sponge fingers, smoothing it out with a spatula.
      2. Repeat the process, adding another layer of soaked sponge fingers and topping with the cream mixture.
      3. Continue layering until all ingredients are used, finishing with a layer of cream.

    Step 4: Chill and Serve

      1. Cover the dish with plastic wrap and refrigerate for at least 4–6 hours, or overnight for best results.
      2. Before serving, dust the top with cocoa powder or grated chocolate for garnish.
      3. Slice or scoop into portions and enjoy!

    Why This Recipe Is Timeless

    Tiramisu’s allure lies in its perfect marriage of flavors and textures. The bittersweet coffee contrasts beautifully with the luscious vanilla cream, creating a harmonious balance that appeals to all taste buds. It’s a dessert that transcends trends, loved by generations for its simplicity and elegance. Whether served at weddings, birthdays, or casual dinners, Tiramisu has a universal charm that makes it a staple on dessert menus worldwide.

    Nutrition Facts (Per Serving)

      • Calories: 320 kcal
      • Protein: 4 g
      • Fat: 20 g
      • Carbohydrates: 35 g
      • Fiber: 1 g
    • Sugar: 25 g
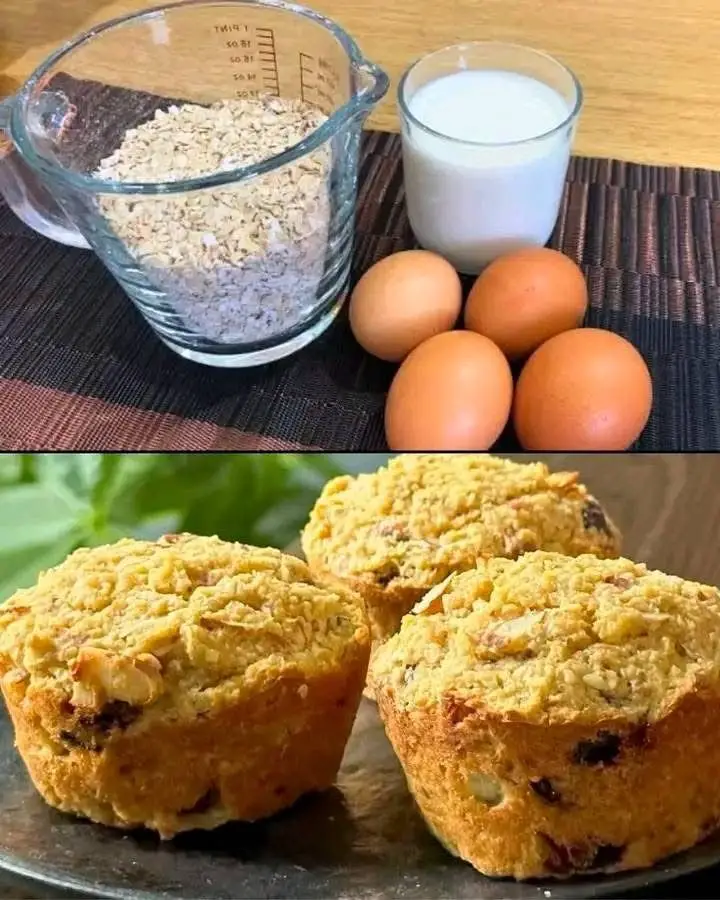
  • Applesauce Oat Muffins

    Applesauce Oat Muffins

    Applesauce Oat Muffins

    Applesauce Oat Muffins are a delightful and healthy treat, perfect for breakfast or a snack. These moist and flavorful muffins are made with wholesome oats and naturally sweetened with applesauce. Whether enjoyed warm out of the oven or cooled down, they’re great for any time of the day and loved by both kids and adults.

    Preparation Time:

      • Prep Time: 10 minutes
    • Cook Time: 18-20 minutes
    • Total Time: 28-30 minutes
      Servings: 12 muffins

    Ingredients:

      • 1 ¾ cups all-purpose flour
      • 1 cup oats (old-fashioned or quick oats)
      • ½ cup sugar
      • 1 ½ teaspoons baking powder
      • 1 teaspoon ground cinnamon
      • ½ teaspoon baking soda
      • ¼ teaspoon salt
      • 1 egg
      • ½ cup milk
      • ¼ cup oil (canola or vegetable)
      • 1 teaspoon vanilla extract
      • 1 cup unsweetened applesauce
      • 1 tablespoon oats, for topping (optional)

    Directions:

      1. Preheat the Oven:
        • Preheat your oven to 375°F (190°C). Prepare a muffin tin by spraying it with nonstick spray or lining with paper liners.
      2. Mix Dry Ingredients:
          • In a large mixing bowl, combine flour, oats, sugar, baking powder, cinnamon, baking soda, and salt.
      3. Mix Wet Ingredients:
        • In a separate bowl, whisk together the egg, milk, oil, and vanilla extract.
      1. Combine the Mixtures:
        • Add the wet ingredients to the dry ingredients along with the applesauce. Stir just until the flour is incorporated—be careful not to overmix.
      2. Fill the Muffin Tins:
          • Scoop the batter into the prepared muffin tin, filling each cup about 2/3 full. Sprinkle the tops with a few extra oats if desired.
      3. Bake:
        • Bake in the preheated oven for 18-20 minutes or until a toothpick inserted into the center of a muffin comes out clean.
    1. Cool:
      • Let the muffins cool in the pan for 3-5 minutes, then transfer them to a wire rack to cool completely.
    2. Serve:
        • Enjoy the muffins warm or fully cooled.

    Serving Suggestions:

      • Serve with a dollop of yogurt and fresh fruit for a balanced breakfast.
      • Pair with a cup of coffee or tea for a delightful afternoon snack.
    • Spread with butter or honey for added sweetness.

    Cooking Tips:

      • Avoid overmixing: Overmixing the batter can make the muffins dense. Stir just until combined for a fluffy texture.
      • Add-ins: Customize your muffins by adding 1/2 cup of raisins, dried cranberries, or chopped nuts for extra flavor and texture.
    • Control sweetness: Use unsweetened applesauce to manage the sweetness level, or adjust the sugar as desired.

    Nutritional Benefits:

      • Oats: Provide dietary fiber, which helps promote digestion and may lower cholesterol.
      • Applesauce: Rich in vitamin C and adds moisture to the muffins without the need for extra fat.
    • Eggs: Offer high-quality protein and essential vitamins and minerals.

    Dietary Information:

      • Dairy-Free: Substitute regular milk with a plant-based milk like almond, soy, or oat milk to make the muffins dairy-free.
      • Gluten-Free: Use a gluten-free flour blend and certified gluten-free oats for a gluten-free version.

    Nutritional Facts (per muffin):

      • Calories: 190
      • Protein: 4g
      • Carbohydrates: 30g
      • Fat: 7g
      • Fiber: 2g
      • Sugar: 12g

    Storage:

    • Room Temperature: Store leftover muffins in an airtight container at room temperature for up to 3 days.
    • Freezing: These muffins freeze well for up to 3 months. To enjoy, thaw at room temperature or warm in the microwave before serving.

    Why You’ll Love This Recipe:

      • Quick and Easy: The batter comes together in minutes, making this a perfect recipe for busy mornings or meal prep.
      • Healthy and Delicious: These muffins are naturally sweetened with applesauce, packed with fiber, and low in added sugar.
      • Versatile and Kid-Friendly: Whether you add mix-ins like raisins or chocolate chips, these muffins are a hit with both kids and adults.
      • Wholesome Ingredients: Made with oats, applesauce, and minimal fat, these muffins offer a nutritious option without sacrificing flavor.

    Conclusion:

    These Applesauce Oat Muffins are a wholesome and flavorful option that’s simple to make and enjoyable at any time of day. Whether you savor them fresh or reheated, these muffins are sure to become a favorite for their nutritious profile and delicious taste. Try them for breakfast, a snack, or a healthy treat that you can feel good about sharing!

  • Shrimp and Turkey Sausage Pasta

    Shrimp and Turkey Sausage Pasta

    A creamy, savory pasta loaded with plump shrimp, juicy turkey sausage, and tossed with a tomato-basil sauce. Perfect for a weeknight dinner or when you’re craving comfort with a kick.


    Ingredients

    • 1 pound linguine pasta (or penne, as shown in the image)

    • 1 pound shrimp, peeled and deveined

    • 1 pound turkey sausage, casings removed (or precooked and sliced)

    • ½ cup onion, finely chopped

    • 2 cloves garlic, minced

    • 1 (28-ounce) can crushed tomatoes

    • ½ cup fresh basil, chopped

    • ¼ cup Parmesan cheese, grated (plus more for serving)

    • 2 tablespoons olive oil

    • Salt and pepper, to taste

    • (Optional) ½ teaspoon red pepper flakes for heat

    • (Optional) ½ cup heavy cream or cream cheese for creamier texture


    Equipment Needed

    • Large skillet or sauté pan

    • Large pot for pasta

    • Wooden spoon or spatula

    • Colander

    • Knife and cutting board


    ‍ Instructions

    1. Cook the Pasta

    • Bring a large pot of salted water to a boil.

    • Cook the linguine (or your pasta of choice) according to package directions until al dente.

    • Drain and set aside. Toss lightly with olive oil to prevent sticking.


    2. Cook the Aromatics

    • In a large skillet over medium heat, heat 2 tablespoons of olive oil.

    • Add ½ cup chopped onion and cook for 4–5 minutes, until softened.

    • Add the minced garlic and cook for 1 minute until fragrant.


    3. Brown the Turkey Sausage

    • Add turkey sausage to the skillet.

      • If using raw sausage, break it up with a spoon and cook until browned and cooked through.

      • If using pre-cooked links (as in your photo), slice them into rounds and sear both sides for a nice crust.

    • Cook for 6–8 minutes, stirring occasionally.


    4. Build the Sauce

    • Pour in the crushed tomatoes and stir to combine.

    • Season with salt, pepper, and red pepper flakes (if using).

    • Let simmer for 10 minutes, uncovered, to thicken slightly.

    • (Optional) Stir in ½ cup heavy cream or 2 tbsp cream cheese for a rich, velvety sauce.


    5. Add the Shrimp

    • Nestle the shrimp into the simmering sauce.

    • Cook for 3–5 minutes, flipping once, until pink and opaque.

      Tip: Do not overcook the shrimp—they turn rubbery if left too long.


    6. Combine with Pasta

    • Add the drained pasta into the skillet.

    • Toss well to coat with the sauce and distribute the shrimp and sausage evenly.

    • Stir in the chopped basil and Parmesan cheese.


    7. Serve and Garnish

    • Plate the pasta while hot.

    • Garnish with extra Parmesan, fresh basil or parsley, and a drizzle of olive oil if desired.


    ⏱️ Recipe Summary

    • Prep Time: 10 minutes

    • Cook Time: 15 minutes

    • Total Time: 25 minutes

    • Servings: 4–6

    • Calories: ~520–600 per serving (varies by cream and cheese)


    Variations & Tips

    Variation Description
    Spicy Cajun Style Add Cajun seasoning and use Andouille sausage.
    Creamy Alfredo Twist Skip tomatoes, use cream, garlic, and Parmesan for a white sauce.
    Low-Carb Swap pasta for zucchini noodles or spaghetti squash.
    Seafood Lovers Add scallops or calamari with the shrimp.
    Make-Ahead Sauce can be made a day ahead and reheated before adding pasta and shrimp.

    Wine Pairing

    Pair with a chilled Pinot Grigio, Sauvignon Blanc, or rosé for a crisp contrast to the richness of the dish.

  • Oatmeal Bread with Walnuts and Sesame

    Oatmeal Bread with Walnuts and Sesame

    Oatmeal Bread with Walnuts and Sesame

    Ingredients:

      • Oats: 280 grams (3 cups)
      • Eggs: 2


      • Yogur: 250 grams (1 cup)
      • Baking powder: 2 teaspoons
      • Salt: Pinch


      • Sesame seeds: 1 tablespoon
      • Walnuts: Handful, roughly chopped
      • Black pepper: Pinch (optional)


    Step-by-Step Instructions:

    Step 1: Preheat the Oven

    1. Preheat your oven to 180°C (350°F). This will ensure that your bread bakes evenly and gets a lovely golden crust.

    Step 2: Prepare the Dry Ingredients

      1. Measure the Oats: In a large mixing bowl, add 280 grams of oats (about 3 cups). These oats will serve as the base of the bread and provide a rich, hearty texture.
      2. Add the Baking Powder and Salt: To the oats, mix in 2 teaspoons of baking powder and a pinch of salt. The baking powder helps the bread rise, giving it a nice fluffy texture.


    1. Optional – Add Black Pepper: If you want a subtle spice kick, add a pinch of black pepper to the dry mix. This step is optional but adds a nice balance to the sweetness of the oats and walnuts.

    Step 3: Mix the Wet Ingredients

      1. Crack the Eggs: In a separate bowl, crack 2 eggs and beat them lightly with a fork until the yolks and whites are well combined. Eggs help to bind the ingredients and give the bread structure.
      2. Incorporate the Yogurt: Add 250 grams (1 cup) of yogurt to the eggs and stir until smooth. The yogurt adds moisture and a slight tangy flavor to the bread, making it soft yet flavorful.


    Step 4: Combine Wet and Dry Ingredients

    1. Mix the Wet into the Dry: Pour the egg and yogurt mixture into the bowl with the oats, baking powder, and salt. Stir everything together with a spatula or wooden spoon until fully combined. The mixture should have a thick, batter-like consistency.
    2. Fold in Walnuts and Sesame Seeds: Add a handful of roughly chopped walnuts and 1 tablespoon of sesame seeds to the mixture. G!ently fold them in until they are evenly distributed throughout the batter. These add a lovely crunch and nutty flavor to the bread.

    Step 5: Prepare the Bread Pan

      1. Grease a Bread Pan: Lightly grease a loaf pan with butter or a non-stick cooking spray. This will ensure that the bread doesn’t stick and is easy to remove once baked.


    Step 6: Bake the Oatmeal Bread

      1. Pour the Batter: Transfer the batter into the greased loaf pan, spreading it out evenly.
      2. Top with Extra Seeds (optional): If you like, sprinkle some extra sesame seeds or chopped walnuts on top for added texture and visual appeal.
      3. Bake: Place the pan in the preheated oven and bake for 35-40 minutes, or until the top is golden brown and a toothpick inserted into the center comes out clean.


    Step 7: Cool and Serve

    1. Cool in the Pan: Let the bread cool in the pan for about 10 minutes before transferring it to a wire rack to cool completely.
    2. Slice and Serve: Once fully cooled, slice the bread and serve it with your favorite toppings, such as butter, jam, or even avocado. Enjoy
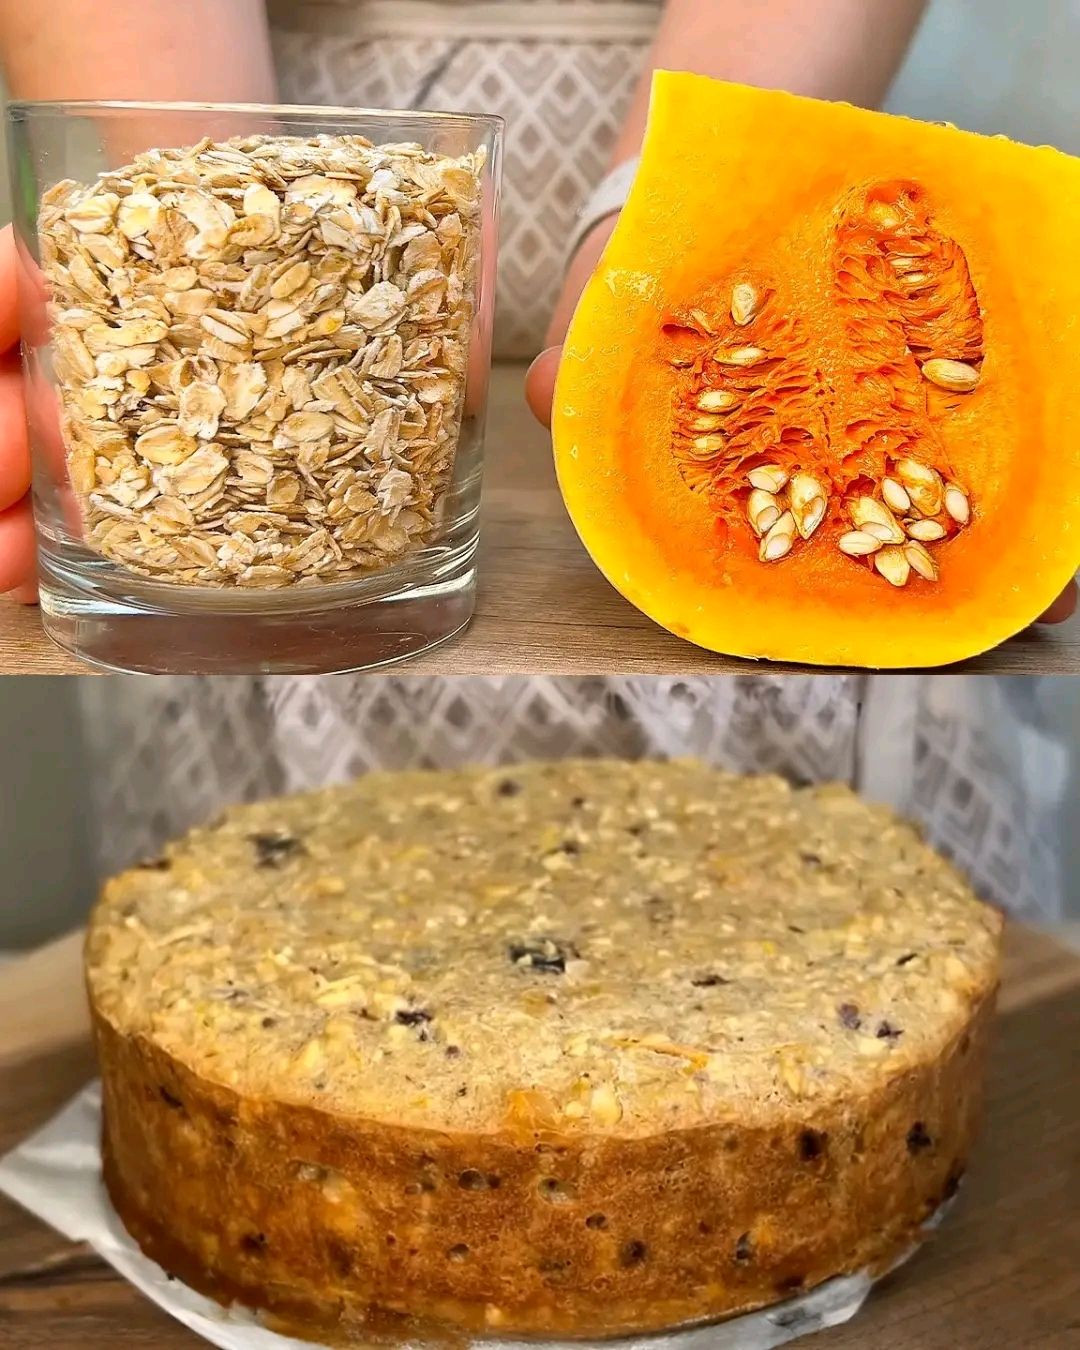
  • Oatmeal Fruit & Veggie Bake Recipe

    Oatmeal Fruit & Veggie Bake Recipe

    Oatmeal Fruit & Veggie Bake Recipe

    This Oatmeal Fruit & Veggie Bake is a perfect combination of nutritious ingredients that fuel your body while keeping your taste buds happy. The combination of oats, fruits, and vegetables offers a hearty, filling dish that’s ideal for breakfast or a healthy snack. It’s easy to prepare, and the blend of dried fruits with fresh pumpkin and apples makes it naturally sweet without the need for added sugar. Packed with fiber and vitamins, this recipe is excellent for anyone looking for a balanced and delicious treat.

    Preparation Time: 15 minutes
    Cooking Time: 35-40 minutes
    Total Time: 50-55 minutes
    Servings: 6-8

    Ingredients:

      • 2 cups (200g) oatmeal
      • 1 teaspoon baking powder
      • 1/2 teaspoon ground cinnamon
      • 1 teaspoon vanilla extract
      • A pinch of salt
      • 1 cup (240 ml) milk
      • 50 grams dried plums (prunes), chopped
      • 50 grams dried apricots, chopped
      • 1/2 cup (50g) cranberries
      • 100 grams pumpkin, grated
      • 1 carrot, grated
      • 2 apples, peeled and grated
      • 3 eggs
    • 3 tablespoons vegetable oil
    • 30 grams nuts (optional)

    Directions:

      1. Prepare the dry mixture: In a large bowl, combine oatmeal, baking powder, cinnamon, vanilla extract, and salt.
      1. Add the milk: Stir in the milk and let the mixture sit for 10 minutes to allow the oats to soften.
      2. Prepare fruits and vegetables: Chop the dried plums and apricots, and grate the pumpkin, carrot, and apples.
      3. Mix in fruits and veggies: After 10 minutes, fold in the dried fruits, pumpkin, carrot, and apples.
      1. Prepare wet ingredients: In a separate bowl, beat the eggs and mix in the vegetable oil. Add this to the oatmeal mixture.
      2. Optional: Stir in the nuts for added crunch and flavor.
      3. Bake: Pour the mixture into a greased 18 cm baking dish and spread evenly. Bake at 180°C (350°F) for 35-40 minutes or until the top is golden brown.
    1. Serve: Let it cool for a few minutes before serving.

    Serving Suggestions:

      • Serve warm with a dollop of yogurt or a drizzle of honey.
      • Pair with a side of fresh fruit or a smoothie for a complete breakfast.
    • Enjoy as a snack with a cup of tea or coffee.
    • Add a scoop of vanilla ice cream for a dessert version.

    Cooking Tips:

      • For a sweeter bake, use a ripe banana instead of eggs.
      • Make sure to grate the vegetables finely to ensure even texture throughout the bake.
      • Use almond milk or oat milk for a dairy-free version.
      • Add a teaspoon of nutmeg or ginger for an extra layer of flavor.

    Nutritional Benefits:

      • Rich in Fiber: Oats, fruits, and vegetables provide a good source of dietary fiber to support digestion.
      • Packed with Vitamins: The addition of pumpkin, carrots, and apples brings plenty of vitamins A and C.
      • Healthy Fats: The optional nuts and vegetable oil offer healthy fats that support heart health.
    • Low in Added Sugar: Naturally sweetened with fruits, this recipe avoids unnecessary sugars.

    Dietary Information:

      • Vegetarian
      • Dairy-Free (if using plant-based milk)
    • Gluten-Free (if using certified gluten-free oats)

    Nutritional Facts (per serving):

      • Calories: 210
      • Protein: 6g
      • Carbohydrates: 32g
      • Fat: 8g
      • Fiber: 5g
    • Sugars: 12g

    Storage:

      • Store in an airtight container in the fridge for up to 4 days.
      • Can be frozen for up to 3 months. To reheat, thaw overnight and warm in the oven or microwave.

    Why You’ll Love This Recipe:

      • Versatile: Enjoy it for breakfast, a snack, or even a healthy dessert.
      • Nutritious: Packed with fiber, vitamins, and healthy fats.
      • Customizable: You can easily swap fruits or add more nuts to suit your preference.
    • Simple to Make: Requires minimal preparation and is perfect for meal prepping.

    Conclusion:

    This Oatmeal Fruit & Veggie Bake is a wholesome, delicious, and nutritious dish that can easily fit into a busy lifestyle. Whether you’re looking for a healthy breakfast option or a filling snack, this bake provides all the energy and nourishment you need to get through your day. The natural sweetness from fruits and the added benefit of veggies make it a unique and flavorful option. Try it out for yourself, and you’ll see why this recipe is a favorite for those looking to balance taste with health.

  • TROPICAL PINEAPPLE LEMONADE PUNCH

    TROPICAL PINEAPPLE LEMONADE PUNCH

    TROPICAL PINEAPPLE LEMONADE PUNCH

    Ingredients:

    2 cups fresh pineapple chunks

    1 cup pineapple juice

    1 cup lemonade

    1 cup sparkling water or lemon-lime soda

    1–2 tablespoons sugar (optional, depending on sweetness)

    Ice cubes

    Lemon slices (for garnish)

    Mint leaves (for garnish)

    Instructions:

    1. In a large pitcher, combine the pineapple chunks, pineapple juice, and lemonade.

    2. Stir well. Taste and add sugar if needed.

    3. Right before serving, add sparkling water or lemon-lime soda to maintain the fizz.

    4. Fill glasses with ice cubes and pour the punch over the ice.

    5. Garnish with lemon slices and fresh mint leaves.

    6. Serve immediately and enjoy!

  • Homemade Ice Cream

    Homemade Ice Cream

    Homemade Ice Cream

    Ingredients:
    – 2 cups heavy cream
    – 1 cup whole milk
    – 3/4 cup granulated sugar
    – 1 teaspoon vanilla extract
    – Pinch of salt

    Directions:
    1. In a mixing bowl, grab your whisk and combine the heavy cream, whole milk, sugar, vanilla extract, and just a pinch of salt. Keep whisking until the sugar is fully dissolved—no one wants crunchy ice cream!
    2. Once you’ve got that creamy goodness, pour it into your KitchenAid ice cream maker bowl.
    3. Churn it up according to your machine’s instructions. You’ll know it’s ready when it thickens up and starts looking like that soft-serve we all love.
    4. Finally, transfer your delicious homemade ice cream to a container. Pop it in the freezer for at least 4 hours, and resist the urge to dive in right away!

  • Soft Raisin-enriched Yeast Buns

    Soft Raisin-enriched Yeast Buns

    Soft Raisin-enriched Yeast Buns
    These Soft Raisin-enriched Yeast Buns are a tender, slightly sweet bread perfect for breakfast, tea time, or a cozy snack. Made with a simple yeast dough enriched by eggs, milk, and butter, then studded with plump raisins and finished with a glossy egg wash, they rise to produce a light, fluffy interior and a golden crust. Whether enjoyed plain, spread with butter, or dunked in coffee, these buns are an irresistible homemade treat.

    Cooking Time
    Preparation & Kneading: 20 minutes

    First Rise: 45 minutes

    Shaping & Second Rise: 40 minutes

    Baking: 20–25 minutes

    Total Active Time: 1 hour

    Total Time (including rises): Approximately 2 hours 10 minutes

    Ingredients
    For the Sponge:

    60 ml lukewarm water (38–40 °C / 100–105 °F)

    1 Tbsp (≈9 g) active dry yeast

    1 tsp granulated sugar

    For the Dough:

    3 Tbsp (≈45 g) granulated sugar

    1 tsp fine salt

    2 large eggs, at room temperature

    8 g vanilla sugar (or 1 tsp vanilla extract)

    100 ml lukewarm milk (38–40 °C / 100–105 °F)

    380 g all-purpose flour, plus extra for dusting

    2 Tbsp (≈30 g) unsalted butter, softened

    Grandma Coco’s Monkey Bread
    Grandma Coco’s Monkey Bread
    60 g unsalted butter, melted (for brushing)

    100–120 g raisins, plumped in warm water and drained

    For Enriching & Filling:

    For the Finish:

    1 egg yolk

    1 tsp milk (for egg wash)

    Step-by-Step Cooking Directions
    Activate the Yeast (Sponge):
    In a small bowl, combine the 60 ml lukewarm water, 1 Tbsp dry yeast, and 1 tsp sugar. Stir gently and let stand for 10 minutes, until the surface is frothy—indicating the yeast is active.

    Mix the Dough:
    In a large mixing bowl, whisk together 3 Tbsp sugar, 1 tsp salt, and 8 g vanilla sugar. Add the 2 eggs and whisk until just blended. Stir in the yeast sponge. Pour in 100 ml lukewarm milk and mix to combine.

    Incorporate the Flour:
    Gradually add 380 g flour, stirring with a wooden spoon or dough hook on low speed. When the dough begins to come together, add the 2 Tbsp softened butter. Knead—by hand on a lightly floured surface or with a stand mixer—for 8–10 minutes, until the dough is smooth, elastic, and slightly tacky. If it’s too sticky, sprinkle in a little extra flour, 1 Tbsp at a time.

    First Rise:
    Shape the dough into a ball and place it in a lightly greased bowl. Cover tightly with plastic wrap or a damp towel and let rise in a warm, draft-free spot for 45 minutes, until doubled in size.

    Prepare Raisins:
    Meanwhile, soak the raisins in warm water for 5–10 minutes to plump, then drain and pat dry. This ensures they stay juicy in the bake.

    Shape the Buns:
    After the first rise, punch down the dough gently to deflate. Turn onto a lightly floured surface and roll into a rectangle about 30×20 cm. Brush the surface with the 60 g melted butter, then evenly sprinkle drained raisins over the dough.

    Roll & Cut:
    Starting from the long side, roll the dough tightly into a log. Pinch the seam to seal. Cut the log into 12 equal pieces (about 3 cm thick). Place each piece cut-side up in two greased 9 × 13 cm baking pans or on a parchment-lined sheet, spaced slightly apart.

    Second Rise:
    Cover the shaped buns loosely with plastic wrap or a towel and allow to rise another 40 minutes, until puffy and nearly doubled.

    Preheat the Oven & Egg Wash:
    As the buns finish proofing, preheat your oven to 180 °C (350 °F). In a small bowl, whisk together the egg yolk and 1 tsp milk for the glaze.

    Glaze & Bake:
    Brush the risen buns gently with the egg wash—this yields a glossy, golden top. Bake on the center rack for 20–25 minutes, until the buns are deep golden and sound hollow when tapped.

    Cool & Serve:
    Remove from oven and let cool in the pans for 5 minutes, then transfer to a wire rack. Serve warm or at room temperature—perfect with butter, jam, or honey.

    Tips & Variations
    Faster Rise: Place the covered dough in an oven warmed to 30 °C (turn on for 2 minutes then off).

    Flavor Boost: Stir 1 tsp ground cinnamon into the dough or filling.

    This recipe consists of a moist and fluffy lemon cake, very easy and delicious.
    This recipe consists of a moist and fluffy lemon cake, very easy and delicious.
    Nutty Twist: Add 50 g chopped walnuts with the raisins.

    Gluten-Free: Substitute a 1:1 gluten-free flour blend and add 1 tsp xanthan gum.

    Common Mistakes to Avoid
    Cold Ingredients: Ensure water and milk are lukewarm (not hot) to activate yeast without killing it.

    Over-Flouring: Add flour sparingly—too much yields dense buns.

    Under-Proofing: Wait until dough doubles; under-proofed buns are heavy.

    Over-Baking: Check at 20 minutes; over-baked buns can become dry.

    Serving Suggestions
    Breakfast Spread: Offer with butter and honey or your favorite preserves.

    Brunch Boards: Include cheeses, fresh fruit, and smoked salmon.

    Snack Time: Toast lightly and serve with a cup of tea or coffee.

    Storing & Freezing
    Room Temperature: Store cooled buns in an airtight container up to 2 days.

    Freezing: Freeze cooled buns in a sealed bag for up to 1 month. Thaw at room temperature and warm in a low oven.

    Frequently Asked Questions
    Q: Can I use instant yeast?
    A: Yes—use 2 tsp instant yeast and mix directly into the dry ingredients; skip the sponge step.

    Q: Why did my buns collapse?
    A: Likely over-proofed or dough too wet; reduce proofing time or add a bit more flour.

    Q: Can I omit raisins?
    A: Yes—fill with chocolate chips or leave plain.

    Q: My buns are gummy inside—why?
    A: Under-baked or cut too large. Bake longer or divide into smaller portions.

    Q: How do I achieve a softer crust?
    A: Brush buns with butter immediately after baking instead of egg wash.

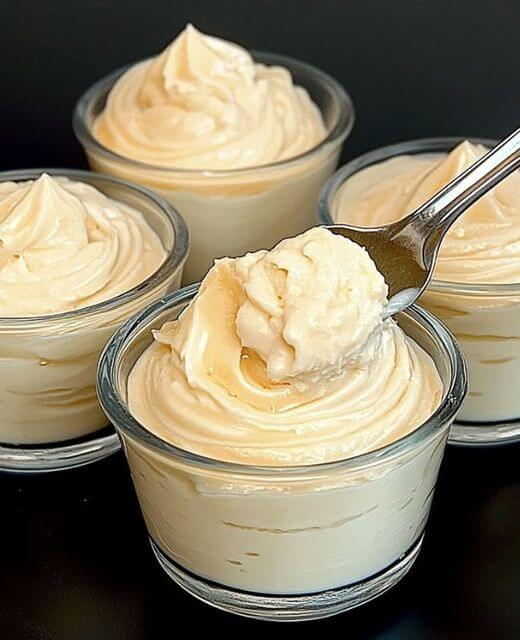
  • 5-Minute Banana Mousse Dessert – A Classic Italian Delight

    5-Minute Banana Mousse Dessert – A Classic Italian Delight

    5-Minute Banana Mousse Dessert – A Classic Italian Delight

    Ingredients

    • 3 bananas
    • 30 g (2 tbsp) butter
    • 250 ml (1 cup) milk
    • 40 g (⅓ cup) corn starch
    • 250 ml (1 cup) cream
    • 150 g (⅓ cup + 2 tbsp) condensed milk

    Step-by-Step Instructions

    1. Prepare the Bananas

    Start by slicing the 3 bananas into thin, even pieces. The slices should be small enough to cook through quickly and break down easily into a smooth puree.

    Fry the Bananas

    In a large frying pan, melt 30 g of butter over low heat. Once the butter has melted, add the banana slices to the pan. Cook the bananas gently for about 10 minutes, stirring occasionally, until they soften and become lightly caramelized. The gentle frying process enhances the natural sweetness of the bananas and brings out a rich, buttery flavor.

    2. Make the Banana Base

    Once the bananas are soft, use an immersion blender to blend them into a smooth puree. You can also use a regular blender if you prefer. The goal is to create a creamy, lump-free banana mixture.

    Add Milk and Cornstarch

    Pour 250 ml of milk into the banana puree and add 40 g of cornstarch. Stir the mixture well to ensure the cornstarch dissolves completely, avoiding any lumps. Cornstarch will act as the thickening agent, giving the mousse its silky texture.

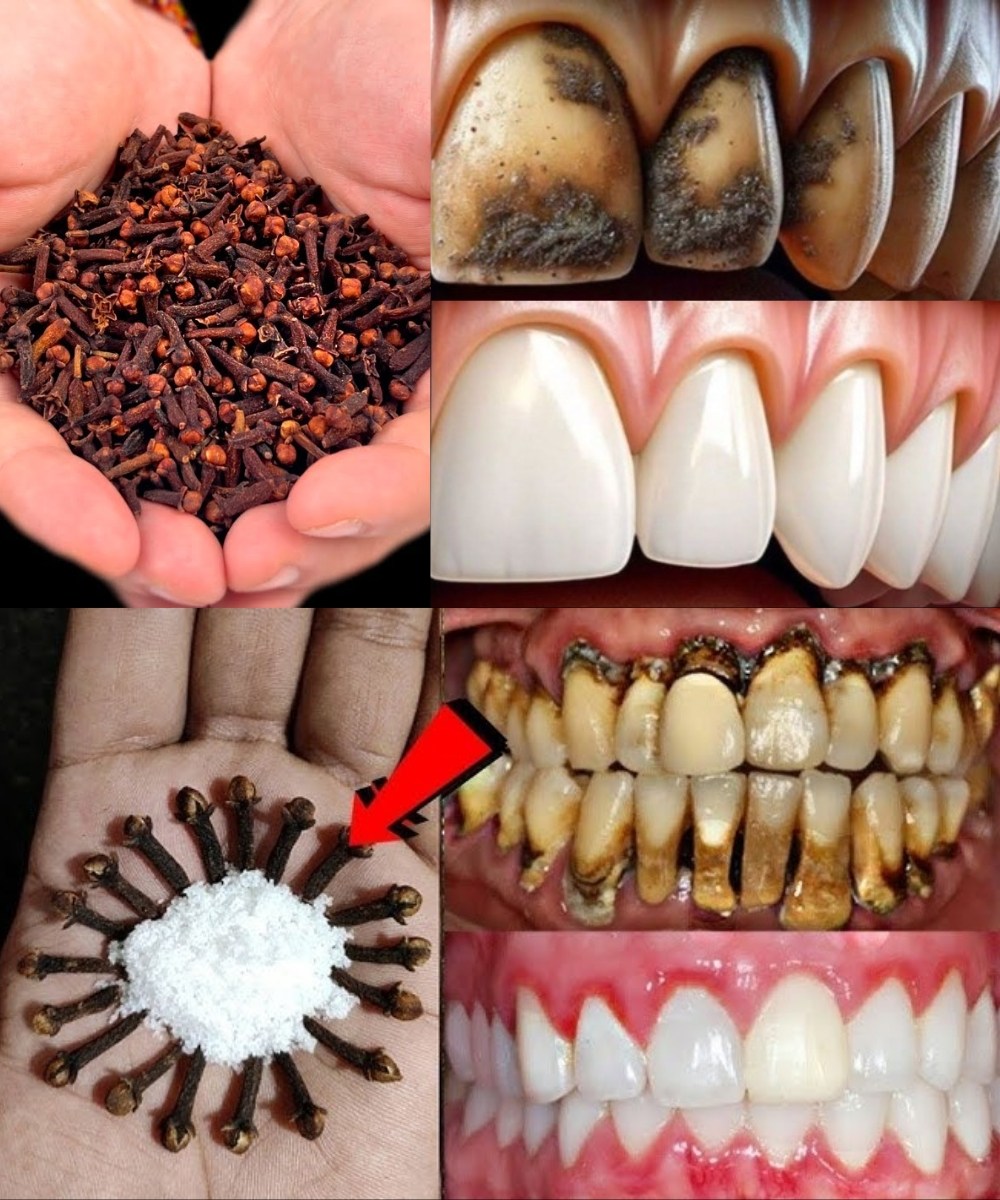
  • Unlock the Secret to Healthier Teeth with the Oral Care Benefits of Chewing Cloves Daily

    Unlock the Secret to Healthier Teeth with the Oral Care Benefits of Chewing Cloves Daily

    Unlock the Secret to Healthier Teeth with the Oral Care Benefits of Chewing Cloves Daily

    The Oral Care Benefits of Chewing Cloves Daily

    Cloves are packed with antioxidants, antibacterial agents, and essential compounds that promote strong teeth and healthy gums. Adding them to your daily routine can make a significant difference in your oral hygiene.

    1. Fights Tooth Decay and Cavities

    Cloves contain eugenol, a natural antibacterial compound that helps fight harmful bacteria responsible for tooth decay and cavities. By chewing cloves daily, you can prevent plaque buildup and maintain cleaner, healthier teeth.

    2. Reduces Gum Inflammation

    Gum inflammation can lead to serious dental issues if not treated. The anti-inflammatory properties of cloves help soothe irritated gums, reduce swelling, and prevent gum disease. Regular use of cloves can support overall gum health.

    3. Promotes Fresh Breath

    Bad breath can be embarrassing and persistent. Cloves act as a natural antiseptic, killing bacteria that cause odor. Additionally, they stimulate saliva production, which helps wash away food particles and bacteria, leaving your mouth fresh and clean.

    4. Cloves as a Natural Pain Reliever for Toothaches

    If you suffer from occasional toothache, cloves can provide natural relief. Their anesthetic properties help numb pain, while their antibacterial effects target the root cause of discomfort.

    5. Natural Anesthetic Properties

    Eugenol in cloves works as a natural pain reliever by numbing sensitive areas of the mouth. Chewing cloves or applying clove oil can provide quick relief from toothache discomfort.

    6. Reduces Sensitivity

    For those struggling with tooth sensitivity, chewing cloves daily can help soothe nerves and reduce discomfort. This makes it easier to enjoy hot or cold foods without pain.

    DIY Remedies Using Cloves for Oral Care

    Aside from chewing cloves, there are several DIY remedies you can try to maximize their oral health benefits.

    Clove and Coconut Oil Toothpaste

    • Ingredients:

      • 2 tablespoons coconut oil

      • 1 tablespoon baking soda

      • 1 teaspoon ground cloves

    • Instructions:

      1. Mix coconut oil, baking soda, and ground cloves in a bowl.

      2. Stir until you form a paste.

      3. Use a toothbrush to apply and brush for 2 minutes.

      4. Rinse thoroughly with water.

    This natural toothpaste helps fight bacteria while nourishing your gums and teeth.

    Clove-Infused Mouthwash

    • Ingredients:

      • 1 cup warm water

      • 5-6 whole cloves

      • 1 tablespoon honey (optional)

    • Instructions:

      1. Simmer water and add cloves, letting it steep for 10 minutes.

      2. Strain the mixture and let it cool to room temperature.

      3. Add honey if desired.

      4. Swish around your mouth for 30 seconds and spit out.

    This mouthwash naturally fights bacteria, freshens breath, and soothes gums.

    Clove Oil for Toothache Relief

    • Ingredients:

      • 5-6 drops clove essential oil

      • 1 tablespoon olive oil

    • Instructions:

      1. Mix clove oil with olive oil to dilute it.

      2. Apply with a cotton ball to affected gums or teeth.

      3. Leave it on for 15-20 minutes for pain relief.

    This is an excellent natural remedy for managing toothache pain effectively.

    Why Chewing Cloves Daily is a Holistic Approach to Oral Health

    Using cloves daily is a simple, natural, and cost-effective way to maintain optimal oral hygiene.

    A Natural, Chemical-Free Solution

    Unlike commercial products filled with artificial ingredients, chewing cloves is a natural alternative that promotes oral health without harmful chemicals.

    Convenient and Budget-Friendly

    Cloves are affordable and easily accessible, making them an excellent addition to your daily routine without extra costs or effort.

    Conclusion

    Chewing cloves daily offers a simple yet effective way to maintain a healthier mouth. Whether you’re looking to fight tooth decay, reduce gum inflammation, or manage tooth sensitivity, this natural remedy provides numerous benefits. Embrace the power of cloves as part of your oral care routine and enjoy cleaner, fresher, and healthier teeth!

    Disclaimer
    Before making any changes to your oral care routine, consult with a healthcare provider. This article is for informational purposes only and should not replace professional medical advice.