Author: Admin

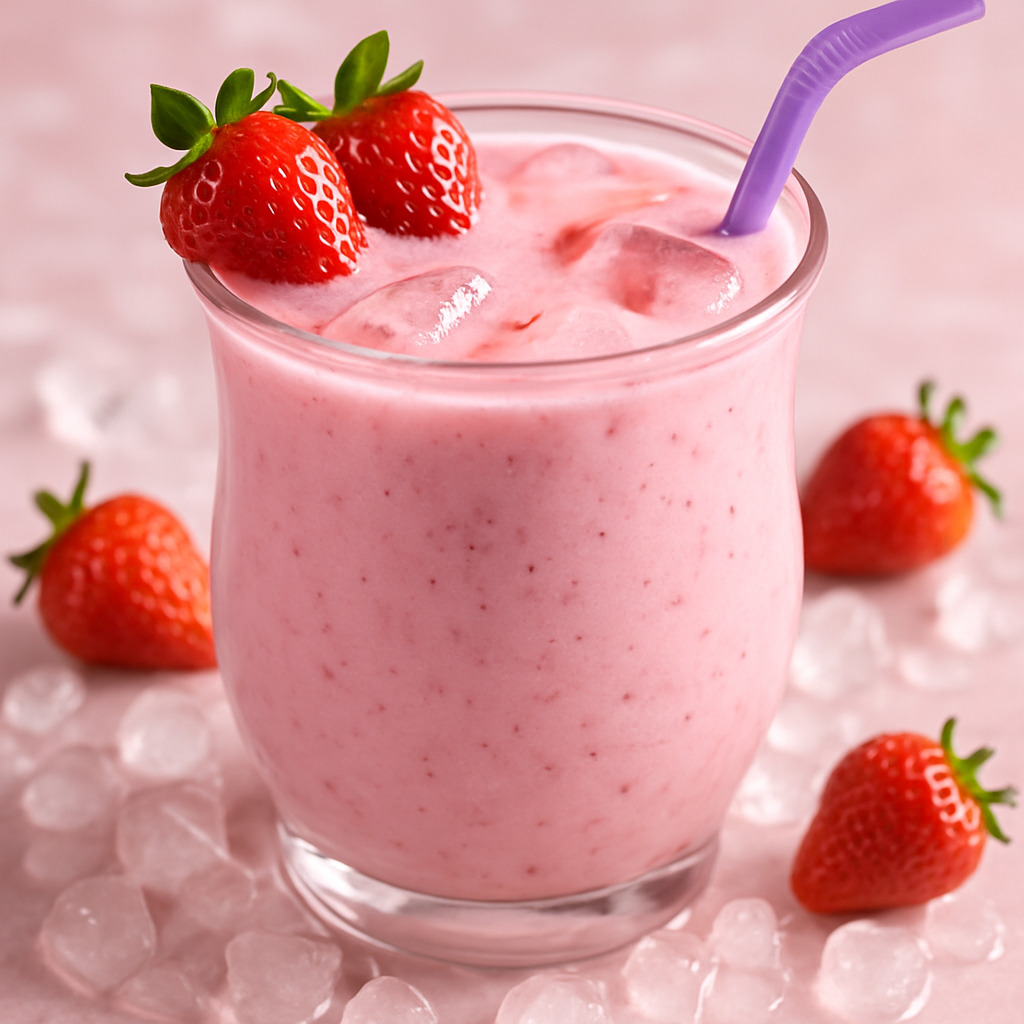
  • Strawberry Smoothie Recipe

    Strawberry Smoothie Recipe

    Strawberry Smoothie Recipe

    Ingredients (1-2 servings):

    • 1 cup fresh or frozen strawberries (plus extra for garnish)

    • 1/2 cup Greek yogurt (or regular yogurt)

    • 1/2 cup milk (dairy or non-dairy like almond, oat, or soy)

    • 1 tablespoon honey or maple syrup (optional, adjust to taste)

    • 1/2 teaspoon vanilla extract (optional)

    • 1/2 to 1 cup ice cubes (depending on how thick and cold you want it)

    Instructions:

    1. Prepare Ingredients: Wash and hull the strawberries if using fresh ones.

    2. Blend: In a blender, combine strawberries, yogurt, milk, honey (if using), vanilla extract (if using), and ice.

    3. Blend Until Smooth: Blend on high speed until creamy and smooth. Add more milk to thin it or more ice for a thicker consistency.

    4. Serve: Pour into a glass. Garnish with whole strawberries on the rim.

    5. Enjoy: Insert a straw and enjoy immediately while cold.

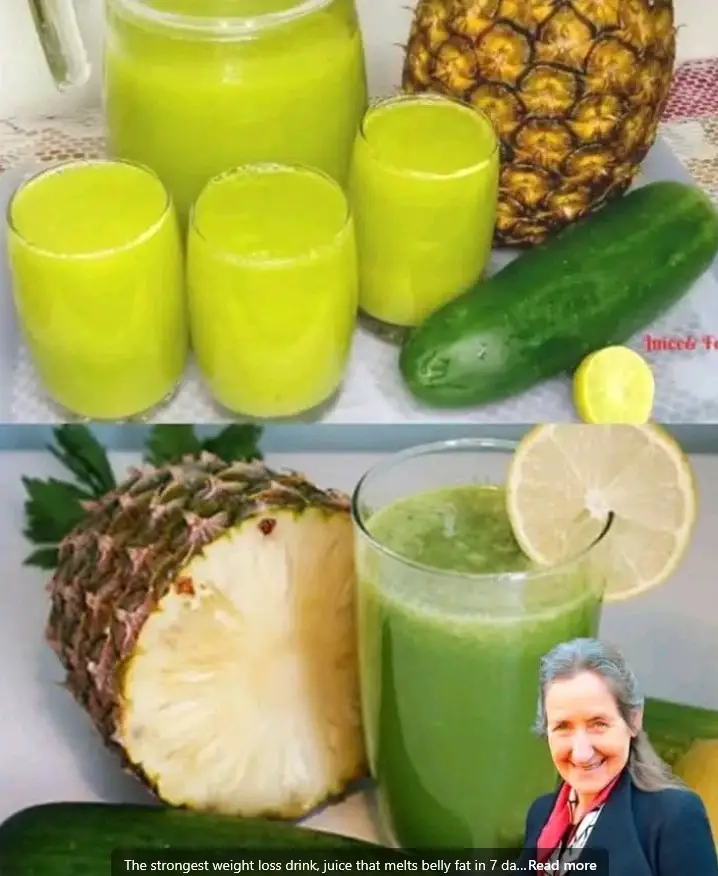
  • Pineapple Cucumber Lemon Detox Juice Recipe

    Pineapple Cucumber Lemon Detox Juice Recipe

    Pineapple Cucumber Lemon Detox Juice Recipe

    Ingredients:

    • 1/2 pineapple (peeled and chopped)

    • 1 cucumber (sliced, with peel)

    • 1 lemon (juice only or sliced)

    • 1 small bunch of parsley or mint (optional for extra detox)

    • 1 cup of water (adjust for consistency)

    Instructions:

    1. Prepare Ingredients: Wash the cucumber, lemon, and herbs. Peel and chop the pineapple.

    2. Blend: Add all ingredients to a blender with water.

    3. Strain (optional): If you prefer smoother juice, strain the mixture using a fine mesh sieve or cheesecloth.

    4. Serve Fresh: Pour into a glass and drink immediately for best nutrient retention.


    Suggested Use:

    • Drink 1 glass in the morning on an empty stomach for best results.

    • Can be consumed once or twice daily for up to a week.


    ⚠️ Note:

    Claims like “melts belly fat in 7 days” are not medically guaranteed. While this juice is hydrating and nutritious, sustainable weight loss comes from a balanced diet and regular exercise. Always consult a healthcare provider before starting any detox or weight-loss regimen.

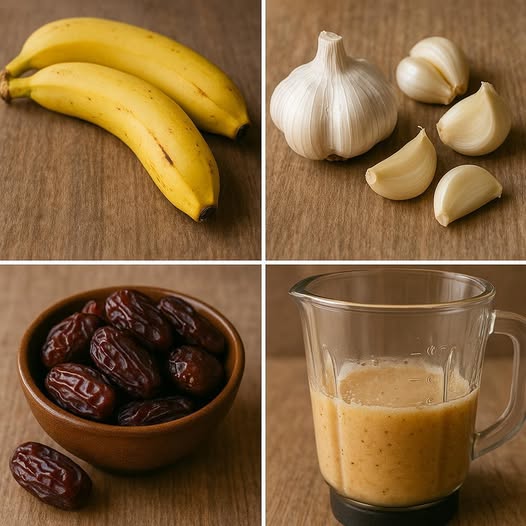
  • Banana-Date-Garlic Smoothie (Health Tonic)

    Banana-Date-Garlic Smoothie (Health Tonic)

    Banana-Date-Garlic Smoothie (Health Tonic)

    Ingredients:

    • 2 ripe bananas

    • 2–3 garlic cloves (peeled)

    • 6–8 pitted dates

    • 1 cup water (or plant-based milk for a creamier texture)

    Optional Add-ins:

    • 1/2 teaspoon cinnamon

    • 1 teaspoon lemon juice (to cut garlic sharpness)

    • 1 tablespoon chia or flax seeds

    Instructions:

    1. Prep the Ingredients:
      Peel the bananas and garlic. Pit the dates if not already pitted.

    2. Blend:
      Add bananas, garlic, dates, and water (or milk) into a blender. Blend on high until smooth.

    3. Adjust:
      Taste the smoothie. If the garlic is too strong, you can add more banana or a splash of lemon juice to balance it out.

    4. Serve:
      Pour into a glass and serve immediately.


    Health Notes:

    • Garlic is known for its antimicrobial and cardiovascular benefits.

    • Dates and bananas are energy-boosting and rich in potassium and fiber.

    • This drink may be used in detox regimens or for immune support, but the flavor is bold and not for everyone.

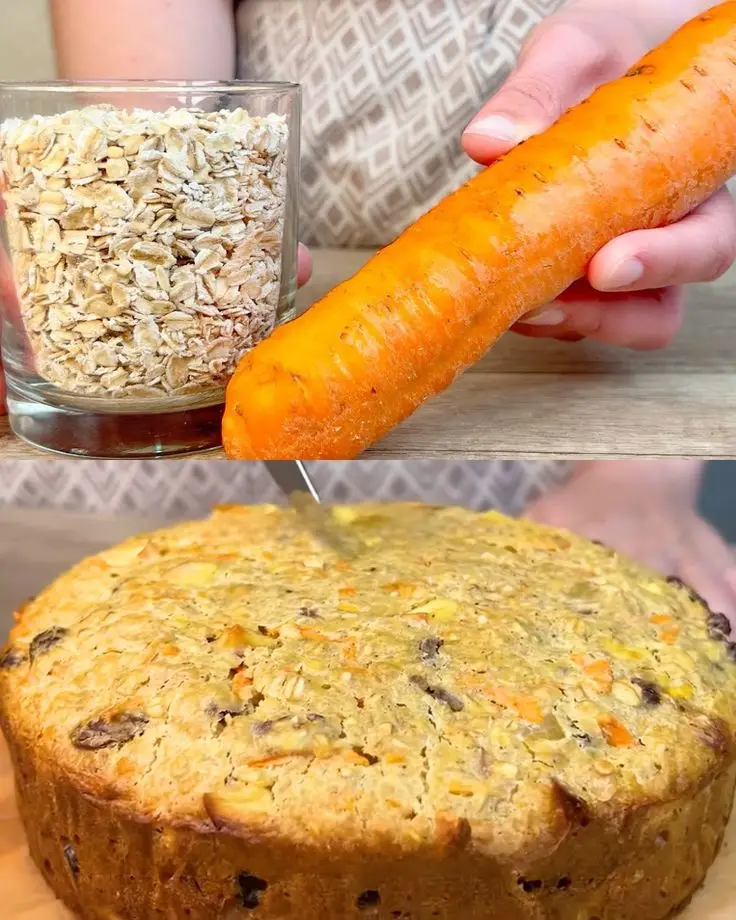
  • Healthy Carrot Oat Cake Recipe

    Healthy Carrot Oat Cake Recipe

    Healthy Carrot Oat Cake Recipe

    Ingredients:

    • 1 cup rolled oats

    • 1 large carrot, grated

    • 2 eggs

    • 1 ripe banana (or 1/3 cup honey or maple syrup)

    • 1/2 cup raisins or chopped nuts (optional)

    • 1/2 cup milk (dairy or plant-based)

    • 1/2 tsp baking soda

    • 1/2 tsp cinnamon

    • Pinch of salt

    • Optional: 1/2 tsp vanilla extract

    Instructions:

    1. Preheat oven to 180°C (350°F). Grease a baking pan or line it with parchment paper.

    2. Grate the carrot finely.

    3. In a large bowl, mash the banana (if using). Add eggs and milk, and mix well.

    4. Add grated carrot, oats, raisins or nuts, cinnamon, baking soda, salt, and vanilla (if using). Mix until well combined.

    5. Pour the batter into the prepared pan and spread evenly.

    6. Bake for 30–40 minutes, or until a toothpick inserted in the center comes out clean.

    7. Let it cool before slicing.

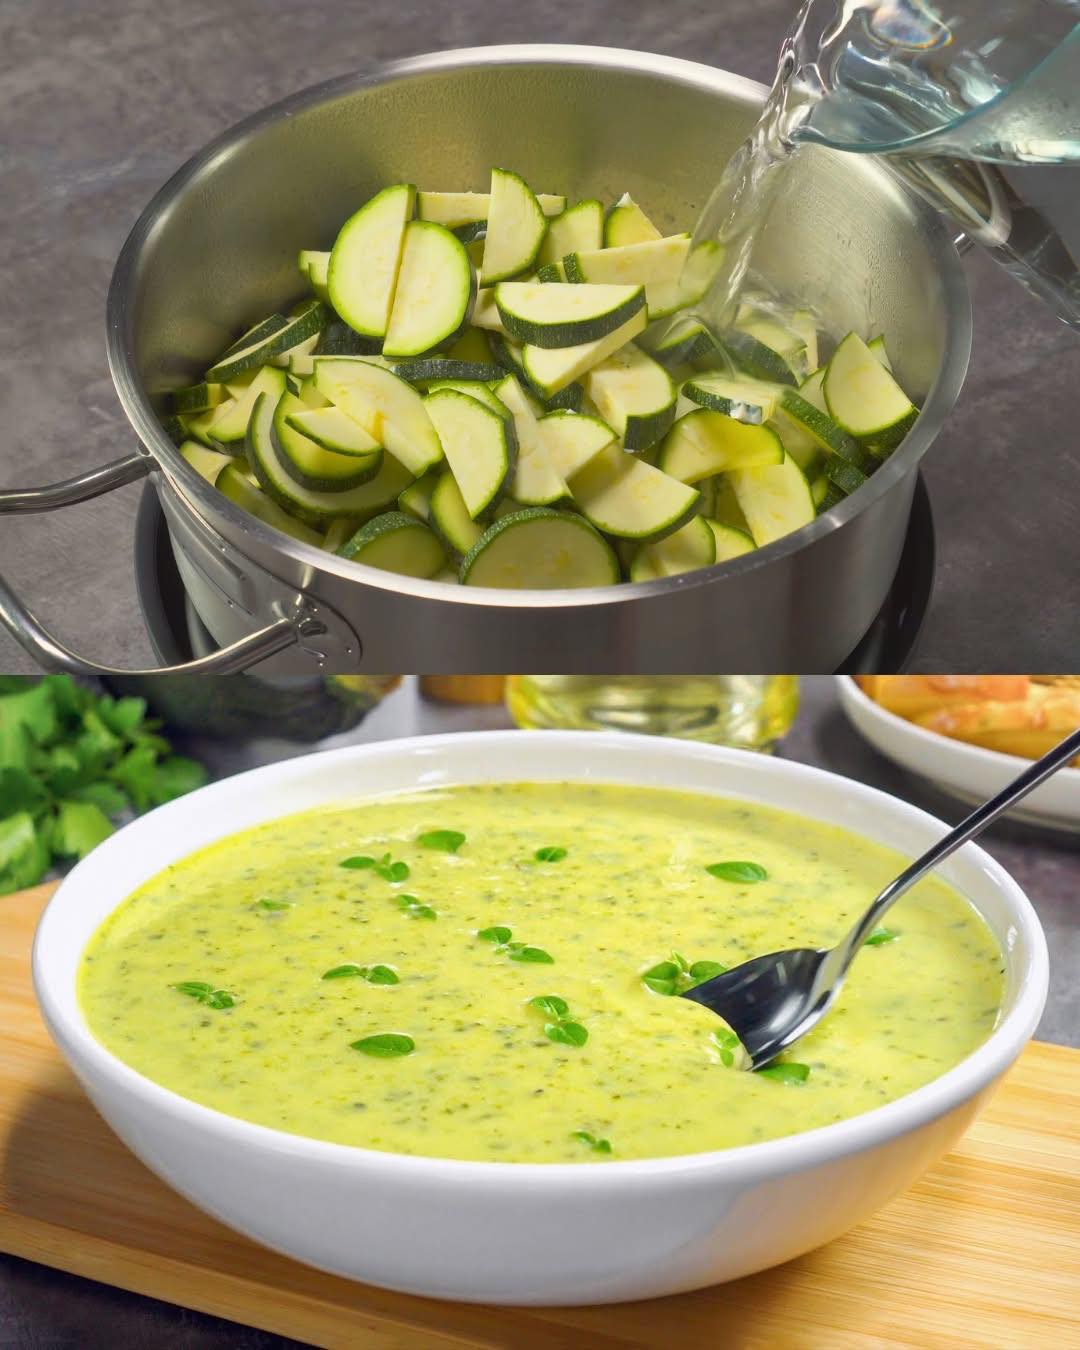
  • Creamy Zucchini Soups

    Creamy Zucchini Soups

    This creamy zucchini soup is a delicious and nutritious meal, perfect for any season. Made with fresh zucchini, onions, garlic, and cream cheese, it creates a rich and flavorful soup that’s both comforting and satisfying. Enjoy it hot, sprinkled with fresh herbs and croutons for added texture and flavor. This delightful dish is a great way to enjoy the bounty of summer or to warm up during the colder months.

    Preparation Time:
    Total Time: 35 minutes
    Prep Time: 10 minutes
    Cook Time: 25 minutes
    Ingredients:
    Vegetables:
    2.2 lb (1000 g) zucchini, cut into half-moon slices
    7 oz (200 g) onion, chopped
    1 clove garlic, minced
    Base:
    7 oz (200 g) cream cheese
    1.5 tbsp vegetable oil
    1 tsp dried parsley
    4 cups (1 liter) hot water
    1/2 tsp dried basil
    Salt, to taste
    Pepper, to taste
    Directions:

    Prepare the Vegetables:
    Chop the onions and garlic. Cut the zucchini into half-moon slices.
    Cook the Base:
    Heat the vegetable oil in a large saucepan over medium heat. Add the chopped onions and fry for 3-4 minutes until golden brown. Add the minced garlic and cook for another minute, then stir in the dried parsley, dried basil, salt, and pepper.
    Simmer the Soup:
    Add the cream cheese and zucchini slices to the saucepan. Pour in the hot water and stir well to combine. Bring to a boil, then cover with a lid, lower the heat to minimal, and simmer for 20 minutes.
    Blend the Soup:
    After simmering, use a blender or mixer to puree the soup until smooth and creamy. Taste and adjust seasoning with salt and pepper as needed.
    Serve:
    Serve the creamy zucchini soup hot, sprinkled with chopped parsley and basil. Garnish with croutons for added texture and flavor.
    Bullet Points:
    Serving Suggestions:
    Serve with a side of crusty bread or a fresh green salad.
    Pair with a grilled cheese sandwich for a comforting meal.
    Top with a dollop of sour cream for extra creaminess.
    Add a sprinkle of cheese on top before serving for added richness.
    Cooking Tips:
    You can use any type of squash for this recipe.
    For added richness, consider including diced potatoes and cooking them along with the zucchini.
    Adjust the spices to your taste preference.
    If you prefer a thinner soup, add more hot water until desired consistency is reached.
    Nutritional Benefits:
    Zucchini: Low in calories and rich in vitamins A and C.
    Onion and Garlic: Provide antioxidants and have anti-inflammatory properties.
    Cream Cheese: Adds creaminess and is a good source of calcium.
    Dietary Information:
    Vegetarian
    Gluten-free if served without croutons or with gluten-free croutons
    Storage:
    Store any leftovers in an airtight container in the refrigerator for up to 2 days.
    Reheat on the stove or in the microwave before serving.
    Why You’ll Love This Recipe:
    Rich Flavor: The combination of zucchini, cream cheese, and spices creates a deliciously rich and creamy soup.
    Easy to Make: Simple steps and common ingredients make this recipe accessible.
    Nutritious: Packed with fresh vegetables and wholesome ingredients.
    Versatile: Enjoy it as a light lunch, dinner, or appetizer.
    Conclusion:
    This Creamy Zucchini Soup is a perfect addition to your recipe collection. It’s easy to make, packed with flavor, and provides a comforting and nutritious meal for any time of the year. Enjoy this delicious soup with your family and friends, and savor the rich, creamy goodness that will warm your heart and soul. Bon appétit! 1f60b

    Frequently Asked Questions (FAQ):
    Can I use other types of squash?
    Yes, you can substitute zucchini with other squashes like yellow squash or butternut squash.
    How can I make the soup vegan?
    Substitute cream cheese with a vegan cream cheese alternative or coconut cream.
    Can I freeze the soup?
    Yes, you can freeze the soup in an airtight container for up to 3 months. Thaw and reheat before serving.
    What can I use instead of cream cheese?
    You can use Greek yogurt for a tangy flavor or cashew cream for a dairy-free option.
    Can I add other vegetables?
    Absolutely! Carrots or celery can be added for more flavor and nutrition.
    How do I make the soup thicker?
    You can add more cream cheese or blend in a few cooked potatoes for thickness.
    What herbs can I add for more flavor?
    Fresh herbs like thyme or dill would complement the soup beautifully.
    Is this soup gluten-free?
    Yes, it is gluten-free if served without croutons or with gluten-free croutons.
    How long can I store leftovers?
    Leftovers can be stored in an airtight container in the refrigerator for up to 2 days.
    Can I use a regular blender instead of an immersion blender?
    Yes, just let the soup cool slightly before transferring it to a regular blender to puree.
  • Cheesy Potato Skillet Recipe

    Cheesy Potato Skillet Recipe

    Welcome to a recipe for Cheesy Potato Skillet, a comforting and delicious dish that’s perfect for breakfast, brunch, or as a side dish for dinner. This skillet combines tender potatoes, savory cheese, and a mix of flavorful ingredients to create a satisfying and hearty meal. Follow this detailed guide to create a mouthwatering cheesy potato skillet.

    Ingredients

    Before we start, let’s gather all the necessary ingredients for the cheesy potato skillet.

    For the Cheesy Potato Skillet:

    • 2 pounds potatoes (Yukon Gold or russet), peeled and diced
    • 1 medium onion, finely chopped
    • 2 cloves garlic, minced
    • 1 cup bell peppers, diced (red, green, or yellow)
    • 2 tablespoons olive oil
    • 1 teaspoon salt
    • 1/2 teaspoon black pepper
    • 1 teaspoon smoked paprika (optional)
    • 1 teaspoon dried thyme (optional)
    • 1 1/2 cups shredded cheddar cheese (or your favorite cheese)
    • 1/2 cup grated Parmesan cheese
    • 2 tablespoons fresh parsley, chopped (optional)
    • 4 slices of bacon, cooked and crumbled (optional)

    Instructions

    Step 1: Preparing the Ingredients

    1. Prepare the Potatoes: Peel and dice the potatoes into small, evenly-sized pieces. This ensures they cook evenly and become tender.
    2. Chop the Vegetables: Finely chop the onion, mince the garlic, and dice the bell peppers.

    Step 2: Cooking the Potatoes

    1. Heat the Skillet: In a large skillet, heat the olive oil over medium-high heat.
    2. Cook the Onions and Peppers: Add the chopped onion and bell peppers to the skillet. Cook for 3-4 minutes until they begin to soften. Add the minced garlic and cook for an additional 1-2 minutes until fragrant.
    3. Add the Potatoes: Add the diced potatoes to the skillet. Season with salt, black pepper, smoked paprika, and dried thyme. Stir to combine.
    4. Cover and Cook: Reduce the heat to medium, cover the skillet, and cook for 15-20 minutes, stirring occasionally, until the potatoes are tender and golden brown. If the potatoes start to stick, add a splash of water or broth to the skillet.

    Step 3: Adding the Cheese

    1. Add the Cheese: Once the potatoes are tender and golden, sprinkle the shredded cheddar cheese and grated Parmesan cheese evenly over the potatoes. Cover the skillet again and cook for an additional 2-3 minutes, until the cheese is melted and bubbly.
    2. Add the Bacon (Optional): If using bacon, sprinkle the cooked and crumbled bacon over the melted cheese.

    Step 4: Serving the Cheesy Potato Skillet

    1. Garnish and Serve: Remove the skillet from the heat. Sprinkle the chopped fresh parsley over the top for a burst of color and freshness.
    2. Enjoy: Serve the cheesy potato skillet hot, directly from the skillet. This dish pairs well with eggs, grilled meats, or as a standalone meal.

    Tips for Perfect Cheesy Potato Skillet

    • Even Dice: Ensure the potatoes are diced into small, even pieces for consistent cooking.
    • Stir Occasionally: Stir the potatoes occasionally to prevent sticking and ensure even browning.
    • Melt the Cheese: Covering the skillet helps melt the cheese evenly and creates a deliciously gooey topping.

    Variations and Add-Ins

    • Spicy Kick: Add a pinch of red pepper flakes or diced jalapeños for a spicy version.
    • Vegetarian: Skip the bacon and add more vegetables like mushrooms, zucchini, or spinach.
    • Different Cheeses: Use a mix of cheeses such as mozzarella, Monterey Jack, or Gouda for a different flavor profile.

    Pairing Suggestions

    Enhance your cheesy potato skillet experience with complementary sides and beverages:

    • Sides: Serve with a fresh green salad, scrambled eggs, or grilled sausages.
    • Beverages: Pair with a glass of orange juice, coffee, or a light beer.
    • Dessert: Finish with a light dessert such as fruit salad, yogurt parfait, or a slice of pound cake.

    Troubleshooting Common Issues

    • Undercooked Potatoes: If the potatoes are not fully cooked, cover the skillet and cook for an additional 5-10 minutes, stirring occasionally.
    • Sticking: If the potatoes start to stick to the skillet, add a bit more oil or a splash of water/broth.
    • Cheese Not Melting: Ensure the skillet is covered after adding the cheese to help it melt evenly.

    The Joy of Cooking: A Comforting Experience

    Making a cheesy potato skillet is not only about the delicious result but also the joy of creating a comforting and satisfying meal. Here are some tips to make your cooking experience even more enjoyable:

    • Music and Ambiance: Play your favorite music or a relaxing playlist to set a cheerful mood in the kitchen.
    • Involve Others: Invite family or friends to help with the preparation. Cooking together can be a fun and bonding experience.
    • Savor the Process: Enjoy the aromas, textures, and flavors as you prepare and cook this delightful skillet.
  • Smothered Chicken Thighs with Gravy over Rice

    Smothered Chicken Thighs with Gravy over Rice

    Smothered Chicken Thighs with Gravy over Rice

    Ingredients:

    For the Chicken:

    • 6 bone-in, skin-on chicken thighs

    • Salt and black pepper (to taste)

    • 1 tsp garlic powder

    • 1 tsp onion powder

    • 1 tsp paprika

    • 1 tbsp olive oil

    • 1 tbsp butter

    For the Gravy:

    • 1 small onion, finely chopped

    • 2 cloves garlic, minced

    • 2 tbsp all-purpose flour

    • 1 ½ cups chicken broth

    • ½ cup heavy cream or milk

    • ½ tsp thyme (optional)

    • Salt and pepper to taste

    • 1 small tomato, diced (optional, based on image)

    For the Rice:

    • 1 ½ cups long grain white rice

    • 3 cups water or chicken broth

    • 1 tbsp butter or oil

    • Salt to taste

    Garnish:

    • Chopped fresh parsley


    Instructions:

    Step 1: Prepare the Chicken

    1. Pat chicken thighs dry. Season with salt, pepper, garlic powder, onion powder, and paprika.

    2. In a large skillet over medium-high heat, heat the olive oil and butter.

    3. Sear the chicken thighs, skin-side down, for about 5-7 minutes until golden brown. Flip and cook another 5 minutes.

    4. Remove chicken and set aside (it will finish cooking in the gravy).

    Step 2: Make the Gravy

    1. In the same skillet, reduce heat to medium. Add chopped onions and sauté until translucent.

    2. Add garlic and cook for 1 more minute.

    3. Sprinkle in the flour and whisk for 1-2 minutes to form a roux.

    4. Gradually add chicken broth while whisking until smooth.

    5. Stir in cream (or milk), thyme, and diced tomatoes if using. Simmer for 2-3 minutes.

    Step 3: Smother the Chicken

    1. Return chicken to the skillet, skin-side up. Spoon gravy over the top.

    2. Reduce heat to low, cover, and simmer for 25–30 minutes until chicken is cooked through and tender.

    3. Remove lid for the last 5 minutes to thicken the gravy.

    Step 4: Cook the Rice

    1. While the chicken cooks, rinse rice until water runs clear.

    2. In a saucepan, bring water or broth to a boil. Add butter and salt.

    3. Stir in rice, cover, and reduce heat to low. Cook for 18 minutes or until liquid is absorbed.

    4. Remove from heat and let sit 5 minutes before fluffing with a fork.

    Step 5: Serve

    1. Plate a bed of rice.

    2. Spoon chicken thighs and gravy over the rice.

    3. Garnish with chopped fresh parsley.

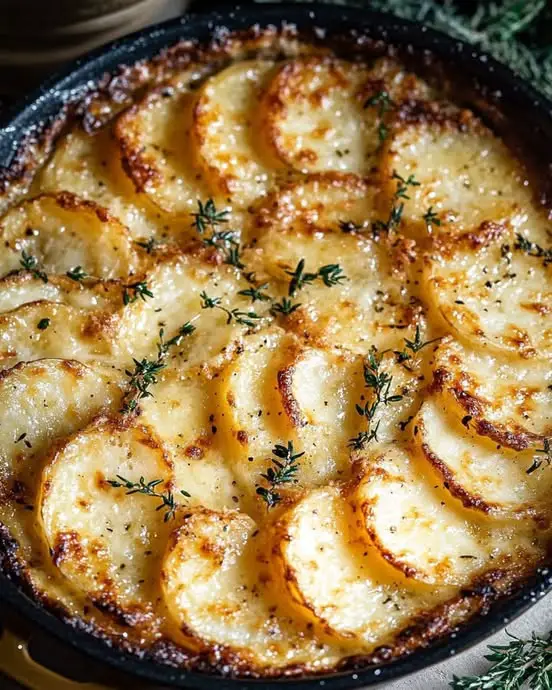
  • Classic Potato Gratin Recipe

    Classic Potato Gratin Recipe

    Classic Potato Gratin Recipe

    Ingredients:

    • 2 lbs (900g) Yukon Gold or Russet potatoes, thinly sliced

    • 2 cups (500ml) heavy cream

    • 1 cup (240ml) whole milk

    • 2 cloves garlic, minced

    • 1 ½ cups (150g) Gruyère cheese, shredded (or a mix of Gruyère and Parmesan)

    • 2 tbsp unsalted butter, for greasing

    • 1 tsp salt

    • ½ tsp black pepper

    • ¼ tsp nutmeg (optional)

    • Fresh thyme sprigs (for garnish)


    Instructions:

    1. Prep the Oven:

      • Preheat oven to 375°F (190°C).

      • Grease a 9×13-inch baking dish or oven-safe skillet with butter.

    2. Prepare Cream Mixture:

      • In a saucepan, heat the cream, milk, garlic, salt, pepper, and nutmeg over medium heat until warm (not boiling). Stir and set aside.

    3. Assemble the Gratin:

      • Layer half of the potato slices in the dish, overlapping slightly.

      • Pour half of the cream mixture over the potatoes.

      • Sprinkle with half of the cheese.

      • Repeat with the remaining potatoes, cream mixture, and cheese.

    4. Bake:

      • Cover loosely with foil and bake for 45 minutes.

      • Remove foil and bake an additional 20-25 minutes, until golden and bubbling.

    5. Cool & Garnish:

      • Let rest for 10 minutes before serving.

      • Garnish with fresh thyme.

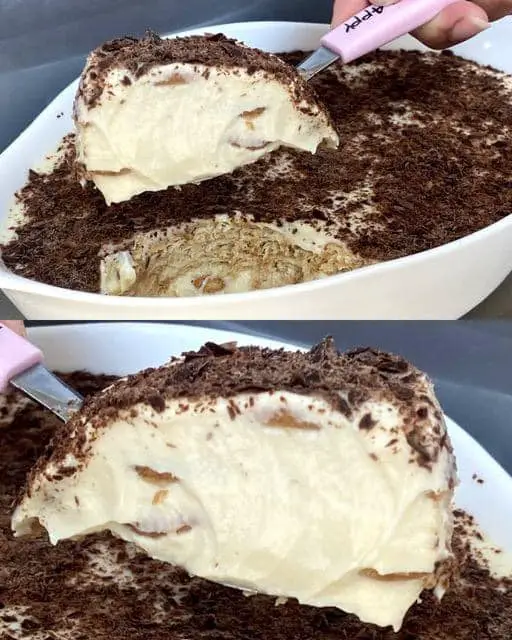
  • No-Bake 5-Ingredient Lemon Biscuit Dessert

    No-Bake 5-Ingredient Lemon Biscuit Dessert

    No-Bake 5-Ingredient Lemon Biscuit Dessert

    Servings: 8–10 | Prep Time: 15 minutes | Chill Time: 1–2 hours
    A creamy, tangy, and indulgent dessert made with just 5 ingredients. No oven needed—just mix, layer, and chill!


    Ingredients

    • 1 can (14 oz / 395 g) sweetened condensed milk

    • 1 package (7 oz / 200 g) Maria biscuits (or graham crackers)

    • 1 carton (7 oz / 200 g) heavy cream

    • 1 cup (8.5 fl oz / 250 ml) whole milk

    • Juice of 1 lemon (approx. 0.63 oz / 18 g or 1 ½ tablespoons)

    • Optional garnish: Grated chocolate or lemon zest


    Instructions

    1. Prepare the Cream Mixture

    • In a large bowl, combine the sweetened condensed milk, heavy cream, whole milk, and fresh lemon juice.

    • Whisk or beat the mixture using a hand mixer for 2–3 minutes until the cream thickens slightly and becomes silky.

    • Taste and adjust lemon juice to your liking (it should be lightly tangy, not overpowering).

    2. Layer the Dessert

    • Use a deep glass or ceramic dish (about 8×8 inches or similar).

    • Pour a thin layer of the cream into the bottom of the dish and spread it evenly.

    • Briefly dip each Maria biscuit in milk (just a quick dip—don’t soak) and place them over the cream in a single layer.

    • Add another layer of cream over the biscuits, spreading to cover completely.

    • Repeat the layering process: cream → dipped biscuits → cream until all ingredients are used.

    • Finish with a layer of cream on top.

    3. Decorate

    • Sprinkle grated chocolate, lemon zest, or crushed biscuit crumbs on the top for texture and presentation.

    • For a fancier finish, pipe a border of whipped cream or use mint leaves and thin lemon slices.

    4. Chill

    • Cover the dish with plastic wrap or a lid.

    • Refrigerate for at least 1 hour, preferably 4+ hours or overnight for best results.

    • This gives the biscuits time to soften and absorb the flavors.


    Serving

    • Slice and serve chilled.

    • It cuts beautifully once set and has a mousse-like consistency.

    • Great for summer gatherings, potlucks, or easy weeknight desserts.


    Tips & Variations

    • Sweeter version: Add 1 tablespoon powdered sugar to the cream if you prefer more sweetness.

    • Fruit variation: Add thin layers of strawberries or bananas between the biscuit layers.

    • Coconut twist: Sprinkle shredded coconut on top instead of chocolate.

    • Dairy-free version: Use coconut cream and almond or oat milk with vegan condensed milk.


    Storage

    • Refrigerator: Keeps well for up to 4 days in an airtight container.

    • Freezing: Not ideal, as the texture of the cream may separate.

  • Garlic Chicken and Parmesan Meatloaf

    Garlic Chicken and Parmesan Meatloaf

    Garlic Chicken and Parmesan Meatloaf 1f9c41f3571f60b
    Ingredients 1f6d2
    700g ground chicken
    125g breadcrumbs
    125g grated Parmesan cheese
    125g grated mozzarella cheese (plus more for garnish)
    3 cloves garlic, minced
    1 egg
    60g milk
    1 tablespoon chopped fresh parsley
    1 teaspoon Italian seasoning
    Salt and black pepper, to taste
    Chopped fresh parsley (for garnish)
    Directions ‍
    Preheat oven: Preheat oven to 190°C (375°F) and line a baking sheet with parchment paper or lightly grease a loaf pan. Meatloaf Preparation: In a large bowl, combine ground chicken, breadcrumbs, Parmesan cheese, mozzarella cheese, garlic, egg, milk, parsley, Italian seasoning, salt, and pepper. Mix until well blended.
    Shaping and Baking: Form the mixture into a loaf on the prepared baking sheet (or press it into the pan). Bake for 35 to 40 minutes, until cooked through and firm.
    Add Cheese: Remove from oven and sprinkle with shredded mozzarella cheese. Return to oven and bake for an additional 5 to 7 minutes, or until the cheese is melted and bubbly.
    Serving: Let the meatloaf rest for 5 minutes before slicing. Garnish with fresh parsley and serve with your favorite sides. Prep Time: 10 min ⏱️
    Cook Time: 40 min 1f373
    Total Time: 50 min ️
    Servings: 4 to 6 ️

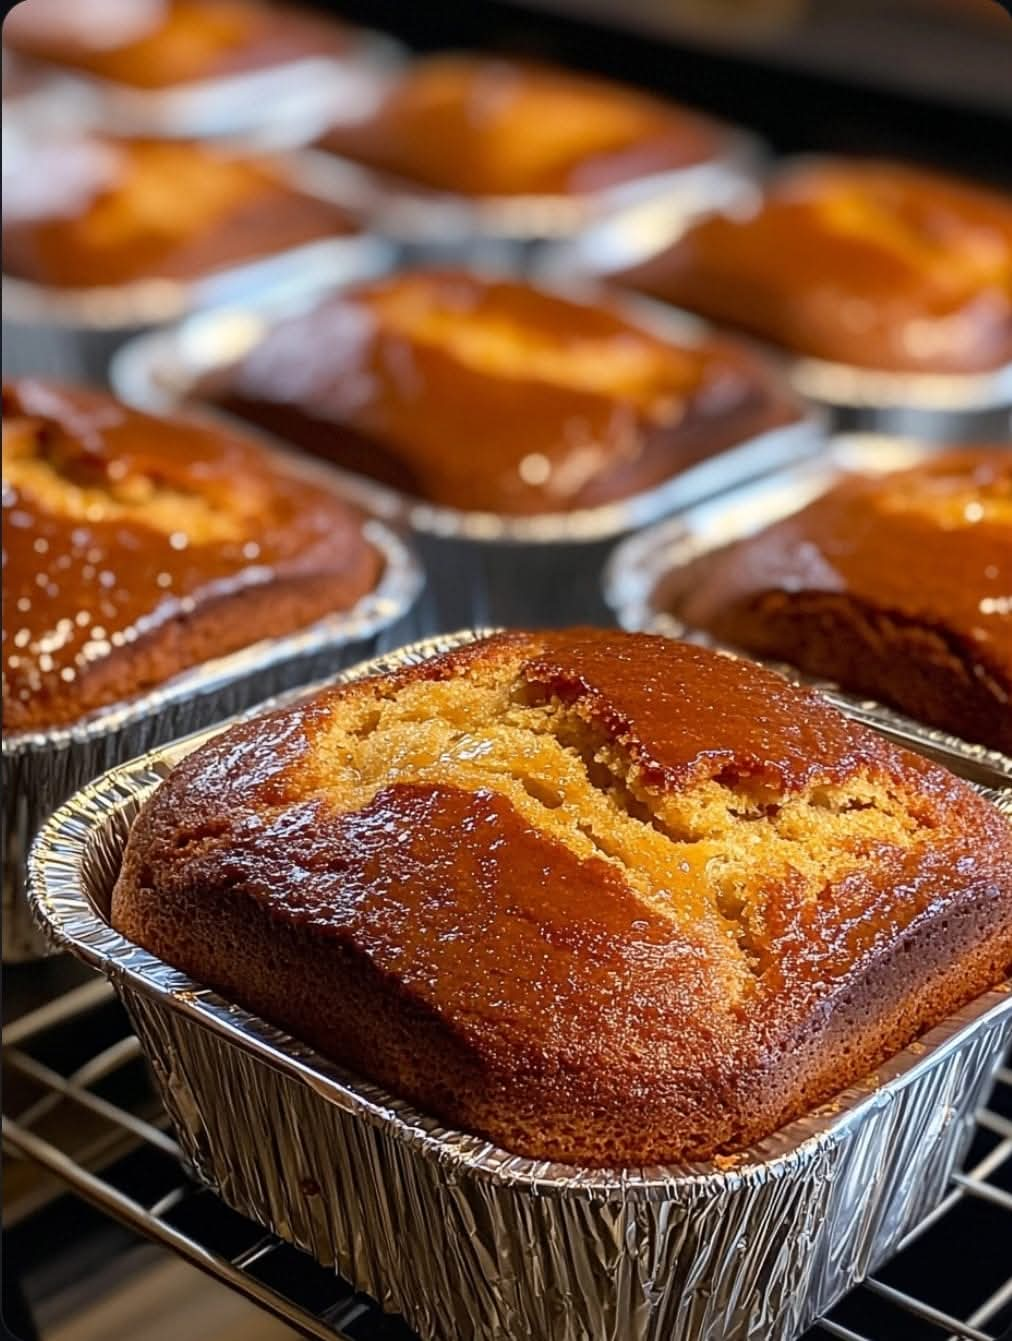
  • Moist Pound Cake (Mini Loaves) Recipe

    Moist Pound Cake (Mini Loaves) Recipe

    Moist Pound Cake (Mini Loaves) Recipe

    Ingredients:

    • 1 cup (227 g) unsalted butter, room temperature

    • 1½ cups (300 g) granulated sugar

    • 4 large eggs

    • 2 tsp vanilla extract

    • 2 cups (250 g) all-purpose flour

    • ½ tsp baking powder

    • ¼ tsp salt

    • ½ cup (120 ml) whole milk or buttermilk

    Optional Glaze:

    • ¼ cup (60 ml) water

    • ¼ cup (50 g) sugar

    • 1 tsp vanilla or lemon juice (optional)


    Instructions:

    1. Preheat oven to 325°F (165°C). Grease mini loaf pans or line with foil containers.

    2. Cream butter and sugar: Beat butter and sugar together until light and fluffy (3–5 minutes).

    3. Add eggs one at a time, beating well after each. Stir in vanilla.

    4. Combine dry ingredients: In a separate bowl, whisk together flour, baking powder, and salt.

    5. Add dry and wet ingredients alternately to the butter mixture, starting and ending with the flour. Mix just until combined.

    6. Pour batter into mini loaf pans (fill ¾ full). Smooth the tops.

    7. Bake for 35–45 minutes or until a toothpick inserted comes out clean.

    8. Prepare glaze (optional): Heat sugar and water until sugar dissolves. Stir in vanilla or lemon juice.

    9. Glaze while warm: Brush syrup over the hot cakes for a shiny, moist finish.

    10. Cool in pans for 10–15 minutes, then remove and let cool completely on a rack.

  • Chocolate Chip Cookies

    Chocolate Chip Cookies

    Ingredients :
    250 g of flour
    125 g of soft butter
    100g of powdered sugar
    50 g of brown sugar
    1 œuf
    1 bag of chemical yeast
    1 bag of vanilla sugar (or 1 teaspoon of vanilla extract)
    150 gm of chocolate chips
    A pinch of salt.
    Instructions:
    Preparation of the dough:
    Preheat the oven to 180°C and cover a baking sheet with sulfurized paper.
    In a salad bowl, beat soft butter with powdered sugar and brown sugar until you achieve a creamy mixture.
    Add the egg and vanilla sugar, then mix well until combined is even.
    Incorporating dry ingredients:
    In another bowl, mix flour, yeast chemical and a pinch of salt.
    Combine the flour mixture with the butter and egg mixture, mixing until you get a homogeneous batter.
    Adding chocolate chips:
    Add the chocolate chips to the batter and mix to distribute them well.
    Shaping cookies:
    Form dough balls about 2 to 3 cm in diameter and arrange them on the baking tray, spacing them out slightly as they will spread out as they cook.
    Lightly flatten each ball of dough with the palm of your hand to give them the shape of biscuits.
    Cooking:
    Bake biscuits for about 10-12 minutes, until slightly golden brown on the edges. The biscuits must be moist in the center.
    Let them cool on the slab for a few minutes before transferring to a grill to let them cool completely.
    Tips:
    Preservation: These biscuits keep well in an airtight container for several days.
    Variations: You can add nuts, hazelnuts or toffee pieces for an even more treat.
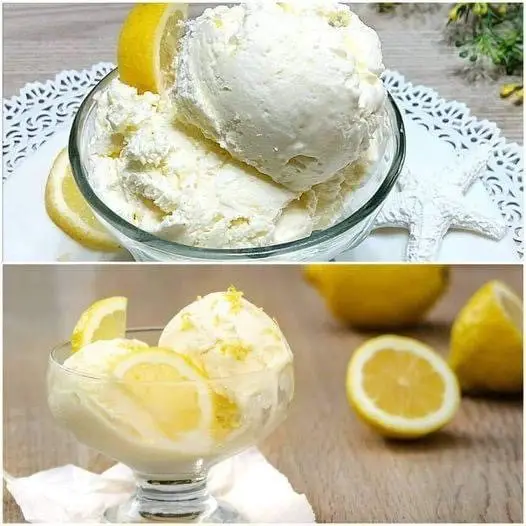
  • Lemon Ice Cream

    Lemon Ice Cream

    Here’s the full recipe for Lemon Ice Cream along with the method and Weight Watchers points calculation:
    Ingredients:
    2 cups heavy cream, cold
    1 can (14 oz) sweetened condensed milk
    Juice from 2-3 lemons (about 1/3 to 1/2 cup, depending on desired lemon flavor)
    Zest from 2 lemons
    Method:
    1. Prepare the Lemons:
    Zest the lemons and then juice them to get about 1/3 to 1/2 cup of fresh lemon juice. Set aside.
    2. Whip the Cream:
    In a large mixing bowl, whip the cold heavy cream using a hand mixer or stand mixer. Whip on medium-high speed until stiff peaks form, usually 3-4 minutes.
    3. Mix Condensed Milk and Lemon:
    In a separate bowl, mix the sweetened condensed milk with the lemon juice and lemon zest. Stir until well combined.
    4. Combine Mixtures:
    Gently fold the whipped cream into the condensed milk and lemon mixture. Fold until the mixture is smooth and well-combined.
    5. Freeze:
    Pour the mixture into a loaf pan or any freezer-safe container. Cover with plastic wrap or a lid.
    Freeze for at least 6 hours, or overnight, until fully set.
    6. Serve:
    Once frozen, scoop and enjoy your creamy lemon ice cream!
    Points Calculation (per serving):
    Here’s the breakdown of the points based on the ingredients:
    Heavy cream (2 cups): 72 points
    Sweetened condensed milk (1 can): 28 points
    Lemon juice and zest: 0 points
    Total: 100 points for the entire recipe.
    If you divide this into 10 servings, each serving will be 10 points. Adjust the serving size if needed for different point values.
  • Strawberry Vanilla Bean Ice Cream

    Strawberry Vanilla Bean Ice Cream

    Strawberry Vanilla Bean Ice Cream

    This homemade ice cream blends the natural sweetness of strawberries with the rich, aromatic touch of vanilla bean — a refreshing treat perfect for any occasion!

    ## Ingredients:
    – 300g fresh strawberries, diced
    – 100g granulated sugar (for strawberries)
    – 1 vanilla bean
    – 480ml heavy cream
    – 240ml whole milk
    – 100g granulated sugar (for cream mixture)
    – 4 large egg yolks
    – 1 tsp vanilla extract

    ## Instructions:

    ### 1. Prepare the strawberries:
    In a bowl, mix 300g of diced strawberries with 100g of sugar. Let sit for 30 minutes to release juices, then gently mash with a fork.

    ### 2. Infuse the vanilla cream:
    Split the vanilla bean lengthwise and scrape out the seeds.
    In a saucepan, combine 480ml heavy cream, 240ml whole milk, the vanilla seeds, and the bean pod. Heat until just simmering, then remove from heat and steep for 15 minutes. Discard the vanilla pod.

    ### 3. Make the custard base:
    In a separate bowl, whisk 4 egg yolks with 100g sugar until pale and slightly thickened.
    Gradually whisk the warm cream mixture into the yolks, stirring constantly to avoid cooking the eggs.

    ### 4. Thicken the mixture:
    Return the custard to the saucepan and cook over low heat, stirring constantly, until it thickens enough to coat the back of a spoon (do not boil).
    Remove from heat and stir in 1 tsp vanilla extract. Let cool to room temperature.

    ### 5. Combine with strawberries:
    Fold the mashed strawberries and their juices into the cooled custard mixture.

    ### 6. Churn the ice cream:
    Pour the mixture into an ice cream machine and churn according to the manufacturer’s instructions until it reaches a soft-serve consistency.

    ### 7. Freeze and serve:
    Transfer the ice cream to a container and freeze for at least 4 hours. Scoop and enjoy!

    ## Prep Time:
    15 minutes | **Total Time:** ~4 hours (including freezing)

    ## Servings:
    6–8

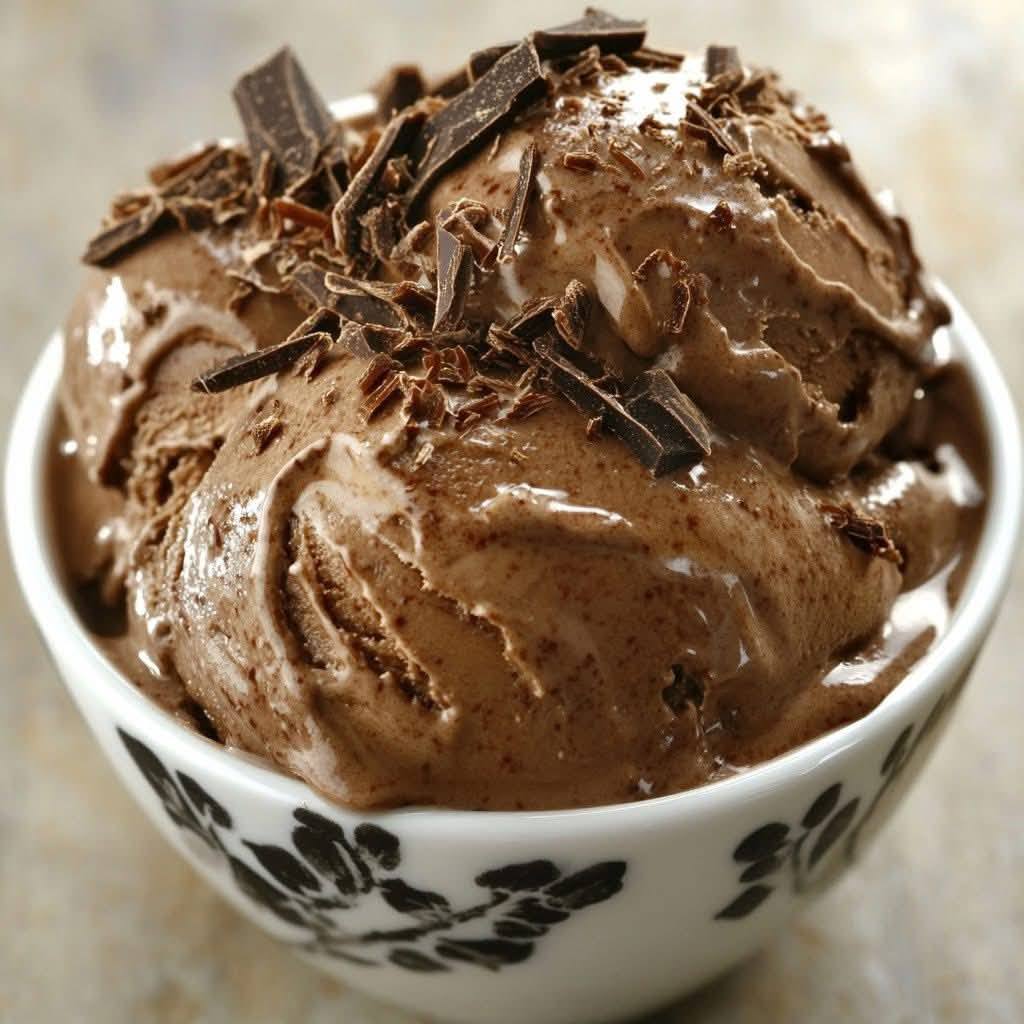
  • Homemade Chocolate Ice Cream Recipe

    Homemade Chocolate Ice Cream Recipe

    Homemade Chocolate Ice Cream Recipe

    Ingredients:

    • 2 cups heavy cream

    • 1 cup whole milk

    • ¾ cup granulated sugar

    • ¾ cup unsweetened cocoa powder

    • 100g (3.5 oz) dark chocolate, chopped

    • 1 teaspoon vanilla extract

    • Pinch of salt

    Optional Toppings:

    • Chocolate shavings (as in the photo)

    • Chocolate chips or chunks

    • Crushed nuts or cookie pieces


    Instructions:

    1. Heat the Base:

      • In a medium saucepan over medium heat, whisk together the cocoa powder, sugar, and salt.

      • Slowly whisk in the milk until smooth.

      • Add the chopped dark chocolate and stir constantly until melted and smooth (do not boil).

    2. Add Cream and Vanilla:

      • Remove from heat.

      • Stir in the heavy cream and vanilla extract.

      • Chill the mixture in the refrigerator for at least 2 hours or until very cold (overnight is best).

    3. Churn:

      • Pour the chilled mixture into your ice cream maker.

      • Churn according to the manufacturer’s instructions (usually about 20–25 minutes).

    4. Freeze:

      • Transfer the churned ice cream to an airtight container.

      • Freeze for at least 4 hours or until firm.

    5. Serve:

      • Scoop into bowls and top with chocolate shavings or your favorite mix-ins.