Author: Admin

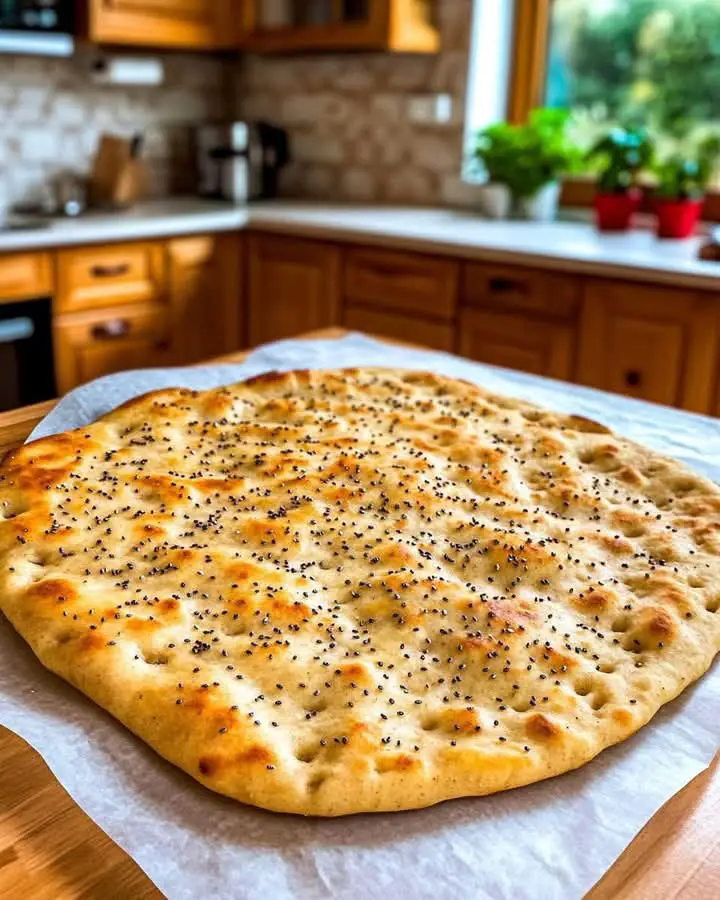
  • Simple Almond Chia Flatbread for Any Topping

    Simple Almond Chia Flatbread for Any Topping

    Simple Almond Chia Flatbread for Any Topping


    Ingredients:

    • 1 cup (100g) almond flour, finely ground
    • 2 tablespoons (20g) chia seeds
    • 1/4 teaspoon salt
    • 1/4 teaspoon dried herbs (like rosemary or thyme, optional)
    • 1/3 cup (80ml) water
    • 1 tablespoon (15ml) olive oil


    Directions:

    1. Preheat oven to 375°F (190°C). Line a baking sheet with parchment paper.

    2. In a mixing bowl, combine the almond flour, chia seeds, salt, and dried herbs (if using).

    3. Add the water and olive oil. Stir until a sticky dough forms. Let the dough rest for 5-10 minutes to allow the chia seeds to gel.

    4. Transfer the dough to the parchment-lined baking sheet. Place another sheet of parchment paper on top.

    5. Using a rolling pin, roll the dough out very thinly between the parchment sheets into a large rectangle or circle (aim for about 1/8 inch or 3mm thickness).

    6. Remove the top parchment paper. You can score the dough into desired flatbread sizes if you wish, or leave it as one large piece.

    7. Bake for 10-15 minutes, or until the edges are golden and the center is firm and slightly browned.

    8. Let it cool on the baking sheet for a few minutes before carefully transferring to a wire rack to cool completely. It will become crispier as it cools. Break or cut into pieces if scored.


    Recipe Information:

    Preparation Time: 10 min | Cooking Time: 12 min | Total Time: 22 min (+ cooling time) | Calories per Serving: approx. 150 (1/4 of recipe) | Number of Servings: 4


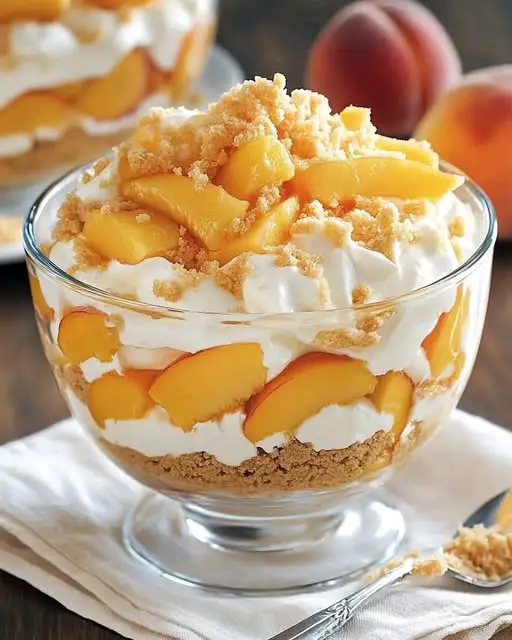
  • Peach Cheesecake Trifle Recipe

    Peach Cheesecake Trifle Recipe

    Peach Cheesecake Trifle Recipe

    Ingredients:

    Crust Layer:

    • 1 ½ cups graham cracker crumbs

    • ¼ cup granulated sugar

    • 6 tbsp unsalted butter, melted

    Cheesecake Layer:

    • 8 oz cream cheese, softened

    • 1 cup powdered sugar

    • 1 tsp vanilla extract

    • 2 cups heavy whipping cream (or use 8 oz whipped topping like Cool Whip)

    Peach Layer:

    • 4–5 fresh ripe peaches, peeled and sliced (or use 2 cans of peaches, drained)


    Instructions:

    1. Make the crust layer:

      • In a bowl, mix graham cracker crumbs, sugar, and melted butter until well combined.

      • Press a layer of the mixture into the bottom of your trifle bowl or dessert glasses.

    2. Prepare the cheesecake layer:

      • Beat the softened cream cheese with powdered sugar and vanilla until smooth.

      • In a separate bowl, whip the heavy cream to stiff peaks (or skip if using pre-made whipped topping).

      • Gently fold the whipped cream into the cream cheese mixture until combined.

    3. Assemble the trifle:

      • Layer the crust, cheesecake filling, and sliced peaches in the trifle bowl.

      • Repeat the layers until you reach the top.

      • Finish with extra peach slices and a sprinkle of graham cracker crumbs on top.

    4. Chill and serve:

      • Refrigerate for at least 2–3 hours before serving to allow it to set and flavors to meld.

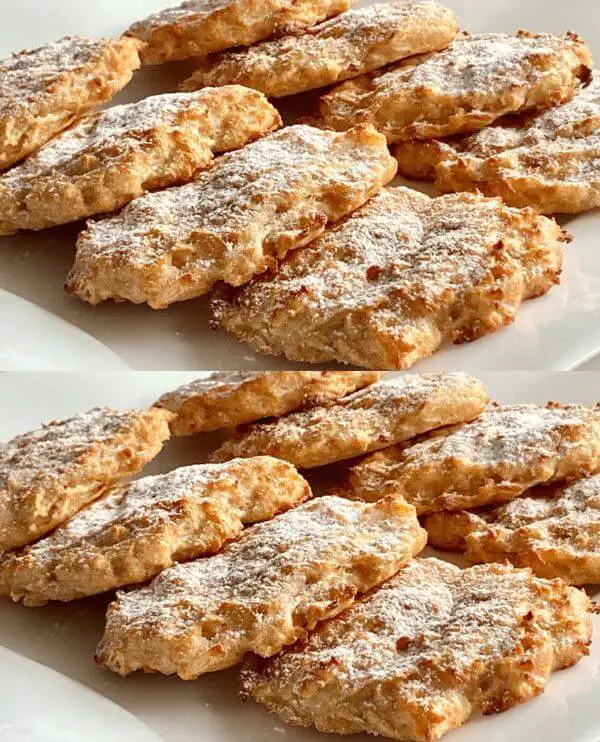
  • The Healthiest Apple Biscuit!!! Delicious Weight Loss Recipe

    The Healthiest Apple Biscuit!!! Delicious Weight Loss Recipe

    The Healthiest Apple Biscuit!!! Delicious Weight Loss Recipe

    Ingredients Needed

    To whip up a batch of these delectable biscuits, you’ll need:

    • Cottage cheese: 200g
    • Apple: 1
    • Egg: 1
    • Whole Wheat Flour: 2.5 tablespoons
    • Baking Powder: ½ teaspoon
    • Sweetener: To taste
    • Salt: A pinch

    Step-by-Step Cooking Method

    1. Preparation of the Egg Mixture: In a small bowl, beat the egg with salt and a little sugar or sweetener of your choice.
    2. Incorporating Cottage Cheese: Add cottage cheese to the egg mixture and mash it with a fork until smooth. Alternatively, you can blend it in a blender for a smoother consistency.
    3. Grating and Adding Apple: Peel the apple and grate it using a coarse grater. Add the grated apple to the egg and cottage cheese mixture.
    4. Mixing in Flour: Gradually add whole wheat flour and baking powder to the mixture, stirring until well combined.
    5. Shaping and Baking the Biscuits: Line a baking tray with parchment paper. Spoon the dough onto the tray, shaping it into biscuits. Bake in a preheated oven at 180 degrees Celsius for about 35-40 minutes, or until golden brown.

    Nutritional Benefits of the Ingredients

    • Cottage Cheese: Rich in protein and calcium, cottage cheese aids in muscle building and bone health.
    • Apple: Packed with fiber and essential vitamins, apples promote digestion and provide a natural energy boost.
    • Egg: A source of high-quality protein, eggs help in muscle repair and satiety.
    • Whole Wheat Flour: Unlike refined flour, whole wheat flour retains the bran and germ, offering more fiber and nutrients.

    The Significance of Healthy Snacking

    Choosing healthy snacks like these apple biscuits can have a significant impact on your weight loss journey. By opting for nutritious alternatives, you can curb cravings, maintain energy levels, and support your overall health and well-being.

    Tips for Making the Recipe Healthier

    For a healthier version of this recipe, you can:

    • Use low-fat cottage cheese or Greek yogurt as a substitute.
    • Experiment with different varieties of apples for added flavor and texture.
    • Limit the amount of sweetener or opt for natural alternatives like honey or maple syrup.
    • Practice portion control and enjoy these biscuits in moderation as part of a balanced diet.

    Serving Suggestions

    These healthiest apple biscuits pair perfectly with a cup of herbal tea or a glass of almond milk. You can also enjoy them with a dollop of Greek yogurt or a spread of nut butter for added protein and flavor.

    Conclusion

    In conclusion, the healthiest apple biscuit is not only a delicious treat but also a nutritious snack option that can support your weight loss goals. With wholesome ingredients and simple preparation, these biscuits are sure to become a staple in your healthy eating repertoire.


    FAQs (Frequently Asked Questions)

    1. Can I use regular flour instead of whole wheat flour?
      • While whole wheat flour offers more nutritional benefits, you can use regular flour as a substitute if preferred. However, keep in mind that whole wheat flour adds fiber and nutrients to the recipe.
    2. Can I omit the sweetener altogether?
      • Yes, you can omit the sweetener or reduce the amount according to your preference. The natural sweetness of the apple adds flavor to the biscuits.
    3. How should I store the apple biscuits?
      • Store the biscuits in an airtight container at room temperature for up to three days. For longer storage, you can refrigerate them for up to a week or freeze them for up to three months.
    4. Can I add nuts or seeds to the recipe?
      • Absolutely! Feel free to customize the recipe by adding chopped nuts, seeds, or dried fruits for extra crunch and nutrition.
    5. Are these biscuits suitable for individuals with dietary restrictions?
      • Yes, these apple biscuits can be enjoyed by individuals following gluten-free, vegetarian, and low-carb diets. However, always check the ingredients and make modifications according to your dietary needs.
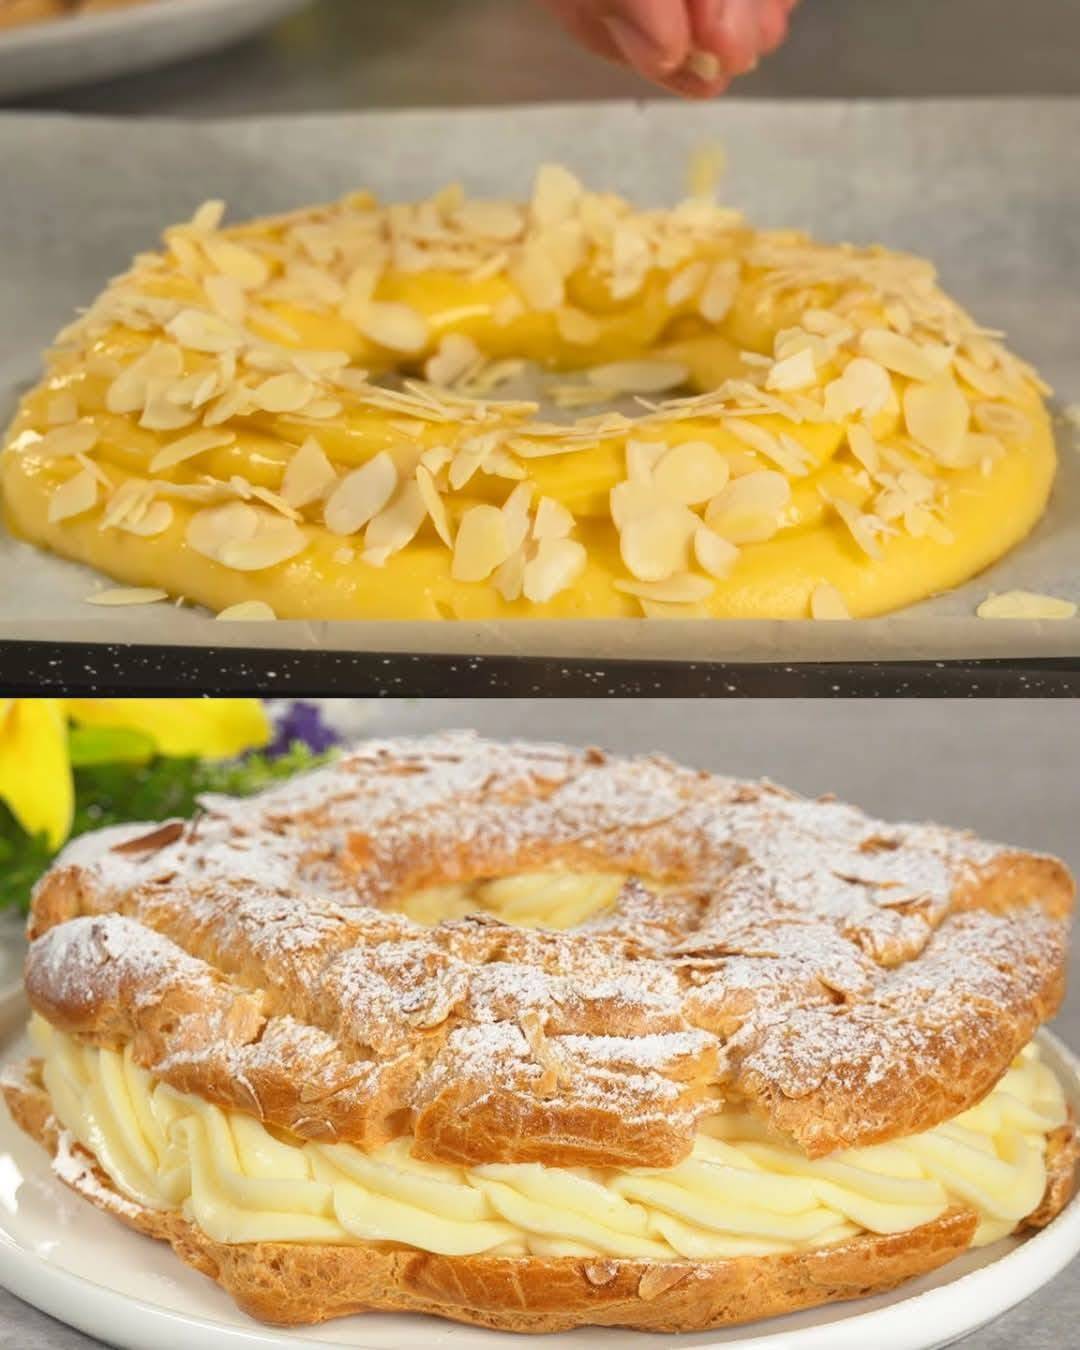
  • Almond Cream Puffs with Mascarpone Filling

    Almond Cream Puffs with Mascarpone Filling

    Almond Cream Puffs with Mascarpone Filling

    These almond cream puffs are an irresistible dessert, combining the delicate crunch of a puff pastry shell with a rich mascarpone filling. The crispy exterior and soft, creamy interior create a delightful texture contrast that will impress anyone who tries them. Whether you’re preparing them for a special occasion or simply craving a sweet treat, these puffs will surely satisfy your taste buds.

    Preparation Time

      • Preparation time: 30 minutes
      • Cooking time: 45 minutes
    • Total time: 1 hour 15 minutes

    Ingredients

    For the pastry:

      • 2 eggs
      • 120g (4 oz) sugar
      • 15g (0.5 oz) vanilla sugar
      • 500ml (17 oz) milk
      • 60g (2 oz) cornstarch
      • 100ml water
      • 100ml milk
      • 80g butter
      • 120g flour
      • 4 eggs (for adding to the dough)
      • Laminated almonds: 30g (1 oz)

    For the mascarpone filling:

    • 250g (8.8 oz) mascarpone cream cheese
    • Powdered sugar (for decorating)

    Directions

      1. Prepare the filling: In a saucepan, combine the eggs, sugar, vanilla sugar, milk, and cornstarch. Cook over medium heat, stirring constantly until the mixture starts to boil. Once it begins to thicken, cover the saucepan with plastic wrap and set aside to cool to room temperature.

      2. Prepare the dough: In a separate saucepan, combine 100ml of water and 100ml of milk with 80g of butter. Heat over low heat until the butter has completely melted. When the mixture starts to boil, add the 120g of flour and continue stirring. Bake this mixture for 2 minutes, then remove from the heat and let it cool for 5 minutes at room temperature.

      1. Incorporate the eggs: Add 4 eggs one at a time to the cooled dough, mixing thoroughly after each addition. Add the last egg slowly, ensuring the dough comes away from the spoon. This will create a thick, smooth dough.

      2. Shape the dough: Line a baking tray with parchment paper. Using a spoon or piping bag, shape the dough into small mounds on the tray. Brush the tops with the remaining egg for a golden finish, then sprinkle the laminated almonds on top.

      3. Bake the puffs: Preheat your oven to 180°C (350°F). Bake the puffs for 35 minutes or until golden brown and puffed up. Once baked, let the dough rest in the oven for an additional 10 minutes with the oven turned off and the door slightly open (about 2 cm) to ensure they retain their structure.

      1. Prepare the mascarpone filling: While the puffs are cooling, mix the mascarpone cheese with powdered sugar to taste. You can adjust the amount of sugar based on your preference for sweetness.

      2. Fill the puffs: Once the cream puffs have cooled, cut a small slit in each puff and carefully pipe in the mascarpone filling.

      3. Serve and enjoy: After filling, sprinkle a light dusting of powdered sugar on top of the cream puffs for a decorative touch. Serve immediately or store in an airtight container in the fridge.

    Nutritional Facts (Per cream puff)

      • Calories: 250 kcal
      • Protein: 6g
      • Carbohydrates: 30g
      • Fat: 15g
      • Saturated Fat: 8g
      • Cholesterol: 70mg
      • Sodium: 60mg
      • Fiber: 1g
      • Sugar: 12g

    The Origins and Popularity of the Recipe

    Cream puffs, or choux à la crème, have been a beloved dessert in European culinary tradition, particularly in France. This light, airy pastry made from choux dough, the same dough used to make éclairs, has been a staple in French pastry kitchens for centuries. The dough itself dates back to the Renaissance era, believed to have been invented by French chef Panterelli in the 16th century. It gained widespread popularity after the famous chef Marie-Antoine Carême perfected it in the 19th century.

    While cream puffs have their roots in French cuisine, they have become popular around the world, particularly in the United States, where they are often filled with whipped cream or custard and served as part of festive meals. The combination of a delicate puff pastry shell and rich cream filling is universally loved for its indulgence and light texture.

    This specific version with mascarpone filling and almond topping is a modern twist on the classic. The mascarpone cheese adds a creamy richness that balances the crunchy pastry perfectly, while the almonds add a nice nutty crunch, making the cream puffs even more delectable.

    Why You’ll Love This Recipe

    These almond cream puffs with mascarpone filling are a perfect treat for anyone who loves the combination of crispy, buttery pastry with a rich, creamy filling. The dough itself is light and airy, creating a perfect contrast to the smooth mascarpone cream inside. The almond topping adds both flavor and texture, making each bite satisfying. The beauty of this recipe lies in its balance of flavors and textures, making it a crowd-pleaser for any occasion. Whether you’re serving them at a dinner party, a special celebration, or just treating yourself, these cream puffs are sure to impress.

    Health Benefits of This Recipe

    Although cream puffs are indulgent, they do provide some health benefits when enjoyed in moderation. Mascarpone cheese, the main ingredient in the filling, is rich in calcium and can help support bone health. The almonds used as a topping are a great source of healthy fats, fiber, and protein, which can help promote heart health and regulate blood sugar levels. However, due to the rich ingredients, this dessert is high in calories, so it’s best enjoyed as an occasional treat.

    Serving Suggestions

      • For a festive gathering: Serve these cream puffs as part of a dessert buffet at your next dinner party or family gathering. Their elegant appearance will make them the star of the dessert table.
    • With a cup of tea or coffee: These puffs pair perfectly with a hot beverage like tea, coffee, or espresso, making them a great choice for an afternoon snack or a brunch treat.
    • As a standalone dessert: These puffs are rich enough to stand alone as a special dessert at the end of a meal. They don’t need any additional accompaniments, but a light dusting of powdered sugar adds an elegant touch.

    Tips

      • Choux dough texture: When making choux dough, it’s important to get the texture just right. The dough should be smooth and thick enough to hold its shape when piped. If it seems too runny, add a little more flour until the desired consistency is achieved.
    • Cooling the dough: After baking the puffs, let them cool in the oven with the door ajar to avoid deflation. This slow cooling process helps the puffs maintain their structure and remain light and airy.
    • Filling consistency: When mixing the mascarpone filling, be sure to whip it until smooth but not overly thick. The filling should be creamy and easy to pipe into the puffs.

    Variations to Try

      • Chocolate filling: For a different twist, you can fill the cream puffs with chocolate ganache or a rich chocolate mousse instead of mascarpone.
    • Fruit fillings: Add some fruit, like berries or lemon curd, to the mascarpone filling for a fresh, zesty flavor.
    • Different toppings: Instead of almonds, try other nuts like hazelnuts or pistachios, or even drizzle the puffs with a light caramel or chocolate sauce for extra sweetness.

    Conclusion

    These almond cream puffs with mascarpone filling are an elegant and delicious treat that will elevate any occasion. With their light, crispy shell and creamy, rich filling, they provide a perfect balance of flavors and textures. Whether you’re looking for a show-stopping dessert or a sweet snack, these puffs are a fantastic choice that’s sure to satisfy. Try making them at home, and you’ll have a delightful dessert that’s both impressive and incredibly delicious.

    Frequently Asked Questions

    1. Can I make the dough ahead of time? Yes, you can make the choux dough ahead of time and store it in the fridge for up to 24 hours. Just make sure to let it come to room temperature before baking.

    2. Can I freeze the cream puffs? Yes, you can freeze the baked cream puffs for up to a month. Store them in an airtight container, and when you’re ready to eat them, let them thaw at room temperature.

    3. Can I use a different filling for the cream puffs? Absolutely! You can experiment with different fillings, such as whipped cream, custard, or even pastry cream, depending on your preference.
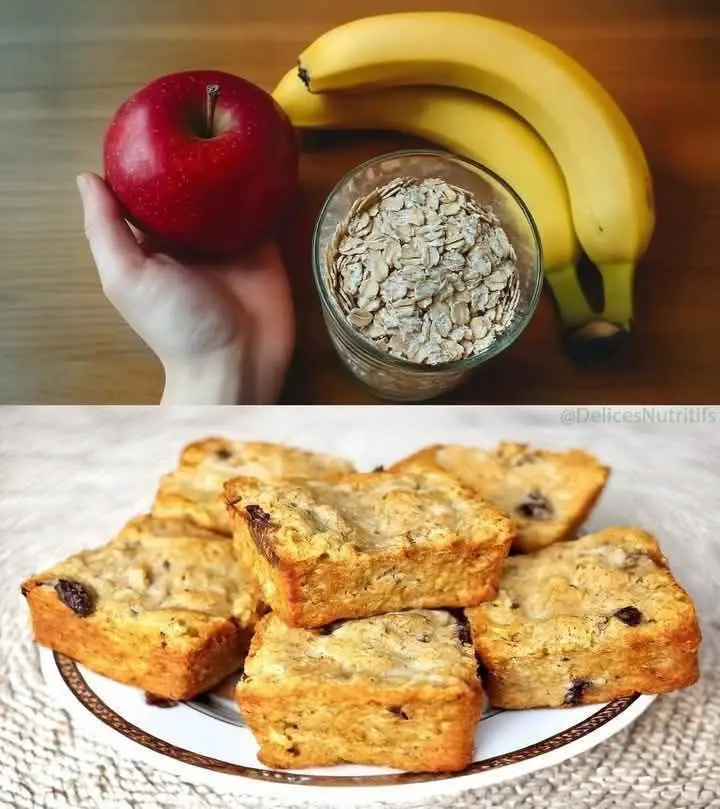
  • Banana Apple Oats Breakfast Bowl

    Banana Apple Oats Breakfast Bowl

     Banana Apple Oats Breakfast Bowl

     Ingredients:

    • 1 ripe banana (mashed)

    • 1 small apple (chopped, skin on or off as preferred)

    • 1/2 cup rolled oats

    • 1 cup milk (dairy or plant-based like almond, oat, soy)

    • 1/2 tsp cinnamon

    • 1 tbsp honey or maple syrup (optional)

    • 1 tbsp chia seeds or flaxseeds (optional for nutrition boost)

    • Nuts or nut butter (optional topping)

    • Pinch of salt

    ‍ Instructions:

    1. Cook the oats: In a saucepan, combine oats, milk, mashed banana, cinnamon, and a pinch of salt. Cook on medium heat for 5–7 minutes, stirring until thick and creamy.

    2. Add the apple: Add chopped apple pieces midway through cooking to let them soften slightly. You can also caramelize them separately in a pan with a touch of honey and cinnamon if you prefer a richer flavor.

    3. Sweeten (if needed): Stir in honey or maple syrup if you want extra sweetness.

    4. Serve & top: Pour into a bowl and top with nuts, seeds, nut butter, or a drizzle of honey. You can also add yogurt or a splash of milk for creaminess.

    ✅ Health Benefits:

     Banana:

    • Rich in potassium — great for heart health.

    • Natural sweetness + good for digestion (thanks to fiber).

    • Contains tryptophan, which may help mood.

     Apple:

    • High in antioxidants and dietary fiber.

    • Supports gut health.

    • Low in calories but filling.

     Oats:

    • Great source of beta-glucan (soluble fiber) that helps reduce cholesterol.

    • Keeps you full longer — good for weight control.

    • Balances blood sugar.

     Extras like Chia/Flax/Nuts:

    • High in omega-3 fatty acids and fiber.

    • Adds texture, protein, and healthy fats.

     Tips:

    • Use overnight oats method if you prefer no-cook: mix everything (except apple) and refrigerate overnight.

    • Want extra protein? Stir in Greek yogurt or protein powder after cooking.

    • Use grated apple for a more blended texture.

    • Try baking it like oatmeal cups or a breakfast casserole!

    Want a baked version or overnight oats version too?

  • Mango Mint Cooler Recipe

    Mango Mint Cooler Recipe

    Mango Mint Cooler Recipe

    Ingredients:

    • 1 cup mango pulp (fresh or canned)

    • 1/2 cup mango chunks (fresh, ripe mango)

    • 1 tablespoon lime juice

    • 1/2 cup soda water (or plain water if preferred)

    • 1 tablespoon sugar (adjust to taste)

    • 4-5 fresh mint leaves

    • Ice cubes (as needed)

    • Lime wedges (optional)

    • A pinch of salt (optional, enhances flavor)

    Instructions:

    1. Prepare the mango pulp:

      • If using fresh mangoes, peel and blend the flesh to make a smooth pulp.

      • Strain if needed for a smoother texture.

    2. Muddle the mint & lime:

      • In a glass or cocktail shaker, gently muddle mint leaves with sugar and lime juice to release flavors.

    3. Mix the drink:

      • In a mixing jug or shaker, combine mango pulp, muddled mint mix, and salt (optional).

      • Add some water or soda water to adjust consistency.

    4. Assemble the drink:

      • Fill a glass halfway with ice cubes and mango chunks.

      • Pour the mango mixture over the ice.

      • Top off with soda water for fizz (optional but refreshing).

    5. Garnish:

      • Add more mango chunks on top.

      • Garnish with a mint sprig and a lime wedge.

    6. Serve immediately chilled and enjoy!

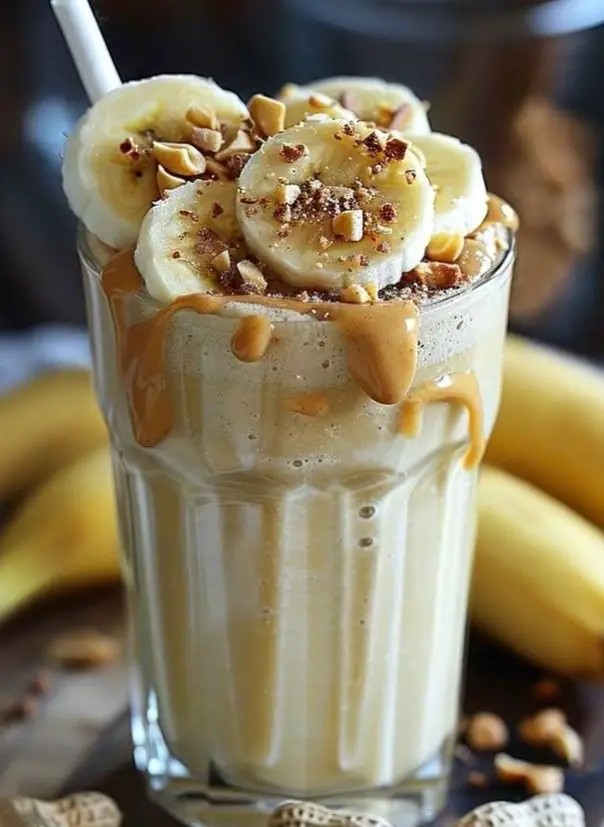
  • Banana Peanut Butter Smoothie Recipe

    Banana Peanut Butter Smoothie Recipe

    Banana Peanut Butter Smoothie Recipe

    Ingredients:

    • 2 ripe bananas (fresh or frozen)

    • 2 tablespoons peanut butter (creamy or crunchy)

    • 1 cup milk (dairy or plant-based like almond, oat, or soy)

    • ½ cup Greek yogurt or vanilla yogurt (optional for creaminess and protein)

    • 1–2 teaspoons honey or maple syrup (optional, depending on sweetness preference)

    • ½ teaspoon vanilla extract (optional)

    • ½ cup ice (optional, especially if bananas aren’t frozen)

    For Garnish (optional but delicious):

    • Sliced banana

    • Drizzle of peanut butter

    • Crushed peanuts or granola


    Instructions:

    1. Blend: Add bananas, peanut butter, milk, yogurt (if using), sweetener, vanilla extract, and ice to a blender. Blend until smooth and creamy.

    2. Taste & Adjust: Taste and adjust sweetness or consistency (add more milk to thin or more banana/yogurt to thicken).

    3. Serve: Pour into a tall glass.

    4. Garnish: Top with banana slices, a drizzle of peanut butter, and a sprinkle of crushed peanuts or granola.

    5. Enjoy: Serve immediately with a straw or spoon.

  • Tropical Strawberry-Mango Smoothie

    Tropical Strawberry-Mango Smoothie

    Tropical Strawberry-Mango Smoothie

    Ingredients:

    • 1 cup pineapple chunks

    • 1 cup strawberries (hulled)

    • 1 cup mango chunks

    • 1–2 tablespoons honey (adjust to taste)

    • 1 cup almond milk (or any milk of choice)

    • 1 cup ice cubes

    Instructions:

    1. Add all ingredients to a blender: pineapple, strawberries, mango, honey, almond milk, and ice cubes.

    2. Blend on high speed until smooth and creamy.

    3. Taste and adjust sweetness by adding more honey if desired.

    4. Pour into a glass, and optionally top with diced strawberries and mango.

    5. Serve immediately with a straw and enjoy!

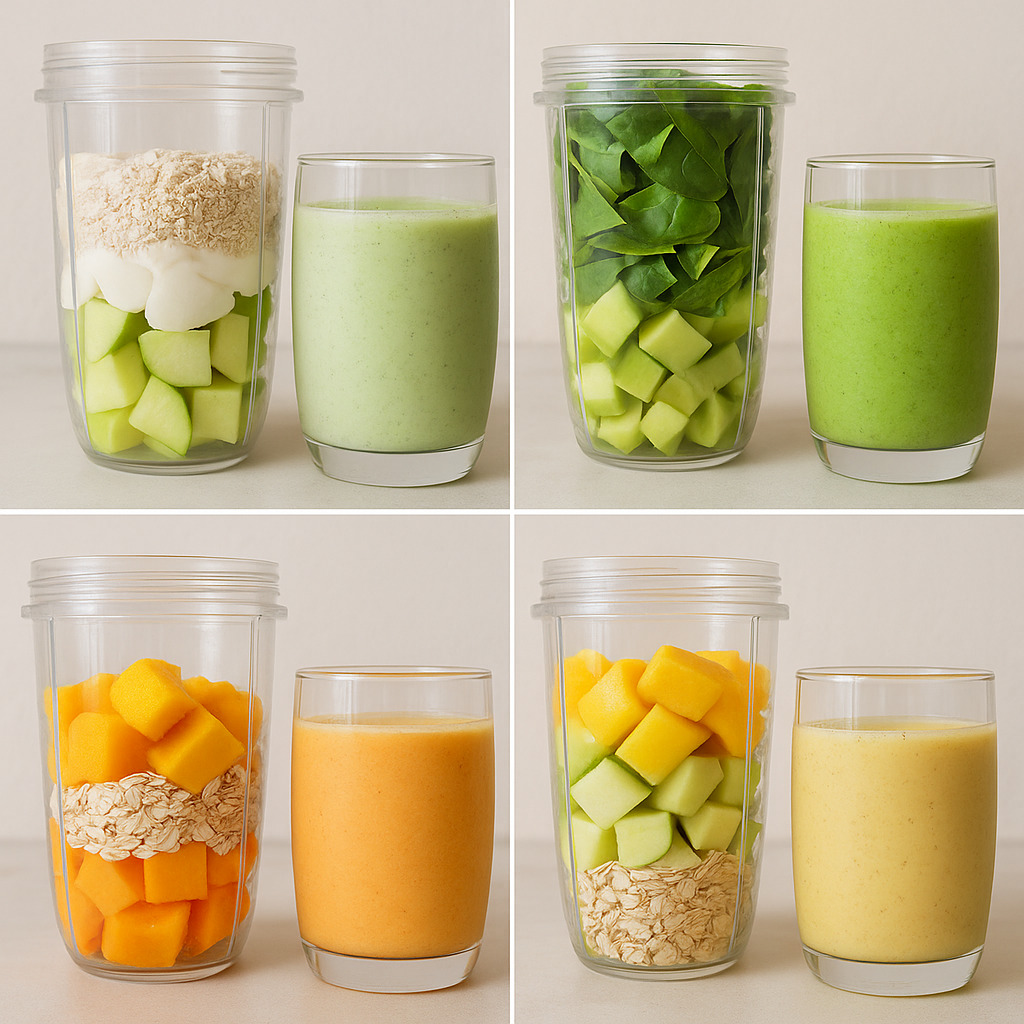
  • four smoothie recipes

    four smoothie recipes

    Top Left (Green Apple Smoothie)

    Ingredients:

    • Green apple chunks

    • Yogurt

    • Rolled oats

    • Possibly a splash of milk or water (in the glass)

    Instructions:

    1. Add all ingredients to a blender.

    2. Blend until smooth.

    3. Serve chilled.


    Top Right (Spinach Apple Smoothie)

    Ingredients:

    • Spinach

    • Green apple chunks

    • Possibly banana or yogurt (for creaminess)

    • Water or a green juice base (in the glass)

    Instructions:

    1. Combine all ingredients in a blender.

    2. Blend well until smooth.

    3. Enjoy fresh.


    Bottom Left (Mango Oat Smoothie)

    Ingredients:

    • Mango chunks

    • Rolled oats

    • Yogurt or milk (seen in the glass)

    Instructions:

    1. Add all ingredients to the blender.

    2. Blend until creamy and smooth.

    3. Serve immediately.


    Bottom Right (Mango Cucumber Smoothie)

    Ingredients:

    • Mango chunks

    • Cucumber chunks

    • Rolled oats

    • Liquid base (probably water or juice)

    Instructions:

    1. Blend all ingredients together until smooth.

    2. Pour and enjoy.

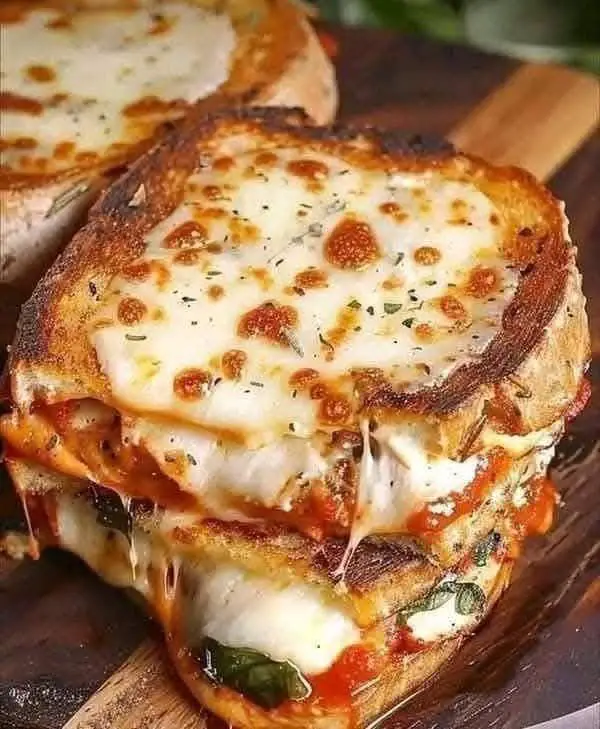
  • Chicken Parmesan grilled cheese sandwich

    Chicken Parmesan grilled cheese sandwich

    V

    Chicken Parmesan grilled cheese sandwich


    Ingredients:

    • 2 slices of bread (your choice, but a sturdy bread like sourdough works well)
    • 1 cup cooked chicken breast, shredded or sliced
    • 1/2 cup marinara sauce
    • 1/2 cup grated Parmesan cheese
    • 1/2 cup shredded mozzarella cheese
    • 2 tablespoons olive oil or butter
    • 1/2 teaspoon dried basil (optional)
    •  1/2 teaspoon garlic powder (optional)


    Instructions:


    1. Prepare the Chicken:


    • If you haven’t already, cook and shred or slice the chicken breast. You can use leftovers or cook it fresh. Season with salt and pepper to taste.


    2. Assemble the Sandwich:


    • Spread a thin layer of marinara sauce on one side of each bread slice.


    • Layer the shredded chicken over the sauce on one slice of bread.


    • Sprinkle the Parmesan cheese and mozzarella cheese over the chicken.


    • Optionally, sprinkle dried basil and garlic powder over the cheese for extra flavor.

    Ezoic


    • Top with the other slice of bread, sauce side down.


    3. Cook the Sandwich:


    • Heat a skillet over medium heat and add 1 tablespoon of olive oil or butter. You can use more if needed for a crispier crust.

    Ezoic


    • Place the sandwich in the skillet and cook until the bread is golden brown and the cheese is melted, about 3-4 minutes per side. Press down gently with a spatula to ensure even grilling.


    4. Serve:


    • Remove from the skillet and let it cool for a minute before slicing. Serve hot.

  • Homemade Vanilla Ice Cream Recipe

    Homemade Vanilla Ice Cream Recipe

    Simple, Creamy & Delicious – No Eggs Needed!

    Make the perfect classic vanilla ice cream at home with just a few simple ingredients. This no-cook base results in rich, smooth ice cream that’s perfect on its own or with your favorite toppings.


    Ingredients

    • 2 cups (480 ml) heavy cream, cold

    • 1 cup (240 ml) whole milk

    • 3/4 cup (150 g) granulated sugar

    • 2 teaspoons pure vanilla extract

    • Pinch of salt


    ‍ Instructions

    1️⃣ Mix the Base

    • In a large mixing bowl, combine the milk and sugar.

    • Whisk vigorously until the sugar is completely dissolved — this ensures smooth texture.

    2️⃣ Add Cream & Flavor

    • Stir in the heavy cream, vanilla extract, and a pinch of salt.

    • Mix well until fully blended.

    3️⃣ Chill the Mixture

    • Cover the bowl and refrigerate the mixture for at least 2–4 hours, or ideally overnight.

    Chilling improves texture and enhances flavor.

    4️⃣ Churn the Ice Cream

    • Pour the chilled mixture into your ice cream maker.

    • Churn according to your machine’s instructions (usually 20–25 minutes) until it reaches a soft-serve consistency.

    5️⃣ Freeze to Set

    • Transfer the churned ice cream to an airtight container.

    • Freeze for at least 2 hours for firmer, scoopable texture.


    Topping & Decoration Ideas

    ✨ Classic Toppings

    • Chocolate syrup

    • Caramel drizzle

    • Whipped cream

    Fruity Flavors

    • Fresh strawberries, blueberries, or bananas

    • Fruit jam or compote

    Crunchy Mix-ins

    • Chopped almonds, pistachios, or walnuts

    • Crushed cookies (Oreos, graham crackers)

    • Waffle cone crumbles

    Fun & Colorful

    • Sprinkles or rainbow confetti

    • Mini marshmallows

    • Edible glitter

    Gourmet Touch

    • Dark chocolate shavings with sea salt

    • Espresso powder

    • Honey drizzle with dried lavender


    Storage Tips

    • Store in a freezer-safe, airtight container.

    • Press a layer of plastic wrap against the surface to prevent ice crystals.

    • Best enjoyed within 2–3 weeks for optimal texture and flavor.


    Serving Suggestion

    Garnish with fresh mint leaves (as shown in the photo), and serve in a chilled bowl or waffle cone. Perfect for summer parties, cozy desserts, or midnight cravings!

  • AIR FRYER GARLIC BREAD PIZZA TOAST

    AIR FRYER GARLIC BREAD PIZZA TOAST

    AIR FRYER GARLIC BREAD PIZZA TOAST


    Air Fryer Garlic Bread Pizza Toast is amazing! If you have been looking for the perfect kid-friendly meal, this is one of the best, and with the air fryer, they are so easy to make!

    If you love a simple meal, this is so good! In less than 10 minutes, from start to finish, you can have the perfect homemade pizza.


    I used to make these in the oven for my family, but not with the Air Fryer, and you get a crunchy crust and a soft to gooey center. Creating the perfect bite.

    This recipe was made to be cooked in the Air Fryer! They are so good! My teens have been preparing these all summer long, and they will certainly make for a great back-to-school lunch. Just wrap them up, and they travel well.

    Pro Tips:

    • This recipe will work in any Air Fryer Basket or Oven Model. I have made this frequently in my Ninja Foodi, Instant Pot Vortex, Instant Pot Crisp Lid and GoWise. The recipe will work exactly tehs ame, although the time may vary.
    • I found that the pepperoni may fly around, so I added the cheese on top, for best results.
    • For a better flavor, I also toasted the bread, before adding the toppings. I found that the bottom layer was crunchier, than adding the toppings, before toasting.
    • Do not crowd the air fryer basket, otherwise your bread may not adequately toast up. For best results, leave space around the bread.

    Can you use Aluminum Foil in the Air Fryer?
    Yes, I have been using aluminum foil for years in my air fryer. Although, you should check the owner’s manual before you do, since every air fryer is slightly different.

    For safety reasons, make sure that you do not have any loose foil that can accidentally fly into the heating element, which would pose a safety hazard and may cause damage to your air fryer.

    About Time 

    • Prep Time  5 mins
    • Cook Time  10 mins
    • Total Time 15 mins

    Ingredients

    • 8 Pieces of Frozen Texas Toast Garlic
    • 1 cup pizza sauce
    • 1/2 cup shredded mozzarella cheese
    • 16 slices pepperoni

    Instructions

    1. Put your frozen Garlic Texas Toast into the Air Fryer Basket. Set the temperature to 350 degrees F, air fryer setting, cook for 3 to 5 minutes, until the Texas Toast is golden brown.
    2. Add the pizza sauce on top.
    3. Add the pepperoni slices on top.
    4. Add the Mozzarella Cheese On Top. Set back into the Air Fryer, air fry for another 3 to 4 minutes at 350 degrees F, air fryer setting, until the cheese is melted.
    5. Plate, serve, and enjoy!

    Amount Per Serving

    Calories 177

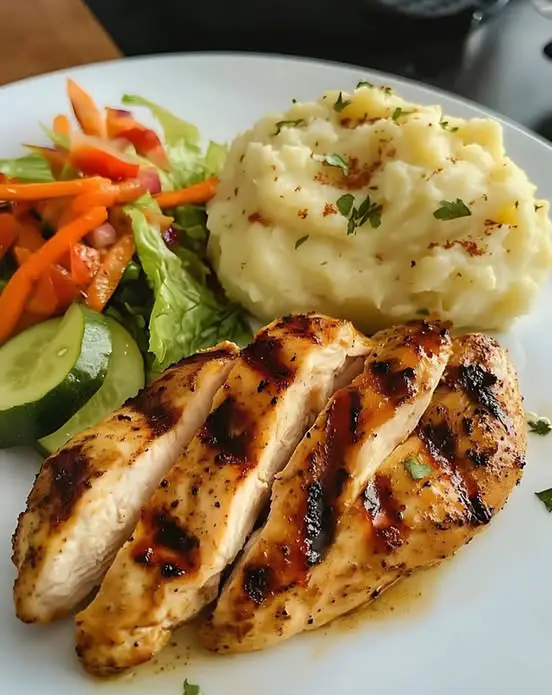
  • Grilled Chicken with Mashed Potatoes & Fresh Salad

    Grilled Chicken with Mashed Potatoes & Fresh Salad

    Healthy, Flavorful, and Easy – Ready in Just 30 Minutes!

    Whether you’re meal prepping or preparing a cozy dinner, this plate has it all: juicy grilled chicken, creamy mashed potatoes, and a crunchy, refreshing salad. It’s rich in protein, light on calories, and bursting with fresh flavor.


    Ingredients (Serves 2)

    For the Grilled Chicken

    • 2 boneless, skinless chicken breasts

    • 1 tablespoon olive oil

    • 1 teaspoon garlic powder

    • 1/2 teaspoon salt

    • 1/2 teaspoon black pepper

    • 1/2 teaspoon paprika (smoked or sweet)

    • Juice of 1 fresh lime

    For the Mashed Potatoes

    • 2 medium potatoes, peeled and boiled until tender

    • 1 tablespoon unsalted butter

    • 2 tablespoons milk (or more, for creamier texture)

    • 1 tablespoon fresh parsley, chopped

    • Salt and black pepper to taste

    For the Fresh Salad

    • 1 cucumber, thinly sliced

    • 1 carrot, peeled and shredded

    • Juice of 1/2 lime

    • Salt and black pepper to taste


    ️ Step-by-Step Instructions

    1️⃣ Marinate the Chicken

    • In a small bowl, combine olive oil, garlic powder, salt, black pepper, paprika, and lime juice.

    • Place the chicken breasts in a shallow dish or zip-top bag and coat evenly with the marinade.

    • Let it marinate for 15–20 minutes (or up to 2 hours in the fridge for deeper flavor).

    Tip: Pound the chicken slightly if the breasts are thick, to ensure even cooking.


    2️⃣ Grill the Chicken

    • Heat a grill pan, cast iron skillet, or nonstick pan over medium-high heat.

    • Add a drizzle of oil if needed, and place the marinated chicken on the hot surface.

    • Cook for 4–5 minutes per side, or until the chicken is nicely browned and the internal temperature reaches 165°F (75°C).

    • Let rest for a few minutes before slicing.

    Tip: Don’t move the chicken too much while cooking – this helps get a good sear.


    3️⃣ Prepare the Mashed Potatoes

    • While the chicken grills, mash the boiled potatoes in a bowl.

    • Add the butter and milk, mixing until smooth and creamy. Add more milk if desired.

    • Season with salt and pepper, and stir in chopped parsley for brightness and color.

    Optional: For ultra-creamy potatoes, use a potato ricer or hand mixer.


    4️⃣ Make the Fresh Salad

    • In a bowl, combine the sliced cucumber and shredded carrot.

    • Drizzle with the lime juice and season with salt and pepper.

    • Toss to coat evenly.

    Optional Add-ins: thinly sliced red onions, cherry tomatoes, or a sprinkle of chili flakes for kick.


    5️⃣ Assemble and Serve

    • On each plate, place a serving of grilled chicken, a scoop of mashed potatoes, and a side of the fresh salad.

    • Garnish with a lime wedge and additional parsley if desired.

    Serve immediately while warm and fresh!


    ⏱ Prep & Cook Time

    • Prep Time: 15 minutes

    • Cook Time: 15 minutes

    • Total Time: 30 minutes


    Nutrition Information (Per Serving)

    • Calories: ~350 kcal

    • Protein: ~30g

    • Carbohydrates: ~25g

    • Fat: ~15g

    • Fiber: ~4g

    Note: Nutrition values may vary slightly depending on ingredients used.


    Tips & Variations

    • Add spice: Toss in chili powder or cayenne for a spicier marinade.

    • No grill pan? Use a regular nonstick skillet or bake the chicken in the oven at 200°C (400°F) for 20–25 minutes.

    • Dairy-free option: Substitute butter and milk with plant-based versions for the potatoes.

    • Low-carb version: Swap mashed potatoes for cauliflower mash or a green veggie side.

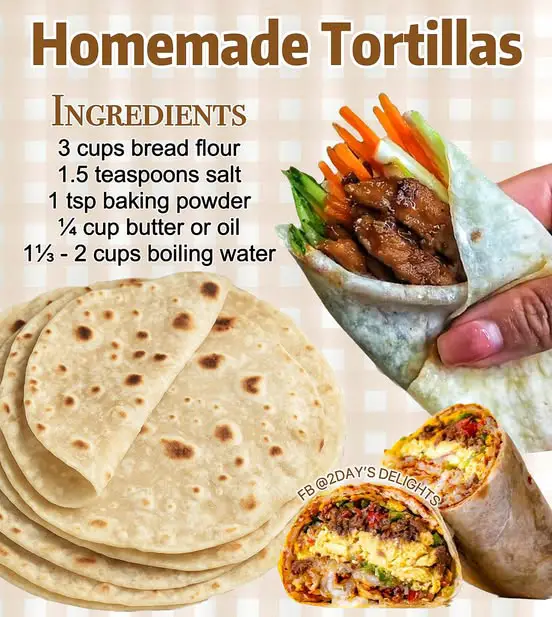
  • Homemade Flour Tortillas

    Homemade Flour Tortillas

    Soft, Chewy, and Delicious – No Preservatives

    These flour tortillas are a kitchen essential — fresh, simple, and far tastier than store-bought. Whether you’re making tacos, burritos, or enjoying them warm with butter or cheese, this step-by-step guide ensures perfect results every time.


    Ingredients

    • 2 cups all-purpose flour (plus more for dusting)

    • 1/2 teaspoon salt

    • 2 tablespoons unsalted butter or neutral oil (like vegetable or canola)

    • 3/4 cup boiling water (you may need slightly more or less)

    Optional: For extra softness, add 1/2 tsp baking powder, though traditional recipes often skip it.


    Equipment

    • Mixing bowl

    • Wooden spoon or silicone spatula

    • Stand mixer with dough hook (optional)

    • Rolling pin

    • Heavy-bottomed skillet, griddle, or nonstick pan

    • Damp kitchen towel or paper towel

    • Airtight container (for storage)


    ‍ Instructions

    1. Mix Dry Ingredients and Fat

    • In a large bowl, combine the flour and salt.

    • Add the butter or oil and rub it into the flour with your fingers until the mixture resembles coarse crumbs. This helps coat the flour and improves the texture.


    2. Add Boiling Water & Knead

    • Slowly pour in the boiling water, stirring with a wooden spoon or spatula until a shaggy dough forms.

    ⚠️ Caution: Boiling water is hot. If you’re kneading by hand, wait until the dough cools slightly and use a spoon at first.

    • Once it’s cool enough to handle, transfer to a floured surface or mix directly in the bowl. Knead the dough for 8–10 minutes (or 5–6 minutes in a stand mixer with a dough hook) until smooth and elastic.

    • If the dough feels sticky, add a bit of flour. If too dry, add a splash of warm water.


    3. Divide and Shape Dough

    • Lightly flour your work surface.

    • Divide the dough into 8–10 equal portions for medium tortillas (or more/less depending on the desired size).

    • Roll each portion into a smooth ball.


    4. Rest the Dough

    • Place the dough balls in a bowl or tray. Cover with a warm, damp towel or plastic wrap and let them rest for 10–15 minutes.

    • This resting phase relaxes the gluten and makes the dough easier to roll out.


    5. Roll Out the Tortillas

    • Preheat a dry skillet or griddle over medium heat.

    • Lightly flour your surface and rolling pin.

    • Roll each dough ball into a thin, round tortilla – about 6–8 inches wide, depending on your portion size.

    Try to keep them even in thickness. Don’t worry if they’re not perfectly round—they’ll still taste great!


    6. Cook the Tortillas

    • Place the rolled tortilla onto the hot skillet. Cook for about 30–45 seconds, or until you see bubbles forming and slight golden spots underneath.

    • Flip and cook the other side for another 20–30 seconds.

    Don’t overcook — they should be soft with light brown spots, not crisp.

    • Remove from the pan and place in a towel-lined container to keep warm and soft while you cook the rest.


    Serving Suggestions

    • Use immediately for tacos, burritos, wraps, tostadas, or simply slathered with butter.

    • Perfect with hummus, curry, grilled meats, or as a soft flatbread side.


    Storage Tips

    • Room temperature: 2–3 days in an airtight container

    • Refrigerator: 5–7 days (wrap tightly to avoid drying out)

    • Freezer: 6–8 months (separate each tortilla with parchment, store in a freezer-safe bag)

    To reheat:

    • Warm in a skillet for 15–30 seconds per side

    • Or microwave covered with a damp paper towel for 10–15 seconds


    Tips & Variations

    • Use whole wheat flour for a nuttier flavor and added fiber.

    • Infuse flavor: Add minced garlic, herbs, or spices to the dough.

    • For extra flexible tortillas, brush lightly with oil after cooking and stack in a covered dish to steam.

    • Make them mini for street-style tacos or large for burritos or wraps.

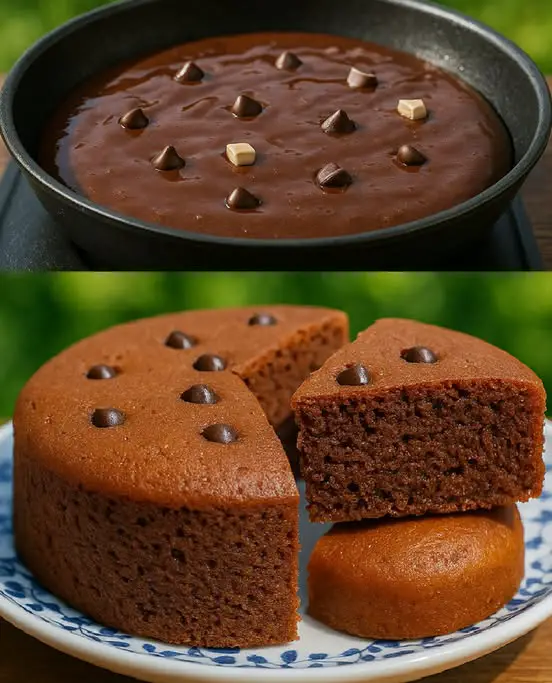
  • 1 Egg Chocolate Cake (No Oven) – Soft, Moist & Delicious

    1 Egg Chocolate Cake (No Oven) – Soft, Moist & Delicious

    This simple, small-batch chocolate cake is the perfect treat when you’re craving something sweet but don’t want to turn on the oven. Made with just one egg and a few pantry staples, it’s light, fluffy, and full of rich chocolate flavor. Best of all, it can be cooked on the stovetop in a regular heavy-bottomed pan.


    Ingredients

    • 1 large egg (room temperature)

    • 1/3 cup granulated sugar (add gradually)

    • 1/4 cup neutral oil (like canola or sunflower oil)

    • 1/3 cup all-purpose flour

    • 2 tablespoons unsweetened cocoa powder

    • 1/2 teaspoon baking powder

    • 1/2 teaspoon vanilla extract

    • 1–2 tablespoons chocolate chips (for topping; optional but recommended)

    • A pinch of salt (optional, enhances chocolate flavor)

    • Butter or oil for greasing the pan


    Equipment

    • Hand whisk or electric beater

    • Mixing bowl

    • Fine mesh sieve (for sifting)

    • 5-inch round cake mould or heat-safe bowl

    • Heavy-bottomed pan with a lid (like a deep non-stick skillet or Dutch oven)

    • Trivet or ring stand (to raise the cake mould off the direct base of the pan)

    • Toothpick or skewer (for testing doneness)


    ‍ Instructions

    Step 1: Prepare the Egg Mixture

    1. Crack the egg into a clean mixing bowl.

    2. Begin whisking or beating the egg. After 10–15 seconds, start adding the sugar gradually, a little at a time.

    3. Continue whisking for 5–7 minutes (if using a hand whisk, or 2–3 minutes with an electric beater), until the mixture turns pale, thick, and reaches stiff ribbon-like peaks. This aeration is key for a fluffy cake without baking soda.

    Tip: If your mixture doesn’t reach stiff peaks, the cake may be denser. Cold eggs can prevent proper aeration—use room-temperature eggs for best results.


    Step 2: Incorporate the Oil

    1. Add the 1/4 cup oil to the whipped egg mixture. Beat or whisk for about 1 more minute, just until fully combined.


    Step 3: Fold in the Dry Ingredients

    1. In a separate bowl, sift together the flour, cocoa powder, baking powder, and a pinch of salt.

    2. Slowly add the dry ingredients to the wet mixture. Gently fold using a spatula (do not beat), mixing just until no dry spots remain.

    3. Stir in the vanilla extract and mix gently to incorporate.

    Be careful not to overmix. This can deflate the air bubbles and result in a dense cake.


    Step 4: Prepare the Mould

    1. Lightly grease a 5-inch round cake mould with oil or butter. You can also line the bottom with parchment paper for easier removal.

    2. Pour the batter into the prepared mould and tap gently on the counter to release any large air bubbles.

    3. Sprinkle a generous amount of chocolate chips on top if desired.


    Step 5: Cook Without an Oven (Stovetop Method)

    1. Place a heavy-bottomed pan (like a deep non-stick skillet or Dutch oven) on the stove. Put a trivet, ring stand, or folded foil at the bottom to keep the cake mould from touching direct heat.

    2. Cover with the lid and preheat on medium heat for 5 minutes.

    3. Carefully place the filled mould inside the pan. Cover the lid tightly.

    4. Reduce heat to low and let it cook for 20–30 minutes.

    Do not open the lid frequently—this releases steam and heat. After 20 minutes, you can check doneness with a toothpick. If it comes out clean or with a few moist crumbs, it’s ready.


    Optional: Oven Method

    If you prefer using an oven:

    • Preheat oven to 160°C (320°F).

    • Bake the cake for 20–30 minutes, checking with a toothpick around the 20-minute mark.


    Step 6: Cool and Serve

    1. Once done, remove the mould from the pan and let the cake cool for at least 10–15 minutes before unmoulding.

    2. Slice and serve as is, or top with a dusting of powdered sugar, a scoop of ice cream, or a drizzle of melted chocolate.


    Serving Suggestions

    • Enjoy warm or at room temperature.

    • Serve with a dollop of whipped cream or yogurt for a light dessert.

    • Top with fresh fruits like strawberries or banana slices.

    • For a richer finish, frost with a quick ganache or spread Nutella on top.


    Storage

    • Store leftovers in an airtight container at room temperature for up to 2 days.

    • You can also refrigerate it for up to 4–5 days. Reheat slightly before serving to revive softness.


    Tips & Variations

    • No cocoa? Replace with extra flour and add chocolate chips or chunks to keep the flavor rich.

    • No chocolate chips? Try crushed nuts, coconut flakes, or just leave plain.

    • Add a dash of coffee powder to intensify the chocolate flavor.

    • Make it eggless: Replace the egg with 1/4 cup plain yogurt or 1/4 cup mashed banana (texture may vary slightly).