Blog

  • Crispy Baked Potato Wedges with Smoky Chipotle Ketchup

    Crispy Baked Potato Wedges with Smoky Chipotle Ketchup

    Crispy Baked Potato Wedges with Smoky Chipotle Ketchup

    These crispy baked potato wedges with smoky chipotle ketchup are a perfect snack, side dish, or party appetizer. The wedges are seasoned to perfection with a blend of spices and baked until crispy, served with a smoky and spicy chipotle ketchup that will keep you coming back for more.

    Total Preparation Time: 45-50 minutes

    Ingredients:

    • 3-4 medium-sized Russet potatoes, scrubbed clean
    • 2-3 tablespoons of olive oil
    • 1 teaspoon paprika (smoked or regular)
    • 1 teaspoon garlic powder
    • 1 teaspoon onion powder
    • Sea salt to taste
    • Black pepper to taste

    For the Smoky Chipotle Ketchup:

    • 1 cup ketchup
    • 1 chipotle pepper in adobo sauce, finely minced

    Directions:

    1. Prep the Potatoes:
      • Preheat your oven to 425 degrees Fahrenheit (220 degrees Celsius).
      • Cut the potatoes in half, then each half into quarters, aiming for 8 wedges per potato.
      • Rinse the potato wedges under cold water, then dry them thoroughly with a kitchen towel. Ensuring they are dry is crucial for achieving maximum crispiness.
    2. Seasoning:
      • Toss the dried potato wedges in a large bowl with olive oil, paprika, garlic powder, onion powder, salt, and pepper until evenly coated.
    3. Baking:
      • Line a baking sheet with aluminum foil and arrange the potato wedges in a single layer, making sure they aren’t overcrowded (use two trays if necessary).
      • Bake in the preheated oven for 20 minutes, then flip the wedges and continue baking for another 10-15 minutes until they are golden and crispy.
    4. Prepare the Smoky Chipotle Ketchup:
      • While the potatoes are baking, mix the ketchup and minced chipotle pepper in a small bowl. Adjust the amount of chipotle based on your preference for heat.
    5. Serving:
      • Serve the hot, crispy potato wedges with the smoky chipotle ketchup for dipping.
      • Enjoy as a delicious snack, a side dish, or even as a party appetizer.

    Serving Suggestions:

    • Pair with a fresh green salad for a balanced meal.
    • Serve alongside grilled meats or burgers for a hearty dinner.
    • Enjoy with a variety of dipping sauces for a fun appetizer platter.
  • Arizona Sunshine Lemon Pie

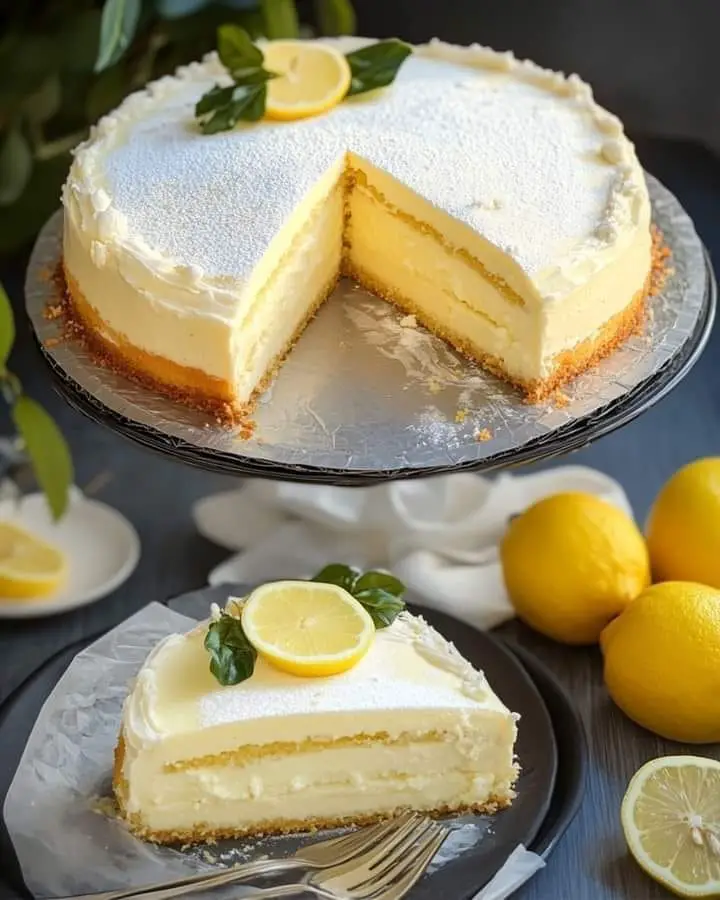
    Arizona Sunshine Lemon Pie

    At 23, I hardly knew how to make pancakes, tomato and mozzarella…

    Jerome de Oliveira was the world champion in confectionery.

    The youngest world champion in the world.

    He is 31 and now has two stores, one in Cannes and one in Cagnes-sur-Mer.

    Nice surprise to find the recipe in special issue #2 of Fou de Pâtisserie magazine.

    Ingredients:

    • 200 grams of wheat flour
    • 100 grams powdered sugar
    • 80 grams butter
    • 1 egg
    • Pinch of salt

    To decorate:

    • 4 lemons (15 cl juice and zest from 3 lemons)
    • 125 grams cane sugar
    • 50 grams butter
    • 3 eggs
    • 1 heaped tablespoon of cornstarch

    Instructions:

    1. Make the Pie Dough:

    Pour the sifted wheat flour, powdered sugar, and salt into a bowl. Add the softened butter cut into pieces. Knead the dough by hand until crumbly. Add the egg and knead until you get a homogeneous dough ball. Cover with plastic wrap and refrigerate for two hours.

    2. Bake the Pie Crust:

    Preheat the oven to 200°C (400°F). Roll out the chilled dough between two sheets of lightly floured baking paper to a thickness of 3 mm. Transfer the dough to a greased and floured tart mold. Prick the dough with a fork, line the bottom with parchment paper, and fill with baking weights or dried beans.

    Bake the crust blind for 10 minutes at 200°C (400°F). Remove the weights and parchment paper, reduce the oven temperature to 180°C (350°F), and bake for another 15 minutes until golden brown. Allow the pie crust to cool on a wire rack.

    3. Prepare the Lemon Cream:

    Grate the zest of 3 lemons and squeeze enough juice from all 4 lemons to measure 15 cl. In a bowl, whisk together eggs, lemon zest, and cane sugar until thickened. Add cornstarch and whisk until smooth.

    In a saucepan, bring the lemon juice to a boil. Pour the hot lemon juice over the egg mixture while whisking vigorously. Return the mixture to the saucepan and cook over low heat for about 3 minutes, stirring constantly until thickened. Remove from heat and let cool slightly. Add the butter, cut into pieces, and stir until smooth.

    4. Assemble the Lemon Pie:

    Pour the cooled lemon cream into the prepared pie crust. Smooth the surface with a spatula. Chill the pie in the refrigerator for at least an hour before serving.

    Enjoy your delicious lemon pie

  • Mouthwatering Stuffed Potato Cakes

    Mouthwatering Stuffed Potato Cakes

    Ingredients

    • For the potato dough:
    • 2 pounds (4 large) potatoes, cut into cubes
    • 1 cup (120g) 1 cup (120g) garbanzo bean flour (whole wheat flour or brown rice flour can be used as alternatives)
    • 2 garlic cloves, shredded
    • 1/4 tsp salt
    • For the mushroom stuffing:
    • 2 Tbsp olive oil
    • 1 pound portobello mushrooms, chopped
    • 1 large onion, chopped
    • ¼ cup fresh dill or parsley, chopped
    • Fine black pepper and salt to taste

    Instructions

    • Add the potatoes to a large pot and cover them with water. Bring the water to a boil, lower the heat, and simmer for 20 minutes.
    • Drain the water from the potatoes and allow them to cool for a few minutes.
    • In a large bowl, mash the cooled potatoes until they are smooth and lump-free. Then, add the flour (or whole wheat flour or brown rice flour, if preferred), shredded garlic, and salt. Mix everything thoroughly to form a dough. Once the dough is prepared, allow it to cool in the refrigerator for about 15 minutes. This cooling step will make it easier to handle when shaping the patties.
    • Preheat a medium-sized pan with oil. Add the onions, cover the pan, and cook on low-medium heat for 5 minutes, stirring occasionally. Uncover the pan, add the mushrooms, and sauté on high heat for 5 minutes, constantly stirring.
    • Using slightly wet hands, divide the potato dough into 8 equal parts (about ¼ cup or 65g each).Next, shape the patties. Take one patty in your hands (make sure your hands are moist so the dough does not stick), and add 1.5 tablespoons of the mushroom mixture in the middle. Cover with another patty and shape it into a flat, round patty.Coat a large pan with oil and heat it to medium-high heat. Carefully place the potato cakes in the pan and cook for 2 minutes on each side, or until they are lightly golden.
  • These are my most well-liked bars. I typically create around 500 of these at birthday celebrations.

    These are my most well-liked bars. I typically create around 500 of these at birthday celebrations.

    These gentle and attractive nougat bars are quite simple to make utilizing solely 4 primary substances. An excellent snack for any occasion!

    Dngredients:

    Quantity of Substances
    Small marshmallows 2 bundles
    Two tablespoons of melted butter.
    Items of white chocolate 2 bundles
    Purple and inexperienced sweet drops One and a half cups

    Instructions:

    Make Marshmallow Combine: Combine marshmallows and melted butter in a bowl that can be utilized within the microwave. Warmth within the microwave for 1-2 minutes, stirring till it’s easy.
    Soften white chocolate: Put white chocolate chips in a bowl that may go within the microwave. Warmth for 30 seconds at a time, stirring till it’s easy.
    Combine the substances collectively. Pour melted white chocolate on prime of the marshmallow combination. Combine till the whole lot is properly blended. Combine in items of gumdrops.

    Bar kinds: Put the combination right into a baking dish lined with parchment paper. Press down evenly.
    Calm down and slice: Put within the fridge for 1-2 hours. Lower into bars and eat!

  • Double Crust Cheesecake

    Double Crust Cheesecake

    Ingredients

    Crusts:

    • 1 box of graham crackers (about 27 graham crackers), crushed into fine crumbs
    • 1/2 C light brown sugar
    • 1 C salted butter, melted

    Cake:

    • 2 C heavy whipping cream
    • 3 (8oz) packages cream cheese, room temperature
    • 1/2 C sugar
    • 1/4 C sour cream
    • 2 tbsp powdered sugar
    • 2 tbsp cornstarch (or more powdered sugar)
    • 2 tsp lemon juice
    • 1/2 tbsp vanilla extract

    How To Make Double Crust Cheesecake

    Begin by making the crust mixture. Combine the ingredients together until all the crumbs are evenly saturated in butter. Pour half into the bottom of a 9″ springform pan and pack it in. Use the bottom of a dry measuring cup to make sure it’s really tight – if it’s too lose it’ll just crumble when you try to slice it. Place the springform pan in the freezer to set, and the other half of crust aside on the counter.

    Using a hand mixer or stand mixer, whip your heavy cream for 2 minutes on medium high, then add 2 tbsp of powdered sugar or cornstarch to stabilize. Continue whipping until the cream forms stiff peaks, about 4-5 minutes more.

    Also using a hand mixer or stand mixer, cream together the cream cheese and sugar. Scrape down the sides of the bowl as you go, and mix until totally combined.

    Add the sour cream, vanilla, lemon, and remaining powered sugar. Beat on high until smooth and fluffy.

    Fold in half of the whipped cream, gently, then fold in the other half. Remove the bottom crust from the fridge.

    Pour the filling into the pan and smooth it in. You’ll need to press it down as you smooth it out to prevent pockets of air, and to make it fit. Remember that there needs to be room for the top crust.

    Once the filling has been smoothed out, use a spoon to sprinkle over half of the remaining crumbs. Use the back of the spoon to smooth them out over the top of the cheesecake while pressing down gently. Add the remaining crumbs, and continue to smooth and press. You might have too many crumbs, but that’s OK. Try to press them in as tightly as you can.

    Use a piece of parchment paper to cover the top of the cheesecake and now press down firmly with your hands. Wrap the springform pan entirely in plastic wrap and refrigerate for at least 8 hours, preferably overnight.

    Slice and serve. I like fresh strawberries on the side.

    NOTES

    You can use a whisk and your arms if you’ve got more stamina than I do.

    You can buy already made graham cracker crumbs in most grocery stores, but I crush mine in my food processor.

    Stabilizing the whipped cream (adding the powdered sugar or cornstarch) is optional but may help the cheesecake retain its shape after slicing (and the temperature increasing) for longer.

    I do not think this would work with a baked cheesecake, but I haven’t tried it.

  • Tropical Pineapple Delight Dessert

    Tropical Pineapple Delight Dessert

    Pineapple Delight

    What You Need

    Ingredients

      • 1 cup crushed graham crackers
      • 1/2 cup melted unsalted butter
      • 1/2 cup sugar
      • 2 cups whipped cream
      • 8 ounces whipped cream cheese
      • 20 oz crushed pineapple, drained

    Instructions

    1. In a medium bowl, combine the sugar, melted butter, and graham cracker crumbs.
    2. Form a crust by pressing the mixture firmly into an 8×8 pan.
    3. In a separate bowl, mix the whipped cream and half of the whipped cream cheese until thoroughly combined. Spread this mixture evenly over the crust.
    4. In the same bowl, mix the drained pineapple with the remaining whipped cream cheese until well combined.
    5. Spread the pineapple mixture over the cream cheese layer.
    6. Place the dessert in the refrigerator to set, preferably for at least four hours, but overnight is best.
    7. Optional: Before serving, top with additional whipped cream and crumbled graham crackers.

    Tips and Variations

    • Add a tropical twist by incorporating diced peaches or mango chunks.
    • Mix crushed nuts into the crust for added texture and flavor.
    • Reduce the sugar for a less sweet dessert, or use low-sugar whipped cream.
    • For a vegan version, substitute coconut cream for the whipped cream and use a dairy-free cream cheese.
  • **Festive Chocolate Clusters: The Perfect Holiday Treat!**

    **Festive Chocolate Clusters: The Perfect Holiday Treat!**

    Looking for a delicious holiday treat that’s easy to make and perfect for sharing? Try these festive chocolate clusters! They’re crunchy, sweet, and oh-so-satisfying. 🎉
    ### **Ingredients:**
    🍫 2 cups semi-sweet chocolate chips
    🤍 1 cup white chocolate chips (optional for drizzling)
    🌰 2 cups mixed nuts (almonds, peanuts, cashews)
    🍇 1 cup dried cranberries or raisins
    🍬 1 cup mini marshmallows
    🎉 Holiday-themed sprinkles for decoration
    ### **Instructions:**
    **1. Melt the Chocolate:**
    🍫 In a microwave-safe bowl, melt the semi-sweet chocolate chips in 30-second intervals, stirring after each interval until smooth.
    🤍 If using white chocolate for drizzling, melt in a separate bowl using the same method.
    **2. Prepare the Mix-Ins:**
    🥜 In a large mixing bowl, combine the mixed nuts, dried cranberries or raisins, and mini marshmallows.
    🍫 Pour the melted semi-sweet chocolate over the mix-ins and stir until everything is well coated.
    **3. Form the Clusters:**
    📄 Line a baking sheet with parchment paper.
    🥄 Drop spoonfuls of the chocolate mixture onto the parchment paper, forming small clusters.
    🤍 If using white chocolate, drizzle it over the clusters for a decorative touch.
    **4. Decorate and Set:**
    🎉 While the chocolate is still wet, sprinkle the clusters with holiday-themed sprinkles.
    ❄️ Allow the clusters to set at room temperature or place them in the refrigerator for quicker setting.
    **5. Serve and Enjoy:**
    🍽️ Once fully set, transfer the clusters to a serving dish or package them in festive containers for gift-giving.
    😋 Enjoy these sweet and crunchy treats with family and friends during the holiday season!
    ### **Tips and Variations:**
    🌰 **Different Nuts and Fruits:** Try different combinations of nuts and dried fruits to find your favorite mix.
    🍭 **Add-Ins:** Add shredded coconut, pretzel pieces, or crushed candy canes for extra flavor and texture.
    🍫 **Dark Chocolate:** Use dark chocolate chips for a richer, more intense chocolate flavor.
    Spread the holiday cheer with these easy and delicious chocolate clusters! 🎁
  • fluffy, mouth-watering Vellutata cake

    fluffy, mouth-watering Vellutata cake

    The Attract of Vellutata

    Vellutata cake, with its origins rooted in Italian culinary traditions, is a testomony to the fantastic thing about simplicity. This easy-to-make dessert requires minimal substances and delivers most satisfaction. Its fluffy crumb, infused with the delicate sweetness of coconut and a touch of Parmesan cheese, is certain to tantalize your style buds and go away you craving for extra.

    Elements You may Want

    Earlier than we delve into the baking course of, let’s collect the important substances:

    • 1 cup milk
    • 1 1/2 cups sugar
    • 4 eggs
    • 3 tablespoons butter
    • 200 milliliters (ml) coconut milk
    • 100 grams Parmesan cheese
    • 50 grams desiccated coconut
    • 1 cup wheat flour
    • 1/2 tablespoon baking powder

    Step-by-Step Information to Vellutata Heaven

    With our substances prepped and prepared, let’s embark on the step-by-step journey to Vellutata bliss:

    Step 1: Mixing the Base:

    1. In a mixing bowl, mix the butter, eggs, coconut milk, milk, sugar, Parmesan cheese, and desiccated coconut.

    2.Utilizing a mixer, beat the combination for about 3 minutes till it achieves a clean and well-blended consistency.

    Step 2: Incorporating the Dry Elements:

    1. Add the wheat flour and baking powder to the moist combination.

    2. Proceed beating till the batter turns into homogenous and freed from lumps.

    Step 3: Baking to Perfection:

    1. Grease and flour a baking pan, ideally a 20 cm x 30 cm rectangular pan.

    2. Pour the batter into the ready pan and unfold it evenly.

    3. Preheat your oven to 180°C (350°F) and bake the cake for about 40 minutes.

    4. To examine for doneness, insert a toothpick into the middle of the cake. If it comes out clear, your Vellutata is prepared.

    Professional Tip: Guarantee your oven is preheated for not less than 10 minutes earlier than putting the cake inside. This ensures even baking and optimum outcomes.

    Step 4: Cooling and Serving:

    1. As soon as baked, let the cake cool utterly within the pan.

    2. Keep in mind, Vellutata has a naturally creamy heart which may stay barely smooth even after baking. That is completely regular, and the cake will agency up because it cools.

    3. As soon as cooled, minimize the cake into squares or slices and serve.

    A Ultimate Notice

    This easy but delicious Vellutata cake is ideal for any event. Whether or not you are in search of a candy ending to a household dinner or a pleasant deal with to share with buddies, this recipe is certain to impress. So, embrace your internal baker and whip up this fluffy delight. Each chunk will transport you to a world of pure culinary bliss!

  • Turkish Manti Recipe

    Turkish Manti Recipe

    Turkish Manti is a traditional dish that consists of small dumplings filled with spiced meat, typically served with a garlic yogurt sauce and drizzled with melted butter infused with red pepper flakes. Here’s a recipe for you to try:

    Ingredients:

    For the Dough:

    • 3 cups all-purpose flour
    • 1 teaspoon salt
    • 1 large egg
    • 1/2 cup water (adjust as needed)

    For the Filling:

    • 250 grams (about 9 oz) ground beef or lamb
    • 1 small onion, finely grated
    • 1/2 teaspoon salt
    • 1/4 teaspoon black pepper
    • 1/4 teaspoon paprika (optional)
    • 1/4 teaspoon ground cumin (optional)

    For the Garlic Yogurt Sauce:

    • 1 cup plain yogurt
    • 2-3 garlic cloves, minced
    • Salt to taste

    For the Butter Sauce:

    • 3 tablespoons butter
    • 1 teaspoon paprika or red pepper flakes (Aleppo pepper is a good choice)

    Instructions:

    1. Make the Dough:

    • In a large bowl, mix the flour and salt. Create a well in the center and add the egg and water.
    • Knead the dough until it becomes smooth and elastic, about 10 minutes. If the dough is too dry, add a little more water; if too sticky, add a bit more flour.
    • Cover the dough with a damp cloth and let it rest for 30 minutes.

    2. Prepare the Filling:

    • In a bowl, mix the ground meat, grated onion, salt, pepper, and any optional spices. Set aside.

    3. Roll and Cut the Dough:

    • Divide the rested dough into two portions. Roll out one portion on a floured surface into a thin sheet, about 1/16 inch thick.
    • Cut the dough into small squares, approximately 2 inches by 2 inches.

    4. Fill the Dough:

    • Place a small amount of filling (about 1/2 teaspoon) in the center of each square.
    • Fold each square diagonally to form a triangle, and then pinch the edges together tightly to seal. Optionally, bring the two corners of the triangle together and pinch to form a boat shape.

    5. Cook the Manti:

    • Bring a large pot of salted water to a boil.
    • Add the manti and cook for 8-10 minutes, or until they float to the surface and the dough is tender. Drain the manti well.

    6. Prepare the Garlic Yogurt Sauce:

    • In a bowl, mix the yogurt with minced garlic and salt. Set aside.

    7. Make the Butter Sauce:

    • In a small pan, melt the butter over medium heat. Add the paprika or red pepper flakes, and cook for about 1 minute until fragrant. Be careful not to burn the butter.

    8. Serve:

    • Place the cooked manti on a serving platter. Spoon the garlic yogurt sauce over the manti, and then drizzle with the spiced butter sauce.
    • Garnish with chopped parsley or mint if desired, and serve hot.

    Tips:

    • Freezing Manti: You can make extra manti and freeze them uncooked. Lay them on a baking sheet in a single layer and freeze until solid, then transfer them to a freezer bag. Cook from frozen, adding a few extra minutes to the cooking time.
    • Serving Ideas: Manti is often served with a side of sumac, which adds a tart flavor, or with a sprinkle of dried mint.

    Enjoy your homemade Turkish Manti!

  • Lemon Custard Pastry

    Lemon Custard Pastry

    Substances

    For the Lemon Custard:
    2 egg yolks
    100 g sugar
    50 g corn starch or flour
    Juice of two lemons
    300 ml milk
    For the Pastry:
    3 eggs
    120 g sugar
    Vanillin (a pinch)
    150 g melted butter
    300 g flour
    1 teaspoon baking powder
    Zest of two lemons
    Powdered sugar (for dusting)

    Instructions

    Put together the Lemon Custard:
    Mix Substances:
    In a saucepan, whisk collectively 2 egg yolks and 100 g sugar till effectively mixed.
    Add the juice of two lemons and 50 g of corn starch (or flour). Combine effectively.
    Regularly add 300 ml of milk, whisking repeatedly to keep away from lumps.

    Cook dinner the Custard:
    Place the saucepan over medium warmth and cook dinner, stirring continually, till the combination involves a boil and thickens.
    As soon as thickened, take away from warmth and let the custard cool utterly.

    Put together the Pastry:
    Combine Moist Substances:
    In a big bowl, beat 3 eggs and 120 g sugar till mild and fluffy.
    Add a pinch of vanillin, 150 g of melted butter, and the zest of two lemons. Combine effectively.

    Mix Dry Substances:
    In a separate bowl, mix 300 g flour and 1 teaspoon baking powder.
    Regularly add the dry substances to the moist combination, mixing till a clean dough types.

    Assemble the Pastry:
    Preheat your oven to 190°C (375°F).
    Grease and flour a baking dish.
    Pour half of the pastry dough into the ready dish and unfold evenly.
    Pour the cooled lemon custard over the dough, spreading it out evenly.
    High with the remaining pastry dough, spreading it rigorously to cowl the custard.

    Bake:
    Bake within the preheated oven for half-hour, or till the highest is golden brown and a toothpick inserted into the pastry comes out clear.

  • Coconut Butter Cake Recipe

    Coconut Butter Cake Recipe

    This Coconut Butter Cake is a pleasant deal with that mixes the richness of butter with the candy taste of dried shredded coconut. Excellent for any event, this cake is moist, tender, and positive to be a success with everybody who tries it.

    Preparation Time
    Prep Time: quarter-hour
    Cook dinner Time: 30-35 minutes
    Whole Time: 45-50 minutes

    Components

    100g (1/2 cup) unsalted butter
    100g (1/2 cup) caster sugar
    2 complete eggs (roughly 50g every)
    1/2 tsp vanilla extract
    100g (2/3 cup) cake flour
    1.5g (1/2 tsp) baking powder
    20ml (4 tsp) contemporary milk
    30g (1/3 cup) dried shredded coconut

    Instructions

    Put together the Pan:
    Preheat your oven to 170°C (340°F).
    Grease a 15x4x9cm loaf pan and line it with parchment paper.
    Cream the Butter and Sugar:
    In a big bowl, beat the unsalted butter and caster sugar collectively till gentle and fluffy.
    Add the Eggs and Vanilla:
    Add the eggs separately, beating nicely after every addition.
    Combine within the vanilla extract.
    Mix Dry Components:
    In a separate bowl, sift collectively the cake flour and baking powder.

    Combine Dry and Moist Components:
    Step by step add the dry elements to the butter combination, mixing till simply mixed.
    Stir within the contemporary milk and dried shredded coconut till evenly distributed.
    Bake the Cake:
    Pour the batter into the ready loaf pan and easy the highest.
    Bake at 170°C (340°F) for 30-35 minutes, or till a toothpick inserted into the middle comes out clear.
    Cool and Serve:
    Permit the cake to chill within the pan for 10 minutes earlier than transferring it to a wire rack to chill utterly.
    Slice and serve. Get pleasure from your scrumptious Coconut Butter Cake!

    Serving Ideas
    Serve with a dollop of whipped cream or a scoop of vanilla ice cream.
    Pair with a sizzling cup of tea or espresso for a pleasant afternoon deal with.
    Cooking Ideas
    Be certain the butter is at room temperature for simpler creaming.
    Don’t overmix the batter to maintain the cake gentle and tender.
    For added taste, toast the dried shredded coconut frivolously earlier than including it to the batter.
    Dietary Advantages
    Coconut: Supplies dietary fiber and wholesome fat.
    Eggs: A superb supply of protein and important vitamins.
    Dietary Info
    Vegetarian: This recipe is appropriate for vegetarians.
    Gluten-Free Possibility: Use a gluten-free flour mix as an alternative of cake flour.
    Storage
    Refrigerate: Retailer the cake in an hermetic container at room temperature for as much as 3 days.
    Freeze: You may freeze the cake for as much as 2 months. Wrap it tightly in plastic wrap and aluminum foil earlier than freezing. Thaw at room temperature earlier than serving.

    Why You’ll Love This Recipe
    Wealthy Taste: The mix of butter and coconut creates a deliciously wealthy taste.
    Moist and Tender: The cake is splendidly moist and tender, good for any event.
    Easy Components: Simple to make with easy, on a regular basis elements.
    Conclusion
    This Coconut Butter Cake is a tasty dessert that’s positive to impress with its wealthy taste and tender texture. Whether or not you’re serving it for an important day or having fun with it as an on a regular basis deal with, this cake is a must-try. Get pleasure from each chew!

  • German Potato Pancakes Recipe: A Crispy, Golden Delight

    German Potato Pancakes Recipe: A Crispy, Golden Delight

    German Potato Pancakes, or “Kartoffelpuffer,” are a traditional and beloved dish in German cuisine. These crispy, golden pancakes are made from grated potatoes and are often served as a side dish, snack, or even as a sweet treat with applesauce. Simple to make yet bursting with flavor, this recipe is a must-try for anyone looking to experience authentic German cooking at home.

    German Potato Pancakes are incredibly versatile and can be enjoyed in various ways. Traditionally, they are served as a savory side dish alongside meats like sausages or schnitzel. However, they can also be served as a sweet treat with applesauce or even sprinkled with sugar. These pancakes make a great appetizer, brunch item, or snack, and are perfect for any time of day.

    If you have leftovers, they can be reheated in the oven or a skillet to maintain their crispiness. They also freeze well, making them a convenient option for quick meals later on.

    This German Potato Pancakes recipe is a fantastic way to bring a taste of Germany into your kitchen. With their crispy exterior and tender, flavorful interior, these pancakes are sure to become a favorite in your household. Whether you enjoy them savory or sweet, these Kartoffelpuffer are a delicious and comforting dish that will leave you craving more!!

    INGREDIENTS:

    • 4 large russet potatoes
    • 1 medium onion
    • 2 large eggs
    • 1/4 cup all-purpose flour
    • 1/2 teaspoon salt
    • 1/4 teaspoon black pepper
    • Vegetable oil for frying
    • Applesauce or sour cream for serving (optional)

    INSTRUCTIONS:

    1. Prepare the Potatoes and Onion: Start by peeling the potatoes and onion. Using a box grater, grate the potatoes and onion into a large bowl. If you prefer a finer texture, you can also use a food processor.
    2. Remove Excess Moisture: To ensure your pancakes are crispy, it’s important to remove as much moisture as possible from the grated potatoes and onion. Place the mixture in a clean kitchen towel or cheesecloth and squeeze out the excess liquid. This step is crucial for achieving the perfect texture.
    3. Combine Ingredients: In the bowl with the grated potatoes and onion, add the eggs, flour, salt, and pepper. Mix everything together until well combined. The eggs and flour act as a binder, helping the pancakes hold their shape during frying.
    4. Heat the Oil: In a large skillet, heat about 1/4 inch of vegetable oil over medium heat. The oil should be hot enough to sizzle when a small drop of the potato mixture is added.
    5. Fry the Pancakes: Scoop about 1/4 cup of the potato mixture into the hot oil, pressing it down with a spatula to form a pancake. Fry the pancakes for about 3-4 minutes on each side, or until they are golden brown and crispy. Be sure not to overcrowd the pan, as this will lower the oil temperature and result in soggy pancakes.
    6. Drain and Serve: Once cooked, remove the pancakes from the skillet and place them on a paper towel-lined plate to drain any excess oil. Serve the German Potato Pancakes hot, with a side of applesauce or sour cream if desired.
  • Magic Crispy Baked Shrimp: A Perfectly Delicious Recipe

    Magic Crispy Baked Shrimp: A Perfectly Delicious Recipe

    If you’re a fan of shrimp, you’re in for a treat with this “Magic Crispy Baked Shrimp” recipe. It’s a delightful combination of tender shrimp coated in a crispy, flavorful crust, baked to golden perfection. This recipe is not only delicious but also quick and easy to prepare, making it perfect for weeknight dinners or even as an appetizer for gatherings.

    The Magic Crispy Baked Shrimp recipe is a true winner, combining ease of preparation with a delightful crunch and flavorful seasoning. Whether you’re cooking for your family or entertaining guests, this dish is sure to impress. Serve it with a side of pasta, rice, or a fresh salad, and you have a complete meal that’s both satisfying and delicious. Enjoy the magic of this crispy baked shrimp, and watch it become a new favorite in your recipe collection!

    INGREDIENTS:

    For this Magic Crispy Baked Shrimp recipe, you’ll need the following ingredients:

    • 1 lb (450g) large shrimp, peeled and deveined
    • 3 tablespoons olive oil, divided
    • 1/2 teaspoon garlic powder
    • 1/2 teaspoon onion powder
    • 1/2 teaspoon paprika
    • 1/4 teaspoon salt
    • 1/4 teaspoon black pepper
    • 1/4 teaspoon red pepper flakes (optional, for a bit of heat)
    • 1/2 cup panko breadcrumbs
    • 1/4 cup grated Parmesan cheese
    • 2 tablespoons chopped fresh parsley (optional, for garnish)
    • Lemon wedges, for serving

    INSTRUCTIONS:

    Step 1: Prepare the Shrimp

    • Preheat your oven to 400°F (200°C). Line a baking sheet with parchment paper or lightly grease it with non-stick spray.
    • In a large bowl, toss the shrimp with 1 tablespoon of olive oil, garlic powder, onion powder, paprika, salt, black pepper, and red pepper flakes (if using). Make sure the shrimp are evenly coated with the seasoning.

    Step 2: Prepare the Crispy Topping

    • In a separate bowl, combine the panko breadcrumbs and Parmesan cheese. Drizzle the remaining 2 tablespoons of olive oil over the mixture and toss until the breadcrumbs are well-coated and slightly clumpy. The olive oil helps the breadcrumbs brown and become crispy in the oven.

    Step 3: Assemble the Shrimp

    • Arrange the seasoned shrimp in a single layer on the prepared baking sheet. Spoon the breadcrumb mixture evenly over the top of each shrimp, pressing gently to adhere.

    Step 4: Bake the Shrimp

    • Place the baking sheet in the preheated oven and bake for 10-12 minutes, or until the shrimp are pink, opaque, and cooked through. The breadcrumb topping should be golden brown and crispy.

    Step 5: Serve

    • Once done, remove the shrimp from the oven and let them cool for a minute or two. Transfer the shrimp to a serving platter, sprinkle with chopped fresh parsley for a burst of color, and serve with lemon wedges on the side. The lemon juice adds a bright, fresh flavor that complements the richness of the crispy topping.

    Why This Recipe Works

    • Perfectly Balanced Flavors: The combination of garlic, onion, and paprika with a hint of spice from the red pepper flakes creates a well-rounded flavor profile that enhances the natural sweetness of the shrimp.
    • Crispy Texture: The panko breadcrumbs, combined with Parmesan cheese and olive oil, create a crunchy crust that contrasts beautifully with the tender shrimp.
    • Quick and Easy: With minimal prep and a short baking time, this recipe is ideal for busy weeknights or when you need to whip up something impressive in a hurry.
    • Versatile: This dish can be served as a main course with a side of vegetables or salad, or as an appetizer for a crowd. It’s also easy to customize by adding your favorite herbs or spices to the breadcrumb mixture.

    Tips for Success

    • Use Fresh or Thawed Shrimp: For the best texture, use fresh shrimp or thoroughly thawed frozen shrimp. Pat the shrimp dry with paper towels before seasoning to ensure the breadcrumbs adhere well.
    • Don’t Overcrowd the Pan: Arrange the shrimp in a single layer on the baking sheet, leaving a bit of space between each piece. This allows the heat to circulate evenly, ensuring that the shrimp cook perfectly and the topping gets crispy.
    • Watch the Baking Time: Shrimp cook quickly, so keep an eye on them while they’re in the oven. Overcooking can result in rubbery shrimp, so remove them as soon as they turn pink and opaque
  • Brown Sugar Ham Glaze Recipe: A Perfect Sweet and Savory Finish for Your Ham

    Brown Sugar Ham Glaze Recipe: A Perfect Sweet and Savory Finish for Your Ham

    When it comes to holiday dinners or special occasions, a glazed ham often takes center stage. One of the most popular and delicious ways to elevate your ham is with a rich, sweet, and slightly tangy brown sugar glaze. This glaze not only adds a beautiful caramelized crust to the ham but also infuses it with mouthwatering flavors that your guests will love.

    The Brown Sugar Ham Glaze is a classic recipe that brings out the best in your holiday or special occasion ham. With its perfect balance of sweetness and spice, this glaze creates a beautiful, sticky crust that enhances the natural flavor of the ham. Whether you’re serving it for Christmas, Easter, or any gathering, this glaze will undoubtedly be a crowd-pleaser. Enjoy making this easy yet impressive dish that will have everyone asking for seconds!

    Here’s how to make the perfect Brown Sugar Ham Glaze and prepare your ham for a truly unforgettable meal.

    INGREDIENTS FOR BROWN SUGAR HAM GLAZE:

    • 1 cup packed brown sugar
    • 1/2 cup honey
    • 1/4 cup Dijon mustard
    • 1/4 cup apple cider vinegar
    • 2 tbsp unsalted butter
    • 1/2 tsp ground cinnamon
    • 1/4 tsp ground cloves
    • 1/4 tsp ground nutmeg
    • 1/4 tsp black pepper
    • 1/4 cup pineapple juice (optional, for extra flavor)

    INSTRUCTIONS:

    Step 1: Prepare the Ham

    1. Choose your ham: For the best results, start with a fully cooked, bone-in ham. You can choose either a spiral-cut ham or a whole ham. The size of the ham will depend on the number of servings you need, but typically a 7-10 pound ham is perfect for most gatherings.
    2. Score the ham: Preheat your oven to 325°F (163°C). Place the ham on a roasting rack in a large roasting pan. Using a sharp knife, score the surface of the ham in a diamond pattern, making shallow cuts about 1/4 inch deep. This will allow the glaze to penetrate the meat and create a more flavorful crust.

    Step 2: Make the Brown Sugar Glaze

    1. Melt the butter: In a medium saucepan, melt the butter over medium heat until it’s fully melted and beginning to bubble.
    2. Add the sugar and honey: Stir in the brown sugar and honey, and cook for about 2-3 minutes until the sugar has dissolved and the mixture is smooth.
    3. Incorporate the spices and mustard: Add the Dijon mustard, apple cider vinegar, cinnamon, cloves, nutmeg, and black pepper. Stir continuously until all the ingredients are well combined.
    4. Simmer: If using, stir in the pineapple juice for an extra layer of sweetness and tanginess. Reduce the heat to low and let the glaze simmer for 5-7 minutes, allowing the flavors to meld together. The glaze should thicken slightly but remain pourable.

    Step 3: Glaze and Bake the Ham

    1. Apply the first layer of glaze: Brush a generous amount of the brown sugar glaze over the surface of the ham, making sure to get into the scored cuts. Cover the ham loosely with aluminum foil to prevent it from drying out.
    2. Bake the ham: Place the ham in the preheated oven and bake according to the weight of your ham (typically 15-18 minutes per pound). Baste the ham with additional glaze every 20-30 minutes to build up a rich, caramelized coating.
    3. Final glaze and finish: During the last 15-20 minutes of baking, remove the foil and brush on a final thick layer of glaze. Turn up the oven to 400°F (204°C) to help the glaze caramelize, keeping a close eye to avoid burning.

    Step 4: Serve the Ham

    1. Rest the ham: Once the ham is fully cooked and the glaze is beautifully caramelized, remove it from the oven and let it rest for 15-20 minutes before slicing. This allows the juices to redistribute throughout the meat, ensuring a moist and flavorful ham.
    2. Slice and serve: Carve the ham into slices, making sure each piece gets a bit of that delicious glaze. Serve the ham alongside your favorite sides, and enjoy the perfect combination of sweet and savory flavors.

    Tips for the Best Brown Sugar Ham Glaze

    • Use high-quality ingredients: The quality of your brown sugar, honey, and spices will directly impact the flavor of the glaze. Opt for fresh spices and pure honey for the best results.
    • Adjust the sweetness: If you prefer a less sweet glaze, you can reduce the amount of brown sugar or increase the amount of mustard and vinegar for more tanginess.
    • Pineapple juice alternative: If you don’t have pineapple juice, orange juice or apple juice can also add a nice fruity note to the glaze.
    • Double the glaze: For an extra-large ham or if you like a particularly thick glaze, consider doubling the glaze recipe to ensure you have plenty to baste with throughout the cooking process.

    ENJOY IT 💛

  • The Ultimate Bacon Mac ‘n’ Cheese Burger: A Comfort Food Delight

    The Ultimate Bacon Mac ‘n’ Cheese Burger: A Comfort Food Delight

    If you’re a fan of indulgent comfort food, then the Bacon Mac ‘n’ Cheese Burger is a must-try recipe that combines two of the most beloved dishes into one mouthwatering masterpiece. Imagine a juicy, flavorful burger topped with creamy, cheesy mac ‘n’ cheese and crispy bacon, all nestled between two soft buns. This burger is not just a meal; it’s an experience.

    The Bacon Mac ‘n’ Cheese Burger is the ultimate treat for burger lovers who enjoy pushing the boundaries of traditional recipes. Combining the creamy comfort of mac ‘n’ cheese with the savory crunch of bacon and the hearty satisfaction of a well-cooked burger, this recipe is sure to be a hit at your next cookout or family dinner. Give it a try and enjoy the delightful fusion of flavors!

    Here’s how to make this incredible dish at home.

    Ingredients

    For the Burger:

    • 1 lb ground beef (preferably 80% lean)
    • Salt and pepper to taste
    • 1 tsp garlic powder
    • 1 tsp onion powder
    • 4 slices of cheddar cheese
    • 4 brioche or hamburger buns
    • Butter for toasting buns

    For the Mac ‘n’ Cheese:

    • 1 cup elbow macaroni
    • 2 tbsp butter
    • 2 tbsp all-purpose flour
    • 1 cup whole milk
    • 1 cup shredded sharp cheddar cheese
    • 1/2 cup shredded mozzarella cheese
    • Salt and pepper to taste

    For the Bacon:

    • 8 slices of bacon, cooked to your preference (crispy or slightly chewy)

    INSTRUCTIONS:

    Step 1: Prepare the Mac ‘n’ Cheese

    1. Cook the pasta: Start by cooking the elbow macaroni according to the package instructions. Once al dente, drain and set aside.
    2. Make the cheese sauce: In a medium saucepan, melt the butter over medium heat. Stir in the flour to create a roux, cooking for about 1-2 minutes until it’s slightly golden.
    3. Add the milk: Gradually whisk in the milk, stirring constantly until the mixture thickens. This should take about 3-4 minutes.
    4. Add the cheese: Once the sauce has thickened, remove the pan from the heat and stir in the shredded cheddar and mozzarella until melted and smooth. Season with salt and pepper to taste.
    5. Combine: Stir the cooked macaroni into the cheese sauce until fully coated. Set aside to cool slightly, allowing the sauce to thicken.

    Step 2: Cook the Bacon

    1. Fry the bacon: While the mac ‘n’ cheese cools, cook the bacon in a large skillet over medium heat until it reaches your desired level of crispiness. Drain on paper towels and set aside.

    Step 3: Prepare the Burgers

    1. Season the beef: In a large mixing bowl, combine the ground beef with garlic powder, onion powder, salt, and pepper. Gently mix until the seasonings are evenly distributed.
    2. Form patties: Divide the seasoned beef into four equal portions and shape them into patties that are slightly larger than your buns (they will shrink slightly as they cook).
    3. Cook the patties: Heat a grill or skillet over medium-high heat. Cook the patties for about 4-5 minutes on each side, or until they reach your preferred doneness. During the last minute of cooking, place a slice of cheddar cheese on each patty to melt.

    Step 4: Assemble the Burgers

    1. Toast the buns: Lightly butter the inside of each bun and toast them on the grill or in a skillet until golden brown.
    2. Build the burger: Place a cheese-topped patty on the bottom half of each bun. Top each patty with a generous scoop of mac ‘n’ cheese, followed by two slices of bacon. Finish with the top half of the bun.
    3. Serve: Serve the burgers immediately, with any remaining mac ‘n’ cheese on the side.

    Tips for the Perfect Bacon Mac ‘n’ Cheese Burger

    • Use freshly shredded cheese: Pre-shredded cheese often contains anti-caking agents that can prevent a smooth, creamy sauce. Shredding your own cheese will result in a better texture and flavor.
    • Season the beef generously: Don’t be afraid to add a bit more seasoning to your beef patties, as the robust flavors will balance well with the richness of the mac ‘n’ cheese and bacon.
    • Try different cheeses: For a different twist, you can experiment with other cheeses like gouda, pepper jack, or gruyere in your mac ‘n’ cheese.
    • Add toppings: While this burger is already a flavor bomb, feel free to add extras like caramelized onions, pickles, or a drizzle of barbecue sauce for even more deliciousness.