Blog

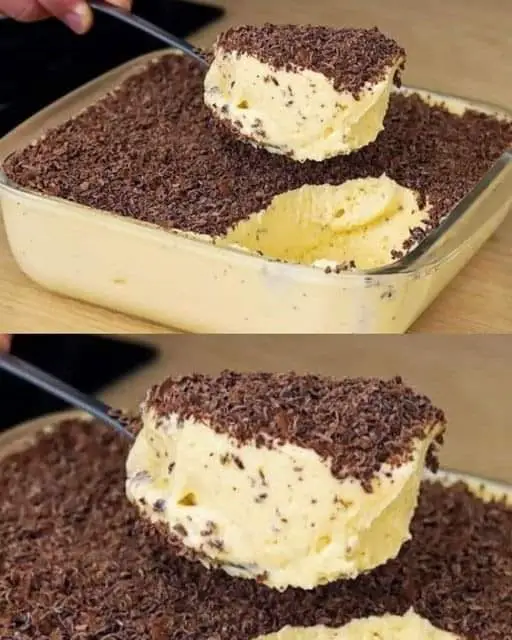
  • Easy Ice Cream Recipe: 4 Ingredients and Very Creamy, Yields Well

    Easy Ice Cream Recipe: 4 Ingredients and Very Creamy, Yields Well

    Quick and Creamy Homemade Ice Cream Recipe | Only 4 Ingredients!

    Whip up a batch of deliciously creamy homemade ice cream with just 4 simple ingredients! This easy recipe yields a wonderfully smooth and satisfying treat.

    This basic no-churn ice cream recipe is versatile, and you can customize it by adding different flavors or mix-ins according to your preference. Experiment with different extracts, fruits, or nuts to create your favorite variations. Enjoy your homemade ice cream!

    Introduction: Indulge in the creamy goodness of homemade ice cream with our quick and easy recipe! With just four simple ingredients, you can create a batch of irresistibly smooth and creamy ice cream that will rival any store-bought treat. Whether you’re craving a refreshing dessert on a hot day or simply looking for a delicious sweet treat, this homemade ice cream recipe is sure to satisfy. Let’s dive into how to make this creamy delight that’s bound to become a family favorite.

    Ingredients:

    • 2 cups heavy cream
    • 1 can (14 ounces) sweetened condensed milk
    • 1 teaspoon vanilla extract
    • Your choice of mix-ins (chocolate chips, crushed cookies, fruit, etc.) – optional

    Instructions:

    1. In a large mixing bowl, whip the heavy cream until stiff peaks form. You can use an electric mixer or do this by hand.
    2. In a separate bowl, combine the sweetened condensed milk and vanilla extract. Mix until well combined.
    3. Gently fold the sweetened condensed milk mixture into the whipped cream. Be careful not to deflate the whipped cream; fold until the mixture is smooth and well incorporated.
    4. If desired, fold in your chosen mix-ins, such as chocolate chips or crushed cookies.
    5. Pour the ice cream mixture into a lidded container or a loaf pan, spreading it out evenly.
    6. Cover the container with a lid or plastic wrap and freeze for at least 6 hours or overnight.
    7. Once fully frozen, your easy and creamy homemade ice cream is ready to be scooped and enjoyed!
  • How to bake scones easily and perfectly

    How to bake scones easily and perfectly

    How to bake scones easily and perfectly

    Table of Contents

    To bake Scones you will need :

    3 ¼ cup plain flour
    1 cup unsalted butter very cold
    1 cup buttermilk (very cold)
    2tspn baking powder
    ¼ tsp bicarbonate of soda
    1tsp salt
    3 tspn granulated sugar

    How to bake scones :

    Add flour ,salt, sugar, baking powder, bicarbonate of soda in a mixing bowl combine with a fork
    Grate the butter using a kitchen grater inside the dry ingredients mixture, use a fork to combine until you reach bread crumbs like mixture .
    Place the bowl in the refrigerator for about 15minutes
    Remove from the refrigerator and add very cold buttermilk gradually and at the same time mixing with a fork.
    Add about 1 tblspn of flour on your working surface and pour your dough ( that is not fully combined at this point but don’t add any extra buttermilk)
    Use your hands to mix the dough, eventually it will combine and form a rectangle
    Use a dough cutter and cut the rectangle into half, Place the other half on top of the other, and roll into a 1 cm thick rectangle using a rolling pin
    Now take your biscuit cutter, cut into desired shapes.
    Brush with milk before baking into a preheated oven of 180degrees for about 20 to 25mins.
    Now you know How to bake scones
    Enjoy your English Scones.

  • Baked Cauliflower with Cheese and Herb Sauce

    Baked Cauliflower with Cheese and Herb Sauce

    Baked Cauliflower with Cheese and Herb Sauce

    Table of Contents

    Ingredients

    For the Cauliflower:

    • Cauliflower: 1, divided into florets
    • Lemon: 3 slices
    • Fresh Dill: 2 sprigs
    • Hard Cheese: Amount to taste, grated (e.g., Parmesan)
    • Semi-Hard Cheese: Amount to taste, grated (e.g., Cheddar or Gruyère)
    • Rosemary: To taste
    • Salt: To taste

    For the Sauce:

    • Butter: 150 g (5.3 oz)
    • Milk: 250 ml (8.5 fl oz)
    • Flour: Around 2 tablespoons, to thicken the sauce
    • Salt: To taste
    • Black Pepper: To taste
    • Nutmeg: To taste
    • Garlic: 4 cloves, minced

    Instructions

    1. Prepare the Cauliflower

    • Divide the Cauliflower: Start by dividing the cauliflower into florets. Cut the florets into bite-sized pieces for even cooking.
    • Cook the Cauliflower: Place the sliced cauliflower in a tall pot with plenty of water. Add 3 slices of lemon and 2 sprigs of fresh dill. These additions will infuse the cauliflower with a fresh, zesty flavor. Cover the pot with a lid and cook for 5 minutes until the cauliflower is slightly tender but still firm.

    2. Prepare the Sauce

    • Melt the Butter: In a saucepan, melt 150 g of butter over low heat. Once melted, add 2 tablespoons of flour and stir continuously to create a smooth roux. This will thicken the sauce.
    • Add Milk and Seasonings: Gradually pour in 250 ml of milk while whisking to avoid lumps. Continue to cook on low heat, stirring constantly, until the sauce thickens.
    • Season the Sauce: Season the sauce with a pinch of saltblack pepper, and a dash of nutmeg for warmth. Add the minced garlic and continue to cook for another 2 minutes to allow the flavors to meld together.

      3. Assemble the Dish

      • Drain the Cauliflower: Once the cauliflower is cooked, drain it thoroughly and place it in a baking dish.
      • Add the Cheese and Sauce: Sprinkle a generous handful of grated hard cheese (like Parmesan) over the cauliflower. Add a pinch of rosemary for an aromatic touch. Pour the prepared sauce evenly over the cauliflower.
      • Top with More Cheese: Sprinkle a handful of grated semi-hard cheese (like Cheddar or Gruyère) over the top. This will melt beautifully and form a golden crust.

      4. Bake the Cauliflower

      • Preheat the Oven: Preheat your oven to 200°C (390°F).
      • Bake: Place the baking dish in the preheated oven and bake for 15 minutes or until the cheese is melted and golden brown.

      5. Serve

      • Serve Hot: Remove the baked cauliflower from the oven and let it cool slightly before serving. This dish is best enjoyed hot, with the cheese bubbly and the cauliflower tender.

      Nutrition Information

      • Servings: 4
      • Calories: Approximately 350 kcal per serving
      • Protein: 12g
      • Fat: 28g
      • Carbohydrates: 14g
      • Fiber: 4g
      • Sugar: 5g
      • Sodium: 600mg

      This Baked Cauliflower with Cheese and Herb Sauce is a delicious and satisfying dish that brings out the best in simple ingredients. The combination of creamy sauce, melted cheese, and tender cauliflower makes it a perfect choice for a cozy dinner. Enjoy this dish with your loved ones, and watch it quickly become a new favorite in your household!

  • Blueberry and Cream Cheese Cake

    Blueberry and Cream Cheese Cake

    Ingredients

    For the Sponge Cake:

    • 5 egg yolks
    • A dash of salt
    • 60 grams of granulated sugar
    • 40 grams of unsweetened cocoa powder
    • 45 grams of water
    • 80 grams of all-purpose flour
    • 1 tablespoon of cornstarch
    • 1 teaspoon of baking powder
    • 5 egg whites
    • An additional 60 grams of granulated sugar
    For the Blueberry Cream Cheese Filling:
    • 18 grams of gelatin powder
    • 120 grams of cold water for gelatin
    • 600 grams of cream cheese softened
    • 240 grams of powdered sugar
    • 500 grams of fresh blueberries
    • 60 grams of granulated sugar
    • 2 tablespoons of fresh lemon juice
    • 500 grams of heavy cream 33% fat content
    • An additional 3 grams of gelatin
    • 20 grams of cold water for the additional gelatin

    Instructions

    For the Sponge Cake:

    • Prepare: Preheat your oven to 180℃ (356℉). Line the baking dish with parchment paper.
    • Yolk Mixture: Beat the egg yolks with a dash of salt and 60 grams of sugar until light and fluffy. Incorporate the cocoa and water smoothly, followed by sifting in the flour, cornstarch, and baking powder.
    • Egg Whites: In a separate bowl, whisk the egg whites to soft peaks, gradually adding 60 grams of sugar until stiff peaks form.
    • Combine: Gently fold the egg whites into the yolk mixture to maintain airiness.
    • Bake: Pour the batter into the prepared dish, smoothing the top. Bake for 25 minutes. Let cool before assembling.

    For the Blueberry Cream Cheese Filling:

    • Gelatin Prep: Sprinkle the gelatin over the cold water in two separate bowls (18g for the cheese mixture, 3g for the cream) and let it bloom for about 5 minutes.
    • Cheese Mixture: Whip the cream cheese and powdered sugar until smooth. Gently warm the first gelatin mixture until dissolved and mix into the cheese along with the lemon juice.
    • Blueberry Blend: In a saucepan, combine blueberries, 60 grams of sugar, and cook until the berries begin to burst. Allow to cool slightly, then blend into the cheese mixture.
    • Whipped Cream: Whip the heavy cream to soft peaks. Warm the additional gelatin mixture and incorporate into the whipped cream.
    • Fold: Gently fold the whipped cream into the blueberry cheese mixture for a light, airy filling.
    Assembly:
    • Spread the blueberry cream mixture over the cooled sponge cake base. Chill in the refrigerator for at least 3 hours to set.

    To Serve:

    • Slice the cake into generous pieces and serve chilled. Each bite promises a harmonious blend of velvety cream cheese, bursting blueberries, and chocolatey sponge cake.
  • Cheesy Pork Chop Casserole

    Cheesy Pork Chop Casserole

    This indulgent dish is a celebration of savory satisfaction, featuring thick, succulent pork chops enveloped in a rich and gooey cheese-laden embrace. Each pork chop, tender and expertly seasoned, is seared to perfection before being nestled into a bed of creamy, cheesy goodness. The star of the show is undoubtedly the molten blanket of melted cheese, which blankets the pork chops, creating a decadent and comforting symphony of flavors.

    As the casserole emerges from the oven, the irresistible aroma of bubbling cheese and perfectly cooked pork fills the air, creating an anticipation that heightens the dining experience. The cheese, a melty medley of gooey perfection, forms a golden crust on top, promising a delightful contrast of textures as you delve into this culinary masterpiece.

    The pork chops, having absorbed the essence of the cheese and accompanying seasonings, are not only tender but also infused with a depth of flavor that extends beyond the surface. The cheese, in turn, adds a creamy and indulgent element, creating a harmonious marriage of meaty richness and dairy decadence in every heavenly bite.

    As you take your first forkful, the pork chops yield effortlessly, revealing a succulence that is complemented by the cheesy symphony. The flavors mingle on the palate, creating a comforting and satisfying experience that transcends the ordinary. The Cheesy Pork Chop Casserole is a testament to the art of comfort food, a dish that invites you to savor the simple pleasures of a well-executed pairing of pork and cheese. It is a celebration of warmth, flavor, and indulgence, a culinary journey that lingers in the memory long after the last forkful has been enjoyed.

    Ingredients

    6 pork chops
    8 sliced potatoes
    1 sliced onion
    6 tablespoons butter
    7 tablespoons extra virgin olive oil
    3 cups chicken stock
    2 1/2 cups grated cheddar cheese
    2 cups milk
    2/3 cup all-purpose flour
    1/4 cup chopped chives
    Salt and pepper to taste
    1 teaspoon granulated garlic

    Preparation

    1. Preheat your oven to 350°F. Meanwhile, soak sliced potatoes in cold water. This removes excess starch and prevents browning. This step can be done a few hours ahed as well.
    2. In a large skillet, melt 4 tbsp of butter and 4 tbsp of olive oil over medium-high heat. Add onions and cook until caramelized. Sprinkle 2/3 cup of all-purpose flour over onions.
    3. Pour in 3 cups of chicken stock and 2 cups of milk. Stir continuously until the mixture thickens and comes to a simmer. Season with salt and pepper. Stir in cheese and chives until melted. Remove from heat.
    4. Grease casserole dish. Drain soaked potatoes. Layer half of potatoes and follow with half of cheese sauce. Repeat for second layer.
    5. Bake in preheated oven for 20 mins.
    6. Meanwhile, let’s brown the chops! Mix together 1 cup flour, granulated garlic, salt and pepper. Dredge each pork chop in this mixture. In another skillet, heat 2 tbsp of softened butter and 3 tbsp of olive oil over medium-high heat. Add the pork chops and cook until they’re browned on both sides, about 4-5 minutes per side.
    7. Place browned pork chops over potatoes in casserole.
    8. Bake uncovered for 40 minutes or until the pork chops are cooked through and the casserole is bubbly and golden.

    Optionally, garnish with additional chopped chives before serving.

    Whether it’s a cozy family dinner or a gathering with friends, this Cheesy Pork Chop Casserole is sure to impress. The tender pork chops combined with the creamy, cheesy sauce make for a satisfying and flavorful dish that everyone will love. So, grab your ingredients and get ready to delight your taste buds with this delicious casserole!

  • 5 Minute Chocolate Fudge

    5 Minute Chocolate Fudge

    Ingredients:
    2 tablespoons of butter
    2/3 cup evaporated milk
    1 2/3 cups granulated sugar
    1/2 teaspoon of salt
    2 cups miniature marshmallows
    1 1/2 c chocolate chips
    1 tsp vanilla extract
    1/2 cup pecan
    Instructions:
    Step1: Mixing butter, milk, sugar also salt in saucepan on heat.
    Bring mixture to boil; cook 4 to 5 minutes, stirring constantly.
    Remove the pan from the fire. Stir in miniature marshmallows, chocolate chips, vanilla and chopped walnuts.
    Step2: Beat fudge for about 1 minute or until marshmallows melt and mixture is well blended. Pour the fudge mixture into a buttered 8-inch square pan and let cool and set.
    Cutting fudge to small squares.
  • Halved Crispy Roast Potatoes Recipe: The Ultimate Side Dish

    Halved Crispy Roast Potatoes Recipe: The Ultimate Side Dish

    When it comes to side dishes, few can rival the deliciousness of perfectly roasted potatoes. The “Halved Crispy Roast Potatoes” recipe takes the classic roast potato to a whole new level, offering a crunchy exterior and a soft, fluffy interior that makes it the perfect accompaniment to any meal. This recipe is a staple in many households, loved for its simplicity, affordability, and unbeatable flavor. Whether you’re serving it with a Sunday roast, alongside a weeknight dinner, or as part of a festive feast, these halved crispy roast potatoes will leave everyone asking for seconds.


    This “Halved Crispy Roast Potatoes” recipe is a must-try for anyone who loves a good, hearty side dish. It’s easy to make, incredibly satisfying, and pairs well with just about any main course. Enjoy the delightful crunch and creamy center with every bite

    INGREDIENTS:

    • 6 large potatoes, preferably Yukon Gold or Russet
    • 3 tablespoons of olive oil or melted butter
    • 1 teaspoon of sea salt
    • 1/2 teaspoon of freshly ground black pepper
    • 1/2 teaspoon of garlic powder (optional)
    • 1 teaspoon of fresh or dried rosemary, finely chopped (optional)
    • 1/2 teaspoon of paprika (optional)
    • Fresh parsley, chopped (for garnish)

    INSTRUCTIONS:

    1. Preheat Your Oven: Start by preheating your oven to 425°F (220°C). This high temperature is essential for achieving that perfect crispy exterior on your potatoes.
    2. Prepare the Potatoes: Wash and peel the potatoes if you prefer, although leaving the skin on can add extra texture and flavor. Cut each potato in half lengthwise to create large, even halves. This size allows the potatoes to cook evenly while giving you that delicious contrast between the crispy edges and the soft interior.
    3. Parboil the Potatoes (Optional but Recommended): For the crispiest potatoes, parboil them before roasting. Place the halved potatoes in a large pot of salted boiling water and cook for about 8-10 minutes until they are just beginning to soften. Drain them thoroughly and let them cool slightly. This step helps to rough up the edges of the potatoes, which in turn creates more surface area for crisping in the oven.
    4. Season the Potatoes: In a large bowl, toss the halved potatoes with olive oil or melted butter. Ensure each potato half is well-coated. Add sea salt, black pepper, and any other seasonings you prefer, such as garlic powder, rosemary, or paprika. The seasoning is key to flavoring the potatoes inside and out.
    5. Roast the Potatoes: Arrange the seasoned potatoes cut side down on a baking sheet lined with parchment paper or foil. This positioning ensures the cut sides get extra crispy. Place the baking sheet in the preheated oven and roast for about 30-40 minutes, or until the potatoes are golden brown and crispy on the outside. Flip the potatoes halfway through the cooking time to ensure they cook evenly.
    6. Garnish and Serve: Once the potatoes are perfectly crispy and cooked through, remove them from the oven. Garnish with fresh parsley for a pop of color and added freshness. Serve immediately while hot and crispy.

    Tips for Perfect Halved Crispy Roast Potatoes:

    • Use the Right Potatoes: Yukon Gold or Russet potatoes work best for this recipe due to their starchy nature, which yields a fluffy interior and crispy exterior.
    • Don’t Skip the Parboiling: Parboiling is the secret to getting that perfect crunch, as it roughs up the surface of the potatoes, allowing them to crisp up better in the oven.
    • Ensure Even Coating: Make sure each potato half is thoroughly coated in oil or butter and seasoning. This not only adds flavor but also helps in achieving that desirable golden crust.
    • Space Them Out: Don’t overcrowd the baking sheet. Giving the potatoes enough space allows the hot air to circulate, ensuring they roast rather than steam.
  • Creamy Banana Crunch Dessert: A Delightful Treat for Any Occasion

    Creamy Banana Crunch Dessert: A Delightful Treat for Any Occasion

    This Creamy Banana Crunch Dessert with Pudding Rice Krispies is a delightful treat that combines the sweet, creamy taste of bananas with the satisfying crunch of Rice Krispies, all enveloped in a luscious pudding layer. It’s an easy-to-make, no-bake dessert that is sure to become a favorite at any gathering.

    This dessert is a wonderful combination of creamy, fruity, and crunchy elements, making it a hit for any occasion. Whether you’re serving it at a family gathering or just indulging at home, the Creamy Banana Crunch Dessert is a delicious and easy-to-make treat that everyone will love.

    Ingredients:

    • 4 cups Rice Krispies cereal
    • 1/2 cup butter
    • 1/2 cup brown sugar
    • 1 (3.4 oz) box of instant vanilla pudding mix
    • 2 cups cold milk
    • 1 (8 oz) container of whipped topping (Cool Whip)
    • 4-5 ripe bananas, sliced
    • 1 cup crushed pineapple, drained
    • 1/2 cup chopped nuts (optional)

    INSTRUCTIONS:

    1. Prepare the Crunch Layer:
      • In a large saucepan, melt the butter over medium heat.
      • Add the brown sugar and stir until it’s completely dissolved and the mixture starts to bubble slightly.
      • Remove from heat and stir in the Rice Krispies until they’re fully coated with the sugary mixture.
      • Press the Rice Krispies mixture into the bottom of a 9×13-inch baking dish, creating a firm and even layer. Let it cool and set while you prepare the other components.
    2. Make the Pudding:
      • In a medium mixing bowl, whisk together the instant vanilla pudding mix and cold milk until thickened, about 2 minutes.
      • Gently fold in the whipped topping until fully combined.
    3. Assemble the Dessert:
      • Spread half of the pudding mixture over the cooled Rice Krispies crust.
      • Layer the sliced bananas evenly over the pudding.
      • Add the drained crushed pineapple on top of the bananas.
      • Spread the remaining pudding mixture over the fruit.
      • If desired, sprinkle chopped nuts on top for added texture and flavor.
    4. Chill and Serve:
      • Refrigerate the dessert for at least 2 hours to allow the flavors to meld and the dessert to firm up.
      • Before serving, garnish with additional banana slices or a drizzle of caramel sauce, if desired.

    Tips for Success:

    • Bananas: Use ripe but firm bananas for the best flavor and texture. Overripe bananas might turn mushy.
    • Rice Krispies: Press the Rice Krispies mixture firmly into the dish, so it forms a solid base that holds together when cut.
    • Chilling: Ensure the dessert is well-chilled before serving to make slicing easier and to enhance the flavors.
  • Strawberry Shortcake Cheesecake Dessert Sushi Rolls

    Strawberry Shortcake Cheesecake Dessert Sushi Rolls

    Ingredients:
    Cheesecake Filling:
    1 package (8 oz) cream cheese, softened
    1/4 cup granulated sugar
    1 teaspoon vanilla extract
    1 cup heavy whipping cream
    Strawberry Filling:
    1 cup fresh strawberries, diced
    2 tablespoons granulated sugar
    Shortcake Layer:
    1 1/2 cups crushed shortbread cookies or graham crackers
    1/4 cup unsalted butter, melted
    Rolls:
    6 large crepes or thin cake layers (store-bought or homemade)
    Powdered sugar, for dusting
    Directions:
    Prepare the Cheesecake Filling:
    In a large bowl, beat the cream cheese, granulated sugar, and vanilla extract until smooth and creamy.
    In a separate bowl, whip the heavy whipping cream until stiff peaks form.
    Gently fold the whipped cream into the cream cheese mixture until well combined.
    Prepare the Strawberry Filling:
    In a small bowl, mix the diced strawberries with the granulated sugar. Let sit for about 10 minutes to macerate.
    Prepare the Shortcake Layer:
    In a medium bowl, combine the crushed shortbread cookies or graham crackers with the melted butter until the mixture resembles wet sand.
    Assemble the Rolls:
    Lay out a crepe or thin cake layer on a flat surface. Spread a thin layer of the cheesecake filling evenly over the entire surface.
    Sprinkle a portion of the shortcake layer over the cheesecake filling.
    Spoon a line of the strawberry filling about 1 inch from the edge of the crepe or cake layer.
    Carefully roll the crepe or cake layer tightly around the strawberry filling, creating a sushi roll shape.
    Repeat with the remaining crepes or cake layers and fillings.
    Chill and Slice:
    Wrap each roll tightly in plastic wrap and refrigerate for at least 1 hour to firm up.
    Once chilled, remove the plastic wrap and use a sharp knife to slice each roll into 1-inch pieces.
    Serve and Enjoy:
    Arrange the Strawberry Shortcake Cheesecake Dessert Sushi Rolls on a serving platter and dust with powdered sugar before serving. Enjoy this delightful and creative treat!
  • Carrot cake rolls with cream

    Carrot cake rolls with cream

    Carrot cake rolls with cream cheese frost filling

    Ingredients

    +For cake:

    °3/4 cup flour

    °2 teaspoons. Ground cinnamon

    °1 teaspoon. Baking Powder

    °1/2 teaspoon. Kosher Salt

    °1/2 teaspoon. Ground ginger

    °1/4 teaspoon. Ground nutmeg

    °1/8 teaspoon. Earth Carnation

    °3 large eggs

    °1/2 Cup Sugar Sweetheart

    °2 tbsp. Vegetable Oil

    °1 teaspoon. Pure vanilla extract

    °3 Grated Medium Islands

    +To fill:

    °1 cup sugar sweets

    °1 pack (8 ounces) soft cream cheese

    °6 tbsp. Soft salted butter

    °1 teaspoon. Pure vanilla extract

    +For glass spray:

    °3 cups of confectionery sugar

    °1/2 teaspoon vanilla extract

    °10-11 tbsp. Milk

    Preparation

    Preheat oven to 375 degrees Fahrenheit and line 15 inches by 10 inches with paper, leaving a little bump on each side.

    In a medium bowl, combine the flour, cinnamon, baking powder, salt, ginger, nutmeg, cloves and whisk well.

    In a large bowl, combine the eggs with the sugar and whisk until combined.

    Add the vegetable oil, vanilla extract and carrots and mix again until combined.

    Pour the dry ingredients into a large bowl and stir until combined.

    Stir the mixture until it is combined. Pour the mixture into the jelly pan and spread in an equal layer. Bake for 12 minutes, then remove the cake from the pan using bulges on both sides.

    Place the cake on a large wooden chopping board and gently roll the cake along.

    Carefully transfer the cake to the cooling rack and allow it to cool completely.

    to prepare the filler,

    Combine the confectionery sugar, cream cheese, butter and vanilla extract in a medium bowl and whisk until smooth and creamy.

    Carefully roll out the cake and spread the filling on the cake, leaving a small gap on all edges.

    Wrap the cake and tightly wrap it in plastic wrap.

    Cool in the fridge for 1 hour before serving.

    When ready to serve, mix the glazing ingredients in the mixing bowl and whisk until smooth. Sprinkle over the cake and chop.

    Enjoy !

  • Tacos with Potatoes and Green Peppers

    Tacos with Potatoes and Green Peppers

    Potato Tacos with Spicy Green Peppers

    Ingredients

    • 1.5 pounds small boiling potatoes, cut in half
    • 3 tablespoons of olive oil, and extra for cooking the tortillas
    • 1 small white onion, thinly sliced
    • 6 regular poblano peppers, roasted and peeled
    • A little bit of salt
    • 8 ounces of crumbled Mexican fresh cheese, or you can use goat cheese or feta as substitutes
    • 16 epazote leaves, finely chopped (if desired)
    • 8-12 corn tortillas, lightly cooked in olive oil

    How to Prepare Potato Tacos with Spicy Green Peppers

    1. Put the potatoes in salted water making sure they are covered. Cook until they become soft, about 15 minutes.
    2. After boiling, let them cool with cold water. After they have cooled down, remove the skin and cut them into small pieces.
    3. Pour the oil into a strong pan and heat it over medium heat.
    4. Add the chopped onions and potatoes. Cook the ingredients in a pan, stirring them every so often to prevent them from sticking, until they turn a dark brown color. This will take around 10 to 15 minutes.
    5. While the potatoes are cooking, remove the seeds from the roasted poblanos and roughly chop them.
    6. Combine these diced poblano peppers with the fried potatoes. If you have epazote, put it in and add salt to the mixture.
    7. Turn off the stove and mix in the cheese.
    8. In another pan, cook the corn tortillas with olive oil over medium heat.
    9. After filling them with the potato mixture, fold them and serve with a sauce you like.

    Frequently Asked Questions

    Can I change the cheese in this recipe?

    Of course! While it’s best to use Mexican queso fresco, you can also use cheeses such as feta or goat cheese. Keep in mind that different types of cheese can change how a taco tastes and feels.

    Is epazote an important ingredient?

    No, not really. Epazote, which is commonly used in Mexican cuisine, is not necessary in this recipe. If you can’t find it, you can use herbs such as cilantro or oregano instead to add various flavors.

    Can I roast the poblano peppers in advance?

    Of course, you can. After cooking the poblano peppers, put them in a closed container and keep them in the fridge. Use them when you are ready to make your tacos.

  • Homemade caramel cake

    Homemade caramel cake

    HomeMade Caramel Cake

    This Southern Caramel Cake recipe is made with layers of homemade moist yellow cake with a luscious thick caramel icing made from scratch! It’s rich and delicious, perfect for any special occasion!

    Ingredients

    Cake

    • 2 cups + 2 tbsp all-purpose flour (sifted, plus extra for dusting cake trays)
    • 1/4 teaspoon salt
    • 2 cups sugar
    • 2 sticks unsalted butter
    • 1 cup water
    • 1 teaspoon soda
    • 1/2 cup milk
    • 2 large eggs
    • 1 teaspoon vanilla

    Caramel Icing

    • 3 cups granulated sugar
    • 1 stick butter
    • 1 cup heavy cream
    • A pinch of salt
    • 2 teaspoons vanilla

    Instructions

    1. Preheat the oven to 350°F. Butter and flour two 9-inch baking sheets.
    2. In a large bowl, sift together the flour and salt. Add the sugar and whisk until combined.
    3. In a saucepan, melt the butter in the water, then bring to a boil. Whisk in the flour and sugar mixture until smooth.
    4. Add the soda, milk, eggs, and vanilla to the mixture. Stir until well blended and smooth.
    5. Pour the batter into the prepared baking sheets.
    6. Bake for 20-25 minutes, checking the cake after about 15 minutes, or until a tester comes out clean. Be careful not to overbake.
    7. Remove the cakes from the oven and let them cool in the pans on a wire rack for 15 minutes. Then transfer the layers to parchment-lined racks to cool completely.
    8. To make the caramel icing, have two pans ready and a large griddle. In a large saucepan, combine 2½ cups of sugar, butter, cream, and a pinch of salt. Cook over medium heat until almost boiling.
    9. Meanwhile, in a small saucepan, melt 1/2 cup of sugar over medium heat until it turns amber. Do not stir, but shake the pan every few minutes to help distribute the sugar. This is the sugar syrup that you will pour into the other pot.
    10. Cook the caramel mixture over medium to medium-high heat while stirring in the sugar syrup. Continue cooking until the mixture reaches the softball stage, or 232°F on a candy thermometer.
    11. Remove the pan from the heat, add the vanilla, and let the mixture cool for 15 minutes.
    12. Transfer the icing to a large mixer and beat on medium speed, or use a hand mixer, for 15-20 minutes, or until the icing is the consistency of soft ice cream. If the icing sets too quickly or becomes too thick, add a little more cream.
    13. Frost the cooled cake layers with the caramel icing. Enjoy!
  • No-Bake Chocolate Split Trifle

    No-Bake Chocolate Split Trifle

    Every summer, my family gets together for a special treat that brings back memories of laughter and joy. This no-bake chocolate split trifle is a delicious dessert that is easy to make and perfect to share with loved ones. Enjoy the layers of creamy goodness and fresh fruit – it’s a hit every time!
    Ingredients :
    For the vanilla waffle layer:
    1 package (14.3 oz) vanilla waffle cookies
    For the chocolate pudding layer:
    1 (5.1 oz) instant chocolate pudding mix
    2 cups of cold milk
    For the banana layer:
    3-4 ripe bananas, sliced
    For the pineapple layer (optional):
    1 (20 oz) can crushed pineapple, drained
    For the whipped cream layer:
    1 tub (8 oz) fresh whip, defrosted (or 2 cups homemade whipped cream)
    For the filling of cherry and chocolate maraschino sauce (optional):
    1/2 cup marasquin cherries, halved or quartered
    1/2 cup chocolate syrup
    Itinéraires :
    Assemble the Trifle:
    In a large dish or clear bowl, create layers starting with a single layer of vanilla waffle cookies covering the bottom.
    Prepare the chocolate pudding:
    Follow the package instructions to make the pudding using 2 cups of cold milk. Pour it evenly over the vanilla waffle layer.
    Add the banana layer:
    Layer sliced bananas on chocolate pudding.
    Pineapple layer optional:
    Spread a layer of crushed pineapple drained over the bananas if you use it.
    Add the whipped cream:
    Lay fresh defrosted whip (or homemade whipped cream) evenly over the pineapple layer (or banana layer if there’s no pineapple).
    Repeat the layers:
    If desired, create another layer of each component (vanilla wafers, chocolate pudding, bananas and whipped cream) to fill the dish.
    Top It Off (facultatif) :
    Garnir la couche supérieure de crème fouettée avec des cerises au marasquin et bruine de sirop de chocolat pour une présentation classique de banana split.
    Refrigerate and serve:
    Cover the bagged dish with plastic packaging and refrigerate for at least 2 hours, or preferably overnight, to let the flavors melt and the vanilla wafers soften slightly.
    Take advantage of it :
    Serve fresh and enjoy this delicious and refreshing bagatelle!
    Conseils :
    Fresh vs. Frozen Fruit :
    You can use fresh or frozen bananas. If you are using frozen bananas, defrost them completely and drain any excess liquid before adding them to the tin
    Homemade whipped cream:
    For a richer flavor, make your own homemade whipped cream instead of cool whip.
    Storage :
    Leftover trinkets can be stored in an airtight container in the refrigerator for up to 3 days. The cookies will be sweeter but the flavor will still be delicious.
    This no-bake chocolate split trifle is a fun and easy dessert that is sure to be a crowd-pleaser!
  • Fried Ice Cream

    Fried Ice Cream

    Ingredients:
    4 cups of vanilla ice cream
    2 cups cornflakes or frosted flakes, crushed
    2 teaspoons ground cinnamon
    2 tablespoons granulated sugar
    1 quart vegetable oil for frying
    Whipped cream (optional)
    Chocolate syrup (optional)
    Maraschino cherries (optional)
    Instructions:
    Using an ice cream scoop, form balls of vanilla ice cream and place them on a baking sheet lined with parchment paper. Freeze the ice cream balls for at least 2 hours, or until they are very firm.
    In a shallow dish, combine the crushed cornflakes, ground cinnamon, and granulated sugar. Mix well.
    Roll each frozen ice cream ball in the cornflake mixture, pressing gently to coat the ice cream completely. Return the coated ice cream balls to the baking sheet and freeze for an additional 30 minutes.
    In a deep fryer or large, deep saucepan, heat the vegetable oil to 375°F (190°C).
    Carefully add the coated ice cream balls to the hot oil, frying only one or two balls at a time to avoid overcrowding the fryer. Fry the ice cream balls for about 15-30 seconds, or until they are golden brown.
    Using a slotted spoon or spider strainer, remove the fried ice cream balls from the oil and place them on a plate lined with paper towels to drain excess oil.
    Serve the fried ice cream immediately with whipped cream, chocolate syrup, and maraschino cherries if desired.
  • **Garlic Parmesan Pork Chops with Cheesy Scalloped Potatoes

    **Garlic Parmesan Pork Chops with Cheesy Scalloped Potatoes

    **Ingredients:**
    *For the Pork Chops:*
    – 4 boneless pork chops
    – Salt and pepper, to taste
    – 2 tablespoons olive oil
    – 4 cloves garlic, minced
    – 1/2 cup grated Parmesan cheese
    – 1/2 cup bread crumbs
    – 1 teaspoon dried thyme
    – 1 teaspoon dried oregano
    – 1/2 teaspoon paprika
    *For the Cheesy Scalloped Potatoes:*
    – 2 pounds potatoes, peeled and thinly sliced
    – 2 tablespoons butter
    – 2 tablespoons all-purpose flour
    – 1 cup milk
    – 1 cup shredded cheddar cheese
    – Salt and pepper, to taste
    – Chopped fresh parsley, for garnish
    **Instructions:**
    1. **Preheat the Oven:**
    Preheat the oven to 375°F (190°C). Grease a baking dish with butter or non-stick spray.
    2. **Prepare the Pork Chops:**
    Season the pork chops with salt and pepper on both sides. In a small bowl, mix together the minced garlic, grated Parmesan cheese, bread crumbs, dried thyme, dried oregano, and paprika. Press the Parmesan mixture onto both sides of each pork chop, coating them evenly.
    3. **Cook the Pork Chops:**
    Heat the olive oil in a large skillet over medium-high heat. Add the pork chops and cook for 3-4 minutes per side, or until golden brown. Remove the pork chops from the skillet and transfer them to the prepared baking dish.
    4. **Prepare the Cheesy Scalloped Potatoes:**
    In a saucepan, melt the butter over medium heat. Stir in the flour and cook for 1-2 minutes. Gradually whisk in the milk, stirring constantly until the mixture thickens. Add the shredded cheddar cheese and stir until melted and smooth. Season with salt and pepper to taste. Arrange the sliced potatoes in the baking dish with the pork chops. Pour the cheese sauce over the potatoes, spreading it evenly.
    5. **Bake:**
    Cover the baking dish with foil and bake in the preheated oven for 30 minutes. Remove the foil and bake for an additional 15 minutes, or until the potatoes are tender and the pork chops are fully cooked.
    6. **Serve:**
    Garnish with chopped fresh parsley before serving. Enjoy!
    **Prep Time: 20 mins | Total Time: 1 hr 10 mins | Servings: 4**