Blog

  • Savory Zucchini & Potato Muffins

    Savory Zucchini & Potato Muffins

    Savory Zucchini & Potato Muffins

    Table of Contents

    Ingredients:

    3 eggs
    30 g melted butter
    100 g flour
    1 teaspoon baking powder
    1 zucchini, grated
    1 onion, finely chopped
    2 tablespoons semolina
    50 ml milk
    1 potato, grated
    100 g bacon, chopped
    1 tomato, diced
    100 g cheese, grated
    1 tablespoon sour cream
    2 tablespoons mayonnaise
    1 tablespoon French mustard
    1 teaspoon dried garlic
    Fresh parsley, chopped
    Salt and black pepper, to taste
    Olive oil for greasing

    Instructions:

    Preheat Oven and Prepare Muffin Tin:
    Preheat your oven to 180°C (350°F). Grease a muffin tin with olive oil or line with muffin papers.

    Mix Wet Ingredients:
    In a large bowl, whisk together the eggs, melted butter, and milk until well combined.

    Combine Dry Ingredients:
    In another bowl, mix the flour, semolina, baking powder, salt, and black pepper.

    Prepare the Filling:
    To the wet ingredients, add the grated zucchini, grated potato, chopped onion, diced tomato, chopped bacon, and grated cheese. Mix well.

    Add Flour Mixture:
    Gradually fold the dry ingredients into the wet mix, ensuring not to overmix.

    Prepare the Muffin Batter:
    Combine all ingredients thoroughly until you have a homogeneous batter.

    Spoon into Muffin Tin:
    Spoon the batter into the prepared muffin tin, filling each cup about three-quarters full.

    Bake:
    Bake in the preheated oven for 20-25 minutes, or until the tops are golden and a toothpick inserted into the center comes out clean.

    Prepare the Sauce:
    While the muffins are baking, mix together sour cream, mayonnaise, French mustard, dried garlic, and chopped parsley to create a creamy sauce.

    Serve:
    Allow the muffins to cool slightly before removing them from the tin. Serve warm with the prepared sauce.

  • Easy Two-Egg Dish Recipe May

    Easy Two-Egg Dish Recipe May

    Easy Two-Egg Dish Recipe

    Table of Contents

    Ingredients:

    • 2 eggs
    • 10g sugar (1 tablespoon)
    • A pinch of salt
    • Cooking oil

    Instructions:

    Preparing the Eggs:

    • Crack the eggs into a bowl and beat them lightly with a fork or whisk.

    Adding Sweetness:

    • Mix in the sugar and a pinch of salt into the beaten eggs. Combine well until the sugar dissolves.

    Cooking:

    • Heat a pan over medium heat and add a small amount of cooking oil.
    • Pour the egg mixture into the pan.

    Cooking the Eggs:

    • Allow the eggs to cook undisturbed for a moment until the edges start to set.
    • Using a spatula, gently push the cooked edges toward the center, allowing the uncooked egg to flow to the sides.
    • Continue this process until the eggs are mostly cooked and set but still slightly moist on top.

    Serve:

    • Slide the cooked eggs onto a plate.

    Enjoy:

  • Grandma’s Delightful Chicken Thighs Recipe! Simply delicious and juicy!

    Grandma’s Delightful Chicken Thighs Recipe! Simply delicious and juicy!

    Grandma’s Delightful Chicken Thighs Recipe! Simply delicious and juicy!

    Table of Contents

     Ingredients:

    • 8 chicken thighs (1200g/2.65 lbs)
    • Salt, black pepper, oregano (to taste)
    • Olive oil
    • Butter (15g/0.5 oz)

    1f36f For the Glaze:

    • 3 tablespoons honey
    • 4 tablespoons sweet chili sauce
    • 3 tablespoons soy sauce
    • Juice of 1/2 lemon
    • 1 tablespoon Dijon mustard

    1f954 Sides:

    • 1 onion (120g/4.2 oz)
    • 4 carrots (200g/7 oz)
    • 6 potatoes (700g/1.5 lbs)
    • Salt and black pepper (to taste)
    • 3 cloves of garlic
    • A bunch of parsley
     Instructions:
    1. Season chicken thighs with salt, black pepper, and oregano.
    2. Heat olive oil and butter in a pan, sear chicken until golden.
    3. In a bowl, mix honey, sweet chili sauce, soy sauce, lemon juice, and Dijon mustard. Pour over chicken.
    4. Bake at 350°F (175°C) for 25-30 mins.

    ️ Serve with roasted veggies:

    1.  Toss onion, carrots, and potatoes with olive oil, salt, black pepper, garlic, and parsley.
    2. Roast at 400°F (200°C) for 25-30 mins.

    Grandmother’s love on a plate! Share your memories

  • 4 INGREDIENT LEMON CAKE (NO FLOUR, BUTTER OR OIL)

    4 INGREDIENT LEMON CAKE (NO FLOUR, BUTTER OR OIL)

    4 INGREDIENT LEMON CAKE (NO FLOUR, BUTTER OR OIL)

    Table of Contents

    INGREDIENTS

    4 large eggs whites and yolks divided
    1 cup (227 g) granulated white sugar divided
    2/3 cup (102 g) potato starch
    2 packed tbsp (9 g) lemon zest

    INSTRUCTIONS:
    1. Preheat your oven to 350°F (175°C). Generously spray the interior of a 9-inch bundt cake pan with non-stick baking spray. Lightly dust the pan with potato starch and tap out any excess. Set aside. If flour is not an issue for you, you can also grease with a baking spray with flour like PAM baking spray with flour and then you don’t need to dust with potato starch.
    2. Add the egg whites to the bowl of a stand mixer. Using the wire whisk attachment, beat at medium speed until the eggs are foamy. With the machine still running, slowly add 1/2 cup of the sugar (1 tbsp at a time). Increase speed to high and continue to beat until mixture is thick, glossy and stiff peaks form.
    3. Transfer the meringue to a clean bowl and set it aside.
    4. Add the egg yolks and remaining 1/2 cup sugar to the stand mixer bowl. Whisk at high speed until the mixture is very thick, has more than doubled in volume, about 4 minutes. When you lift the whisk, the mixture should ribbon down and hold its form on top of the mixture for several seconds before sinking in. See photo in post for reference.
    5. Sift the potato starch with a fine mesh strainer into the egg yolk mixture and mix with a spatula until evenly combined. It will be stiff and very thick.
    6. Add in 1/3 of the egg whites, gently folding the egg whites into the egg yolk mixture with a spatula until just combined. Be careful not to deflate the egg whites too much. Repeat with the next 1/3 and then the final 1/3 of egg whites.
    7. Sprinkle in the lemon zest and gently fold it in to the batter with your spatula just until it is evenly combined into the batter.
    8. Pour the batter into the prepared bundt pan and smooth the top with a spatula.
    9. Bake in the preheated oven for about 40 minutes or until the cake is golden brown and a toothpick inserted into the center comes out clean. When you apply light pressure to the surface it should feel firm and should not completely sink in.
    See also  The BEST Apple Cake You Will EVER Eat! Forget All Other Recipes!

    Remove the cake from the oven and let it cool in the pan for about 20-30 minutes, or until cake and cake pan no longer feel to hot to touch. Then invert the cake onto a plate to cool completely. It is important that you unmold the cake from the cake pan after 20-30 minutes and not wait too long. If you wait for the cake to finish cooling, it will start to stick to the pan. If you unmold it after letting it cool only 20-30 minutes, it should slide out easily. In addition, I found that letting the cake cool fully on a plate with the crispy meringue layer on the bottom of the plate helps the meringue layer stick to the cake and not break off as easily when cutting the cake. When cake is finished cooling, you can decorate the cake before serving. I like serving with a dusting of powdered sugar or drizzling it with lemon icing. Use a large sharp knife to gently cut into the cake to serve.

    NUTRITION

    serving: 1slice, calories: 112kcal, carbohydrates: 23g, protein: 3g, fat: 1g, saturated fat: 0.5g, sodium: 27mg, fiber: 1g, sugar: 14g, net carbs: 22

  • Ossetian Pie Recipe: A Delicious Tradition

    Ossetian Pie Recipe: A Delicious Tradition

    Ossetian Pie Recipe: A Delicious Tradition

    Table of Contents

    Ossetian pie, a traditional dish from the Caucasus region, offers a delightful blend of flavors and textures. In this article, we’ll explore the steps to create this culinary masterpiece right in your own kitchen.

    Ingredients

    To prepare an Ossetian pie, you’ll need:

    • For the filling:
      • 300 grams of peeled potatoes
      • 200 grams of hard cheese
      • Black pepper to taste
    • For the dough:
      • Flour: 250 grams
      • Baking soda: 1 teaspoon (level)
      • Kefir: 200 milliliters
      • Vegetable oil: 40 milliliters
      • Salt: 1/2 teaspoon
      • Sugar: 1 teaspoon
    Instructions
    1. Prepare the Potatoes: Peel the potatoes, place them in a pan, cover with water, add a pinch of salt, and cook until tender.
    2. Make the Dough: In a mixing bowl, combine the flour and baking soda. In another bowl, mix kefir, vegetable oil, salt, and sugar. Gradually add the flour mixture to the kefir mixture, kneading until you have a smooth, elastic dough. Let it rest while preparing the filling.
    3. Prepare the Filling: Drain the cooked potatoes and mash them into a puree. Grate the hard cheese and mix it with the mashed potatoes. Season with black pepper to taste.
    4. Assemble the Pie: Roll out the dough on a floured surface into a circle. Place the filling in the center of the dough circle. Fold the edges of the dough over the filling, pinching them together like a bag. Shape the pie into a circle, about 30 cm in diameter.
    5. Preheat the Oven: Preheat your oven to the maximum temperature.
    6. Bake the Pie: Transfer the assembled pie onto a baking sheet. Mix the yolk with milk and brush it over the pie. Make an incision in the middle of the pie. Bake in the preheated oven for about 10 minutes at 220°C until golden brown.
    7. Serve and Enjoy: Serve the Ossetian pie warm to enjoy the stretchy melted cheese. It’s equally delicious when served cold, making it a versatile treat for any time of day.
    See also  Practical Potato Crepe Pastry Recipe
    4. Tips for Success
    • Use a silicone mat for easy dough handling.
    • Adjust the ratio of filling to dough according to your preference.
    • Experiment with different cheeses and seasonings for unique flavor variations.
    5. Serving Suggestions

    Serve the Ossetian pie warm to enjoy the stretchy melted cheese. It’s also delicious when served cold, making it a versatile dish for any occasion.

    6. Variations and Additions
    • Add cooked meat for a heartier pie.
    • Incorporate herbs or spices for extra flavor.
    • Try different dough recipes for a personalized touch.
    7. Conclusion

    Crafting an Ossetian pie is a rewarding experience that brings people together through the joy of food. With simple ingredients and a bit of creativity, you can create a culinary masterpiece that’s sure to impress.

  • Prepare this Easy and Delicious Potato Recipe Whenever You Have Potatoes!

    Prepare this Easy and Delicious Potato Recipe Whenever You Have Potatoes!

    Prepare this Easy and Delicious Potato Recipe Whenever You Have Potatoes!

    Table of Contents

    Potatoes are a staple in many households, loved for their versatility and delicious taste. If you’re looking for a simple yet satisfying potato recipe, crispy potato croquettes are the way to go. With just a few basic ingredients and easy-to-follow steps, you can whip up a batch of these golden-brown delights that will have everyone asking for more.

     Ingredients
    • 6 potatoes (800 g)
    • 1/2 cup of starch (100 g)
    • Grated cheddar cheese (150 g)
    • 1 pinch of parsley
    • 1 teaspoon of salt (8 g)
    • 1 egg
    • 1 cup bread crumbs
    • Vegetable oil (for frying)
    Preparation of Potato Croquettes
    1. Peel and Cut Potatoes: Start by peeling the potatoes and cutting them into cubes.
    2. Boil Potatoes: Place the potato cubes in a pot, cover them with water, and boil until they are soft.
    3. Mash Potatoes: Drain the water and transfer the boiled potatoes to a large bowl. Mash them until they reach a smooth, puree-like consistency.
    4. Add Ingredients: To the mashed potatoes, add starch, grated cheddar cheese, salt, and parsley. Mix everything well until fully combined.
    4. Shaping the Croquettes
    • Grease Hands: Grease your hands with oil to prevent sticking.
    • Shape Croquettes: Take portions of the potato mixture and shape them into croquettes, forming them into oval or cylindrical shapes.
    See also  I CAN’T Stop Making It! NO FRYING OR FUSSING. Tastier than MEAT!
    5. Coating and Frying
    • Coat with Egg and Breadcrumbs: Dip each croquette first in beaten egg, then coat it evenly with breadcrumbs.
    • Fry Croquettes: Heat vegetable oil in a pan and fry the croquettes until they are golden brown and crispy on all sides.
    6. Serving the Croquettes

    Once the croquettes are fried to perfection, serve them hot and crispy. They can be enjoyed as a snack, appetizer, or side dish alongside your favorite dipping sauce or condiment.

    7. Why Potato Croquettes?

    Potato croquettes are a fantastic dish because they are:

    • Versatile: They can be served as a snack, appetizer, or side dish.
    • Kid-Friendly: Children love their crispy texture and delicious taste.
    • Easy to Make: With simple ingredients and straightforward steps, anyone can prepare them at home.
    8. Tips for Perfect Croquettes
    • Ensure the potatoes are cooked until soft but not mushy.
    • Use high-quality cheese for maximum flavor.
    • Fry the croquettes in hot oil for a crispy exterior.
    • Serve them immediately for the best taste and texture.
    9. Health Considerations

    While potato croquettes are undeniably delicious, it’s essential to enjoy them in moderation as part of a balanced diet. Considerations include:

    • Portion Control: Enjoy croquettes as a treat rather than a staple.
    • Balance: Pair them with healthier options like a side salad or steamed vegetables.
    • Moderation: Limit intake of fried foods for overall health.
    10. Conclusion

    In conclusion, crispy potato croquettes are a fantastic way to enjoy the humble potato in a new and exciting form. With simple ingredients and easy steps, you can create a dish that’s sure to impress friends and family alike. Whether served as a snack, appetizer, or side dish, these golden-brown delights are bound to become a favorite in your household.

  • How to Make Delicious Cookies in Minutes with Just One Egg!

    How to Make Delicious Cookies in Minutes with Just One Egg!

    How to Make Delicious Cookies in Minutes with Just One Egg!

    Table of Contents

    Are you ready to embark on a baking adventure that’s both effortless and rewarding? This article will guide you through the process of making delectable cookies with just a handful of ingredients and a little bit of time. Get your aprons on and let’s dive into the world of homemade goodness!

    Ingredients

    To create these delightful cookies, you’ll need:

    • 1 egg
    • 1 1/2 cups (200 g) flour
    • 1/2 cup (100 g) sugar
    • 1 teaspoon baking powder
    • 1/2 cup vegetable oil
    Preparing the Dough
    1. Combine the Wet Ingredients: Break an egg into a mixing bowl and add granulated sugar and vegetable oil. Whisk the ingredients vigorously until the sugar dissolves completely.
    2. Incorporate the Dry Ingredients: Pour vanilla sugar into the egg mixture and continue whisking until the mixture turns white.
    3. Mix in the Flour: In a separate bowl, mix flour and baking powder. Sift these dry ingredients into the egg mixture and gently fold them together until a dough forms.
    Shaping the Cookies
    1. Knead the Dough: Transfer the dough onto a clean surface and knead it by hand until it becomes soft and elastic.
    2. Form the Cookies: Pinch off small pieces of dough and roll them into balls. Place the balls onto a baking sheet lined with parchment paper, leaving some space between each.
    Baking the Cookies
    1. Preheat the Oven: Heat your oven to 200 degrees Celsius (approximately 390 degrees Fahrenheit).
    2. Bake to Perfection: Place the baking sheet in the preheated oven and bake the cookies for 10-12 minutes, or until they turn golden brown.
    See also  No-Bake Cake with the Taste of Ice Cream: A Delicious and Easy Dessert
    Serving Suggestions

    Serve these warm, freshly baked cookies with a glass of cold milk for the ultimate indulgence. They also make fantastic gifts for friends and family – just package them up in a cute tin or jar!

    Why Homemade Cookies?

    There’s something truly special about homemade cookies. Unlike store-bought varieties, which are often laden with preservatives and artificial flavors, homemade cookies are made with love and wholesome ingredients. Plus, the satisfaction of creating something delicious from scratch is incomparable.

    Tips for Success
    • Use Fresh Ingredients: Make sure your egg and flour are fresh for the best results.
    • Don’t Overmix: Be gentle when combining the ingredients to avoid tough cookies.
    • Experiment with Flavors: Add chocolate chips, nuts, or dried fruit to customize your cookies to your taste.
  • No-Bake Cake with the Taste of Ice Cream: A Delicious and Easy Dessert

    No-Bake Cake with the Taste of Ice Cream: A Delicious and Easy Dessert

    No-Bake Cake with the Taste of Ice Cream: A Delicious and Easy Dessert

    Table of Contents

    Ingredients

    For the Filling

    • Eggs: 2 large
    • Sugar: 3/4 cup (150 g)
    • Sour Cream: 2 cups (480 g), 20% fat
    • Vanilla Sugar: 1 bag (10 g or 1 tablespoon)
    • Corn Starch: 2 tablespoons (16 g)
    • Butter: 3 1/2 tablespoons (50 g), softened

    For the Cake Base

    • Flour: 2 cups (250 g)
    • Sugar: 1/3 cup (65 g)
    • Butter: 2/3 cup (150 g), cold and grated

    Yield: 8-10 servings
    Total Time: 3 hours 30 minutes (including chilling time)

    Step-by-Step Instructions

    1. Make the Cream Filling

    1. Mix Ingredients: In a medium saucepan, crack in the 2 eggs. Add 3/4 cup of sugar, 1 bag (10 g) of vanilla sugar, and 2 tablespoons of corn starch. Whisk thoroughly until smooth and bubbly.
    2. Add Sour Cream: Gradually add 2 cups of sour cream, whisking continuously until well combined and smooth.
    3. Cook the Cream: Place the saucepan over medium heat and cook the mixture, stirring constantly with a whisk, until it thickens (about 2-3 minutes). Once thickened, remove from heat.
    4. Add Butter: Stir in 3 1/2 tablespoons of butter and mix until fully melted and incorporated into the cream. Set the cream aside to cool slightly while you prepare the cake base.
    See also  Don’t Cook Dinner Until You See These Recipes! Incredibly Delicious, Quick, and Easy!

    2. Prepare the Cake Base

    1. Combine Dry Ingredients: In a large bowl, combine 2 cups of flour and 1/3 cup of sugar. Mix well to combine.
    2. Incorporate Butter: Grate 2/3 cup (150 g) of cold butter using a coarse grater directly into the flour mixture. Rub the butter into the flour and sugar using your hands until the mixture resembles coarse crumbs.
    3. Cook the Crumbs: Heat a non-stick frying pan over low heat. Add the crumb mixture and cook, stirring constantly, until golden and fragrant. This will take about 5-7 minutes. Remove from heat and let cool slightly.

    3. Assemble the Cake

    1. Prepare the Mold: Use a pastry mold or a detachable cake ring. Line it with oiled dense polyethylene or plastic wrap to keep the sides intact and for easy removal of the cake.
    2. Layer the Cake:
      • Start with Crumbs: Sprinkle a couple of spoonfuls of the crumbs on the bottom of the prepared mold and level the surface.
      • Add Cream: Spoon a couple of spoonfuls of the cream filling over the crumbs, smoothing it out carefully to avoid disturbing the crumb layer.
      • Repeat Layers: Continue layering crumbs and cream alternately, finishing with a layer of cream on top.

    4. Finish and Chill

    1. Chill the Cake: Cover the assembled cake with cling film and refrigerate for at least 2-3 hours, or preferably overnight, to allow the layers to set and the flavors to meld.

    5. Serve

    1. Decorate and Serve: When ready to serve, remove the cake from the mold and peel away the plastic wrap. Optionally, decorate the top with shavings of white chocolate or fresh fruit for an elegant touch. Slice and enjoy!
    See also  Chocolate Yogurt Cake

    Nutrition Information (Per Serving, Based on 10 Servings)

    • Calories: 310 kcal
    • Protein: 4 g
    • Carbohydrates: 34 g
    • Sugars: 17 g
    • Total Fat: 18 g
    • Saturated Fat: 10 g
    • Cholesterol: 90 mg
    • Sodium: 50 mg

    Tips for the Best No-Bake Cake

    • Ensure Cream is Thickened: Cook the  cream mixture until it thickens to a pudding-like consistency. This will help the layers hold together when the cake is sliced.
    • Chill Thoroughly: Allowing the cake to chill for several hours or overnight ensures the layers set properly and the flavors develop fully.
    • Customize Fillings: Add fresh berries, chocolate chips, or a layer of fruit preserves between the layers for added flavor and variety.
  • How to Make a Healthy Slimming Dessert: Gluten-Free, No Sugar Added!

    How to Make a Healthy Slimming Dessert: Gluten-Free, No Sugar Added!

    How to Make a Healthy Slimming Dessert: Gluten-Free, No Sugar Added!

    Table of Contents

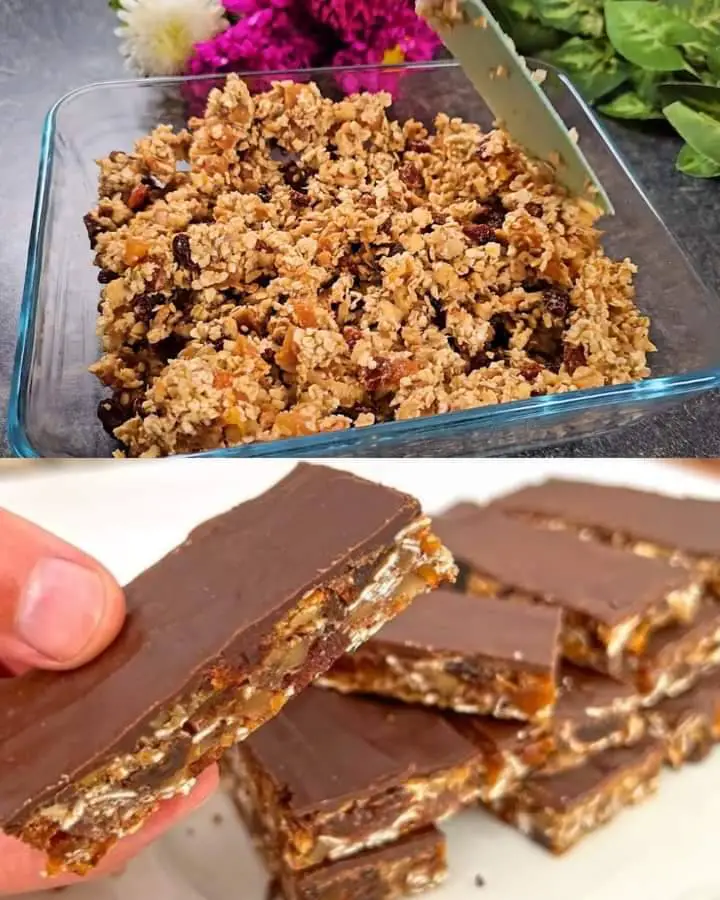
    Desserts often get a bad rap for being indulgent and unhealthy. However, with the right ingredients and preparation, desserts can be both delicious and nutritious. This healthy slimming dessert combines wholesome ingredients like oatmeal, bananas, and cocoa to create a treat that satisfies your sweet tooth without derailing your diet goals. Let’s explore how to make it!

    Ingredients

    To whip up this healthy slimming dessert, you’ll need:

    • 120 g oatmeal
    • 250 ml warm milk
    • 2 bananas
    • 2 eggs
    • 4 tablespoons cocoa (45 g)
    • 1 tablespoon baking powder
    • 40 walnuts
    • 75 g dark chocolate
    Preparation Steps

    Let’s break down the preparation process into simple steps:

    1. Soaking Oatmeal

    Begin by pouring the oatmeal into a bowl and adding warm milk. Allow it to soak for 10 minutes, allowing the oatmeal to soften.

    2. Preparing Bananas

    While the oatmeal is soaking, peel the bananas and mash them using a fork. This will add natural sweetness and moisture to the dessert.

    3. Mixing Dry Ingredients

    In a separate bowl, combine the cocoa and baking powder. Mix well to ensure even distribution of the cocoa flavor.

    See also  Hawaiian Banana Bread
    4. Beating Eggs

    Crack the eggs into a bowl and whisk them until they are well beaten. This will help incorporate air into the eggs, resulting in a lighter texture for the dessert.

    Mixing the Ingredients

    Now that all the ingredients are prepared, it’s time to bring them together:

    1. Combining Oatmeal and Bananas

    Add the mashed bananas to the bowl of soaked oatmeal. Mix them together until well combined.

    2. Adding Cocoa Mixture

    Next, pour the cocoa and baking powder mixture into the oatmeal and banana mixture. Stir until everything is evenly incorporated.

    3. Incorporating Eggs

    Gently fold the beaten eggs into the oatmeal mixture. Be careful not to overmix, as this can deflate the eggs and result in a denser dessert.

    Baking the Dessert

    Once the batter is ready, it’s time to bake:

    Preparing the Baking Dish

    Grease a baking dish with oil to prevent the dessert from sticking. Pour the batter into the dish and spread it out evenly.

    Adding Walnuts

    Sprinkle chopped walnuts over the top of the batter, adding a crunchy texture and nutty flavor to the dessert.

    Baking Process

    Place the baking dish in a preheated oven and bake at 180°C for approximately 40 minutes, or until the dessert is cooked through and golden brown on top.

    Adding Chocolate Topping

    To add a decadent finishing touch to the dessert:

    Melting Dark Chocolate

    Break the dark chocolate into small pieces and melt it either in the microwave or using a water bath until smooth and glossy.

    Drizzling Chocolate

    Transfer the melted chocolate into a pastry bag and drizzle it over the baked dessert. Allow the chocolate to harden before serving.

    See also  SPONGE CAKE
    Serving the Dessert

    Once the chocolate topping has set, slice the dessert into portions and serve:

    Enjoying the Treat

    Indulge in this delicious and guilt-free dessert, savoring each bite of the rich cocoa flavor, creamy bananas, and crunchy walnuts.

    Storing Leftovers

    Any leftovers can be stored in an airtight container in the refrigerator for up to several days. Simply reheat in the microwave before serving.

    Why Choose This Dessert?

    This healthy slimming dessert offers several compelling reasons to give it a try:

    • Nutritious Ingredients: Oatmeal, bananas, and walnuts provide essential nutrients such as fiber, potassium, and healthy fats.
    • Low in Added Sugar: Unlike many desserts, this recipe contains no added sugar, making it suitable for those looking to reduce their sugar intake.
    • Gluten-Free Option: With oatmeal as the base, this dessert is naturally gluten-free, catering to individuals with gluten sensitivities or celiac disease.
    Health Benefits

    In addition to being delicious, this dessert offers various health benefits:

    • Heart Health: Oatmeal and walnuts are known for their heart-healthy properties, helping to lower cholesterol levels and reduce the risk of heart disease.
    • Blood Sugar Management: Bananas provide natural sweetness without causing spikes in blood sugar levels, making this dessert suitable for individuals with diabetes or those watching their blood sugar levels.
    • Satiety: The fiber content from oatmeal and walnuts helps promote feelings of fullness and satisfaction, making it easier to control portion sizes and prevent overeating.
    Conclusion

    In conclusion, this healthy slimming dessert is a delightful treat that proves you can enjoy sweets while still prioritizing your health. With wholesome ingredients and simple preparation steps, it’s easy to whip up a batch of this guilt-free dessert whenever the craving strikes. So go ahead, indulge your sweet tooth without compromising your wellness goals!

  • Outback Steakhouse Alice Springs Chicken

    Outback Steakhouse Alice Springs Chicken

    This is a perfect duplicate of the famous Outback Steakhouse Alice Springs Chicken. This is really a simple recipe, Boneless Chicken Breast topped with Cheese and Bacon. This goes to prove that not all great dishes have tons of ingredients in order to make them taste as good as they do. Think about that next time you consider spending hard-earned money at a Fancy restaurant for the same food you could make yourself.

    This is a truly simple dish that will taste better than the fancy restaurants. It tastes great and is family friendly and budget friendly. It is also rather healthy.

    Ingredients

    • 3 large boneless skinless chicken breasts
    • 6 slices of thick-cut bacon
    • 2 C. Shredded cheddar cheese
    • Salt and pepper to taste
    •  C. Chopped green onions for garnish

    How To Make Outback Steakhouse Alice Springs Chicken

    • Preheat the oven to 350 degrees.
    • Slice each chicken breast in half lengthwise.
    • Season each side of the chicken with salt and pepper to taste, and bake for 25 minutes.
    • While the chicken is cooking, partially cook the bacon until the fat is all rendered from it, but it is not crispy yet.
    • Remove the chicken from the oven, cut each piece of bacon in half and place the strips of bacon on top of each piece of chicken.
    • Return the chicken to the oven and cook for an additional 10 minutes.
    • Remove the chicken again, top with the shredded cheese and bake another 5 minutes.
    • Top with green onions for garnish before serving.
  • Four Ingredient Nougat Bars

    Four Ingredient Nougat Bars

    Four Ingredient Nougat Bars – I recall growing up and seeing this treat on the dessert table every holiday. This was one of those desserts that was saved for adults only.

    I never did understand that as I was growing up. When I got older, I started making this treat myself and although I do not understand why it was an adult only treat, I understand why they kept it all to themselves.

    Ingredients

    • 2 packages of miniature marshmallows
    • 2 tbsp butter, melted
    • 2 packages of white chocolate chips
    • 1 ½ cups red and green gumdrops

    How To Make Four Ingredient Nougat Bars

    FIRST STEP:

    Cut the gum drops in half

    Layer a baking dish with parchment paper, be sure there is enough paper hanging over the sides

    Bring a pot of water to a boil on the stove

    SECOND STEP:

    Place a heat proof bowl or another pan over the first pot with the water

    To the top dish add in the miniature marshmallows, the white chocolate chips and the butter

    Melt the ingredients in the pan, over( or rather like a double boiler)

    Stir until all is melted

    THIRD STEP:

    Gently fold in the gumdrops

    Pour into the baking dish with the parchment paper

    Let rest overnight so the nougat sets

    Lift out of the baking dish using the parchment paper, cut into bars

    Enjoy!

  • Million Dollar Spaghetti Casserole

    Million Dollar Spaghetti Casserole

    Million Dollar Spaghetti is a spaghetti casserole with layers of noodles, cheese, and homemade meat sauce. It’s budget friendly, easy to make, and a meal the whole family will love.

    Ingredients

    • 1 lb. Spaghetti noodles
    • 1 Jar spaghetti sauce
    • 1 lb. Ground beef
    • Salt and pepper to taste
    • 8 oz. Cream cheese softened
    • 8 oz. Cottage cheese
    • ¼ C. Sour cream
    • ½ C. Butter melted
    • Parmesan cheese to taste

    Instructions

    • Preheat the oven to 350 degrees.
    • Cook the noodles to your liking and drain well.
    • Add the ground beef to a skillet over medium high heat on the stove and cook until browned completely. Drain any excess fat.
    • Mix together the sauce and the ground beef.
    • In a bowl, stir together the cream cheese, cottage cheese and sour cream until well combined.
    • Spread the butter in the bottom of a 9×13 baking dish.
    • Add half the noodles to the baking dish.
    • Spread the cheese mixture over the top of the noodles.
    • Place the rest of the noodles in a second layer over the cheese mixture.
    • Pour the meat and sauce mixture over the noodles.
    • Bake for 30 minutes, add Parmesan cheese to taste and bake another 15 minutes before serving.
  • Quick and Delicious Chickpea Lavash with Yogurt: A No-Yeast Recipe

    Quick and Delicious Chickpea Lavash with Yogurt: A No-Yeast Recipe

    Quick and Delicious Chickpea Lavash with Yogurt: A No-Yeast Recipe

    Table of Contents

    1. Prepare the Dough:
    In a mixing bowl, combine the chickpea flour and salt. Add the yogurt and start mixing with a spoon or your hands.
    Gradually add a little warm water until the mixture comes together to form a soft, pliable dough. The dough should be easy to handle and not too sticky.
    2. Knead the Dough:
    Turn the dough onto a lightly floured surface (using chickpea flour) and knead gently for about 2-3 minutes. If desired, knead in herbs or spices to enhance the flavor.
    3. Roll Out the Lavash:
    Divide the dough into small balls, about the size of a golf ball.
    Using a rolling pin, roll each ball into a thin circle or oval shape. Aim for the dough to be as thin as possible without tearing.
    4. Cook the Lavash:
    Heat a non-stick skillet over medium-high heat. Once hot, place a rolled-out dough circle onto the skillet.
    Cook for about 1-2 minutes on each side or until the surface is golden brown and bubbly. Flip and cook the other side.
    5. Serve:
    Serve the warm lavash immediately. It’s perfect for wrapping vegetables and grilled meats or simply dipping into hummus or other spreads.
    Conclusion:
    This chickpea and yogurt lavash is not only a healthy alternative to traditional flatbreads but also a quick and delicious option for any meal. Whether you’re a novice or an experienced baker, this recipe is straightforward and satisfying, proving that making homemade bread can be simple and fun. Enjoy the fresh, warm lavash as part of a nutritious meal, and revel in the flavors and textures that homemade bread brings to the table.
  • CHOCOLATE CUPCAKES

    CHOCOLATE CUPCAKES

    1f31f INGREDIENTS
    ◾️200g of common wheat flour
    ◾️15g cocoa
    ◾️6g baking powder
    ◾️4g baking soda
    ◾️1g of salt
    ◾️150 ml of milk
    ◾️10ml white vinegar
    ◾️2 eggs
    ◾️200 brown sugar
    ◾️1 tsp vanilla essence
    ◾️125 ml of oil
    1f31f PREPARATION
    ◾️In a bowl, place common wheat flour, cocoa powder, baking powder, bicarbonate of soda and salt. Then mix and reserve.
    ◾️In a cup, place the milk and white vinegar, mix and reserve.
    ◾️In a bowl, place the eggs, beat for 2 minutes, then add brown sugar, continue beating until the volume triples.
    ◾️Add the oil, beat for 1 minute, then add the mixed milk, the vanilla essence and beat for 2 more minutes.
    ◾️Add the dry ingredients little by little, mix thoroughly.
    ◾️Pour into 18 cupcake liners, bake in a preheated oven at 180°C for 15 minutes.
    I love you all ♥1f4951f60d