Blog

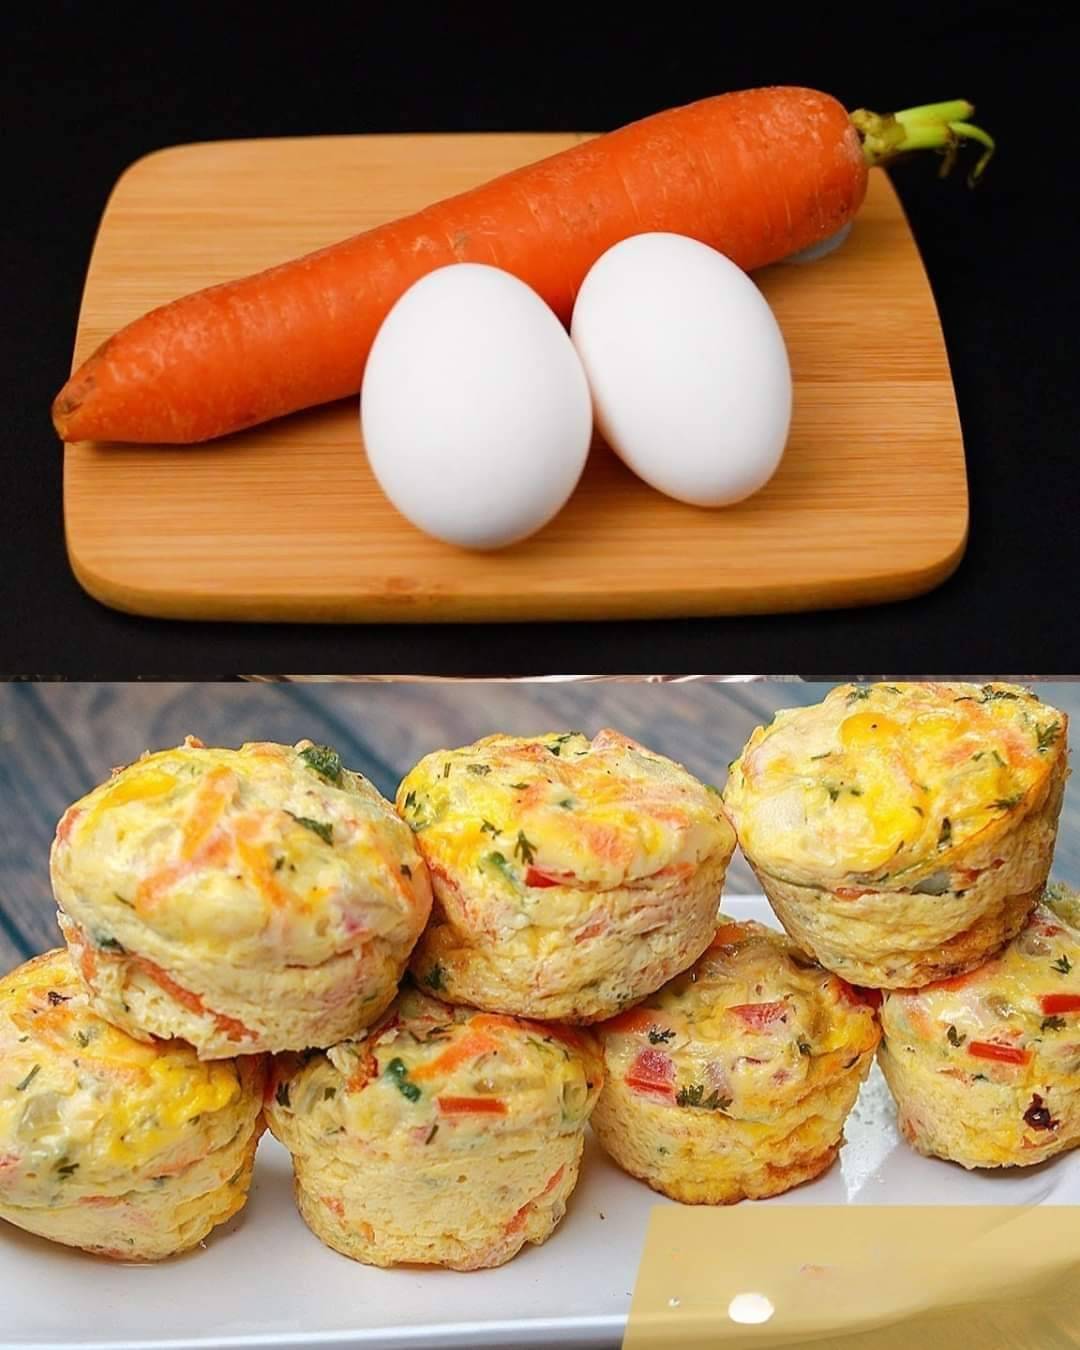
  • Vegetable Omelet Muffins for Kids Recipe

    Vegetable Omelet Muffins for Kids Recipe

    Vegetable Omelet Muffins for Kids Recipe

    Table of Contents

    Ingredients:

    • 6 large eggs (provides protein and helps bind everything together)

    Veggies:

    • 1 small onion, finely chopped
    • 1 green chili, finely chopped (optional for a milder flavor)
    • 1 small carrot, finely chopped
    • 1/2 cup sweetcorn
    • Optional: chopped bell peppers, broccoli florets, cherry tomatoes
    • 2 tablespoons coriander leaves, chopped (substitute with parsley or chives if preferred)
    • 1/2 cup mozzarella cheese, shredded (can use cheddar or another type of shredded cheese)

    Seasonings:

    • Salt to taste
    • Black pepper to taste

    Directions:

    Preheat the Oven:

      1. Preheat your oven to 180°C (350°F).
    1. Grease a muffin tin with cooking spray or line with muffin cups.

    Prepare the Veggies:

      1. Finely chop the onion, green chili (if using), carrot, and any other vegetables you are adding.

    Mix the Eggs:

      1. In a large mixing bowl, crack the 6 eggs and beat them well.
      2. Add the finely chopped veggies, sweetcorn, and chopped coriander leaves to the eggs.
    1. Season with salt and black pepper to taste.
    2. Mix in the shredded mozzarella cheese.

    Fill the Muffin Tin:

    1. Pour the egg and veggie mixture into the prepared muffin tin, filling each cup about 3/4 full.

    Bake:

      1. Bake in the preheated oven for 20-25 minutes, or until the muffins are set and golden brown on top.

    Serve:

      1. Allow the muffins to cool slightly before removing them from the tin.
      2. Serve warm and enjoy!

    Serving Suggestions:

      • Serve these omelet muffins with a side of fresh fruit for a complete breakfast.
      • They also make a great addition to lunchboxes or can be enjoyed as a healthy snack.
    See also  Coconut Cheese Bites Recipe

    Cooking Tips:

      • Feel free to customize the veggies based on your child’s preferences.
      • To make the muffins extra fluffy, you can add a splash of milk or cream to the egg mixture.
    • Make sure to finely chop the vegetables to ensure they cook through evenly.
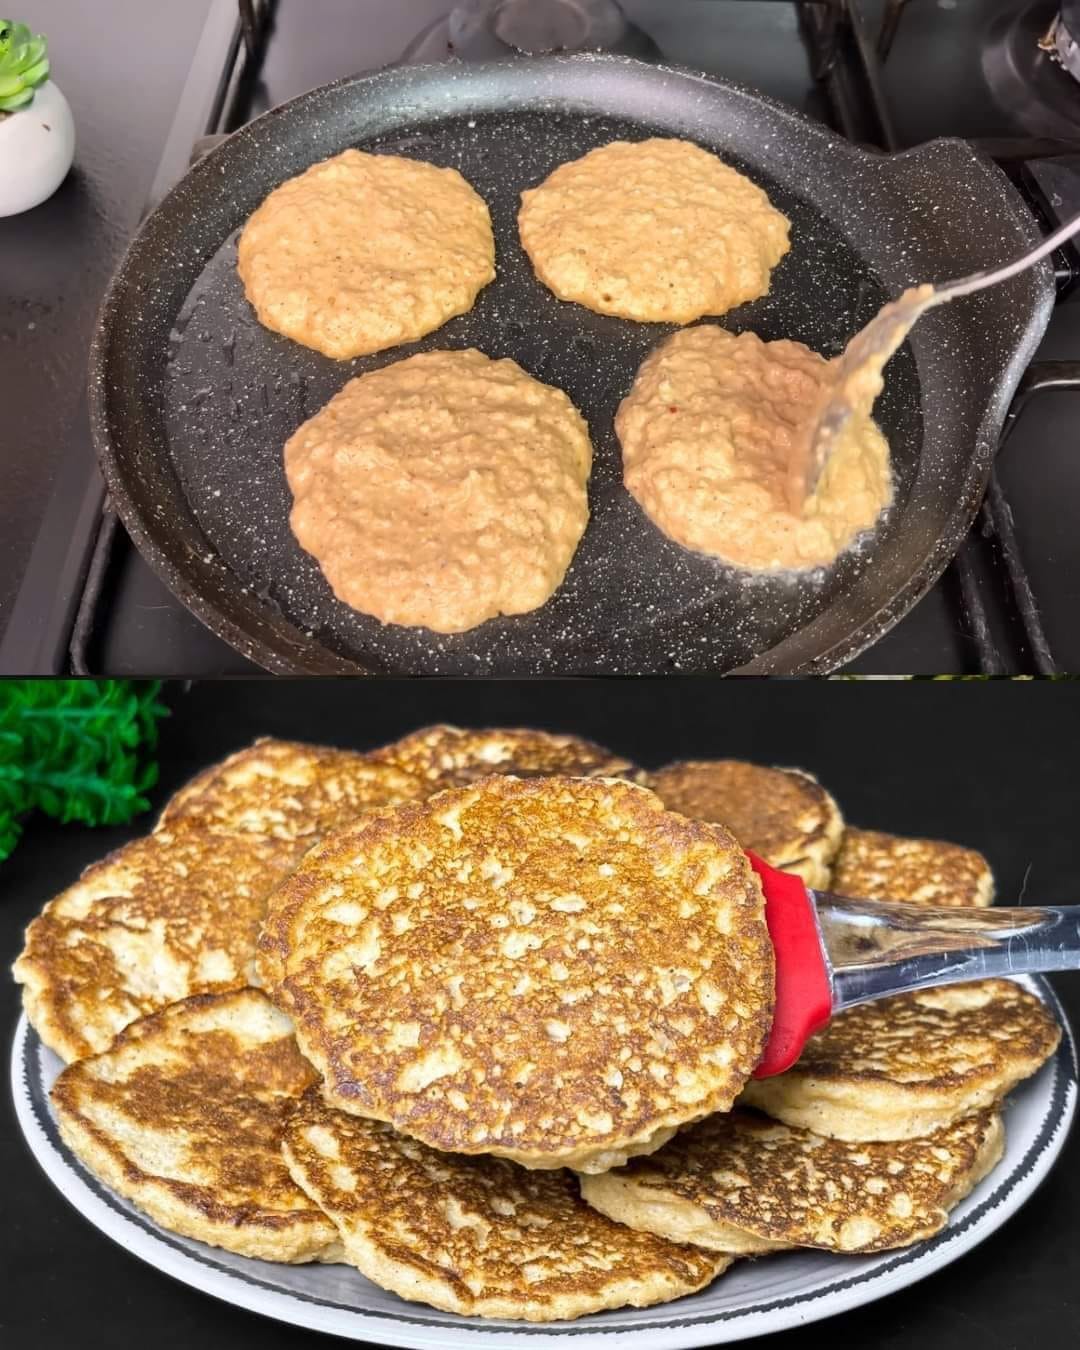
  • Apple Cinnamon Oatmeal Pancakes

    Apple Cinnamon Oatmeal Pancakes

    Ingredients:

    • 1 cup oatmeal
    • 2 apples
    • 2 eggs
    • 150g yogurt
    • 1 teaspoon cinnamon
    • 1 teaspoon baking powder

    Directions:

    1. Prepare the Ingredients:
    • Peel, core, and finely chop the apples.
    • In a blender, grind the oatmeal into a fine flour.
    1. Make the Batter:
    • In a mixing bowl, combine the ground oatmeal, baking powder, and cinnamon.
    • In another bowl, beat the eggs and mix in the yogurt.
    • Add the wet ingredients to the dry ingredients and mix until well combined.
    • Fold in the chopped apples.
    1. Cook the Pancakes:
    • Heat a non-stick skillet or griddle over medium heat and lightly grease it with oil or cooking spray.
    • Pour a small amount of batter onto the skillet to form pancakes.
    • Cook until bubbles form on the surface, then flip and cook until golden brown on the other side, about 2-3 minutes per side.
    1. Serve:
    • Serve the pancakes warm, topped with your favorite toppings such as maple syrup, honey, or additional yogurt and fresh fruit.

    Serving Suggestions:

    • Serve with a dollop of Greek yogurt and a drizzle of honey.
    • Add a handful of fresh berries or sliced bananas on top.
    • Sprinkle with additional cinnamon or powdered sugar for extra flavor.

    Cooking Tips:

    • Make sure to finely chop the apples to ensure even cooking.
    • For a fluffier texture, let the batter rest for a few minutes before cooking.
    • Use a non-stick skillet to avoid the pancakes sticking to the pan.

    Nutritional Benefits:

    • Rich in fiber from the oatmeal and apples.
    • Provides protein from the eggs and yogurt.
    • Contains essential vitamins and minerals from the apples and cinnamon.

    Dietary Information:

    • Gluten-free (ensure oats are certified gluten-free)
    • No added sugar
    • High in protein and fiber
    See also  The World’s Best Recipe! Moist and Delicious Muffins That Melt in Your Mouth!

    Storage:

    • Store any leftover pancakes in an airtight container in the refrigerator for up to 2 days.
    • Reheat in a toaster or microwave before serving.

    Why You’ll Love This Recipe:

    • It’s a quick and easy breakfast option.
    • The combination of apples and cinnamon creates a delicious, comforting flavor.
    • These pancakes are nutritious and perfect for a balanced breakfast.
  • Italian Lemon Yogurt Cake Recipe without sugar

    Italian Lemon Yogurt Cake Recipe without sugar

    Italian Lemon Yogurt Cake Recipe without sugar

    Table of Contents

    INGREDIENTS:

    • 1 ½ cups all-purpose flour
    • 2 teaspoons baking powder
    • ½ teaspoon kosher salt
    • 1 cup plain coconut yogurt or use whole milk yogurt
    • Stevia powder
    • 3 large eggs
    • 2 teaspoons grated lemon zest 2 lemons
    • ⅓ cup freshly squeezed lemon juice
    • ½ teaspoon pure vanilla extract
    • ½ cup olive oil
    • ¼ cup lemon juice
    • ¼ setvia powder
    For the glaze:
    • juice of one lemon
    • 1 cup confectioner’s sugar

    INSTRUCTIONS:

    Preheat the oven to 350 degrees. Grease an 8½ x 4¼ x 2½-inch loaf pan. Line the bottom with parchment paper. Or you could spray the pan with baking spray.

    Dry ingredients: In a large bowl, sift together the flour, baking powder, and salt.

    Wet ingredients: In another bowl, whisk together the yogurt, sugar, the eggs, lemon zest, lemon juice, and vanilla. Slowly whisk the dry ingredients into the wet ingredients.

    Combine dry with wet ingredients: Slowly whisk the dry ingredients into the wet ingredients.

    Fold in the oil: Fold the coconut oil into the batter, incorporate it well with a spatula. Pour the batter into the prepared pan and bake for about 50 minutes, or until a cake tester placed in the center of the loaf comes out clean.

    Prep the lemon syrup: While the cake is baking, prepare the lemon syrup: Cook the 1/4 cup lemon juice and 1/4 cup sugar in a small pan until the sugar dissolves and the mixture is clear. Set aside.

    See also  Nutty Date Energy Bars

    Allow the cake to cool: When the cake is done, allow it to cool in the pan for 10 minutes. While the cake is still warm, pour the lemon-sugar mixture over the cake and allow it to soak in. Cool.

    Prep the glaze: For the glaze, combine the confectioners’ sugar and lemon juice and pour over the cake. Depending on how you like your glaze, you could make it thinner with more juice, or thicker, with more confectioner’s sugar. The icing will be completely firm in about an hour.

    Nutritional Info:

    Calories: 2384kcal | Carbohydrates: 475g | Protein: 20g | Fat: 111g | Saturated Fat: 90g | Polyunsaturated Fat: 3g | Monounsaturated Fat: 7g | Sodium: 2017mg | Potassium: 272mg | Fiber: 5g | Sugar: 202g | Vitamin A: 4IU | Vitamin C: 24mg | Calcium: 506mg | Iron: 10mg

  • Mini Pineapple & Condensed Coconut Milk Cheesecakes

    Mini Pineapple & Condensed Coconut Milk Cheesecakes

    Mini Pineapple & Condensed Coconut Milk Cheesecakes

    Table of Contents

    Experience a tropical escape with our Mini Pineapple & Condensed Coconut Milk Cheesecakes! A blend of creamy coconut, tangy pineapple, and a crunchy biscuit base – it’s a bite-sized paradise!

    Ingredients:

    – 180g plain sweet biscuits (Nice, Granita, or Milk Arrowroot)
    – ½ tsp ground cinnamon
    – 90g unsalted butter, melted
    – 85g pkt pineapple-flavored jelly
    – 125ml boiling water
    – 160ml cold water
    – 250g cream cheese, room temperature
    – 125ml sweetened condensed coconut milk
    – 150g well-drained crushed pineapple
    – 250ml thickened cream

    Instructions:

    1. Crush biscuits, mix with cinnamon and melted butter. Press into bases.
    2. Dissolve jelly in boiling water, add cold water. Cool slightly.
    3. Beat cream cheese until smooth, add condensed coconut milk.
    4. Gradually add jelly mix. Stir in crushed pineapple.
    5. Whip cream until stiff peaks, fold into mixture.
    6. Pour over bases, refrigerate until set.

  • Vanilla Almond Cream Cake

    Vanilla Almond Cream Cake

    Vanilla Almond Cream Cake

    Table of Contents

    Ingredients:

    For the Cream:

    See also  How to Make Delicious Cookies in Minutes with Just One Egg!

    2 eggs
    150 grams sugar (3/4 cup)
    1 teaspoon vanilla sugar
    70 grams cornstarch (1/2 cup)
    500 ml milk (2 cups)
    For the Choux Pastry:

    100 ml water (1/2 cup)
    100 ml milk (1/2 cup)
    80 grams butter (1/3 cup)
    A pinch of salt
    1 teaspoon sugar
    120 grams flour (1 cup)
    3-4 eggs (depending on size)
    Flaked almonds for topping
    For the Buttercream:

    140 grams butter at room temperature (2/3 cup)
    Prepared pudding from the cream filling (at room temperature)

    Directions:

    Prepare the Cream:
    Combine Ingredients: In a saucepan, whisk together 2 eggs, 150 grams sugar, vanilla sugar, and 70 grams cornstarch.
    Add Milk: Gradually stir in 500 ml milk, mixing until smooth.
    Cook the Cream: Cook over medium heat, stirring constantly, until the mixture thickens to a pudding-like consistency.
    Cool the Cream: Cover the cream with cling film, pressing it directly onto the surface to prevent a skin from forming. Let it cool completely.
    Prepare the Choux Pastry:
    Heat Ingredients: In a saucepan, combine 100 ml water, 100 ml milk, 80 grams butter, a pinch of salt, and 1 teaspoon sugar. Heat until the butter is fully melted.
    Add Flour: Stir in 120 grams flour all at once and cook the batter for 1-2 minutes, stirring constantly until it forms a smooth dough that pulls away from the sides of the pan.
    Cool Slightly: Remove from heat and let the dough cool for about 4 minutes.Add Eggs: Gradually add 3-4 eggs to the dough, one at a time, mixing well after each addition until the dough is smooth and glossy. The dough should slowly pull away from the spoon when lifted.
    Form and Bake: Preheat your oven to 180°C (355°F). On a baking sheet, pipe or spoon the dough into a circle with a diameter of 18 cm (7 inches). Brush with the remaining egg and sprinkle with flaked almonds. Bake for 30-40 minutes or until golden brown. Let cool completely.
    Prepare the Buttercream:
    Mix Buttercream: Gradually add the room temperature pudding to the 140 grams of room temperature butter, mixing until smooth and creamy.
    Assemble the Cake:
    Slice and Fill: Slice the cooled choux pastry horizontally to create two layers. Spread the buttercream evenly on the bottom layer and place the top layer over it.
    Chill: Refrigerate the assembled cake for 30 minutes before serving to allow the cream to set.
    Serving Suggestions:
    Serve chilled with a dusting of powdered sugar on top.
    Pair with a cup of tea or coffee for a delightful dessert experience.
    Garnish with fresh berries for added color and flavor.
    Serve with a dollop of whipped cream or a drizzle of chocolate sauce for extra indulgence.
    Cooking Tips:
    Ensure the cream and butter are at room temperature before mixing to avoid curdling.
    If the choux pastry dough is too thick, add a bit more egg, little by little, until the consistency is right.
    Allow the choux pastry to cool completely before slicing to avoid deflation.
    To prevent the choux pastry from becoming soggy, assemble the cake shortly before serving.
    Nutritional Benefits:
    Eggs: Provide high-quality protein and essential vitamins.
    Milk: A good source of calcium and vitamin D.
    Almonds: Rich in healthy fats, fiber, and protein.
    Dietary Information:
    Vegetarian: This recipe is suitable for vegetarians.
    Gluten-Free Option: Substitute regular flour with a gluten-free flour blend.
    Nutritional Facts (per serving, based on 10 servings):
    Calories: 320
    Protein: 6g
    Carbohydrates: 28g
    Dietary Fiber: 2g
    Sugars: 15g
    Fat: 20g
    Saturated Fat: 12g
    Cholesterol: 120mg
    Sodium: 180mg
    Calcium: 100mg
    Iron: 1mg
    Storage Tips:
    Refrigerate: Store the assembled cake in an airtight container in the refrigerator for up to 3 days.
    Freeze: Freeze the unfilled choux pastry for up to 1 month. Thaw before using.
    Why You’ll Love This Recipe:
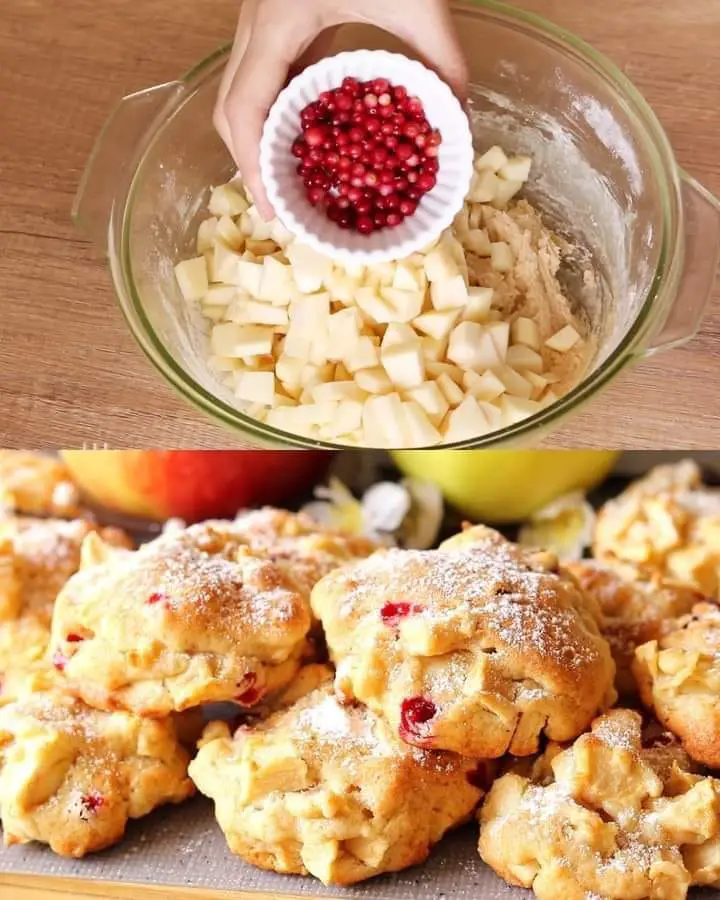
  • Quick Apple Cookies Recipe

    Quick Apple Cookies Recipe

    Quick Apple Cookies Recipe

    Quick Apple Cookies Recipe

    Table of Contents

    Ingredients:

      • 2 apples, peeled and diced
      • 70g (5 tbsp) butter, softened
      • 60g (1/3 cup) sugar
      • 1 egg
      • 140g (1 cup) flour
      • 1 tsp baking powder
    • A pinch of salt
    • A pinch of cinnamon

    Directions:

      • Preheat your oven to 180°C (350°F).
      • In a bowl, cream together the softened butter and sugar until light and fluffy.
      • Beat in the egg until well combined.
      • In a separate bowl, mix the flour, baking powder, salt, and cinnamon.
      • Gradually add the dry ingredients to the butter mixture and mix until just combined.
      • Fold in the diced apples.
      • Drop spoonfuls of dough onto a lined baking sheet, spacing them evenly.
      • Bake in the preheated oven for 15-20 minutes or until golden brown. Adjust baking time based on your oven’s characteristics.
      • Let cool on a wire rack before serving.

    Serving Suggestions:

    Serve these apple cookies warm with a sprinkle of powdered sugar or a drizzle of honey. They pair perfectly with a cup of tea or coffee.

    Cooking Tips:

      • For a more pronounced cinnamon flavor, add an extra 1/2 teaspoon.
    • You can substitute part of the flour with whole wheat flour for a healthier twist.

    Nutritional Benefits:

    These cookies provide a good balance of carbohydrates and fats, and apples add a boost of fiber and vitamins.

    Storage Tips:

    Store in an airtight container at room temperature for up to 3 days, or refrigerate for up to a week.

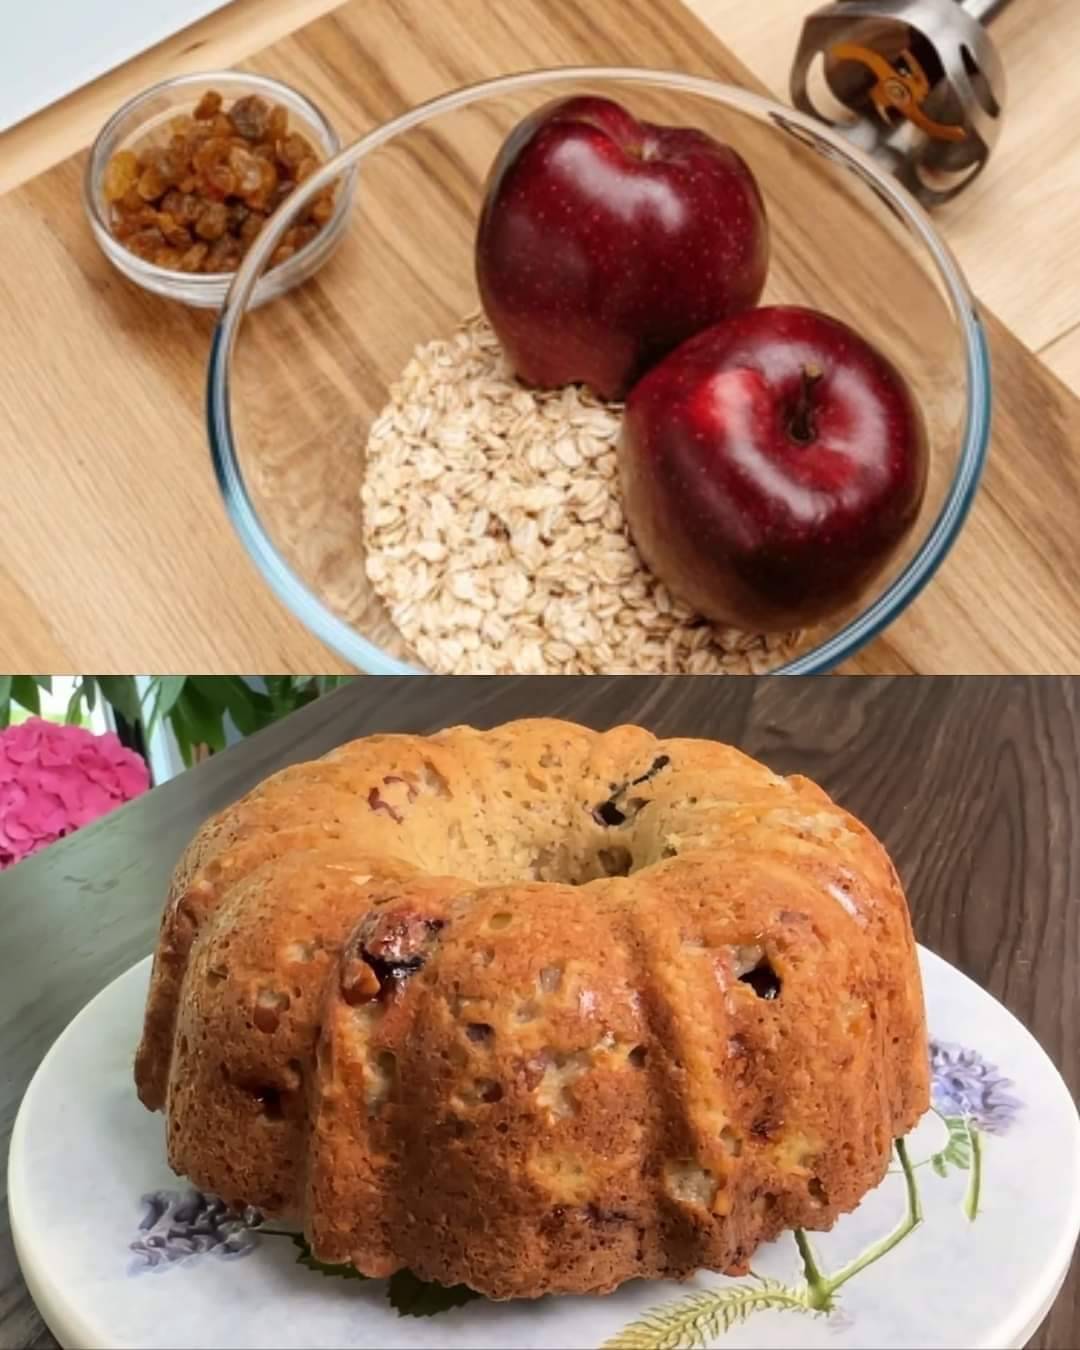
  • Baked Oatmeal with Apples, Cranberries, and Almonds

    Baked Oatmeal with Apples, Cranberries, and Almonds

    Baked Oatmeal with Apples, Cranberries, and Almonds

    Table of Contents

    Ingredients:

    Base:

      • 220g rolled oats (approximately 2 cups)

    Wet Ingredients:

      • 2 large eggs, beaten
      • 1 mashed banana
    • Vanillin (to taste) – substitute with ½ teaspoon vanilla extract if preferred

    Fruit and Nut Additions:

      • 2 large apples, sliced
      • Lemon juice (to prevent browning)
      • 80g dried cranberries
      • 80g sliced almonds

    Other:

    • Olive oil (for greasing the baking mold)

    Directions:

      1. Preheat the Oven:
          • Preheat your oven to 180°C (380°F) to ensure the oatmeal bakes evenly.


      2. Prepare the Baking Mold:
        • Lightly grease a baking dish with olive oil to prevent sticking. This will make it easier to remove the baked oatmeal once it’s cooked.
      1. Prepare the Apples:
        • Slice the apples into thin wedges or bite-sized pieces.
        • Drizzle them with a little lemon juice to prevent browning while you prepare the other ingredients.
      1. Mix Wet Ingredients:
        • In a large bowl, whisk together the beaten eggs and vanillin (or vanilla extract).
        • Mash the banana and add it to the egg mixture. Stir well to combine.
      1. Combine Dry and Wet Ingredients:
        • Add the rolled oats, dried cranberries, and sliced almonds to the wet ingredients.
        • Stir everything together until well combined.
      1. Add Apples and Bake:
        • Gently fold in the sliced apples, ensuring they are evenly distributed throughout the oatmeal mixture.
        • Pour the complete mixture into the greased baking dish.
    1. Bake:
      • Bake the oatmeal in the preheated oven for 40 minutes, or until the top is golden brown and a toothpick inserted into the center comes out clean.
    2. Serve:
        • Allow the baked oatmeal to cool slightly before serving.


      • Enjoy it warm on its own, or with your favorite toppings like a drizzle of honey, maple syrup, or a dollop of yogurt.

    Serving Suggestions:

      • Serve with a side of yogurt or a splash of milk.
    • Drizzle with honey or maple syrup for added sweetness.
    • Pair with a cup of tea or coffee for a delightful breakfast.

    Cooking Tips:

      • Ensure the apples are evenly sliced to ensure even baking.
    • You can substitute the dried cranberries with raisins or dried apricots if preferred.
    • To make this recipe gluten-free, use certified gluten-free oats.
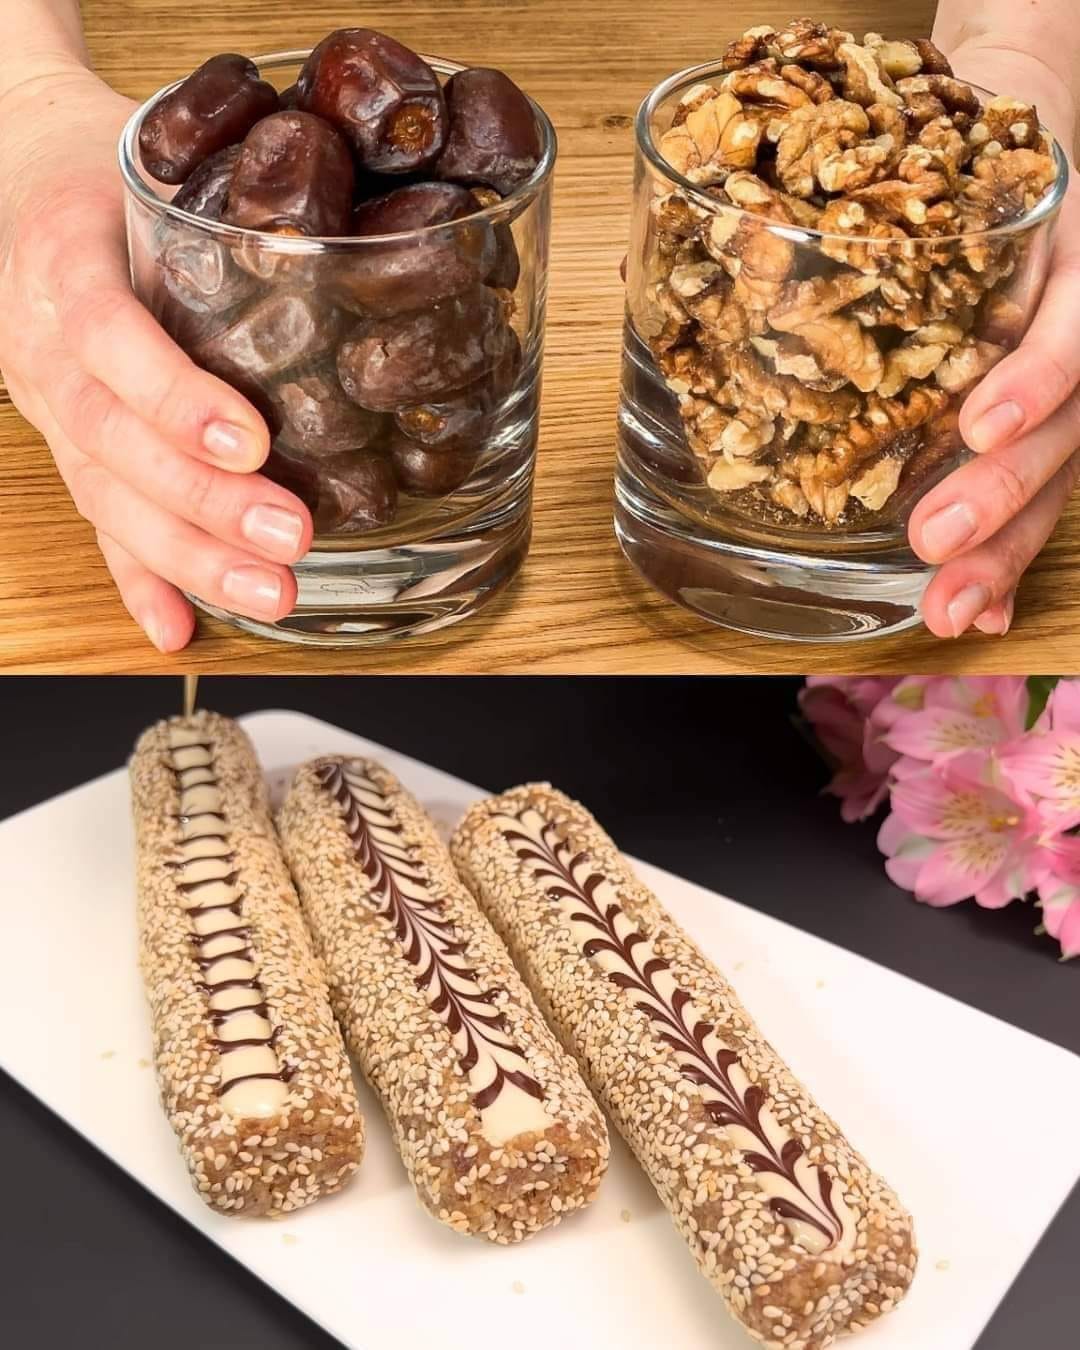
  • No-Bake Walnut Date Bites: Delicious & Healthy in 5 Minutes! pen_spark

    No-Bake Walnut Date Bites: Delicious & Healthy in 5 Minutes! pen_spark

    No-Bake Walnut Date Bites: Delicious & Healthy in 5 Minutes! pen_spark

    Table of Contents

    Ingredients:

      • 200 grams walnuts
      • 280 grams pitted dates (about 1 cup)
    • Optional:
        • 30 grams sesame seeds (for coating)
        • 90 grams white chocolate, melted
        • 15 grams dark chocolate, melted


    Instructions:

      1. Prep the Base: In a food processor, grind the walnuts until they resemble fine crumbs. Add the pitted dates and blend until a sticky dough forms. Scrape down the sides as needed.

      1. Shape the Bites: Scoop out small portions of the dough and roll them into bite-sized balls.


      2. Get Creative (Optional): If desired, coat the balls in sesame seeds for a delightful crunch.


      3. Chocolate Drizzle (Optional): Line a baking sheet with parchment paper. Place the prepared balls on the sheet. In separate bowls, melt the white and dark chocolate (you can use a microwave on low power, stirring frequently). Drizzle the white chocolate over the balls, followed by a decorative drizzle of dark chocolate.


    1. Set & Enjoy: Place the baking sheet in the refrigerator for about 15 minutes, allowing the chocolate to harden. Once set, enjoy your delicious and healthy Walnut Date Bites!

    More Information:

      • This recipe is naturally vegan, gluten-free, and dairy-free (if you skip the chocolate drizzle).
      • Feel free to adjust the ratio of walnuts to dates depending on your preference for sweetness and texture.
      • If the mixture seems too dry, add a tablespoon or two of water to the food processor while blending the dates.
      • For a fun twist, try adding a pinch of cinnamon or a splash of vanilla extract to the dough mixture.
    • These bites can be stored in an airtight container in the refrigerator for up to a week.
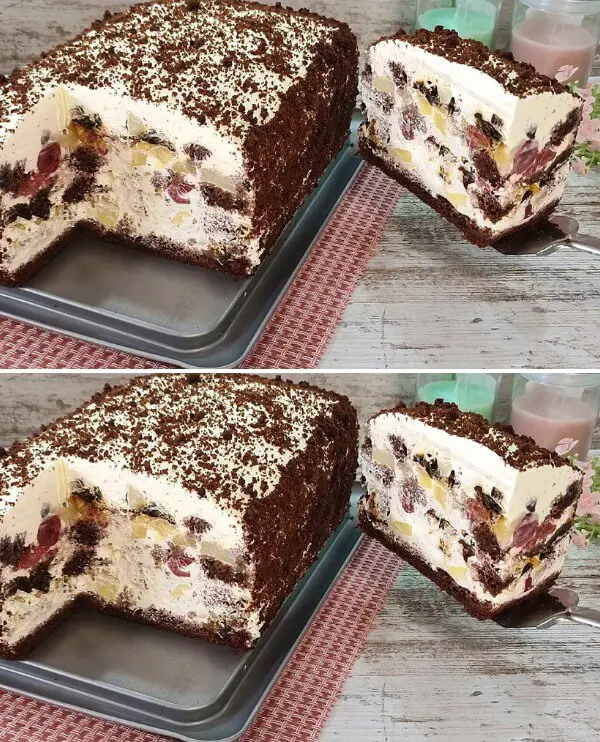
  • Pancho Cake Extravaganza Embark on a journey of irresistibility

    Pancho Cake Extravaganza Embark on a journey of irresistibility

    Pancho Cake Extravaganza Embark on a journey of irresistibility

    Table of Contents

    Embark on a journey of irresistibility with the famous Pancho Cake – unrealistically delicious, quick, and easy, without a hint of gelatin! This delightful creation boasts layers of chocolate sponge, pineapples, prunes, walnuts, and cherries, all embraced by a luscious cream.

    Chocolate Sponge Cake:

    – 4 medium-sized eggs
    – A pinch of salt
    – 16g vanilla sugar
    – 180g sugar
    – 100ml milk (room temperature)
    – 100g odorless vegetable oil
    – 220g flour
    – 40g cocoa
    – 10g baking powder

    Prepare Chocolate Sponge Cake:

    – Preheat the oven to 175°C (350°F).
    – In a bowl, whisk eggs with salt, vanilla sugar, and sugar until light and fluffy.
    – Add milk and vegetable oil, continuing to whisk.
    – Sift in flour, cocoa, and baking powder. Fold until well combined.
    – Pour the batter into a prepared baking dish and bake for about 35 minutes or until a wooden stick comes out clean.

    Prepare Ingredients for Layering:

    – Drain canned pineapples, reserving 50ml of pineapple juice for impregnation.
    – Snack on prunes to soften them.
    – Chop walnuts.
    – Drain canned cherries.

    Cream Preparation:

    – In a bowl, whip chilled whipping cream with powdered sugar and vanilla sugar until stiff peaks form.
    – In a separate bowl, mix mascarpone (or detached sour cream), cream cheese, and sour cream until smooth.
    – Gently fold the whipped cream into the mascarpone mixture until well combined.

    See also  Easy and Delicious Ground Beef Burrito Recipe
    Assembling the Pancho Cake:

    – Cut the chocolate sponge into two layers.
    – Sprinkle each layer with pineapple juice for impregnation.
    – Spread a layer of cream, followed by pineapples, prunes, and walnuts. Repeat for the second layer, finishing with cherries on top.

    Chill and Serve:

    – Refrigerate the Pancho Cake for at least 4 hours or overnight to let the flavors meld.
    – Slice and serve this heavenly creation to the delight of your taste buds!

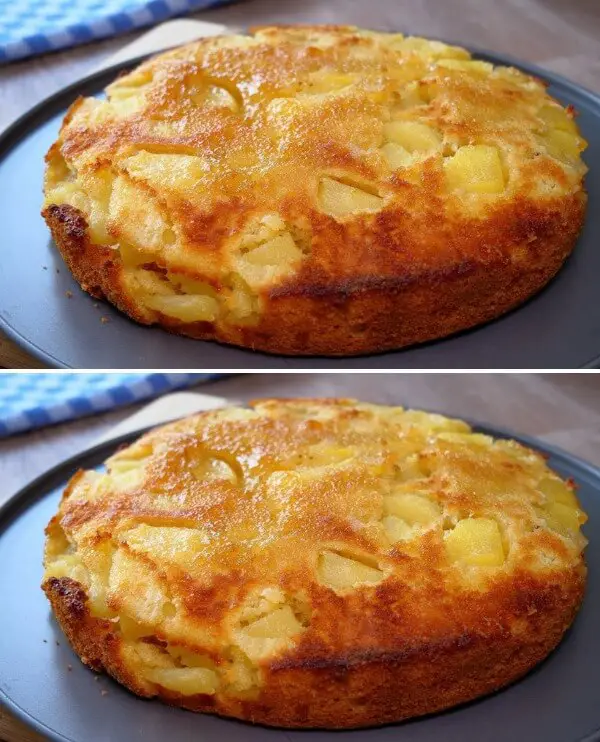
  • Ultimate Apple Cake Extravaganza

    Ultimate Apple Cake Extravaganza

    Ultimate Apple Cake Extravaganza

    Table of Contents

    Get ready for an apple cake experience like no other! This recipe guarantees the BEST apple cake you will EVER eat. Forget the rest and indulge in the sweetness of perfection.

    Ingredients for a 19 cm Baking Pan:
    For the Cake Batter:

    – 3 eggs (room temperature)
    – 75 grams sugar (2.64 oz.)
    – 8 g vanilla sugar (0.28 oz.)
    – 150 grams flour (5.29 oz.)
    – 10 g baking powder (0.35 oz.)
    – 100 g melted butter (3.5 oz.)

    For Topping:

    – 3 apples
    – 3 tablespoons sugar for sprinkling
    – Cinnamon to taste

    ‍ Instructions:

    Prepare the Cake Batter:

    – In a bowl, whisk together eggs, sugar, and vanilla sugar until fluffy.
    – Sift in the flour and baking powder, gently folding them into the batter.
    – Incorporate melted butter into the mixture until smooth.

    Assemble and Bake:

    – Pour the batter into a greased 19 cm baking pan.

    Prepare the Apples:

    – Peel and thinly slice the apples.
    – Arrange apple slices on top of the batter.

    Sweet Finishing Touch:

    – Sprinkle sugar generously over the apples.
    – Dust the top with cinnamon for that extra layer of flavor.

    Bake to Perfection:

    – Bake in a preheated oven at 180°C (356°F) for 35 minutes.
    – After turning, switch to the grill function and bake for an additional 3 minutes until the top achieves a golden finish.

    See also  Super Energy Dessert: No White Sugar, No Baking Required!
    Serve and Enjoy:

    – Allow the cake to cool slightly before serving. Slice into perfection and savor the best apple cake you’ll ever taste!

    Ready for a taste sensation? Bake this Ultimate Apple Cake, and your taste buds will thank you! Share your delightful creation with the world.

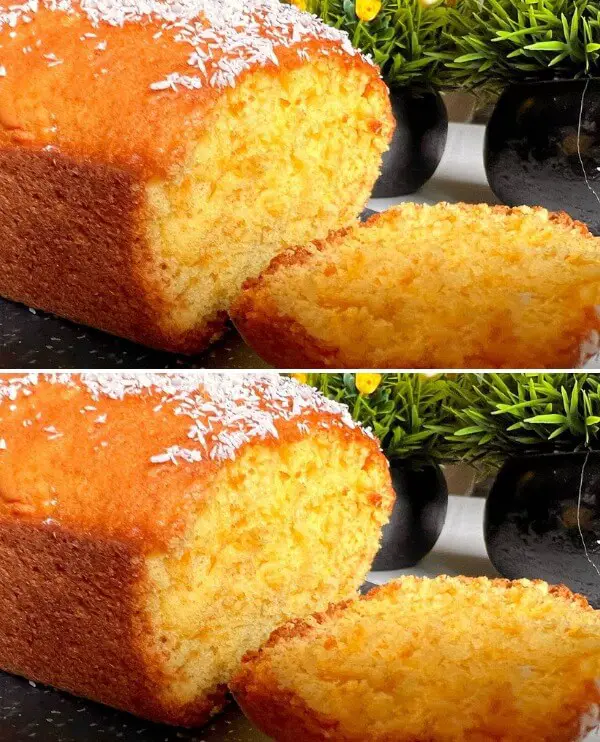
  • Irresistible Orange Cake in 10 Minutes

    Irresistible Orange Cake in 10 Minutes

    Irresistible Orange Cake in 10 Minutes

    Table of Contents

    Experience the magic of the famous Orange Cake! In just 10 minutes, indulge in a treat that will make your taste buds dance. This cake, with a hint of honey and coconut, literally melts in your mouth.

    Ingredients:

    – 3 eggs
    – Pinch of salt
    – 150g sugar
    – 150ml vegetable oil
    – 150ml orange juice
    – Grated orange zest
    – 220g flour
    – 10g baking powder
    – Honey
    – Coconuts (for garnish)

    ‍ Instructions:
    Prepare the Batter:

    – In a bowl, whisk together eggs, a pinch of salt, and sugar until light and fluffy.
    – Gradually add vegetable oil while continuing to whisk.
    – Mix in orange juice and grated orange zest.

    Combine Dry Ingredients:

    – In a separate bowl, sift together flour and baking powder.

    Mix the Batter:

    – Gradually add the dry ingredients to the wet ingredients, stirring gently until just combined. Do not overmix.

    Bake:

    – Pour the batter into a prepared cake pan.
    – Bake in a preheated oven at 180°C (350°F) for approximately 30-35 minutes, or until a toothpick comes out clean.

    Finish with Sweetness:

    – While the cake is still warm, drizzle honey over the top for a sweet touch.

    Garnish:

    – Sprinkle shredded coconuts over the honey-drizzled cake.

    Serve and Enjoy:

    – Allow the cake to cool before slicing. Each bite will be a delightful burst of citrusy goodness!

  • Boiling Water Dumplings with Savory Filling

    Boiling Water Dumplings with Savory Filling

    Boiling Water Dumplings with Savory Filling

    Table of Contents

    Get ready for a culinary revelation with these Boiling Water Dumplings! A magical fusion of a simple flour and boiling water dough, filled with a savory mix of minced meat, onions, and herbs. Get ready for a taste sensation like no other!

     Ingredients:

    For the Dough:

    – 175 ml boiling water
    – 1 tsp salt
    – 350 gr flour
    – 20 ml vegetable oil

    For the Filling:

    – 2 onions, finely chopped
    – Greens to taste
    – 250 gr minced meat
    – Salt and spices to taste
    – 30 ml boiling water

    For Frying:

    – Vegetable oil

    ‍ Instructions:

    1. In a bowl, mix boiling water, salt, and flour to make a dough. Knead until smooth, then add vegetable oil. Set aside.
    2. For the filling, sauté chopped onions in oil until golden. Add minced meat, salt, and spices. Cook until meat is browned.
    3. Roll out the dough and cut into circles.
    4. Place a spoonful of filling in the center of each circle. Fold and seal the edges.
    5. Boil dumplings in salted water until they float.
    6. Sauté boiled dumplings in oil until golden brown.

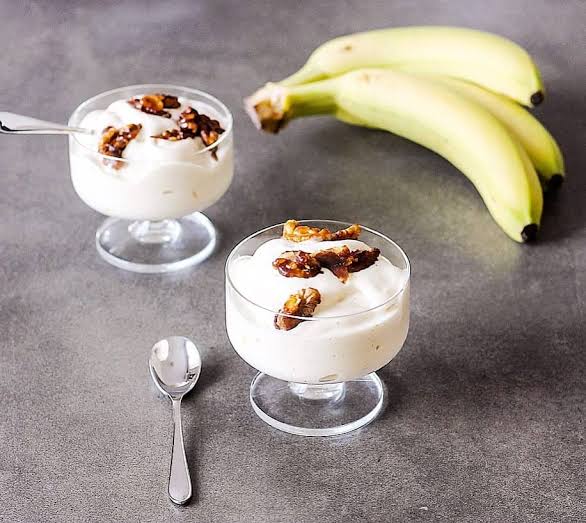
  • Homemade banana yogurt with 3 ingredients: Simple and lactose-free natural recipe

    Homemade banana yogurt with 3 ingredients: Simple and lactose-free natural recipe

    Homemade banana yogurt with 3 ingredients: Simple and lactose-free natural recipe

    How to Make Homemade Banana Yogurt

    Lactose-free natural yogurt so you can enjoy all the benefits of this nutritious food, rich in calcium, B vitamins, phosphorus, and magnesium. See below the list of all ingredients and required quantities. And then, a very complete preparation method with details of the recipe.

    Recipe Ingredients:

    • 1 ⅔ cups coconut milk – (400 ml)
    • 4 large, very ripe bananas
    • 1 teaspoon organic granulated sugar

    To ensure a sweet and pleasant flavor, start by peeling and removing any spoiled bananas. Then, put the bananas and coconut milk in a blender. If the coconut milk has separated, stir it thoroughly before adding it. Next, add the organic granulated sugar, which will help the fermentation process by feeding the microorganisms.

    Blend everything until you have a smooth, creamy mixture with a pleasant aroma. Finally, pour the mixture into a jar or container with a lid, leaving some space at the top to allow for safe fermentation.

    The container should now be placed away from insects and direct sunlight. Depending on the room temperature, the fermentation period might last anywhere from one to three days. To aid in the microbes’ distribution, stir the yogurt twice day.

    Taste it after a few days to see if the flavor and consistency are what you want. To prolong the yogurt’s shelf life, eat a portion when it’s ready and keep the remainder in the fridge. The yogurt is prepared! It can be eaten by itself, combined with cereal or other fruits, or added to sauces and smoothies.

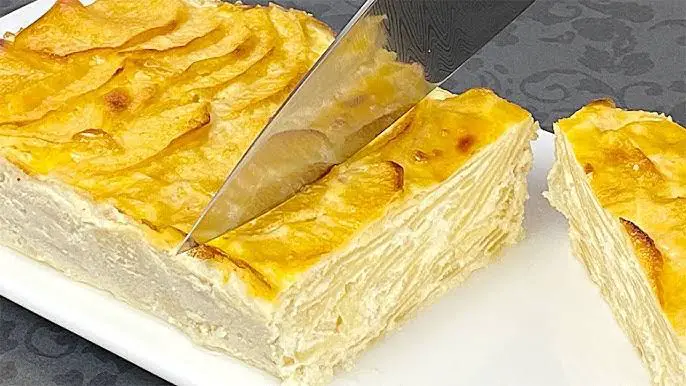
  • Apple dessert with 3 ingredients: Sugar-free, gluten-free and delicious and healthy

    Apple dessert with 3 ingredients: Sugar-free, gluten-free and delicious and healthy

    Apple dessert with 3 ingredients: Sugar-free, gluten-free and delicious and healthy

    How to Make Apple dessert with 3 ingredients

    Creamy and packed with protein, this recipe is free of sugar and flour, offering a perfect blend of flavor and texture. See below the list of all ingredients and required quantities. And then, a very complete preparation method with details of the recipe.

    Recipe ingredients:

    • 2 eggs
    • 2 apples
    • 7 oz ricotta or cream cheese – (200g)
    • 1 tablespoon of sweetener of your choice (optional)
    • Vanilla extract or cinnamon powder (optional)
    • Lemon juice (optional).

    First, decide if you want a yellow, red, or green apple. The sweetness of each kind varies, so pick the one that most closely matches your preferences. After that, give the apples a good wash, peel them, cut them in half, and take out the seeds and core.

    Cut them into small slices after that. To prevent the slices from browning, squeeze a little lemon juice over them, which will also enhance the taste.

    Next, combine the ricotta (or cream cheese) and the eggs in a bowl. Blend until a uniformly smooth texture is achieved.

    Next, add cinnamon or vanilla extract for an added taste boost. Add your favorite sweetener for a sweeter dessert. After that, whisk the ricotta and egg mixture thoroughly before adding the apple slices.

    Then, to make it easier to remove the dessert later, butter a rectangle baking dish and line the bottom with parchment paper.

    Arrange the apple slices in the plate now, saving some raw ones to garnish. The top should then be faintly browned after about 35 minutes of baking at 338°F (170°C).

    Lastly, take the dish out of the oven and allow it to cool fully. After that, place parchment paper over it and place it in the refrigerator for the night.

    Once fully chilled, carefully remove it from the dish. If desired, finish with honey or powdered sugar, though the flavor is already delicious on its own.

    Store the dessert in a sealed container in the refrigerator, where it can last up to a week, becoming even more flavorful over time.


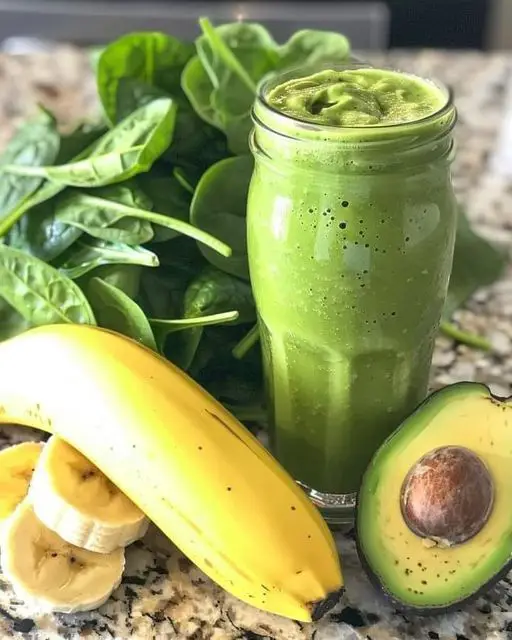
  • AVOCADO AND SPINACH SMOOTHIE

    AVOCADO AND SPINACH SMOOTHIE

    1 ripe avocado 1f951
    1 cup fresh spinach leaves 1f331
    1 banana 1f34c
    1 cup almond milk (or milk of your choice) 1f95b
    1 tablespoon honey 1f36f
    1/2 cup ice cubes ❄️
    Instructions:
    Prep Ingredients: Scoop out the avocado, peel the banana, and rinse the spinach leaves.
    Blend: Add the avocado, spinach, banana, almond milk, and honey into a blender.
    Add Ice: Toss in the ice cubes to chill the smoothie.
    Blend Until Smooth: Blend all ingredients until the smoothie is creamy and well-combined.
    Serve: Pour into a glass, garnish with a spinach leaf or a slice of avocado, and enjoy your nutritious and creamy Avocado and Spinach Smoothie!
    This smoothie is packed with healthy fats, fiber, and vitamins, making it a perfect start to your day!