Blog

  • CINNAMON SUGAR DONUT SWEET BREAD

    CINNAMON SUGAR DONUT SWEET BREAD

    The cinnamon sugar donut sweet bread is a recipe that is so easy to make and will be a hit with people of all ages.

    Ingredients

    Bread Ingredients:

    • 1/4 C canola oil
    • 1/4 C unsalted butter (softened)
    • 1 C sugar
    • 2 large eggs (room temp)
    • 1 tsp vanilla
    • 1 1/2 C flour
    • 1 tsp baking powder
    • 1/2 tsp salt
    • 1/2 C buttermilk *
    • 1/2 tsp cinnamon
    • 1/2 tsp molasses

    Coating Ingredients:

    • 1/2 C unsalted butter (melted)
    • 1/4 C sugar
    • 1/4 C brown sugar (packed)
    • 1/2 tsp cinnamon
    • * I use 1/2 C whole milk mixed with 1/2 tsp white vinegar as a substitute for buttermilk.

    Instructions

    1. Preheat oven to 350 degrees.
    2. Mix oil, butter, and sugar in a bowl until combined.
    3. Stir in eggs and vanilla until the mixture is smooth.
    4. Gently begin adding the dry ingredients and the buttermilk*,bstirring until the batter has formed.
    5. Scrape sides of the bowl so those ingredients can also be included in the batter.
    6. Make sure that there are no lumps.
    7. Remove 1/2 cup of the batter. Add it to a smaller bowl. Set aside. Now add the cinnamon and molasses. Stir to mix well.
    8. Prepped the loaf pan by spraying it with a baking spray.
    9. Begin by scooping in half of the bread batter into the loaf pan. Smooth this out in the bottom of the pan.
    10. Spoon half of the cinnamon/molasses batter on top of the bread batter.
    11. Scoop the remaining bread batter on top of the cinnamon/molasses batter carefully.
    12. Spoon the remaining cinnamon/molasses batter on top of the bread batter.
    13. Using a butter knife or a toothpick swirl the batters together.
    14. Bake at 350 degrees for 45-50 minutes.
    15. Remove from oven and allow to cool for 10 minutes while still in the loaf.
    16. Gently loosen the edges and the sides of the loaf from the pan.
    17. Using your hands carefully remove the loaf from the pan.
    18. Prepare the coating for the loaf while it is cooling.
    19. Pour the melted butter in a large shallow dish. Add both sugars and cinnamon stirring to mix well.
    20. Dip each side of the loaf into the melted butter until coated.
    21. Spoon the melted butter on the edges.
    22. Carefully take the bread out of the melted butter and place each side into the sugar cinnamon mix ensuring that the side is well coated. Sprinkle the sugar-cinnamon mixture on top of the bread.
  • German Potato Pancakes

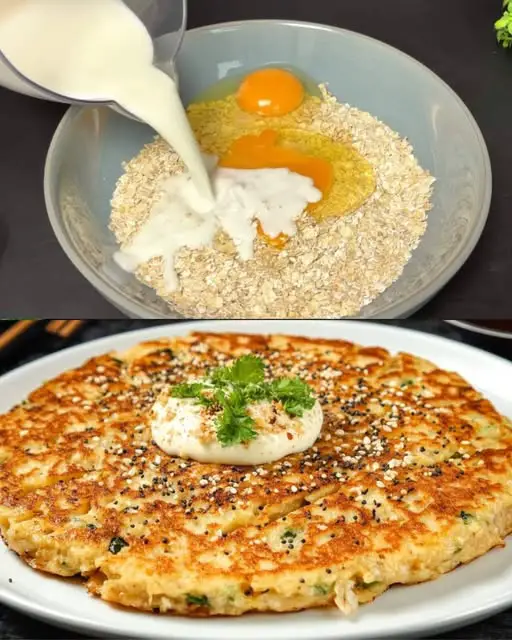
    German Potato Pancakes

    There are so many potato pancake recipes out there and they are all claiming to be the German Potato Pancakes Original. These are really fun to make and eat. They are crispy, slightly crunchy and overly tasty. These cakes are truly loved worldwide. Of course, each locale has their own recipe. For instance, Swedish pancakes are also quite popular, and eerily similar to the German Potato pancakes.

    Ingredients

    • 2 ½ pounds Russet potatoes, or any starchy potato, peeled and grated very finely
    • 1 yellow onion, grated very fine
    • 2 large eggs
    • 1 tsp salt
    • ¼ cup all purpose flour
    • Oil for frying

    How To Make German Potato Pancakes

    FIRST STEP:

    After grating the potatoes, using a towel, thoroughly wring out all the liquid from the potatoes

    Place the drained potatoes into a large bowl with the grated onion, salt, eggs and flour.

    Mix it thoroughly with your hands, you want it to be somewhat tacky. Add a little more flour if it is too sticky

    SECOND STEP:

    Heat 3 tbsp oil in a skillet

    Place ⅓ to ½ a cup of mixture into the hot skillet

    THIRD STEP:

    Fry for three to five minutes on each side, until they are golden.

    Briefly drain on paper towels

    FOURTH STEP:

    Serve immediately, while hot with applesauce and a sprinkle of powdered sugar, sour cream or even yogurt.

    These could also be served with meat and a gravy, using these as a side dish.

    Enjoy!

  • German Chocolate Sheet Cake

    German Chocolate Sheet Cake

    German Chocolate Sheet Cake has been a favorite dessert in my family for as long as I can remember. My dad requests it for every birthday and my grandmother’s famous recipe is safely stowed in every family member’s recipe box. Because my dad’s side of the family does in fact hail from Germany, I never questioned the assumption that German Chocolate Cake was, well… German. So, you can imagine my surprise when I learned that was not the case!

    INGREDIENTS
    • 2 cups all purpose flour
    • 2 cups white sugar
    • ¼ cup cocoa powder
    • 1 cup water
    • ½ cup butter (1 stick)
    • ½ cup shortening
    • 4 oz German baking chocolate
    • ½ cup buttermilk
    • 1 teaspoon baking soda
    • ½ teaspoon salt
    • 2 eggs
    • 1 teaspoon vanilla
    FROSTING
    • 12 oz can evaporated milk
    • 3 egg yolks
    • ¾ cup butter
    • 1 cup sugar
    • 1/2 cup brown sugar
    • 1 ½ cups shredded coconut
    • 1 ½ cups pecans, roughly chopped
    • 1 ½ teaspoons vanilla
    PREPARATION
    1. Preheat oven to 400 degrees F and grease a sheet pan.
    2. In a large bowl, mix together the flour, sugar, and cocoa powder.
    3. In a small saucepan, add the water, butter, shortening, and chocolate. Bring to a boil over medium heat. Once the mixture is smooth and fully combined, add it to the dry ingredients and whisk to combine.
    4. Stirring between each addition, first add the buttermilk, baking soda, salt, eggs, and then vanilla.
    5. Transfer batter to the prepared sheet pan and bake for 20-22 minutes. Let cool before frosting.
    FROSTING
    1. Add the milk, egg yolks, butter, and sugars to a medium sized saucepan over medium heat. Bring mixture to a boil and then lower heat to a simmer. Stir frequently and continue cooking for 10-12 minutes or until mixture has thickened. Remove from heat.
    2. Stir in coconut, pecan, and vanilla.
    3. Let frosting cool slightly and then spread over the cooled cake.
    4. Chill for 1-2 hours, then serve.
  • Cheesy Chicken Fritters

    Cheesy Chicken Fritters

    Cheesy, Juicy and Flavorful Chicken Fritters always get glowing reviews. If you love easy chicken recipes, this is your recipe!

    Ingredients for Chicken Fritters:

    • 1 1/2 lbs chicken breasts, (3 large)
    • 2 large eggs
    • 1/3 cup mayonnaise
    • 1/3 cup all-purpose flour, or cornstarch or potato starch for gluten free
    • 4 oz mozzarella cheese, (1 1/3 cups shredded)
    • 1 1/2 Tbsp chopped fresh dill
    • 1/2 tsp salt , or to taste
    • 1/8 tsp black pepper
    • 2 Tbsp Extra light olive oil, to saute (or any high heat cooking oil)

    Ingredients for Garlic Aioli Dip (Optional)

    • 1/3 cup mayonnaise
    • 1 garlic clove, pressed
    • 1/2 Tbsp lemon juice
    • 1/4 tsp salt
    • 1/8 tsp black pepper

    How To Make Cheesy Chicken Fritters

    1. Using a sharp knife, dice chicken into 1/3″ thick pieces and place them in a large mixing bowl. Tip: If chicken breast is partially frozen, it will be a little bit easier to slice.
    2. Into the mixing bowl, add remaining batter ingredients: 2 eggs, 1/3 cup mayonnaise, 1/3 cup flour, 1 1/3 cups shredded mozzarella, 1 1/2 Tbsp dill, 1/2 tsp salt and 1/8 tsp black pepper, or season to taste. Stir the mixture until well combined, cover with plastic wrap and refrigerate 2 hours or overnight.
    3. Heat a large non-stick pan over medium heat and add 2 Tbsp oil. When oil is hot, add the chicken mixture a heaping Tablespoon at a time. Slightly flatten out the tops with the back of your spoon and sauté uncovered 3-4 min on the first side, then flip and saute 3 min on the second side or until outsides are golden brown and chicken is fully cooked through* Repeat with remaining fritters adding more oil as needed.

    4. To make the aioli (if using), combine all ingredients in a small bowl or measuring cup and stir together until smooth.

    Recipe Notes

    *To test for doneness, cut a fritter in half and the chicken should be completely white inside. If your chicken patty is browning too fast, adjust your heat down.

  • Appeal of pineapple up side down cake

    Appeal of pineapple up side down cake

    Appeal of pineapple up side down cake

    • 1/4 cup unsalted butter, melted
    • 1/2 cup packed brown sugar
    • 1 can (20 ounces) pineapple slices in juice, drained
    • 10 maraschino cherries

    For the Cake:

    • 1 1/2 cups all-purpose flour
    • 1 teaspoon baking powder
    • 1/2 teaspoon baking soda
    • 1/4 teaspoon salt
    • 1/2 cup unsalted butter, softened
    • 1 cup granulated sugar
    • 2 large eggs
    • 1 teaspoon vanilla extract
    • 3/4 cup whole milk

    Directions Set the Oven’s Temperature to 350°F (175°C). A 9-inch round cake pan should be greased.

    Get the topping ready: After the cake pan is ready, pour the melted butter into it, tilting it to coat the bottom. equitably. Over the butter, scatter the brown sugar. Place the pieces of pineapple on top of the brown sugar. and center each pineapple ring with a maraschino cherry.

    Combine the Dry Ingredients:

    Whisk together the salt and ingredients in a medium bowl. Put aside. Mix Wet Ingredients: Beat the granulated sugar and softened butter in a big basin until light. as well as fluffy. Beat thoroughly after adding each egg one at a time. Add the vanilla extract and stir.the baking soda, baking powder, and flour as well as salt. Put aside.

    Mix Wet Ingredients:

    Beat the granulated sugar and softened butter in a big basin until light. as well as fluffy. Beat thoroughly after adding each egg one at a time. Add the vanilla extract and stir.

    Assemble the Batter:

    Alternately add the milk and the dry ingredients to the wet mixture starting with the dry ingredients and finishing with them. Stir just until incorporated.

    Pour Batter: Spread the batter evenly over the pineapple and cherries in the pan. uniformly using a spatula

    Prepare the cake:

    Bake for 45 to 50 minutes in a preheated oven, or until a toothpick inserted into the The center is clean. Give the cake ten minutes to cool in the pan.

    Invert the Cake:

    To remove the cake from the pan, cut around the edges of the cake with a knife. Set out a portion. carefully flip the cake onto the dish after placing it over the pan. Give it a few minutes to rest before raising the pan.

    Serve and Savor:

    Cut the cake into slices and serve it warm or room temperature. Savor the decadent, buttery cake.

    Add the pineapple topping that has caramelized. The Pineapple Upside-Down Cake’s Everlasting Appeal The lasting appeal of pineapple upside-down cake can be ascribed to both its eye-catching design and its distinctive blend of flavors and textures. The pineapple that has been caramelized andcherries create a beautiful, glossy top that is both inviting and delicious. Whether served at a family gathering, a special celebration, or simply as a treat for yourself, pineapple upside-down cake nevera .

  • Cabbage and Minced Meat

    Cabbage and Minced Meat

    Cabbage and Minced Meat

    Ingredients:

    • 1 little cabbage, cut into small pieces.
    • 1 pound of ground beef
    • 1 can of chopped tomatoes (15 oz)
    • 1 cup of chopped onions
    • 2 pieces of garlic, finely chopped
    • 1 tablespoon of powdered broth seasoning
    • Half a teaspoon of cumin
    • 1/4 teaspoon of cayenne pepper
    • 1/2 teaspoon of smoked paprika
    • Add salt according to your preferenc

    Get the minced beef ready.

    Place the minced beef over medium heat in a large cast-iron skillet or pan. As the ground beef cooks till browned, divide it with a wooden spoon. In a pan with a little oil, cook the garlic and onions.

    Place the chopped garlic and onions on one side of the pan and the minced meat on the other. Sauté the garlic and onions for two to three minutes, or until they are transparent and fragrant.

    Add the spices and tomatoes. Add the tomatoes’ juice and diced tomatoes. Add the salt, smoked paprika, cumin, spicy pepper, and broth powder. Stir all ingredients together and bring to a boil. Reduce the heat and cook the mixture.

    To allow the flavors to meld, reduce the heat to medium-high and cook for about five minutes. If needed, adjust the seasonings or add additional salt after tasting the mixture. Add cabbage.

    Add the beef and tomato mixture to the skillet along with the sliced cabbage. Continue to boil, stirring occasionally, until the cabbage is tender, about 10 to 15 minutes.

    Assist: Enjoy the dish’s robust and flavorful flavors when it’s still hot.

    Enjoy yourselves!

    Have fun!

  • Coconut butter bars 

    Coconut butter bars 

    Coconut butter bars 

    Coconut is one of those flavors that people seem to either love or hate. I, for one, cannot get enough of it. If you feel similarly then today’s recipe is for you! These Coconut Butter Bars are an absolute dream in dessert form. With a buttery crust, a creamy filling, and plenty of coconut flakes, there’s a whole lot to love about this sweet treat. And, did I mention that they’re super easy to whip up? Let’s get into how they’re made!

    Crust

    • 2 cups flour
    • 1 cup brown sugar, packed
    • 1 teaspoon salt
    • 1 cup butter (2 sticks), melted

    Filling

    • 1/2 cup flour
    • 1 (14 oz) can sweetened condensed milk
    • 2 tablespoons granulated sugar
    • 3 eggs
    • 1/4 cup butter, melted
    • 2 teaspoons vanilla extract
    • 1 teaspoon salt
    • 3 cups sweetened shredded coconut
    • 1 cup sweetened shredded coconut, additional for topping

    Getting Ready Lightly butter a 9 x 13-inch baking dish and preheat the oven to 350 degrees F. Combine all of the crust ingredients in a medium bowl and stir until a dough forms. Using your hands or a spatula, push the dough into a uniform layer in the baking dish that has been prepared. Bake the crust until brown, 13 to 15 minutes. Stir the filling while the crust bakes. All of the filling ingredients—aside from one cup of coconut—should be combined in a large dish. Cover the baked crust with the filling, spreading it evenly. Add the final cup of coconut on top. Bake for a further 25 to 28 minutes, or until the coconut begins to brown and the center is set. Before slicing, let bars cool.

  • Delicious cake made with a blender: simple and irresistible

    Delicious cake made with a blender: simple and irresistible

    Delicious cake made with a blender: simple and irresistible

    Hi everyone, today we’re going to learn how to make Cake made with a blender using simple ingredients. So grab your pen and paper to jot down the ingredients, then follow the complete preparation method.

    How to Make Delicious cake made with a blender

    An incredible recipe that conquers with its simplicity and outstanding flavor. Prepared in a blender, this cake combines classic ingredients with easy preparation, creating an ideal dessert or snack for the whole family. See below the list of all ingredients and required quantities. And then, a very complete preparation method with details of the recipe.

    Recipe Ingredients:

    • 4 eggs
    • ¾ cup coconut milk (about 6.8 fl oz) – (200ml)
    • 1 cup shredded dried coconut (about 3.5 oz) – (100g)
    • 4 tablespoons butter or margarine
    • 1 can sweetened condensed milk (14 oz)
    • 1 ½ cups whole milk (12 fl oz)
    • 5 tablespoons cornstarch

    Guidelines:

    In a blender, begin by combining the eggs, butter, coconut milk, condensed milk, and whole milk. Blend until smooth, about 4 minutes. Then, blend once more until thoroughly combined, adding the cornstarch and shredded coconut. Transfer the mixture into a baking pan that has been oiled and coated with cornstarch. Top with additional shredded coconut if you’d like

    Then, bake in a preheated oven at 350°F (180°C) for approximately 50 to 60 minutes.

    Finally, perform the toothpick test: insert a toothpick, and if it comes out damp but not wet, the cake is ready

    Finally, if the middle is still undercooked but the top browns too quickly, cover with aluminum foil and keep baking in a water bath. Before taking the cake out of the pan, let it cool fully at room temperature.

  • Smothered meat Chop Scalloped Potato Casserole

    Smothered meat Chop Scalloped Potato Casserole

    Smothered meat Chop Scalloped Potato Casserole

    The Smothered meat Chop Scalloped Potato Casserole is a hearty and comforting dish that combines the savory richness of meat chops with the creamy, indulgent texture of scalloped potatoes. This casserole starts with a layer of thinly sliced potatoes, arranged in an overlapping fashion. These potatoes are seasoned with a blend of herbs such as thyme and rosemary, along with minced garlic, salt, and pepper, to infuse them with flavor.

    Ingredients:

    • 4 bone-in meat chops, about 1-inch thick
    • Salt and pepper, to taste
    • 1 tablespoon vegetable oil
    • 1 large onion, thinly sliced
    • 3 cloves garlic, minced
    • 3 tablespoons all-purpose flour
    • 1 1/2 cups milk
    • 1 cup chicken broth
    • 2 pounds potatoes, thinly sliced
    • 1 cup shredded cheddar cheese
    • 1 teaspoon paprika
    • Fresh parsley, chopped (for garnish)

    Directions:

    Set the oven temperature to 175°C (350°F). Use salt and pepper to season the meat chops. In a skillet, heat the oil over medium-high heat. Set aside the meat chops after browning them on both sides. Cook the garlic and onions in the same skillet until they are transparent. Stir for one minute after adding the flour to create a roux.

    Add the chicken broth and milk gradually, stirring until the mixture thickens. Take off the heat. In a casserole dish, arrange half of the potatoes in layers. Place half of the cheese and sauce on top.

    Continue with the remaining cheese, sauce, and potatoes. Add a little paprika. Top the layers with pork chops.

    Bake, covered with foil, for one hour. Take off the cover and continue baking for another 15 to 20 minutes, or until the potatoes and meat are soft.

    Before serving, let stand for ten minutes. Add parsley as a garnish. For a genuinely satisfying and delightful supper, serve this Smothered meat Chop Scalloped Potato Casserole with your favorite sides.

  • Chickpea Burgers with Yogurt Sauce

    Chickpea Burgers with Yogurt Sauce

    Chickpea burgers with yogurt sauce are a favorite meal for many people. They combine the rich flavor of chickpeas with the zesty taste of yogurt dip infused with dill. This tasty mix is not only delicious but also a healthy choice for any meal. Whether you are having a party or just having a nice dinner at home, this meal will definitely make a good impression.

    There is something very fulfilling about chickpea burgers. They are simple to make, can be used in many ways, and are full of protein. The chickpeas are mashed until smooth and are the main ingredient of the patties. Egg yolks, red bell pepper, and fresh parsley are added to give them a delicious taste and bright color. Cooking these patties in a little olive oil makes the outside crispy and the inside tender and tasty.

    Every chickpea patty needs a tasty dip to go with it. The sauce for the patties is prepared with Greek yogurt, dill, garlic, and lemon juice, giving it a creamy and tangy flavor. This sauce not only makes the food taste better but also adds a refreshing touch, making it a great combination.

    List of items needed:

    For the hamburger patties:
    Chickpeas: 1 cup, cooked (you can use canned chickpeas or dried chickpeas soaked overnight and boiled)
    Yolk of an Egg: 3 Red Pepper Pepper: 1/4 cup, chopped into small pieces.
    Chopped parsley: 1/4 cup Olive oil: For frying
    Salt and pepper: as desired.
    For the Yogurt Sauce:
    Greek yogurt: 1 cup
    Dill: 1 tablespoon, chopped
    Garlic: 1 piece, finely chopped
    Lemon Juice: 2 teaspoons
    Salt and pepper: as desired.
    Guidelines
    1. Get the chickpeas ready:
    If you are using dried chickpeas, soak them in water overnight and cook them until they are soft. If you are using canned chickpeas, make sure to wash them well.
    2. Prepare the burger patties:
    In a bowl, crush the cooked chickpeas until they are mostly smooth.
    Put the egg yolks, diced red bell pepper, parsley, and a little salt and pepper. Mix together until well mixed.
    Shape the mixture into small round pieces.

    3. Cook the burger patties.

    Warm up a frying pan on medium heat and add a little bit of olive oil.
    Cook the patties in a pan for 3-4 minutes on each side until they are golden brown and crispy.
    4. Make the Yogurt Dip: In a small bowl, mix together Greek yogurt, chopped dill, minced garlic, lemon juice, and add salt and pepper to taste. Mix well.
    5. Serve: Serve the warm chickpea cakes with the zesty yogurt sauce on the side.
    Benefits for your health:
    Chickpeas are a good source of protein and fiber, which makes them very helpful for controlling blood sugar levels. Mixing olive oil, which has good fats, with Greek yogurt, which has probiotics, makes this meal good for your heart and digestion.

    Have fun!

  • | I’VE LOST MY ACTIVE MEMBERS LIST, PLEASE SAY (HI) TO JOIN MY NEW LIST Elegant Ricotta and Spinach Quiche

    | I’VE LOST MY ACTIVE MEMBERS LIST, PLEASE SAY (HI) TO JOIN MY NEW LIST Elegant Ricotta and Spinach Quiche

    | I’VE LOST MY ACTIVE MEMBERS LIST, PLEASE SAY (HI) TO JOIN MY NEW LIST
    Elegant Ricotta and Spinach Quiche 

    Ingredients:

    1 pie crust (store-bought or homemade)
    1 tablespoon olive oil
    1 small onion, finely chopped
    2 cups fresh spinach, chopped
    1 cup ricotta cheese
    3 large eggs
    1 cup heavy cream
    1/2 cup grated Parmesan cheese
    Salt and pepper to taste
    A pinch of nutmeg
    Directions:

    Preheat oven to 375°F (190°C).
    Roll out the pie crust and press it into a 9-inch quiche dish or pie plate. Prick the bottom with a fork. Pre-bake the crust for 8 minutes. Remove from oven.
    In a skillet, heat olive oil over medium heat. Add the onion and sauté until translucent, about 5 minutes. Add the spinach and cook until wilted, about 2 minutes. Remove from heat and let cool.
    In a large bowl, mix together the ricotta cheese, eggs, heavy cream, Parmesan cheese, salt, pepper, and nutmeg until well combined. Stir in the cooled spinach and onion mixture.
    Pour the filling into the pre-baked crust. Bake for 35-40 minutes, or until the quiche is set and the top is golden brown.
    Let the quiche cool for a few minutes before slicing. Serve warm or at room temperature.
    Prep Time: 20 minutes | Cooking Time: 40 minutes | Total Time: 1 hour

    Kcal: 320 kcal | Servings: 8 servings

  • Pistachio Babka Bread

    Pistachio Babka Bread

    Pistachio Babka Bread 1f3301f35e

    Ingredients:
    – 4 cups all-purpose flour
    – 1/2 cup sugar
    – 1 packet (2 1/4 tsp) active dry yeast
    – 1 cup warm milk
    – 1/2 cup unsalted butter, melted
    – 3 large eggs
    – 1/2 tsp salt
    – 1 cup pistachios, chopped
    – 1/2 cup brown sugar
    – 1 tsp ground cinnamon
    – 1/4 cup powdered sugar (for glaze)

    Directions:

    1. In a large bowl, mix warm milk and yeast. Let it sit for about 5 minutes until it bubbles.
    2. Add melted butter, sugar, eggs, and salt to the yeast mixture. Stir well.
    3. Gradually add flour, mixing until a soft dough forms. Knead the dough for about 5-7 minutes until smooth.
    4. Place the dough in a greased bowl, cover it with a cloth, and let it rise in a warm place for about 1 hour or until it doubles in size.
    5. Once risen, roll the dough out into a rectangle on a floured surface.
    6. Spread brown sugar, cinnamon, and chopped pistachios evenly over the dough.
    7. Roll the dough tightly from one end to the other, forming a log. Cut the log in half lengthwise to reveal the filling.
    8. Twist the two halves together and place in a greased loaf pan. Let it rise again for about 30 minutes.
    9. Preheat your oven to 350°F (175°C). Bake the babka for 30-35 minutes until golden brown.
    10. Once baked, let it cool for a bit. Mix powdered sugar with a little water to make a glaze and drizzle it over the babka.

    Your delightful pistachio babka bread is ready to enjoy! Perfect for sharing with family and friends!

  • Fresh Mango Strawberry Swirled Slushies

    Fresh Mango Strawberry Swirled Slushies

    There’s nothing quite like a refreshing slushie to beat the heat on a warm day. Our Fresh Mango Strawberry Swirled Slushies combine the tropical sweetness of mangoes with the vibrant tartness of strawberries, creating a delightful and visually stunning drink. Perfect for summer gatherings, poolside parties, or simply enjoying a sunny afternoon, these slushies are sure to become a favorite.
    Why You’ll Love This Recipe

    Fresh Mango Strawberry Swirled Slushies are not only delicious but also packed with natural fruit goodness. They’re easy to make, requiring just a few simple ingredients and a blender. This recipe is versatile and can be easily adapted to suit your taste preferences or dietary needs. Plus, the beautiful swirl of colors makes them as pleasing to the eye as they are to the palate.
    Who Is This Recipe For?

    This recipe is perfect for:

    Fruit lovers looking for a refreshing and healthy beverage.
    Parents seeking a fun and nutritious drink for their kids.
    Anyone hosting a summer party or barbecue who wants to serve a crowd-pleasing drink.

    Ingredients

    To make these refreshing slushies, you will need:

    2 ripe mangoes, peeled and cubed
    2 cups fresh strawberries, hulled and halved
    1 cup ice for the mango layer
    1 cup ice for the strawberry layer
    1/4 cup water (optional)
    2 tablespoons honey or agave syrup (optional)
    Fresh mint leaves for garnish (optional)

    Directions

    Prepare the Mango Layer: In a blender, combine the mango cubes and 1 cup of ice. Blend until smooth, adding a little water if necessary to reach the desired consistency. Taste and add honey or agave syrup if additional sweetness is desired. Pour the mango mixture into a bowl and rinse out the blender.
    Prepare the

    Strawberry Layer: In the cleaned blender, combine the strawberries and 1 cup of ice. Blend until smooth, adding a little water if necessary to reach the desired consistency. Taste and add honey or agave syrup if additional sweetness is desired.
    Assemble the

    Slushies: Pour a layer of the mango mixture into tall glasses, filling each glass about halfway. Carefully pour a layer of the strawberry mixture on top of the mango layer. Use a straw or spoon to gently swirl the two layers together to create a marbled effect.
    Garnish and Serve: Garnish with fresh mint leaves if desired. Serve immediately and enjoy this refreshing treat.

    Tips and Tricks

    Frozen Fruit: If fresh fruit is not available, you can use frozen mango and strawberries. This will also help keep the slushies extra cold.
    Sweetness Level: Adjust the sweetness to your liking. The natural sweetness of the fruit may be enough, but feel free to add more honey or agave syrup as needed.
    Alcoholic Version: For an adult twist, add a splash of rum or vodka to the blender for a refreshing cocktail.

  • A classic! My nana used to make it and thankfully I saved her recipe

    A classic! My nana used to make it and thankfully I saved her recipe

    My nana used to make it and thankfully I saved her recipe
    By Holly Owens
    Peanut Butter Chocolate Gooey Butter Cake is one of those delightful desserts that hits all the right notes—rich, decadent, and incredibly satisfying. This cake is a fun and indulgent twist on the classic gooey butter cake, which originated in St. Louis, Missouri. If you’re a fan of peanut butter and chocolate (and let’s be honest, who isn’t?), then this cake is calling your name. It’s perfect for a lazy Sunday afternoon treat, a potluck with friends, or a special family gathering. Trust me, once you take a bite, you’ll understand why this cake is worth a bit of extra time in the kitchen.
    This gooey butter cake is quite rich, so it’s best paired with something light and refreshing. A dollop of whipped cream or a scoop of vanilla ice cream are classic choices, but fresh berries or a simple fruit salad would also be lovely. If you’re serving this at a gathering, some hot coffee or a glass of cold milk on the side can balance the sweetness perfectly.
    Peanut Butter Chocolate Gooey Butter Cake
    Servings: 12
    Ingredients
    1 box chocolate cake mix
    1/2 cup unsalted butter, melted
    3 large eggs
    8 oz cream cheese, softened
    1 cup creamy peanut butter
    3 3/4 cups powdered sugar
    1 tsp vanilla extract
    1/2 cup semi-sweet chocolate chips
    Directions

    Preheat your oven to 350°F (175°C) and grease a 9×13 inch baking dish.
    In a large bowl, combine the chocolate cake mix, melted butter, and 1 egg. Mix until well combined. Press this mixture evenly into the bottom of the prepared baking dish.
    In another large bowl, beat the cream cheese and peanut butter together until smooth. Add the remaining 2 eggs, one at a time, beating well after each addition.
    Gradually mix in the powdered sugar and vanilla extract until smooth and creamy.
    Fold in the chocolate chips.
    Spread the peanut butter mixture evenly over the chocolate base in the baking dish.
    Bake in the preheated oven for 35-40 minutes, or until the edges are set, and the center is slightly gooey.
    Allow the cake to cool in the pan before cutting into squares and serving.
    Variations & Tips
    If you want to switch it up, try using a different flavor of cake mix—yellow or even a fun flavor like peanut butter. For a crunchy twist, throw in some crushed pretzels on top before baking. And if you have a nut allergy, you can substitute the peanut butter with a nut-free spread like sunflower seed butter. Enjoy experimenting with different variations and find your favorite!

  • Bloody Candy Apples Milkshake

    Bloody Candy Apples Milkshake

    Get ready to chill your guests with this spooky, delicious Bloody Candy Apples Milkshake! Perfect for Halloween celebrations, it’s a delightful mix of fall flavors that will send shivers down your spine.

    Ingredients:

    Milkshake:
    – 2 large scoops vanilla ice cream
    – 1/2 cup whole milk
    – 1/4 tsp cinnamon
    – 2 tbsp caramel sauce
    – 1/4 cup red apple juice

    Bloody Drip Sauce:
    – 1/4 cup corn syrup
    – Red food coloring (or a mix of red and black for a darker effect)

    Toppings:
    – Whipped cream
    – Caramel-dipped mini apples (optional)
    – Crushed red sour candies or caramel chips
    – Red or black sprinkles

    Directions:

    1. Make the Bloody Sauce:
    In a small bowl, mix the corn syrup with a few drops of red food coloring. Stir until the color is well blended. If you prefer a darker look, add a drop of black food coloring.

    2. Prepare the Glass:
    Drizzle the bloody sauce along the inside rims of your glass to create a spooky dripping effect.

    3. Blend the Milkshake:
    In a blender, combine the vanilla ice cream, whole milk, caramel sauce, red apple juice, and cinnamon. Blend until smooth and creamy. Adjust the thickness by adding more milk or ice cream if needed.

    4. Assemble the Milkshake:
    Pour the milkshake into the glass with the bloody drips.

    5. Add Toppings:
    Top your milkshake with a generous swirl of whipped cream, then sprinkle on crushed candy pieces and sprinkles for an extra spooky touch.

    6. Optional Garnish:
    Skewer mini caramel-dipped apples or apple slices and place them on top for a festive and eerie garnish.

    Your Bloody Candy Apples Milkshake is now ready to serve! Enjoy this chillingly delicious treat and let the Halloween fun begin!