Blog

  • Rotel Cream Cheese Sausage Balls

    Rotel Cream Cheese Sausage Balls

    Rotel Cream Cheese Sausage Balls are a savory, flavorful appetizer that’s perfect for parties or gatherings. They’re easy to make and have a spicy, cheesy kick thanks to the addition of Rotel tomatoes, cream cheese, and sausage. Here’s a simple recipe for you to try!


    Ingredients:

    • 1 pound breakfast sausage (mild or spicy, depending on preference)
    • 1 can (10 oz) Rotel diced tomatoes and green chilies, drained
    • 8 oz cream cheese, softened
    • 1 1/2 cups shredded sharp cheddar cheese
    • 1 1/2 cups biscuit mix (like Bisquick)
    • 1/2 tsp garlic powder (optional)
    • 1/2 tsp onion powder (optional)
    • Salt and pepper to taste

    Instructions:

    1. Preheat oven: Preheat your oven to 375°F (190°C). Line a baking sheet with parchment paper or lightly grease it.
    2. Cook sausage: In a large skillet over medium heat, cook the sausage, breaking it apart as it cooks, until browned and fully cooked. Drain any excess fat.
    3. Mix ingredients: In a large mixing bowl, combine the cooked sausage (with any juices), drained Rotel tomatoes, softened cream cheese, shredded cheddar cheese, biscuit mix, garlic powder, onion powder, salt, and pepper. Mix until everything is evenly combined. It may be a bit thick and sticky, but that’s normal.
    4. Form balls: Using your hands or a cookie scoop, form the mixture into small balls (about 1 inch in diameter) and place them on the prepared baking sheet. You should get around 20-24 sausage balls.
    5. Bake: Bake in the preheated oven for 15-18 minutes, or until the sausage balls are golden brown and cooked through. You may want to check that they’re fully cooked by cutting one open to ensure it’s hot and the inside is fully cooked.
    6. Serve: Allow the sausage balls to cool slightly before serving. These are perfect served warm as an appetizer or snack.

    Enjoy these deliciously cheesy, savory bites with a little spicy kick from the Rotel!

  • 12-Spoon Italian Cake

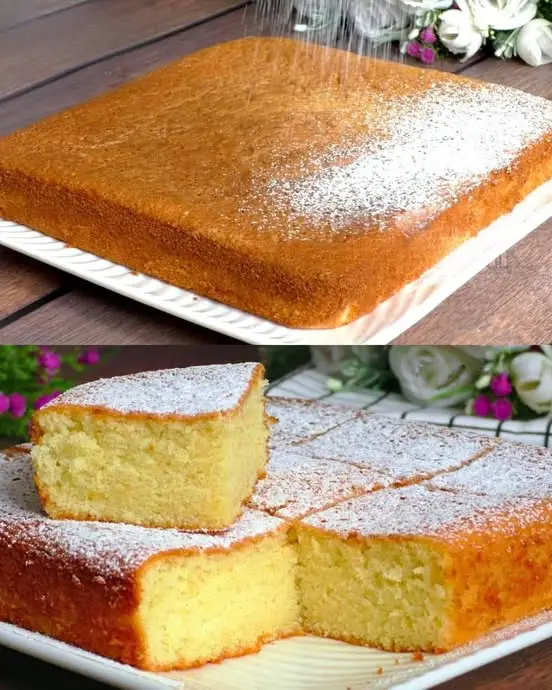
    12-Spoon Italian Cake

    12-Spoon Italian Cake

    Table of Contents


    Ingredients (for a 21×21 cm baking tray)

      • 3 eggs
      • 12 tbsp sugar
      • 1 tsp vanilla sugar


      • A pinch of salt
      • 12 tbsp milk
      • 12 tbsp vegetable oil


      • 12 tbsp flour
      • 1 tsp baking powder
      • Powdered sugar (for dusting)


    Directions

    1. Preheat the Oven:
      • Preheat your oven to 180°C (356°F).
    2. Prepare the Batter:
        • In a large mixing bowl, add 3 eggs.


        • Add 12 tbsp of sugar to the bowl.
        • Add 1 tsp of vanilla sugar.
        • Add a pinch of salt.


      • Beat the mixture for 3-4 minutes until it is light and frothy.
    3. Add Wet Ingredients:
        • Add 12 tbsp of milk to the egg mixture and mix well.


      • Add 12 tbsp of vegetable oil and continue mixing until well combined.
    4. Combine Dry Ingredients:
        • In a separate bowl, combine 12 tbsp of flour and 1 tsp of baking powder.


      • Gradually add the dry ingredients to the wet mixture, mixing until smooth and free of lumps.
    5. Prepare the Baking Tray:
        • Grease a 21×21 cm baking tray or line it with parchment paper.


      • Pour the batter into the prepared tray, spreading it evenly.
    6. Bake:
        • Bake in the preheated oven at 180°C (356°F) for 35 minutes, or until a toothpick inserted into the center comes out clean.


    7. Cool and Serve:
        • Allow the cake to cool in the tray for a few minutes before transferring it to a wire rack to cool completely.
        • Dust the top with powdered sugar before serving.


    Serving Suggestions

    Serve this Italian cake as a standalone dessert or with a scoop of vanilla ice cream. It also pairs well with fresh berries and a dollop of whipped cream.


    Cooking Tips

      • Ensure all ingredients are at room temperature before starting.


    • Do not overmix the batter to avoid a dense cake.
    • Check the cake a few minutes before the end of the baking time to prevent overbaking.
  • Baked Zucchini with Fresh Herb Sauce

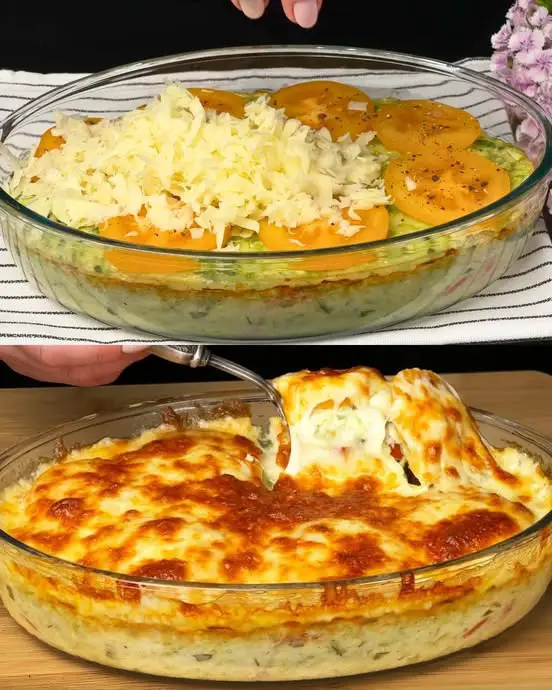
    Baked Zucchini with Fresh Herb Sauce

    Baked Zucchini with Fresh Herb Sauce

    Table of Contents

    Ingredients

    For the Baked Zucchini:

      • Zucchini: 2 medium, grated (about 500g)
      • Salt: To taste (for zucchini and seasoning)


      • Eggs: 2 large, beaten
      • Cherry Tomatoes: 1 cup, halved
      • Fresh Parsley: 1/4 cup, chopped


      • Garlic: 2 cloves, minced
      • Flour: 60g (1/2 cup)
      • Black Pepper: To taste


    • Mozzarella Cheese: 150g (1 1/2 cups), shredded

    For the Sauce:

      • Sour Cream: 60g (1/4 cup)


      • Mayonnaise: 60g (1/4 cup)
      • Fresh Cucumber: 1 small, finely chopped
      • Fresh Herbs (Dill or Parsley): 2 tablespoons, chopped


    • Garlic: 1 clove, minced
    • Salt: To taste

    Directions


      • Prepare the Zucchini:
        • Grate the zucchini and place it in a colander. Sprinkle with salt and let sit for 10 minutes. Squeeze out excess liquid using a clean kitchen towel or your hands.
      • Combine Ingredients:
          • In a large bowl, mix the grated zucchini, beaten eggs, halved cherry tomatoes, parsley, and garlic. Add flour and black pepper, stirring until well combined.


      • Bake the Zucchini:
          • Preheat the oven to 180°C (350°F).
          • Grease a baking dish and spread the zucchini mixture evenly. Top with shredded mozzarella.


        • Bake for 25-30 minutes, or until the top is golden and the cheese is bubbly.
      • Prepare the Sauce:
          • In a small bowl, combine sour cream and mayonnaise. Mix in the chopped cucumber, herbs, garlic, and a pinch of salt. Stir well.


      • Serve:
        • Let the baked zucchini cool slightly before cutting into portions. Serve warm with the herb sauce for dipping or drizzling.

    Serving Suggestions

      • Serve with a side salad for a complete meal.
      • Pair with crusty bread for added texture.


    • Enjoy as a side dish with grilled chicken or fish.

    Cooking Tips

      • Drain zucchini thoroughly to prevent a watery bake.


    • Use parchment paper for easy cleanup and to prevent sticking.
    • Customize toppings: Add grated Parmesan for extra flavor or sprinkle red chili flakes for a
  • No-Oven Stovetop Caramelized Onion Pull-Apart Bread

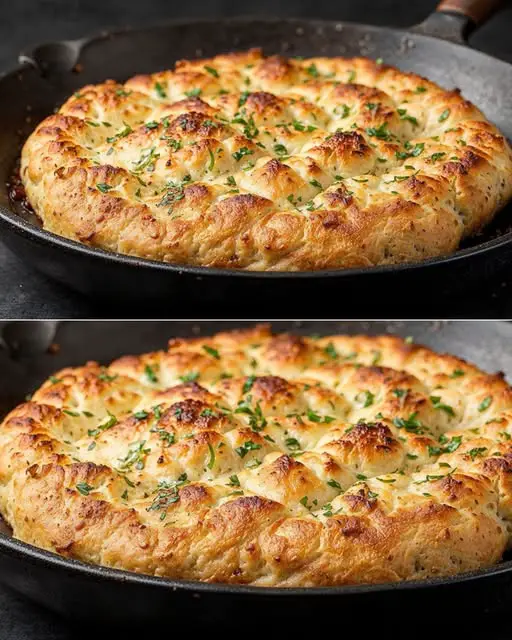
    No-Oven Stovetop Caramelized Onion Pull-Apart Bread

    Ingredients

    For the Dough

    • 3 cups (375g) all-purpose flour
    • 1 cup (240ml) warm milk (105-110°F/40-43°C)
    • 2¼ teaspoons (7g) active dry yeast
    • 1 tablespoon (15g) sugar
    • 1 teaspoon (5g) fine sea salt
    • 3 tablespoons (45ml) vegetable oil
    • 1 large egg, room temperature

    For the Onion Filling

    • 2 medium onions (300g), finely chopped
    • 4 tablespoons (60g) unsalted butter
    • 2 cloves garlic, minced
    • ¼ cup (15g) fresh parsley, finely chopped
    • 1 teaspoon (5g) sea salt
    • ½ teaspoon (2g) freshly ground black pepper
    • ½ teaspoon dried thyme (optional)

    For Finishing

    • 2 tablespoons (30ml) olive oil for brushing
    • 2 tablespoons (30g) melted butter
    • Extra fresh parsley for garnish

    Instructions

    Preparing the Dough

    1. In a large bowl, combine warm milk, sugar, and yeast. Let stand for 5-10 minutes until foamy.
    2. Whisk in egg and vegetable oil until well combined.
    3. Gradually add flour and salt, mixing until a shaggy dough forms.
    4. Turn onto a lightly floured surface and knead for 8-10 minutes until smooth and elastic.
    5. Place in an oiled bowl, cover with plastic wrap or damp cloth.
    6. Let rise in a warm place for 1 hour or until doubled in size.

    Making the Filling

    1. Melt butter in a large skillet over medium-low heat.
    2. Add chopped onions and a pinch of salt.
    3. Cook for 15-20 minutes, stirring occasionally, until golden brown and caramelized.
    4. Add minced garlic, cook for 1 minute until fragrant.
    5. Season with salt, pepper, and thyme if using.
    6. Remove from heat, stir in parsley.
    7. Let cool completely.
    See also  Taste The Delicious Lemon Pepper Wings

    Assembly

    1. Punch down dough and divide into 16-20 equal pieces (about 45g each).
    2. Flatten each piece into a 3-inch circle.
    3. Place 1 tablespoon of cooled onion filling in center.
    4. Pinch edges to seal completely, forming a ball.
    5. Arrange balls in a greased 12-inch cast-iron skillet.
    6. Cover and let rise for 30 minutes.

    Stovetop Cooking

    1. Place skillet on very low heat.
    2. Cover with a tight-fitting lid.
    3. Cook for 20-25 minutes until bottom is golden brown.
    4. Brush top with olive oil.
    5. Cover and cook additional 10-15 minutes until fully cooked.
    6. Test doneness by inserting a skewer in center – should come out clean.

    Finishing

    1. Brush hot bread with melted butter.
    2. Sprinkle with fresh parsley.
    3. Let cool 5-10 minutes before serving.

    Storage and Reheating

    • Store cooled bread in airtight container for up to 2 days.
    • Reheat individual portions in microwave for 20-30 seconds.
    • Whole bread can be reheated on low heat in covered skillet.

    Troubleshooting Tips

    • If bottom browns too quickly: Use heat diffuser or double-layer of heavy foil under pan
    • If bread isn’t cooking through: Lower heat and extend cooking time
    • If dough is too sticky: Add flour 1 tablespoon at a time while kneading
    • If filling leaks: Ensure edges are completely sealed
  • Apple Lemon Sponge Cake

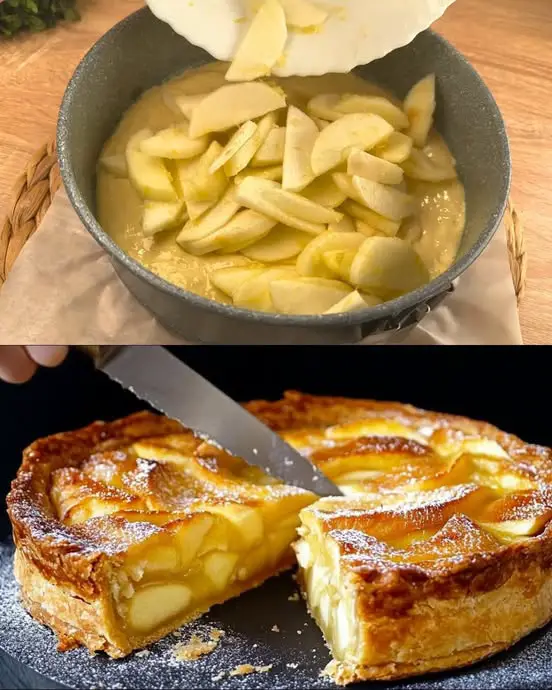
    Apple Lemon Sponge Cake

    Apple Lemon Sponge Cake

    Table of Contents

    Ingredients


      • 3 eggs (separate yolks and whites)
      • 100g (1/2 cup) sugar, for yolks
      • 100g (1/2 cup) sugar, for egg whites


      • A pinch of salt
      • 1 tsp baking powder
      • 2 apples, peeled and thinly sliced


      • Lemon peel (zest of 1 lemon)
      • Lemon juice (juice of 1 lemon)
      • Butter, for greasing the pan


    • Baking paper

    Directions

      • Prepare the Batter:
          • Separate egg whites and yolks. In a bowl, whisk egg yolks with 100g sugar until creamy.


        • In another bowl, beat egg whites with a pinch of salt until stiff peaks form, then gradually add 100g sugar while beating.
        • Combine egg whites and yolk mixture gently. Sift in baking powder and fold until smooth.


      • Prepare the Apples:
        • Peel, core, and slice the apples. Toss with lemon juice and lemon zest.
      • Assemble the Cake:
          • Preheat oven to 180°C (356°F).


        • Grease a baking pan with butter and line with baking paper.
        • Pour most of the batter into the pan. Spread the apple slices over the batter, then drizzle the remaining batter on top.


    • Bake:
      • Bake for 40 minutes or until a toothpick inserted in the center comes out clean.

    Serving Suggestions


      • Serve warm with a dollop of whipped cream.
      • Pair with a scoop of vanilla ice cream.
      • Dust with powdered sugar for an elegant touch.


    • Enjoy with a cup of tea or coffee.
    • Add a drizzle of caramel sauce for extra sweetness.

    Cooking Tips


      • Use tart apples like Granny Smith for a balanced flavor.
      • Ensure egg whites are beaten to stiff peaks for a fluffy texture.
      • Gently fold the batter to retain air for a light sponge.
    See also  5-Minute Perfect Breakfast Quick and Delicious Egg Cheese Toast


    • Adjust sugar levels based on the sweetness of the apples.
    • Let the cake cool slightly before removing it from the pan to maintain its shape.

    Nutritional Benefits


      • Apples provide fiber and natural sweetness.
      • Lemon adds vitamin C and freshness.
      • A low-fat dessert with simple, wholesome ingredients.

    Dietary Information

      • Contains gluten and eggs.
      • Not suitable for those with allergies to these ingredients.

    Nutritional Facts (Per Serving)

      • Calories: 190
      • Protein: 4g


    • Carbohydrates: 35g
    • Fat: 4g
    • Fiber: 2g
  • Refreshing Homemade Lemonade Recipe

    Refreshing Homemade Lemonade Recipe

    Ingredients:
    – 6-8 fresh lemons
    – 1 cup granulated sugar
    – 5 cups cold water
    – Ice cubes
    – Fresh mint leaves for garnish

    Steps:
    1. **Prepare the Lemons**: Roll the lemons on the counter to soften them, then cut them in half and juice them. You should get about 1 cup of lemon juice.
    2. **Make the Simple Syrup**: In a small saucepan, combine 1 cup of water and 1 cup of sugar. Heat over medium heat, stirring until the sugar is completely dissolved. Let it cool.
    3. **Mix the Lemonade**: In a large pitcher, combine the lemon juice, simple syrup, and the remaining 4 cups of cold water. Stir well.
    4. **Add Ice and Garnish**: Fill the pitcher with ice cubes and add a few slices of lemon and fresh mint leaves for garnish.
    5. **Serve**: Pour the lemonade into glasses, add more ice if desired, and garnish with additional lemon slices and mint leaves.

    Enjoy your refreshing homemade lemonade! 1f379

  • Oatmeal Banana Bake with Cranberries and Raisins

    Oatmeal Banana Bake with Cranberries and Raisins

    Oatmeal Banana Bake with Cranberries and Raisins

    Table of Contents

    Ingredients:


      • 2 cups rolled oats (200 g)
      • 2 ripe bananas (approximately 200 g)
      • 1/2 cup dried cranberries (70 g)


      • 1/2 cup raisins (75 g)
      • 2 eggs
      • 1 teaspoon vanilla extract


      • 1/4 teaspoon salt
      • 1/2 teaspoon ground cinnamon (optional)
      • 1/4 cup honey or maple syrup (optional)


    • 1 1/2 cups milk of your choice (360 ml)

    Directions:

      1. Preheat the Oven:
        Preheat your oven to 180°C (350°F).


      1. Prepare the Bananas:
        In a mixing bowl, mash the bananas with a fork until smooth.
      2. Mix Ingredients:
        Add the oats, cranberries, raisins, eggs, vanilla extract, salt, cinnamon, and milk to the mashed bananas. Stir everything together until well combined.
      3. Bake:
        Grease your favorite baking dish and pour the mixture into it. Bake in the preheated oven for 35-40 minutes, or until the top is golden and set.


    1. Serve and Enjoy:
      Allow to cool slightly before slicing. You can sweeten it further if desired and garnish with additional cranberries or sliced bananas.

    Serving Suggestions:

      • Serve warm, drizzled with honey or maple syrup.


    • Top with yogurt for added creaminess.
    • Pair with a cup of tea or coffee for a comforting breakfast.

    Cooking Tips:


      • Use overripe bananas for extra sweetness.
      • Feel free to add nuts or seeds for added crunch.
      • Adjust the sweetness to your preference by using less or more honey/maple syrup.

    Nutritional Benefits:

      • Bananas: Provide potassium and natural sweetness.
      • Oats: High in fiber and great for heart health.


    • Cranberries & Raisins: Add antioxidants and additional nutrients.

    Dietary Information:

      • Vegetarian: Yes


    • Nut-Free: Yes (if you avoid nuts)
    • Dairy-Free: Can be made with plant-based milk
    See also  Apple Pastry Recipe

    Storage:
    Store any leftovers in an airtight container in the refrigerator for up to 3 days. Reheat before serving.

    Why You’ll Love This Recipe:

      • Nutritious and Delicious: A perfect blend of flavors and textures.
      • Easy to Make: Quick preparation with minimal cleanup.


    • Versatile: Customize with your favorite fruits and nuts.
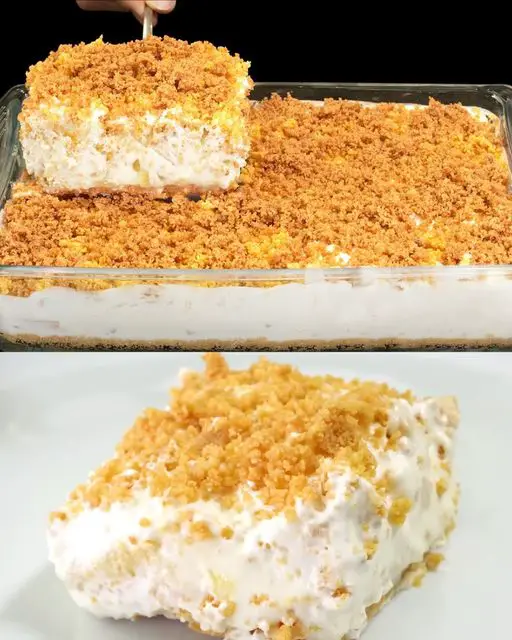
  • Pineapple Dream Dessert! The best I’ve ever eaten! Recipe in 5 minutes! No baking!

    Pineapple Dream Dessert! The best I’ve ever eaten! Recipe in 5 minutes! No baking!

    Pineapple Dream Dessert! The best I’ve ever eaten! Recipe in 5 minutes! No baking!

    Table of Contents

    Ingredients:

    200g cookies

    80g butter

    350g pineapple

    200g cream cheese

    80g powdered sugar

    300ml 33% cream

    Directions:

    Crush the cookies into fine crumbs using a food processor or by placing them in a plastic bag and crushing them with a rolling pin.

    Melt the butter and thoroughly mix it with the cookie crumbs.

    Firmly press the cookie mixture into the bottom of a 9×9 inch (23×23 cm) baking dish to form the crust.

    In a separate bowl, beat the cream cheese and powdered sugar until smooth.

    Whip the cream until stiff peaks form.

    Gently fold the whipped cream into the cream cheese mixture.

    Evenly spread the cream mixture over the cookie crust.

    Drain the pineapple and distribute it evenly over the cream layer.

    Refrigerate the dessert for at least 4 hours, or until it is firmly set.

    Cut into squares and serve chilled.

  • Crispy Spinach and Onion Pastry

    Crispy Spinach and Onion Pastry

    Crispy Spinach and Onion Pastry

    Table of Contents

    Ingredients
    For the Dough:

      • 1 teaspoon salt (6 g)
      • 1.5 glasses water (300 ml)


      • 4 cups all-purpose flour (455 g) (adjust as needed)
      • 1 tablespoon oil (for greasing)
      • 100 g melted butter


    • 1/2 glass oil (100 ml)

    For the Filling:

      • 350 g chopped spinach


      • 1 onion, chopped
      • 1 teaspoon salt
      • 1 teaspoon black pepper


    • 1 teaspoon red pepper

    Directions

    Prepare the Dough:

      • In a large mixing bowl, combine salt and water. Gradually add flour in a controlled manner, mixing until a medium-soft dough forms that does not stick to your hands.


    • Knead the dough for 8–10 minutes until smooth and elastic.
    • Grease the dough with 1 tablespoon of oil, cover it, and let it rest for 10 minutes.

    Portion and Rest the Dough:


    • Divide the dough into 12 equal parts. Roll each piece into a ball.
    • Cover the dough balls and let them rest for another 10 minutes.

    Prepare the Filling:


    • In a bowl, combine chopped spinach, onion, salt, black pepper, and red pepper. Mix gently, ensuring the spinach does not release too much water.

    Roll and Assemble the Pastries:

      • Roll out each dough ball to the size of a dessert plate.


      • Grease a tray with oil and arrange the rolled dough on it, brushing each layer with the melted butter and oil mixture. Cover and let it rest for 20–25 minutes.
      • Roll out each piece of dough as thin as possible, pulling gently as shown in the video.
      • Place the spinach filling in the center of each dough sheet, fold, and wrap as demonstrated.
    See also  Irresistible Chicken Patties with Mozzarella: A Family Favorite Recipe

    Bake:

      • Preheat the oven to 185°C (365°F).
      • Brush the pastries with oil and arrange them on a greased tray.


    • Bake in the preheated oven for 40–45 minutes, or until golden and crispy.

    Serve:

      • Let the pastries cool slightly before serving. Enjoy warm with a side of yogurt or a fresh salad.

    5 Serving Suggestions

      • Pair with a dollop of plain yogurt or tzatziki.
      • Serve alongside a fresh cucumber and tomato salad.


      • Enjoy with a bowl of lentil soup for a hearty meal.
      • Garnish with fresh parsley or dill for extra flavor.
      • Serve with a hot cup of tea for a comforting snack.

    Cooking Tips

      • Use high-quality flour to ensure the dough is easy to work with.
      • Avoid overfilling the pastries to prevent them from tearing.


    • Let the dough rest properly for easier rolling and stretching.
    • Brush each layer generously with the butter and oil mixture for flakiness.
    • Store leftovers in the fridge and reheat in the oven to restore crispiness.
  • Creamy Chocolate Chip Cookie Crumble Ice Cream

    Creamy Chocolate Chip Cookie Crumble Ice Cream

    Ingredients:

    – 2 cups heavy whipping cream
    – 1 cup sweetened condensed milk
    – 1 teaspoon vanilla extract
    – 1/2 cup mini chocolate chips (plus extra for topping)
    – 1/2 cup crumbled chocolate cookies (plus extra for topping)

    Directions:
    1. In a large mixing bowl, whip the heavy cream using a hand mixer or stand mixer until stiff peaks form.
    2. Gently fold in the sweetened condensed milk and vanilla extract, being careful to maintain the light and airy texture.
    3. Once combined, fold in the mini chocolate chips and cookie crumbles, distributing them evenly throughout the mixture.
    4. Pour the ice cream mixture into a freezer-safe container and smooth the top.
    5. Sprinkle additional chocolate chips and cookie crumbles on top for decoration.
    6. Cover the container with a lid or plastic wrap and freeze for at least 4–6 hours, or until firm.
    7. Scoop into bowls, garnish with more chocolate chips and cookie crumbles, and serve immediately for a deliciously creamy treat.

    Prep Time: 15 minutes | Freezing Time: 4–6 hours | Total Time: 6 hours 15 minutes | Kcal: 290 per serving | Servings: 6

  • Cheesy Sausage Breakfast Bake

    Cheesy Sausage Breakfast Bake

    Cheesy Sausage Breakfast Bake

    Table of Contents

    Ingredients:

      • Eggs: 3 large


      • Milk: 100ml (1/2 cup)
      • Salt: To taste
      • Black Pepper: To taste


      • Paprika: To taste
      • Garlic: 2 cloves, minced
      • Onion: 1/2, finely chopped


      • Dill: Fresh, chopped (optional)
      • Sausages: 2, sliced
      • Cheese: 150g, shredded (like mozzarella)


      • Bread: 4 slices (or tortilla)
      • Tomato: 1, diced
      • Spring Onions: Chopped (for garnish)


    • Butter: For greasing the baking dish

    Directions:

      1. Preheat the Oven: Preheat your oven to 190°C (375°F).
      2. Prepare the Egg Mixture: In a large bowl, whisk together the eggs, milk, salt, black pepper, paprika, and minced garlic until well combined.


      1. Combine Ingredients: In a greased baking dish, layer the bread (or tortilla), sliced sausages, diced tomatoes, and chopped onion. Pour the egg mixture evenly over the top.
      2. Add Cheese: Sprinkle shredded cheese over the top of the egg mixture.
      3. Bake: Place the baking dish in the preheated oven and bake for 20 minutes or until the eggs are set and the cheese is golden and bubbly.


    1. Garnish and Serve: Remove from the oven, sprinkle with fresh dill and spring onions if desired, and serve warm.

    Serving Suggestions:

      • Pair with fresh fruit or a side salad for a complete breakfast.
      • Serve with a dollop of sour cream or yogurt for added creaminess.


    Cooking Tips:

    • For extra flavor, sauté the onions and garlic before adding them to the dish.
    • Customize with other veggies like bell peppers or spinach for added nutrition.
    • Use different types of cheese to vary the flavor profile.
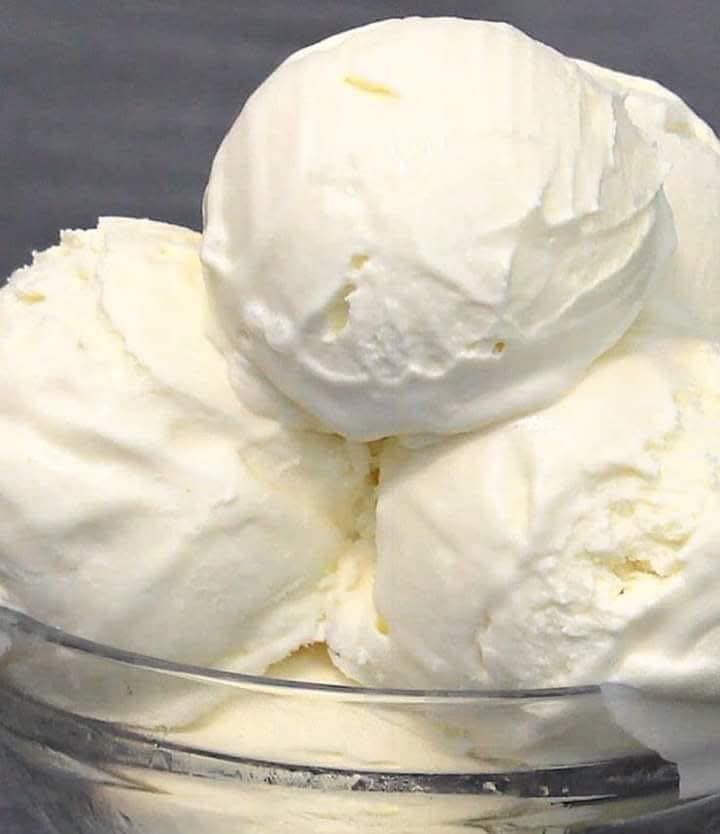
  • super simple 3-ingredient ice cream recipe:

    super simple 3-ingredient ice cream recipe:

    Ingredients
    – 2 cups heavy cream
    – 1 can (14 oz) sweetened condensed milk
    – 1 tsp vanilla extract

    Instructions
    In a large bowl, whip the heavy cream until stiff peaks form. You can use a hand mixer or a stand mixer for this.

    Gently fold in the sweetened condensed milk and vanilla extract until well combined.

    Pour the mixture into a loaf pan or a freezer-safe container. Cover with plastic wrap and freeze for at least 6 hours, or until firm.

    There you have it! Simple, creamy, and delicious ice cream. Enjoy! 1f366

  • Cheesy Sausage Breakfast Bake

    Cheesy Sausage Breakfast Bake

    Ingredients:

      • Eggs: 3 large


      • Milk: 100ml (1/2 cup)
      • Salt: To taste
      • Black Pepper: To taste


      • Paprika: To taste
      • Garlic: 2 cloves, minced
      • Onion: 1/2, finely chopped


      • Dill: Fresh, chopped (optional)
      • Sausages: 2, sliced
      • Cheese: 150g, shredded (like mozzarella)


      • Bread: 4 slices (or tortilla)
      • Tomato: 1, diced
      • Spring Onions: Chopped (for garnish)


    • Butter: For greasing the baking dish

    Directions:

      1. Preheat the Oven: Preheat your oven to 190°C (375°F).
      2. Prepare the Egg Mixture: In a large bowl, whisk together the eggs, milk, salt, black pepper, paprika, and minced garlic until well combined.


      1. Combine Ingredients: In a greased baking dish, layer the bread (or tortilla), sliced sausages, diced tomatoes, and chopped onion. Pour the egg mixture evenly over the top.
      2. Add Cheese: Sprinkle shredded cheese over the top of the egg mixture.
      3. Bake: Place the baking dish in the preheated oven and bake for 20 minutes or until the eggs are set and the cheese is golden and bubbly.


    1. Garnish and Serve: Remove from the oven, sprinkle with fresh dill and spring onions if desired, and serve warm.

    Serving Suggestions:

      • Pair with fresh fruit or a side salad for a complete breakfast.
      • Serve with a dollop of sour cream or yogurt for added creaminess.


    Cooking Tips:

    • For extra flavor, sauté the onions and garlic before adding them to the dish.
    • Customize with other veggies like bell peppers or spinach for added nutrition.
    • Use different types of cheese to vary the flavor profile.
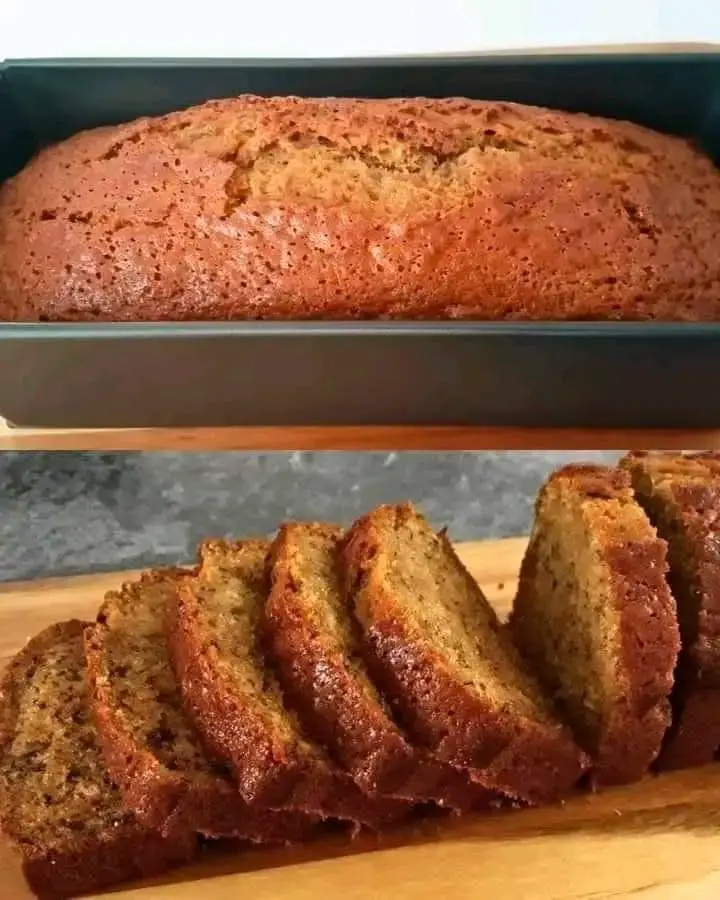
  • Moist Banana Bread Recipe

    Moist Banana Bread Recipe

    Here’s a classic Moist Banana Bread recipe that’s easy to make, delicious, and perfect for using up ripe bananas. This banana bread is soft, flavorful, and full of natural sweetness.

    Moist Banana Bread Recipe

    Ingredients:

    • 1 1/2 cups all-purpose flour
    • 1 teaspoon baking soda
    • 1/2 teaspoon salt
    • 1/2 cup unsalted butter, softened
    • 3/4 cup granulated sugar
    • 2 large eggs
    • 4 ripe bananas, mashed (about 1 1/2 cups)
    • 1 teaspoon vanilla extract
    • 1/4 cup sour cream or plain yogurt (for added moisture)
    • Optional: 1/2 cup chopped walnuts or chocolate chips

    Instructions:

    1. Preheat the Oven:

    • Preheat your oven to 350°F (175°C). Grease and flour a 9×5-inch loaf pan, or line it with parchment paper for easy removal.

    2. Mix the Dry Ingredients:

    • In a medium bowl, whisk together the flour, baking soda, and salt. Set aside.

    3. Cream the Butter and Sugar:

    • In a large bowl, beat the softened butter and sugar together using a hand mixer or stand mixer until light and fluffy, about 2-3 minutes.

    4. Add the Wet Ingredients:

    • Add the eggs, one at a time, beating well after each addition. Stir in the mashed bananas and vanilla extract until combined.

    5. Combine Wet and Dry Ingredients:

    • Gradually add the dry ingredients to the banana mixture, mixing until just combined. Be careful not to overmix, as this can lead to a denser bread.
    • Stir in the sour cream or yogurt to add moisture and create a soft texture.

    6. Optional Add-ins:

    • If desired, fold in walnuts or chocolate chips for added flavor and texture.

    7. Bake:

    • Pour the batter into the prepared loaf pan and smooth the top with a spatula.
    • Bake for 60-70 minutes, or until a toothpick inserted into the center of the bread comes out clean or with just a few crumbs. If the top is browning too quickly, cover it loosely with foil and continue baking.

    8. Cool and Serve:

    • Let the banana bread cool in the pan for 10 minutes before transferring it to a wire rack to cool completely.
    • Slice and enjoy!

    Tips:

    • Ripe Bananas: The riper the bananas, the better! Overripe bananas with lots of brown spots are ideal for maximum sweetness and moisture.
    • Storage: Store banana bread in an airtight container at room temperature for up to 3 days. For longer storage, wrap it tightly in plastic wrap and freeze for up to 3 months.
    • Variations: You can add cinnamon, nutmeg, or a pinch of allspice for extra flavor. You can also substitute half of the butter with vegetable oil for a slightly lighter texture.

    This Moist Banana Bread is soft, tender, and full of banana flavor. It’s perfect for breakfast, a snack, or even dessert. Enjoy it warm with a pat of butter or on its own!

  • Caramelized Banana Pudding Delight

    Caramelized Banana Pudding Delight

    Here’s a Caramelized Banana Pudding Delight recipe that takes the classic banana pudding to the next level with a delicious caramelized topping. It’s creamy, rich, and sweet—sure to be a crowd-pleaser!

    Ingredients:

    • For the pudding:
      • 2 cups whole milk
      • 1/2 cup heavy cream
      • 3/4 cup granulated sugar
      • 4 large egg yolks
      • 2 tablespoons cornstarch
      • 1 teaspoon vanilla extract
      • 1/4 teaspoon salt
      • 2 ripe bananas, sliced
      • 1 box (about 12 oz) vanilla wafers (or 1 package of graham crackers if you prefer)
    • For the caramelized banana topping:
      • 2 ripe bananas, sliced
      • 1/4 cup granulated sugar
      • 1 tablespoon unsalted butter
      • 1 tablespoon dark rum (optional)
    • For the whipped cream (optional):
      • 1 cup heavy cream
      • 1 tablespoon powdered sugar
      • 1 teaspoon vanilla extract

    Instructions:

    1. Make the pudding:

    • In a medium saucepan, combine the whole milk and heavy cream. Heat over medium until warm but not boiling.
    • In a separate bowl, whisk together the egg yolks, sugar, cornstarch, and salt until smooth.
    • Gradually pour the warm milk mixture into the egg yolk mixture, whisking constantly to avoid curdling the eggs.
    • Return the mixture to the saucepan and cook over medium heat, stirring constantly, until it thickens and starts to bubble (about 5-7 minutes). Once thickened, remove from heat and stir in the vanilla extract.
    • Let the pudding cool for a few minutes, then transfer it to a bowl. Cover with plastic wrap (press the wrap directly onto the surface of the pudding to avoid a skin forming) and refrigerate for at least 2 hours, or until completely chilled.

    2. Caramelize the bananas:

    • In a skillet over medium heat, melt the butter and add the sliced bananas.
    • Sprinkle the granulated sugar over the bananas. Allow it to melt and caramelize, cooking the bananas for about 2-3 minutes until they become golden brown and syrupy. (If you’re using rum, add it now and let it cook for an additional minute to burn off the alcohol.)
    • Remove from heat and set aside to cool slightly.

    3. Assemble the pudding:

    • In a serving dish, layer the bottom with a few vanilla wafers (or graham crackers).
    • Spread a layer of the chilled banana pudding over the wafers, smoothing it out.
    • Add a layer of fresh banana slices over the pudding.
    • Repeat the layers, ending with a layer of pudding on top.

    4. Top with caramelized bananas:

    • Spoon the caramelized bananas over the top of the pudding, making sure to drizzle any caramel syrup that has formed in the pan as well.

    5. Make the whipped cream (optional):

    • In a chilled bowl, beat the heavy cream, powdered sugar, and vanilla extract until soft peaks form.
    • Spoon the whipped cream on top of the pudding just before serving, or you can serve it alongside.

    6. Chill and serve:

    • Refrigerate the assembled dessert for at least 2-3 hours to allow the flavors to meld.
    • Serve chilled and enjoy the creamy, caramelized layers of banana goodness!

    Tips:

    • For a richer flavor, you can add a bit of brown sugar to the caramelization process instead of using regular granulated sugar.
    • Customize the layers: You can also add toasted coconut or crushed nuts between the layers for extra texture and flavor.
    • Storage: This dessert can be stored in the refrigerator for up to 3 days. The caramelized bananas are best added right before serving to preserve their texture.

    This Caramelized Banana Pudding Delight is a twist on the traditional banana pudding, giving it an extra caramelized layer of sweetness and complexity. It’s a delicious and show-stopping dessert!