Blog

  • Cheese-Stuffed Flatbreads

    Cheese-Stuffed Flatbreads

    Cheese-Stuffed Flatbreads

    Table of Contents

    Ingredients:

    For the Dough:

      • 350g (3 cups) flour
      • 150 ml warm water


      • 1 tablespoon salt
      • 75 ml vegetable oil
      • 6g baking powder


    • Oil for frying

    For the Stuffing:

      • 200g cheese (mozzarella or your favorite melting cheese)


    • 1 teaspoon dried oregano

    Directions:

    • Prepare the Dough:
        • In a large mixing bowl, combine the flour, salt, and baking powder.


        • Add the vegetable oil and mix until the flour absorbs the oil.
        • Gradually add warm water, mixing continuously until a dough forms.
        • Knead the dough for about 10 minutes until it’s smooth and elastic.


      • Cover with a damp cloth and let it rest for 15-20 minutes.
    • Prepare the Stuffing:
        • Grate or finely chop the cheese.


      • Mix the cheese with the dried oregano in a bowl.
    • Assemble the Flatbreads:
        • Divide the dough into equal portions.


        • Roll each portion into a ball, then flatten into a circle using a rolling pin.
        • Place a portion of the cheese and oregano mixture in the center of each circle.
        • Fold the dough over the filling, sealing the edges with a little water if necessary.


    • Cook the Flatbreads:
        • Heat oil in a frying pan over medium heat.
        • Place the stuffed flatbreads in the pan and fry for 3-4 minutes per side, until golden brown.


      • Remove from the pan and drain on paper towels to remove excess oil.

    Serving Suggestions:


      • Serve hot with a side of fresh salad, or with a dipping sauce like tzatziki or marinara.
      • These flatbreads can be paired with roasted vegetables for a well-rounded meal.
      • Enjoy them as a snack with a cooling yogurt dip.


    • Serve as a side dish alongside grilled meats or a hearty soup.
    • Perfect for lunch or as a fun appetizer for parties.

    Cooking Tips:


      • Ensure that the dough is kneaded well for a soft and elastic texture.
      • Use warm water to activate the dough, which helps with a smoother consistency.
      • You can experiment with different cheeses like cheddar or feta for a varied flavor.


    • If the dough is sticky, sprinkle a little more flour while kneading.
  • Cabbage Patties Recipe

    Cabbage Patties Recipe

    Cabbage Patties Recipe

    Table of Contents

    Ingredients:

      • Cabbage: 2 cups (150g), finely shredded
      • Egg: 1 large
      • All-purpose flour: 1/2 cup (60g)
      • Grated cheese (optional): 1/4 cup (30g)
      • Onion: 1 small (50g), finely chopped
      • Garlic: 2 cloves, minced
      • Salt: To taste
    • Pepper: To taste
    • Olive oil or vegetable oil: For frying

    Directions:

      1. Mix Ingredients:
          • In a large bowl, combine the shredded cabbage, egg, flour, grated cheese, onion, garlic, salt, and pepper. Mix until well combined.


      2. Form Patties:
        • Shape the mixture into palm-sized patties. Add a bit more flour if the mixture is too loose.
      1. Heat Oil:
        • Preheat a skillet over medium heat with oil.
      2. Fry Patties:
          • Fry the patties for 2-3 minutes on each side until golden brown. Drain on paper towels.


      3. Serve:
        • Serve with a yogurt dip, sour cream, or your favorite sauce.

    Serving Suggestions:

    • Serve with a fresh green salad and a yogurt dip for a complete meal.
    • Add a dash of chili sauce for some extra spice.

    Cooking Tips:

      • If your mixture is too loose, add an extra tablespoon of flour to help bind the patties.
    • Use a non-stick skillet to prevent sticking.

    Nutritional Benefits:

      • Cabbage is rich in vitamins C and K.
      • Eggs and cheese (optional) provide protein, while olive oil adds healthy fats.

    Dietary Information:

    • This recipe can be made vegetarian by omitting meat-based cheese.
    • For a gluten-free version, use almond or chickpea flour instead of all-purpose flour.

    Nutritional Facts (per patty):

      • Calories: 120
      • Fat: 7g
      • Carbohydrates: 10g
      • Protein: 5g

    Storage:

    • Store any leftover patties in an airtight container in the refrigerator for up to 3 days. Reheat in a skillet or the oven to maintain crispiness.

    Why You’ll Love This Recipe:

      • It’s quick, easy, and made with simple, everyday ingredients.
      • Versatile – you can modify the recipe by adding your favorite veggies.
    • Crispy on the outside, soft and flavorful on the inside.
    • Great for meal prepping or using up leftover cabbage.
  • Delicious Turkish-Style Eggplant Recipe

    Delicious Turkish-Style Eggplant Recipe

    Delicious Turkish-Style Eggplant Recipe

    Table of Contents

    Ingredients:

      • 2 large eggplants
      • Salt (to taste)
      • 3 eggs
      • Ground black pepper (to taste)
      • Paprika (to taste)
      • 1 tsp mustard
      • Olive oil (for frying)
      • 150g breadcrumbs
    • 2 tbsp flour
    • Italian herbs (to taste)

    Instructions:

    Step 1: Prepare the Eggplants

      1. Slice the eggplants: Cut the eggplants into thin, even slices. You can either slice them into rounds or lengthwise strips, depending on your preference.
    1. Salt the eggplants: Sprinkle a generous amount of salt over the sliced eggplants. Let them sit for about 15-20 minutes to draw out excess moisture and bitterness. Afterward, rinse the eggplant slices with cold water and pat them dry with a kitchen towel.

    Step 2: Prepare the Egg Coating

      1. Beat the eggs: In a bowl, whisk together the eggs, mustard, a pinch of salt, ground black pepper, and paprika. The mustard will give the coating an extra layer of flavor and help the seasoning stick to the eggplants.
      2. Prepare the breading: In a separate bowl, mix the breadcrumbs with Italian herbs and a little more black pepper or paprika for extra flavor. In another small dish, place the flour, which will help the egg mixture stick to the eggplant slices.

    Step 3: Coat the Eggplants

      1. Dredge the eggplants: First, lightly coat each eggplant slice with flour. Shake off any excess flour.
      2. Dip in egg mixture: Next, dip each slice into the egg mixture, ensuring they are well coated.
      3. Cover with breadcrumbs: Finally, press each slice into the seasoned breadcrumbs, coating both sides thoroughly. The breadcrumbs will give the eggplants a beautiful, crispy texture once fried.
    See also  They say it’s the best lemon cake in the world, try it

    Step 4: Fry the Eggplants

      1. Heat the oil: In a large frying pan, heat a generous amount of olive oil over medium heat. You want enough oil to shallow fry the eggplants, so they turn golden and crispy.
      2. Fry the eggplants: Place the coated eggplant slices in the hot oil. Fry for about 2-3 minutes on each side, or until they are golden brown and crispy. Be sure not to overcrowd the pan, so the slices cook evenly.
      3. Drain excess oil: Once fried, remove the eggplants from the pan and place them on a paper towel-lined plate to absorb any excess oil.

    Step 5: Serve

    Serve the crispy eggplant slices hot with your favorite dipping sauce or alongside a fresh salad. These eggplants are crispy on the outside and soft and flavorful on the inside, making them the perfect accompaniment to any meal

    Cooking Tips:

      • Salting the eggplants: Salting the eggplants beforehand is an important step to remove their natural bitterness and help them crisp up better when frying.
    • Frying temperature: Be sure not to overheat the oil, as it can cause the eggplants to burn before they’re fully cooked through. Medium heat is ideal for getting that golden crust.
    • Baking option: For a healthier version, you can bake the coated eggplant slices in the oven. Simply place them on a parchment-lined baking tray and bake at 200°C (390°F) for about 20-25 minutes, flipping halfway through until golden and crispy.
  • Oatmeal Apple Mug Cake with Dried Fruits and Chocolate Chips

    Oatmeal Apple Mug Cake with Dried Fruits and Chocolate Chips

    Oatmeal Apple Mug Cake with Dried Fruits and Chocolate Chips

    Table of Contents

    Ingredients (Serves 4-6)

    For the Cake:

      • 1 cup (100 g) oatmeal
      • 1 teaspoon baking powder


      • ½ teaspoon ground cinnamon
      • A pinch of salt
      • ½ cup (50 g) dried apricots, chopped


      • ½ cup (50 g) dried cranberries
      • 2 eggs (washed)
      • ⅓ cup (80 ml) Greek yogurt


      • 3 tablespoons vegetable oil
      • 2 apples, peeled and grated
      • 30 g almonds, chopped


    • ½ cup (100 g) sugar-free chocolate chips

    For the Topping:

      • 50 g Greek yogurt


    • 1 tablespoon agave syrup
    • 1 tablespoon cocoa powder

    Directions

    1. Prepare the Dry Ingredients:

    • In a large mixing bowl, combine oatmeal, baking powder, ground cinnamon, and a pinch of salt. Mix well.

    2. Prepare the Wet Ingredients:


    • In a separate bowl, whisk together eggs, Greek yogurt, and vegetable oil until smooth.

    3. Combine the Ingredients:

      • Gradually add the wet ingredients to the dry mixture and mix until just combined.


    • Fold in the grated apples, dried apricots, dried cranberries, chopped almonds, and chocolate chips.

    4. Prepare the Baking Dish:

      • Line a mug or small baking dish with baking paper. Pour the batter into the prepared dish, filling about ¾ full to allow for rising.

    5. Bake the Cake:

    • Preheat your oven to 180°C (356°F). Place the mug or baking dish in the oven and bake for 30–35 minutes, or until a toothpick inserted in the center comes out clean.

    6. Prepare the Topping:


    • In a small bowl, mix Greek yogurt, agave syrup, and cocoa powder until smooth.

    7. Serve:

      • Allow the cake to cool slightly before removing it from the mug or dish. Spread the yogurt topping over the cake. Slice and serve warm.
    See also  Crispy Garlic-Roasted Potatoes with Herbs

    Serving Suggestions

      • Garnish with additional chopped almonds or dried fruits.
      • Pair with a cup of tea or coffee for a cozy snack.


    • Serve with a scoop of vanilla ice cream for a dessert twist.

    Cooking Tips

      • Use finely grated apples for a smoother texture in the cake.


    • For extra sweetness, drizzle with honey or maple syrup before serving.
    • Substitute dried apricots and cranberries with raisins, dates, or any dried fruit of your choice.

    Nutritional Benefits


      • Oats provide fiber for digestive health.
      • Dried fruits are rich in antioxidants and natural sugars for energy.
      • Apples add natural sweetness and moisture, reducing the need for added sugars.


    • Greek yogurt contributes protein and probiotics for gut health.
  • Made Homemade Mango Iced Tea

    Made Homemade Mango Iced Tea

    Ingredients:

    – 4 cups water
    – 4 black tea bags
    – 1/2 cup sugar
    – 1 ripe mango, peeled and diced
    – Fresh mint leaves

    Instructions:

    1. In a saucepan, bring water to a boil. Remove from heat and add the tea bags. Let steep for about 5 minutes.
    2. Stir in the sugar until dissolved. Allow the tea to cool to room temperature.
    3. In a blender, puree the diced mango until smooth.
    4. Strain the mango puree through a fine mesh sieve to remove any fibers.
    5. In a pitcher, combine the brewed tea and mango puree. Stir well.
    6. Chill the mango iced tea in the refrigerator for at least 1 hour.
    7. Serve over ice and garnish with fresh mint leaves.
    8. Enjoy this refreshing Homemade Mango Iced Tea on a sunny day!

    Prep Time: 10 minutes | Cook Time: 5 minutes | Total Time: About 1 hour and 15 minutes | Yield: 4 servings

  • Refreshing Tropical Strawberry Mango Smoothie Recipe

    Refreshing Tropical Strawberry Mango Smoothie Recipe

    Hey smoothie lovers!  If you’re craving a burst of tropical flavors, this smoothie is calling your name! Packed with the delicious sweetness of mango and strawberries, this refreshing drink is not only gorgeous to look at but also a powerhouse of nutrients. Whether you’re starting your morning with a burst of sunshine or cooling off in the afternoon, this Tropical Strawberry Mango Smoothie is here to brighten your day.

    Ingredients:

    • 1 cup fresh mango chunks – The star of this smoothie! Mango adds that luscious, tropical sweetness. For an even creamier texture, freeze the chunks before blending.
    • ½ cup fresh strawberries, diced – Adds a hint of berry sweetness and a beautiful pink hue. Freeze them beforehand to make your smoothie extra cold.
    • 1 cup orange juice – Gives a zesty citrusy base that pairs perfectly with mango. You can also use coconut water for a lighter option.
    • ½ cup Greek yogurt – This thickens the smoothie and adds a boost of protein. Use vanilla-flavored yogurt for a subtle sweetness.
    • 1 tablespoon chia seeds – Tiny but mighty! They add fiber, a slight crunch, and omega-3 fatty acids to keep you full longer.
    • Ice cubes (optional) – If you prefer a thicker, frostier smoothie, add a handful of ice cubes before blending.

    How to Make the Tropical Strawberry Mango Smoothie

    Step 1: Prepare your ingredients. If possible, use frozen mango chunks and strawberries for an extra creamy and cold texture.

    Step 2: In a blender, add the mango chunks, diced strawberries, orange juice, Greek yogurt, and chia seeds. Blend on high speed until smooth.

    Step 3: Check the consistency. If it’s too thick, add a bit more orange juice. If you want it colder, toss in a few ice cubes and blend again.

    Step 4: Pour the smoothie into a glass and garnish with extra mango chunks and a strawberry on the rim.

    Step 5: Enjoy immediately while it’s fresh and chilled!

    Equipment Needed for This Recipe

    Click to get the equipment on Amazon!

    • High-speed blender – A powerful blender will make this smoothie ultra-smooth and creamy.
    • Measuring cups and spoons – For precise measurements.
    • Straws – Perfect for sipping your delicious creation.

    Frequently Asked Questions

    Can I use frozen mango and strawberries?

    Yes! Frozen mango and strawberries make the smoothie extra thick and frosty, which is perfect for hot days. Plus, it saves you time on prep.

    Is there a dairy-free option?

    Absolutely! You can substitute Greek yogurt with a dairy-free yogurt like coconut or almond yogurt. Or, skip the yogurt and add a frozen banana for creaminess.

    What can I use instead of orange juice?

    Coconut water, pineapple juice, or almond milk are great alternatives. Each will add a unique flavor twist to the smoothie.

    Can I make this smoothie ahead of time?

    Smoothies are best enjoyed fresh, but you can store leftovers in an airtight container in the fridge for up to 24 hours. Give it a good stir before drinking.

    How can I make this smoothie more filling?

    Add a scoop of protein powder or a handful of oats to make this smoothie more substantial. You could also add more chia seeds or a nut butter.

    Are chia seeds necessary?

    No, they’re optional, but chia seeds add extra fiber and omega-3s, which are great for energy and digestion.

    Can I make this without a blender?

    A blender is ideal for this smoothie, but in a pinch, you could use a hand blender or a food processor.

    Conclusion

    I hope you’re as excited as I am about this Tropical Strawberry Mango Smoothie! It’s easy to make, bursting with fresh flavors, and perfect for any time of day. If you loved this recipe, don’t forget to share it on Facebook using the share buttons below or save it to Pinterest for later!

  • Crispy Potato Pancakes

    Crispy Potato Pancakes

    Crispy Potato Pancakes

    Table of Contents

    Ingredients


      • 1 medium potato (about 150g), grated
      • 1 egg
      • 2 tbsp all-purpose flour (16g)


    • 2 tbsp water (30ml)
    • About 1 tbsp vegetable oil (15ml) for frying

    Directions


      • Peel and grate the potato into a bowl. Squeeze out excess moisture using a kitchen towel or your hands.
      • In a separate bowl, beat the egg. Add grated potato, flour, and water. Mix until well combined.
      • Heat vegetable oil in a non-stick skillet over medium heat.


      • Drop spoonfuls of the mixture into the skillet and flatten them into pancake shapes.
      • Fry for 2-3 minutes per side until golden brown and crispy.
      • Remove from the skillet and place on a paper towel to drain excess oil.

    Serving Suggestions

      • Serve with sour cream or applesauce for dipping.
      • Pair with a fresh salad for a light meal.


      • Enjoy alongside scrambled eggs for breakfast.
      • Top with smoked salmon or cream cheese for an elegant twist.
      • Sprinkle with chopped herbs like parsley or chives for extra flavor.

    Cooking Tips

      • Use starchy potatoes for the crispiest pancakes.
      • Ensure you squeeze out excess moisture from the grated potato for better texture.


      • Don’t overcrowd the skillet; cook in batches if necessary.
      • Add a pinch of salt and pepper to the mixture for extra flavor.
      • Use a spatula to press the pancakes while frying to achieve even crispiness.

    Nutritional Benefits

      • Potatoes are rich in potassium and fiber.
      • Eggs provide protein and essential nutrients.


    • Minimal oil keeps this dish lighter than deep-fried options.

    Dietary Information

      • Vegetarian-friendly.


    • Contains gluten; substitute with gluten-free flour for a gluten-free option.

    Nutritional Facts (Per Serving)

      • Calories: 150
    See also  Say Goodbye to Sugar: Enjoy Healthy Cookies Without Flour and Sugar!


      • Protein: 4g
      • Carbohydrates: 15g
      • Fat: 7g


    • Fiber: 2g

    Storage

      • Store leftovers in an airtight container in the fridge for up to 2 days.


    • Reheat in a skillet or oven to regain crispiness.
    • Freeze uncooked patties between parchment paper for up to 1 month; thaw before frying.

    Why You’ll Love This Recipe


      • Quick, easy, and made with pantry staples.
      • Crispy and golden on the outside, soft inside.
      • Versatile and pairs with sweet or savory toppings.


    • Great for a snack, side dish, or light meal.
  • Strawberry Cheesecake Banana Pudding

    Strawberry Cheesecake Banana Pudding

    If you’re looking for a dessert that screams indulgence yet feels like a comforting hug, you’ve landed in the right place. This Strawberry Cheesecake Banana Pudding is the ultimate no-bake dessert, blending creamy cheesecake filling, fresh strawberries, and sweet bananas into a symphony of flavors. Perfect for potlucks, birthdays, or just a sweet craving, this recipe will have everyone coming back for seconds (or thirds!).


    Ingredients

    1. Cream cheese (8 oz)

    A block of softened cream cheese is the foundation for that rich cheesecake flavor. To make it easier to blend, leave it out at room temperature for about 30 minutes.

    2. Sweetened condensed milk (14 oz)

    This adds the perfect amount of sweetness and helps create that smooth pudding texture.

    3. Instant vanilla pudding mix (3.4 oz)

    This ingredient ensures a luscious, thick pudding that holds its shape. Tip: Mix it with cold milk for the best results.

    4. Milk (2 cups)

    To activate the pudding mix, you’ll need cold milk. Whole milk works best for a creamier finish.

    5. Cool Whip (16 oz)

    Light, airy, and sweet, Cool Whip is the secret to that cloud-like fluffiness in your dessert.

    6. Strawberries (1 pound)

    Wash and slice these fresh strawberries to layer in vibrant color and sweetness. A quick tip: Pat them dry with a paper towel to avoid sogginess.

    7. Bananas (3–4)

    Ripe bananas add a naturally sweet flavor that pairs perfectly with the tangy cheesecake filling. Slice them just before layering to prevent browning.

    8. Vanilla wafer cookies (2 cups, crushed)

    These cookies bring a lovely crunch and hint of vanilla to balance the creamy textures. Crush them coarsely for that rustic, homemade feel.


    How to Make Strawberry Cheesecake Banana Pudding

    Step 1: Prepare the cheesecake filling

    In a large mixing bowl, beat the cream cheese until smooth and creamy. Add the sweetened condensed milk, instant pudding mix, and milk. Whisk until the mixture is thick and well-combined. Fold in half of the Cool Whip for extra fluffiness.

    Step 2: Crush the vanilla wafers

    Using a rolling pin or food processor, crush the vanilla wafers into coarse crumbs. Set aside to use as a delicious crunchy layer.

    Step 3: Slice the fruit

    Wash and slice the strawberries and bananas. For the best presentation, reserve a few slices of each to decorate the top layer.

    Step 4: Layer the dessert

    In a large serving dish or aluminum tray:

    • Start with a layer of crushed vanilla wafers.
    • Add a generous layer of the cheesecake filling.
    • Top with a layer of sliced bananas and strawberries.
    • Repeat the process until your dish is filled, finishing with a layer of fruit and cookie crumbles on top.

    Step 5: Chill and serve

    Refrigerate the pudding for at least 2 hours (or overnight) to allow the flavors to meld together. Serve cold and enjoy!


    Equipment Needed

    • Mixing bowls: Essential for preparing the cheesecake filling and pudding layers.
    • Hand mixer: Makes blending the cream cheese and pudding mix a breeze.
    • Aluminum tray or glass dish: Ideal for layering and serving this dessert.
    • Rolling pin: Perfect for crushing the vanilla wafers.

    Frequently Asked Questions

    Can I make this recipe ahead of time?

    Absolutely! This dessert is even better when prepared the night before, as the flavors have time to meld together. Just be sure to add the fruit toppings right before serving to keep them fresh.

    How do I keep the bananas from browning?

    To keep bananas from browning, toss the slices lightly in lemon or pineapple juice before layering. This helps preserve their color and freshness.

    Can I use fresh whipped cream instead of Cool Whip?

    Yes, fresh whipped cream works beautifully! Just whip 2 cups of heavy cream with a bit of powdered sugar until stiff peaks form, and use it in place of Cool Whip.

    Can I substitute vanilla wafers?

    Definitely! Graham crackers or shortbread cookies are great alternatives if you don’t have vanilla wafers on hand.

    What size dish works best for this recipe?

    A 9×13-inch dish is perfect for layering this dessert. If you’re making it for a smaller group, you can easily halve the recipe and use an 8×8-inch dish.

    Can I freeze leftovers?

    While this dessert is best enjoyed fresh, you can freeze leftovers in an airtight container for up to 2 weeks. Thaw in the fridge before serving.


    Conclusion

    I hope you love this Strawberry Cheesecake Banana Pudding as much as I do! It’s the kind of dessert that turns any gathering into a celebration. Don’t forget to share this recipe with your friends on Facebook using the share buttons below or save it on Pinterest for later. Happy layering! 

  • Detox infused water recipe for weight loss and body cleansing

    Detox infused water recipe for weight loss and body cleansing

    Detox infused water recipe for weight loss and body cleansing

    1f952Ingredients1f952
    1 liter of water 1f964
    1 lemon sliced ​​1f34b
    1 cucumber sliced ​​1f952
    1 tablespoon grated ginger 1fada
    10 fresh mint leaves 1f343

  • Crispy Potato Pancakes

    Crispy Potato Pancakes

    Ingredients


      • 1 medium potato (about 150g), grated
      • 1 egg
      • 2 tbsp all-purpose flour (16g)


    • 2 tbsp water (30ml)
    • About 1 tbsp vegetable oil (15ml) for frying

    Directions


      • Peel and grate the potato into a bowl. Squeeze out excess moisture using a kitchen towel or your hands.
      • In a separate bowl, beat the egg. Add grated potato, flour, and water. Mix until well combined.
      • Heat vegetable oil in a non-stick skillet over medium heat.


      • Drop spoonfuls of the mixture into the skillet and flatten them into pancake shapes.
      • Fry for 2-3 minutes per side until golden brown and crispy.
      • Remove from the skillet and place on a paper towel to drain excess oil.

    Serving Suggestions

      • Serve with sour cream or applesauce for dipping.
      • Pair with a fresh salad for a light meal.


      • Enjoy alongside scrambled eggs for breakfast.
      • Top with smoked salmon or cream cheese for an elegant twist.
      • Sprinkle with chopped herbs like parsley or chives for extra flavor.

    Cooking Tips

      • Use starchy potatoes for the crispiest pancakes.
      • Ensure you squeeze out excess moisture from the grated potato for better texture.


      • Don’t overcrowd the skillet; cook in batches if necessary.
      • Add a pinch of salt and pepper to the mixture for extra flavor.
      • Use a spatula to press the pancakes while frying to achieve even crispiness.

    Nutritional Benefits

      • Potatoes are rich in potassium and fiber.
      • Eggs provide protein and essential nutrients.


    • Minimal oil keeps this dish lighter than deep-fried options.

    Dietary Information

      • Vegetarian-friendly.


    • Contains gluten; substitute with gluten-free flour for a gluten-free option.

    Nutritional Facts (Per Serving)

      • Calories: 150


      • Protein: 4g
      • Carbohydrates: 15g
      • Fat: 7g


    • Fiber: 2g

    Storage

      • Store leftovers in an airtight container in the fridge for up to 2 days.


    • Reheat in a skillet or oven to regain crispiness.
    • Freeze uncooked patties between parchment paper for up to 1 month; thaw before frying.

    Why You’ll Love This Recipe


      • Quick, easy, and made with pantry staples.
      • Crispy and golden on the outside, soft inside.
      • Versatile and pairs with sweet or savory toppings.


    • Great for a snack, side dish, or light meal.
  • Oatmeal Apple Mug Cake with Dried Fruits and Chocolate Chips

    Oatmeal Apple Mug Cake with Dried Fruits and Chocolate Chips

    Ingredients (Serves 4-6)

    For the Cake:

      • 1 cup (100 g) oatmeal
      • 1 teaspoon baking powder


      • ½ teaspoon ground cinnamon
      • A pinch of salt
      • ½ cup (50 g) dried apricots, chopped


      • ½ cup (50 g) dried cranberries
      • 2 eggs (washed)
      • ⅓ cup (80 ml) Greek yogurt


      • 3 tablespoons vegetable oil
      • 2 apples, peeled and grated
      • 30 g almonds, chopped


    • ½ cup (100 g) sugar-free chocolate chips

    For the Topping:

      • 50 g Greek yogurt


    • 1 tablespoon agave syrup
    • 1 tablespoon cocoa powder

    Directions

    1. Prepare the Dry Ingredients:

    • In a large mixing bowl, combine oatmeal, baking powder, ground cinnamon, and a pinch of salt. Mix well.

    2. Prepare the Wet Ingredients:


    • In a separate bowl, whisk together eggs, Greek yogurt, and vegetable oil until smooth.

    3. Combine the Ingredients:

      • Gradually add the wet ingredients to the dry mixture and mix until just combined.


    • Fold in the grated apples, dried apricots, dried cranberries, chopped almonds, and chocolate chips.

    4. Prepare the Baking Dish:

      • Line a mug or small baking dish with baking paper. Pour the batter into the prepared dish, filling about ¾ full to allow for rising.

    5. Bake the Cake:

    • Preheat your oven to 180°C (356°F). Place the mug or baking dish in the oven and bake for 30–35 minutes, or until a toothpick inserted in the center comes out clean.

    6. Prepare the Topping:


    • In a small bowl, mix Greek yogurt, agave syrup, and cocoa powder until smooth.

    7. Serve:

      • Allow the cake to cool slightly before removing it from the mug or dish. Spread the yogurt topping over the cake. Slice and serve warm.

    Serving Suggestions

      • Garnish with additional chopped almonds or dried fruits.
      • Pair with a cup of tea or coffee for a cozy snack.


    • Serve with a scoop of vanilla ice cream for a dessert twist.

    Cooking Tips

      • Use finely grated apples for a smoother texture in the cake.


    • For extra sweetness, drizzle with honey or maple syrup before serving.
    • Substitute dried apricots and cranberries with raisins, dates, or any dried fruit of your choice.

    Nutritional Benefits


      • Oats provide fiber for digestive health.
      • Dried fruits are rich in antioxidants and natural sugars for energy.
      • Apples add natural sweetness and moisture, reducing the need for added sugars.


    • Greek yogurt contributes protein and probiotics for gut health.
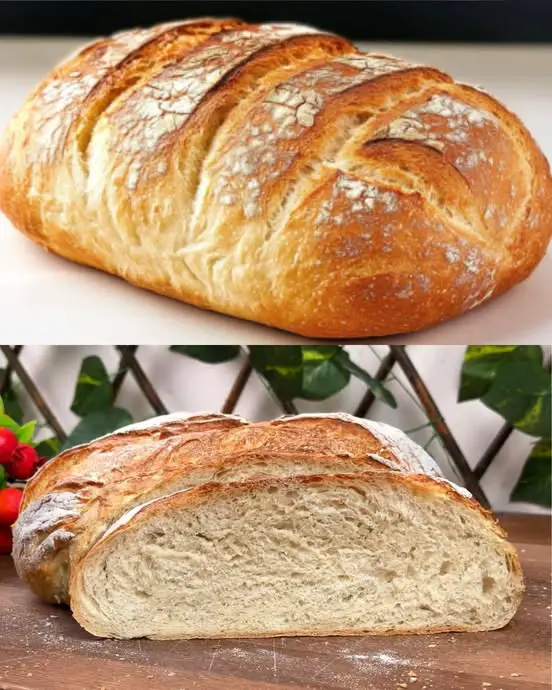
  • Rustic Whole Wheat Yogurt Bread with Mixed Seeds

    Rustic Whole Wheat Yogurt Bread with Mixed Seeds

    Rustic Whole Wheat Yogurt Bread with Mixed Seeds

    Table of Contents

    Ingredients

    For the Bread:

    • 10.6 oz (300g) whole wheat flour
    • 8.45 fl oz (250ml) sour yogurt (European-style)
    • ½ teaspoon (2.5g) baking soda
    • 1 teaspoon (5g) salt
    • 1 tablespoon (15ml) olive oil (optional, for a softer crumb)

    For the Topping:

    • 2 tablespoons (30g) mixed seeds:
    • Rolled oats
    • Pumpkin seeds
    • Sunflower seeds
    • Flax seeds
    • 1 tablespoon (15ml) water for brushing

    Step-by-Step Instructions

    Preparation (10 minutes):

    1. Preheat your oven to 360°F (180°C). Place a baking sheet or dutch oven inside to heat.
    2. Line a baking sheet with parchment paper if not using a dutch oven.

    Making the Dough (15 minutes):

    1. In a large mixing bowl, whisk together the whole wheat flour, baking soda, and salt.
    2. Create a well in the center of the dry ingredients.
    3. Gradually pour in the sour yogurt, stirring with a wooden spoon.
    4. Add olive oil if using.
    5. Mix until a shaggy dough forms.
    6. Turn onto a lightly floured surface.
    7. Knead for 5-7 minutes until the dough becomes smooth and non-sticky.

    Shaping and Finishing (5 minutes):

    1. Form the dough into a round loaf shape.
    2. Transfer to prepared parchment paper.
    3. Using a sharp knife, score the top with an ‘X’ pattern, about ½-inch deep.
    4. Brush the surface with water.
    5. Generously sprinkle with mixed seeds.

    Baking (30-35 minutes):

    1. Carefully transfer the bread to the preheated baking sheet or dutch oven.
    2. Bake for 30-35 minutes until golden brown.
    3. The bread should sound hollow when tapped on the bottom.
    4. Cool on a wire rack for at least 30 minutes before slicing.
    See also  Italian Peach Ricotta Tart

    Nutritional Information

    (Per slice, based on 12 slices)

    • Calories: 120
    • Protein: 4g
    • Carbohydrates: 22g
    • Fiber: 3g
    • Fat: 2g
    • Sodium: 185mg

    Total Time:

    • Prep Time: 30 minutes
    • Baking Time: 30-35 minutes
    • Cooling Time: 30 minutes
    • Total Time: 1 hour 35 minutes

    Pro Tips and Tricks

    1. Temperature Matters: Use room temperature yogurt for better incorporation.
    2. Don’t Overwork: Knead just until the dough comes together to avoid toughness.
    3. Steam Effect: Place a small pan of water at the bottom of the oven for a crispier crust.
    4. Testing Doneness: Internal temperature should reach 190°F (88°C).

    Variations and Substitutions

    1. Flour Options:
    • Replace up to 50% with all-purpose flour for a lighter texture
    • Try spelt flour for a nuttier flavor
    • Add 2 tablespoons of wheat germ for extra nutrition
    1. Yogurt Alternatives:
    • Buttermilk
    • Kefir
    • Plant-based yogurt with 1 tablespoon lemon juice
    1. Seed Variations:
    • Everything bagel seasoning
    • Sesame seeds only
    • Crushed walnuts or pecans
  • 3 ingredient frying pancake

    3 ingredient frying pancake

    Hello, everyone, today we’re going to learn how to make pancake using simple ingredients. So grab your pen and paper to jot down the ingredients, then follow the complete preparation method.

    How to Make 3 ingredient frying pancake

    Easy 3-ingredient recipe, this morning or afternoon snack is ready in just a few steps. See below the list of all ingredients and required quantities. And then, a very complete preparation method with details of the recipe.

    Recipe Ingredients:

    • 2 ripe bananas
    • 1 cup oat flakes
    • 2 tablespoons cocoa powder

    Directions

    First, using a bowl, mashed potato the ripe bananas into a purée.

    Then add the rolled oats and cocoa powder to the mashed banana. Now mix well until the dough is uniform.

    Then shape the mixture into small cakes using your hands.

    Finally, now heat a non-stick frying pan over medium heat and cook the dumplings until golden brown on both sides. That’s it, now serve warm and enjoy.

  • Feta, Cheddar and Spinach Muffins

    Feta, Cheddar and Spinach Muffins

    INGREDIENTS
    300 g plain flour
    2 1/2 tsp baking powder
    100 g cheddar cheese
    150 g chopped feta
    130 g baby leaf spinach
    1 egg – or 2 Tbls plain yoghurt
    220 ml milk, use skim if you like.
    1 tsp cayenne pepper
    A dash of crushed black pepper
    30 g butter melted or olive oil
    half a red onion, chopped
    Directions:
    1. Preheat oven to 170C, line a muffin tin with cupcake liners.
    2. Use a pan to melt the butter and add onion, fry till lightly browned, now add spinach, toss it until the spinach just wilts. Do not overcook.
    3. Mix dry ingredients in a bowl.
    4. Whisk egg and milk in another bowl.
    5. Combine with dry ingredients.
    6. Add spinach and onion mixture.
    7. Half fill muffin cups mixture forming round shapes with spoon or ice cream scoop
    8. Bake for about 30 minutes until done.
    Insert a toothpick into a muffin and it should come out clean.
    Enjoy with butter or serve with soup or stew for today?
    1f9671f9671f9671f967
  • Simple and Delicious Potato Croquettes

    Simple and Delicious Potato Croquettes

    Simple and Delicious Potato Croquettes

    Table of Contents

    Ingredients:

      • 3 medium potatoes, peeled and boiled (about 450g)
      • 30g (1 oz) cheese, grated
      • 2 cloves garlic, minced
      • A handful of parsley, finely chopped
      • 5 tablespoons cornstarch
      • Salt and black pepper, to taste
      • 2 eggs, beaten
      • 100g (1 cup) breadcrumbs
      • Vegetable oil, for frying
      • For the sauce:
        • 2 tablespoons yogurt
        • 1 tablespoon mayonnaise

    Directions:

      • Cook the Potatoes: Peel, boil, and mash the potatoes until smooth.
      • Mix the Ingredients: Combine the mashed potatoes with garlic, parsley, cheese, salt, pepper, and cornstarch. Mix until smooth.
      • Shape the Croquettes: Form the mixture into small cylinder or oval shapes.
      • Coat the Croquettes: Dip each croquette into beaten eggs, then coat with breadcrumbs.
      • Fry the Croquettes: Heat oil in a frying pan and fry the croquettes for 2-3 minutes per side until golden brown. Drain on paper towels.
    • Prepare the Sauce: Mix yogurt and mayonnaise for a simple dipping sauce.
    • Serve: Serve the croquettes warm with dipping sauce.

    Serving Suggestions:

      • Serve with the yogurt-mayo dip for a light and tangy contrast.
      • Pair with a side salad or vegetables for a balanced meal.
      • Great as a party snack or appetizer with a variety of dips.
    • Serve with ketchup, spicy mayo, or garlic aioli for added flavor.

    Cooking Tips:

      • Cheese Options: Use cheddar, mozzarella, or Parmesan for different flavor profiles.
      • Make Ahead: You can shape the croquettes in advance and refrigerate for up to 24 hours before frying.
      • Baking Alternative: For a healthier option, bake the croquettes at 400°F (200°C) for 20-25 minutes, flipping halfway through.
      • Oil Temperature: Make sure the oil is hot enough for frying; test with a small piece of bread.
    See also  Classic Homemade Bread Recipe

    Nutritional Benefits:

      • Potatoes: Rich in potassium, fiber, and vitamin C, providing energy and aiding digestion.
      • Garlic and Parsley: Contain antioxidants and help boost immune health.
    • Cheese: Adds calcium and protein for bone health and muscle function.
    • Cornstarch: Helps bind the mixture while keeping the croquettes light and crispy.

    Dietary Information:

      • Vegetarian: Suitable for vegetarians.
      • Gluten-Free Option: Use gluten-free breadcrumbs for a gluten-free version.
      • Dairy-Free Option: Replace cheese with a dairy-free alternative and use plant-based yogurt and mayo for the sauce.

    Nutritional Facts (per croquette):

      • Calories: 150
      • Protein: 4g
      • Carbohydrates: 18g
      • Fat: 7g
      • Fiber: 2g
    • Sugar: 1g

    Storage:

      • Store leftovers in the fridge for up to 3 days.
    • Freeze uncooked croquettes for up to 3 months and fry directly from frozen.
    • Reheat in the oven or air fryer for best results.

    Why You’ll Love This Recipe:

      • Easy to Make: Simple ingredients and straightforward steps make this recipe beginner-friendly.
      • Versatile: Can be served as an appetizer, snack, or side dish.
      • Crowd-Pleaser: Loved by both kids and adults, perfect for gatherings.
    • Customizable: Add your favorite herbs, spices, or cheeses for endless variations.