Blog

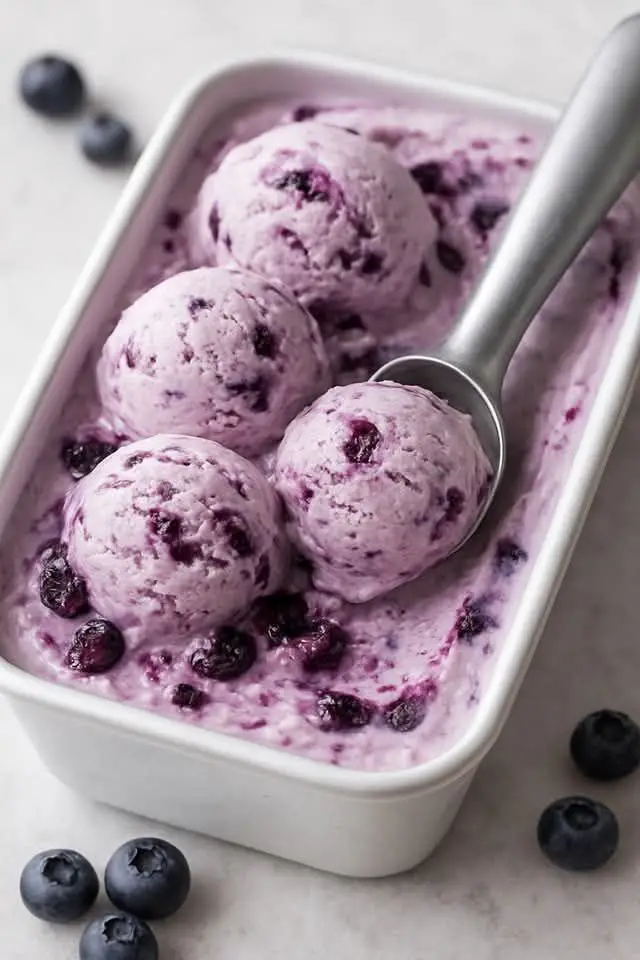
  • Berry Chocolate Ice Cream  A Refreshing Delight for Summer Days!

    Berry Chocolate Ice Cream A Refreshing Delight for Summer Days!

    Ingredients:
    For the Ice Cream Base:
    2 cups (480ml) heavy cream
    1 cup (240ml) whole milk
    3/4 cup (150g) granulated sugar
    1 tbsp vanilla extract
    4 large egg yolks
    For the Chocolate Swirl:
    3/4 cup (120g) dark chocolate chips
    1/2 cup (120ml) heavy cream
    For the Berry Topping:
    1/2 cup fresh strawberries, sliced
    1/2 cup fresh raspberries
    1/2 cup fresh blueberries
    1/4 cup chocolate shavings or chocolate chips
    Instructions:
    Preparing the Ice Cream Base:
    In a saucepan over medium heat, combine heavy cream, milk, and half of the sugar. Heat until warm but not boiling.
    In a separate bowl, whisk the egg yolks and remaining sugar until pale and creamy.
    Slowly pour the warm milk mixture into the egg mixture while whisking continuously.
    Return the mixture to the saucepan and cook over low heat, stirring constantly until thickened (about 5 minutes).
    Remove from heat, stir in vanilla extract, and allow it to cool.
    Chill the mixture in the refrigerator for at least 4 hours or overnight.
    Making the Chocolate Swirl:
    Heat the heavy cream until warm. Pour it over the chocolate chips and stir until smooth.
    Let the chocolate mixture cool slightly before use.
    Churning and Freezing:
    Pour the chilled ice cream base into an ice cream maker and churn according to the manufacturer’s instructions.
    Once churned, layer the ice cream in a container, drizzling chocolate sauce between layers.
    Use a knife to swirl the chocolate into the ice cream gently.
    Freeze for at least 4 hours before serving.
    Decorating and Serving:
    Top the ice cream with fresh strawberries, raspberries, and blueberries.
    Sprinkle chocolate shavings and chocolate chips for a decadent touch.
    Serve in a chilled bowl or an elegant dish for the perfect presentation.
    Decoration Tips:
    Berry Placement: Arrange the berries in clusters for a more visually appealing presentation.
    Extra Garnish: A drizzle of extra chocolate sauce or a dusting of powdered sugar can enhance the look.
    Serving Idea: Serve with crispy waffle cones or alongside warm brownies for contrast.
    Presentation Upgrade: Use a rectangular ceramic dish for a sophisticated touch and place it on a wooden board.
  • Apple Brownie with Dark Chocolate and Cranberries

    Apple Brownie with Dark Chocolate and Cranberries

    Apple Brownie with Dark Chocolate and Cranberries

    This decadent apple brownie is a fusion of rich dark chocolate and the natural sweetness of applesauce, complemented by tangy dried cranberries. The addition of orange zest provides a refreshing citrusy note, while the optional pistachios and melted chocolate make for a beautiful and indulgent decoration. This easy-to-make dessert is perfect for any chocolate lover!

    Preparation Time: 10 minutes
    Cook Time: 25-30 minutes
    Total Time: 40-45 minutes

    Ingredients:
    For the Brownie:

      • Applesauce – 180g (6.3 oz)
      • Dark chocolate – 150g (5.3 oz)
      • 3 eggs
      • Dried cranberries – 30g (1 oz)
      • Orange zest (optional)
      • Any starch (cornstarch, potato starch, or similar) – 40g (1.4 oz)
    • Baking powder – 1 tsp
    • A pinch of salt

    For Decoration (optional):

    • Melted chocolate – for drizzling
    • Pistachios – chopped (for garnish)

    Directions:

      1. Preheat the Oven:
        • Preheat your oven to 180°C (350°F).
        • Grease and line a square baking pan (approximately 20×20 cm or 8×8 inches) with parchment paper.
      1. Prepare the Wet Ingredients:
        • In a large bowl, whisk together the applesauce and eggs until smooth.
        • If using, add the orange zest to the wet mixture for a citrusy flavor boost.
    1. Melt the Chocolate:
      • Break the dark chocolate into pieces and melt it in a heatproof bowl over a double boiler or microwave in short intervals. Stir until smooth and allow to cool slightly before adding it to the mixture.
    2. Mix the Dry Ingredients:
        • In a separate bowl, combine the starch, baking powder, and a pinch of salt.
      • Gradually add this dry mixture to the wet ingredients, stirring until fully combined.
    3. Add the Cranberries:
        • Fold in the dried cranberries, mixing them evenly throughout the batter.
    4. Bake the Brownie:
        • Pour the batter into the prepared baking pan and spread it evenly.
        • Bake in the preheated oven for 25-30 minutes, or until a toothpick inserted into the center comes out clean.
    5. Cool and Decorate:
        • Allow the brownie to cool completely before slicing.
        • If desired, drizzle with melted chocolate and sprinkle with chopped pistachios for a decorative touch.

    Serving Suggestions:

      • Serve with a dollop of whipped cream or a scoop of vanilla ice cream.
      • Pair with a hot cup of coffee or tea for an afternoon treat.
      • Top with fresh berries or a sprinkle of powdered sugar for extra sweetness.
      • Enjoy as a breakfast treat with a cup of yogurt.
    • Serve as a dessert for family gatherings or dinner parties.

    Cooking Tips:

      • Make sure the chocolate is slightly cooled before adding it to the mixture to avoid cooking the eggs.
    • You can substitute the cranberries with raisins or other dried fruits if preferred.
    • Ensure the batter is evenly spread in the pan to bake uniformly.

    Nutritional Benefits:

      • Applesauce adds natural sweetness and moisture, reducing the need for excess sugar.
      • Dark chocolate provides antioxidants and can improve heart health when consumed in moderation.
      • Cranberries offer health benefits like improving urinary tract health and are high in vitamin C.

    Dietary Information:

      • Suitable for vegetarians.
      • Contains gluten (if using regular starch).
    • Can be made gluten-free by using a certified gluten-free starch.

    Nutritional Facts (per serving):

      • Calories: ~18
      • Fat: 8g
      • Carbohydrates: 25g
      • Protein: 3g
    • Fiber: 2g
    • Sugar: 15g

    Storage:

    • Store in an airtight container at room temperature for up to 3 days.
    • For longer storage, refrigerate for up to 1 week, or freeze for up to 3 months.

    Why You’ll Love This Recipe:
    This apple brownie is the perfect combination of rich chocolate flavor and fruity sweetness. It’s easy to make, yet sophisticated enough to impress guests. The cranberries add a delightful tang, while the optional pistachios give a nice crunch, making each bite a treat. Plus, it’s a great way to enjoy a comforting dessert with a twist on the traditional brownie.

    Conclusion:
    Apple brownies are a delicious alternative to classic brownies, offering a moist and flavorful texture. The combination of applesauce and dark chocolate creates a rich taste that is hard to resist. Whether you’re baking for a special occasion or just craving a treat, this recipe will surely satisfy your sweet tooth. Give it a try – you won’t regret it!

  • Caramelized Apple Pastry

    Caramelized Apple Pastry

    Caramelized Apple Pastry

    This Caramelized Apple Pastry combines a soft, buttery dough with a sweet and spiced apple filling for a delightful homemade treat. Perfect for dessert, tea time, or a cozy snack, this easy-to-make pastry is sure to impress your family and friends. The caramelized apple filling adds a warm, comforting flavor, while the dough creates a golden, flaky crust.

    Preparation Time

      • Prep Time: 20 minutes
    • Cook Time: 20 minutes
    • Total Time: 40 minutes

    Ingredients

    For the Apple Filling:

      • 1 apple, peeled, cored, and diced
      • 1 tbsp (14 g) butter
    • 2 tbsp (25 g) sugar
    • A pinch of cinnamon (to taste)

    For the Dough:

      • 1 large egg
      • A pinch of salt
      • 8 g (1 tbsp) vanilla sugar
      • 50 g (1/4 cup) sugar
      • 2 tbsp (30 ml) milk
      • 50 g (3 1/2 tbsp) melted butter
    • 4 g (1 tsp) baking powder
    • 250 g (2 cups) all-purpose flour

    For Serving:

    • Powdered sugar (for dusting)

    Directions

    Prepare the Apple Filling:

      1. Heat a skillet over medium heat and melt 1 tbsp of butter.
      2. Add the diced apple, 2 tbsp sugar, and a pinch of cinnamon.
      3. Cook, stirring occasionally, for 5–7 minutes, or until the apples are soft and caramelized.
    1. Remove from heat and allow the mixture to cool completely.

    Prepare the Dough:

      1. In a mixing bowl, beat the egg with a pinch of salt, vanilla sugar, and regular sugar until well combined.
    1. Add the milk and melted butter, mixing thoroughly.
    2. Gradually sift in the flour and baking powder, stirring until a soft dough forms.

    Assemble the Pastry:

      1. Preheat your oven to 180°C (350°F).
      2. On a floured surface, roll out the dough to about 1/4 inch thickness.
      3. Spread the cooled apple filling evenly over the dough.
    1. Fold or roll the dough over the filling, sealing the edges to enclose the apples.
    2. Place the assembled pastry on a baking sheet lined with parchment paper.

    Bake the Pastry:

    1. Bake in the preheated oven for 15–20 minutes, or until golden brown and fully cooked.

    Serve:

      1. Let the pastry cool slightly before dusting with powdered sugar.
    1. Slice and serve warm or at room temperature.

    Serving Suggestions

      • Pair with a scoop of vanilla ice cream or a dollop of whipped cream for an indulgent dessert.
    • Serve with a hot cup of coffee, tea, or spiced cider for a cozy treat.

    Cooking Tips

      • Use a firm apple variety like Granny Smith or Honeycrisp for a balance of sweetness and tartness
    • Avoid overcooking the filling, as it will continue to soften while baking.
    • Seal the edges of the pastry well to prevent the filling from leaking during baking.

    Nutritional Benefits

    • Apples provide fiber, vitamin C, and antioxidants.
    • The simple dough is light and contains fewer ingredients compared to store-bought pastries.

    Dietary Information

    • Vegetarian
    • Can be made dairy-free by substituting butter with a plant-based alternative and using almond or oat milk.

    Nutritional Facts (Per Serving, Approx. 8 Servings)

      • Calories: 190
      • Protein: 3g
      • Carbohydrates: 30g
    • Fat: 7g
    • Fiber: 1g

    Storage

    • Store in an airtight container at room temperature for up to 2 days.
    • Reheat in the oven at 180°C (350°F) for a few minutes to restore freshness.

    Why You’ll Love This Recipe

      • Quick and easy to make with simple pantry ingredients.
      • The warm, spiced apple filling creates a comforting and delicious flavor.
      • Perfect for both casual snacks and elegant desserts.
    • Can be customized with additional fruits, nuts, or spices.

    Conclusion
    This Caramelized Apple Pastry is the perfect balance of soft, buttery dough and sweet, spiced apple filling. It’s easy to prepare and versatile enough for any occasion. Whether enjoyed warm with powdered sugar or paired with a creamy topping, this pastry is sure to delight your taste buds. Try it today and bring the comforting flavors of homemade baking to your table!

    Frequently Asked Questions

      1. Can I use other fruits instead of apples?
        Yes, pears, peaches, or berries work well as substitutes.
      2. Can I add nuts to the filling?
        Absolutely! Chopped walnuts, pecans, or almonds add a nice crunch.
      3. What if I don’t have vanilla sugar?
        Substitute with 1 tsp vanilla extract or omit it entirely.
      1. Can I make this pastry ahead of time?
        Yes, you can prepare the dough and filling separately, then assemble and bake when ready.
      2. What’s the best way to reheat leftovers?
        Reheat in a 180°C (350°F) oven for 5–7 minutes to restore crispness.
      3. Can I make this recipe vegan?
        Yes, replace the egg with a flax or chia egg, butter with plant-based alternatives, and milk with almond or oat milk.
      1. What type of sugar works best?
        Regular granulated sugar is ideal, but brown sugar adds a deeper caramel flavor.
      2. Can I freeze this pastry?
        Yes, freeze after baking and cool completely. Reheat in the oven before serving.
      3. Can I use pre-made pastry dough?
        Yes, puff pastry or pie dough can be used as a shortcut.
    1. How do I prevent the pastry from getting soggy?
      Ensure the apple filling is cooled completely before spreading it on the dough.
  • Beetroot and Carrot Salad with Walnuts and Cheese

    Beetroot and Carrot Salad with Walnuts and Cheese

    Beetroot and Carrot Salad with Walnuts and Cheese

    This Beetroot and Carrot Salad with Walnuts and Cheese is a vibrant, fresh, and flavorful dish that combines the earthiness of beets, the sweetness of carrots, and the richness of cheese and walnuts. Tossed together with a creamy, tangy dressing, this salad is a perfect side dish for any meal or a light, nutritious lunch. It’s quick to prepare, requires only a few ingredients, and provides a beautiful pop of color to your table. The combination of beetscarrots, and walnuts offers a satisfying crunch, while the dressing adds just the right amount of richness and zest.

    Preparation Time:

      • Prep Time: 15 minutes
      • Cook Time: 20 minutes (for boiling beets and carrots)
      • Total Time: 35 minutes
      • Servings: 4

    Ingredients:

    For the Salad:

      • 1 beetroot, cooked
      • 2 carrots, cooked
      • 100g cheese (grated, choose your favorite type such as cheddarfeta, or mozzarella)
      • 1/2 cup fresh parsley, chopped
    • 70g walnuts, ground
    • 1 clove of garlic, minced

    For the Dressing:

      • 200 ml oil (olive or vegetable oil)
      • 100 ml milk
      • 30 ml lemon juice
      • 1 tablespoon mustard (Dijon or yellow mustard)
      • Salt and pepper, to taste
      • 1 tablespoon sugar

    Instructions:

      1. Cook the Vegetables:

          • Boil the beetroot and carrots until soft. This should take about 20 minutes. After they’re cooked, allow them to cool.
        • Once cool, grate the beetroot and carrots into strips using a box grater or food processor.
      2. Prepare the Salad Ingredients:

          • Grate the cheese and chop the parsley finely.
          • Grind the walnuts into small pieces using a food processor or nut grinder.
          • Mince the garlic finely.
      3. Make the Dressing:

          • In a bowl, combine the oilmilklemon juicemustardsaltpepper, and sugar.
        • Use a mixer or whisk to blend the ingredients together until smooth and creamy.
      4. Assemble the Salad:

        • In a large bowl, combine the grated beets and carrots with the cheesewalnutsparsley, and minced garlic.
        • Pour the prepared dressing over the salad and toss gently to combine everything evenly.
      1. Serve:

        • Serve the salad immediately, or refrigerate for 15-20 minutes to chill before serving. This salad can also be stored in the refrigerator for up to 1 day.

    Serving Suggestions:

      • Serve as a side dish to complement grilled meats, sandwiches, or as a light meal on its own.
      • Enjoy with some crusty bread or over a bed of leafy greens for extra nutrition.

    Cooking Tips:

      • For added flavor, try toasting the walnuts in a dry pan for a few minutes before adding them to the salad.
      • If you want a more creamy dressing, you can substitute the milk with yogurt or sour cream.
    • Feel free to add extra veggies like cucumber or sweetcorn for additional texture and flavor.

    Nutritional Benefits:

      • Beetroot is rich in fibervitamins, and antioxidants, which support digestion and heart health.
      • Carrots provide beta-carotene, essential for eye health and immune function.
      • Walnuts are packed with healthy fatsprotein, and omega-3 fatty acids, promoting brain health and reducing inflammation.
      • Cheese adds calcium, which is vital for bone health.

    Dietary Information:

      • Vegetarian: This salad is completely vegetarian and makes for a healthy, filling meal.
      • Gluten-Free: This recipe is naturally gluten-free, making it suitable for those with gluten sensitivities.
    • Dairy-Free Version: Substitute cheese with vegan cheese or nut-based cheese for a dairy-free option.

    Conclusion:

    This Beetroot and Carrot Salad with Walnuts and Cheese is a refreshing and healthy dish that offers a delightful mix of flavors and textures. It’s easy to prepare, packed with nutrients, and can be enjoyed as a light lunch or a vibrant side dish. The tangy dressing ties everything together, and the combination of beetscarrotscheese, and walnuts will surely become a family favorite.

  • Decadent Chocolate Mousse Cake

    Decadent Chocolate Mousse Cake

    The Art of Chocolate Indulgence

    Prepare to embark on a culinary journey that transcends ordinary desserts. This Chocolate Mousse Cake is not just a recipe; it’s a celebration of rich, velvety chocolate that promises to elevate your baking skills and delight even the most discerning palates. Imagine a dessert that combines the lightness of a mousse with the satisfying density of a cake – a true testament to the magic of chocolate.

    Why This Chocolate Mousse Cake Stands Out

    • Incredibly smooth and creamy texture
    • Sophisticated flavor profile
    • Impressive presentation
    • Relatively simple ingredients
    • Perfect for special occasions

    Ingredients: Your Gourmet Baking Arsenal

    Gather these premium ingredients:

    • Eggs: 3 large
    • Dark Chocolate: 100 grams (3.5 oz)
    • Mascarpone Cheese: 250 grams (8.8 oz)
    • Vanilla Extract: 1 tablespoon (optional)

    Step-by-Step Culinary Creation

    1. Egg Separation Technique

    The foundation of your mousse cake’s texture:

    • Carefully separate egg whites from yolks
    • Use three separate bowls to ensure no yolk contamination
    • Room temperature eggs separate more easily
    • Ensure all utensils are completely clean and dry

    2. Chocolate Melting Mastery

    Create a smooth chocolate base:

    • Use a double boiler method
    • Break dark chocolate into uniform pieces
    • Melt slowly over low heat
    • Stir gently to prevent burning
    • Remove from heat when just melted
    • Allow to cool slightly but remain liquid

    3. Mascarpone Mixture

    Build the creamy foundation:

    • Select high-quality mascarpone
    • Ensure mascarpone is at room temperature
    • Mix melted chocolate and mascarpone
    • Stir until completely smooth
    • Optional: Add vanilla extract for depth of flavor
    • The mixture should be glossy and uniform

    4. Egg White Transformation

    Create the signature light texture:

    • Use clean, dry whisk or electric mixer
    • Whip egg whites in a clean, dry bowl
    • Beat until firm peaks form
    • Whites should stand up straight when whisk is lifted
    • Be careful not to overbeat, which can make whites grainy

    5. Delicate Folding Technique

    The critical moment of integration:

    • Fold in egg whites in three careful stages
    • First third: Incorporate to lighten the mixture
    • Gently fold, cutting through the center and folding over
    • Second third: Fold with even more care
    • Final third: Fold delicately to maintain air bubbles

    6. Cake Preparation

    Set the stage for baking:

    • Choose a 15 or 18 cm cake mold
    • Line with baking paper
    • Ensure paper extends slightly above rim
    • Pour cake mixture carefully
    • Smooth the top gently
    • Tap mold to remove any air bubbles

    7. Precision Baking

    Create the perfect texture:

    • Preheat oven to 175°C (350°F)
    • First bake: 30 minutes
    • Prepare a water bath (halfway up the mold)
    • Second bake in water bath: 30 minutes
    • Final rest in turned-off oven: 30 minutes
    • Keep oven door closed during resting

    8. Cooling and Serving

    The final touches:

    • Remove from oven carefully
    • Allow to cool completely
    • Gently remove from mold
    • Optional: Dust with cocoa powder
    • Serve at room temperature

    Nutritional Insights

    Serving Size: 1 slice

    Nutritional Breakdown:

    • Calories: 250-300
    • Protein: 6-8g
    • Carbohydrates: 8-10g
    • Fat: 22-25g
    • Calcium: 10-15% daily value
    • Iron: 8-10% daily value

    Preparation Time: 30 minutes Baking Time: 60 minutes Resting Time: 30 minutes Total Time: Approximately 2 hours Servings: 6-8 slices

    Expert Baking Tips

    1. Chocolate Quality: Use high-percentage dark chocolate
    2. Egg White Technique: Ensure absolutely no yolk contamination
    3. Folding Method: Use a figure-eight motion
    4. Water Bath Precision: Use hot water
    5. Cooling Importance: Do not rush the cooling process

    Creative Variations

    Customize your chocolate experience:

    • Flavor Twist: Add orange zest or espresso
    • Nutty Version: Sprinkle chopped nuts on top
    • Lighter Option: Use low-fat mascarpone
    • Garnish Ideas: Fresh berries or chocolate shavings
    • Gluten-Free: Naturally gluten-free recipe

    Frequently Asked Questions

    Q1: Can I make this in advance? Yes, keeps well refrigerated for 2-3 days.

    Q2: Is a water bath really necessary? Helps create smooth, even texture and prevents cracking.

    Q3: Can I use milk chocolate? Dark chocolate recommended for best flavor and texture.

    Q4: How do I know when it’s done? Slightly firm to touch, with a slight wobble in center.

    Q5: Can I freeze this cake? Best enjoyed fresh, but can be frozen for up to 1 month.

    Storage and Make-Ahead Wisdom

    • Refrigeration: 2-3 days
    • Room Temperature: Best served slightly chilled
    • Freezing: Up to 1 month
    • Covering: Use cake dome or loose plastic wrap
    • Serving: Remove from refrigerator 30 minutes before serving

    Surrender to the ultimate chocolate experience – where decadence meets artistry!

  • Caramelized Banana Cream Dessert

    Caramelized Banana Cream Dessert

    Caramelized Banana Cream Dessert

    This Caramelized Banana Cream Dessert is a luscious treat that combines the sweetness of caramelized bananas with a silky custard cream. Topped with a light whipped mixture and a dusting of cocoa powder, it’s the perfect dessert for any occasion.

    Preparation Time

      • Prep Time: 15 minutes
      • Cooking Time: 25 minutes
      • Chilling Time: 1 hour
      • Total Time: 1 hour 40 minutes

    Ingredients

    For the Caramelized Bananas:

      • 3 bananas
    • 30 g butter

    For the Custard Cream:

      • 150 ml milk
    • 40 g cornstarch
    • 100 ml milk (for cornstarch mixture)

    For the Whipped Cream Layer:

    • 200 ml heavy cream (33% fat)
    • 150 g condensed milk

    For Topping:

    • Cocoa powder

    Directions

      1. Caramelize the Bananas:
          • Slice the bananas into rounds.
        • Melt 30 g of butter in a non-stick pan over low heat.
        • Add the banana slices and cook for 10 minutes on low heat, flipping occasionally, until golden and caramelized.
      1. Prepare the Custard Cream:
          • In a saucepan, heat 150 ml of milk over medium heat.
          • In a separate bowl, mix 40 g of cornstarch with 100 ml of milk until smooth.
          • Slowly pour the cornstarch mixture into the heated milk, stirring constantly.
        • Cook over medium heat until the mixture thickens, then remove from heat.
        • Cover the custard with plastic wrap directly on the surface to prevent a skin from forming. Chill in the refrigerator.
      1. Whip the Cream:
        • In a mixing bowl, whip 200 ml of heavy cream until soft peaks form.
        • Gradually add 150 g of condensed milk and whip until stiff peaks form.
    1. Assemble the Dessert:
        • In serving glasses or bowls, layer the caramelized bananas at the bottom.
        • Add a layer of the chilled custard cream.
        • Top with the whipped cream and condensed milk mixture.
        • Dust the top with cocoa powder for a decorative touch.
        • Chill in the refrigerator for at least 1 hour before serving.Finish and Chill:

    Serving Suggestions

      • Garnish with fresh mint leaves or banana slices for added elegance.
    • Serve with a side of biscotti or shortbread cookies for crunch.
    • Pair with a cup of espresso or tea for a delightful experience.

    Cooking Tips

      • Use ripe bananas for optimal sweetness and caramelization.
      • Stir the custard constantly to prevent lumps from forming.
      • Chill the cream thoroughly before whipping for the best consistency.

    Nutritional Benefits

      • Bananas: Provide potassium and natural sweetness.
      • Milk and Cream: Source of calcium and protein.
    • Cocoa Powder: Adds antioxidants and rich flavor.

    Dietary Information

      • Contains dairy and gluten-free if cornstarch is gluten-free.

    Storage Tips

      • Store leftovers in the refrigerator for up to 2 days.
      • Serve chilled; do not freeze, as the texture may change.

    Why You’ll Love This Recipe

      • Easy to make with simple ingredients.
      • Combines creamy textures with caramelized banana sweetness.
    • Perfect for both casual and special occasions.
  • Vegan Mango Gelato

    Vegan Mango Gelato

    Juicy mangoes in a creamy and dairy-free treat, this mango gelato is a perfect indulgence for those warm days. With its vibrant color and intense mango flavor, this guilt-free dessert is not only vegan but also irresistibly delicious.

    Ingredients:
    3 ripe mangoes, peeled and diced
    1/2 cup coconut cream (from a can of full-fat coconut milk)
    1/4 cup maple syrup or agave nectar
    1 tablespoon lemon juice
    Pinch of salt
    1 teaspoon vanilla extract (optional)
    Instructions:
    Freeze Mangoes:
    Place the diced mangoes on a baking sheet and freeze them until they are firm, for about 2-3 hours.
    Blend Ingredients:
    Once the mango chunks are frozen, transfer them to a blender or food processor.
    Add the coconut cream, maple syrup or agave nectar, lemon juice, pinch of salt, and vanilla extract (if using) to the blender.
    Blend the mixture on high speed until it becomes smooth and creamy. You might need to pause and scrape down the sides of the blender as needed.
    Adjust Sweetness:

    Taste the mixture and adjust the sweetness if necessary by adding more maple syrup or agave nectar.
    Freeze Gelato:
    Once the mixture is well blended and sweetened to your liking, transfer it to a freezer-safe container.
    Cover the container and place it in the freezer for about 4-6 hours, or until the gelato is firm.
    Every hour during the freezing process, take the container out and give the gelato a good stir to prevent ice crystals from forming and to ensure a creamy texture.
    Serve:
    When the Vegan Mango Gelato is completely frozen and has reached the desired consistency, scoop it into bowls or cones and serve immediately.
    Nutrition Facts (Per Serving, approx. 1/4 of the recipe):
    Calories: 130
    Total Fat: 4g
    Saturated Fat: 3g
    Cholesterol: 0mg
    Sodium: 4mg
    Total Carbohydrate: 26g
    Dietary Fiber: 2g
    Total Sugars: 21g
    Protein: 1g
    Tips:
    Ripe Mangoes: Ensure the mangoes are fully ripe for the best flavor and sweetness.
    Creamier Texture: Stirring the gelato periodically while freezing helps prevent ice crystals and ensures a smoother texture.
    Variations: Experiment with other fruits like strawberries or peaches for different flavors.
    Enjoy this refreshing and creamy Vegan Mango Gelato as a delightful treat to cool off on a hot day!

  • Caramelized Banana Cream Dessert

    Caramelized Banana Cream Dessert

    Caramelized Banana Cream Dessert

    This Caramelized Banana Cream Dessert is a luscious treat that combines the sweetness of caramelized bananas with a silky custard cream. Topped with a light whipped mixture and a dusting of cocoa powder, it’s the perfect dessert for any occasion.

    Preparation Time

      • Prep Time: 15 minutes
      • Cooking Time: 25 minutes
      • Chilling Time: 1 hour
      • Total Time: 1 hour 40 minutes

    Ingredients

    For the Caramelized Bananas:

      • 3 bananas
    • 30 g butter

    For the Custard Cream:

      • 150 ml milk
    • 40 g cornstarch
    • 100 ml milk (for cornstarch mixture)

    For the Whipped Cream Layer:

    • 200 ml heavy cream (33% fat)
    • 150 g condensed milk

    For Topping:

    • Cocoa powder

    Directions

      1. Caramelize the Bananas:
          • Slice the bananas into rounds.
        • Melt 30 g of butter in a non-stick pan over low heat.
        • Add the banana slices and cook for 10 minutes on low heat, flipping occasionally, until golden and caramelized.
      1. Prepare the Custard Cream:
          • In a saucepan, heat 150 ml of milk over medium heat.
          • In a separate bowl, mix 40 g of cornstarch with 100 ml of milk until smooth.
          • Slowly pour the cornstarch mixture into the heated milk, stirring constantly.
        • Cook over medium heat until the mixture thickens, then remove from heat.
        • Cover the custard with plastic wrap directly on the surface to prevent a skin from forming. Chill in the refrigerator.
      1. Whip the Cream:
        • In a mixing bowl, whip 200 ml of heavy cream until soft peaks form.
        • Gradually add 150 g of condensed milk and whip until stiff peaks form.
    1. Assemble the Dessert:
        • In serving glasses or bowls, layer the caramelized bananas at the bottom.
        • Add a layer of the chilled custard cream.
        • Top with the whipped cream and condensed milk mixture.
        • Dust the top with cocoa powder for a decorative touch.
        • Chill in the refrigerator for at least 1 hour before serving.Finish and Chill:

    Serving Suggestions

      • Garnish with fresh mint leaves or banana slices for added elegance.
    • Serve with a side of biscotti or shortbread cookies for crunch.
    • Pair with a cup of espresso or tea for a delightful experience.

    Cooking Tips

      • Use ripe bananas for optimal sweetness and caramelization.
      • Stir the custard constantly to prevent lumps from forming.
      • Chill the cream thoroughly before whipping for the best consistency.

    Nutritional Benefits

      • Bananas: Provide potassium and natural sweetness.
      • Milk and Cream: Source of calcium and protein.
    • Cocoa Powder: Adds antioxidants and rich flavor.

    Dietary Information

      • Contains dairy and gluten-free if cornstarch is gluten-free.

    Storage Tips

      • Store leftovers in the refrigerator for up to 2 days.
      • Serve chilled; do not freeze, as the texture may change.

    Why You’ll Love This Recipe

      • Easy to make with simple ingredients.
      • Combines creamy textures with caramelized banana sweetness.
    • Perfect for both casual and special occasions.
  • Cake in 15 minutes! The famous cake that drives the whole world crazy! Better than apple pie

    Cake in 15 minutes! The famous cake that drives the whole world crazy! Better than apple pie

    Cake in 15 minutes! The famous cake that drives the whole world crazy! Better than apple pie
    Table of Contents
    Picture this: You’re craving something sweet, but you don’t want to spend hours in the kitchen. Fear not! This 15-minute cake recipe is here to save the day. With simple ingredients and easy steps, you’ll be indulging in a moist, flavorful cake in no time.

    Ingredients
    For the cake:

    1 2/3 cups (about 200 g) of flour
    7 tablespoons (about 100 ml) of seed oil
    3/4 cup minus 1 tablespoon (about 75 g) of powdered sweetener (or alternatively 3/4 cup (about 150 g) of normal sugar)
    1/4 cup plus 1 1/2 teaspoons (about 70 ml) of milk
    1 1/2 teaspoons of baking powder
    1 1/2 teaspoons of vanilla sugar
    3 eggs
    1 pinch of salt
    Enough icing sugar for dusting
    For the cream:

    8.8 ounces (about 250 g) of light cheese (such as light cream cheese)
    1 teaspoon of vanilla sugar
    2 teaspoons of powdered sweetener (or 2 tablespoons regular sugar)
    1 tablespoon cornstarch
    1 egg
    Preparation: Making the Dough
    Mixing the Batter
    Let’s kick things off by cracking those eggs into a bowl. Add a pinch of salt and your choice of sweetener, then whisk until frothy. Next, incorporate the oil and milk, followed by the flour, baking powder, and vanilla sugar. Mix thoroughly to avoid lumps.

    See also So tasty and easy
    Preparing the Mold
    Line a 22×22 centimeter square mold with parchment paper, then pour the batter and level it evenly. Set it aside for now.

    Preparation: Making the Cream
    Creamy Goodness
    In a bowl, combine the light cheese, egg, sweetener, corn starch, and vanilla sugar. Blend until smooth and creamy. Transfer the mixture into a piping bag for easy application.

    Assembling the Cake
    Decorating with Cream
    Now comes the fun part! Use the piping bag to garnish the cake batter in a checkerboard pattern. Get creative with your design!

    Baking the Cake
    Time to Bake
    Preheat your oven to 180°C and bake the cake for 30-35 minutes. Once done, remove it from the mold and dust it with icing sugar for that final touch.

    Conclusion
    In just 15 minutes, you’ve whipped up a cake that rivals even the most time-consuming desserts. With its fluffy texture and creamy topping, this cake is sure to become a household favorite. Say goodbye to lengthy baking sessions and hello to quick, delicious treats!

  • Tropical Delight: Fruity Tapioca Jelly Drink

    Tropical Delight: Fruity Tapioca Jelly Drink

    This refreshing Fruity Tapioca Jelly Drink is a delightful and colorful treat that’s perfect for any occasion. With a combination of jelly, fruit, cream, and tapioca pearls, it’s a fun and tasty beverage that everyone will love.

    Ingredients
    4 cups water
    1/4 cup white sugar
    25 grams white unflavored jelly powder
    835 grams fruit cocktail (can be substituted with any fresh fruits you like)
    250 ml all-purpose cream or heavy cream
    300 ml condensed milk
    2 cups evaporated milk or fresh milk
    Red food coloring
    Yellow food coloring
    Green food coloring
    1 cup cooked small tapioca pearls
    Preparation Time:

    Prep Time: 20 minutes
    Cook Time: 15 minutes
    Chill Time: 1 hour
    Total Time: 1 hour 35 minutes

    Instructions:

    Prepare the Jelly:
    In a pot, bring 4 cups of water to a boil.

    Add 1/4 cup white sugar and 25 grams of white unflavored jelly powder to the boiling water. Stir until completely dissolved.
    Divide the jelly mixture into three separate bowls.
    Add a few drops of red food coloring to the first bowl, yellow food coloring to the second bowl, and green food coloring to the third bowl. Stir each bowl until the color is evenly distributed.

    Pour each colored jelly mixture into separate shallow containers and let them cool to set. Once set, cut the jelly into small cubes.
    Mix the Drink:
    In a large mixing bowl, combine the 250 ml of all-purpose cream or heavy cream, 300 ml of condensed milk, and 2 cups of evaporated milk or fresh milk. Mix well until smooth.
    Add the fruit cocktail (or your choice of fresh fruits) to the cream mixture. Stir to combine.
    Gently fold in the cooked small tapioca pearls and the colored jelly cubes.
    Serve:
    Pour the fruity tapioca jelly drink into serving glasses.
    Chill in the refrigerator for at least 1 hour before serving to allow the flavors to meld together.
    Serve cold and enjoy!

    Serving Suggestions:
    Serve as a refreshing dessert or snack on a hot day.
    Garnish with fresh mint leaves or extra fruit pieces for added presentation.
    Cooking Tips:
    Make sure the jelly is fully set before cutting into cubes to maintain its shape in the drink.
    Adjust the sweetness to your liking by adding more or less condensed milk.
    Nutritional Benefits:
    Provides a source of vitamins and minerals from the fruit.
    Contains calcium and protein from the milk and cream.
    Tapioca pearls add a fun texture and a bit of fiber.
    Dietary Information:
    Contains dairy.
    Can be made gluten-free by ensuring all ingredients are certified gluten-free.
    Storage:
    Store any leftovers in an airtight container in the refrigerator for up to 2 days.
    Why You’ll Love This Recipe:
    It’s a fun and colorful drink that’s sure to delight both kids and adults.
    Easy to make with simple ingredients.
    Perfect for parties, gatherings, or just a refreshing treat at home.
    Conclusion:
    Enjoy this delightful Fruity Tapioca Jelly Drink as a fun and refreshing treat that’s perfect for any occasion. With its colorful jelly cubes, creamy base, and chewy tapioca pearls, it’s a unique and delicious beverage that’s sure to impress. Happy cooking and enjoy eating!

  • She’s 100 Years Old! She Drinks This Every Day & My Blood Pressure Became Normal – The Secret? OKRA!

    She’s 100 Years Old! She Drinks This Every Day & My Blood Pressure Became Normal – The Secret? OKRA!

    She’s 100 Years Old! She Drinks This Every Day & My Blood Pressure Became Normal – The Secret? OKRA!

    If you’re dealing with high blood pressure, okra water could be the natural solution you’ve been looking for! This simple yet powerful drink has been used for generations to support heart health, lower blood pressure, and cleanse the body. And the most inspiring part? A 100-year-old woman swears by it!

    Why Okra Water Helps Lower Blood Pressure Naturally

    Packed with Potassium & Magnesium – Helps relax blood vessels, promoting better circulation and naturally reducing blood pressure.

    Detoxifies & Lowers Cholesterol – The soluble fiber in okra aids in flushing out excess cholesterol and fat from the arteries.

    Balances Blood Sugar Levels – Slows sugar absorption, preventing spikes that can contribute to high blood pressure.

    Aids Digestion & Reduces Bloating – Supports gut health, improves digestion, and prevents constipation.

    Strengthens Immunity & Reduces Inflammation – Rich in antioxidants, okra helps combat inflammation and boost immune function.

    100-Year-Old Woman’s Okra Water Recipe for Blood Pressure Control

    Ingredients:

    • 4–5 fresh okra pods
    • 1 cup of water
    • ½ teaspoon lemon juice (optional, for taste)

    How to Prepare:

    1. Rinse the okra pods and trim both ends.

    2. Slice them in half lengthwise and place them in a glass.

    3. Pour water over the okra and let it soak overnight (8–12 hours).

    4. In the morning, remove the okra and drink the infused water on an empty stomach.

    When to Expect Results

    Some people notice improvements in blood pressure within a week.

    For long-term benefits, drink it daily for at least 2–3 weeks.

    Final Thoughts

    Okra water is a simple, natural, and effective way to support heart health, aid digestion, and detoxify the body. If a 100-year-old woman swears by it, why not give it a try?

  • Sage Chicken Meatballs with Creamy Parmesan Orzo

    Sage Chicken Meatballs with Creamy Parmesan Orzo

    When it comes to creating a delicious, wholesome meal, this recipe for Sage Chicken Meatballs with Creamy Parmesan Orzo is a standout choice. Packed with herbs, rich flavors, and comforting textures, it’s a dish that can turn an ordinary dinner into an extraordinary culinary experience. Below, we’ll dive into the step-by-step process of preparing this delightful meal.


    Why You’ll Love This Recipe

    This recipe is perfect for weeknight dinners or special occasions, offering a delightful combination of hearty chicken meatballs and creamy orzo pasta. Here’s why it’s a favorite:

    • Herbaceous and Flavorful: Fresh sage and parsley bring a burst of earthy and aromatic notes.
    • Creamy Comfort: The Parmesan orzo adds richness and indulgence to the dish.
    • Family-Friendly: Even picky eaters will fall in love with these tender meatballs and cheesy pasta.

    Ingredients You’ll Need

    For the Meatballs:

    • ¼ cup breadcrumbs
    • 1 egg
    • 2 Tbsp. butter, melted
    • 1 shallot, minced
    • 4 garlic cloves, minced
    • 1 tsp. Italian seasoning
    • ½ tsp. garlic powder
    • ¼ tsp. crushed red pepper flakes (optional)
    • ¼ cup grated Parmesan cheese
    • 2 Tbsp. fresh sage, minced
    • 2 Tbsp. fresh parsley, minced
    • ½ tsp. salt
    • ⅛ tsp. black pepper
    • 1 lb. ground chicken

    For the Parmesan Orzo:

    • 1 cup orzo pasta
    • 16 oz. chicken or vegetable broth
    • 2 Tbsp. butter
    • 2 Tbsp. shallot, minced
    • 2 Tbsp. sage leaves, minced
    • ½ cup grated Parmesan cheese
    • ¼ cup heavy cream
    • 2 Tbsp. parsley, minced
    • 4 oz. fresh spinach

    How to Prepare Sage Chicken Meatballs

    1. Preheat the Oven

    Start by preheating your oven to 400°F (200°C). Lightly grease a baking sheet or line it with parchment paper to prevent sticking.

    2. Mix the Meatball Ingredients

    In a large bowl, combine the following ingredients:

    • Breadcrumbs
    • Egg
    • Melted butter
    • Minced shallot and garlic
    • Italian seasoning
    • Garlic powder
    • Crushed red pepper flakes (optional)
    • Grated Parmesan cheese
    • Minced sage and parsley
    • Salt and black pepper

    Mix these ingredients thoroughly until well combined.

    3. Form the Meatballs

    Add the ground chicken to the bowl and gently mix with your hands until just combined. Avoid overmixing, as it can result in dense meatballs. Shape the mixture into 1-inch balls and place them on the prepared baking sheet.

    4. Bake to Perfection

    Bake the meatballs in the preheated oven for about 20 minutes, or until they reach an internal temperature of 165°F (74°C). Once done, remove them from the oven and set aside.

    How to Prepare Creamy Parmesan Orzo

    1. Cook the Orzo

    In a large pot, bring the chicken or vegetable broth to a boil. Add the orzo, reduce the heat to a simmer, and cover. Let it cook for about 10 minutes, stirring occasionally, until the pasta is tender and most of the liquid is absorbed.

    2. Prepare the Sauce

    In a separate skillet, melt the butter over medium heat. Add the minced shallot and sage, sautéing for about 2 minutes until fragrant. Reduce the heat to low to avoid burning.

    3. Combine and Finish

    Add the cooked orzo to the skillet and stir in:

    • Grated Parmesan cheese
    • Heavy cream
    • Fresh spinach
    • Parsley

    Stir until the cheese melts and the spinach wilts, creating a silky, creamy sauce.


    Plating and Serving

    To serve, spoon the creamy Parmesan orzo onto plates or into bowls. Place the baked sage chicken meatballs on top, and garnish with extra grated Parmesan and minced sage for a final touch of elegance.


    Pro Tips for Success

    • Use Fresh Herbs: Fresh sage and parsley elevate the flavors in this dish, so avoid substituting with dried herbs unless absolutely necessary.
    • Don’t Overcook the Meatballs: Use a meat thermometer to ensure they are cooked through but still juicy.
    • Customize the Orzo: Add roasted vegetables like cherry tomatoes or mushrooms for extra flavor and texture.

    Nutritional Information

    This recipe serves 4 and is approximately 450 calories per serving. It’s a balanced meal that provides protein, healthy fats, and carbohydrates, making it a satisfying choice for lunch or dinner.


    Frequently Asked Questions

    Can I make this recipe gluten-free?

    Yes! Substitute the breadcrumbs with gluten-free breadcrumbs and use gluten-free pasta instead of orzo.

    Can I use another type of ground meat?

    Absolutely. Ground turkey or lean ground beef can work well as substitutes for chicken.

    How do I store leftovers?

    Store any leftovers in an airtight container in the refrigerator for up to 3 days. Reheat in a skillet over low heat, adding a splash of cream or broth to restore the sauce’s creaminess.


    Conclusion

    This recipe for Sage Chicken Meatballs with Creamy Parmesan Orzo is a true comfort food masterpiece, combining herb-infused meatballs with a rich, cheesy pasta. Whether you’re cooking for your family or hosting a dinner party, this dish is sure to impress. Give it a try and experience the perfect balance of flavors and textures. Bon appétit!


  • Elegant Ricotta and Spinach Quiche

    Elegant Ricotta and Spinach Quiche

    Whether you’re hosting a brunch, seeking a luxurious weekday dinner, or simply looking to impress, the Elegant Ricotta and Spinach Quiche offers a delightful blend of flavors and textures that elevate it from a mere meal to a culinary experience. This quiche combines the creamy richness of ricotta cheese with the fresh zest of spinach, encased in a perfectly flaky crust. In this blog post, I’ll walk you through the steps to create this elegant dish, share useful tips and variations, and answer some frequently asked questions to help you achieve the best results.

    Who Should Try This Recipe?

    This recipe is ideal for anyone who appreciates the finer things in life but doesn’t want to spend hours in the kitchen. Whether you are a busy professional looking for a quick yet refined meal, a home cook wanting to expand your culinary repertoire, or a host aiming to dazzle your guests, this quiche fits all occasions. Its simplicity, combined with the sophisticated flavors, makes it suitable for both beginners and experienced cooks.

    Why This Quiche Stands Out

    The Elegant Ricotta and Spinach Quiche is not just another quiche. It is a testament to the harmony of simple ingredients coming together to create something spectacular. The mild, creamy texture of ricotta provides a perfect contrast to the savory depth of the sautéed spinach and onion, while the nutmeg adds a subtle warmth that ties everything together beautifully.

    Necessary Kitchen Equipment

    To prepare this quiche, you’ll need a few basic kitchen tools:

    • A 9-inch quiche dish or pie plate
    • Rolling pin (if using homemade pie crust)
    • Skillet for sautéing
    • Mixing bowl
    • Whisk or fork
    • Measuring cups and spoons
    • Knife and chopping board

    Step-by-Step Directions

    Preparing the Base

    Start by preheating your oven to 375°F (190°C). Roll out your pie crust on a lightly floured surface to fit a 9-inch quiche dish. Gently press the crust into the dish, making sure it is even. Prick the bottom with a fork to prevent bubbling, and pre-bake for 8 minutes.

    Cooking the Filling

    While the crust is baking, heat a tablespoon of olive oil in a skillet over medium heat. Add the finely chopped onion, cooking until it becomes translucent. Then, incorporate the chopped spinach, cooking just until wilted. Let this mixture cool off the heat.

    Combining the Ingredients

    In a large bowl, whisk together the ricotta cheese, eggs, heavy cream, grated Parmesan cheese, a pinch of salt, pepper, and nutmeg. Stir in the cooled spinach and onion mixture until everything is well combined.

    Baking

    Pour the filling into the pre-baked crust and return it to the oven. Bake for 35-40 minutes, or until the quiche is set and the top is golden brown. Let it cool for a few minutes before serving.

    Tips and Variations

    • Crust Variations: For a gluten-free option, use a gluten-free pie crust. Alternatively, for a lower carb version, skip the crust altogether and bake the filling in a well-greased pie plate.
    • Cheese Swaps: Feel free to substitute part of the ricotta with cottage cheese for a different texture, or add some feta for a tangier taste.
    • Adding Proteins: Incorporate cooked bacon bits or diced ham for an extra layer of flavor.
    • Vegetable Add-ins: Mushrooms, bell peppers, or artichokes also make great additions to this quiche.

    Storing Leftovers

    Leftover quiche can be covered and refrigerated for up to 3 days. Reheat in the oven at 350°F until warmed through. For longer storage, freeze the quiche for up to a month and thaw in the refrigerator overnight before reheating.

    Food and Drink Pairings

    This quiche pairs wonderfully with a light salad, such as a spring mix with a vinaigrette dressing, to keep the meal refreshing and balanced. For drinks, a crisp white wine like Sauvignon Blanc complements the creamy texture of the quiche beautifully.

    FAQ

    Q: Can I make this quiche ahead of time?
    A: Yes, you can prepare the quiche a day in advance and reheat it before serving.

    Q: How do I know when the quiche is done?
    A: The quiche is done when the center is set and no longer jiggles when you gently shake the dish.


    Conclusion and Call to Action

    Crafting an Elegant Ricotta and Spinach Quiche is an enjoyable experience with delicious rewards. It’s a versatile dish that suits various dietary needs and preferences. Try making it for your next gathering or a fancy yet effortless dinner at home. If you enjoyed this recipe, please share it on social media and subscribe to our blog for more gourmet recipes and cooking tips. Your support helps us bring more great content to food lovers like you!

    Ingredients

    1 pie crust (store-bought or homemade)
    1 tablespoon olive oil
    1 small onion, finely chopped
    2 cups fresh spinach, chopped
    1 cup ricotta cheese
    3 large eggs
    1 cup heavy cream
    1/2 cup grated Parmesan cheese
    Salt and pepper to taste
    A pinch of nutmeg

    Instructions

    Preheat oven to 375°F (190°C).
    Roll out the pie crust and press it into a 9-inch quiche dish or pie plate. Prick the bottom with a fork. Pre-bake the crust for 8 minutes. Remove from oven.
    In a skillet, heat olive oil over medium heat. Add the onion and sauté until translucent, about 5 minutes. Add the spinach and cook until wilted, about 2 minutes. Remove from heat and let cool.
    In a large bowl, mix together the ricotta cheese, eggs, heavy cream, Parmesan cheese, salt, pepper, and nutmeg until well combined. Stir in the cooled spinach and onion mixture.
    Pour the filling into the pre-baked crust. Bake for 35-40 minutes, or until the quiche is set and the top is golden brown.
    Let the quiche cool for a few minutes before slicing. Serve warm or at room temperature.
  • Zucchini Pizza Crust: A Healthy, Delicious Alternative to Traditional Pizza

    Zucchini Pizza Crust: A Healthy, Delicious Alternative to Traditional Pizza

    Zucchini Pizza Crust: A Healthy, Delicious Alternative to Traditional Pizza
    Ingredients
    For one 12-inch pizza crust:

    1 large zucchini (approximately 300g)
    4 tablespoons (30g) oat flour
    3.5 ounces (100g) grated mozzarella cheese
    2 large eggs
    1/2 teaspoon salt
    1/4 teaspoon freshly ground black pepper
    Optional: 1/2 teaspoon dried Italian herbs (oregano, basil, thyme)
    Step-by-Step Instructions
    1. Preparing the Zucchini
    The key to a crispy zucchini crust lies in properly preparing the zucchini. Here’s how I do it:

    I start by washing the zucchini thoroughly under cool running water.
    Using a box grater or food processor with a grating attachment, I grate the entire zucchini, including the skin. The skin adds extra nutrients and a nice green color to the crust.
    I transfer the grated zucchini to a large bowl and sprinkle it with 1/2 teaspoon of salt. I mix it well and let it sit for about 5 minutes. This process, known as degorging, helps draw out excess moisture from the zucchini.
    After 5 minutes, I transfer the grated zucchini to a clean kitchen towel or cheesecloth. I gather the edges of the towel and squeeze as much liquid as possible out of the zucchini. This step is crucial for achieving a crispy crust, so I make sure to squeeze out as much liquid as I can.
    2. Mixing the Crust Ingredients
    Now that the zucchini is prepared, it’s time to make the crust mixture:

    In a large mixing bowl, I combine the drained zucchini, 4 tablespoons of oat flour, 3.5 ounces of grated mozzarella cheese, 2 eggs, and 1/4 teaspoon of freshly ground black pepper. If I’m using dried Italian herbs, I add them at this stage too.
    Using a fork or my hands, I mix all the ingredients thoroughly until they’re well combined. The mixture should be slightly wet but hold together when squeezed.
    3. Shaping and Baking the Crust
    With the crust mixture ready, it’s time to shape and bake it:

    Healthy Apple Cottage Cheese Biscuits
    I preheat my oven to 180°C (350°F).
    On a baking sheet, I spread a piece of parchment paper and lightly grease it with olive oil or cooking spray.
    I transfer the zucchini mixture to the center of the parchment paper and use my hands to spread it into a circle about 12 inches in diameter. I make sure the thickness is even throughout for uniform baking.
    Using my fingers, I create a slightly raised edge around the perimeter of the crust to hold the toppings.
    I place the baking sheet with the crust into the preheated oven and bake for about 20 minutes, or until the edges start to turn golden brown and the center feels set when lightly touched.
    4. Adding Toppings and Final Baking
    Once the crust is golden and set, it’s ready for toppings:

    I remove the crust from the oven and add my desired toppings. This is where you can get creative! I often use a light spread of tomato sauce, additional cheese, and vegetables like bell peppers, mushrooms, and onions.
    I return the pizza to the oven and bake for an additional 10-15 minutes, or until the cheese is melted and bubbly and the toppings are cooked to my liking.
    Once done, I remove the pizza from the oven and let it cool for a few minutes before slicing. This helps the crust set further and makes it easier to cut and serve.
    Nutrition Information
    This recipe yields one 12-inch pizza crust, which typically serves 4. Per serving (1/4 of the crust, without additional toppings):

    Calories: 150
    Total Fat: 9g
    Saturated Fat: 4g
    Cholesterol: 110mg
    Sodium: 400mg
    Total Carbohydrates: 8g
    Dietary Fiber: 2g
    Sugars: 2g
    Protein: 11g
    Please note that these values are approximate and may vary based on specific ingredients used and additional toppings.

    Health Benefits
    This zucchini pizza crust offers numerous health benefits compared to traditional pizza:

    Baked Potatoes with Garlic and Butter
    Low in Carbohydrates: With only 8g of carbs per serving, it’s an excellent option for those following low-carb or keto diets.
    High in Nutrients: Zucchini is rich in vitamins A and C, potassium, and antioxidants. It also provides a good amount of fiber, which aids digestion and promotes feelings of fullness.
    Protein-Rich: Thanks to the eggs and cheese, this crust provides a good amount of protein, which is essential for muscle health and satiety.
    Gluten-Free: For those with gluten sensitivities or celiac disease, this crust offers a safe and delicious pizza option.
    Lower in Calories: Compared to traditional pizza crusts, this zucchini version is significantly lower in calories, making it a great choice for those watching their calorie intake.
    Variations and Customizations
    The beauty of this zucchini pizza crust lies in its versatility. Here are some variations you might enjoy:

    Dairy-Free Version: Replace the mozzarella cheese with a dairy-free alternative or nutritional yeast for a vegan-friendly option.
    Spice it Up: Add red pepper flakes or cayenne pepper to the crust mixture for a spicier base.
    Herb Infusion: Experiment with different herbs in the crust. Fresh basil, rosemary, or thyme can add wonderful flavors.
    Veggie Mix: Try mixing in other grated vegetables like carrots or summer squash for added nutrition and color.
    Mini Pizzas: Instead of one large crust, shape the mixture into several smaller rounds for individual pizzas or appetizers.
    Tips for Success
    To ensure your Zucchini Pizza Crust turns out perfectly every time, keep these tips in mind:

    Squeeze Out All the Moisture: This is crucial for a crispy crust. Don’t skimp on this step!
    Even Thickness: Spread the mixture as evenly as possible for uniform cooking.
    Parchment Paper is Your Friend: It prevents sticking and makes transferring the pizza easier.
    Pre-bake Thoroughly: Make sure the crust is golden and set before adding toppings to prevent a soggy center.
    Let it Rest: Allow the pizza to cool for a few minutes after baking. This helps the crust set and makes it easier to slice and handle.
    In conclusion, this Zucchini Pizza Crust is a game-changer for pizza lovers looking for a healthier alternative. It’s a delicious way to incorporate more vegetables into your diet without sacrificing the joy of pizza night. Whether you’re following a specific diet plan or simply looking to make more nutritious choices, this recipe offers a satisfying, customizable option that the whole family can enjoy. So, fire up your oven and get ready to rediscover pizza in a whole new, healthier light!

  • Irresistible Chicken Patties with Mozzarella: A Family Favorite Recipe

    Irresistible Chicken Patties with Mozzarella: A Family Favorite Recipe

    Irresistible Chicken Patties with Mozzarella: A Family Favorite Recipe

    Ingredients

      • 30 grams (1/4 cup) green onions, finely chopped
      • 500 grams (1 lb) chicken breast, finely diced or ground
      • 2 tablespoons sour cream
      • 2 large eggs
      • 2 tablespoons fresh parsley, chopped
      • 80 grams (3/4 cup) mozzarella cheese, shredded
      • 2 tablespoons all-purpose flour
      • Salt and pepper to taste
      • 1/2 teaspoon dry garlic powder
      • 1/2 teaspoon paprika
      • Oil for frying

    Instructions

      1. Prepare the Ingredients:
        • Finely chop 30 grams of green onions and 2 tablespoons of fresh parsley. Set aside.
        • Dice or grind 500 grams of chicken breast into small pieces. Place it in a large mixing bowl.
      1. Combine Ingredients:
        • To the bowl with the chicken, add 2 tablespoons of sour cream and 2 large eggs. Mix well to combine.
        • Add the chopped green onions, parsley, and 80 grams of shredded mozzarella cheese. Stir everything together.
      1. Add Dry Ingredients and Seasonings:
        • Sprinkle in 2 tablespoons of flour, salt, and pepper to taste. Add 1/2 teaspoon each of dry garlic powder and paprika.
        • Mix all ingredients thoroughly until they are well incorporated. The mixture should be slightly sticky but hold together.
    1. Form the Patties:
      • Using your hands or a spoon, scoop out portions of the mixture and shape them into patties, about 2-3 inches in diameter.
    2. Fry the Patties:
        • Heat oil in a large skillet over medium heat. Once hot, add the patties to the pan.


      • Fry the patties for 2-3 minutes on each side, or until they are golden brown and cooked through. Make sure not to overcrowd the pan; cook in batches if necessary.
    3. Serve and Enjoy:
        • Remove the patties from the pan and drain on paper towels to remove excess oil. Serve warm, garnished with extra parsley or green onions if desired. Enjoy them as a main dish with a side salad, rice, or vegetables!


    Cooking Tips

      • Ensure Even Cooking: Make sure your chicken pieces are finely diced or well-ground for even cooking. This will help the patties cook through without burning the outside.
      • Control the Heat: Fry over medium heat to ensure the patties are crispy on the outside and fully cooked on the inside. High heat may cause them to brown too quickly.
    • Customize Your Flavors: Feel free to add other herbs like dill or basil, or substitute mozzarella with cheddar or another favorite cheese.

    Nutritional Benefits

      • High in Protein: Chicken breast is a lean source of protein that helps in muscle building and repair.
      • Calcium-Rich: Mozzarella adds a good amount of calcium, which is vital for bone health.
    • Low-Carb Option: This recipe is relatively low in carbohydrates, making it suitable for those following a low-carb diet.

    Why You’ll Love This Recipe

      • Quick and Easy: Ready in under 30 minutes, perfect for busy weeknights.
      • Deliciously Cheesy: The mozzarella melts into the patties, giving them a gooey, cheesy center.
    • Customizable: Easily adjust the herbs and spices to suit your taste.
    • Crowd-Pleaser: Whether for family dinners or gatherings, these patties are always a hit!

    Dietary Information

      • Gluten-Free Option: Substitute flour with gluten-free flour or almond flour.
    • Keto-Friendly: With minor adjustments, such as using almond flour, this recipe can fit into a keto diet plan.
    • Nut-Free: This recipe contains no nuts, making it safe for those with nut allergies.