Crock Pot Marry Me Chicken![]()
![]()
Recipe
Ingredients:
4 chicken breasts, skin on or skinless
2 tsp Italian seasoning
Salt and pepper
1 tbsp unsalted butter
1 tsp olive oil (can omit if preferred)
½ cup (120ml) white wine + ½ cup water OR 1 cup (240ml) chicken broth
4 tbsp diced sun-dried tomatoes (drained)
1 tsp sweet paprika
1 tsp garlic granules
1 tsp chicken bouillon (if using wine)
1 cup (225g) sour cream or heavy cream
1 tbsp cornstarch diluted in 2 tbsp cold water (optional)
2-3 tbsp grated Parmesan cheese
2 tbsp flat leaf parsley or fresh basil, chopped
Directions:
Season the chicken breasts with salt and pepper and sprinkle with the dried Italian herbs.
Heat the butter and oil in a pan or directly in the slow cooker if it has a browning function. Pan fry, skin side down, until golden.
Turn the chicken breasts over (transfer to the slow cooker if not already using) and pour in the wine or chicken broth. Season with paprika, garlic granules, and add the sun-dried tomatoes.
Cover and cook on the LOW setting for 90 minutes – 2 hours or until the chicken registers an internal temperature of 165°F (75°C).
Optional: make a cornstarch slurry by mixing it with a little cold water and stir into the sauce ten minutes before cooking time is over. The cornstarch will need to be heated through to activate and thicken the sauce. If you are using sour cream, you can leave this out.
Pile the chicken to one side and stir in the sour cream or heavy cream until incorporated. Stir in the grated Parmesan cheese and fresh parsley.
Serve the chicken over rice or noodles, with mashed potatoes, or however you like!
Prep Time: 15 minutes | Cooking Time: 2 hours | Total Time: 2 hours 15 minutes
Kcal: 400 kcal | Servings: 4 servings
Blog
-

Crock Pot Marry Me Chicken
-

Homemade Garlic Butter Cheese Bombs
Homemade Garlic Butter Cheese BombsGolden, gooey, and packed with melty cheese and garlicky goodness—these irresistible cheese bombs are the ultimate crowd-pleasing snack or appetizer! Ingredients:1 can (16 oz) refrigerated biscuit dough1 cup shredded mozzarella cheese2 tbsp unsalted butter, melted3 cloves garlic, minced1 tbsp fresh parsley, chopped½ tsp garlic powder¼ tsp salt¼ tsp black pepper
 Instructions:
 Preheat and Prepare PanPreheat oven to 375°F (190°C).Grease a 9×13-inch baking dish or line with parchment paper.
 Shape the DoughOpen the can of biscuit dough and separate the biscuits.Flatten each biscuit round with your hands or a rolling pin.
 Stuff with CheesePlace 1 tbsp mozzarella in the center of each biscuit.Fold and pinch the edges to form sealed dough balls.
 Make the Garlic ButterIn a bowl, mix melted butter with:Minced garlicChopped parsleyGarlic powderSalt & pepper
 Assemble and BrushArrange the stuffed dough balls in your baking dish.Brush the tops generously with the garlic butter mixture.
 BakeBake for 15–18 minutes, until golden brown and the cheese is melted.
 Serve WarmGarnish with extra parsley if desired.Serve immediately while warm and gooey!
 -

Low Carb Cheesy Stuffed Meatloaf Bites
Low carb cheesy stuffed meatloaf bites offer a delicious twist on the traditional meatloaf recipe, making them ideal for anyone wanting to reduce their carbohydrate intake without compromising on taste. These bite-sized treats are baked in a muffin tin, which not only makes them convenient but also excellent for portion management. Derived from classic meatloaf—a beloved dish in numerous American homes—these bites feature a delightful cheesy surprise at their core. They are perfect for meal prep, family gatherings, or as appetizers for parties.
These meatloaf bites pair excellently with a fresh green salad or roasted vegetables to create a well-rounded meal. For a cozy side dish, you might serve them with creamy cauliflower mash or zesty coleslaw. If you’re hosting, presenting these bites with an assortment of dipping sauces, such as spicy ketchup, garlic aioli, or tangy mustard, can turn them into a hit among guests.
Ingredients
1 lb ground beef
1/2 cup almond flour
1/4 cup grated Parmesan cheese
1/4 cup chopped onion
1 clove garlic, minced
1 large egg
1/4 cup unsweetened almond milk
1 tablespoon Worcestershire sauce
1 teaspoon Italian seasoning
1/2 teaspoon salt
1/4 teaspoon black pepper
12 small cubes of cheddar cheese
DirectionsPreheat your oven to 375°F (190°C) and lightly grease a 12-cup muffin tin.
In a large bowl, mix together the ground beef, almond flour, Parmesan cheese, chopped onion, minced garlic, egg, almond milk, Worcestershire sauce, Italian seasoning, salt, and pepper until everything is well integrated.
Divide the meat mixture into 12 equal portions.
Take one portion and flatten it slightly in your hand, placing a cube of cheddar cheese in the center. Encapsulate the cheese by wrapping the meat around it to form a ball, then place it in a muffin cup. Repeat this with the remaining meat mixture and cheese cubes.
Bake in the preheated oven for 20-25 minutes, or until the meat is fully cooked and the tops are lightly browned.
Let the meatloaf bites cool for a few minutes before removing them from the muffin tin. Serve warm.
Variations & Tips
For a different flavor, consider using ground turkey or chicken instead of beef. You can also substitute with various cheeses like mozzarella or pepper jack for added flair. Incorporating finely chopped bell peppers or mushrooms into the meat mixture can provide extra flavor and texture. For a spicier dish, add a pinch of cayenne pepper or chopped jalapeños. If you’re aiming for a dairy-free option, try using a dairy-free cheese alternative. -

Quick and Easy 5-Minute Cupcake
Ingredients:
4 tablespoons all-purpose flour
4 tablespoons granulated sugar
2 tablespoons cocoa powder (for chocolate cupcakes, optional)
¼ teaspoon baking powder
Pinch of salt
3 tablespoons milk (any variety)
2 tablespoons vegetable oil (or melted butter)
1/4 teaspoon vanilla extract
Optional: chocolate chips, nuts, or dried fruits for added texture
Instructions:1. Gather and Prepare Ingredients:
In a large mixing bowl or a microwave-safe mug, combine the flour, sugar, cocoa powder (if making chocolate cupcakes), baking powder, and salt. Mix well with a fork or spoon to combine all the dry ingredients.
2. Add Wet Ingredients:Create a well in the center of the dry ingredients and add the milk, vegetable oil, and vanilla extract. Stir the mixture until smoothly combined and there are no lumps. If you want to add chocolate chips or any other mix-ins, fold them in at this stage.
3. Microwave the Cupcake:Place the cupcake mixture in the microwave. Cook on high for about 1 to 1.5 minutes, checking after 1 minute. Microwaves vary in power, so cooking time may differ; the cupcake is done when it has risen and is firm to the touch. Be careful not to overcook, as it can become dry.
4. Let It Cool:Allow the cupcake to cool for a minute after microwaving, as it will be very hot. If you made it in a mug, you can either eat it straight from there or carefully turn it out onto a plate.
5. Serve and Enjoy:You can enjoy the cupcake plain, or add a scoop of frosting or whipped cream on top. A dusting of powdered sugar or a drizzle of chocolate syrup can enhance its appearance and taste.
Tips for Customization:
Flavor Variations:For vanilla cupcakes, simply omit the cocoa powder and enjoy a classic flavor.
Try adding a sprinkle of cinnamon for a warm spice flavor or almond extract instead of vanilla for a different twist.
Toppings:Consider icing your cupcake with your favorite frosting after it has cooled completely, or drizzle with caramel or chocolate sauce.
Fresh fruit, such as sliced strawberries or raspberries, can also make a delicious topping.
Serving Size:This recipe makes one cupcake. If you want to make multiple cupcakes, simply multiply the ingredients by the desired number and cook them in separate mugs or bowls in batches.
Storage:
These cupcakes are best eaten fresh, but if you have leftovers, store them in an airtight container at room temperature for up to two days.
This 5-Minute cupcake recipe is perfect for a quick dessert or when you have a sudden craving for something sweet. With just a few simple ingredients and minimal effort, you can enjoy a delightful treat that melts in your mouth! Bake away, and let me know how your cupcakes turn out! -

ZUCCHINI PANCAKES
Ingredients:
500g zucchini
2 eggs
1 onion
salt
pepper
300ml milk
250g flour
150g cheese
Dill
cured ham
Indications:1. Wash the courgettes and grate them.
2. Beat the eggs in a bowl and pour them over the zucchini.
3. Cut the onion into cubes and add it to the zucchini.
4. Then add salt, pepper, milk and flour.
5. Mix grated cheese with dill.
6. Cook the pancakes and put them in the pan -
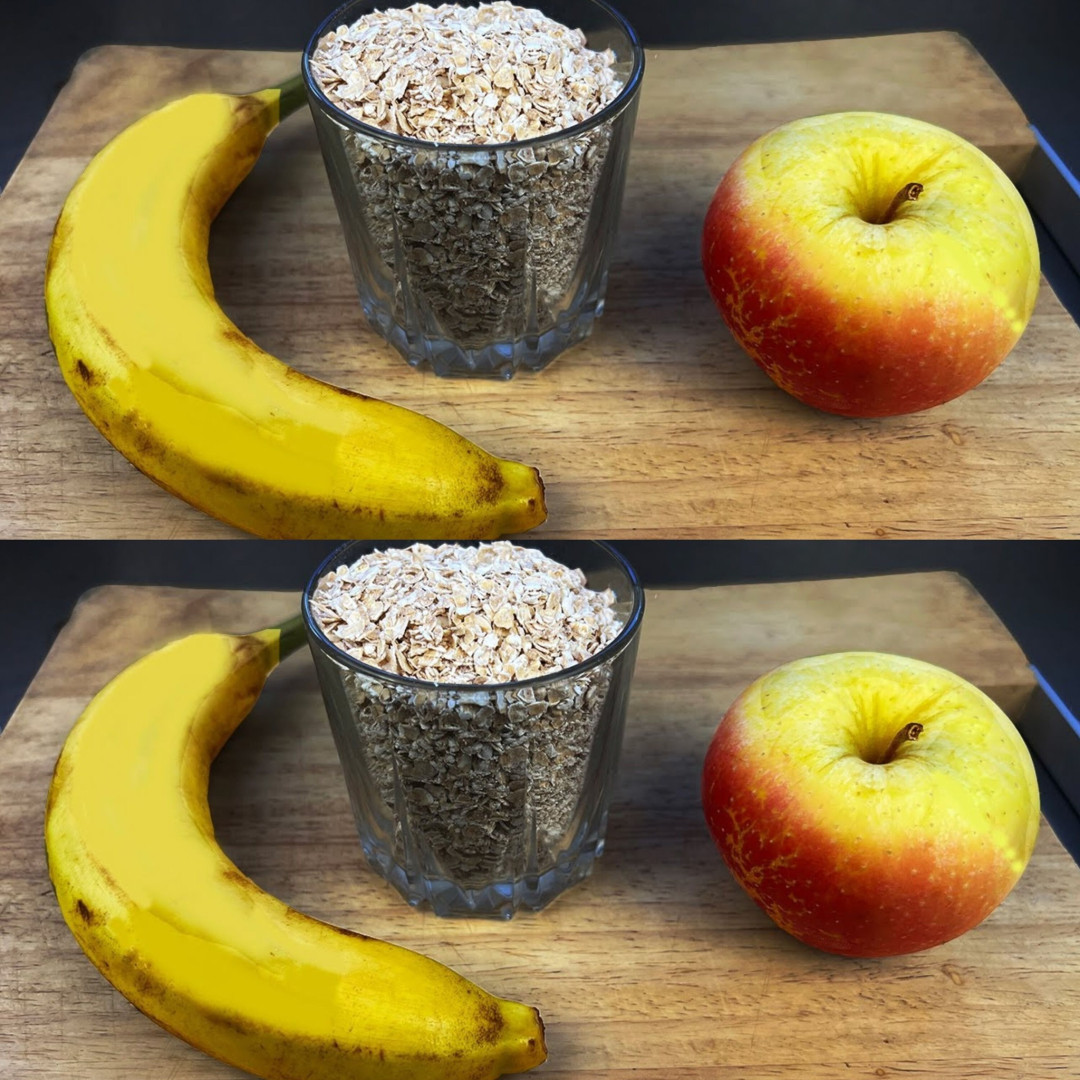
Do you have oatmeal, apples and bananas? Healthy breakfast recipe. In 5 minutes
5-Minute Healthy Oatmeal with Apples & Bananas
Ingredients:1/2 cup rolled oats
1 cup water or milk (your choice: dairy, almond, oat milk, etc.)
1 small apple (chopped)
1 ripe banana (sliced)
1/2 teaspoon cinnamon (optional, for extra flavor)
A handful of nuts or seeds (optional, for crunch)
Honey or maple syrup (optional, for sweetness)
Instructions:Cook the Oats:
In a small pot, bring the water or milk to a boil. Add the oats and reduce heat to low. Cook for 2-3 minutes, stirring occasionally.
Add Fruits:
Stir in the chopped apple and sliced banana while the oats are cooking. The heat will slightly soften the fruits, making them sweeter and creamier.
Flavor:
Sprinkle with cinnamon and stir well.
Serve:
Pour into a bowl. Top with nuts/seeds and a drizzle of honey or syrup if desired.
Why You’ll Love It:
✔ Ready in 5 minutes
✔ Packed with fiber, vitamins, and natural energy
✔ Naturally sweet, no need for added sugar
✔ Keeps you full & satisfied all morning -

Discover the Ultimate 3-Day Lemon & Carrot Liver & Gut Detox for Maximum Energy & Weight Loss
This simple, natural cleanse will boost your metabolism, improve digestion, and help you shed stubborn fat effortlessly!
Feeling sluggish, bloated, or low on energy lately? Sometimes your body whispers that it needs a gentle reset—without expensive supplements or harsh cleanses. Discover this easy, affordable, and natural detox using just two powerful ingredients: lemon and carrot. In just three days, you can reboot your gut and liver for improved health, boosted immunity, and a radiant glow!
Why Your Liver & Gut Deserve a Deep Cleanse
Your liver acts as the body’s detox powerhouse, filtering toxins, balancing nutrients, and breaking down fats. Your gut is crucial for digestion, immune health, and absorption of essential vitamins. Lifestyle choices like processed foods, stress, and environmental toxins overload these organs, leading to bloating, fatigue, skin issues, and sluggish metabolism.This superfood detox harnesses the natural cleansing power of lemon and carrot — known as detox smoothies for weight loss and liver detox drinks — designed to support healthy digestion, boost energy levels, and promote fat burning.
Why Lemon & Carrot Are Nature’s Detox Superfoods
Lemons
Rich in vitamin C, a powerful antioxidant for skin health and immunity
Supports liver detoxification and enhances hydration
Stimulates digestion, reduces bloating, and balances body pH
CarrotsLoaded with beta-carotene (vitamin A), essential for liver health
Promotes natural digestion and gut health
Low in calories, high in fiber for weight loss and fat metabolism
Together, lemon and carrot create a refreshing, antioxidant-rich detox drink that promotes fat loss, reduces inflammation, and clears skin.How to Prepare Your Power-Packed 3-Day Lemon & Carrot Detox Drink
Ingredients:1 large organic carrot, peeled and finely grated
Juice of 1 fresh organic lemon
8 oz warm filtered water
Optional: 1 teaspoon raw honey or natural sweetener
Preparation Steps:Grate the carrot into a glass jar or bowl.
Squeeze fresh lemon juice, removing seeds.
Mix the grated carrot and lemon juice with warm water in a glass.
Stir well, then add honey if desired for a touch of sweetness.
Drink this detox elixir first thing in the morning on an empty stomach for optimal results.
Tip: Repeat daily for three consecutive days to experience noticeable improvements in digestion, energy, and overall well-being.Supporting Tips for Maximum Detox Benefits
Stay super hydrated: Drink plenty of water to flush toxins.
Opt for a nutritious, clean diet: Think fresh fruits, leafy greens, and lean proteins.
♂️ Incorporate light movement: Walking, stretching, or yoga boosts circulation.
Prioritize sleep: Rest enables your body’s natural healing process.
What You Can Expect
This natural detox helps many people experience:✅ Reduced bloating and water retention
✅ Increased energy and mental clarity
✅ Enhanced digestion and metabolism
✅ Clearer, healthier skin
Remember, everyone’s body responds differently, but even a short reset can create space for a new vibrant you!Final Words: A Simple, Affordable Way to Rejuvenate Your Body Naturally ♀️
This lemon and carrot detox is a gentle yet effective way to support your liver detoxification and digestive health without expensive products or extreme fasting. In just three days, nourish your body, boost your energy, and step into your day feeling refreshed and radiant!Start your natural reset today and enjoy the health benefits for years to come!
Frequently Asked Questions
Q: Is this detox safe if I have a sensitive stomach?
A: Yes — start with smaller amounts and gradually increase. Always consult your healthcare provider if unsure.Q: Can I extend the detox beyond three days?
A: It’s best for short-term use; consult a professional before longer routines.Q: Can I add ingredients like ginger or turmeric?
A: Absolutely! Both add natural anti-inflammatory and digestive benefits. -

Classic Banana Milkshake Recipe
Classic Banana Milkshake Recipe
This recipe is for one serving. You can easily double or triple it for more servings.
Prep time: 2 minutes Cook time: 0 minutes Total time: 2 minutes
Ingredients:
- 1 large ripe banana (or 2 small ripe bananas), preferably frozen in chunks for a thicker, colder shake
- 1 cup (240ml) cold milk (dairy or non-dairy like almond milk, soy milk, oat milk)
- 1-2 tablespoons sugar or other sweetener (like honey, maple syrup, or agave nectar), to taste (optional, depending on banana ripeness and preference)
- 1/2 teaspoon vanilla extract (optional, but highly recommended for flavor)
- A few ice cubes (optional, if not using frozen banana or for an extra cold shake)
- Additional banana slices for garnish (optional)
Equipment:
- Blender
Instructions:
- Prepare the banana: If using a fresh banana, peel it and break it into a few pieces. If using a frozen banana, simply take it out of the freezer.
- Combine ingredients: Add the banana pieces, cold milk, sugar (if using), and vanilla extract (if using) to your blender. If you want a thicker, colder shake and aren’t using frozen banana, add a few ice cubes now.
- Blend: Secure the lid on your blender and blend on high speed until smooth and creamy. If the shake is too thick, add a little more milk, a tablespoon at a time, and blend again. If it’s too thin, you can add a few more frozen banana chunks or ice cubes and blend again.
- Taste and adjust: Taste the milkshake and add more sugar or sweetener if desired, then blend briefly to incorporate.
- Serve: Pour the banana milkshake into a tall glass. Garnish with a few fresh banana slices on the rim or floating in the shake, as shown in the image. Serve immediately and enjoy!
Tips for the Best Banana Milkshake:
- Frozen Bananas are Key: For the thickest, coldest, and creamiest milkshakes without watering them down with too much ice, use ripe bananas that you’ve peeled, sliced, and frozen beforehand.
- Ripeness Matters: Use very ripe bananas (those with brown spots) for the sweetest, most flavorful milkshake, reducing the need for added sugar.
- Adjust Sweetness: The amount of sugar needed will depend on the ripeness of your bananas and your personal preference.
- Add-ins: Get creative!
- Protein Boost: Add a scoop of your favorite protein powder.
- Nutty Flavor: A tablespoon of peanut butter or almond butter.
- Spice: A pinch of cinnamon or nutmeg.
- Chocolate: A tablespoon of cocoa powder or chocolate syrup for a chocolate banana milkshake.
- Oats: A few tablespoons of rolled oats for extra fiber and thickness.
-
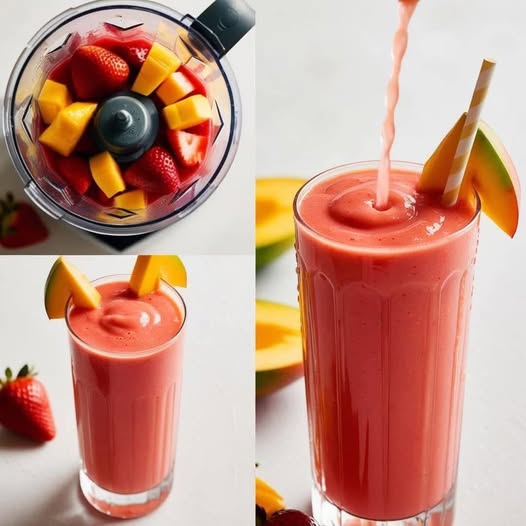
Strawberry Mango Smoothie
Strawberry Mango Smoothie
This vibrant and refreshing smoothie is packed with the sweet and tangy flavors of fresh strawberries and juicy mangoes. Perfect for a quick breakfast, a healthy snack, or a delicious way to cool down!
Yields: 1 serving Prep time: 5 minutes
Ingredients:
- 1 cup frozen strawberries (or fresh strawberries with 1/2 cup ice)
- 1 cup frozen mango chunks (or fresh mango with 1/2 cup ice)
- 1/2 cup liquid (such as water, milk, almond milk, coconut water, or orange juice – adjust for desired thickness)
- Optional: 1-2 teaspoons honey, maple syrup, or agave nectar (if you prefer it sweeter)
- Optional: A squeeze of lime or lemon juice for brightness
- Optional additions for extra nutrition:
- 1/2 ripe banana (for creaminess and natural sweetness)
- 1/4 cup Greek yogurt (for protein)
- 1 tablespoon chia seeds or flax seeds (for fiber and omega-3s)
- A handful of spinach (you won’t taste it!)
Instructions:
- Combine ingredients: Add the frozen strawberries, frozen mango chunks, and your chosen liquid to a high-speed blender.
- Blend: Start blending on low speed, gradually increasing to high. Blend until smooth and creamy, scraping down the sides of the blender with a spatula if needed.
- Adjust consistency: If the smoothie is too thick, add more liquid (a tablespoon at a time) and blend again until you reach your desired consistency. If it’s too thin, add a few more frozen fruit pieces or a handful of ice and blend again.
- Sweeten (optional): Taste the smoothie. If you prefer it sweeter, add honey, maple syrup, or agave nectar to taste and blend briefly to combine.
- Serve: Pour the smoothie into a tall glass.
- Garnish (optional): Garnish with a slice of fresh mango and a whole strawberry, and a fun straw, just like in the picture!
Tips for the perfect smoothie:
- Use frozen fruit: Frozen fruit is key for a thick, cold smoothie without needing too much ice, which can dilute the flavor.
- Adjust liquid: The amount of liquid you use will determine the thickness of your smoothie. Start with less and add more as needed.
- Layering: For best blending, add liquid first, then soft fruits/greens, and finally frozen fruits on top.
- Experiment: Don’t be afraid to adjust the ratios or add other fruits or ingredients to suit your taste!
Enjoy your delicious homemade strawberry mango smoothie!
-
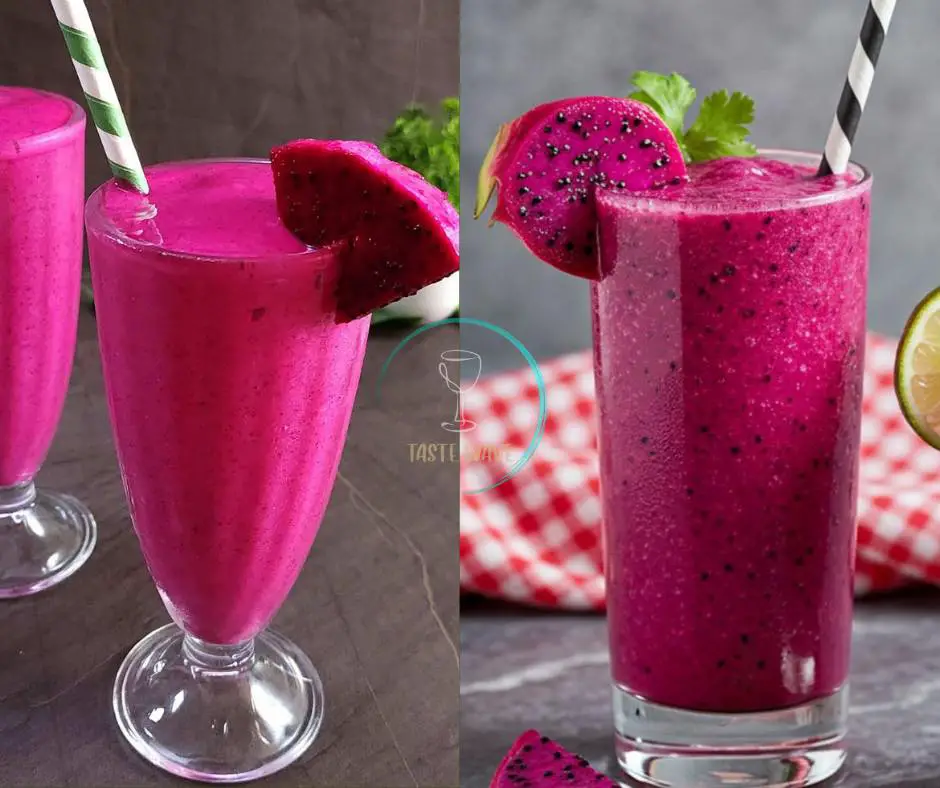
Dragon Fruit Smoothie Recipe
Dragon Fruit Smoothie Recipe
✅ Ingredients:
-
1 large pink dragon fruit (ripe, peeled and cubed)
-
1/2 cup plain yogurt (or plant-based yogurt for a vegan version)
-
1/2 cup milk (or almond/soy/coconut milk for dairy-free option)
-
1–2 tablespoons honey or maple syrup (optional, adjust to taste)
-
1/2 teaspoon vanilla extract (optional, for added flavor)
-
1/2 cup ice cubes (adjust based on preference)
-
Lime or lemon juice (optional, a squeeze for tanginess)
-
Fresh mint or coriander leaves (optional for garnish)
Instructions:
-
Prepare the fruit: Peel and cube the dragon fruit. You can use fresh or frozen fruit. Frozen gives a thicker, colder smoothie.
-
Blend: In a blender, add:
-
Dragon fruit cubes
-
Yogurt
-
Milk
-
Sweetener (honey/maple syrup)
-
Vanilla extract (optional)
-
Ice cubes
-
-
Blend until smooth: Blend on high speed for about 30–60 seconds until creamy and smooth. Adjust consistency by adding more milk if needed.
-
Taste and adjust: Taste the smoothie and add more sweetener or a splash of lime/lemon juice if desired.
-
Serve: Pour into glasses. Garnish with a slice of dragon fruit on the rim, fresh mint or coriander, and a straw.
-
-

Onion and Cumin Beef Stir-fry Recipe
Onion and Cumin Beef Stir-fry Recipe
-
Ingredients:
1 lb flank steak, thinly sliced against the grain1 large onion, sliced2 cloves garlic, minced1 tbsp fresh ginger, minced1 tbsp cumin seeds1 tsp ground cumin1/2 tsp red pepper flakes2 tbsp soy sauce1 tbsp oyster sauce1 tbsp vegetable oilSalt and pepper to tasteFresh cilantro for garnish (optional)-
Instructions:
-
1. Marinate the beef:In a bowl, combine the sliced beef with 1 tbsp soy sauce and 1/2 tsp ground cumin. Mix well and let it marinate for at least 15 minutes.2. Heat the oil:In a large skillet or wok over high heat, heat the vegetable oil.3. Cook the beef:Add the marinated beef to the skillet and stir-fry until browned on all sides. Remove the beef from the skillet and set aside.4. Sauté aromatics:Add the garlic, ginger, and cumin seeds to the skillet and cook for about 30 seconds, or until fragrant.5. Add onion:Add the sliced onion to the skillet and stir-fry for 2-3 minutes, or until softened.6. Return beef to skillet:Add the cooked beef back to the skillet and mix well with the onions.7. Season the stir-fry:Add the remaining soy sauce, oyster sauce, red pepper flakes, and salt and pepper to taste. Stir-fry for another 1-2 minutes to combine flavors.8. Garnish and serve:Garnish the stir-fry with fresh cilantro, if desired, and serve hot with rice
-
-

Tangy Sweet and Sour Meatballs
Ingredients:
1 pound ground beef
1/2 cup breadcrumbs
1/4 cup milk
1 egg
1/4 cup finely chopped onion
1/4 teaspoon garlic powder
1/2 teaspoon salt
1/4 teaspoon black pepper
1 tablespoon vegetable oil
Sauce:1 cup ketchup
1/2 cup brown sugar
1/4 cup white vinegar
1 tablespoon soy sauce
1 teaspoon cornstarch (optional, for thickening)Instructions:
In a large bowl, combine the ground beef, breadcrumbs, milk, egg, chopped onion, garlic powder, salt, and black pepper. Mix until well combined.
Shape the mixture into small meatballs, about 1 inch in diameter.
Heat the vegetable oil in a large skillet over medium heat. Add the meatballs and cook, turning occasionally, until browned on all sides and cooked through, about 10-12 minutes.
In a separate bowl, whisk together the ketchup, brown sugar, white vinegar, and soy sauce. If desired, add cornstarch to thicken the sauce.
Pour the sauce over the meatballs in the skillet. Stir gently to coat the meatballs evenly with the sauce.
Reduce the heat to low and simmer for 10 minutes, allowing the flavors to meld and the sauce to thicken. -
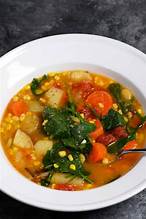
Hearty Vegetable Soup
Hearty Vegetable Soup
This comforting and nutritious soup is packed with fresh vegetables and a flavorful broth. It’s perfect for a light meal or a healthy appetizer.
Yields: 6-8 servings Prep time: 20 minutes Cook time: 30-40 minutes
Ingredients:
- 1 tablespoon olive oil
- 1 medium yellow onion, chopped
- 2 cloves garlic, minced
- 2 large carrots, peeled and sliced into rounds or half-moons
- 2 stalks celery, chopped (optional, but good for depth)
- 3 medium potatoes (e.g., Yukon Gold or red potatoes), peeled and cut into 1/2-inch cubes
- 1 (14.5-ounce) can diced tomatoes, undrained
- 4 cups vegetable broth (or chicken broth for a non-vegetarian option)
- 1 cup water (or more broth if preferred)
- 1 cup frozen corn kernels
- 5-6 ounces fresh spinach, roughly chopped
- 1 teaspoon dried thyme
- 1/2 teaspoon dried basil
- 1/4 teaspoon black pepper, or to taste
- 1/2 teaspoon salt, or to taste (adjust based on broth sodium content)
- Optional additions for serving: fresh parsley or dill, a sprinkle of Parmesan cheese, a crusty bread.
Instructions:
- Sauté Aromatics: Heat the olive oil in a large pot or Dutch oven over medium heat. Add the chopped onion and cook, stirring occasionally, until softened and translucent, about 5-7 minutes. Add the minced garlic and cook for another minute until fragrant, being careful not to burn it.
- Add Harder Vegetables: Stir in the sliced carrots and chopped celery (if using). Cook for 5 minutes, stirring occasionally, to start softening them slightly.
- Add Potatoes and Tomatoes: Add the cubed potatoes and the can of undrained diced tomatoes to the pot. Stir to combine.
- Deglaze and Simmer: Pour in the vegetable broth and water. Scrape the bottom of the pot with a wooden spoon to loosen any browned bits. Bring the soup to a boil, then reduce the heat to low, cover, and simmer for 15-20 minutes, or until the potatoes and carrots are tender when pierced with a fork.
- Add Corn and Seasonings: Stir in the frozen corn kernels, dried thyme, dried basil, black pepper, and salt. Continue to simmer for another 5 minutes.
- Wilting Spinach: Just before serving, stir in the fresh spinach. Cook for only 1-2 minutes, or until the spinach has wilted. You want it vibrant and not overcooked.
- Taste and Adjust: Taste the soup and adjust seasonings as needed. You might want a little more salt, pepper, or herbs.
- Serve: Ladle the hot soup into bowls. Garnish with fresh herbs if desired, and serve immediately with crusty bread.
Tips and Variations:
- Protein Boost: Add a can of drained and rinsed cannellini beans, chickpeas, or kidney beans along with the corn for added protein and fiber. Cooked shredded chicken can also be added at the end.
- Spice it Up: Add a pinch of red pepper flakes for a little heat.
- Different Vegetables: Feel free to swap or add other vegetables like green beans, zucchini (add towards the end to prevent mushiness), or bell peppers.
- Herb Variations: Rosemary or oregano can be used in place of or in addition to thyme and basil.
- Richer Flavor: For a richer broth, you can roast the carrots and potatoes lightly before adding them to the soup.
- Creamy Version: For a creamy soup, remove about 1-2 cups of the soup (mostly solids) and blend it until smooth, then stir it back into the pot. Alternatively, stir in a splash of heavy cream or coconut milk at the very end.
Enjoy your delicious homemade vegetable soup!
-

Turkey Chili
2. Turkey Chili
SmartPoints: ~3 per cup
Servings: 6Ingredients:
-
1 lb lean ground turkey (99% fat-free)
-
1 small onion, chopped
-
2 garlic cloves, minced
-
1 can (14 oz) diced tomatoes
-
1 can (14 oz) kidney beans, drained and rinsed
-
1 can (14 oz) black beans, drained and rinsed
-
1 tbsp chili powder
-
1 tsp cumin
-
1 tsp paprika
-
Salt & pepper to taste
-
1 cup low-sodium chicken broth
Instructions:
-
In a large pot, sauté onion and garlic for 2–3 minutes.
-
Add ground turkey and cook until browned.
-
Add tomatoes, beans, broth, and spices.
-
Simmer uncovered on low heat for 30–40 minutes, stirring occasionally.
-
Adjust seasoning as needed.
-
-

Belly Fat Buster: The Ginger Elixir for a Flatter Stomach
Are you tired of battling belly fat and feeling bloated? Look no further than your kitchen for a simple and effective solution—ginger! This powerhouse ingredient is not only safe and natural but also known for its fat-burning, digestive-boosting, and bloating-reducing properties.
Drinking ginger water or tea throughout the day can be a game-changer in your journey to a flatter belly and overall well-being. No need for extreme diets or pills—just sip on the goodness of ginger!
Why Ginger Works Wonders for Belly Fat
Here’s why ginger is your go-to ally in the battle against belly fat:
✅ Boosts Metabolism: By slightly increasing your body temperature (thermogenesis), ginger helps you burn more calories all day long.
✅ Reduces Inflammation: Fight bloating, water retention, and inflammation with ginger, giving your belly a flatter appearance.
✅ Improves Digestion: Ginger aids in digestion, reduces gas, and speeds up the breakdown of food in your system.
✅ Controls Appetite: Sipping on ginger before meals might curb your cravings and assist in portion control.
The Ginger Belly Fat Burner Drink: All-Day Detox Water
Ingredients:
- 1 liter of water
- 1–2 inches of fresh ginger root (sliced or grated)
- Juice from ½ a lemon (optional for taste and added benefits)
- A few mint leaves (optional, for digestion and freshness)
Instructions:
- Boil the water.
- Add ginger and let it simmer for 10–15 minutes.
- Allow the mixture to cool slightly, strain it, then add lemon juice and mint if desired.
- Pour the elixir into a bottle and enjoy it throughout the day!
When to Enjoy the Ginger Elixir
For optimal results, here’s when to sip on this belly fat-burning drink:
- Morning (on an empty stomach): Kickstart your metabolism.
- Before meals: Control your appetite and support digestion.
- After meals: Say goodbye to bloating.
- Evening: Support your body’s fat-burning process overnight.
Realistic Expectations
While ginger water isn’t a magic solution, when paired with a balanced diet and regular exercise, it can:
- ✔ Reduce belly bloating
- ✔ Enhance your body’s fat-burning efficiency
- ✔ Help you achieve a flatter tummy over time
Final Words: Cheers to a Flatter Belly with Ginger!
Ginger isn’t just a spice—it’s your belly’s best friend! With its natural properties and long-lasting benefits, ginger is a simple ally in your journey to a flatter stomach. Stay consistent with your ginger intake, feel the difference, and watch your belly become flatter than ever before!