Blog

  • baked sausage cream cheese crescents

    baked sausage cream cheese crescents

    Baked Sausage Cream Cheese Crescents: A Savory and Flaky Delight

    Baked sausage cream cheese crescents are a delicious and easy-to-make appetizer, breakfast treat, or snack. The combination of creamy cheese, flavorful sausage, and golden, flaky crescent rolls creates a mouthwatering bite that is both satisfying and addictive. Whether you’re hosting a party, preparing a quick breakfast, or looking for a savory snack, these crescents are a perfect choice. Follow this simple step-by-step guide to make them at home.

    Why You’ll Love This Recipe

    • Quick and Easy: Made with only a few simple ingredients.
    • Irresistible Flavor: The rich, creamy filling pairs perfectly with buttery crescent rolls.
    • Versatile: Great for breakfast, brunch, appetizers, or snacks.
    • Customizable: Add extra flavors like herbs, spices, or cheese variations.

    Ingredients

    • 1 can (8 oz) refrigerated crescent roll dough
    • 1/2 pound ground sausage (pork, turkey, or chicken)
    • 4 oz (half a block) cream cheese, softened
    • 1/2 cup shredded cheddar cheese (optional for extra cheesiness)
    • 1/2 teaspoon garlic powder
    • 1/2 teaspoon onion powder
    • 1/4 teaspoon black pepper
    • 1 tablespoon chopped fresh parsley (optional for garnish)
    • 1 egg (for egg wash, optional)
    • 1 tablespoon water (if using egg wash)

    Step-by-Step Instructions

    Step 1: Cook the Sausage

    1. In a skillet over medium heat, cook the ground sausage until browned and fully cooked, breaking it up into small crumbles.
    2. Drain any excess grease and transfer the cooked sausage to a mixing bowl.

    Step 2: Prepare the Filling

    1. Add the softened cream cheese to the bowl with the cooked sausage.
    2. Stir in the shredded cheddar cheese (if using), garlic powder, onion powder, and black pepper.
    3. Mix well until all ingredients are fully combined.

    Step 3: Prepare the Crescent Dough

    1. Preheat your oven to 375°F (190°C).
    2. Line a baking sheet with parchment paper or lightly grease it.
    3. Unroll the crescent roll dough and separate it into individual triangles.

    Step 4: Fill and Roll

    1. Place a small spoonful (about 1 tablespoon) of the sausage and cream cheese mixture near the wider end of each crescent triangle.
    2. Roll each triangle from the wide end toward the tip, enclosing the filling inside.
    3. Place the rolled crescents on the prepared baking sheet, leaving space between them.

    Step 5: Add Egg Wash (Optional)

    1. In a small bowl, whisk together the egg and water.
    2. Lightly brush the tops of the crescents with the egg wash for a golden, glossy finish.

    Step 6: Bake

    1. Place the baking sheet in the preheated oven.
    2. Bake for 12-15 minutes, or until the crescents are golden brown and flaky.

    Step 7: Serve and Enjoy

    1. Remove the crescents from the oven and let them cool slightly.
    2. Garnish with chopped fresh parsley (optional) for added color and flavor.
    3. Serve warm and enjoy!

    Tips for Perfect Sausage Cream Cheese Crescents

    • Use high-quality crescent dough for the best texture and flavor.
    • Make them extra cheesy by adding shredded mozzarella or pepper jack.
    • Spice them up with a dash of hot sauce or red pepper flakes.
    • Store leftovers in an airtight container in the refrigerator for up to 3 days. Reheat in the oven for the best texture.

    Serving Suggestions

    • Enjoy with a side of scrambled eggs for a hearty breakfast.
    • Pair with a dipping sauce like honey mustard or marinara.
    • Serve as an appetizer for parties and gatherings.

    Final Thoughts

    Baked sausage cream cheese crescents are a simple yet incredibly flavorful dish that’s perfect for any occasion. With minimal effort and a handful of ingredients, you can create a warm, flaky, and creamy snack that everyone will love. Try this easy recipe today and impress your family and friends!

  • Grilled Pineapple Chipotle Salmon

    Grilled Pineapple Chipotle Salmon

    Grilled Pineapple Chipotle Salmon


    Ingredients:


    • 4 salmon fillets (about 6 oz each, skin-on or off)
    • 1 cup fresh pineapple, chopped
    • 2 tablespoons chipotle peppers in adobo sauce, minced
    • 2 tablespoons honey
    • 1 tablespoon lime juice
    • 2 tablespoons olive oil
    • 1 garlic clove, minced
    • ½ teaspoon ground cumin
    • Salt and black pepper, to taste
    • Fresh cilantro, chopped (for garnish)
    • Lime wedges, for serving


    Directions:


    In a blender or food processor, combine the pineapple, chipotle peppers, honey, lime juice, olive oil, garlic, cumin, salt, and pepper. Blend until smooth and set aside.


    Preheat your grill to medium-high heat and lightly oil the grates.


    Pat the salmon fillets dry and season lightly with salt and pepper.


    Brush a layer of the pineapple chipotle sauce over the salmon fillets, reserving some sauce for later.


    Grill the salmon, skin-side down first if skin-on, for 4–5 minutes per side, or until it flakes easily with a fork.


    During the last minute of cooking, brush again with more sauce to caramelize.


    Remove from grill, garnish with fresh cilantro, and serve with lime wedges and any remaining sauce on the side.


    Prep Time: 10 minutes | Cooking Time: 10 minutes | Total Time: 20 minutes


    Kcal: 360 kcal | Servings: 4 servings

  • Chicken Tenderloin Pasta with Creamy Tomato Sauce

    Chicken Tenderloin Pasta with Creamy Tomato Sauce

    Chicken Tenderloin Pasta with Creamy Tomato Sauce


    Indulge in a luscious pasta dish featuring tender chicken and a rich, creamy tomato sauce. This recipe brings a delightful blend of flavors that everyone will love, perfect for a cozy dinner at home.


    Ingredients:


    • For the Pasta:
    • – 8 oz spaghetti or fettuccine
    • – 1 tbsp olive oil
    • – Salt for boiling water


    For the Chicken:

    • – 1 lb chicken tenderloin, sliced
    • – 2 tbsp unsalted butter
    • – 3 cloves garlic, minced
    • – 1/2 tsp smoked paprika
    • – 1/4 tsp chili flakes (optional)
    • – Salt and black pepper, to taste


    For the Creamy Tomato Sauce:

    • – 2 tbsp unsalted butter
    • – 2 cloves garlic, minced
    • – 1 cup heavy cream
    • – 1/2 cup grated Parmesan cheese
    • – 1/2 cup tomato puree
    • – 1/4 cup chicken or vegetable broth
    • – 1 tsp Italian seasoning
    • – Salt and black pepper, to taste


    For Garnish:

    • – Fresh basil, chopped
    • – Extra Parmesan cheese


    Instructions:


    1. Cook the Pasta:

    Bring a large pot of salted water to a boil. Add the spaghetti or fettuccine and cook according to package instructions, usually about 9-11 minutes, until al dente. Drain the pasta, reserving 1/2 cup of pasta water. Drizzle the olive oil over the pasta to prevent sticking and set aside.


    2. Prepare the Chicken:

    In a large skillet, melt 2 tbsp of butter over medium-high heat. Add the minced garlic and sauté for 1-2 minutes until fragrant. Add the chicken tenderloin slices, smoked paprika, chili flakes if using, salt, and black pepper. Cook for 4-5 minutes on each side until the chicken is golden and cooked through. Remove the chicken from the skillet and set aside.


    3. Make the Creamy Tomato Sauce:

    In the same skillet, melt 2 tbsp of butter over medium heat. Add the minced garlic and sauté for 1 minute until fragrant. Stir in the tomato puree and cook for another 2 minutes. Pour in the heavy cream, chicken broth, and Italian seasoning. Stir to combine and let the sauce simmer for about 3-4 minutes until it thickens slightly. Stir in the grated Parmesan cheese and season with salt and pepper to taste. Add the reserved pasta water if needed to thin the sauce to your desired consistency.


    4. Combine:

    Add the cooked pasta to the skillet with the creamy tomato sauce and toss to coat the pasta evenly in the sauce. Return the cooked chicken to the skillet, tossing everything together until well combined and heated through.


    5. Serve:

    Divide the pasta into serving bowls. Garnish with freshly chopped basil and extra Parmesan cheese

    Creamy Salsa Verde Chicken Enchiladas.


    1/2 tbsp Butter

    1/2 tbsp Sizzle

    1/2 cup yellow onion, diced

    1 jalapeño, diced (remove seeds for less spice)

    4-5 cloves garlic, grated

    Salt and pepper, to taste

    Cumin, to taste

    3.5-4 cups salsa verde, to taste

    1 cup sour cream

    1/4 cup cilantro, chopped

    Juice from 1 lime, to taste

    1 rotisserie chicken, shredded

    4 oz Monterrey jack cheese, freshly shredded

    4 oz white cheddar cheese, freshly shredded

    8 flour tortillas (can sub corn)

    1-2 avocados, cubed (optional)

    Garnish: Sour cream, lime wedge, cilantro


    1. Preheat oven to 350F

    2. In a large sauce pan, melt your butter and olive oil over med-low heat. Add in your onion and jalapeño, followed by your salt, pepper, and cumin. Stir and saute for 5-6 minutes. Grate in your garlic and stir. Cook for another 30 seconds.

    3. Pour in your salsa verde, sour cream, and cilantro. Stir. Taste and adjust seasoning as needed. Remove 1 cup of sauce and set aside.

    4. Add in your shredded chicken and half of your shredded cheese. Stir until combined.

    5. In a 9×13” baking dish, spread a light layer of your enchilada sauce

    6. Place about 3 tablespoons of your chicken mixture in the center of your tortillas, followed by your cubed avocado, to taste. Roll and place in your baking dish.

    7. Once your enchiladas are rolled, pour the remainder of your enchilada sauce over the top. Sprinkle the rest of your cheese, cover with foil, and bake for 20-30 minutes. Remove foil and finish baking until the cheesy is melted and bubbly (can finish under the broiler).

    8. Serve with sour cream, cilantro, and a lime wedge. Enjoy!

  • Patty Melts with Secret Sauce: A Diner Classic You Can Make at Home

    Patty Melts with Secret Sauce: A Diner Classic You Can Make at Home

    If you’ve ever sat at a cozy booth in an old-school diner, chances are you’ve come across the legendary patty melt. A glorious mash-up of a cheeseburger and grilled cheese sandwich, this comfort food staple is crispy, juicy, cheesy, and utterly satisfying. But what truly takes a patty melt over the top? The secret sauce.

    Today, we’re bringing you a homemade Patty Melts with Secret Sauce recipe that delivers big flavor and nostalgic vibes—right from your own kitchen.


    What Is a Patty Melt?

    A patty melt combines a seasoned beef patty, caramelized onions, gooey cheese, and a generous slathering of secret sauce—grilled between two slices of rye bread until golden and crispy. It’s hearty, indulgent, and bursting with savory goodness in every bite.


    Ingredients You’ll Need

    For the Patty Melts:

    • 1 lb ground beef (80/20 for best flavor)

    • Salt and pepper to taste

    • 1 large onion, thinly sliced

    • 1 tbsp butter (plus more for grilling)

    • 4 slices of rye bread (or your favorite sandwich bread)

    • 4 slices of Swiss or American cheese

    For the Secret Sauce:

    • 1/4 cup mayonnaise

    • 2 tbsp ketchup

    • 1 tbsp yellow mustard

    • 1 tbsp sweet pickle relish

    • 1/2 tsp garlic powder

    • 1/4 tsp smoked paprika (optional for a kick)


    How to Make It

    1. Caramelize the Onions:

    In a skillet over medium-low heat, melt the butter and add the sliced onions. Cook slowly, stirring occasionally, for about 20-25 minutes until golden and caramelized. Set aside.

    2. Make the Secret Sauce:

    In a small bowl, mix together all sauce ingredients until well combined. Chill until ready to use—it gets even better as the flavors meld.

    3. Form and Cook the Patties:

    Divide the ground beef into two equal portions and shape into oval patties, roughly the size of your bread slices. Season with salt and pepper. In the same skillet, cook the patties over medium-high heat for 3-4 minutes per side or until cooked through. Set aside.

    4. Assemble the Patty Melts:

    Spread secret sauce on one side of each bread slice. Layer a slice of cheese, a cooked patty, caramelized onions, another slice of cheese, and top with the other slice of bread (sauce side down).

    5. Grill to Perfection:

    Heat a clean skillet or griddle over medium heat and melt a bit of butter. Grill each sandwich for 3-4 minutes per side, pressing slightly with a spatula, until the bread is golden brown and the cheese is melted.


    Tips for the Best Patty Melt

    • Don’t Rush the Onions: Low and slow is the key to deep flavor.

    • Butter the Bread Well: This ensures a crisp, golden exterior.

    • Let It Rest a Minute: Before slicing, give the melt a moment so the cheese doesn’t ooze out too fast.


    Customize Your Melt

    • Swap rye for sourdough or Texas toast if you prefer.

    • Add sautéed mushrooms or crispy bacon for extra richness.

    • Use pepper jack or provolone if you want to mix up the cheese game.


    Why You’ll Love It

    Patty melts are the perfect blend of textures and flavors: buttery crispy bread, juicy beef, sweet onions, melty cheese, and that irresistible tangy sauce that ties it all together. Whether you’re feeding a hungry family or craving late-night diner food at home, this recipe delivers every time.

    Ready to wow your tastebuds? Fire up the skillet and enjoy one of the most satisfying sandwiches you’ll ever make!

  • Vegetable Egg Muffins with Carrot & Zucchini

    Vegetable Egg Muffins with Carrot & Zucchini

    Vegetable Egg Muffins with Carrot & Zucchini

    Table of Contents

    These colorful and nutritious egg muffins are the perfect make-ahead breakfast, snack, or light lunch. Packed with fresh zucchini, sweet carrots, and aromatic dill, they’re both satisfying and wholesome. Easy to whip up with just a handful of ingredients, they’re a great way to sneak more veggies into your day. Plus, they’re freezer-friendly and portable!

    ⏱️ Time Breakdown:

    • Prep Time: 10 minutes

    • Cook Time: 25 minutes

    • Total Time: 35 minutes

    Ingredients:

    3 eggs

    1 medium carrot, peeled and diced

    1 medium zucchini, sliced or diced

    1–2 tablespoons fresh dill, finely chopped

    2–3 tablespoons all-purpose flour

    1 tablespoon olive oil

    Salt and pepper to taste

    Optional: grated cheese (like cheddar or mozzarella) for extra flavor

    Instructions:

    Preheat Oven

    Preheat your oven to 180°C (350°F). Lightly grease a muffin tin or use silicone liners.

    Prepare Vegetables

    Dice the carrot and zucchini into small cubes or thin half-moons for even baking.

    Optionally, lightly sauté the veggies in a bit of oil for 3–5 minutes to soften them.

    Mix Wet Ingredients

    In a mixing bowl, crack the eggs and whisk them well.

    Add chopped dill, salt, pepper, and olive oil. Mix well.

    Combine Everything

    Add the flour and whisk until smooth (this helps bind the muffins).

    Stir in the vegetables and optional cheese.

    Fill Muffin Tin

    Divide the mixture evenly among the muffin cups (about ¾ full).

    See also   Grinder Bean Salad 

    Bake

    Bake for 20–25 minutes, or until the tops are golden and a toothpick comes out clean.

    Cool & Serve

    Let cool slightly before removing from the tin. Serve warm or at room temperature.

    ✅ Tips for Perfect Veggie Egg Muffins

    • Grate or finely chop veggies to ensure they cook through evenly.
    • Drain excess moisture from zucchini if it’s too watery—just sprinkle with salt and let it sit, then squeeze gently.
    • Customize freely: Add bell peppers, corn, or spinach for extra color and nutrients.
    • Add cheese like cheddar, mozzarella, or feta for a richer flavor.
    • Use silicone muffin cups or line your tin well to prevent sticking.
    • Cool completely before storing in the fridge or freezer to avoid sogginess.

    ❓ Frequently Asked Questions

    Q: Can I make these dairy-free or gluten-free?
    A: Absolutely! Skip the cheese or use dairy-free cheese. Use gluten-free flour or almond flour instead of regular flour.

    Q: How long do they last in the fridge?
    A: Store in an airtight container for up to 4 days in the fridge.

    Q: Can I freeze them?
    A: Yes! Wrap individually and freeze for up to 2 months. Reheat in the microwave or oven.

    Q: Can I use egg whites only?
    A: You can! Replace 1 whole egg with 2 egg whites for a lighter version.

    Q: Do I need to cook the vegetables first?
    A: Not necessarily, but sautéing them slightly enhances the flavor and softens them, especially the carrots.

    Nutrition (Per Muffin, approx.)

    Note: Values will vary based on exact quantities and add-ins (like cheese).

    Calories: ~90 kcal

  • Jalapeño Popper Deviled Eggs

    Jalapeño Popper Deviled Eggs

    ️ Jalapeño Popper Deviled Eggs

    Bold, creamy, spicy—and irresistibly cheesy. These deviled eggs are everything you love about jalapeño poppers in bite-sized, party-ready form.


    Why You’ll Love This Recipe

    • Spicy & Cheesy – The creamy, cheddar-loaded filling is full of jalapeño flavor and smoky bacon bits.

    • Crowd-Pleasing – A fun, bold twist on traditional deviled eggs.

    • Easy to Make – Beginner-friendly and ready in under 30 minutes.

    • Make-Ahead Friendly – Assemble ahead and garnish just before serving.

    • Perfect for Parties – A guaranteed hit at potlucks, brunches, or casual get-togethers.


    Ingredients

    Yields 12 deviled eggs (24 halves)

    For the Eggs:

    • 6 large eggs

    • 1/4 cup mayonnaise

    • 2 oz cream cheese, softened

    • 1/4 cup shredded cheddar cheese

    • 2 tbsp cooked bacon, crumbled

    • 1–2 tbsp diced pickled jalapeños (adjust to taste)

    • 1 tsp Dijon mustard (optional, for tang)

    • Salt & pepper, to taste

    For Garnish:

    • Extra crumbled bacon

    • Diced pickled jalapeños

    • Fresh chives, chopped


    ‍ Step-by-Step Instructions

    Step 1: Hard-Boil the Eggs

    1. Place eggs in a single layer in a saucepan and cover with cold water (about 1 inch above the eggs).

    2. Bring to a boil over medium-high heat.

    3. Once boiling, turn off the heat, cover, and let the eggs sit for 9–12 minutes, depending on yolk firmness preference.

    4. Transfer eggs to an ice bath and let cool completely before peeling.

    Tip: For easier peeling, gently crack the eggs and peel under cold running water.


    Step 2: Prepare the Filling

    1. Slice cooled eggs in half lengthwise and carefully scoop the yolks into a bowl.

    2. Mash yolks with a fork until crumbly.

    3. Add mayonnaise, cream cheese, cheddar, bacon, jalapeños, and Dijon (if using).

    4. Mix until smooth and creamy.

    5. Taste and season with salt and pepper.

    Texture Tip: For a super-smooth filling, use a hand mixer or food processor.


    Step 3: Fill the Egg Whites

    1. Spoon mixture into a piping bag fitted with a star tip (or use a zip-top bag with the corner snipped off).

    2. Pipe the filling into each egg white half. Alternatively, use a spoon.


    Step 4: Garnish and Serve

    1. Top each egg with a sprinkle of bacon, diced jalapeños, and chopped chives.

    2. Serve chilled or at room temperature.


    Why This Recipe Works

    Element Why It Works
    Creamy Base Cream cheese + mayo = velvety smooth, tangy richness.
    Cheddar Cheese Adds depth and brings the jalapeño popper flavor home.
    Pickled Jalapeños Just the right amount of heat and acidity.
    Bacon Adds smoky crunch and classic comfort.

    Variations to Try

    • Add Heat – Stir in a pinch of cayenne or finely diced fresh jalapeños.

    • Vegetarian – Skip the bacon or use plant-based crumbles.

    • Smoky Flavor – Mix in smoked paprika or chipotle powder.

    • Fresh Herbs – Add chopped cilantro or parsley to the filling.

    • Extra Cheesy – Top with a sprinkle of Parmesan or more cheddar before serving.


    ✅ Tips for Success

    • Peel Perfectly – Gently crack the shells and peel under running water for easier cleanup.

    • Adjust the Spice – Start mild and add more jalapeños to taste.

    • Make-Ahead – Prep the filling and boil the eggs a day in advance. Store separately and assemble just before serving.

    • Storage – Store leftovers in an airtight container in the fridge for up to 2 days. Best enjoyed fresh!


    ️ Serving Suggestions

    • Romantic Touch – Garnish with edible flowers or microgreens.

    • Brunch Staple – Pair with coffee, tea, fruit salad, and scones.

    • Party Platter – Serve alongside sliders, spinach dip, or veggie skewers.


    Final Thoughts

    These Jalapeño Popper Deviled Eggs take everything that’s fun, spicy, and indulgent about party food—and pack it into a creamy, cheesy, two-bite wonder. They’re perfect for when you want something elevated yet approachable, and the best part? They’re endlessly customizable.

    Your Turn!
    Have you made these or added your own twist? Drop your favorite combos or presentation ideas below! ️

  • Homemade Panettone Recipe: Incredible Results

    Homemade Panettone Recipe: Incredible Results

    Homemade Panettone Recipe: Incredible Results Every Time
    Table of Contents:

    Introduction

    Ingredients

    Step-by-Step Instructions

    Preparing the Sponge

    Making the Dough

    First Rise

    Shaping and Second Rise

    Baking

    Finishing Touches

    Storage Tips

    Troubleshooting

    Variations and Add-ins

    Final Thoughts

    1. Introduction
    Panettone is an iconic Italian sweet bread, often enjoyed during the holiday season. Known for its soft, fluffy texture and rich flavor, it can seem intimidating to make at home—but don’t worry! With a bit of patience and the right technique, you can create a Panettone that rivals even the best bakery version. This recipe focuses on flavor, texture, and aroma, producing a beautifully risen loaf with a tender crumb and delicious chocolate chip surprises inside.

    2. Ingredients
    For the Sponge (Pre-Ferment):
    1 1/2 cups bread flour (150g)

    1 tablespoon instant yeast (10g)

    3/4 cup water (150ml, lukewarm)

    For the Main Dough:
    4 1/2 cups bread flour (450g)

    1/2 cup sugar (80g)

    4 egg yolks

    1 teaspoon salt (5g)

    3 tablespoons butter or margarine (75g, softened)

    1/3 cup water (70ml, lukewarm)

    1 tablespoon Panettone aroma (or a mix of orange zest, lemon zest, and vanilla extract, approx. 12ml)

    1 tablespoon honey (20g)

    1 1/2 cups chocolate chips (210g, preferably mini dark or semi-sweet)

    Note: All ingredients should be at room temperature unless otherwise specified. This helps with even mixing and fermentation.

    3. ‍ Step-by-Step Instructions
    A. Preparing the Sponge (Pre-Ferment)
    In a large mixing bowl, combine:

    1 1/2 cups bread flour

    1 tablespoon instant yeast

    3/4 cup lukewarm water

    Stir well until you get a smooth, sticky dough. It doesn’t need to be kneaded, just fully mixed.

    Cover with a clean towel or plastic wrap and let it rest at room temperature for 30–45 minutes, or until the surface becomes bubbly and airy.

    B. Making the Dough
    To the bubbly sponge, add:

    4 1/2 cups bread flour

    1/2 cup sugar

    4 egg yolks

    1 teaspoon salt

    Begin mixing until a shaggy dough forms. You can use a stand mixer with a dough hook or mix by hand with a sturdy spoon.

    Gradually add:

    3 tablespoons of softened butter (or margarine)

    1/3 cup lukewarm water

    Continue kneading (5–7 minutes in a stand mixer, 10–12 minutes by hand) until the dough becomes smooth, elastic, and slightly tacky.

    Add:

    1 tablespoon Panettone aroma (or substitute blend)

    1 tablespoon honey

    Knead briefly until the aroma and honey are fully incorporated.

    Gently fold in:

    1 1/2 cups chocolate chips

    Fold carefully to prevent overworking the dough and to distribute the chips evenly.

    4. ⏳ First Rise
    Shape the dough into a ball and place it into a greased large bowl. Cover with a clean cloth or plastic wrap.

    Let it rise in a warm, draft-free spot until doubled in size. This can take anywhere from 1 1/2 to 2 1/2 hours, depending on room temperature.

    5. Shaping and Second Rise
    Once risen, gently deflate the dough and shape it into a round.

    Transfer it into a Panettone mold or a deep, parchment-lined cake tin (6-7 inch diameter, at least 5 inches tall). Traditional paper molds work best.

    Let the dough rise again until it reaches just below the rim of the mold—usually another 60–90 minutes.

    Meanwhile, preheat your oven to 350°F (175°C).

    6. Baking
    Optional: Score an “X” on the top of the loaf with a sharp knife and place a small cube of butter in the center of the X for a traditional finish.

    Bake in the preheated oven for 40–50 minutes, or until:

    The top is deep golden brown

    A skewer inserted into the center comes out clean

    Internal temperature reads 190°F (88°C)

    If the top browns too quickly, cover loosely with foil during the last 15 minutes.

    7. ✨ Finishing Touches
    Once baked, remove the Panettone and let it cool upside down to maintain height (traditional bakers use skewers through the base and hang it upside down between two objects). If this is too tricky, cool it upright on a wire rack.

    Let it cool completely before slicing. This enhances flavor and texture.

    8. Storage Tips
    Store wrapped in plastic wrap or foil at room temperature for up to 5 days.

    To freeze: wrap tightly and store in a freezer-safe bag for up to 2 months.

    Best served slightly warm or toasted, with a cup of espresso or tea.

    9. Troubleshooting
    Problem Likely Cause Solution
    Dense loaf Under-kneaded or under-proofed Knead longer and ensure proper rise
    Collapsed top Over-proofed before baking Reduce second rise time slightly
    Dry texture Overbaked or not enough fat Check bake time and use full yolks & butter
    10. Variations and Add-ins
    Classic Fruit Panettone – Replace chocolate chips with:

    3/4 cup raisins

    3/4 cup candied orange/lemon peel
    (Soak in rum or orange juice beforehand)

    Nutty Panettone – Add 1/2 cup chopped almonds or pistachios

    Coffee-Chocolate – Add 1 tsp espresso powder to dough for a mocha twist

    Cranberry-White Chocolate – Replace chips with dried cranberries and white chocolate chunks

    11. Final Thoughts
    Making Panettone at home may take a bit of time, but the reward is a soft, fluffy, aromatic bread that’s perfect for holidays, breakfast, or an indulgent snack. This recipe yields professional-level results with a chocolatey twist, but don’t hesitate to experiment with your favorite mix-ins and flavors.

    Enjoy baking—and buon appetito!

  • Crunchy Thai Chickpea Salad – A Fresh & Flavorful Delight

    Crunchy Thai Chickpea Salad – A Fresh & Flavorful Delight

    The best part? It’s completely plant-based (with an easy honey swap to make it vegan) and packed with fiber and protein to keep you full and satisfied. Let’s dive into this flavor-packed, no-cook recipe.

    Let’s dive into what makes this dish so special and how you can whip it up in no time!


    video of: Spicy Thai Peanut Noodle SaladPlay Video
    Spicy Thai Peanut Noodle Salad

    Share
    Watch onHumix
    Spicy Thai Peanut Noodle Salad
    Why You’ll Love This Thai Chickpea Salad
    Crunchy and Refreshing: A mix of crisp veggies and chickpeas for the perfect texture contrast.
    Protein-Packed: Chickpeas provide plant-based protein, making this salad satisfying and filling.
    No Cooking Required: Just chop, mix, and enjoy—ready in 10 minutes or less.
    Deliciously Thai-Inspired: A creamy, nutty, tangy dressing with just the right amount of spice.
    Great for Meal Prep: Stays fresh in the fridge for days, making it perfect for grab-and-go lunches.
    What Does Crunchy Thai Chickpea Salad Taste Like?
    This salad has a perfect balance of flavors:

    Fresh and Light – Thanks to crunchy veggies like cabbage, bell pepper, and carrots.
    Creamy and Nutty – The tahini-based dressing adds a rich, slightly nutty flavor.
    Tangy and Spicy – A kick from red pepper flakes, lime juice, and soy sauce.
    Sweet and Savory – A hint of honey (or maple syrup) ties everything together beautifully.
    Every bite is bright, zesty, and full of crunch.

    Ingredients for Crunchy Thai Chickpea Salad
    Veggies and Chickpeas:
    1 can (15 oz) chickpeas, drained and rinsed
    ½ cup shredded carrots
    ½ cup red bell pepper, diced
    ¼ cup red cabbage, thinly sliced
    2 tablespoons chopped green onions
    For the Dressing:
    2 tablespoons tahini
    1 tablespoon soy sauce
    1 tablespoon lime juice
    1 teaspoon honey (or maple syrup for a vegan option)
    ½ teaspoon red pepper flakes
    ½ teaspoon sesame oil
    1 clove garlic, minced
    For Garnish:
    1 tablespoon chopped peanuts
    1 tablespoon fresh cilantro, chopped
    ½ teaspoon sesame seeds
    Tools You’ll Need
    Mixing bowls – For tossing the salad and whisking the dressing
    Sharp knife and cutting board – For prepping your veggies
    Whisk or fork – To mix the dressing smoothly
    Measuring spoons and cups – For accurate ingredient portions
    How to Make Crunchy Thai Chickpea Salad
    Step 1: Prep the Ingredients
    Drain and rinse the chickpeas.
    Dice the bell pepper, shred the carrots, and thinly slice the red cabbage and green onions.
    Step 2: Make the Dressing
    In a small bowl, whisk together the tahini, soy sauce, lime juice, honey (or maple syrup), red pepper flakes, sesame oil, and minced garlic until smooth.
    If the dressing is too thick, add 1-2 teaspoons of water to thin it out.

    Want To Save This Recipe?
    Want this recipe? Enter your email to get it sent straight to your inbox! You’ll also receive new recipes and inspiration as a bonus!

    Website
    Your Email…
    Save this recipe
    We use your personal data for interest-based advertising, as outlined in our Privacy Notice.
    Step 3: Toss the Salad
    In a large bowl, combine the chickpeas, carrots, bell pepper, cabbage, and green onions.
    Pour the dressing over the salad and toss until everything is evenly coated.
    Step 4: Add the Garnishes
    Sprinkle with chopped peanuts, fresh cilantro, and sesame seeds.
    Step 5: Serve and Enjoy
    Enjoy immediately for maximum crunch, or let it sit for 10 minutes to allow the flavors to meld together.
    What to Serve with Thai Chickpea Salad
    This hearty salad can be enjoyed on its own, but it also pairs well with:

    Steamed jasmine rice or quinoa – To turn it into a complete meal
    Spring rolls or dumplings – A light, flavorful side
    Miso soup or Thai coconut soup – A warm, comforting pairing
    Avocado slices – Creamy avocado complements the crunch beautifully
    Or serve it in lettuce wraps for a fun, hands-on meal.

    Tips for the Best Thai Chickpea Salad
    Use Fresh Ingredients: The fresher the veggies, the crunchier the salad.
    Customize the Spice Level: Add extra red pepper flakes for more heat, or leave them out for a milder version.
    Let It Marinate: Letting the salad sit for 15-30 minutes before eating enhances the flavors.
    Make It Nut-Free: Swap tahini for sunflower seed butter and skip the peanuts.
    Storage Instructions
    Fridge: Store leftovers in an airtight container for up to 3 days. The flavors get even better overnight.
    Freezing: Not recommended, as the fresh veggies will lose their crunch.
    Make-Ahead Tip: Prep all ingredients except the dressing and store them separately. Toss everything together just before serving for the freshest taste.
    Frequently Asked Questions (FAQ)
    1. Can I make this salad ahead of time?
    Yes. It actually tastes even better after sitting for a few hours in the fridge. Just store the dressing separately and mix before serving.

    2. Can I add more protein?
    Definitely. Try adding:

    Grilled tofu or tempeh
    Shredded chicken (if not vegetarian)
    Quinoa or edamame for extra plant-based protein
    3. Is this salad gluten-free?
    Yes. Just use gluten-free soy sauce or tamari instead of regular soy sauce.

    4. Can I swap out the chickpeas?
    Of course. White beans, edamame, or even shredded cabbage would work well in place of chickpeas.

    5. What can I use instead of tahini?
    If you don’t have tahini, you can substitute:

    Peanut butter (for a Thai peanut dressing twist)
    Sunflower seed butter (for a nut-free option)
    Almond butter (for a slightly sweeter, richer flavor)
    Final Thoughts – Fresh, Crunchy, and Full of Flavor
    This Crunchy Thai Chickpea Salad is quick, easy, and packed with bold flavors and textures. Whether you enjoy it as a light meal, meal prep lunch, or side dish, it’s a healthy and delicious way to satisfy your cravings.

    If you make this salad, I would love to see it. Tag me on Instagram or Pinterest and share your creation.

    Tried this recipe? Leave a comment and let me know how you liked it.

    Looking for more healthy, flavorful recipes? Try these next:

    Spicy Thai Peanut Noodles
    Mediterranean Chickpea Salad
    Vegan Buddha Bowl with Tahini Dressing
    Enjoy every bite of this crunchy, creamy, and delicious Thai-inspired salad.

    Why This Salad Deserves a Spot in Your Meal Rotation
    The Crunchy Thai Chickpea Salad isn’t just another salad—it’s a celebration of flavors and textures that will leave your taste buds dancing. The combination of creamy tahini dressing with crisp vegetables and hearty chickpeas makes it both satisfying and refreshing.

    Want To Save This Recipe?
    Want this recipe? Enter your email to get it sent straight to your inbox! You’ll also receive new recipes and inspiration as a bonus!

    Website
    Your Email…
    Save this recipe
    We use your personal data for interest-based advertising, as outlined in our Privacy Notice.
    Whether you’re looking for a quick lunch idea or a crowd-pleasing potluck dish, this salad checks all the boxes. Plus, it’s customizable enough to suit any dietary preference or ingredient availability.

    So what are you waiting for? Grab your ingredients and get ready to enjoy this vibrant and crunchy creation!

  • Cherry Crumble Cake with Meringue and Yogurt Cream

    Cherry Crumble Cake with Meringue and Yogurt Cream

    Cherry Crumble Cake with Meringue and Yogurt Cream
    This exquisite cake brings together a crisp, buttery crumble base, a vibrant cherry filling, and a pillowy topping of yogurt‑folded meringue—perfect for any occasion that calls for a show‑stopping dessert.

    In this recipe, we transform pantry staples into a stunning, multi‑textured cake that balances sweetness and tartness, crunch and creaminess. The foundation is a tender shortcrust dough enriched with butter and lightly sweetened sugar. A portion of this dough is pressed into the pan to form a sturdy base, while the remainder is crumbled and reserved as a streusel topping. The vibrant cherry layer that follows uses frozen pitted cherries gently macerated with sugar and brightened by fresh lemon juice, thickened with starch for a jam‑like consistency. The crowning glory is a two‑part cream: first, a classic French meringue whipped until glossy peaks form with sugar and a hint of vanilla; then folded together with tangy Greek yogurt and additional starch for body and stability. As the cake bakes, the meringue sets into a delicate cloud, while the streusel lid browns to golden perfection. Each slice reveals three beautiful strata—crumb, fruit jewel, and snowy cream—offering a symphony of textures in every bite.

    This dessert is perfect for afternoon teas, potlucks, or festive gatherings, and it travels well—slices hold their shape and look impressive on any buffet table. Since the layers complement each other, you can adjust sweetness or tartness to suit your taste: increase sugar for a sweeter filling, or add more lemon zest for extra brightness. The recipe is scalable: halve it for an intimate gathering or double it for a crowd. Whether you’re a novice baker or an experienced pastry enthusiast, this cherry crumble cake will delight guests and become a new favorite in your recipe repertoire.

    Preparation, Cook, and Total Times
    Preparation Time: 30 minutes (plus refrigeration and resting time)

    Chill Time (dough): 30 minutes

    Cook Time: 45 minutes

    Rest & Cooling Time: 1 hour before slicing; ideally chill 2–3 hours or overnight

    Total Active Time: 1 hour 15 minutes

    Total Time (including chilling): Approximately 5 hours

    Yield
    Makes one 9″×13″ (23 × 33 cm) pan; serves 12–16 slices.

    Cuisine
    Modern European‑inspired bake with Eastern European cherry influences.

    A Full List of Ingredients
    For the Crumble Base and Topping:

    2 large eggs, separated (yolks and whites reserved separately)

    60 g (⅓ cup) granulated sugar

    300 g (2 ¼ cups) all‑purpose flour

    10 g (2 tsp) baking powder

    140 g (½ cup + 2 Tbsp) unsalted butter, softened and cubed

    For the Cherry Filling:

    500 g (1 lb) frozen pitted cherries

    100 g (½ cup) granulated sugar

    Juice of 1 lemon (about 2 Tbsp)

    3 Tbsp cornstarch (starch)

    For the Yogurt Meringue Topping:

    Egg whites from 2 large eggs

    100 g (½ cup) granulated sugar

    ½ tsp pure vanilla extract

    40 g (¼ cup) cornstarch

    200 g (¾ cup plus 1 Tbsp) Greek yogurt

    For Finishing:

    Powdered sugar, for dusting (optional)

    Step‑by‑Step Cooking Directions
    Preheat & Prepare Pan: Preheat your oven to 170 °C (340 °F). Grease a 9″×13″ baking pan and line with parchment paper, leaving an overhang for easy removal.

    Make the Crumble Dough: In a large bowl, whisk egg yolks with 60 g sugar until pale. Stir in flour and baking powder. Using clean fingers or a pastry cutter, rub in cubed butter until mixture resembles coarse crumbs.

    Homemade Panettone Recipe: Incredible Results
    Form Base & Reserve Crumbles: Press about two‑thirds of the dough evenly into the prepared pan to form a firm base. Crumble the remaining dough into small pieces and set aside in the fridge.

    Chill Dough: Refrigerate pan for 30 minutes to let the base firm up.

    Prepare Cherry Layer: In a medium saucepan, combine cherries, 100 g sugar, and lemon juice. Cook over medium heat, stirring occasionally, until cherries release juices, about 5 minutes. Stir cornstarch into 3 Tbsp cold water to make a slurry; whisk into cherries and simmer until thickened, about 2 minutes. Remove from heat and cool slightly.

    Assemble Layers: Pour cooled cherry mixture over the chilled crust, spreading evenly.

    Whip Meringue: In a clean bowl, beat egg whites with an electric mixer on medium speed until foamy. Gradually add 100 g sugar, increasing speed to high until stiff, glossy peaks form (4–5 minutes). Beat in vanilla.

    Fold Yogurt & Starch: In a separate bowl, whisk Greek yogurt with 40 g cornstarch until smooth. Gently fold yogurt mixture into meringue until streak‑free, taking care not to deflate the peaks.

    Top & Crumble: Spread the yogurt meringue over cherries in an even layer. Sprinkle reserved crumble pieces evenly atop the meringue.

    Bake: Place pan in preheated oven and bake 45 minutes, or until crumble is golden and meringue is set (no longer glossy in center).

    Cool & Dust: Remove from oven and let cool on a wire rack 1 hour. Dust with powdered sugar if desired. For clean slicing, chill 2–3 hours or overnight before lifting from pan and cutting.

    Nutritional Information
    Per 1 slice (assuming 16 servings):

    Calories: 240 kcal

    Protein: 4 g

    Carbohydrates: 30 g

    ­       Sugar: 18 g

    Fat: 11 g

    ­       Saturated Fat: 6 g

    Cholesterol: 45 mg

    Fiber: 1 g

    Sodium: 110 mg

    The Origins and Popularity of the Recipe
    Crumb‑topped cakes have roots in Central and Eastern Europe, notably the Polish “kruszonka” and German Streuselkuchen. Traditional versions layer fruit—often plums, apples, or cherries—beneath a sweet crumb. The meringue‑folded yogurt topping is a modern twist, inspired by French patisserie’s “île flottante” meringue islands and Eastern European yogurt‑based desserts. With the global rise of fusion baking in the 21st century, home bakers began combining techniques—strudels, crumbles, and creamy frostings—to create multi‑textured treats. This cake epitomizes that trend, merging a heritage fruit crumble with contemporary yogurt‑meringue cream, delivering the best of old‑world comfort and new‑world lightness. It’s particularly beloved in spring and summer when cherries are abundant, and its vibrant hue makes it a visual centerpiece at gatherings.

    Reasons Why You’ll Love the Recipe
    Multi‑Textural Delight: Crunchy base, juicy fruit, and creamy cloud top in one slice.

    Seasonal Versatility: Swap cherries for berries, apples, or stone fruits.

    Show‑Stopping Presentation: Three distinct, vibrant layers impress guests.

    Beginner‑Friendly Steps: Simple dough and stovetop filling—no pastry chef skills required.

    Make‑Ahead Ease: Can be baked a day ahead and refrigerated for stress‑free entertaining.

    Balanced Sweetness: Yogurt adds tang, reducing overall sugar impact.

    Health Benefits
    Protein Boost: Greek yogurt and eggs provide high‑quality protein for satiety.

    Antioxidants: Cherries are rich in anthocyanins, which help combat inflammation.

    Probiotics: Live cultures in yogurt support gut health.

    Controlled Fat: Butter is used judiciously for flavor; the meringue is virtually fat‑free.

    Reduced Refined Sugar: Lemon juice brightens flavor, allowing lower sugar in fruit filling.

    Serving Suggestions
    Fresh Berries: Garnish slices with a handful of fresh raspberries or blueberries.

    Savory Cabbage Pancakes
    Whipped Cream: A dollop of lightly sweetened whipped cream for extra decadence.

    Mint Sprigs: Fresh mint adds color contrast and herbal aroma.

    Ice Cream: Serve warm slices with vanilla or cherry‑almond ice cream.

    Cheese Plate: Pair with mild, creamy cheeses (e.g., ricotta or mascarpone) as a palate cleanser.

    Common Mistakes to Avoid
    Under‑Chilled Crust: Pressing and chilling the base prevents sogginess—don’t skip the chill step.

    Runny Filling: Ensure the cherry cornstarch slurry is fully cooked to avoid a loose layer.

    Deflated Meringue: Fold yogurt in gently; over‑folding will lose volume and result in a dense topping.

    Over‑Browning: Watch the crumble—if edges darken too quickly, tent loosely with foil.

    Skipping Rest: Cutting too soon can cause layers to blur; chilling ensures clean strata.

    Pairing Recommendations
    Wines: Light, effervescent Prosecco or a semi‑dry Rosé complements the tart cherries.

    Beers: A Belgian Witbier with citrus notes balances the sweet and tangy layers.

    Teas: Earl Grey tea offers bergamot aroma that pairs beautifully with cherry.

    Coffee: A medium roast coffee with nutty undertones contrasts the tart fruit.

    Non‑Alcoholic: Sparkling lemonade or cherry‑infused iced tea enhances fruit flavors.

    Cooking Tips
    Uniform Crumbs: Use your fingertips to rub butter into flour for even streusel size.

    Even Baking: Rotate the pan halfway through baking for uniform color.

    Egg Temperature: Room‑temperature eggs whip to greater volume for meringue.

    Cherry Alternatives: Fresh cherries may be used; pit and macerate them for 30 minutes with sugar.

    Advance Prep: Dough can be made and frozen; thaw and press into pan when ready.

    Variations to Try
    Berry Medley: Use a mix of strawberries, raspberries, and blueberries instead of cherries.

    Nutty Crunch: Fold chopped almonds or walnuts into the streusel topping.

    Chocolate Drizzle: After baking, drizzle melted dark chocolate over the cooled top.

    Citrus Zest: Add lemon or orange zest to dough for extra brightness.

    Spiced Twist: Incorporate ground cinnamon or cardamom into the crumble base.

    Similar Recipes to Try
    Apple Crumble Coffee Cake (with cinnamon streusel)

    Mixed Berry Cheesecake Bars (with graham‑cracker crust)

    Lemon Meringue Tart (bright citrus and silky meringue)

    Plum Streusel Kuchen (German‑style fruit crumb cake)

    Rhubarb Custard Pie (tart fruit and creamy filling)

    Ingredient Spotlight
    Greek Yogurt: This thick, tangy yogurt adds richness and stabilizes the meringue, creating a tender, moist topping. Its live cultures may aid digestion, and its high protein content helps with structure, reducing egg reliance in the cream layer.

    Conclusion
    This Cherry Crumble Cake with Meringue and Yogurt Cream is a breathtaking dessert that satisfies on every sensory level. Its harmonious balance of crunchy, juicy, and airy components showcases how simple ingredients can transform into an elegant, memorable treat. Whether you’re celebrating a special occasion or elevating a casual weekend tea, this cake delivers dazzling color, complex flavor, and pleasing textures. With its make‑ahead convenience and adaptable nature, it’s destined to become a staple in your baking repertoire—offering endless opportunities for experimentation and enjoyment.

  • Quick Puff Pastry Apple Rolls Recipe

    Quick Puff Pastry Apple Rolls Recipe

    Quick Puff Pastry Apple Rolls Recipe

    Ingredients:

    • 500 g (17.6 oz) puff pastry
    • 2 apples, grated
    • 20 g (1 ½ tbsp) sugar
    • 5 g (1 tsp) cinnamon
    • 1 egg, for brushing

    Optional for Serving:

    • Strawberry puree
    • Black tea

    Instructions:

    1. Prepare the Filling

    Start by peeling the 2 apples and grating them into a medium-sized bowl. The grated apples will form the sweet, juicy filling for your pastry. Once grated, mix the apples with 20 g of sugar and 5 g of cinnamon, ensuring that the mixture is evenly combined. The sugar will bring out the natural sweetness of the apples, while the cinnamon adds a warm, spiced flavor.

    2. Roll the Dough

    On a clean, flat surface, roll out the 500 g puff pastry into a large rectangular shape. Aim for an even thickness so that the pastry bakes uniformly. Once rolled out, evenly spread the prepared apple mixture across the surface of the puff pastry, leaving a small border around the edges.

    3. Roll and Slice

    Carefully begin rolling the puff pastry from one edge, working slowly to create a tight roll or log shape. Once fully rolled, use a sharp knife to slice the log into small rolls, about 2 cm thick. Each slice should contain layers of pastry and apple filling.

    4. Egg Wash

    Preheat your oven to 180°C (350°F) and line a baking tray with parchment paper. Arrange the apple rolls on the tray, leaving some space between each roll for them to expand during baking. In a small bowl, beat 1 egg and brush the top of each roll with the egg wash to give them a golden, glossy finish once baked.

  • Savory Cabbage Pancakes

    Savory Cabbage Pancakes

    Savory Cabbage Pancakes

    Ingredients:

      • 1/2 cabbage, finely shredded
      • 1 onion, finely chopped
      • 1 carrot, grated
      • 3 eggs
      • 500 ml kefir or thick yogurt (17 oz)
      • 300 g flour (10.6 oz)
      • 1 teaspoon baking soda or baking powder
      • Salt and black pepper, to taste
      • Olive  oil for frying

    Directions:

      1. Prepare vegetables: Finely shred the cabbage, chop the onion, and grate the carrot.
      2. Mix wet ingredients: In a large bowl, beat 3 eggs, then stir in 500 ml kefir or thick yogurt.
      3. Add dry ingredients: Sift 300 g of flour and 1 teaspoon of baking soda (or baking powder) into the wet mixture. Stir until smooth.
      1. Combine with vegetables: Fold in the shredded cabbage, onion, and grated carrot. Season with salt and black pepper to taste.
      2. Fry the pancakes: Heat a little oil in a frying pan over medium heat. Drop spoonfuls of the mixture into the pan, flatten slightly, and fry for 2-3 minutes on each side until golden brown.
      3. Serve warm: Remove from the pan and drain on paper towels. Serve immediately.

    Serving Suggestions:

      • Serve with a dollop of sour cream or yogurt for extra creaminess.
      • Add a side of salad or some roasted vegetables for a complete meal.
      • Garnish with fresh herbs like parsley or dill.

    Cooking Tips:

      • For a healthier option, bake the pancakes on a greased baking sheet at 180°C (350°F) for about 15-20 minutes, flipping halfway through.
      • Add a handful of grated cheese for an extra savory flavor.
      • If you want a lighter texture, use sparkling water instead of kefir or yogurt.
  • No-Bake Chocolate Biscuit Cake: A Quick and Delicious Treat

    No-Bake Chocolate Biscuit Cake: A Quick and Delicious Treat

    If you’re craving something sweet but don’t have the time or energy to turn on the oven, this No-Bake Chocolate Biscuit Cake is the perfect solution! It’s incredibly simple, quick to prepare, and packed with rich chocolatey goodness. You can make it twice a week, and everyone will be begging for seconds.

    Ingredients:
    For the Cake:

    600g biscuits (digestive biscuits or graham crackers work best)

    120g sugar

    60g cocoa powder

    250ml milk

    60g butter

    A pinch of vanilla extract

    How to Make:

    Prepare the Biscuits: Break the biscuits into small pieces (you can either crush them with your hands or use a rolling pin).

    Make the Chocolate Mixture: In a saucepan, combine the sugar, cocoa powder, milk, and butter. Place over medium heat and stir until the butter is melted and everything is combined into a smooth, glossy mixture.

    Add the Vanilla: Once the chocolate mixture is smooth, add the pinch of vanilla extract and stir.

    Combine with Biscuits: Pour the chocolate mixture over the crushed biscuits. Stir everything together until the biscuits are well-coated in the chocolate sauce.

    Set in a Pan: Transfer the biscuit and chocolate mixture into a greased or lined baking pan. Press it down gently to make an even layer.

    Chill: Refrigerate for at least 2-3 hours (or overnight for best results) until it is firm and set.

    Serve: Once chilled, slice into squares or bars, and enjoy your no-bake chocolate biscuit cake!

    Serving and Storage Tips:

    Serving: Serve chilled as a snack or dessert. It pairs wonderfully with a hot cup of coffee or tea.

    Storage: Store any leftovers in an airtight container in the fridge for up to a week.

    Variations:
    Add chopped nuts, dried fruits, or mini marshmallows for a fun twist.

    Drizzle some melted white chocolate or chocolate ganache on top for an extra touch of indulgence.

    FAQ:
    Can I use any type of biscuit?

    Yes! Digestive biscuits or graham crackers are ideal, but any plain, crispy biscuits will work.

    Can I substitute the milk?

    You can use plant-based milk like almond or oat milk if preferred.

    How do I know when it’s ready to serve?

    The cake should be firm and easy to slice after chilling for a few hours. If it still feels soft, let it sit in the fridge a little longer.

    Enjoy this simple and irresistible no-bake chocolate treat—perfect for those quick dessert cravings!

  • Cucumber and Cabbage Salad

    Cucumber and Cabbage Salad

    Cucumber and Cabbage Salad

     Cucumber and Cabbage Salad
    Yields: 2-3 servings
    Prep time: 15 minutes
    Ingredients:
    Salad:
    2 cups shredded cabbage (green or Napa), about 1/4 of a medium head
    1/2 cucumber, thinly sliced (English cucumbers work well)
    1/2 red bell pepper, thinly sliced
    2 green onions, thinly sliced
    2 tablespoons fresh dill or parsley, chopped (or a mix of both) – optional
    Dressing:
    2 tablespoons mayonnaise (or Greek yogurt for a lighter version)
    1 tablespoon olive oil
    1 tablespoon apple cider vinegar or lemon juice (adjust to taste)
    1 teaspoon Dijon mustard
    1/2 teaspoon garlic powder
    1/2 teaspoon salt (or to taste)
    1/4 teaspoon black pepper (or to taste)
    Optional: 1/2 teaspoon honey or maple syrup (for a touch of sweetness)

    Instructions:

    Prepare the Vegetables:
    Cabbage: If using a whole head of cabbage, remove any damaged outer leaves. Cut the cabbage in half and then shred it thinly using a sharp knife or a mandoline slicer.
    Cucumber: Wash the cucumber and slice it thinly. If you’re using a regular cucumber, you can peel it partially or entirely if you prefer. English cucumbers have thinner skin and don’t need peeling.
    Red Bell Pepper: Wash the bell pepper, remove the stem and seeds, and slice it thinly.
    Green Onions: Trim the root ends and thinly slice the green onions, including both the white and green parts.
    Herbs: Wash and chop the fresh dill and/or parsley.
    Make the Dressing:
    In a small bowl, whisk together the mayonnaise (or Greek yogurt), olive oil, apple cider vinegar or lemon juice, Dijon mustard, garlic powder, salt, and pepper.
    Taste and adjust the seasonings as needed. Add a touch of honey or maple syrup if you prefer a slightly sweeter dressing.
    Assemble the Salad:
    In a large bowl, combine the shredded cabbage, cucumber slices, red bell pepper slices, and green onions.
    Add the chopped dill and/or parsley, if using.
    Pour the dressing over the salad and toss gently to coat all the ingredients. Be careful not to bruise the vegetables.
    Chill (Optional): The salad can be served immediately, but it’s often more refreshing if chilled for 15-30 minutes to allow the flavors to meld.
    Serve: Serve the salad as a side dish or light meal.
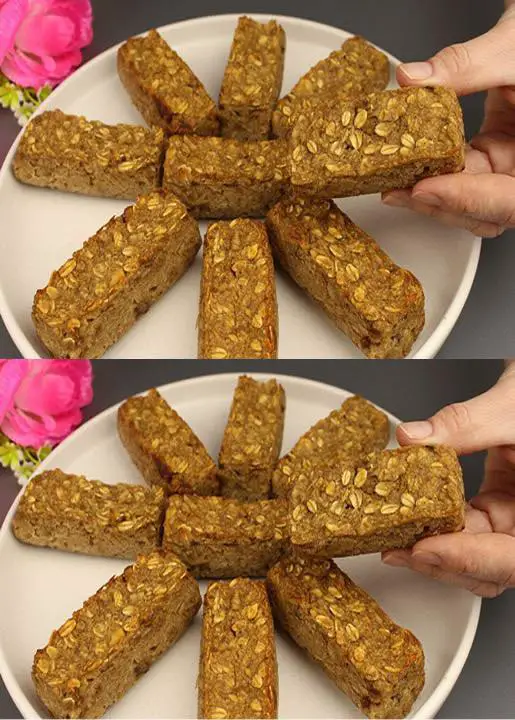
  • Apple Walnut Oat Bake

    Apple Walnut Oat Bake

    This Apple Walnut Oat Bake is a delightful, wholesome treat that combines the rich flavors of oats, apples, and walnuts with a touch of cinnamon and maple syrup. Perfect as a breakfast option or a cozy dessert, this recipe is easy to prepare and sure to please your taste buds. The optional addition of cocoa adds a unique twist, making this bake even more indulgent.

    Preparation Time:

    Total Time: 40-45 minutes
    Prep Time: 10-15 minutes
    Cook Time: 25-30 minutes
    Ingredients:

    1 1/2 cups (150 g) rolled oats
    1 cup (90 g) walnuts, chopped
    2 medium apples, peeled, cored, and chopped
    1/4 cup (60 ml) water
    1/4 teaspoon cinnamon
    1 teaspoon maple syrup
    1/4 cup (60 ml) coconut oil or melted butter
    1 tablespoon cocoa powder (optional)
    Directions:

    Preheat Oven: Preheat your oven to 180°C (360°F).
    Mix Ingredients: In a large bowl, combine rolled oats, chopped walnuts, chopped apples, water, cinnamon, and maple syrup. If using, add the cocoa powder. Mix well.
    Add Oil or Butter: Stir in the melted coconut oil or butter until everything is well-coated.
    Bake: Pour the mixture into a greased baking dish. Bake for 25-30 minutes or until the top is golden brown and the apples are tender.
    Serving Suggestions:

    Serve warm with a scoop of vanilla ice cream or a dollop of Greek yogurt.
    Drizzle with additional maple syrup for extra sweetness.
    Cooking Tips:

    For a crunchier topping, sprinkle extra walnuts on top before baking.
    If you prefer a softer texture, cover the baking dish with foil during the first half of the baking time.
    Nutritional Benefits:

    Oats provide fiber and essential nutrients that support heart health.
    Walnuts are rich in healthy fats and antioxidants.
    Apples add natural sweetness and a dose of vitamin C.
    Dietary Information:

    This recipe is vegetarian and can be made vegan by using coconut oil instead of butter.
    Nutritional Facts (per serving, assuming 6 servings):

    Calories: 220
    Total Fat: 15g
    Saturated Fat: 7g
    Cholesterol: 0mg (with coconut oil)
    Sodium: 10mg
    Total Carbohydrate: 20g
    Dietary Fiber: 4g
    Sugars: 6g
    Protein: 4g
    Storage:

    Store leftovers in an airtight container in the refrigerator for up to 3 days.
    Reheat in the oven or microwave before serving.
    Can be frozen for up to 1 month; thaw in the refrigerator before reheating.
    Why You’ll Love This Recipe:

    It’s a simple, healthy bake that’s both nourishing and satisfying.
    The combination of oats, walnuts, and apples creates a perfect balance of flavors and textures.
    The recipe is versatile, allowing for easy substitutions to suit your preferences.
    Great for breakfast or as a comforting dessert.
    Conclusion: This Apple Walnut Oat Bake is a heartwarming recipe that brings together wholesome ingredients in a delicious and easy-to-make dish. Whether you’re enjoying it as a nutritious breakfast or a cozy dessert, this bake offers the perfect balance of sweetness and crunch. With the added option of cocoa for a chocolatey twist, this recipe is sure to become a favorite in your kitchen. Enjoy the rich, comforting flavors of oats, apples, and walnuts in every bite!

    Frequently Asked Questions:

    Can I use quick oats instead of rolled oats?
    Yes, but the texture will be softer and less chewy.
    Can I substitute the walnuts with other nuts?
    Absolutely! Pecans or almonds would work well in this recipe.
    Is the cocoa powder necessary?
    No, it’s optional. The cocoa adds a rich chocolate flavor, but the bake is delicious without it too.
    Can I add other spices?
    Yes, nutmeg or cardamom would be great additions for extra flavor.
    What can I use instead of coconut oil?
    You can use melted butter or any other mild-flavored oil.
    Can I use honey instead of maple syrup?
    Yes, honey can be used as a substitute for maple syrup.
    How do I know when the bake is done?
    The top should be golden brown, and the apples should be tender when pierced with a fork.
    Can I add dried fruits to this recipe?
    Yes, dried cranberries or raisins would be a delicious addition.
    Can I prepare this recipe ahead of time?
    Yes, you can assemble it the night before and bake it fresh in the morning.
    What can I serve this with?
    It pairs well with ice cream, yogurt, or a drizzle of maple syrup.

  • Coconut Lime Ice Cream

    Coconut Lime Ice Cream

    Coconut Lime Ice Cream

    Ingredients:
    – 1 can (14 oz) coconut milk
    – 1 cup heavy cream
    – 3/4 cup sugar
    – 1/4 cup lime juice
    – Zest of 1 lime
    – 1/2 tsp vanilla extract
    – Pinch of salt

    Directions:
    1. In a mixing bowl, whisk together the coconut milk, heavy cream, sugar, lime juice, lime zest, vanilla extract, and a pinch of salt until the sugar is fully dissolved. This is where the magic starts!
    2. Pour that creamy goodness into your ice cream maker and churn as per the manufacturer’s instructions—usually about 20-25 minutes should do the trick.
    3. After it’s churned to perfection, transfer your ice cream to an airtight container and pop it in the freezer. Let it chill out for at least 4 hours or until it’s nice and firm.
    4. Scoop yourself a bowl of this delightful coconut lime ice cream and if you’re feeling extra fancy, garnish with some additional lime zest on top. Enjoy the tropical vibes!