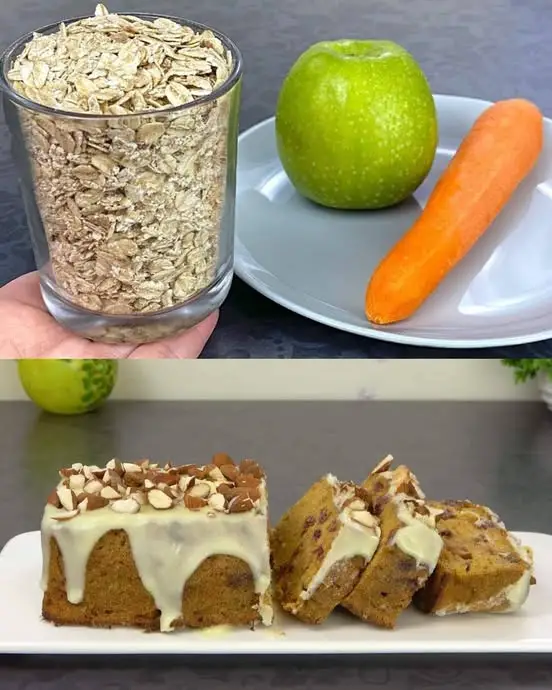
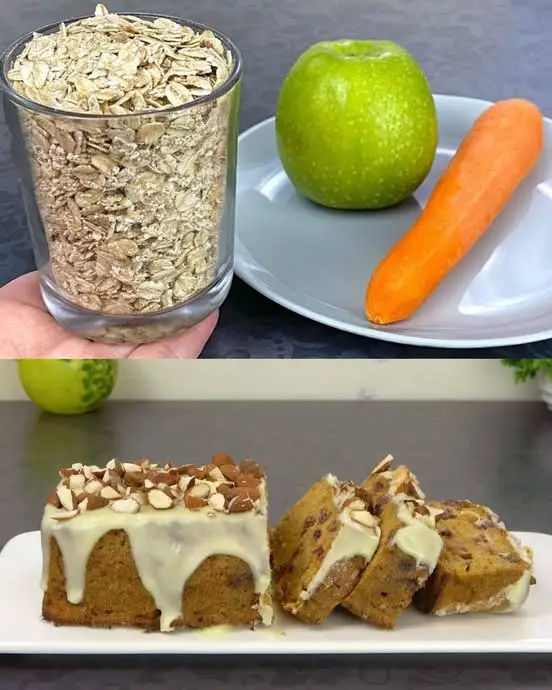
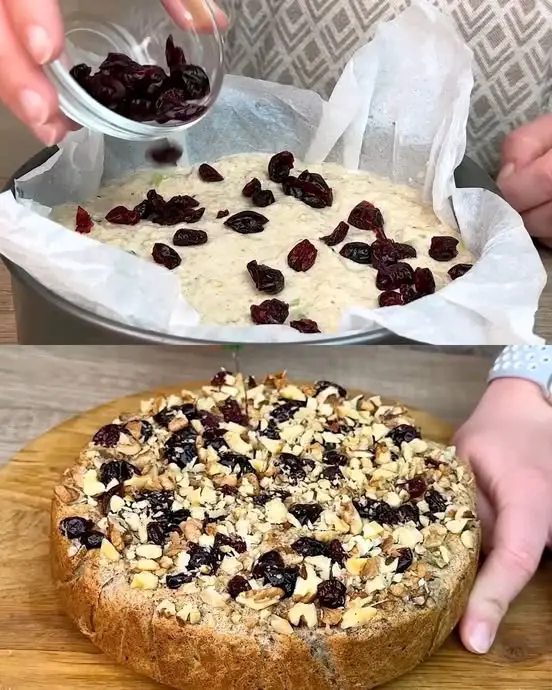
Category: quick and easy recipe

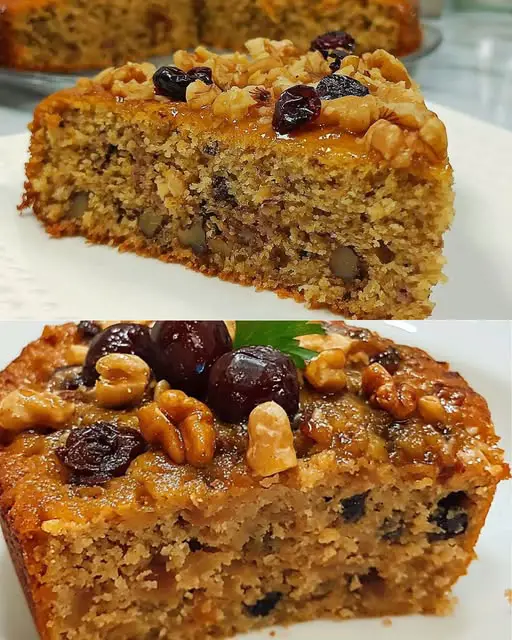
  • Heavenly Raisin Bread: A Comfort Food Classic with a Creamy Twist

    Heavenly Raisin Bread: A Comfort Food Classic with a Creamy Twist

    VHeavenly Raisin Bread: A Comfort Food Classic with a Creamy Twist
    The Heartwarming Story Behind Raisin Bread
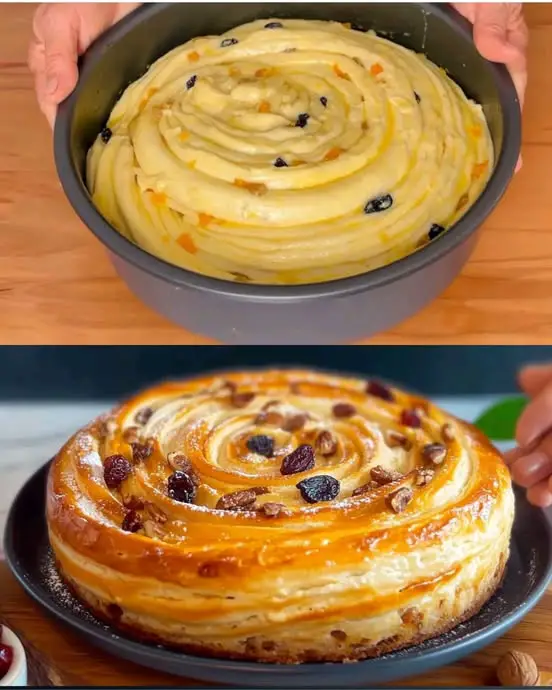
    There’s something magical about a slice of homemade bread that fills the kitchen with warmth and nostalgia. This Raisin Bread with Cottage Cheese is more than just a recipe—it’s a culinary hug that brings together the sweet burst of raisins, the creamy richness of cottage cheese, and the comforting softness of freshly baked bread.

    Inspired by traditional home baking, this recipe transforms simple ingredients into a delightful treat that’s perfect for breakfast, afternoon tea, or a sweet indulgence any time of day. Each bite tells a story of comfort, tradition, and the simple joy of home cooking.

    Ingredients
    For the Raisin Bread
    Eggs: 2 large
    Salt: 1 pinch
    Vanilla Sugar: 1 teaspoon (or 1 teaspoon sugar + 1/4 teaspoon vanilla extract)
    Granulated Sugar: 100g (1/2 cup)
    Butter: 80g (5.6 tablespoons), melted
    Cottage Cheese or White Yogurt: 130g (1/2 cup)
    All-Purpose Flour: 150g (1 1/4 cups)
    Baking Powder: 1 teaspoon
    Raisins: 80g (1/2 cup)
    Butter (for greasing): 1 tablespoon
    Powdered Sugar: For dusting (to taste)
    Step-by-Step Cooking Instructions
    Preparing the Batter
    Prepare Ingredients
    Preheat oven to 180°C (350°F)
    Grease a standard loaf pan (approximately 9×5 inches) with 1 tablespoon of butter
    Line the pan with parchment paper for easy removal
    Create the Egg Base
    In a large mixing bowl, crack 2 eggs
    Add a pinch of salt
    Add vanilla sugar (or sugar with vanilla extract)
    Beat with an electric mixer or whisk
    Continue beating until the mixture becomes light and foamy
    Gradually add granulated sugar while continuing to beat
    Mix until the mixture is pale and doubles in volume
    Incorporate Wet Ingredients
    Melt butter and allow to cool slightly
    Gently fold melted butter into the egg mixture
    Add cottage cheese or white yogurt
    Stir until well combined
    Ensure no large lumps remain
    Add Dry Ingredients
    Sift flour and baking powder together
    Gradually fold flour mixture into the wet ingredients
    Mix until just combined
    Do not overmix to keep the bread tender
    Fold in raisins, distributing evenly throughout the batter
    Bake to Perfection
    Pour batter into the prepared loaf pan
    Spread evenly with a spatula
    Tap the pan gently on the counter to remove air bubbles
    Place in preheated oven
    Bake for 35-40 minutes
    Check doneness by inserting a toothpick into the center
    Toothpick should come out clean or with just a few moist crumbs
    Cool and Serve
    Remove from oven
    Let cool in the pan for 10 minutes
    Transfer to a wire rack
    Allow to cool completely
    Dust with powdered sugar
    Slice and serve
    Nutritional Information
    Serving Size: 1 slice (approximately 1/10 of the loaf)

    Calories: 220-250
    Protein: 5-6g
    Carbohydrates: 30-35g
    Fat: 10-12g
    Fiber: 1-2g
    Calcium: 4-5% of daily value
    Preparation Time: 15 minutes Cooking Time: 35-40 minutes Total Time: Approximately 55 minutes Servings: 10 slices

    Pro Cooking Tips and Tricks
    Raisin Tip: Soak raisins in warm water for 10 minutes before adding to prevent burning
    Flour Sifting: Sift flour to ensure no lumps and achieve a lighter texture
    Mixing Technique: Fold ingredients gently to maintain air in the batter
    Evenness: Use a spatula to spread batter evenly in the pan
    Moisture Check: Check bread early to prevent over-baking
    Recipe Variations and Substitutions
    Gluten-Free Option: Use gluten-free flour blend
    Dairy-Free Variation: Replace cottage cheese with coconut yogurt
    Fruit Alternatives: Swap raisins with cranberries, chopped apricots, or chocolate chips
    Spice It Up: Add cinnamon or nutmeg to the batter
    Nutty Twist: Fold in chopped walnuts or almonds
    Frequently Asked Questions
    Q1: Can I use Greek yogurt instead of cottage cheese? A: Yes! Greek yogurt works well and provides similar moisture and protein.

    Q2: How do I store this raisin bread? A: Store in an airtight container at room temperature for 3-4 days or refrigerate for up to a week.

    Q3: Can I freeze the bread? A: Absolutely! Wrap tightly and freeze for up to 3 months. Thaw at room temperature.

    Q4: My raisins always sink to the bottom. How can I prevent this? A: Toss raisins in a little flour before adding to the batter to help them stay suspended.

    Q5: Can I make this bread vegan? A: Use egg replacer, plant-based yogurt, and vegan butter for a similar result.

    Storage and Make-Ahead Tips
    Room Temperature: Store in airtight container for 3-4 days
    Refrigeration: Keeps well for up to 1 week
    Freezing: Freeze whole or in slices for up to 3 months
    Reheating: Warm slightly in toaster oven or microwave
    Prep Ahead: Mix dry ingredients the night before
    Indulge in the comforting embrace of this delightful Raisin Bread—a slice of pure homemade happiness!

  • Crispy Cheese & Hot Dog Corn Dogs

    Crispy Cheese & Hot Dog Corn Dogs

    Ingredients:

    • 2 hot dog
    • 1 block of mozzarella cheese
    • 1 cup all-purpose flour
    • 1 egg
    • 1/2 cup milk
    • 1 teaspoon sugar
    • 1/2 teaspoon salt
    • 1 teaspoon baking powder
    • 1 cup panko breadcrumbs
    • ️ Cooking oil (for frying)
    • Wooden skewers
    • Ketchup (for topping)

    ‍ Instructions:

    1️⃣ Prepare the Ingredients
    Cut hot dogs in half.
    Slice mozzarella cheese into similar-sized sticks.
    Insert a wooden skewer through a hot dog piece and a cheese piece.

    2️⃣ Make the Batter
    In a bowl, mix flour, sugar, salt, and baking powder.
    Add egg and milk, then stir until smooth.

    3️⃣ Coat the Corn Dogs
    Dip each skewer into the batter until fully coated.
    Roll in panko breadcrumbs for extra crunch.

    4️⃣ Fry Until Golden
    Heat oil in a deep pan to 350°F (175°C).
    Fry until golden brown and crispy.

    5️⃣ Serve & Enjoy
    ️ Let them cool slightly.
    Drizzle with ketchup and enjoy!

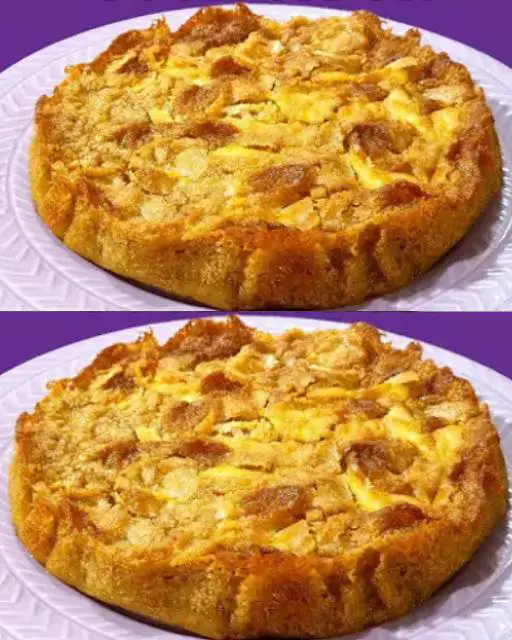
  • Heavenly Ricotta Dessert: A Creamy Culinary Masterpiece

    Heavenly Ricotta Dessert: A Creamy Culinary Masterpiece

    Heavenly Ricotta Dessert: A Creamy Culinary Masterpiece

    Discover the Ultimate Italian-Inspired Sweet Sensation

    Imagine a dessert that combines the lightness of a perfectly baked cake with the creamy richness of ricotta cheese. This extraordinary recipe is more than just a sweet treat – it’s a celebration of Italian baking tradition, bringing together simple ingredients to create something truly magical.

    The Story Behind the Dessert

    Born from the rich culinary heritage of Italy, this ricotta dessert represents the perfect balance of simplicity and sophistication. Each bite tells a story of family, tradition, and the art of home baking.

    Ingredients: Your Culinary Canvas

    Gather these ingredients to create your delectable masterpiece:

    For the Cake Batter:

    • Eggs: 4 large
    • Salt: A pinch
    • Sugar: 200 grams (7 oz / 1 cup)
    • Vegetable Oil: 120 ml (1/2 cup)
    • Kefir: 120 ml (1/2 cup)
    • 00 Flour: 300 grams (10.5 oz / 2 1/2 cups)
    • Baking Powder: 8 grams (1 1/2 teaspoons)

    For the Ricotta Filling:

    • Ricotta Cheese: 300 grams (10.5 oz / 1 1/4 cups)
    • Icing Sugar: 3 tablespoons
    • Vanilla Sugar: 8 grams (1 tablespoon)
    • Egg: 1 large

    For Finishing:

    • Powdered Sugar: For dusting

    Step-by-Step Baking Instructions: Your Path to Dessert Perfection

    1. Preparing the Cake Batter

    The foundation of your delicious dessert:

    • Choose a deep mixing bowl
    • Crack eggs into the bowl
    • Add a pinch of salt
    • Begin beating eggs
    • Gradually add sugar
    • Beat until mixture becomes white and frothy
    • Mixture should be light and voluminous

    2. Adding Liquid Ingredients

    Building depth of flavor:

    • Add vegetable oil
    • Pour in kefir
    • Continue beating
    • Ensure ingredients are well incorporated
    • Mixture should remain smooth and consistent

    3. Incorporating Dry Ingredients

    Creating the perfect cake base:

    • Sift flour and baking powder together
    • Gradually add to wet ingredients
    • Mix gently
    • Avoid overmixing
    • Batter should be liquid and smooth

    4. Preparing the Ricotta Filling

    The creamy heart of the dessert:

    • In a separate bowl, place ricotta cheese
    • Add powdered sugar
    • Incorporate vanilla sugar
    • Add one egg
    • Blend until smooth and creamy
    • Transfer to a piping bag

    5. Assembling and Baking

    Bringing it all together:

    • Preheat oven to 180°C (350°F)
    • Line baking tray with parchment paper
    • Pour cake batter into prepared tray
    • Create grid pattern with ricotta mixture
    • Use piping bag to make decorative lines
    • Bake for 35 minutes
    • Cake should be golden and set

    6. Finishing Touches

    The final flourish:

    • Remove from oven
    • Allow to cool slightly
    • Dust generously with powdered sugar
    • Serve warm or at room temperature

    Nutritional Insights

    A balanced indulgence:

    • Calories per Slice: Approximately 280-320
    • Protein: 8-10g
    • Carbohydrates: 30-35g
    • Fat: 15-18g
    • Calcium: 10-15% of daily value

    Preparation Time: 25 minutes Cooking Time: 35 minutes Total Time: 60 minutes Servings: 8-10 slices

    Pro Baking Tips and Tricks

    Mastering the Perfect Ricotta Dessert

    • Egg Technique: Beat eggs thoroughly for maximum volume
    • Kefir Magic: Adds moisture and slight tanginess
    • Ricotta Tip: Use fresh, high-quality ricotta
    • Baking Hack: Check doneness with a toothpick
    • Cooling Trick: Let cake rest before cutting

    Recipe Variations and Substitutions

    Unleash your culinary creativity:

    • Gluten-Free Version: Use gluten-free flour blend
    • Dairy-Free Adaptation: Replace ricotta with coconut cream
    • Flavor Variations: Add lemon zest or cinnamon
    • Fruit Twist: Top with fresh berries
    • Chocolate Lovers: Sprinkle with cocoa powder

    Frequently Asked Questions

    Q1: Can I make this dessert ahead of time? Yes! Can be prepared a day in advance and stored in refrigerator.

    Q2: What if I don’t have kefir? Substitute with yogurt or buttermilk.

    Q3: How do I store leftovers? Refrigerate in airtight container for 2-3 days.

    Q4: Can I freeze this dessert? Best enjoyed fresh, but can be frozen for up to 1 month.

    Q5: How can I make it less sweet? Reduce sugar in both batter and ricotta filling.

    Storage and Make-Ahead Tips

    Keeping Your Ricotta Dessert Fresh

    • Refrigeration: Store 2-3 days in airtight container
    • Room Temperature: Best within 1 day
    • Freezing: Not recommended due to texture changes
    • Serving: Best served slightly warm
    • Prep Ahead: Bake earlier in day, dust with sugar before serving

    Enjoy this delightful ricotta dessert – a true celebration of Italian baking!

    Final Thoughts

    More than just a dessert, this ricotta creation is a journey through texture, flavor, and culinary tradition. Whether you’re an experienced baker or a curious novice, this recipe promises to delight and inspire.

  • How to Make Mosaic jelly with 4 ingredients

    How to Make Mosaic jelly with 4 ingredients

    How to Make Mosaic jelly with 4 ingredients


    How to Make One 14-ounce can of heavy cream is required.

    one fourteen-ounce can of sweetened condensed milk

    five flavored gelatin packets, each containing three and a half ounces

    two 0.3-ounce packages of pineapple-flavored gelatin

    Instructions:

    Half a cup (125 ml) of boiling water is all you need to dissolve the five flavored gelatins. Next, fill each with half a cup (125 ml) of ice water. Put each one in its own container and put it in the fridge until it sets completely.

    Prepare the Gelatin by cutting it into cubes or any other form you choose after it has firmed up.

    Next, in 3/4 cup (175 ml) of boiling water for each package of pineapple gelatin, dissolve the gelatin. Next, whisk in 3/4 cup (175 ml) of chilled water.

    After the pineapple gelatin has cooled, add the chilled heavy cream and sweetened condensed milk; stir until combined. This will make the cream.

    Finishing the Gelatin Salad: Lastly, add the pineapple cream mixture and gently fold in the gelatin cubes. Place in the fridge until completely set, then transfer to a glass dish.

    Some pointers:

    If you want your dessert to stand out more, try using different tastes of gelatin.

    Before combining the gelatins with the cream, let them cool completely so they don’t melt.

    For an added burst of flavor, include sliced strawberries, kiwis, or pineapple.

    Serve chilled with a garnish of fresh mint leaves.

  • Natural Bomb to Boost Immunity: Carrot and Beet Drink

    Natural Bomb to Boost Immunity: Carrot and Beet Drink

    Natural Bomb to Boost Immunity: Carrot and Beet Drink

    Carrots and beets are nutritional powerhouses that can strengthen your immune system and protect you against viruses and bacteria. This natural bomb of nutrients combines their rich vitamins, minerals, and antioxidants into a delicious drink that energizes and fortifies your body.

    Ingredients

    • Carrots: 3 medium-sized (peeled and chopped)
    • Beets: 1 medium-sized (peeled and chopped)
    • Ginger: 1-inch piece (optional, for added immune-boosting properties)
    • Lemon Juice: 1 tablespoon
    • Honey: 1 teaspoon (optional, for sweetness)
    • Water: 1/2 cup

    Preparation Instructions

    1. Prepare the Ingredients
      • Wash, peel, and chop the carrots and beet into small pieces.
      • Peel the ginger if using.
    2. Blend or Juice
      • Place the carrots, beet, and ginger in a blender or juicer.
      • Add 1/2 cup of water and blend until smooth.
    3. Strain the Juice (Optional)
      • If you prefer a smoother drink, strain the blended mixture through a fine mesh sieve or cheesecloth.
      • Press the pulp to extract all the juice.
    4. Add Lemon and Honey
      • Stir in the lemon juice for an extra dose of vitamin C and a teaspoon of honey for sweetness, if desired.
    5. Serve Fresh
      • Pour the drink into a glass and enjoy it immediately to retain maximum nutrients.

    Health Benefits of Carrot and Beet Drink

    1. Boosts Immunity
      • Carrots are rich in vitamin A and antioxidants that strengthen your immune system.
      • Beets are packed with vitamin C, folate, and iron, which support white blood cell production and overall immune function.
    2. Detoxifies the Body
      • Beets help cleanse the liver, while carrots support kidney health, making this drink a natural detoxifier.
    3. Improves Blood Health
      • Beets increase hemoglobin levels, and their nitrates improve blood flow. Carrots contribute to better blood circulation and oxygen delivery.
    4. Fights Inflammation
      • The antioxidants and anti-inflammatory compounds in carrots, beets, and ginger help reduce chronic inflammation and protect against infections.
    5. Supports Respiratory Health
      • The high levels of vitamin C in beets and lemon enhance respiratory health and help fight off colds and flu.
    6. Energizes the Body
      • This drink is a natural energy booster, thanks to its iron, magnesium, and potassium content, which help reduce fatigue and improve stamina.

    How to Use

    • Drink 1 glass daily, preferably in the morning on an empty stomach, for maximum benefits.
    • Continue for 1-2 weeks as part of your immunity-boosting routine.

    Precautions

    • Beets can temporarily turn urine or stool pink/red; this is harmless.
    • Consult a doctor if you have kidney stones, as beets are high in oxalates.

    Conclusion

    This carrot and beet drink is a natural immunity booster that fortifies your body against viruses and bacteria. Packed with essential nutrients, it’s a flavorful and easy way to stay healthy and energized. Try it today and enjoy the powerful benefits!

  • Cheesy Mashed Potato Puffs: A Fun, Flavorful Twist on Leftovers!

    Cheesy Mashed Potato Puffs: A Fun, Flavorful Twist on Leftovers!

    Got leftover mashed potatoes? Turn them into these irresistible Cheesy Mashed Potato Puffs! Crispy on the outside, fluffy on the inside, and packed with gooey cheese, these puffs are the perfect way to reinvent your leftovers. Whether you’re serving them as a side dish, appetizer, or snack, these puffs are sure to be a hit. Let’s dive into this easy and delicious recipe!


    Why You’ll Love This Recipe

    • Crispy & Cheesy: The perfect combination of textures and flavors.
    • Easy to Make: Uses simple ingredients and leftover mashed potatoes.
    • Versatile: Great as a side, appetizer, or snack.
    • Crowd-Pleaser: Loved by kids and adults alike!

    Ingredients You’ll Need

    Here’s what you’ll need to make these delicious puffs (makes about 12 puffs):

    • 2 cups leftover mashed potatoes: The base of the puffs.
    • 1 cup shredded cheddar cheese: Adds gooey, cheesy goodness.
    • 1 large egg: Binds the mixture together.
    • 1/4 cup grated Parmesan cheese: Adds a salty, nutty flavor.
    • 1/4 cup all-purpose flour: Helps hold the puffs together.
    • 1/4 teaspoon garlic powder: Enhances the flavor.
    • 1/4 teaspoon onion powder: Adds depth.
    • Salt and pepper, to taste: Balances the flavors.
    • Cooking spray or oil: For greasing the muffin tin.

    Step-by-Step Instructions

    1. Preheat your oven to 375°F (190°C).
    2. Lightly grease a muffin tin with cooking spray or oil.

    2. Mix the Ingredients

    1. In a large bowl, combine the mashed potatoescheddar cheeseeggParmesan cheeseflourgarlic powderonion powdersalt, and pepper.
    2. Stir until everything is well combined.

    3. Fill the Muffin Tin

    1. Scoop the mixture into the prepared muffin tin, filling each cup about 3/4 full.
    2. Smooth the tops with a spoon or your fingers.

    4. Bake to Perfection

    1. Bake for 25-30 minutes, or until the puffs are golden brown and crispy on the edges.
    2. Let them cool in the tin for 5 minutes, then carefully remove them with a spoon or knife.

    5. Serve and Enjoy

    1. Serve warm with sour cream, chives, or your favorite dipping sauce.
    2. Watch them disappear!

    Tips for Success

    • Use Cold Mashed Potatoes: They hold their shape better when baking.
    • Add Extra Flavor: Mix in cooked bacon, green onions, or herbs for a twist.
    • Make Them Ahead: Prepare the mixture the night before and bake them fresh in the morning.
    • Store Leftovers: Keep in an airtight container in the fridge for up to 3 days and reheat in the oven.

    Serving Suggestions

    These puffs are perfect for:

    • Appetizers: Serve with dipping sauces like ranch or marinara.
    • Side Dishes: Pair with roasted chicken, steak, or veggies.
    • Snacks: Enjoy as a tasty afternoon treat.
    • Brunch: Add them to your breakfast or brunch spread.


    Final Thoughts

    These Cheesy Mashed Potato Puffs are a fun, flavorful way to use up leftover mashed potatoes. They’re crispy, cheesy, and utterly satisfying—perfect for any occasion. Give them a try and let me know how they turn out in the comments below!


  • Dark Chocolate Blackberry Cupcakes – A Rich & Fruity Delight

    Dark Chocolate Blackberry Cupcakes – A Rich & Fruity Delight

    There’s something magical about the mix of deep, velvety dark chocolate and the sweet-tart burst of blackberries. These cupcakes are rich, moist, and topped with a dreamy blackberry frosting—perfect for any chocolate lover!
    Ingredients:
    For the cupcakes:
    1 cup all-purpose flour
    ½ cup unsweetened cocoa powder
    1 tsp baking soda
    ½ tsp salt
    ½ cup unsalted butter, melted
    ¾ cup brown sugar
    2 large eggs
    1 tsp vanilla extract
    ½ cup buttermilk
    ½ cup hot coffee (or hot water)
    ½ cup fresh blackberries, mashed
    For the frosting:
    ½ cup unsalted butter, softened
    2 cups powdered sugar
    ¼ cup blackberry puree (strained to remove seeds)
    1 tsp vanilla extract
    1-2 tbsp heavy cream (if needed)
    Directions:
    1️⃣ Preheat oven to 350°F (175°C). Line a cupcake pan with liners.
    2️⃣ In a bowl, whisk flour, cocoa powder, baking soda, and salt.
    3️⃣ In another bowl, mix melted butter and brown sugar until smooth. Add eggs and vanilla, then stir in mashed blackberries.
    4️⃣ Alternately add dry ingredients and buttermilk, mixing gently. Stir in hot coffee until just combined.
    5️⃣ Fill cupcake liners ¾ full and bake for 18-20 minutes or until a toothpick comes out clean. Let cool completely.
    6️⃣ For the frosting, beat butter until creamy. Add powdered sugar, blackberry puree, and vanilla. Beat until fluffy, adding cream if needed.
    7️⃣ Pipe frosting onto cooled cupcakes and enjoy!
    ✨Tip: Garnish with a fresh blackberry or a drizzle of melted chocolate for an elegant touch!
    May be an image of cupcake
    All reactions:

    21K

  • Sourdough Herb and Cheese Rolls Recipe

    Sourdough Herb and Cheese Rolls Recipe

    Sourdough Herb and Cheese Rolls Recipe
    Ingredients:
    For the Dough:
    ½ cup (120g) sourdough starter (discard or active)
    ¾ cup (180ml) warm milk
    2 ½ cups (315g) all-purpose flour
    2 tbsp unsalted butter, melted
    1 tbsp sugar
    1 tsp salt
    ½ tsp garlic powder (optional)
    For the Filling:
    1 cup shredded cheese (cheddar, mozzarella, or parmesan)
    2 tbsp butter, softened
    1 tsp dried oregano
    1 tsp dried basil
    ½ tsp black pepper
    For Topping (Optional):
    1 egg yolk + 1 tbsp water (for egg wash)
    Extra shredded cheese and herbs for garnish
    Instructions:
    Make the Dough – In a bowl, mix the sourdough starter, warm milk, melted butter, sugar, salt, and garlic powder. Gradually add the flour and knead until a soft dough forms (about 8 minutes). Cover and let rest for 4-6 hours (or overnight in the fridge).
    Prepare the Filling – Mix the shredded cheese, softened butter, oregano, basil, and black pepper in a small bowl.
    Shape the Rolls – Roll the dough into a rectangle (about ¼ inch thick). Spread the cheese mixture evenly over the surface. Roll it up tightly like a cinnamon roll and slice into 10-12 rolls.
    Final Rise – Arrange the rolls in a greased baking dish. Cover and let rise for 1-2 hours until puffy.
    Bake – Preheat the oven to 375°F (190°C). Brush the rolls with egg wash and sprinkle with extra cheese and herbs. Bake for 20-25 minutes until golden brown.
    Cool & Serve – Let them cool slightly before serving. Enjoy warm with butter!
  • Healthy Pickled Beets Recipe

    Healthy Pickled Beets Recipe

    Healthy Pickled Beets Recipe

    Ingredients

    8 medium fresh beets

    1/2 cup sugar

    1-1/2 teaspoons whole cloves

    1-1/2 teaspoons whole allspice

    1/2 teaspoon salt

    Preparation

    The Scrub beets and trim tops to 1 inch. Place them in a pot; Add water until covered. Bring to a boil. Reduce heat; Cover and simmer until tender, 25 to 30 minutes. Remove from water; Cold.Peel  and slice the beets; Place in a bowl and reserve.

    In a small saucepan, combine vinegar, sugar, cloves, allspice and salt. Bring to a boil; Let cook for 5 minutes. Pour over the beets. Refrigerate for at least 1 hour.Drain before serving.

  • Cheesy Chicken Bacon Taquitos Recipe

    Cheesy Chicken Bacon Taquitos Recipe

    This looks like a delicious Cheesy Chicken Bacon Taquitos recipe! Here’s a detailed version with emoji to make it fun and easy to follow!


    Cheesy Chicken Bacon Taquitos Recipe

    Ingredients:

    • 2 cups cooked and shredded chicken
    • 1 cup shredded cheese (cheddar, mozzarella, or Mexican blend)
    • ½ cup cooked and crumbled bacon
    • 1 tsp garlic powder
    • ½ tsp salt
    • ½ tsp black pepper
    • ️ ½ tsp paprika (optional for extra spice)
    • 6-8 small flour or corn tortillas
    • 2 tbsp butter or oil (for frying or baking)
    • Chopped fresh cilantro (for garnish)

    ‍ Instructions:

    1️⃣ Preheat oven to 375°F (190°C) or heat a pan if frying.

    2️⃣ Prepare the Filling: In a bowl, mix shredded chicken, cheese, bacon, garlic powder, salt, pepper, and paprika.

    3️⃣ Assemble the Taquitos: Place 2-3 tablespoons of filling onto each tortilla, roll tightly, and place seam-side down.

    4️⃣ Cooking Options:

    • Pan-fry: Heat oil in a pan and cook taquitos for 2-3 minutes per side until golden brown.
    • Bake: Place taquitos on a lined baking sheet, brush with melted butter, and bake for 15-20 minutes until crispy.

    5️⃣ Top & Serve: Sprinkle with extra cheese, let melt, and garnish with fresh cilantro. Serve with salsa, guacamole, or sour cream!


    Enjoy these crispy, cheesy, and savory taquitos with your favorite dips! Let me know if you’d like any modifications! ❤️

  • Cozy Baked Cinnamon Apple Crisp (Gluten-Free & Dairy-Free)

    Cozy Baked Cinnamon Apple Crisp (Gluten-Free & Dairy-Free)

    Cozy Baked Cinnamon Apple Crisp (Gluten-Free & Dairy-Free)

    Nothing says comfort quite like the aroma of baked apples and warm cinnamon wafting through your home. This gluten-free and dairy-free apple crisp combines tender, spiced apples with a perfectly crispy oat topping, creating a dessert that’s both nostalgic and allergy-friendly. Perfect for fall gatherings, holiday celebrations, or anytime you crave a wholesome, comforting dessert.

    Ingredients

    Serves 6-8

    For the Apple Filling

    • 4 large apples (about 800g), cored and sliced ¼-inch thick
    • 15ml (1 tablespoon) fresh lemon juice
    • 5g (1 teaspoon) ground cinnamon
    • 30g (2 tablespoons) coconut sugar (optional)
    • 5g (1 teaspoon) vanilla extract

    For the Crisp Topping

    • 50g (½ cup) certified gluten-free rolled oats
    • 30g (¼ cup) almond flour
    • 30ml (2 tablespoons) melted coconut oil
    • 30ml (2 tablespoons) pure maple syrup
    • 2g (½ teaspoon) ground cinnamon
    • Pinch of sea salt

    Instructions

    1. Prepare (10 minutes)
    • Preheat oven to 190°C (375°F)
    • Grease a 9-inch square baking dish or 2-quart casserole
    • Core and slice apples uniformly
    1. Season Apples (5 minutes)
    • In a large bowl, toss sliced apples with lemon juice
    • Add cinnamon, vanilla, and coconut sugar if using
    • Mix until evenly coated
    • Transfer to prepared baking dish
    1. Make Topping (5 minutes)
    • Combine gluten-free oats and almond flour in a bowl
    • Add melted coconut oil and maple syrup
    • Mix until crumbly texture forms
    • Sprinkle with cinnamon and salt, mix well
    1. Assemble and Bake (25-30 minutes)
    • Spread topping evenly over seasoned apples
    • Bake until apples are tender and topping is golden
    • Check doneness by inserting a knife into apples

    Nutritional Information (per serving, based on 8 servings)

    • Calories: 185
    • Fat: 8g
    • Carbohydrates: 28g
    • Fiber: 4g
    • Protein: 2g
    • Sugar: 20g

    Total Time

    • Prep Time: 20 minutes
    • Bake Time: 25-30 minutes
    • Total Time: 45-50 minutes

    Pro Tips and Tricks

    1. Apple Selection
    • Use a mix of sweet and tart apples
    • Honeycrisp, Granny Smith, Pink Lady work well
    • Choose firm apples that hold shape when baked
    1. Texture Tips
    • Slice apples uniformly for even cooking
    • Don’t overmix topping to maintain crumbly texture
    • Cover with foil if topping browns too quickly
    1. Serving Suggestions
    • Serve warm for best texture and flavor
    • Top with dairy-free vanilla ice cream
    • Drizzle with additional maple syrup
    1. Preparation
    • Prepare topping in advance
    • Store in refrigerator until ready to use
    • Bring to room temperature before baking

    Variations and Substitutions

    1. Fruit Options
    • Mix in pears for variety
    • Add berries for extra tartness
    • Include cranberries during holiday season
    1. Topping Alternatives
    • Use coconut flour instead of almond flour
    • Try pecans or walnuts for crunch
    • Substitute honey for maple syrup (not vegan)
    1. Spice Variations
    • Add nutmeg for warmth
    • Include ginger for zing
    • Mix in cardamom for complexity
    1. Sweetener Options
    • Use date syrup instead of maple syrup
    • Try coconut sugar in topping
    • Reduce sweetener for tart preference

    Common FAQs

    Q: Can I prepare this in advance?
    A: Yes, assemble up to 24 hours ahead and refrigerate unbaked. Bring to room temperature before baking.

    Q: Why is my topping not crispy?
    A: Ensure coconut oil is properly incorporated and avoid overcrowding the topping.

    Q: How do I store leftovers?
    A: Cover and refrigerate for up to 5 days. Reheat in oven for best results.

    Q: Can I freeze this dessert?
    A: Yes, freeze unbaked for up to 3 months. Bake directly from frozen, adding 10-15 minutes.

    Storage and Make-Ahead Tips

    Refrigerator Storage

    • Cover tightly and store up to 5 days
    • Best reheated in 350°F oven for 15 minutes
    • Avoid microwave to maintain crispy topping

    Freezer Instructions

    • Wrap unbaked crisp tightly
    • Store up to 3 months
    • Thaw overnight in refrigerator
    • Bake as directed, adding extra time if needed

    Make-Ahead Options

    • Prepare filling and topping separately
    • Store in refrigerator up to 24 hours
    • Assemble just before baking
    • Allow ingredients to reach room temperature

    Reheating Tips

    • Preheat oven to 350°F
    • Cover loosely with foil
    • Heat 15-20 minutes until warm
    • Remove foil for final 5 minutes to re-crisp topping
  • Famous Chocolate Depression Cake

    Famous Chocolate Depression Cake

    The Depression Cake began in the Depression era. The cake itself has no eggs or dairy in it. The plan for those times was to make food stretch as far as they could without using any of the ration coupons.

    MY LATEST VIDEOS

    Chocolate Depression Cake 23 min scaled

    Want to save this recipe? Enter your email below and we’ll send the recipe straight to your inbox!


    NOTE: By saving this recipe, you agree to join our weekly recipes newsletter.

    The coupons allowed them to get so much sugar or other items that were needed. The women wanted to be able to feed their families and still give them cakes or desserts, they found ways to do so when money was scarce or non-existent.

    Chocolate Depression Cake 19 min scaled

    This chocolate cake is moist, fluffy and very chocolatey. Very seldom would this cake have frosting on it back in those times. The Dairy, the powdered sugar were not items that were of importance when it came to feeding a hungry family in hard times.

    Chocolate Depression Cake 22 min scaled

    REMEMBER

    WANT TO SAVE THIS RECIPE? CLICK BELOW AND PIN IT

    Pin

    You can make this cake plain and enjoy it just as much as you would with the frosting.

    Chocolate Depression Cake 21 min scaled

    Frequently Asked Questions:

                How can a Cake have no eggs?

    I seriously cannot explain it in a way that would make sense. However, I will tell you it has to do with the way the vinegar and baking soda react with each other. All I will say definitively is that this cake is the perfect cake! I seldom buy box mixes anymore.

                Could I leave the Cocoa Powder out of the recipe?

    I imagine that would be okay, but you will need to replace at least some of the dry ingredients from the cocoa with flour.

                Do I need to refrigerate this cake?

    There is no dairy in the cake, so it would be perfectly okay sitting covered on your counter. Remember, not all families had refrigerators or ice boxes back in the Depression times.

                Could I add nuts or chips to the cake?

    You could definitely add nuts or cherries, or chocolate chips or whatever pleases you in this recipe. Share what you added so we all can try.

    Chocolate Depression Cake 19 min scaled

    What do you need to make Famous Chocolate Depression Cake

                1 cup water

    1 cup Granulated Sugar

    ⅓ cup Vegetable Oil

    1 tsp Vanilla Extract

    1 tsp White Vinegar

    ½ tsp Salt

    1 tsp Baking Soda

    ¼ cup Cocoa Powder, unsweetened

    1 ½ cups Flour

    Frosting:

    2 tbsp butter, softened

    ¼ cup Cocoa Powder, unsweetened

    1 cup Powdered Sugar

    ½ tsp Vanilla Extract

    1 tbsp Heavy cream(you can use milk if you have no cream)

    Chocolate Depression Cake min scaled

    How to make Famous Chocolate Depression Cake

    Cake:

    Preheat the oven to 350*

    Combine the flour, sugar, cocoa powder, salt and baking soda in a bowl

    a)

    Chocolate Depression Cake 2 min scaled

    b)

    Chocolate Depression Cake 3 min scaled

    In another bowl combine the water, vinegar, vanilla and oil

    Chocolate Depression Cake 4 min scaled

    Slowly add the wet ingredients to the bowl with the dry mix

    Chocolate Depression Cake 5 min scaled

    Mix until all lumps are removed

    Chocolate Depression Cake 6 min scaled

    Grease a 9×9 baking pan

    Spread the batter into the prepared pan evenly

    Chocolate Depression Cake 7 min scaled

    Bake for 30 to 35 minutes, until the center bounces back or a toothpick comes out clean

    Remove from the oven and set aside to cool

    Chocolate Depression Cake 8 min scaled

    Frosting:

    Melt the butter in a saucepan

    Stir in the cocoa powder, the mixture will be thick

    Transfer the mixture to a medium sized bowl

    Using an electric hand mixer, beat in the milk, vanilla and powdered sugar

    a)

    Chocolate Depression Cake 9 min scaled

    b)

    Chocolate Depression Cake 10 min scaled

    c)

    Chocolate Depression Cake 11 min scaled

    Once combined, beat on high until the frosting is light and fluffy, smooth and creamy

    Chocolate Depression Cake 12 min scaled

    Spread over the cooled cake

    a)

    Chocolate Depression Cake 13 min scaled

    b)

    Chocolate Depression Cake 14 min scaled

    c)

    Chocolate Depression Cake 15 min scaled

    d)

    Chocolate Depression Cake 16 min scaled

    e)

    Chocolate Depression Cake 17 min scaled

    Enjoy!

  • Picadillo Con Papas

    Picadillo Con Papas

    Ingredients

    • 1 pound ground beef
    • 1/2 onion, diced
    • 1/2 green bell pepper, diced
    • 2 tablespoons minced garlic
    • 1 medium russet potato, chopped
    • 1 (10.5-ounce can) Diced Tomatoes and chilies (like RO*TEL)
    • 1 (8-ounce can) tomato sauce
    • salt and pepper to taste
    • 2 Tablespoons taco seasoning
    • 1 teaspoon cumin
    • Chopped cilantro or green onions for garnish

    Instructions

    1. Brown the ground beef. In a skillet over medium heat, add oil and add the ground beef. Stir the ground beef to break it up and to cook it until it is no longer pink. Drain excess fat.
    2. Add chopped onions to the ground beef. In the same skillet as the ground beef, add the chopped onions and bell pepper.
    3. Stir the onions, bell peppers, and browned ground beef until the onions are softened. Add the minced garlic and stir for about a minute.
    4. Add diced potatoes to the ground beef and onions. Stir in the diced potatoes. It is very important that the potatoes are cut into very small pieces so they will cook with the ground beef. If you use thicker potato chunks you may have to start cooking the potatoes before you brown the ground beef. Personally, I like to dice the potatoes so the pieces are about the same as the chopped onions.
    5. Add the Flavor. Add the diced tomatoes and chiles (with liquid), tomato sauce, and add the taco seasoning, cumin, salt, and pepper, and stir.
    6. Cover and simmer for about 20 minutes. Garnish with chopped cilantro or chopped green onions before serving.
  • Crustless German Quark Cheesecake

    Crustless German Quark Cheesecake

    Crustless German Quark Cheesecake

    Discover this authentic German-style cheesecake that skips the traditional graham cracker crust in favor of a pure, creamy filling. This simplified version highlights the unique properties of quark, creating a lighter, protein-rich dessert that’s both elegant and surprisingly simple to make. Popular throughout Central Europe, this crustless cheesecake offers a delightful alternative to traditional American versions.

    Ingredients

    For the Filling

    • 28 ounces (800g) quark cheese (20% fat content)
    • 7 ounces (200g) margarine
    • 3.5 ounces (100g) granulated sugar
    • 3 large eggs, room temperature
    • 1 packet (0.3 oz/8g) vanilla sugar (or 2 teaspoons vanilla extract)
    • 1 packet (0.5 oz/15g) baking powder
    • Fresh lemon juice to taste (approximately 1-2 tablespoons)

    For the Pan

    • Butter or cooking spray for greasing

    Detailed Instructions

    1. Preparation Phase (15 minutes)
    • Place oven rack in the middle position
    • Preheat the oven to 356°F (180°C)
    • Grease a 9-inch (23cm) springform pan thoroughly
    • Remove eggs and quark from refrigerator to reach room temperature
    1. Melting the Margarine (5 minutes)
    • Melt margarine in a small saucepan over low heat
    • Remove from heat and let cool slightly
    • Do not allow it to brown or bubble
    1. Making the Batter (10 minutes)
    • In a large mixing bowl, combine quark and melted margarine
    • Add sugar and vanilla sugar, mix until well combined
    • Beat in eggs one at a time until fully incorporated
    • Add lemon juice to taste
    • Fold in baking powder gently but thoroughly
    1. Baking Process (45-50 minutes)
    • Pour batter into prepared springform pan
    • Smooth the top with a spatula
    • Bake for 45-50 minutes until golden brown
    • The center should still have a slight wobble
    • Test with a toothpick – it should come out mostly clean
    1. Cooling Phase (2 hours)
    • Let cool in the pan for 15 minutes
    • Run a knife around the edge
    • Release springform slowly
    • Cool completely on a wire rack

    Nutritional Information

    (Per slice, serves 12)

    • Calories: 285
    • Protein: 12g
    • Carbohydrates: 15g
    • Fat: 20g
    • Saturated Fat: 5g
    • Cholesterol: 62mg
    • Sodium: 250mg
    • Calcium: 120mg

    Total Time:

    • Preparation: 30 minutes
    • Baking: 45-50 minutes
    • Cooling: 2 hours
    • Total: 3 hours 20 minutes

    Pro Baking Tips

    • Room temperature ingredients are crucial for a smooth batter
    • Don’t overmix after adding baking powder
    • Place a water bath on the bottom rack of the oven to prevent cracking
    • Check the cake 5 minutes before the recommended baking time
    • The cake will continue cooking slightly as it cools
    • A slightly wobbly center is perfect – it will set while cooling

    Variations and Substitutions

    • Quark Alternatives:
    • Greek yogurt (strained overnight)
    • Combination of cream cheese and sour cream
    • Fromage blanc
    • Fat Content Options:
    • Butter instead of margarine
    • Low-fat quark (adjust baking time)
    • Flavoring Ideas:
    • Orange zest instead of lemon
    • 1 teaspoon almond extract
    • Vanilla bean paste
    • Light rum or brandy (1 tablespoon)

    Common FAQs

    Q: What if I can’t find quark in my local store?
    A: Make your own by straining plain yogurt overnight, or substitute with a mixture of cream cheese and Greek yogurt (equal parts).

    Q: Why did my cheesecake crack?
    A: Usually due to rapid temperature changes. Use a water bath and cool gradually in the oven with the door slightly open.

    Q: Can I make this cheesecake ahead of time?
    A: Yes, it actually improves after 24 hours in the refrigerator as flavors develop.

    Q: Why is my cheesecake too dense?
    A: Likely due to cold ingredients or overmixing. Ensure all ingredients are at room temperature before starting.

    Storage and Make-Ahead Tips

    • Refrigerator Storage:
    • Keeps fresh for up to 5 days
    • Store in an airtight container
    • Let sit at room temperature for 30 minutes before serving
    • Freezer Storage:
    • Can be frozen for up to 3 months
    • Wrap tightly in plastic wrap and aluminum foil
    • Thaw overnight in refrigerator
    • Make-Ahead Tips:
    • Prepare 1-2 days in advance for best flavor
    • Bring ingredients to room temperature the night before
    • Can be served chilled or at room temperature
    • Serving Suggestions:
    • Fresh berries
    • Whipped cream
    • Berry compote
    • Dusting of powdered sugar
  • Healthy Chocolate Banana Oat Cake (No Added Sugar)

    Healthy Chocolate Banana Oat Cake (No Added Sugar)

    Healthy Chocolate Banana Oat Cake (No Added Sugar)

    Discover the perfect balance of indulgence and nutrition with this naturally sweetened chocolate banana cake. Made with wholesome ingredients like oats, cocoa, and bananas, this dessert proves that healthy can be heavenly. Perfect for health-conscious dessert lovers, diabetics, or anyone looking to reduce their sugar intake without sacrificing taste.

    Ingredients

    For the Cake

    • 120g (1½ cups) rolled oats
    • 250ml (1 cup) hot milk
    • 2 medium ripe bananas (approximately 200g/7oz)
    • 2 large eggs
    • 30g (⅓ cup) unsweetened cocoa powder
    • 5g (1 teaspoon) baking powder
    • Pinch of salt
    • Optional: 50g (⅓ cup) mixed dried fruits (sultanas, chopped apricots, or prunes)
    • Optional: 30g (¼ cup) chopped nuts for topping

    For the Chocolate Glaze

    • 50g (1.8oz) dark chocolate
    • 25ml (1.7 tablespoons) milk

    Instructions

    Preparing the Cake Batter

    1. Preheat your oven to 180°C (350°F). Line a 20cm (8-inch) square baking pan with parchment paper.
    2. Pour hot milk over the oats in a large bowl and let sit for 10 minutes until oats are softened.
    3. Mash the bananas thoroughly until smooth.
    4. Add mashed bananas and eggs to the soaked oats, mix well.
    5. In a separate bowl, combine cocoa powder, baking powder, and salt.
    6. Fold the dry ingredients into the wet mixture until well combined.
    7. If using, stir in dried fruits.
    8. Pour the batter into the prepared pan and smooth the top.
    9. Sprinkle with chopped nuts if desired.

    Baking

    1. Bake for 35-40 minutes, or until a toothpick inserted into the center comes out clean.
    2. Let cool in the pan for 10 minutes before transferring to a wire rack.

    Making the Chocolate Glaze

    1. Chop chocolate into small pieces.
    2. Heat milk until just before boiling.
    3. Pour hot milk over chocolate and stir until smooth.
    4. Pour over cooled cake and spread evenly.
    5. Let glaze set before serving.

    Nutritional Information

    Per serving (1/9 of cake):

    • Calories: 185
    • Protein: 6g
    • Carbohydrates: 28g
    • Fiber: 4g
    • Natural Sugars: 12g
    • Fat: 7g

    Prep Time: 15 minutes
    Cook Time: 35-40 minutes
    Total Time: 55 minutes
    Servings: 9 pieces

    Cooking Tips and Tricks

    • Use very ripe bananas for maximum natural sweetness
    • Let oats soak thoroughly for better texture
    • Don’t overbake to keep the cake moist
    • Cool completely before glazing
    • Use room temperature eggs for better mixing

    Variations and Substitutions

    • Replace milk with almond or oat milk for dairy-free version
    • Add cinnamon or vanilla extract for extra flavor
    • Use different nuts like walnuts, pecans, or almonds
    • Try adding orange zest for citrus twist
    • Substitute dark chocolate with sugar-free chocolate

    Common FAQs

    Can I make this gluten-free?

    Yes, use certified gluten-free oats and baking powder.

    How ripe should the bananas be?

    Very ripe bananas with brown spots are best for natural sweetness.

    Can I freeze this cake?

    Yes, freeze unglazed cake for up to 3 months, wrapped well.

    Why did my cake turn out dry?

    Either overbaking or not enough banana. Make sure to use ripe bananas and check doneness early.

    Storage and Make-Ahead Tips

    • Store at room temperature for up to 3 days in an airtight container
    • Refrigerate for up to a week
    • Freeze unglazed cake for up to 3 months
    • Thaw overnight in refrigerator
    • Warm slightly before serving for best texture

    This wholesome dessert is perfect for breakfast, afternoon tea, or a guilt-free dessert. The natural sweetness from bananas combined with rich cocoa creates a satisfying treat that’s both nutritious and delicious.