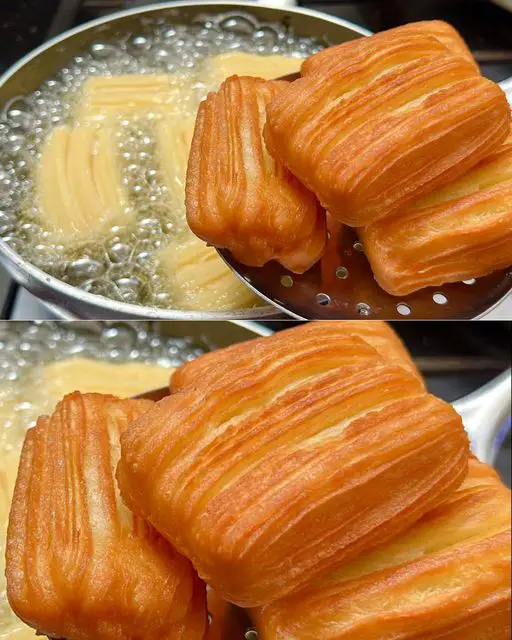
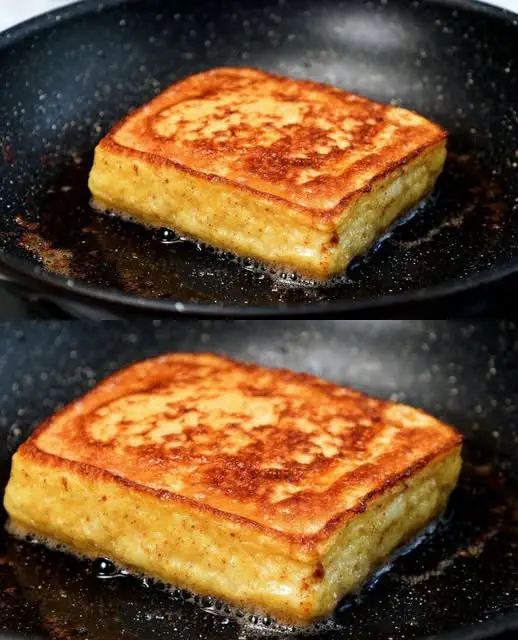
Category: quick and easy recipe

  • Whole Wheat Bread Recipe

    Whole Wheat Bread Recipe

    Whole Wheat Bread Recipe

    Table of Contents

    Ingredients:

      • 2 cups (240-260g) whole wheat flour
      • 1/2 cup (60-65g) bread flour or all-purpose flour
      • 2 teaspoons (7g) instant yeast (or active dry yeast)
      • 2 tablespoons sugar (or honey)
      • 1 teaspoon salt
      • 1 cup (240mL) milk, heated (120-130°F for instant yeast, 110-120°F for active dry yeast)
      • 2 tablespoons (30mL) olive oil
      • 1 egg
    • About 1/4 cup additional bread flour (for kneading)

    Instructions:
    Step 1: Prepare the Dough

      • Mix dry ingredients: In a large bowl, combine whole wheat flour, bread flour, yeast, sugar, and salt.
    • Heat the milk: Warm the milk to the appropriate temperature based on your yeast.
    • Combine wet ingredients: Add the warmed milk, olive oil, and egg to the flour mixture. Stir until a sticky dough forms.

    Step 2: Form the Dough

    • Stir and knead: Add more bread flour (about 1/4 cup) if necessary, and knead the dough on a floured surface for 8-10 minutes until smooth and elastic.

    Step 3: Let the Dough Rise

      • First rise: Place the dough in an oiled bowl, cover, and let rise in a warm place for 1-1.5 hours until doubled in size.

    Step 4: Shape and Second Rise

      • Shape the dough: Punch down the dough and shape it into a loaf by rolling it into a log.
      • Second rise: Place the dough into a greased loaf pan and let it rise again for 30-45 minutes, until it rises just above the top of the pan.
    See also  Delicious and Healthy Dessert Recipe: Without Sugar and Flour

    Step 5: Bake the Bread

      • Preheat oven to 350°F (175°C).
      • Bake: Bake for 30-35 minutes until golden and hollow-sounding when tapped.
    • Cool: Let the bread cool in the pan for 10 minutes before transferring to a wire rack to cool completely.

    Serving Suggestions:

      • Toast slices and serve with butter, jam, or honey.
      • Make sandwiches with fresh vegetables, meats, or cheese.
      • Serve with soups or stews for a hearty meal.
      • Use as a base for French toast or bread pudding.

    Cooking Tips:

      • Ensure the milk is the correct temperature for the yeast to activate properly.
      • Knead the dough thoroughly for a smooth, elastic texture.
    • Let the bread cool fully before slicing to avoid squishing the loaf.

    Nutritional Benefits:

      • Rich in fiber from whole wheat flour.
      • Provides energy through complex carbohydrates.
      • Olive oil adds healthy fats.
      • Egg contributes to protein and essential vitamins.

    Dietary Information:

      • Vegetarian: Suitable for vegetarians as no meat products are used.
      • Nut-Free: Safe for those with nut allergies.
    • Dairy-Free Option: Substitute milk with plant-based milk and use egg substitutes for a dairy-free version.

    Nutritional Facts (Per Slice):

      • Calories: 150
      • Carbohydrates: 25g
      • Protein: 5g
      • Fat: 4g
    • Fiber: 3g

    Storage:

    Store in an airtight container at room temperature for up to 3 days, or in the fridge for up to a week. You can also freeze the bread, tightly wrapped, for up to 3 months.

  • Easy & Delicious No-Knead Cheese Bread

    Easy & Delicious No-Knead Cheese Bread

    Easy & Delicious No-Knead Cheese Bread

    Table of Contents

    Ingredients:

      • All-Purpose Flour: 3 cups, plus extra for dusting
      • Salt: 1 ½ teaspoons
      • Instant Yeast: ½ teaspoon (or active dry yeast)
      • Warm Water: 1 ¼ cups (around 95°F – 105°F)
      • Olive Oil: ¼ cup
      • Shredded Cheese: 1 – 1 ½ cups (cheddar, mozzarella, parmesan, or a combination)

    Instructions:

      1. Combine Dry Ingredients:
        • In a large bowl, whisk together the flour, salt, and instant yeast.
      2. Make the Dough:
          • Pour in the warm water and olive oil. Mix with a wooden spoon or your hand until a shaggy dough forms. The dough will be sticky but manageable.


      3. First Rise:
        • Cover the bowl with plastic wrap or a damp kitchen towel to prevent drying out. Let the dough rise in a warm place for 3-5 hours, or until doubled in size.
      1. Incorporate the Cheese:
        • Once risen, gently fold in the shredded cheese with a spatula. Reserve some cheese if desired for sprinkling on top before baking.
      2. Shape and Second Rise:
          • Lightly flour a work surface and your hands. Transfer the dough to the floured surface and fold it over itself a few times to shape it into a round loaf. Place seam-side down in a well-floured Dutch oven or baking dish. Cover and let rise for 1-2 hours.


      3. Bake the Bread:
        • Preheat your oven to 450°F (230°C). Remove the lid or cover from the Dutch oven/baking dish. Bake for 30-35 minutes, or until the crust is golden brown and a toothpick inserted into the center comes out clean.
    1. Cool and Enjoy:
      • Remove from the oven and cool on a wire rack for at least 30 minutes before slicing. This helps the interior set and prevents excessive cheese oozing.

    Additional Information:

      • Active Dry Yeast vs. Instant Yeast: Both work for this recipe. If using active dry yeast, dissolve it in warm water with a pinch of sugar for 5 minutes before adding to the dry ingredients.
    • Cheese Variations: Experiment with different cheeses like Monterey Jack, Gruyere, or Gouda. Add herbs like rosemary or thyme for extra flavor.

    Serving Suggestions:

      • With Soups: Pair with your favorite soup for a comforting meal.
      • With Salads: Serve alongside a fresh salad for a complete lunch or dinner.
    • As a Snack: Enjoy warm with a pat of butter.

    Conclusion:

    Skip the store-bought bread and enjoy the simplicity of this No-Knead Cheese Bread. With minimal effort, you’ll have a homemade loaf that’s warm, cheesy, and perfect for any meal. Ideal for both beginner and experienced bakers, this recipe is sure to become a household favorite.

  • Chocolate and Vanilla Marbled Cake Roll.

    Chocolate and Vanilla Marbled Cake Roll.

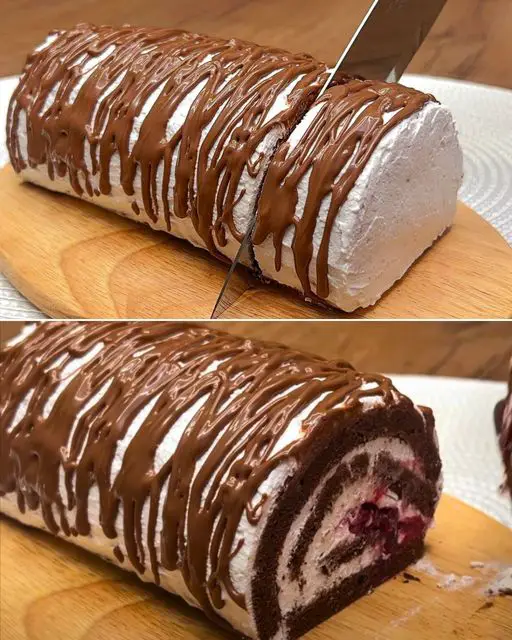
    Are you craving a dessert that’s both visually stunning and irresistibly delicious? Look no further than this Chocolate and Vanilla Marbled Cake Roll. With its delicate sponge cake, rich chocolate swirls, and creamy filling, it’s a treat that’s sure to impress. Making the cake is a bit of a delicate process, but it’s surprisingly easy. Start with a single batter, then divide it in half. Transform one half into a rich chocolate batter by stirring in cocoa powder, then swirl the chocolate batter over the vanilla batter before baking. Once baked and cooled, fill the rolled cake with a creamy mixture and refrigerate. The result? A fluffylight, and airy sponge, with a creamy filling and rich chocolatey flavor. Serve it for afternoon tea, a special occasion, or simply to satisfy a sweet tooth craving!

    What is a Chocolate and Vanilla Marbled Cake Roll?

    A Chocolate and Vanilla Marbled Cake Roll is a dessert featuring a delicate sponge cake that’s beautifully swirled with both chocolate and vanilla batter. Once baked, it’s rolled up with a creamy filling, typically whipped cream or cream cheese frosting. The result is a visually stunning treat with a perfect balance of flavors and textures. It’s a popular choice for tea parties, celebrations, or simply a decadent afternoon snack.

    Creating a cake roll involves a delicate process. The batter is made by whipping egg whites into a meringue, and then gently folding in the yolk mixture. The batter is divided into two parts: one plain and one with cocoa powder added. The two batters are swirled together in a baking pan before baking. Once baked and cooled, the cake is carefully rolled up with a creamy filling.

    Tips

    • Spend enough time whipping the eggs and sugar together. This incorporates air into the batter, creating a light and fluffy cake.
    • Use a high-quality cocoa powder to enhance the chocolate flavor.
    • Use room-temperature eggs and milk for even mixing and a smooth batter. Cold eggs can take longer to whip and lead to a denser cake.
    • When adding flour, fold it in gently with a spatula until just incorporated. Over mixing can deflate the air you’ve whipped into the eggs, leading to a tough cake.
    • Keep an eye on your cake during baking. A toothpick inserted in the center should come out clean. Over baking can make the cake dry and crack when rolling.
    • Don’t wait for the cake to cool completely before rolling. Roll it up while still warm (but not too hot to touch) to prevent cracking.
    • Once rolled, let the cake cool completely before unrolling and filling. This allows the cake to set and hold its shape better.
    • Resist the urge to pile on the filling! Too much filling can make the cake burst open when rolled.
    • Line your baking sheet with parchment paper for easy removal of the cake after baking.

    How Do I Prevent My Swiss Roll From Cracking?

    To prevent cracking, it’s crucial to roll the cake immediately after baking while it’s still warm and pliable. Also, ensure you don’t over bake the cake as a dry cake is more prone to cracking.

    What Can I Substitute For Olive Oil In The Recipe?

    You can replace olive oil with neutral-flavored oil like vegetable oil or canola oil. For a richer flavor, consider using melted butter.

    Can I Make This Recipe Gluten-Free?

    Yes, you can make this recipe gluten-free by using gluten-free flour. Ensure you use gluten-free baking powder as well.

    What Other Fillings Can I Use Besides Whipped Cream And Cream Cheese?

    You can experiment with various fillings like chocolate ganache, pastry cream, or even fresh fruit curd.

    How Can I Make This Recipe Vegan?

    To make this recipe vegan, use vegan egg replacerplant-based milk, and vegan butter. For the filling, opt for vegan whipped cream and vegan cream cheese.

    Can I Make This Roll Ahead of Time?

    Of course you can! Since it requires cooling in the fridge after baking, preparing it in advance actually helps enhance the texture and flavor. You can make the cake, store it in the fridge, and then fill it with the cream before serving. Just make sure to keep it tightly wrapped to prevent it from drying out.

    Can I Freeze The Swiss Roll?

    Fantastic news: yes! To do so, wrap it tightly in plastic wrap before adding the cream filling, and place it in an airtight container. You can freeze the cake for up to 2-3 months. When ready to serve, thaw it in the fridge overnight and add the cream filling before serving for the best texture and taste.

  • Baked tangerine chicken

    Baked tangerine chicken

    Ingredients:

    Chicken pieces, 300ml of mandarin juice, onion, a tablespoon of dehydrated garlic powder, a tablespoon of oregano, a teaspoon of sweet paprika, ground black pepper, chicken broth or pastilla de avecrem, olive

    Elaboration :

    Season the chicken with salt and pepper, in a bowl mix the finely chopped onion, the tangerine juice, oregano, sweet paprika, the garlic powder and pour over the chicken pieces and marinate the best overnight and cover with film.

    In a baking dish previously preheated to 190 degrees, brush the bottom with olive oil and put the drained chicken pieces and put it in the oven.

    In a saucepan, pour the juices that we had from the marinade and add half a glass of chicken broth and cook until the mixture is reduced by half, then pour over the chicken and cook for about an hour, brushing the chicken from time to time.

    1. Finally put the grill position and brown to taste. Accompany with white rice or French fries and a good salad.
  • 2-Ingredient Coconut Delight (No Condensed Milk)

    2-Ingredient Coconut Delight (No Condensed Milk)

    2-Ingredient Coconut Delight (No Condensed Milk)

    Table of Contents

    Ingredients:

      • Milk: 300 ml (1 1/4 cups) – The base liquid to bind the coconut and give it a creamy texture.
      • Sugar: 3 tablespoons (optional) – Adjust to taste depending on how sweet you prefer your coconut mixture.
      • Grated coconut: 1 cup (250 ml) – The star ingredient, bringing flavor, texture, and richness to the bites.
      • Chocolate: 200 g (7 oz) of your choice (for coating) – Milk chocolate, dark chocolate, or even white chocolate can be used, depending on your preferenc

    Instructions:

    1. Prepare the Coconut Mixture:

      • Heat the Milk: In a medium-sized pot, pour 300 ml of milk and place it over medium heat. If you’re using 3 tablespoons of sugar (optional), add it to the milk now and stir until dissolved.
      • Add the Coconut: Once the milk is warm, stir in 1 cup of grated coconut. Continue cooking the mixture over medium heat, stirring constantly to prevent it from sticking to the bottom of the pot.
      • Cook Until Thickened: Cook the mixture for about 8-10 minutes, or until it starts to thicken and pull away from the sides of the pot. You’ll know it’s ready when the coconut absorbs most of the milk, and the mixture becomes a thick paste.

    2. Cool and Shape the Coconut Mixture:

      • Let It Cool: Transfer the coconut mixture to a plate, spreading it out slightly to help it cool faster. Cover the plate with plastic wrap to keep the mixture moist as it cools. Let it sit for 20-30 minutes, or until it’s completely cool to the touch.
      • Shape Into Balls: Once the mixture has cooled, use a 15 g measuring scoop (or a small spoon) to portion the mixture. Roll each portion between your hands to form small balls. You should end up with about 20 coconut balls.
      • Chill to Set: Place the shaped coconut balls on a tray or plate and transfer them to the fridge to chill for at least 1 hour. This will help them firm up and hold their shape when coated with chocolate.
    See also  Irresistible Berry Jam Cake

    3. Coat the Coconut Balls in Chocolate:

      • Melt the Chocolate: While the coconut balls are chilling, melt 200 g of chocolate in a microwave-safe bowl or over a double boiler. If necessary, temper the chocolate to ensure a smooth, shiny finish when it sets.
      • Dip the Coconut Balls: Using a fork or dipping tool, carefully dip each chilled coconut ball into the melted chocolate, coating it completely. Allow any excess chocolate to drip off before placing the coated balls on a sheet of parchment paper.
      • Optional Decoration: For a decorative touch, drizzle the coated balls with a little extra melted dark chocolate or sprinkle with shredded coconut.

    4. Set and Serve:

    • Chill Again: Place the chocolate-coated coconut balls back in the fridge for about 5 minutes, or until the chocolate hardens and sets.
    • Serve: Once the chocolate is fully set, your coconut delights are ready to serve! Enjoy them chilled or at room temperature.

    Tips and Variations:

      • Sweetness Adjustment: If you prefer less sweetness, omit the sugar from the coconut mixture. The chocolate coating will still provide plenty of sweetness.
      • Flavor Variations: You can experiment with adding a dash of vanilla extract or even a pinch of cinnamon to the coconut mixture for extra flavor.
      • Chocolate Choices: Dark chocolate provides a more intense flavor that balances the sweetness of the coconut, while milk chocolate or white chocolate gives a sweeter, creamier result.
      • Add Nuts or Fruit: For a bit of texture, consider adding chopped nuts, like almonds or hazelnuts, or dried fruit, such as raisins or cranberries, to the coconut mixture before shaping into balls.
    • Make it Vegan: Use a plant-based milk like almond or coconut milk, and choose dairy-free chocolate to make this recipe vegan-friendly.
    See also  A Delicious Weekend Tradition: Broccoli and Potato Surprise!

    Storage and Serving Suggestions:

    • Storage: Store these coconut bites in an airtight container in the fridge for up to 1 week. You can also freeze them for longer storage, up to 2 months. Just thaw in the fridge before serving.
    • Serving Ideas: Serve these bites as part of a dessert platter, or pair them with coffee or tea for a simple, elegant treat. They also make great homemade gifts for friends and family!
  • Crispy Crust, Soft Inside Bread Rolls

    Crispy Crust, Soft Inside Bread Rolls

    Crispy Crust, Soft Inside Bread Rolls

    Table of Contents

    Ingredients:

      • 1 cup (220 ml) water, room temperature
      • ¾ tsp (3 g) fresh yeast or ½ tsp (2 g) dry yeast
      • 1 tsp (4 g) sugar (optional)
    • 2 ½ cups (320 g) bread flour
    • 1 tsp (6 g) salt

    Directions:

      1. Prepare the Dough:
        • In a bowl, mix 1 cup (220 ml) of water with ¾ tsp (3 g) fresh yeast (or ½ tsp (2 g) dry yeast) and 1 tsp (4 g) of sugar (if using). Stir until the yeast is dissolved.
        • Add 2 ½ cups (320 g) of bread flour and 1 tsp (6 g) of salt to the yeast mixture. Mix until all the flour is incorporated, and there are no dry patches left. There’s no need to knead the dough.
    1. Rest and Fold the Dough:
        • Cover the bowl with a damp towel or plastic wrap and let the dough rest for 30 minutes.
        • With a wet hand, stretch each of the four sides of the dough and fold it toward the center.
        • Lift the dough and “slap” it back into the bowl to help develop the gluten (this is the “lift and slap” technique).


      • Cover again and let rest for another 30 minutes.
    2. Repeat Folding and Let Rise:
        • Repeat the stretching, folding, and “lift and slap” process once more.


      • Cover and let the dough rise for about 2 hours, or until it has doubled in size.
    3. Shape the Bread Rolls:
        • Lightly flour your work surface and carefully transfer the dough onto it.


        • Gently fold the dough to make it easier to cut.
        • Cut the dough into 4 equal parts, maintaining the airy bubbles in the dough.
        • For each piece, shape it into a ball by rolling it on the floured surface and sealing the bottom.


    4. Rest and Prepare for Baking:
        • Let the dough balls rest for 10 minutes. Then, gently flatten them slightly.
        • Roll each piece into a ball again, press down with your fingers, and place them seam-side down on a baking tray lined with parchment paper.


      • Cover with a towel and let rise for 30 minutes.
    5. Bake the Bread Rolls:
        • Preheat your oven to 450°F (230°C).


        • Lightly sprinkle flour over the bread rolls and smooth it out with your hand.
        • Score the top of each roll with a sharp blade or knife.
        • Sprinkle a little water around the breads to create steam, then cover with another tray.


      • Bake in the preheated oven for 20 minutes.
    6. Finish Baking:
        • After 20 minutes, remove the top tray and reduce the oven temperature to 390°F (200°C).


      • Bake for an additional 10 minutes, or until the bread rolls are golden brown and the crust is crispy and flaky.
    7. Serve and Enjoy:
        • Let the bread rolls cool slightly before serving. Enjoy them warm with butter, or use them as the base for your favorite sandwiches!


    Serving Suggestions:
    These bread rolls are versatile and can be served with soups, salads, or spreads like hummus or butter. They’re also perfect for sandwiches.

    Cooking Tips:

    • For an extra crispy crust, add a small dish of water to the oven to create steam during the first part of the baking.
    • If you like a softer crust, skip the additional water spritzing.

    Nutritional Benefits:
    These bread rolls are a great source of carbohydrates, providing energy and a satisfying base for any meal.

    Storage Tips:
    Store in an airtight container at room temperature for up to 2 days. For longer storage, freeze the bread rolls and reheat them in the oven when needed.

  • Oatmeal Pancakes

    Oatmeal Pancakes

    Oatmeal Pancakes

    Table of Contents

    Ingredients

      • Oatmeal: 2 cups (220 g)
      • Sweetener (honey, maple syrup, sugar, etc.): 3 tbsp (50 g)
      • Salt: 1/2 tsp (3 g)
      • Eggs: 4 large
      • Warm Milk: 1 cup (250 ml)
      • Butter, melted: 3 1/2 tbsp (50 g)
      • Vanilla Extract: 1 tbsp
    • Water: 1 cup (250 ml)
    • Oil for frying: A drop of neutral oil (canola, sunflower, or vegetable)

    Directions

      • Prepare the Oatmeal Mixture:
          • In a large mixing bowl, combine 2 cups of oatmeal, 3 tbsp of sweetener, and 1/2 tsp of salt.


      • Add Wet Ingredients:
        • In a separate bowl, lightly beat the 4 eggs. Gradually add the warm milk to the oatmeal mixture, stirring continuously. Then, add the beaten eggs, melted butter, and vanilla extract. Mix well until fully combined.
      • Adjust Consistency:
        • Slowly add 1 cup of water to the batter, stirring to achieve a smooth and pourable consistency.
      • Heat the Pan and Cook the Pancakes:
          • Heat a non-stick frying pan over medium heat and add a drop of oil. Once hot, pour a ladleful of batter onto the pan and spread slightly. Cook for 2-3 minutes until bubbles form and edges set.


      • Flip and Cook the Other Side:
        • Flip the pancake and cook for another 2-3 minutes or until golden brown. Repeat with remaining batter, adding more oil as needed.
    • Serve and Enjoy:
      • Serve warm with your favorite toppings such as fresh fruits, yogurt, maple syrup, honey, or nut butter.

    Serving Suggestions

      • Drizzle with maple syrup or honey.
    • Top with fresh berries, banana slices, or a dollop of Greek yogurt.
    • For a savory twist, serve with scrambled eggs and sautéed vegetables.

    Cooking Tips

      • Use warm milk to help the batter mix more easily and result in fluffier pancakes.
    • Let the batter rest for 5-10 minutes before cooking for extra fluffiness.
    • Ensure a non-stick pan or well-seasoned skillet to prevent sticking.

    Nutritional Benefits

      • Oats: Rich in fiber, promoting good digestion and fullness.
    • Eggs: Provide high-quality protein and essential nutrients.
    • Dairy and Butter: Adds flavor and fats; choose low-fat or non-dairy options to adjust fat content.

    Dietary Information

      • Diet: Vegetarian-Friendly
    • Gluten-Free: If using certified gluten-free oats
    • Dairy-Free Option: Use plant-based milk and vegan butter substitutes.

    Storage Tips

      • Refrigerator: Store leftover pancakes in an airtight container for up to 3 days; reheat in a toaster or pan.
    • Freezer: Freeze in a single layer on a baking sheet, then transfer to a freezer bag for up to 3 months. Reheat directly from frozen.
  • Why Carrot and Lemon for Weight Loss?

    Why Carrot and Lemon for Weight Loss?

    If you’re looking for a natural and effective way to lose weight and melt belly fat without diet or exercise, this carrot and lemon drink could be your secret weapon! Both carrots and lemons are loaded with fat-burning properties, antioxidants, and essential nutrients that support weight loss and detoxify the body. This refreshing drink can help you shed up to 20kg in a month if used consistently.

    Why Carrot and Lemon for Weight Loss?

    Carrots are low in calories but high in fiber, which helps keep you full longer and prevents overeating. They are also rich in vitamin A, which supports the body’s fat-burning process.

    Lemons are a natural detoxifier, packed with vitamin C and antioxidants that boost metabolism, improve digestion, and help flush out toxins. The combination of these two ingredients creates a powerful, fat-burning drink.

    Ingredients:

    • 2 medium carrots (peeled and chopped)
    • 1 large lemon (juiced)
    • 1/2 inch of ginger (optional, for extra metabolism boost)
    • 1 cup of water
    • A pinch of cayenne pepper (optional, for added fat-burning properties)

    Instructions:

    Step 1: Prepare the Ingredients

    • Peel and chop the carrots into small pieces. If using ginger, peel and grate it as well.
    • Squeeze the juice of one lemon and set it aside.

    Step 2: Blend the Carrots

    • Add the chopped carrots to a blender along with 1 cup of water. Blend until smooth to create a carrot juice base.

    Step 3: Add Lemon Juice and Other Ingredients

    • Pour the fresh lemon juice into the carrot mixture and stir well.
    • If you want to boost the fat-burning potential, add a pinch of cayenne pepper or the grated ginger. These ingredients help speed up metabolism and promote faster fat loss.

    Step 4: Strain and Serve

    • If you prefer a smoother texture, strain the mixture through a fine sieve. However, keeping the fiber from the carrots will make the drink even more effective for weight loss.

    Step 5: Drink It Fresh

    • Drink this carrot and lemon weight-loss juice first thing in the morning on an empty stomach for best results. You can also have it before meals to promote fat burning throughout the day.

    How This Drink Helps with Weight Loss:

    1. Boosts Metabolism: The vitamin C in lemons helps boost metabolism and promotes fat breakdown in the body.
    2. Promotes Fat Burning: Carrots contain nutrients that help the body break down fat cells more effectively, while the fiber helps curb appetite and reduce calorie intake.
    3. Detoxifies the Body: Lemons help flush out toxins and support liver health, which is crucial for efficient fat burning.
    4. Reduces Belly Fat: This drink is particularly effective in targeting belly fat, thanks to the fat-burning properties of lemon and the fiber in carrots, which keeps you full longer and reduces cravings.
    5. Suppresses Appetite: Drinking this juice regularly can help reduce hunger pangs, making it easier to control portions and avoid unhealthy snacks.

    Tips for Best Results:

    • Drink Daily: To achieve maximum results, drink this carrot and lemon juice every day, preferably in the morning.
    • Stay Hydrated: Drink plenty of water throughout the day to stay hydrated and support the detox process.
    • Be Consistent: While this drink can help you lose weight without diet or exercise, consistency is key! Incorporating this drink into your daily routine will enhance fat-burning results.

    Conclusion: A Natural, Simple Way to Lose Weight

    This carrot and lemon weight-loss drink is a fast and easy way to melt fat, especially around the belly, without dieting or exercising. By adding this drink to your daily routine, you can lose up to 20kg in a month and improve your overall health naturally. Give it a try, and you’ll be amazed at how quickly the pounds start to melt away!

  • Blooming Quesadilla Ring

    Blooming Quesadilla Ring

    Blooming Quesadilla Ring

    Blooming Quesadilla Ring

    Is there ever a time when quesadillas aren’t wanted (OK, needed!)? These are easy to make and make a great “movie night” snack for the entire family. This great recipe comes to us from our Facebook Community via Moses Guffey! Thank you, Moses!

    Ingredients

    2 cups cooked and shredded chicken
    1 onion, chopped
    1 red bell pepper, chopped
    1 jalapeño, chopped
    1 cup taco sauce
    20 taco-size tortillas
    3 cups shredded cheddar cheese
    3 cups shredded Monterey jack cheese

    Directions

    Preheat the oven to 375˚F. Line a baking sheet with parchment paper. In a large bowl, add the chicken, onion, red bell pepper, jalapeño, and taco sauce, and mix to combine. Set aside.
    Cut each tortilla in half. Evenly add about 2 tablespoons each of the cheddar cheese, Monterey Jack cheese, and chicken mixture to each tortilla half.
    Roll the tortillas into cones, starting from the cut edge and making sure not to push the ingredients out of the tortilla.
    Place a wide mouth jar or glass in the center of the baking sheet.
    Create a ring around the jar with about 13 tortilla cones. The points of the cones should be in the center, touching the jar. Sprinkle cheddar and Monterey Jack cheese over the layer. Repeat with the remaining cones to make 2 more layers, finishing with the rest of the cheddar and Monterey Jack.
    Remove the jar from the center of the ring. Bake until the cheese is melted and the edges of the tortillas are crispy, 15-20 minutes.
    Carefully transfer the blooming quesadilla to a serving platter. Place your dip of choice inside the ring and top with your desired garnishes. Serve immediately.
    Servings ~ 20

  • Air Fryer Egg Rolls

    Air Fryer Egg Rolls

    Equipment

    Table of Contents

    • 1 Air Fryer
    • Ingredients

      • ½ pound ground pork
      • 2 tablespoons sesame oil
      • ¼ cup chopped green onions
      • ½ cup chopped onions yellow or white
      • 1 teaspoon fresh ginger minced
      • 1 teaspoon garlic minced, about 2 garlic cloves
      • 2 tablespoons soy sauce
      • 2 cups shredded cabbage purple or green
      • cup shredded carrots
      • 8 egg roll wrappers
      • Instructions

          1. To make the egg roll filling, use a large skillet, on medium-high heat, and brown the ground pork. Stir together until the pork is cooked, about 3-5 minutes.
          2. Keep the skillet on medium heat, combine sesame oil, onions, ginger, garlic, soy sauce, cabbage, and carrots. Continue stirring until the vegetables begin to soften, and all of the ingredients are well combined, about 3-5 minutes. Remove from heat and let mixture slightly cool before trying to wrap them.
        • On a flat surface, lay out wrappers with corners left and right. Fill the center of the wonton with a large spoonful or two of the cabbage the filling.
        • Fold bottom corn over the filling and tuck under. Next, fold in the left and right corners, and then turn over, (rolling like a burrito) to make a large pillow shape. Dip you one or two fingers in water, or use a pastry brush, and then trace the wrapper with water, just on the outer edges, so when you fold them, they will seal.
          • Lightly spray the air fryer basket with nonstick cooking spray, and place each rolls in air fryer, in a single layer, without stacking or overlapping.
          • Air fry at 400 degrees F for 5-8 minutes, until golden brown and crispy. Flip halfway during the air frying process.

          Notes

          You can make the filling ahead of time, and keep in the refrigerator until ready to make the egg rolls. This saves a little bit of time, and lets the meat and veggies marinate together.
          Brush or spray the egg rolls with a little bit of olive oil. This will help them turn golden brown and crispy. 

          This recipe makes should make 6-8 egg rolls, depending on how much filling you put on the egg roll. If making a double batch of egg rolls, leave enough space in the air fryer basket so the air can flow around them and they can cook evenly.

          To save time, use a coleslaw mix from the produce section at your local grocery store. It will have shredded cabbage and carrots ready to go.

          Nutrition

          Calories: 325kcalCarbohydrates: 23gProtein: 14gFat: 20gSaturated Fat: 6gPolyunsaturated Fat: 4gMonounsaturated Fat: 8gCholesterol: 43mgSodium: 714mgPotassium: 417mgFiber: 3gSugar: 4gVitamin A: 5451IUVitamin C: 18mgCalcium: 57mgIron: 2mg
  • Flaky Butter Bread Recipe

    Flaky Butter Bread Recipe

    Flaky Butter Bread Recipe

    Table of Contents

    Ingredients:

    • Dry yeast: 5 g (0.17 oz)
    • Sugar: 10 g (2 teaspoons)
    • Water: 125 ml (1/2 cup)
    • Milk: 125 ml (1/2 cup)
    • Flour: 480 g (3 3/4 cups)
    • Salt: 6 g (1 teaspoon)
    • Butter: 125 g (1/2 cup), softened
    • Egg yolk: 1
    • Vegetable oil: 1 teaspoon
    • Sesame seeds: for sprinkling

    Directions:

    Activate yeast:
    In a bowl, combine yeast, sugar, water, and milk. Stir until the yeast and sugar dissolve. Let it rest for 5-10 minutes.
    Mix the dough:
    Add flour and salt to the yeast mixture. Stir with a spoon until combined.
    Gradually knead the dough by hand until it becomes soft and smooth.
    Rest the dough:
    Divide the dough into two equal parts. Roll each into a ball, cover, and let them rest for 10 minutes.
    Prepare the butter dough:
    Roll out the dough into a large circle, brush generously with softened butter, and fold as shown in the video.
    Repeat the folding process to create layers. Set the dough aside and prepare the second dough in the same manner.
    Chill the dough:
    Place both folded doughs in the freezer for 20 minutes to firm up.
    Shape the dough:
    Roll out each dough to the size of a serving plate. Stack them carefully on a baking tray.
    Egg wash and bake:
    Brush the top with a mixture of egg yolk and oil. Sprinkle sesame seeds on top.
    Bake in a preheated oven at 190°C (375°F) for 20-25 minutes, or until golden brown.
    Serve:
    Let the bread cool slightly before serving. Enjoy warm with butter or your favorite spread.
    Serving Suggestions:
    Serve this bread warm with butter, honey, or jam for a delicious breakfast treat.
    Pair it with soups or stews for a comforting meal.
    Cooking Tips:
    Ensure the butter is soft enough to spread evenly over the dough for perfect flakiness.
    Be gentle when folding to avoid tearing the dough, and chill to help maintain the layers.
    Nutritional Benefits:
    Milk and butter provide a good source of calcium and healthy fats.
    This bread is rich in carbohydrates, giving energy and a feeling of satiety.
  • Preparing the Naan Bread Pizzas:

    Preparing the Naan Bread Pizzas:

    Preparation Time: 10 minutes
    Cooking Time: 8-10 minutes
    Total Time: 20 minutes
    Servings: 2-4

    Ingredients:

    • 2 pieces of naan bread (store-bought or homemade)
    • 1/2 cup pizza sauce
    • 1 1/2 cups shredded mozzarella cheese
    • Your favorite pizza toppings (e.g., sliced pepperoni, bell peppers, olives, mushrooms, etc.)
    • Olive oil (for brushing)
    • Fresh basil or parsley (optional, for garnish)

    Instructions:

    Preparing the Naan Bread Pizzas:

    1. Preheat Air Fryer: Preheat your air fryer to 375°F (190°C).
    1. Assemble Pizzas: Place the naan bread on a clean surface or a plate. Spread a layer of pizza sauce over each naan, leaving a small border around the edges. Sprinkle shredded mozzarella cheese evenly over the sauce.
    2. Add Toppings: Customize your naan bread pizzas with your favorite toppings. Add sliced pepperoni, bell peppers, olives, mushrooms, or any other toppings you prefer.
    3. Brush with Olive Oil: Lightly brush the edges of the naan with olive oil. This will help them turn golden and crispy in the air fryer.

    Air Frying:

    1. Air Fry: Place the assembled naan bread pizzas in the air fryer basket, making sure they are not overlapping. Depending on the size of your air fryer, you may need to cook them in batches.
    2. Cooking Time: Air fry for 8-10 minutes or until the cheese is melted and bubbly, and the edges of the naan are golden brown and crisp. Check after 6 minutes to ensure they don’t overcook.
    1. Check for Doneness: Carefully lift one of the naan bread pizzas to check if the bottom is crisp and golden brown.

    Serving:

    1. Garnish (Optional): If desired, garnish with fresh basil or parsley for a burst of freshness.
    2. Slice and Serve: Using a pizza cutter or a sharp knife, slice the naan bread pizzas into wedges. Serve hot.

    Enjoy:

    Indulge in the quick and delicious flavor of these Air Fryer Naan Bread Pizzas. They make for a convenient and tasty meal or snack, and you can easily customize them to suit your taste preferences.

  • Air Fryer Bread

    Air Fryer Bread

    Equipment

    Table of Contents

    • 1 Air fryer
    • 1 7″ baking pan round or two small loaf pan
    • 1 Mixing bowl
    • 1 Spatula
    • Ingredients

      • 3 cupstrong white bread flour 390 grams
      • 1 teaspoonsugar
      • 1 teaspoonsalt
      • 2.1/4 teaspoonyeast
      • ¼ cupolive oil
      • 1.5 cupwarm water
      • Instructions

          • In a large mixing bowl, combine the dry ingredients – flour, sugar, salt, and yeast.
          • Add the warm water and olive oil. Reserve 1 tablespoon for washing (glaze).
          • Mix the ingredients with a wooden spoon or spatula until a dough forms.
          • Place the dough in a lightly oiled bowl, cover it with a clean kitchen towel, and let the dough rise in a warm place for 1-2 hours or until it has doubled in size.
        • I use the instant pot during the winter months.
        • Once the dough has risen, punch it down to release the air.
        • Place the dough on a lightly floured surface.
        • Shape the dough into a boule (ball) and place in an oiled 7 inch springform tin. Ensure the tin that you use fits your air fryer basket.
        • Allow for a second rise for 15-20 minutes.
        • Wash with a glaze (oil) and score the top of the dough if you wish.
        • Now, preheat your air fryer to 200C/400F for 5 minutes.
        • Place the tin in the warm air fryer basket and air fry at 200C/400F for around 10 minutes,
        • Then, lower the heat to 170C/350F and air fry for a further 20 minutes, checking periodically to ensure it doesn’t burn and that the top of the dough does not touch the heating element.
        • The bread is done when it has a golden brown crust, and tapping on it produces a hollow sound.
        • Allow the bread to cool on a cooling rack before slicing.
        • Notes

          For how to prove dough in Instant Pot, check out my Instant Bread recipe. 

          For recipe tips, serving suggestions and storage scroll through the post above.

          You may use melted butter or ghee for glaze, for a vegetarian bread recipe.

  • Amish Cinnamon Bread

    Amish Cinnamon Bread

    Ingredients:

    For The Batter:

    • 1 cup butter, softened
    • 2 cups sugar
    • 2 eggs
    • 2 cups buttermilk or homemade buttermilk— 2 cups milk plus 2 tablespoons vinegar or
    • lemon juice
    • 4 cups flour
    • 2 teaspoons baking soda

    For The Cinnamon/Sugar Mixture:


    • 2/3 cups sugar
    • 2 teaspoons cinnamon
    • PREPARATION:

      ream together butter, 2 cups of sugar, and eggs. Add milk, flour, and baking soda. Put 1/2 of batter (or a little less) into greased loaf pans (1/4 in each pan). Mix in separate
      bowl the 2/3 c sugar and cinnamon.
      Sprinkle 3/4 of cinnamon mixture on top of the 1/2 batter in each pan. Add remaining batter to pans; sprinkle with last of cinnamon topping. Swirl with a knife. Bake at 350 degrees for 45-50 min. or until toothpick tester come clean. Cool in pan for 20 minutes before removing from pan. Makes 2 loaves

      Enjoy. The Family will love this recipe.

      Enjoy !

  • Orange and Yogurt Dessert: Ready in 5 Minutes Without an Oven!

    Orange and Yogurt Dessert: Ready in 5 Minutes Without an Oven!

    Orange and Yogurt Dessert: Ready in 5 Minutes Without an Oven!

    Table of Contents

    Ingredients:

    1 egg
    2 tablespoons of sugar
    2 tablespoons of cooking oil
    1 pinch of salt
    Finely grated orange zest
    60 ml freshly squeezed orange juice
    125 g solid yogurt or sour cream
    280g flour
    6 g of baking powder (1/2 sachet)
    Sugar and vanilla sugar for rolling

    Instructions:

    1. In a large bowl, beat the egg with the sugar and cooking oil until the mixture is smooth and creamy.
    2. Add the pinch of salt, orange zest and freshly squeezed orange juice to the bowl and mix well.
    3. Add the solid yogurt or sour cream to the mixture and stir until well combined.
    4. Add the sifted flour and baking powder to the bowl and mix until you obtain a soft and homogeneous dough.
    5. Dust a work surface with flour and place the dough on it. Knead lightly until it forms a ball.
    6. Divide the dough into small portions and form into walnut-sized balls.
    7. In a plate, mix the sugar and vanilla sugar. Dip each ball of dough into this mixture so that they are evenly coated.
    8. Place the dough balls on a tray or plate and refrigerate for at least 30 minutes to harden slightly.
    9. Ready to enjoy! Serve these delicious orange and yogurt dough balls as a dessert or snack, and surprise your guests with their refreshing flavor and creamy texture.

    Conclusion:

    With its combination of citrus and cream flavors, this orange and yogurt dessert is a quick and delicious option to satisfy your sweet tooth. Plus, since it doesn’t require cooking, it’s perfect for those times when you’re looking for something quick and easy to prepare. Dare to try this recipe and let yourself be seduced by its fresh and tempting flavor!