Category: quick and easy recipe

  • Spinach Cake Recipe

    Spinach Cake Recipe

    Spinach Cake Recipe

    Ingredients:
    For the Cake:

      • 1 handful fresh spinach
      • ⅓ cup milk (85 ml)
      • 4 large eggs
      • 1 ½ cups sugar (300 g)
      • 1 ½ cups all-purpose flour (240 g)
      • 2 teaspoons baking powder (10 g)

    For the Cream:

      • 2 packets whipped cream powder (150 g)
      • 1 cup cold milk (250 ml)
    • 1 teaspoon vanilla extract (5 g)
    • 150 g (⅔ cup) mild cream cheese

    Directions:

      • Prepare the Spinach Puree:
        • Wash and pat dry the spinach.
        • Blend spinach with ⅓ cup milk until smooth and bright green. Set aside.
      • Prepare the Cake Batter:
          • Preheat the oven to 350°F (175°C). Grease and flour two 9-inch round cake pans.
          • In a large bowl, beat the eggs and sugar with an electric mixer until light and fluffy (about 5 minutes).
          • Mix the spinach puree into the egg mixture.


        • Sift together flour and baking powder in a separate bowl. Gradually add to the wet mixture and mix until just combined.
      • Bake the Cake:
          • Divide the batter evenly between the prepared cake pans.


        • Bake for 25-30 minutes, or until a toothpick comes out clean.
        • Let cakes cool for 10 minutes in the pans, then transfer to a wire rack to cool completely.
      • Prepare the Cream:
        • In a large bowl, beat the whipped cream powder, cold milk, and vanilla extract on high speed until stiff peaks form.
        • Add cream cheese and continue beating until smooth and creamy.
      • Assemble the Cake:
          • Level the tops of the cakes if necessary.
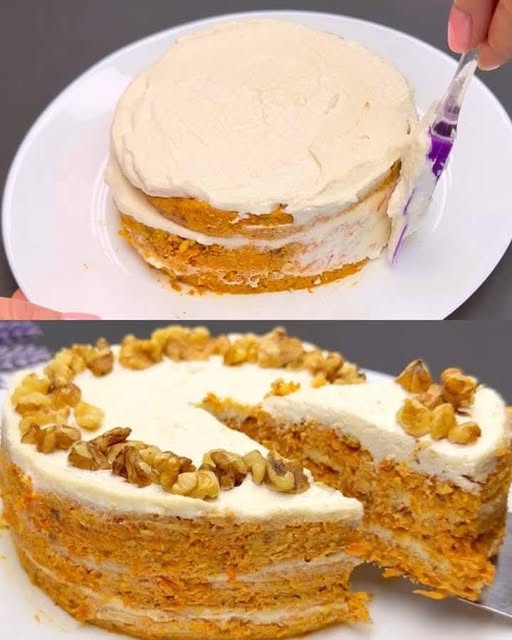
          • Spread a layer of frosting on one cake layer, then place the second layer on top.
          • Frost the top and sides of the cake with the remaining cream cheese frosting.


      • Chill and Serve:
        • Refrigerate the cake for at least 1 hour to set before serving.

    Serving Suggestions:

      • Serve chilled for the best texture and flavor.
      • Pair with fresh berries or a drizzle of berry compote for a fruity contrast.
    • Garnish with a sprinkle of powdered sugar or edible flowers for a decorative touch.

    Cooking Tips:

      • Use a high-speed blender to puree the spinach for a smoother consistency.
    • For even cake layers, weigh the batter as you divide it between the pans.
    • Make sure the cake layers are fully cooled before frosting to prevent melting.

    Nutritional Benefits:

      • Spinach: Rich in iron, vitamin A, and vitamin K, providing a nutritional boost without affecting flavor.
      • Eggs: Offer high-quality protein, vitamins, and healthy fats.
      • Cream Cheese: Adds a source of calcium and protein.

    Dietary Information:

      • Vegetarian: Suitable for vegetarians.
      • Nut-Free: Does not contain nuts, safe for those with nut allergies.
    • Lower Sugar: This recipe uses natural ingredients to lower the overall sugar content.

    Nutritional Facts (per slice):

      • Calories: 220-250
      • Protein: 5g
      • Carbohydrates: 30g
      • Fat: 12g
    • Fiber: 1g
    • Sugar: 20g

    Storage:

    • Store the cake in an airtight container in the refrigerator for up to 3 days.
    • You can freeze unfrosted cake layers for up to 1 month; thaw before frosting.
  • Sweet Potato Cakes Recipe

    Sweet Potato Cakes Recipe

    Sweet Potato Cakes Recipe

    Table of Contents

    Ingredients:

      • 400g sweet potatoes
      • 100g glutinous rice flour
      • 20g sugar
      • 120 ml milk
      • Toasted sesame seeds, for topping
    • Cooking oil, for frying

    Directions:

      1. Prepare the Sweet Potatoes:
          • Peel and cut the 400g sweet potatoes into small pieces.
          • Place the sweet potatoes in a steamer and cook for about 20 minutes until they are soft.


      2. Mash the Sweet Potatoes:
          • Once cooked, remove the sweet potatoes from the steamer and place them in a large bowl.
          • While still hot, use a tool like a dough roller or a potato masher to crush the sweet potatoes until smooth.


      3. Mix the Dough:
          • Add 100g glutinous rice flour and 20g sugar to the mashed sweet potatoes. Stir well to combine.
          • Gradually pour in 120 ml milk, mixing continuously to avoid making the mixture too pasty. You may need to use your hands to knead the dough for about 5-10 minutes until it becomes smooth and soft.


      4. Shape the Dough:
          • Roll the dough out on a floured surface and divide it into small portions.
          • Roll each portion into a ball and flatten it with your hands to form small cakes.


      5. Add Sesame Seeds:
        • Sprinkle toasted sesame seeds on top of each cake and press them gently into the dough.
      1. Fry the Cakes:
        • Heat cooking oil in a pan over low heat until it reaches 140°C (284°F).
        • Fry the cakes for about 3 minutes on each side until they turn golden brown.
      1. Serve:
        • Once the cakes are golden and crispy on both sides, remove them from the pan and place them on a paper towel to absorb any excess oil.
        • Serve warm and enjoy the soft, chewy texture and the sweet, fragrant flavor.

    Serving Suggestions:

    • Serve the sweet potato cakes with a drizzle of honey or a dusting of powdered sugar for extra sweetness.
    • Pair them with a cup of tea or coffee for a delightful afternoon snack.

    Cooking Tips:

      • Be sure to mash the sweet potatoes while they’re still hot for a smoother dough.
    • If you prefer a healthier option, you can bake the cakes instead of frying them at 180°C (356°F) for about 15 minutes, flipping halfway through.

    Nutritional Benefits:

      • Sweet potatoes are a rich source of fiber, vitamins A and C, and potassium.
      • Glutinous rice flour adds a chewy texture, making the cakes soft and flexible.
    • Sesame seeds are packed with healthy fats, vitamins, and minerals.

    Dietary Information:

      • Gluten-free: Made with glutinous rice flour, this recipe is naturally gluten-free.
      • Vegetarian: Suitable for a vegetarian diet.

    Nutritional Facts (per serving):

      • Calories: 150
      • Protein: 2g
      • Carbohydrates: 25g
    • Fat: 4g
    • Fiber: 3g

    Storage:

      • Fridge: Store the cooked cakes in an airtight container in the fridge for up to 3 days. Reheat in a pan or microwave before serving.
    • Freezer: You can freeze uncooked cakes and fry them when ready to eat.

    Why You’ll Love This Recipe:

      • Simple and Healthy: With minimal ingredients, this recipe is both easy and nutritious.
      • Delightfully Chewy: The combination of sweet potatoes and glutinous rice flour gives these cakes a wonderfully soft, chewy texture.
    • Versatile: They can be fried or baked, depending on your preference.
  • Chocolate Tahini Bites ✨

    Chocolate Tahini Bites ✨

    Ingredients:

    • 1 cup tahini
      (Creamy sesame paste that adds richness!)
    • 1/4 cup maple syrup
      (Natural sweetness that’s oh-so-good!)
    • 1/2 cup cocoa powder
      (Chocolatey goodness for that rich flavor!)
    • 1/4 cup shredded coconut
      (A tropical twist that adds texture!)
    • 1/2 tsp vanilla extract
      (A splash of flavor to enhance the taste!)
    • A pinch of salt
      (Just a touch to balance the sweetness!)
    • Optional:
      Nuts or seeds (like chopped almonds or pumpkin seeds)
      (For an extra crunch!)

    Instructions:

    1. Mix It Up!
      In a large mixing bowl, combine 1 cup tahini, 1/4 cup maple syrup, 1/2 cup cocoa powder, 1/2 tsp vanilla extract, and a pinch of salt. Stir until smooth and well blended.
    2. Add Some Texture!
      Fold in 1/4 cup shredded coconut and any optional nuts or seeds you want for a delicious crunch!
    3. Shape the Bites!
      Scoop out tablespoon-sized portions of the mixture and roll them into balls. Place them on a parchment-lined tray.
    4. Chill Time! ❄️
      Refrigerate the bites for at least 30 minutes to firm them up.
    5. Time to Indulge!
      Once chilled, enjoy your delightful chocolate tahini bites! Perfect for snacking or dessert!

    Storage Tips:

    Store your bites in an airtight container in the fridge for up to one week. They make a great grab-and-go snack!


    Enjoy your delicious, healthy treats! ️

  • Unforgettable Orange Cake Delight Forget all other cakes

    Unforgettable Orange Cake Delight Forget all other cakes

    Unforgettable Orange Cake Delight Forget all other cakes

    Table of Contents

    Forget all other cakes with this mouthwatering treat!

    For the Cake:

    – 3 eggs
    – 120g sugar
    – 8g vanilla sugar
    – 120ml milk
    – 120ml sunflower oil
    – 200g flour
    – 12g baking powder
    – Orange peel

    For the Cream:

    – 1 orange
    – 500ml milk
    – 8g vanilla sugar
    – 5 tbsp sugar
    – 4 tbsp cornstarch
    – 1 tsp butter (15g)
    – 150ml already sweetened whipping cream
    – 20ml lemon juice

    Instructions:

    1. Preheat the oven to 180°C (356°F).
    2. In a bowl, beat 3 eggs, sugar, and vanilla sugar until fluffy.
    3. Mix in milk and sunflower oil.
    4. Gradually add flour and baking powder, stirring until smooth.
    5. Add orange peel to the batter.
    6. Pour the batter into a greased cake pan and bake for about 30-35 minutes until golden brown.
    7. For the cream, zest and juice the orange.
    8. In a saucepan, combine milk, vanilla sugar, sugar, cornstarch, and butter. Cook until it thickens.
    9. Remove from heat, add orange zest and juice. Let it cool.
    10. Whip the whipping cream and gently fold it into the cooled orange mixture.
    11. When the cake has cooled, spread the cream on top.
    12. Drizzle lemon juice over the cream for a zesty finish.

  • Apple Yogurt Pancakes Recipe

    Apple Yogurt Pancakes Recipe

    Apple Yogurt Pancakes Recipe

    Table of Contents

    Ingredients:

      • 1 apple, peeled and grated
      • 1 egg
      • 2 tbsp sugar
      • A pinch of salt
      • 150 grams (2/3 cup) yogurt
    • 140 grams (4.93 oz or 2/3 cup + 1/4 cup) all-purpose flour
    • 1/2 tsp baking powder

    Directions:

    1. Prepare the Batter:

      1. Grate the Apple:
          • Peel and grate 1 apple into a bowl.


      2. Mix Wet Ingredients:
        • In a separate large bowl, whisk together 1 egg2 tbsp sugar, a pinch of salt, and 150 grams yogurt until well combined.
    1. Combine Dry Ingredients:
      • In another bowl, mix 140 grams flour with 1/2 tsp baking powder.
    2. Combine Wet and Dry:
        • Add the dry ingredients to the wet ingredients and stir until just combined. Gently fold in the grated apple. The batter will be thick, but that’s okay.


    2. Cook the Pancakes:

      1. Heat the Pan:
        • Heat a non-stick skillet or frying pan over medium heat and lightly grease with oil or butter.
      1. Cook the Pancakes:
        • Pour small portions of batter onto the hot pan (about 2-3 tablespoons for each pancake).
        • Cook for about 2-3 minutes on each side until golden brown and cooked through.

    3. Serve:

    • Serve the pancakes warm with your favorite toppings, such as honey, maple syrup, or fresh fruit. Enjoy your meal!

    Serving Suggestions:

      • Top the pancakes with a drizzle of honey, maple syrup, or a dusting of powdered sugar.
      • Serve with fresh berries, sliced bananas, or a dollop of yogurt on the side.

    Cooking Tips:

    • Be careful not to overmix the batter to keep the pancakes fluffy.
    • If the batter seems too thick, add a little milk or more yogurt to loosen it slightly.

    Nutritional Benefits:

      • Apple adds natural sweetness and fiber.
    • Yogurt provides protein and probiotics, making the pancakes more nutritious.

    Dietary Information:

    • Vegetarian: This recipe is suitable for vegetarians.

    Nutritional Facts (per serving):

      • Calories: 200
      • Protein: 5g
      • Carbohydrates: 30g
      • Fat: 5g

    Storage:

    • Fridge: Store leftover pancakes in an airtight container in the fridge for up to 2 days. Reheat in a skillet or microwave.
    • Freezer: Pancakes can be frozen in a single layer and stored for up to 1 month. Reheat from frozen in a toaster or oven.

    Why You’ll Love This Recipe:

      • Easy and Quick: Simple ingredients and a fast cooking process make these pancakes perfect for busy mornings.
    • Healthy and Light: With yogurt and apples, these pancakes are a light yet satisfying breakfast option.
    • Customizable: Add your favorite toppings or mix-ins like cinnamon, nuts, or raisins.
  • Caramelized Pear Upside-Down Cake

    Caramelized Pear Upside-Down Cake

    Caramelized Pear Upside-Down Cake

    Table of Contents

    Ingredients

    For the Caramelized Pear Layer:

      • Sugar: 140 g (2/3 cup)
      • Water: 5-6 tablespoons
      • Pears: 3-4 medium, peeled, cored, and sliced

    For the Cake Batter:

      • Butter: 200 g (7 oz), softened
      • Powdered sugar: 160 g (1 1/3 cups)
      • Eggs: 4 large
      • All-purpose flour: 200 g (1 2/3 cups)
      • Baking powder: 1 teaspoon

    Baking Information:

      • Baking pan: 26 cm (10 inches) in diameter
      • Baking temperature: 160°C (320°F) in a fan oven
    • Baking time: 30 minutes

    Instructions (Step-by-Step)

    Step 1: Prepare the Caramelized Pears

      1. Caramelize the sugar: In a medium saucepan, combine 140 g (2/3 cup) of sugar and 5-6 tablespoons of water. Stir gently over medium heat until the sugar dissolves and starts to caramelize. Continue cooking without stirring, swirling the pan occasionally, until the sugar turns a deep amber color. This will take about 5-7 minutes.
      2. Pour the caramel into the pan: Carefully pour the caramel into the bottom of a greased 26 cm (10-inch) cake pan, spreading it evenly.
    1. Arrange the pears: Peel, core, and slice 3-4 medium pears. Arrange the pear slices in a circular pattern over the caramel in the cake pan, ensuring they are evenly distributed. Set aside while you prepare the cake batter.

    Step 2: Prepare the Cake Batter

      1. Cream the butter and powdered sugar: In a large mixing bowl, beat 200 g (7 oz) of softened butter and 160 g (1 1/3 cups) of powdered sugar together until light and fluffy. This will take about 3-4 minutes using an electric mixer on medium speed.
      2. Add the eggs: Beat in the eggs one at a time, mixing well after each addition. Make sure the mixture is smooth and creamy.
    1. Sift the dry ingredients: In a separate bowl, sift together 200 g (1 2/3 cups) of all-purpose flour and 1 teaspoon of baking powder.
    2. Combine the wet and dry ingredients: Gradually fold the sifted flour and baking powder into the butter mixture using a spatula. Mix until just combined, being careful not to overmix the batter. The batter should be smooth and slightly thick.
    See also  Baked Eggplant with Meat Filling and Cheese

    Step 3: Assemble and Bake the Cake

      1. Pour the batter over the pears: Carefully spoon the prepared cake batter over the caramelized pears in the cake pan. Use a spatula to spread the batter evenly, ensuring it covers all the pears.
    1. Bake the cake: Preheat the oven to 160°C (320°F) with the fan on. Place the cake in the oven and bake for 30 minutes, or until a toothpick inserted into the center of the cake comes out clean.

    Step 4: Cool and Invert the Cake

      1. Cool the cake: Once the cake is done baking, remove it from the oven and let it cool in the pan for 10-15 minutes.
      2. Invert the cake: After the cake has cooled slightly, run a knife around the edges to loosen it from the pan. Place a serving plate over the top of the pan and carefully invert the cake onto the plate. The caramelized pear layer should now be on top, showcasing the beautiful pear slices.
    1. Cool completely: Let the cake cool to room temperature before slicing.

    Step 5: Serve

    1. Slice and serve: Once the cake has cooled, slice it into wedges and serve. This cake pairs wonderfully with a dollop of whipped cream or a scoop of vanilla ice cream.

    Cooking Tips

      • Caramel tips: Be sure to keep a close eye on the caramel as it cooks to prevent it from burning. Once it turns amber, remove it from the heat immediately.
      • Pears: Use firm pears that hold their shape during baking, such as Bosc, Bartlett, or Anjou pears. Avoid overly ripe pears, as they may become too soft in the cake.
      • Room temperature ingredients: Ensure that the butter and eggs are at room temperature before making the batter. This helps create a smooth and evenly mixed batter.
      • Cooling: Allow the cake to cool slightly before inverting to ensure that the caramel has set enough to hold the pear slices in place.
    See also  Crispy Zucchini Parmesan

    Nutritional Facts (Per Serving, Based on 12 Servings)

      • Calories: 320 kcal
      • Protein: 4 g
      • Carbohydrates: 38 g
      • Fat: 18 g
      • Saturated Fat: 11 g
      • Fiber: 2 g
      • Sugar: 28 g
      • Sodium: 150 mg
      • Calcium: 3% DV
    • Iron: 6% DV
  • Classic Chocolate Drizzle Popcorn

    Classic Chocolate Drizzle Popcorn

    Here are a couple of delicious chocolate popcorn recipes for you to try!

    ### 1. Classic Chocolate Drizzle Popcorn

    **Ingredients:**
    – 1/2 cup popcorn kernels (or 1 bag of microwave popcorn)
    – 1 cup chocolate chips (milk, dark, or white chocolate)
    – 1 tablespoon vegetable oil (optional)
    – Sea salt (to taste)

    **Instructions:**
    1. **Pop the Popcorn:** Pop the popcorn kernels using your preferred method (stovetop, air popper, or microwave). If using the stovetop, heat the oil in a pot and add the kernels until they pop.
    2. **Melt the Chocolate:** In a microwave-safe bowl, melt the chocolate chips in 30-second intervals, stirring in between until smooth.
    3. **Combine:** Place the popcorn in a large bowl. Drizzle the melted chocolate over the popcorn and gently toss to coat.
    4. **Add Salt:** Sprinkle sea salt over the popcorn for a sweet and salty flavor.
    5. **Set:** Spread the chocolate-coated popcorn on a baking sheet lined with parchment paper. Let it cool until the chocolate hardens, then break into pieces.

    ### 2. Chocolate Peanut Butter Popcorn

    **Ingredients:**
    – 1/2 cup popcorn kernels (or 1 bag of microwave popcorn)
    – 1/2 cup chocolate chips
    – 1/4 cup peanut butter
    – 1 tablespoon butter
    – 1/4 cup powdered sugar (optional)
    – Sea salt (to taste)

    **Instructions:**
    1. **Pop the Popcorn:** Prepare the popcorn as described in the previous recipe.
    2. **Melt the Chocolate and Peanut Butter:** In a microwave-safe bowl, combine the chocolate chips, peanut butter, and butter. Melt in 30-second intervals, stirring until smooth.
    3. **Mix with Popcorn:** Pour the chocolate-peanut butter mixture over the popcorn and toss to coat evenly.
    4. **Add Powdered Sugar:** If desired, sprinkle powdered sugar over the coated popcorn for extra sweetness and toss to combine.
    5. **Set and Serve:** Spread on a baking sheet and let cool. Break into pieces and enjoy!

    ### 3. S’mores Chocolate Popcorn

    **Ingredients:**
    – 1/2 cup popcorn kernels (or 1 bag of microwave popcorn)
    – 1 cup chocolate chips
    – 1/2 cup mini marshmallows
    – 1/2 cup crushed graham crackers
    – 1 tablespoon butter
    – Sea salt (to taste)

    **Instructions:**
    1. **Pop the Popcorn:** Prepare the popcorn.
    2. **Melt the Chocolate:** Melt the chocolate chips in a microwave-safe bowl as mentioned earlier.
    3. **Combine:** In a large bowl, mix the popcorn with melted chocolate, mini marshmallows, and crushed graham crackers. Toss gently to combine.
    4. **Add Salt:** Sprinkle with sea salt for a balanced flavor.
    5. **Set:** Spread on a baking sheet and let cool. Break into pieces to serve.

    Enjoy your chocolate popcorn creations!

  • Unbelievably Easy Minute Tea Cookies Perfect for tea time

    Unbelievably Easy Minute Tea Cookies Perfect for tea time

    Ingredients (Approx. 23 Cookies – ~350g):

    – 1 medium egg
    – 50g sugar
    – 50g butter
    – 40g honey (1 tbsp)
    – ~220g flour
    – 3/4 tsp baking powder (4g)
    – A pinch of salt
    – Walnuts
    – Optional fillings: dried apricots, prunes, raisins, or chocolate

    Instructions:

    1. Beat the egg and sugar together until creamy.
    2. Melt the butter, add honey, and mix well.
    3. Combine the egg-sugar mixture with the butter-honey mixture.
    4. In a separate bowl, mix flour, baking powder, and a pinch of salt.
    5. Gradually add dry ingredients to the wet mixture and knead the dough.
    6. Add walnuts (and optional fillings if desired) into the dough.
    7. Form small cookie balls and place them on a baking sheet.
    8. Bake in a preheated oven at 180°C (356°F) for about 15 minutes.

  • Irresistible Generous Cake Recipe

    Irresistible Generous Cake Recipe

    Irresistible Generous Cake Recipe

    Table of Contents

    Get ready for a dessert sensation that’s better than apple pie! 1f967

    For the Cake Batter:
    • – 2 eggs 1f95a1f95a
    • – 5 tbsp sugar (100g) 1f35a
    • – 8g vanilla sugar 1f366
    • – A pinch of salt 1f9c2
    • – 4 tbsp oil (40 ml) 1fad2
    • – 2 tbsp butter (40g) 1f9c8
    • – 4g baking powder 1f944
    • – 3 large cups of flour (300g) 1f370
    • – A 26 cm diameter cake mold, greased with butter 1f382

    For the Generous Filling:

    • – 1 egg 1f95a
    • – 5 tbsp sugar (100g) 1f35a
    • – 4 tbsp cornstarch (60g) 1f33d
    • – Grated peel of half a lemon 1f34b
    • – 500 ml milk 1f95b
    • – 1 tbsp butter (20g) 1f9c8
    • – 1 tbsp lemon juice 1f34b

    To Decorate:

    • – Egg yolk + 1 tsp milk 1f95a1f95b
    • – Sugar 1f36c
    Instructions:

    1. Preheat the oven to 180°C (356°F).
    2. In a bowl, whisk together 2 eggs, sugar, vanilla sugar, and a pinch of salt.
    3. Add oil, butter, baking powder, and flour. Mix until you have a smooth dough.
    4. Grease a 26 cm cake mold with butter and spread the dough evenly.
    5. In a separate bowl, whisk together 1 egg, sugar, cornstarch, lemon peel, and lemon juice.
    6. Heat the milk and gradually add it to the egg mixture while whisking.
    7. Pour the generous filling over the cake batter in the mold.
    8. In a small bowl, combine the egg yolk and milk for decoration, then drizzle over the top.
    9. Sprinkle with sugar.
    10. Bake for 35-40 minutes until golden brown.

    Enjoy the generosity of this cake! Share your creation with

  • Holiday’s Best Broccoli Delight!

    Holiday’s Best Broccoli Delight!

    Holiday’s Best Broccoli Delight!

    Table of Contents

    Craving a delightful holiday treat? Try our irresistible Broccoli Recipe! 1f60b

    Ingredients:
    • – 1 broccoli 1f966
    • – 1 tsp salt 1f9c2
    • – 350g/12.34oz mushrooms 1f344
    • – Olive oil
    • – 1/2 tsp salt 1f9c2
    • – Black pepper ️
    • – 1 onion 1f9c5
    • – 6 eggs 1f95a1f95a1f95a1f95a1f95a1f95a
    • – Salt 1f9c2
    • – Black pepper ️
    • – 250g/8.81oz ricotta 1f9c0
    • – 2 garlic cloves 1f9c4
    • – Italian herbs 1f33f
    Instructions:

    1. Blanch broccoli for 2 minutes, then cool.
    2. Sauté mushrooms in olive oil with 1/2 tsp salt and black pepper until done.
    3. Fry onion until translucent.
    4. Whisk eggs with salt and black pepper, then mix in blended broccoli stalk.
    5. Grate broccoli inflorescence without the stem.
    6. Grease with olive oil and bake at 180°C (350°F) for 20 minutes.
    7. Mix ricotta, fried mushrooms, garlic, and Italian herbs.
    8. Spread mixture onto baked broccoli.
    9. Roll and wrap in parchment, refrigerate for 1 hour.

    Indulge in this holiday delight! Share your photos with

  • MOCHA CHEESECAKE

    MOCHA CHEESECAKE

    Ingredients:

    3 sachets gelatin powder
    3 tablespoons water
    5 bars cream cheese (190 gr.)
    2 cups condensed milk
    1 tablespoon vanilla
    1 cup whipping cream
    1 tablespoon milk
    1 tablespoon instant coffee
    ½ cup chocolate, melted
    1 ½ cups chocolate chip cookie
    4 tablespoons unsalted butter, melted
    Ganache:
    1 cup whipping cream
    1 cup chocolate chips
    1 tablespoon unsalted butter

    Preparation:

    1. Mix the gelatin powder with the water and stir well. Let stand for 5 minutes until hydrated and microwave for 30 seconds until melted.
    2. In a large deep bowl, place the cream cheese with the condensed milk and vanilla, beat for 5 minutes until completely mixed.
    3. Add whipping cream and melted gelatin slowly until incorporated and beat until smooth.
    4. Separate two cups of the mixture for the vanilla layer.
    5. Separate three cups for the coffee layer. Mix the milk and instant coffee and add to the mixture. Stir completely.
    6. Fully add the melted chocolate to the remaining mixture.
    7. In a food processor, crush the chocolate chip cookies and add the melted butter, blend until fully incorporated.
    8. In a deep container 22 centimeters in diameter, covered with adherent plastic, pour the vanilla mixture. Refrigerate 20 minutes.
    9. Once refrigerated, pour in the coffee mixture and refrigerate for 20 minutes.
    10. Once cooled, pour the chocolate mixture and carefully sprinkle the crushed biscuit until the entire surface is covered. Refrigerate for 4 hours.
    11. Make the ganache: In a small saucepan over low heat, heat the whipping cream and add the chocolate chips, mix until melted. Add the tablespoon of butter and mix until melted. Rest for 30 minutes or until cool.
    12. Unmold carefully and cover with the ganache.
    13. Serve in slices and enjoy.

  • Quick and Easy Ham and Cheese Roll-Ups

    Quick and Easy Ham and Cheese Roll-Ups

    Quick and Easy Ham and Cheese Roll-Ups

    Table of Contents

    Ingredients

    For the Roll-Ups:

      • 3 eggs
      • A pinch of salt
      • A pinch of ground black pepper (optional)
      • 4 slices of ham (or mortadella, sausage, or your preferred meat)
      • 1 cup shredded mozzarella cheese (or any cheese that melts well)
      • 6 slices of sandwich bread (flattened)
      • 1 tablespoon vegetable oil (for cooking)
    • 1 tablespoon butter (for cooking)

    Additional Ingredients (Optional):

      • Powdered paprika (for added spice)
      • Toothpicks (to secure the rolls while cooking)

    Step-by-Step Instructions

    Step 1: Prepare the Egg Mixture

      1. Beat the eggs:
        Crack 3 eggs into a medium-sized bowl. Add a pinch of salt and, if desired, a pinch of ground black pepper for seasoning. Beat the eggs well until they are fully mixed and slightly frothy.
      2. Set aside the mixture:
        Once the eggs are well mixed, set the bowl aside. This egg mixture will be used to dip the bread rolls before frying, helping them to become golden and crispy.

    Step 2: Prepare the Ham and Cheese Filling

      1. Chop the ham:
        Take 4 slices of ham and chop them into small squares. You can also use alternatives like mortadella, sausage, or any deli meat you prefer. For a vegetarian option, you could even substitute with cooked vegetables like spinach or mushrooms.
      2. Mix the ham and cheese:
        In a mixing bowl, combine the chopped ham with 1 cup of shredded mozzarella cheese. You can use more or less cheese depending on your preference. Mix well so the cheese and ham are evenly distributed.
      3. Season the mixture:
        If you want to add a bit of spice, sprinkle in a small amount of powdered paprika. This is optional, especially if you’re serving these to children.
    See also  Pumpkin and Apple Oatmeal Bake

    Step 3: Prepare the Bread

    1. Flatten the bread:
      Using a rolling pin or your hands, flatten each slice of bread. This will make it easier to roll them up later. You want the bread to be as flat as possible without breaking.
    2. Lightly brush the bread with the egg mixture:
      To help keep the filling inside the bread during cooking, lightly brush the edges of each flattened bread slice with a bit of the beaten egg mixture. This will act as a seal when you roll them up.

    Step 4: Fill and Roll the Bread

      1. Add the filling:
        Place a spoonful of the ham and cheese mixture in the center of each flattened bread slice. Spread it evenly across the surface, making sure not to overfill, as this can make the rolls difficult to seal.
    1. Roll the bread:
      Carefully roll each slice of bread into a tight log, ensuring the filling stays inside. To keep the rolls sealed, you can use a toothpick to hold them together while frying. Alternatively, pressing the edges firmly will also help them stay closed.

    Step 5: Cook the Roll-Ups

      1. Heat the oil and butter:
        In a large skillet or frying pan, add 1 tablespoon of vegetable oil and 1 tablespoon of butter. Heat over medium-low heat until the butter has melted and the oil is shimmering.
      2. Dip the roll-ups in egg:
        One at a time, dip each bread roll-up into the egg mixture, making sure they are evenly coated. This will create a crispy golden exterior when fried.
    1. Fry the roll-ups:
      Place the roll-ups in the skillet, seam-side down first to ensure they stay sealed. Cook for about 2 minutes per side, turning gently with tongs or a spatula. Cook until all sides are golden brown and crispy. This should take about 6-8 minutes in total.
    2. Cook until golden brown:
      Keep turning the rolls until they are evenly golden on all sides. Ensure that the heat is low to medium, so the roll-ups cook through without burning on the outside.
    See also  A Mother’s Homemade Garlic Elixir: A Soothing Solution for Everyday Ailments

    Step 6: Serve the Roll-Ups

      1. Remove from the pan:
        Once the roll-ups are golden and crispy, remove them from the skillet and place them on a plate lined with paper towels to absorb any excess oil.
    1. Serve warm:
      Serve the ham and cheese roll-ups while they’re still warm and gooey. These can be eaten as-is or paired with dipping sauces like ketchup, mustard, or even salsa. If you’re serving them at a party, consider cutting them in half for easy finger food.

    Cooking Tips

      • Bread choice: Use soft sandwich bread for this recipe. Avoid using bread that is too thick or crusty, as it will be difficult to roll and fry.
      • Filling variations: Feel free to experiment with different fillings. You could use a combination of cheese and vegetables, or even add herbs like parsley or chives for extra flavor. For a sweet version, you could substitute the ham and cheese with Nutella or jam.
      • Prevent burning: Cook the roll-ups over medium-low heat to prevent the bread from burning while allowing the cheese inside to melt fully.
      • Make ahead: You can prepare the roll-ups ahead of time and store them in the refrigerator. Fry them just before serving for best results.

    Storage

      • In the refrigerator: Store any leftover roll-ups in an airtight container in the refrigerator for up to 2 days. Reheat them in a skillet over low heat or in the oven to maintain their crispiness.
      • In the freezer: These roll-ups can also be frozen before frying. Simply wrap them tightly in plastic wrap and store them in the freezer for up to 1 month. When ready to cook, thaw them in the refrigerator and fry as usual.
    See also  Everyone Can Make This Easy Recipe with Scoops and Green Onions!

    Nutritional Facts (Per serving, based on 2 roll-ups per person)

      • Calories: Approximately 280 kcal
      • Protein: 15g
      • Carbohydrates: 20g
      • Fat: 15g
      • Fiber: 1g
      • Sugars: 2g
      • Sodium: 420mg
      • Calcium: 15% of the daily recommended intake
    • Iron: 10% of the daily recommended intake
  • Prepare a Healthy Oatmeal and Apple Dessert in Minutes!

    Prepare a Healthy Oatmeal and Apple Dessert in Minutes!

    Prepare a Healthy Oatmeal and Apple Dessert in Minutes!

    Ingredients:

    – 1 cup Oatmeal
    – 2 tbsp Ricotta Cheese
    – 1 Egg
    – 50 ml Water
    – Vanilla Extract and Stevia (to taste)
    – 1 tbsp Vegetable Oil
    – 2 Apples
    – 1 tsp Butter
    – Blue Agave Syrup (optional, for drizzling)

    ‍ Instructions:

    1. In a bowl, combine oatmeal, ricotta cheese, egg, water, a few drops of vanilla extract, and stevia to taste. Mix well.

    2. Heat vegetable oil in a pan over low heat.

    3. Slice the apples and add them to the pan along with 1 tsp of butter. Sauté for about 10 minutes until the apples soften.

    4. While the apples are cooking, heat a non-stick skillet over medium heat. Pour the oatmeal mixture onto the skillet to form pancakes. Cook for a few minutes on each side until they are golden brown and cooked through.

    5. Serve the oatmeal pancakes topped with the sautéed apples.

    6. Drizzle with blue agave syrup if desired for extra sweetness.


    ENJOY!

  • Stuffed Sweet Potatoes with Mushrooms and Cream Cheese

    Stuffed Sweet Potatoes with Mushrooms and Cream Cheese

    Stuffed Sweet Potatoes with Mushrooms and Cream Cheese

    Table of Contents

    Ingredients:

      • 4 sweet potatoes
      • Olive oil, for cooking
      • Salt, to taste
      • 1 onion, chopped
      • 6-8 mushrooms, chopped
      • Black pepper, to taste
      • 5 tablespoons cream cheese
      • Green onions, chopped
    • A small piece of cheese, grated (optional)

    Directions:

      1. Prepare and Bake Sweet Potatoes:
          • Preheat the oven to 200°C (400°F).
          • Rub the sweet potatoes with olive oil and sprinkle with salt.


        • Place them on a baking sheet and bake for 30-40 minutes until tender.
      2. Sauté Onions and Mushrooms:
          • While the sweet potatoes are baking, heat olive oil in a pan over medium heat.


        • Add chopped onion and sauté for 5 minutes.
        • Add chopped mushrooms, season with salt and black pepper, and cook until the mushrooms are done (about 5-7 minutes).
      1. Make the Filling:
        • In a bowl, combine the sautéed mushrooms and onions with 5 tablespoons of cream cheese. Mix well.
        • Stir in chopped green onions.
    1. Stuff and Bake the Sweet Potatoes:
        • Once the sweet potatoes are done, remove them from the oven and let them cool slightly.
        • Slice them open and stuff them with the mushroom-cream cheese mixture.
        • Optionally, sprinkle some grated cheese on top.


      • Drizzle with a little olive oil and bake again for 10-15 minutes until heated through.

    Serving Suggestions:

      • Serve with a fresh green salad for a balanced meal.
    • Add a side of crispy bacon or grilled chicken for extra protein.

    Cooking Tips:

      • For extra flavor, you can add garlic or thyme when sautéing the mushrooms.
      • To make the filling creamier, add a bit of sour cream or Greek yogurt along with the cream cheese.
    See also  My Husband Asks to Cook This Cake 3 Times a Week! The Tastiest Cake!

    Nutritional Benefits:

      • Sweet potatoes are rich in fiber, vitamins A and C, promoting good digestion and immune health.
      • Mushrooms provide antioxidants and B vitamins for energy and cell health.
      • Cream cheese adds a good source of calcium and healthy fats.

    Dietary Information:

      • Gluten-free: This recipe is naturally gluten-free.
      • Vegetarian: As written, the recipe is vegetarian-friendly.
      • Easily customizable: Add bacon, ham, or chicken to suit your preferences.

    Nutritional Facts (per serving):

      • Calories: 320
      • Protein: 8g
      • Carbs: 45g
    • Fiber: 6g
    • Fat: 12g

    Storage:

      • Store leftovers in an airtight container in the fridge for up to 3 days.
    • Reheat in the oven or microwave before serving.

    Why You’ll Love This Recipe:

      • Simple and Delicious: Easy to make and packed with flavor.
      • Customizable: Add your favorite toppings or proteins to make it your own.
    • Healthy and Filling: Loaded with nutritious ingredients that keep you full.
    • Perfect Comfort Food: Warm, creamy, and satisfying, perfect for any meal.
  • Cabbage Patties Recipe

    Cabbage Patties Recipe

    Cabbage Patties Recipe

    Table of Contents

    Ingredients:

      • Cabbage: 2 cups (150g), finely shredded
      • Egg: 1 large
      • All-purpose flour: 1/2 cup (60g)
      • Grated cheese (optional): 1/4 cup (30g)
      • Onion: 1 small (50g), finely chopped
      • Garlic: 2 cloves, minced
      • Salt: To taste
    • Pepper: To taste
    • Olive oil or vegetable oil: For frying

    Directions:

      1. Mix Ingredients:
          • In a large bowl, combine the shredded cabbage, egg, flour, grated cheese, onion, garlic, salt, and pepper. Mix until well combined.


      2. Form Patties:
        • Shape the mixture into palm-sized patties. Add a bit more flour if the mixture is too loose.
      1. Heat Oil:
        • Preheat a skillet over medium heat with oil.
      2. Fry Patties:
          • Fry the patties for 2-3 minutes on each side until golden brown. Drain on paper towels.


      3. Serve:
        • Serve with a yogurt dip, sour cream, or your favorite sauce.

    Serving Suggestions:

    • Serve with a fresh green salad and a yogurt dip for a complete meal.
    • Add a dash of chili sauce for some extra spice.

    Cooking Tips:

      • If your mixture is too loose, add an extra tablespoon of flour to help bind the patties.
    • Use a non-stick skillet to prevent sticking.

    Nutritional Benefits:

      • Cabbage is rich in vitamins C and K.
      • Eggs and cheese (optional) provide protein, while olive oil adds healthy fats.

    Dietary Information:

    • This recipe can be made vegetarian by omitting meat-based cheese.
    • For a gluten-free version, use almond or chickpea flour instead of all-purpose flour.

    Nutritional Facts (per patty):

      • Calories: 120
      • Fat: 7g
      • Carbohydrates: 10g
      • Protein: 5g

    Storage:

    • Store any leftover patties in an airtight container in the refrigerator for up to 3 days. Reheat in a skillet or the oven to maintain crispiness.

    Why You’ll Love This Recipe:

      • It’s quick, easy, and made with simple, everyday ingredients.
      • Versatile – you can modify the recipe by adding your favorite veggies.
    • Crispy on the outside, soft and flavorful on the inside.
    • Great for meal prepping or using up leftover cabbage.