Category: quick and easy recipe

  • Quick and Delicious Carrot and Walnut Cake: Simple and Flavorful

    Quick and Delicious Carrot and Walnut Cake: Simple and Flavorful

    Quick and Delicious Carrot and Walnut Cake: Simple and Flavorful

    Table of Contents

    Ingredients

      • Eggs: 3 large
      • Sugar: 150 g (about 3/4 cup)


      • Vegetable Oil: 80 ml (about 1/3 cup)
      • Flour: 180 g (about 1 1/2 cups) – All-purpose or 000 flour
      • Orange Zest: From 1 orange


      • Grated Carrot: 200 g (about 2 medium carrots)
      • Walnuts: 100 g (about 1/2 cup), chopped
      • Salt: A pinch


      • Baking Powder: 2 teaspoons
      • Spice Mix for Cake: 1/2 teaspoon (includes cinnamon, cloves, nutmeg, ginger, cardamom, vanilla, and anise)
      • Cinnamon: 1/4 teaspoon


    • Orange Juice: 1 tablespoon

    Instructions

      1. Prepare the Batter:
          • Preheat your oven to 180°C (350°F). Grease and flour an 8-inch (20 cm) round cake pan or line it with parchment paper.
          • In a large mixing bowl, whisk the eggs and sugar together until the mixture is light and fluffy. This should take about 3-4 minutes.


        • Gradually add the vegetable oil while continuing to whisk, ensuring that it is fully incorporated into the egg mixture.
      2. Incorporate the Dry Ingredients:
          • In a separate bowl, sift together the flour, baking powder, salt, spice mix, and cinnamon. Sifting helps to aerate the flour and evenly distribute the baking powder and spices.


        • Gradually fold the dry ingredients into the wet mixture using a spatula or wooden spoon. Mix until just combined, being careful not to overmix to avoid a dense cake.
      3. Add Flavor and Texture:
          • Add the grated carrot, orange zest, and orange juice to the batter. Stir gently to combine, ensuring the carrot and zest are evenly distributed throughout the mixture.


        • Finally, fold in the chopped walnuts. These add a delightful crunch and depth of flavor to the cake.
      4. Bake the Cake:
          • Pour the batter into the prepared cake pan, spreading it evenly.


        • Bake in the preheated oven for 30-35 minutes, or until a toothpick inserted into the center of the cake comes out clean. The cake should be golden brown and spring back when lightly pressed.
        • Once baked, remove the cake from the oven and let it cool in the pan for 10 minutes before transferring it to a wire rack to cool completely.
    See also  How to Prepare Super Tasty Potato Meatballs


    1. Serve:
      • Once the cake has cooled, you can dust it with powdered sugar, top it with a cream cheese frosting, or serve it as is for a simpler presentation. Slice and enjoy with a cup of tea or coffee.

    Cooking Tips

      • Grate the Carrots Finely: For a smoother texture, use the fine side of a box grater to grate the carrots. This allows the carrot to blend seamlessly into the cake, adding moisture without being too noticeable.


      • Room Temperature Ingredients: Ensure that your eggs are at room temperature before starting. This helps them to mix better with the other ingredients, resulting in a lighter cake.
      • Spice Mix Customization: The spice mix adds warmth and depth to the cake, but feel free to adjust the spices to suit your taste. You can add more cinnamon for a spicier kick or increase the vanilla for a sweeter, aromatic flavor.
      • Orange Variations: If you love citrus, you can add a little more orange zest or juice for a more pronounced flavor. Alternatively, lemon zest can be used for a slightly different twist.


    Nutritional Benefits

    This carrot and walnut cake is more than just a sweet treat; it offers some notable nutritional benefits:

      • Carrots: Carrots are rich in beta-carotene, which the body converts to vitamin A, essential for healthy vision and immune function. They also provide dietary fiber, supporting digestive health.
      • Walnuts: Walnuts are a great source of omega-3 fatty acids, which are beneficial for heart health. They also contain antioxidants, protein, and fiber, making them a nutritious addition to the cake.


    • Orange Zest and Juice: Oranges are packed with vitamin C, an antioxidant that supports immune function and skin health. The zest adds not only flavor but also a boost of nutrients.
    • Spices: The blend of spices used in this cake provides not only warmth and flavor but also various health benefits. For example, cinnamon is known for its anti-inflammatory properties and ability to help regulate blood sugar levels.
  • Homemade Nutty Nougat with Honey and Roasted Nuts

    Homemade Nutty Nougat with Honey and Roasted Nuts

    Homemade Nutty Nougat with Honey and Roasted Nuts

    Table of Contents

    Ingredients:

      • Honey: ½ cup (200g)
      • Sugar: ¾ cup (125g)
      • Egg White: 1 large
      • Salt: A pinch
      • Roasted Hazelnuts: 1 cup (120g)
      • Roasted Blanched Almonds: ½ cup (60g)
      • Vegetable Oil: For greasing
    • Parchment Paper: For lining the mold

    Directions:

      • Prepare the Mold: Grease a 26 × 15 cm (10.2 × 5.9 inches) mold with vegetable oil and line it with parchment paper.
      • Cook the Honey and Sugar: In a saucepan, combine ½ cup of honey and ¾ cup of sugar. Cook over low heat, stirring occasionally, until the sugar completely dissolves and the mixture becomes smooth.
      • Beat the Egg White: In a separate bowl, beat 1 large egg white with a pinch of salt until stiff peaks form.
      • Combine Egg White with Honey Mixture: Turn off the heat of the honey mixture and gradually add the beaten egg white, stirring quickly to incorporate it without cooking the egg white.
      • Cook the Mixture: Place the saucepan back on very low heat. Stir continuously for 20-25 minutes until the mixture thickens. Test: Drop a small amount of the mixture into cold water. If it forms a gum-like consistency, it’s ready.
      • Add the Nuts: Stir in 1 cup of roasted hazelnuts and ½ cup of roasted blanched almonds until well mixed.
      • Shape the Nougat: Grease your hands with oil and press the nougat mixture into the prepared mold, flattening it gently.
      • Let the Nougat Set: Cover and let it rest at room temperature for 2 hours to set.
    • Serve and Enjoy: Once set, remove the nougat from the mold and cut into pieces.
    See also  Making Irresistible Broccoli Croquettes: A Daily Delight

    Serving Suggestions:

      1. Serve with a cup of coffee or tea for a delightful afternoon treat.
      2. Cut into bite-sized pieces and add to a charcuterie board.
      1. Gift-wrap small pieces in parchment paper for a homemade holiday gift.
      2. Use as a topping for vanilla ice cream or yogurt for added texture and sweetness.
      3. Include as part of a dessert platter at parties or gatherings.

    Cooking Tips:

      1. Use a candy thermometer if you have one to ensure the mixture reaches the right consistency.
      2. Stir constantly while cooking to prevent the honey mixture from burning or sticking to the bottom.
      3. Be quick when adding the egg white to the honey mixture to avoid scrambling the egg.
    1. Grease your hands with oil when handling the nougat to prevent it from sticking.
    2. For a smoother texture, chop the roasted nuts finely before mixing them into the nougat.
  • Custard Sponge Cake

    Custard Sponge Cake

    Custard Sponge Cake

    Table of Contents

    Ingredients

    For the Sponge Cake:

    • 4 large eggs
    • 1 cup granulated sugar
    • 1 cup all-purpose flour
    • 1 teaspoon baking powder
    • 1/2 teaspoon salt
    • 1 teaspoon vanilla extract
    • 1/4 cup milk

    For the Custard Topping:

    • 2 cups milk
    • 1/2 cup granulated sugar
    • 1/4 cup cornstarch
    • 3 egg yolks
    • 1 teaspoon vanilla extract
    • 2 tablespoons unsalted butter

    Instructions:

        • Preheat your oven to 350°F (175°C) and line a round cake pan with parchment paper.
        • In a large bowl, beat eggs and sugar until pale and fluffy.
        • Prepare the Sponge Cake: 
      • Sift together flour, baking powder, and salt. Gently fold into the egg mixture.
      • Mix in vanilla extract and milk until just combined.
      • Pour batter into the prepared pan and bake for 25-30 minutes, or until a toothpick inserted into the center comes out clean.
      • Let the cake cool in the pan for 10 minutes, then turn out onto a wire rack to cool completely.
    1. Make the Custard Topping:
      • In a medium saucepan, whisk together milk, sugar, and cornstarch over medium heat.
      • In a small bowl, whisk the egg yolks, then temper them by slowly pouring in some of the hot milk mixture, whisking constantly.
      • Pour the tempered yolks back into the saucepan and continue to cook, stirring constantly, until the mixture thickens and coats the back of a spoon.
      • Remove from heat and stir in vanilla extract and butter until smooth.
    2. Assemble the Cake:
      • Once the cake is cool, place it on a serving plate.
      • Pour the warm custard over the top of the sponge cake, spreading to cover evenly.
      • Allow the custard to set slightly before slicing.
  • Chicken buns: the recipe to make them fluffy and tasty

    Chicken buns: the recipe to make them fluffy and tasty

    Ingredients: 
    – For the dough:
    400 g of flour
    130 ml of water
    130 ml of milk
    1 tsp of dry brewer’s yeast (8 g)
    1 tbsp of sugar
    1 tsp of salt (5 g)
    60 ml of oil
    – For the stuffing:
    350 g of chicken breast
    1/2 onion
    1/2 bell pepper
    2 garlic cloves
    Parsley (or coriander or any other aromatic herb)
    Salt
    Pepper
    Ginger
    Turmeric
    Paprika
    Olive oil
    Sour cream (or cream cheese)
    Grated cheese
    1 egg yolk + 1 tbsp of milk for brushing
    Directions: 
    1. Mix milk, water, sugar and yeast; then add 5 tbsp of flour.
    2. Cover and let sit for 5 minutes.
    3. Add oil, the rest of the flour and salt.
    4. Knead into a smooth and elastic dough.
    5. Cover and let rise for 40 minutes.
    6. Meanwhile make the filling by mixing chicken, vegetables, olive oil and all of the spices.
    7. Cook this mixture in a pan at medium heat for 5-7 minutes.
    8. Cut the dough in 7 pieces, let sit for 10 minutes then flatten.
    9. Place in a tray coated with baking paper.
    10. Fill with sour cream, the chicken mixture and grated cheese.
    11. Brush the edges with whisked egg yolk and milk.
    12. Bake at 180° for 20-25 minutes.
  • Clean Kidney, Liver, and Lungs with Mandarins:

    Clean Kidney, Liver, and Lungs with Mandarins:

    Clean Kidney, Liver, and Lungs with Mandarins: The Natural Bacteria Killer
    Mandarins, also known as tangerines, are not only delicious but also packed with nutrients that support the health of your kidneys, liver, and lungs. Their natural antibacterial properties help cleanse your body, ensuring all the dirt and toxins are effectively removed. Here’s how mandarins can contribute to your overall health and how to incorporate them into your diet.

    Health Benefits of Mandarins
    Rich in Vitamin C: Mandarins are high in vitamin C, which is essential for boosting the immune system and fighting off infections.

    Antioxidants: They are packed with antioxidants like flavonoids and carotenoids that help reduce oxidative stress and inflammation.

    Fiber: The fiber in mandarins supports digestive health and aids in detoxifying the body.
    Hydration: Mandarins have a high water content, which helps keep your body hydrated and supports the detoxification process.

    Natural Cleansing: The combination of vitamins, minerals, and antioxidants in mandarins helps cleanse the kidneys, liver, and lungs.

    How to Use Mandarins for Detoxification
    Here are some effective ways to use mandarins to cleanse your kidney, liver, and lungs:

    1. Mandarin Detox Water

    Ingredients:

    2 mandarins

    1 lemon

    1 liter of water

    A handful of fresh mint leaves (optional)

    Instructions:

    1.Prepare the Fruit: Peel the mandarins and separate them into segments. Slice the lemon thinly.

    2.Combine Ingredients: In a large jug, combine the mandarin segments, lemon slices, and fresh mint leaves.

    3.Add Water: Pour the water over the fruit and mint.

    4.Infuse: Let it sit in the refrigerator for at least 2 hours, or overnight for the best flavor.

    5.Drink: Enjoy this refreshing detox water throughout the day.

    2. Mandarin and Ginger Tea

    Ingredients:

    2 mandarins

    1-inch piece of fresh ginger

    1 teaspoon honey (optional)

    2 cups of water

    Instructions:

    1.Prepare the Ingredients: Peel the mandarins and separate them into segments. Peel and slice the ginger.

    2.Boil the Water: In a saucepan, bring the water to a boil.

    3.Add Ingredients: Add the mandarin segments and ginger slices to the boiling water.

    4.Simmer: Reduce the heat and let it simmer for 10 minutes.

    5.Strain and Serve: Strain the tea into a cup and add honey if desired. Enjoy this warm, soothing tea.

    3. Mandarin Smoothie

    Ingredients:

    3 mandarins

    1 banana

    1 cup spinach

    1/2 cup Greek yogurt

    1 cup almond milk (or any milk of your choice)

    1 teaspoon chia seeds (optional)

    Instructions:1.Prepare the Fruit: Peel the mandarins and banana.

    2.Blend: Combine all ingredients in a blender and blend until smooth.

    3.Serve: Pour into a glass and enjoy this nutritious smoothie as a meal or snack.

    Tips for Best Results

    Use Fresh Mandarins: For the best flavor and nutritional benefits, use fresh, ripe mandarins.

    Stay Consistent: Incorporate mandarin-based drinks and snacks into your daily routine for ongoing detoxification and health benefits.

    Balanced Diet: Pair these detox drinks and snacks with a balanced diet rich in fruits, vegetables, lean proteins, and whole grains.

    Additional Health Tips

    Hydrate: Drink plenty of water throughout the day to support the detoxification process.

    Exercise Regularly: Engage in regular physical activity to enhance circulation and overall health.

    Avoid Toxins: Limit exposure to toxins by avoiding processed foods, alcohol, and tobacco.

    Conclusion

    Incorporating mandarins into your diet is a delicious and effective way to support the health of your kidneys, liver, and lungs. With their high vitamin C content, antioxidants, and natural cleansing properties, mandarins help remove toxins and bacteria from your body. Enjoy these simple recipes and tips to boost your overall health and well-being.

  • Zucchini Meatballs with Oatmeal: Healthier and Tastier than Meat!

    Zucchini Meatballs with Oatmeal: Healthier and Tastier than Meat!

    Zucchini Meatballs with Oatmeal: Healthier and Tastier than Meat!

    Table of Contents

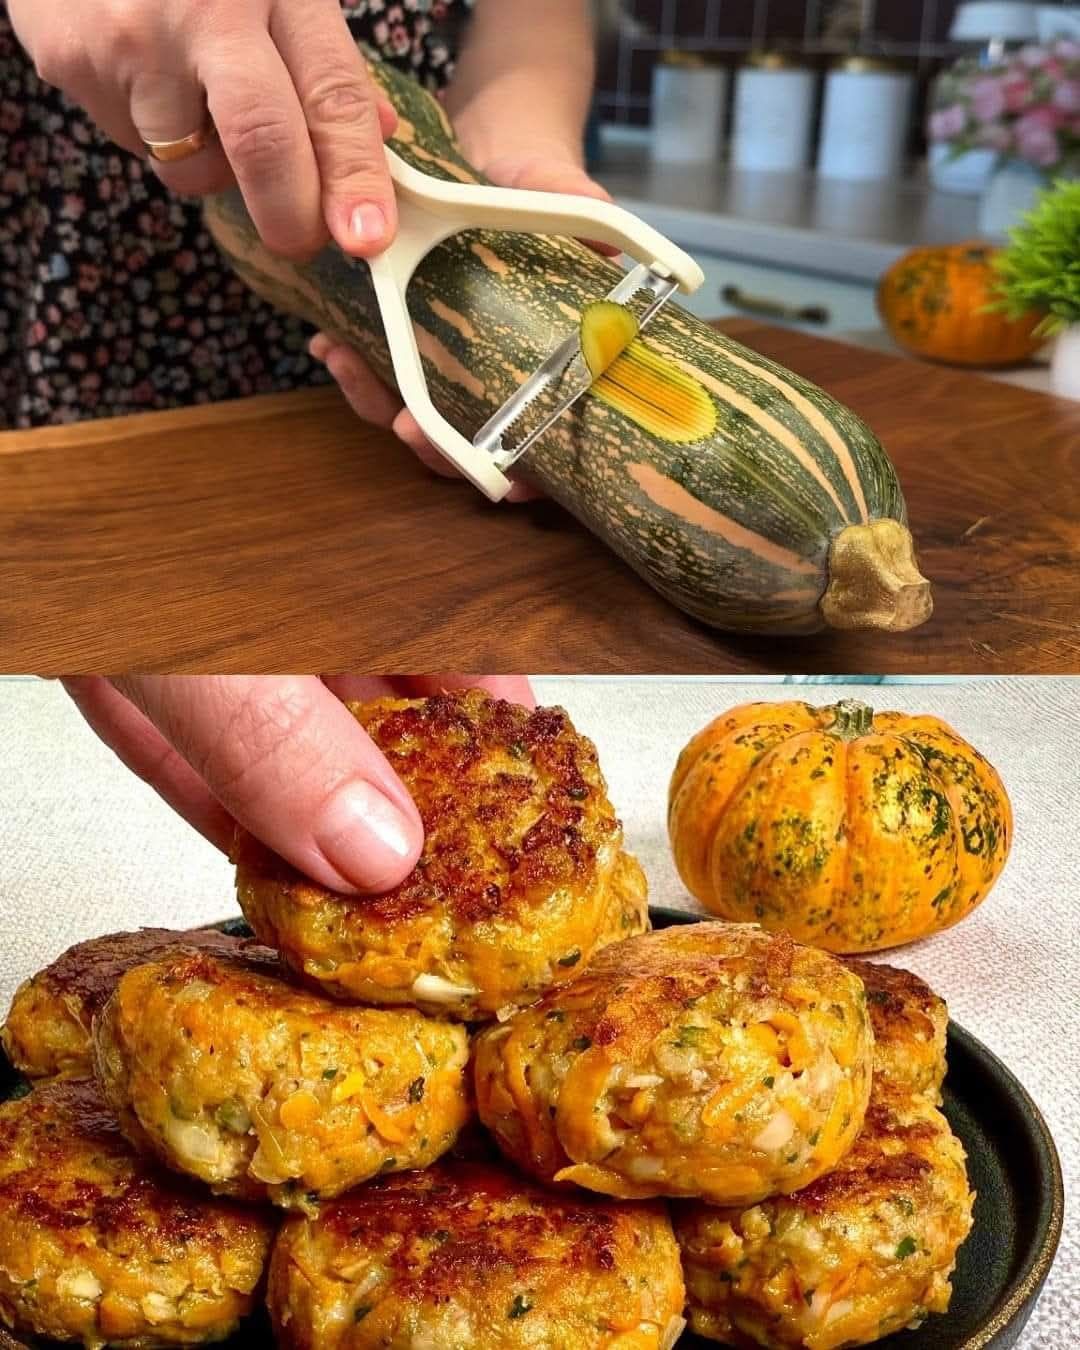
    Zucchini meatballs are a fantastic way to incorporate more vegetables into your diet. Zucchini is low in calories but rich in vitamins A and C, potassium, and antioxidants. When combined with carrots, potatoes, and protein-packed oatmeal, these meatballs provide a balanced, wholesome meal. The addition of cheese, eggs, and herbs creates a flavorful blend that is both light and satisfying. The use of oatmeal instead of breadcrumbs not only boosts the fiber content but also makes these meatballs more nutritious and filling.

    Ingredients
    • 1 zucchini (about 350 grams, grated)
    • 1 carrot (grated)
    • 2 eggs
    • 100 grams of cheese (such as feta, parmesan, or mozzarella, grated)
    • Parsley (finely chopped, about a handful)
    • 1 potato (grated)
    • 1 clove of garlic (minced)
    • Salt (to taste)
    • Black pepper (to taste)
    • 1 teaspoon Herbes de Provence
    • Paprika (to taste, optional)
    • 4 tablespoons oatmeal (about 40 grams, ground to a fine consistency)
    • 2 tablespoons flour (for coating the meatballs)
    • Olive oil (for frying)

    For the Sauce:

    • 2 tablespoons sour cream or yogurt
    • 1 tablespoon mayonnaise
    • Dill (finely chopped, about a teaspoon)
    • 1 teaspoon dried garlic
    • 1 teaspoon smoked paprika powder
    Step-by-Step Preparation of Zucchini Meatballs with Oatmeal
    Step 1: Grate and Drain the Zucchini
    1. Grate the Zucchini: Start by grating the zucchini using a medium-sized grater. Place the grated zucchini in a colander and sprinkle it with a pinch of salt. Let it sit for about 15 minutes. The salt will draw out the excess moisture, which is crucial for achieving the perfect texture in the meatballs.
    2. Drain and Squeeze: After 15 minutes, squeeze out the excess water from the zucchini using your hands or a clean kitchen towel. This step ensures that the meatballs won’t be too soggy and will hold their shape during cooking.
    See also  Homemade Bread recipe…You can bake it for Breakfast 
    Step 2: Mix the Ingredients
    1. Combine Vegetables and Seasonings: In a large mixing bowl, add the drained zucchini, grated carrot, and grated potato. Mix in the minced garlic, chopped parsley, and grated cheese.
    2. Add Eggs and Seasonings: Crack the eggs into the bowl and stir to combine. Season the mixture with salt, black pepper, Herbes de Provence, and a dash of paprika for added flavor.
    3. Incorporate the Oatmeal: Grind the oatmeal in a blender or food processor until it reaches a fine consistency. Add the ground oatmeal to the mixture and stir well. Let the mixture rest for about 15 minutes to allow the oatmeal to absorb some of the moisture and thicken the mixture.
    Step 3: Form and Fry the Meatballs
    1. Shape the Meatballs: Once the mixture has rested, use your hands to form small meatballs, about the size of a walnut. The mixture might be slightly sticky, so wet your hands occasionally to make shaping easier.
    2. Coat with Flour: Lightly roll each meatball in flour to coat. This step gives the meatballs a nice crispy exterior when fried.
    3. Fry the Meatballs: Heat a generous amount of olive oil in a large non-stick pan over medium heat. Fry the meatballs in batches, making sure not to overcrowd the pan. Cook each meatball for about 4-5 minutes on each side, or until they are golden brown and cooked through. Place the cooked meatballs on a paper towel-lined plate to absorb any excess oil.
    Step 4: Prepare the Sauce
    1. Mix the Sauce Ingredients: In a small bowl, combine 2 tablespoons of sour cream or yogurt with 1 tablespoon of mayonnaise. Add the chopped dill, dried garlic, and smoked paprika powder. Stir well to combine all the ingredients.
    2. Serve: Serve the zucchini meatballs warm with the sauce on the side for dipping. The sauce adds a creamy, tangy contrast that complements the savory, herby flavor of the meatballs perfectly.
    See also  broccoli recipes for every day
    Serving Suggestions

    These zucchini meatballs with oatmeal are incredibly versatile. They can be served as a main dish accompanied by a fresh salad, or as an appetizer or snack on their own. They also make a great addition to pasta dishes, wraps, or even on top of rice for a more substantial meal.

    Nutritional Information (Per Serving, Based on 20 Meatballs)
    • Calories: 60 kcal
    • Protein: 3 grams
    • Fat: 3 grams
    • Carbohydrates: 6 grams
    • Fiber: 1 gram
    • Sugar: 1 gram
    • Sodium: 90 mg
    Conclusion

    These zucchini meatballs with oatmeal are a delicious, healthy, and easy-to-make alternative to traditional meatballs. They’re loaded with fresh vegetables, aromatic herbs, and wholesome oats, making them not only tasty but also incredibly nourishing. The combination of flavors and textures, along with the creamy dill sauce, makes this dish a delightful treat that the whole family will love. Whether you’re looking to cut down on meat, add more veggies to your diet, or simply try something new, this recipe is a must-try. Enjoy your meal!

  • Homemade Cheese in Just 5 Minutes

    Homemade Cheese in Just 5 Minutes

    Homemade Cheese in Just 5 Minutes

    Table of Contents

    Why buy cheese when you can make it at home in no time? Here’s how:

    Ingredients:

    • Empty plastic bottle
    • 2 liters of milk
    • Salt
    • 50 milliliters of white vinegar
    • 100 grams of butter
    • 200 grams of mozzarella cheese

    To Serve:

    • Bread
    • Tomato
    • Balsamic sauce

    Instructions:

    1. Pour 2 liters of milk into a large pot and heat it until it’s almost boiling.
    2. Add a pinch of salt and 50 milliliters of white vinegar to the milk. Stir gently.
    3. Turn off the heat and let the mixture sit for about 5 minutes. It should curdle during this time.
    4. Place a cheesecloth or clean kitchen towel over the top of a plastic bottle and secure it with a rubber band.
    5. Carefully pour the curdled milk into the bottle, allowing the whey to drain out. This can take a few minutes.
    6. Once most of the whey has drained, remove the cheese from the bottle. It should be firm and ready to use.
    7. In a separate pan, melt 100 grams of butter and add 200 grams of mozzarella cheese. Stir until the cheese is melted and well combined.
    8. Serve your homemade cheese with bread, sliced tomatoes, and a drizzle of balsamic sauce.


  • White Bun Recipe

    White Bun Recipe

    White Bun Recipe

    Table of Contents

    Ingredients

      • 700 grams of wheat flour
      • 1 teaspoon of salt
      • 400 ml warm milk
      • 4 tablespoons of sugar
      • 8 grams of dry yeast
      • 2 eggs
      • 80 ml sunflower oil
      • 10 grams of baking powder
      • 10 ml apple cider vinegar
      • 50 grams of butter, melted
      • 1 egg yolk
    • Milk (for brushing)
    • Sesame seeds (for topping)

    Directions

      1. Activate Yeast: In a small bowl, mix the warm milk and sugar. Sprinkle the dry yeast over the top and let it sit for 5-10 minutes until it becomes frothy.
      1. Mix Dry Ingredients: In a large mixing bowl, combine the wheat flour, salt, and baking powder.
      2. Combine Wet Ingredients: In a separate bowl, whisk the eggs, sunflower oil, and apple cider vinegar. Add the melted butter and mix well.
      3. Form Dough: Add the yeast mixture and the wet ingredients to the dry ingredients. Mix until a dough forms.
      1. Knead Dough: Turn the dough onto a floured surface and knead for about 10 minutes until smooth and elastic.
      2. First Rise: Place the dough in a greased bowl, cover it with a clean towel, and let it rise in a warm place for about 1 hour, or until it has doubled in size.
      3. Shape Buns: Punch down the dough and divide it into equal portions. Shape each portion into a bun and place them on a baking sheet lined with parchment paper.
      1. Second Rise: Cover the buns with a towel and let them rise for another 30 minutes.
      2. Preheat Oven: Preheat your oven to 180°C (350°F).
      3. Prepare for Baking: In a small bowl, beat the egg yolk with a little milk. Brush the tops of the buns with this mixture and sprinkle with sesame seeds.
    1. Bake: Bake the buns in the preheated oven for 30-35 minutes, or until golden brown.
    2. Cool: Let the buns cool on a wire rack before serving.
    See also  The Easiest Crispy Baklava Recipe

    Serving Suggestions

    Enjoy these white buns fresh out of the oven with butter, or use them for sandwiches and burgers. They also make a great accompaniment to soups and stews.

    Cooking Tips

      • Ensure the milk is warm, not hot, to activate the yeast properly.
      • For a richer flavor, you can replace some of the milk with cream.
      • Knead the dough well to develop gluten, which helps the buns rise and become fluffy.

    Nutritional Benefits

    These white buns provide carbohydrates for energy and some protein from the eggs. Using sunflower oil and butter adds healthy fats, making these buns a more nutritious option compared to store-bought varieties.

    Dietary Information

    • Vegetarian: This recipe is suitable for vegetarians.
    • Nut-Free: There are no nuts in this recipe, making it safe for those with nut allergies.
  • Eggless Christmas fruit cake recipe

    Eggless Christmas fruit cake recipe

    Eggless Christmas fruit cake recipe

    Eggless Christmas fruit cake recipeEggless Christmas  fruit cake recipeIngredients– 2 cups all-purpose flour– 1 cup mixed dried fruits (raisins, currants, chopped dates)– 1/2 cup orange juice– 1/2 cup granulated sugar– 1/2 cup vegetable oil– 1/4 cup chopped nuts (optional)– 1 tsp baking powder– 1/2 tsp baking soda– 1/2 tsp ground cinnamon– 1/4 tsp ground nutmeg– 1/4 tsp salt– 1 tsp vanilla extractInstructions

    Preheat your oven to 350°F (175°C). Grease and flour an 8-inch round cake pan.

    In a large bowl, whisk together the flour, baking powder, baking soda, cinnamon, nutmeg, and salt.

    In another bowl, combine the orange juice, sugar, vegetable oil, and vanilla extract.

    Mix well.
    Gradually add the dry ingredients to the wet ingredients, stirring until just combined.

    Fold in the mixed dried fruits and chopped nuts (if using).
    Pour the batter into the prepared cake pan. Bake for 45-55 minutes, or until a toothpick inserted into the center comes out clean.
    Allow the cake to cool in the pan for 10 minutes, then transfer to a wire rack to cool completely.
    TRESH CAKES

  • Fluffy Blueberry Pancakes Recipe

    Fluffy Blueberry Pancakes Recipe

    Fluffy Blueberry Pancakes Recipe

    Table of Contents

    Ingredients

      • 270 g (1 cup + 2 tbsp) milk, room temperature
      • 10 g (2 tbsp) vinegar or lemon juice
      • 180 g (1 + 1/2 cups) all-purpose flour
      • 4 g (1 tsp) baking powder
      • 4 g (1/2 tsp) baking soda
      • 20 g (2 tbsp) sugar
      • 1/4 tsp salt
      • 40 g (3 tbsp) unsalted butter, melted (or substitute with vegetable oil)
      • 1/2 tsp vanilla extract
      • Zest of 1/2 lemon
    • 125 g (1 cup) blueberries, fresh preferred

    Directions

      1. Prepare the Milk Mixture:
        • In a large bowl, combine milk and vinegar. Stir and let the mixture rest for about 10 minutes; it will curdle slightly, mimicking buttermilk.
      1. Mix Dry Ingredients:
        • In another bowl, sift together the flour, baking powder, baking soda, salt, and sugar. Mix well and set aside.
      2. Combine Wet Ingredients:
          • To the milk mixture, add the melted butter and mix until well combined.


      3. Incorporate Wet and Dry Ingredients:
        • Pour the wet mixture into the bowl with the dry ingredients. Add vanilla extract and lemon zest. Gently mix with a spatula until just combined; be careful not to overmix. The batter should be slightly lumpy.
      1. Add Blueberries:
        • Fold in the blueberries gently to avoid breaking them, ensuring they are evenly distributed throughout the batter.
      2. Rest the Batter:
          • Cover the bowl and let the batter rest for 10 minutes while you heat the pan.


      3. Cook the Pancakes:
        • Heat a nonstick pan over medium heat. Lightly grease the pan with butter if desired. Use a 1/3 cup measure to scoop the batter and pour it onto the hot pan.
    1. Flip and Cook:
      • When bubbles form on the surface and the edges appear set, flip the pancake. Cook the other side for about 50 seconds or until golden brown.
    2. Serve:
        • Serve the pancakes immediately with butter, maple syrup, or your favorite toppings.


    Serving Suggestions

      • Serve with a dollop of whipped cream, fresh blueberries, and a drizzle of honey or maple syrup.
      • Pair with crispy bacon and scrambled eggs for a complete breakfast.

    Cooking Tips

      • Resting the Batter: Allowing the batter to rest helps the pancakes to become fluffier.
      • Blueberry Placement: For an extra burst of blueberry flavor, sprinkle a few additional blueberries onto each pancake just after pouring the batter into the pan.
      • Pan Temperature: Ensure the pan is hot but not smoking, as a too-hot pan can cause the pancakes to burn on the outside while remaining undercooked inside.

    Nutritional Benefits

    • Blueberries: Packed with antioxidants, vitamins C and K, and fiber, blueberries add a nutritious boost to these pancakes.
    • Calcium-Rich: The addition of milk provides calcium, essential for bone health.

    Dietary Information

      • Vegetarian-Friendly: Contains no meat products.
    • Nut-Free: Safe for those with nut allergies, as there are no nuts in the recipe.

    Nutritional Facts (per pancake, estimated)

      • Calories: 130
      • Protein: 3 g
      • Carbohydrates: 20 g
      • Fat: 5 g
      • Fiber: 1 g

    Storage

    • Refrigerator: Store any leftover pancakes in an airtight container in the refrigerator for up to 3 days. Reheat in the microwave or on a skillet.
    • Freezer: Freeze cooked pancakes in a single layer on a baking sheet. Once frozen, transfer to a ziplock bag for up to 2 months. Reheat directly from frozen in a toaster or oven.

    Why You’ll Love This Recipe

      • Perfectly Fluffy: These pancakes are soft, light, and airy, with just the right amount of chew.
    • Bursting with Berries: Every bite is packed with juicy, sweet blueberries that add freshness and flavor.
    • Quick and Easy: A simple recipe that’s ready in under an hour, perfect for breakfast or brunch.
  • Unveiling the Secret: A Delicious Pastry with a Pudding Surprise!

    Unveiling the Secret: A Delicious Pastry with a Pudding Surprise!

    Unveiling the Secret: A Delicious Pastry with a Pudding Surprise!

    Table of Contents

    Ingredients:

      • For the Fluffy Dough:

          • 20 g yeast


          • 500 ml warm milk
          • 100 g sugar
          • 150 ml vegetable oil


          • 2 eggs
          • 2 g salt
          • 1 kg flour


      • Creamy Vanilla Pudding Filling:

          • 80 g vanilla flavored pudding powder


        • 780 ml milk
      • Nutty Topping:


        • 150 g walnuts, chopped
        • 150 g almond flakes


    • Finishing Touches:

        • 100 g soft butter
        • 30 ml vegetable oil


    Instructions:

      1. Activate the Yeast: In a large bowl, dissolve the yeast in the warm milk. Stir in the sugar until it dissolves completely.


      2. Combine Wet Ingredients: Add the vegetable oil, eggs, and salt to the yeast mixture and mix well.


      1. Dough Time: Gradually incorporate the flour, mixing until a soft dough forms. Transfer the dough to a lightly floured surface and knead for several minutes until smooth and elastic.


      2. Let the Dough Rise: Place the dough in a greased bowl, cover it with a damp cloth, and let it rise in a warm place for 40 minutes, or until doubled in size.


      3. Prepare the Pan: Grease a 35 x 40 cm baking tray with vegetable oil.


      1. Cook the Pudding: In a saucepan, whisk together the vanilla pudding powder and milk. Cook over medium heat, stirring constantly, until the pudding thickens. Remove from heat and let it cool for 30 minutes.

      2. Assemble the Pastry: Roll out the risen dough to fit the prepared baking tray. Spread the cooled vanilla pudding evenly over the dough.


      3. Nutty Delight: Sprinkle the chopped walnuts and almond flakes generously over the pudding layer.


    1. Dot and Drizzle: Dot the top of the pastry with small pieces of softened butter and drizzle with vegetable oil.


    2. Baking Time: Preheat your oven to 170°C (340°F) and bake the pastry for 25 minutes, or until golden brown.


    3. Serving Suggestion: Allow the pastry to cool slightly before cutting into pieces. Serve and enjoy this unique and delicious treat!

  • Apple Caramel Pie with Walnuts

    Apple Caramel Pie with Walnuts

    Apple Caramel Pie with Walnuts

    Table of Contents

    Ingredients:

    Topping:

      • 700 grams apples, peeled, cored, and sliced


      • 1 tablespoon lemon juice
      • 50 grams butter
      • 70 grams sugar


    • 100 grams walnut kernels, chopped

    Dough:

      • 130 grams butter, softened


      • 130 grams sugar
      • Pinch of salt
      • 3 eggs


    • 180 grams flour
    • 1 teaspoon baking powder

    Baking Instructions:


      • Temperature: 180°C (356°F)
      • Time: 40 minutes
      • Baking Pan Diameter: 26 cm (10 inches)


    Instructions:

    1. Prepare the Apples:

    • In a large bowl, toss the sliced apples with lemon juice. This helps prevent browning and adds a bit of tartness.

    2. Make the Caramel Sauce:

    • In a saucepan, melt the butter over medium heat. Stir in the sugar until it’s fully dissolved and the mixture starts to caramelize. Be careful not to burn it. Cook for about 3-5 minutes, stirring constantly.

    3. Prepare the Topping:

      • Add the sliced apples to the caramel sauce and mix until the apples are well coated. Stir in the chopped walnuts. Set aside to cool slightly.


    4. Prepare the Dough:

      • Preheat your oven to 180°C (356°F).
      • In a mixing bowl, cream together the softened butter and sugar until light and fluffy. Add the eggs, one at a time, beating well after each addition.
      • In a separate bowl, sift together the flour, baking powder, and salt. Gradually add the dry ingredients to the butter mixture, mixing until just combined.


    5. Assemble the Pie:

    • Roll out the dough on a floured surface and transfer it to a 26 cm (10-inch) pie pan. Press it into the bottom and sides of the pan. Trim any excess dough.
    • Spoon the apple and caramel mixture into the prepared crust, spreading it evenly.
    See also  Carrot Apple Oat Cake

    6. Bake:

      • Bake in the preheated oven for 40 minutes, or until the crust is golden brown and the filling is bubbly. Check the pie halfway through baking; if the edges are browning too quickly, cover them with foil.


    7. Cool and Serve:

    • Allow the pie to cool slightly before serving. This will help the filling set and make it easier to slice. Serve warm or at room temperature, with a scoop of vanilla ice cream or a dollop of whipped cream if desired.
  • Chocolate Walnut Biscuit Cake: A No-Bake Indulgence

    Chocolate Walnut Biscuit Cake: A No-Bake Indulgence

    Chocolate Walnut Biscuit Cake: A No-Bake Indulgence

    Table of Contents

    Ingredients

    Main Cake Ingredients:

      • Vanilla biscuits: 600 g (21 oz)
      • Wafers: 200 g (7.1 oz)
      • Walnuts: 200 g (7.1 oz), finely chopped


      • Milk: 450 ml (15 fl oz)
      • Sugar: 80 g (2.8 oz)
      • Vanilla sugar: 30 g (1.1 oz)


    • Butter: 100 g (3.5 oz), softened
    • Cocoa powder: 80 g (2.8 oz)

    Chocolate Glaze:

      • Milka milk chocolate: 70 g (2.5 oz), for melting


    • Milka milk chocolate bars: 2 pc, for garnish

    Prep Time, Cooking Time, and Total Time

      • Prep Time: 20 minutes
      • Chill Time: 3-4 hours


    • Total Time: 4 hours 20 minutes

    Steps to Make the Chocolate Walnut Biscuit Cake

    Step 1: Prepare the Base Mixture

      1. In a medium saucepan, combine the milk, sugar, vanilla sugar, and cocoa powder.
      2. Heat over medium-low, stirring constantly, until the sugar dissolves and the mixture is smooth. Avoid letting it boil.


    1. Add the softened butter and continue stirring until it melts completely. Set the mixture aside to cool slightly.

    Step 2: Assemble the Biscuit Layers

      1. Break the vanilla biscuits into smaller pieces (not crumbs) and place them in a large mixing bowl.
      2. Crush the wafers into small chunks and mix them with the biscuits.
    See also  The Famous Bread That Drives the Whole World Crazy! Recipe in 5 Minutes!


    1. Add the finely chopped walnuts to the mixture, ensuring they’re evenly distributed.

    Step 3: Combine with the Cocoa Mixture

      1. Gradually pour the warm cocoa mixture over the biscuits, wafers, and walnuts.
      2. Use a wooden spoon or spatula to gently fold the ingredients together, ensuring every piece is coated with the chocolate mixture.


    Step 4: Shape the Cake

      1. Line a rectangular cake pan or a springform pan with plastic wrap, leaving enough overhang to cover the top of the cake.
      2. Transfer the mixture to the pan, pressing it down firmly with the back of a spoon or your hands to create an even layer.
      3. Cover the top with the overhanging plastic wrap and refrigerate for 3-4 hours or until firm.


    Step 5: Prepare the Chocolate Glaze

    1. Melt the Milka milk chocolate in a heatproof bowl set over a pot of simmering water (double boiler method) or in the microwave in 30-second intervals.
    2. Once melted, pour the chocolate glaze evenly over the chilled cake.

    Step 6: Garnish and Serve

      1. Decorate the cake with additional Milka milk chocolate pieces or shavings for an elegant finish.


    1. Return the cake to the refrigerator for 15-20 minutes to set the glaze.
    2. Slice into squares or rectangles and serve chilled.

    Nutritional Information

      • Servings: 12


      • Calories (per serving): Approximately 330 kcal
      • Protein: 5 g
      • Carbohydrates: 34 g


      • Fat: 20 g
      • Saturated Fat: 10 g
      • Sugar: 22 g


    • Fiber: 2 g
  • Perfect Homemade fluffy bread

    Perfect Homemade fluffy bread

    Perfect Homemade fluffy bread

    Table of Contents

    Ingredients:

    Bread flour: 2 ½ cups (320 grams)
    Water: ¾ cup + 2 tablespoons (210 ml), lukewarm
    Brewer’s yeast: 1 tsp. (3 grams) or dry yeast: ½ tsp. (2 grams)
    Sugar: 1 tsp.
    Salt: 1 tsp.

    Instructions:

    Activate the Yeast:
    In a small bowl, dissolve the sugar and yeast in the lukewarm water. Make sure the water is not too hot, as it can kill the yeast. Let this mixture sit for about 5-10 minutes until it becomes foamy, indicating that the yeast is activated.

    Prepare the Dough:
    In a large mixing bowl, combine the bread flour and salt. Create a well in the center of the flour and pour in the yeast mixture.
    Gradually mix the flour with the water, using a spatula or your hands, until a soft dough forms. The dough should be slightly sticky but manageable.

    Knead the Dough:
    Transfer the dough onto a lightly floured surface and knead it for about 8-10 minutes. The goal is to develop the gluten, which will give the bread its structure and elasticity.
    The dough should become smooth and elastic by the end of kneading.

    First Rise:
    Shape the dough into a ball and place it in a lightly oiled bowl. Cover it with a damp cloth or plastic wrap, and let it rise in a warm place for about 1-1.5 hours, or until it has doubled in size.

    Shape the Dough:
    After the dough has risen, punch it down gently to release the air. Turn it out onto a floured surface and shape it into a loaf.
    You can shape it into a round loaf, a baguette-style loaf, or even place it into a bread tin for a more uniform shape.

    See also  Natural BOMB for Cleansing the Liver and Blood Vessels: 4 Powerful Ingredients!

    Second Rise:
    Place the shaped dough onto a parchment-lined baking sheet or into a greased loaf tin. Cover it again with a damp cloth and let it rise for an additional 30-40 minutes, or until it has puffed up.

    Preheat the Oven:
    While the dough is doing its second rise, preheat your oven to 220°C (425°F). If you want a crispy crust, place a shallow pan of water on the bottom of the oven to create steam while the bread bakes.

    Bake the Bread:
    Once the dough has risen, make a few shallow slashes on the surface with a sharp knife or bread lame. This helps the bread expand while baking.
    Bake the bread in the preheated oven for 20-25 minutes, or until the crust is golden brown and the bread sounds hollow when tapped on the bottom.
    If using a bread tin, the baking time may extend slightly to ensure the bread is fully cooked through.

    Cool the Bread:
    Once baked, remove the bread from the oven and allow it to cool on a wire rack. It’s important to let the bread cool before slicing, as this allows the interior to set properly.

    Nutritional Facts (per slice, approximately 1/12th of the loaf):
    Calories: 80 kcal
    Carbohydrates: 16g
    Protein: 3g
    Fat: 0.5g
    Fiber: 1g
    Sugar: 1g
    Sodium: 150mg

    Storage Tips:
    Room Temperature: Store the bread in an airtight container or a bread bag at room temperature for up to 3-4 days. Avoid storing bread in the fridge, as it can dry out faster.
    Freezing: If you want to store the bread for longer, you can freeze it. Once cooled, slice the loaf and place the slices in a freezer-safe bag. Bread can be stored in the freezer for up to 3 months. To reheat, simply toast the slices or warm them in the oven.

    See also  Fried Beef Dumplings

    Cooking Tips:
    Use Lukewarm Water: The water should be warm to the touch but not hot, around 38°C (100°F), to help the yeast activate.
    Measure Ingredients Accurately: Use a kitchen scale to measure the flour for the best results, as too much flour can make the bread dense.
    Kneading the Dough: If the dough feels too sticky, add a bit more flour, but avoid adding too much as it can make the bread heavy.
    Crust Variations: For a softer crust, you can brush the bread with melted butter as soon as it comes out of the oven. For a crunchier crust, add the pan of water to the oven as mentioned earlier.
    Flavor Additions: This basic bread recipe can be easily customized. You can add herbs like rosemary, thyme, or garlic powder for extra flavor. Seeds like sesame, flax, or sunflower can also be sprinkled on top for added texture.