Overview:
This Hawaiian Chicken Sheet Pan recipe combines the delightful flavors of sweet pineapple, savory chicken, and fresh vegetables, all roasted to perfection on a single sheet pan. It’s not just delicious; it’s also a convenient, healthy option that fits well into a balanced meal plan, especially for those following Weight Watchers. With a focus on fresh ingredients and simple preparation, this recipe is ideal for busy weeknights.
Points Information:
For those following Weight Watchers, this recipe is approximately 6 points per serving. This is based on using skinless chicken breast, low-sodium soy sauce, and fresh produce, making it a nutritious choice that fits into your meal plan without compromising on flavor.
Ingredients:
For the Chicken:
1.5 pounds skinless, boneless chicken breasts
1/4 cup low-sodium soy sauce
1/4 cup honey or agave syrup
2 tablespoons rice vinegar
2 cloves garlic, minced
1 tablespoon fresh ginger, minced
1 teaspoon sesame oil
1/4 teaspoon black pepper
For the Vegetables:
2 cups fresh broccoli florets
1 red bell pepper, sliced
1 yellow bell pepper, sliced
1 cup sugar snap peas
1 cup pineapple chunks (fresh or canned in juice, drained)
1 tablespoon olive oil
Salt and pepper to taste
Garnish:
2 green onions, sliced
Sesame seeds (optional)
Step 1: Marinating the Chicken
In a medium bowl, combine soy sauce, honey, rice vinegar, garlic, ginger, sesame oil, and black pepper. This marinade not only adds flavor but also helps to tenderize the chicken.
Place the chicken breasts in a resealable plastic bag or a shallow dish, and pour the marinade over the chicken. Seal the bag or cover the dish and refrigerate for at least 30 minutes, or up to 4 hours for deeper flavor.
Step 2: Preparing the Vegetables
While the chicken is marinating, prepare your vegetables. Rinse and cut the broccoli into florets, slice the bell peppers, and trim the sugar snap peas. If using fresh pineapple, cut it into bite-sized chunks.
In a large mixing bowl, toss the prepared vegetables and pineapple with olive oil, salt, and pepper to taste. This will enhance the flavors and ensure even cooking.
Step 3: Preheating the Oven
Preheat your oven to 425°F (220°C). A hot oven is key to achieving perfectly roasted chicken and vegetables.
Step 4: Arranging the Sheet Pan
Line a large baking sheet with parchment paper for easy cleanup.
Place the marinated chicken breasts on one side of the sheet pan. Arrange the vegetable and pineapple mixture on the other side. Make sure the ingredients are evenly spaced to promote even cooking.
Step 5: Roasting the Chicken and Vegetables
Roast in the preheated oven for 25-30 minutes, or until the chicken reaches an internal temperature of 165°F (75°C) and the vegetables are tender and slightly caramelized. Flip the chicken halfway through for even browning.
Step 6: Finishing Touches
Once cooked, remove the sheet pan from the oven. Allow the chicken to rest for 5 minutes before slicing. This helps retain moisture.
Slice the chicken and arrange it on a serving platter alongside the roasted vegetables and pineapple.
Nutrition Information:
Per Serving (Based on 4 Servings):
Calories: 320
Protein: 30g
Carbohydrates: 40g
Fiber: 4g
Sugars: 14g
Total Fat: 5g
Saturated Fat: 1g
Sodium: 600mg
Serving Suggestions:
This dish pairs beautifully with brown rice or quinoa for a complete meal. For added flavor, consider serving it with a side of teriyaki sauce or a sprinkle of fresh cilantro.
Tips for Success:
Meal Prep: Consider marinating the chicken a day in advance to save time on busy weekdays.
Vegetable Variations: Feel free to substitute or add other vegetables like zucchini, carrots, or red onion based on your preference and seasonal availability.
Storage: Leftovers can be stored in an airtight container in the refrigerator for up to 3 days. Reheat in the oven or microwave until warmed through.
Conclusion:
The Hawaiian Chicken Sheet Pan is not just a meal; it’s an experience filled with vibrant flavors and nutritious ingredients. Whether you’re looking for a quick weeknight dinner or a dish to impress guests, this recipe checks all the boxes. The ease of preparation, combined with the delightful combination of flavors, makes it a go-to option in any home kitchen. Plus, its adaptability ensures it can cater to various dietary needs, making it a fantastic addition to your recipe repertoire. Enjoy this tropical taste of the islands right from your kitchen!
This recipe is designed to be informative and easy to follow, ensuring that even novice cooks can recreate this delightful dish. The combination of marinated chicken and fresh vegetables makes it a wholesome choice for family meals or meal prep. Enjoy your culinary journey to Hawaii with every bite!
Makes 1 loaf
This No-Yeast, No-Oven Bread is a celebration of bold flavors, creamy textures, and effortless indulgence, offering a dish that feels luxurious yet approachable. With its customizable options, endless charm, and ease of preparation, it’s a recipe that’s sure to impress whether you’re cooking for a special occasion, a casual snack, or simply craving something satisfying.
Your Turn! Have you ever made no-yeast bread or experimented with stovetop baking? Share your favorite variations or serving ideas below.
3-4 medium potatoes, sliced
1 onion, finely chopped
1 carrot, grated
150 g mushrooms, sliced
2 eggs
Salt, to taste
Black pepper, to taste
1/2 teaspoon ground garlic
1/4 teaspoon ground nutmeg
150 g mozzarella cheese (3.52 oz), shredded
50 g Parmesan cheese, grated
6-8 cherry tomatoes, halved
olive oil for frying
Prepare potatoes:
Heat vegetable oil in a frying pan and fry the potato slices until golden and tender. Season with salt and pepper, then set aside.
Sauté vegetables:
In the same pan, add a bit more oil if necessary, and sauté the onions until translucent. Add grated carrots and mushrooms, cooking until soft. Season with salt, ground garlic, and nutmeg.
Layer ingredients:
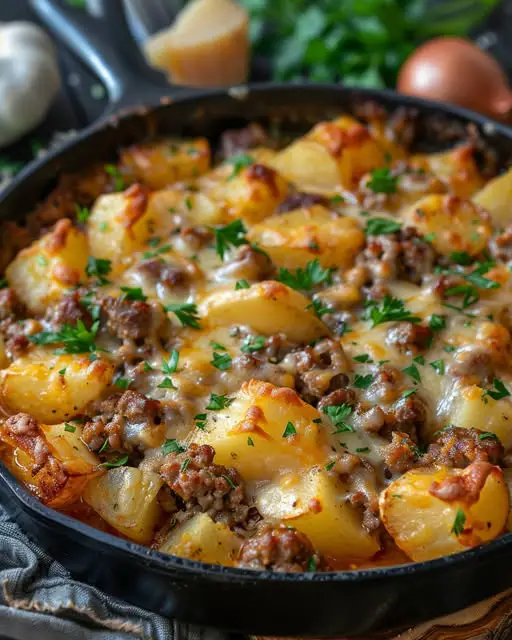
In a greased baking dish, layer the fried potatoes at the bottom. Top with the sautéed vegetables, then sprinkle half of the mozzarella cheese over the vegetables.
Add eggs and cheese:
In a small bowl, whisk the eggs with a pinch of salt and pepper. Pour the eggs over the vegetables. Arrange halved cherry tomatoes on top, then finish with the remaining mozzarella and Parmesan cheese.
Oatmeal Bread with Walnuts and Sesame
Ingredients:
Oats: 280 grams (3 cups)
Eggs: 2
Yogur: 250 grams (1 cup)
Baking powder: 2 teaspoons
Salt: Pinch
Sesame seeds: 1 tablespoon
Walnuts: Handful, roughly chopped
Black pepper: Pinch (optional)
Oatmeal Bread with Walnuts and Sesame
Step-by-Step Instructions:
Step 1: Preheat the Oven
Preheat your oven to 180°C (350°F). This will ensure that your bread bakes evenly and gets a lovely golden crust.
Step 2: Prepare the Dry Ingredients
Measure the Oats: In a large mixing bowl, add 280 grams of oats (about 3 cups). These oats will serve as the base of the bread and provide a rich, hearty texture.
Add the Baking Powder and Salt: To the oats, mix in 2 teaspoons of baking powder and a pinch of salt. The baking powder helps the bread rise, giving it a nice fluffy texture.
Optional – Add Black Pepper: If you want a subtle spice kick, add a pinch of black pepper to the dry mix. This step is optional but adds a nice balance to the sweetness of the oats and walnuts.
Step 3: Mix the Wet Ingredients
Crack the Eggs: In a separate bowl, crack 2 eggs and beat them lightly with a fork until the yolks and whites are well combined. Eggs help to bind the ingredients and give the bread structure.
Incorporate the Yogurt: Add 250 grams (1 cup) of yogurt to the eggs and stir until smooth. The yogurt adds moisture and a slight tangy flavor to the bread, making it soft yet flavorful.
Step 4: Combine Wet and Dry Ingredients
Mix the Wet into the Dry: Pour the egg and yogurt mixture into the bowl with the oats, baking powder, and salt. Stir everything together with a spatula or wooden spoon until fully combined. The mixture should have a thick, batter-like consistency.
Fold in Walnuts and Sesame Seeds: Add a handful of roughly chopped walnuts and 1 tablespoon of sesame seeds to the mixture. G!ently fold them in until they are evenly distributed throughout the batter. These add a lovely crunch and nutty flavor to the bread.
Step 5: Prepare the Bread Pan
Grease a Bread Pan: Lightly grease a loaf pan with butter or a non-stick cooking spray. This will ensure that the bread doesn’t stick and is easy to remove once baked.
Cottage Cheese Pastry with Vanilla: Soft and Sweet Delight
Step 6: Bake the Oatmeal Bread
Pour the Batter: Transfer the batter into the greased loaf pan, spreading it out evenly.
Top with Extra Seeds (optional): If you like, sprinkle some extra sesame seeds or chopped walnuts on top for added texture and visual appeal.
Bake: Place the pan in the preheated oven and bake for 35-40 minutes, or until the top is golden brown and a toothpick inserted into the center comes out clean.
Step 7: Cool and Serve
Cool in the Pan: Let the bread cool in the pan for about 10 minutes before transferring it to a wire rack to cool completely.
Slice and Serve: Once fully cooled, slice the bread and serve it with your favorite toppings, such as butter, jam, or even avocado. Enjoy
If you’re looking for a simple yet satisfying dish that’s easier than making pizza but just as comforting, this Rustic Golden Potato Bake is here to save the day. With just three humble potatoes as the star ingredient, this recipe transforms basic spuds into a golden, cheesy, and irresistible bake. Perfect for breakfast, brunch, or even a side dish, it’s budget-friendly, quick to prepare, and packed with flavor. Let’s dive into this deliciously easy creation!
Why You’ll Love Rustic Golden Potato Bake
Before we get started, here’s why this potato bake deserves a spot in your kitchen:
Incredibly Simple : Just three potatoes form the base of this hearty bake—no fancy ingredients required.
Affordable & Filling : Potatoes are inexpensive and incredibly versatile, making this dish perfect for feeding a crowd without breaking the bank.
Customizable : Add cheese, herbs, bacon, or veggies to suit your taste preferences.
Kid-Friendly : Both kids and adults will love its crispy edges and creamy center.
Perfect for Leftovers : Use leftover boiled or roasted potatoes to save time and reduce waste.
Ingredients You’ll Need
For the Potato Base:
3 large russet potatoes (or any starchy variety)
2 tablespoons olive oil or butter
Salt and pepper to taste
Optional Add-Ins:
1 cup shredded cheddar cheese (or any melty cheese)
1/4 cup chopped green onions or fresh parsley (for garnish)
Crumbled bacon or cooked sausage (for extra protein)
Dried thyme, rosemary, or paprika (for seasoning flair)
How to Make Rustic Golden Potato BakeThis recipe is as straightforward as they come. Follow these step-by-step instructions for perfection.
Step 1: Prep the Potatoes
Peel the potatoes and grate them using a box grater or food processor. Place the grated potatoes in a bowl of cold water to prevent browning while you prepare the rest of the ingredients.
Step 2: Squeeze Out Excess Moisture
Drain the potatoes and pat them dry with paper towels or a clean kitchen towel. Squeezing out excess moisture ensures the bake becomes crispy instead of soggy.
Step 3: Preheat and Oil the Dish
Preheat your oven to 400°F (200°C). Grease a 9×9-inch baking dish or line it with parchment paper for easy cleanup.
Step 4: Combine Everything
In a mixing bowl, toss the grated potatoes with olive oil or melted butter, ensuring they’re evenly coated. Season generously with salt and pepper. If adding cheese, herbs, or bacon, mix them in now.
Step 5: Layer and Bake
Spread the potato mixture evenly in the prepared baking dish, pressing down lightly to create an even layer.
Bake in the preheated oven for 30-35 minutes, or until the top is golden brown and crispy. For added crunch, broil for 2-3 minutes at the end of cooking (watch closely to avoid burning).
Step 6: Garnish and Serve
Once baked, remove the dish from the oven and let it cool for a few minutes. Sprinkle with chopped green onions, parsley, or additional cheese before serving. Slice into squares and enjoy warm!
Tips for Success
Don’t Skip Drying the Potatoes : Removing excess moisture ensures the bake turns out crispy on top and creamy inside.
Add Extra Flavor : Stir in diced jalapeños, sun-dried tomatoes, or caramelized onions for a gourmet twist.
Make It Cheesy : A generous sprinkling of shredded cheese adds richness and meltiness to every bite.
Store Properly : Keep leftovers in an airtight container in the fridge for up to 3 days. Reheat gently in the oven or air fryer for optimal crispiness.
Conclusion
With its rustic charm and golden allure, this Rustic Golden Potato Bake proves that simplicity can be stunning. Whether served as a standalone dish or alongside eggs, grilled meats, or salads, it’s sure to satisfy anyone who takes a bite. So grab your potatoes, fire up the oven, and prepare to savor one seriously delicious creajtion. Happy cooking!
How to Make Easy Dessert
Quick and easy dessert with few ingredients. See below the list of all ingredients and required quantities. And then, a very complete preparation method with details of the recipe.
Recipe Ingredients:
400 ml (13.5 oz) hot water
2 packets cherry-flavored gelatin (25 grams / 0.88 oz each)
1 ¼ cups (140 grams / 5 oz) powdered milk
100 ml (3.4 oz) cold water
Instructions:
In a blender, combine the hot water and cherry gelatin packets. Blend until the gelatin dissolves completely.
Add the powdered milk to the blender and blend again until fully incorporated.
Pour in the cold water and blend one more time until smooth.
Lightly grease a bundt pan or pudding mold with a small amount of oil. Transfer the mixture into the mold.
Refrigerate for about 3 hours or until the pudding is fully set.
Once firm, remove from the mold. Optionally, decorate with additional powdered milk or toppings of your choice.
Easy 2-Ingredient Dessert: Banana Ice Cream
Ingredients:
Creamy Passion Fruit Ice Cream: I Always Make This Easy Dessert-The Flavor Is Wonderful
Ripe Bananas
Any Berries (e.g., strawberries, blueberries) – or cocoa powder if you prefer chocolate flavor
Instructions:
Slice and Freeze the bananas for at least 2 hours or overnight.
Blend the frozen bananas and berries (or cocoa powder) in a food processor until creamy and smooth.
Serve Immediately for soft-serve texture or freeze for an hour for a firmer scoop.
Tips:
Use very ripe bananas for the sweetest, creamiest texture.
Add a splash of plant-based milk if your blender needs help.
Mix in nuts, seeds, or granola for crunch if desired.
Try mango or pineapple instead of berries for a tropical twist.
Homemade Skillet Bread: Recipe with a Delicious Flavor, Perfect for Any Time: No Baking Required
✅ Benefits:
Naturally Sweet – no need for added sugar or condensed milk
Vegan & Dairy-Free
High in Fiber – thanks to bananas
Rich in Antioxidants from berries
Kid-Friendly and Allergy-Friendly (no nuts unless added)
Want more easy 2-ingredient dessert ideas like this?
Easy Dessert Without Condensed Milk with 2 Simple Ingredients
Minimal Equipment: You don’t need a loaf pan, proofing basket, or baking stone.
Crispy Crust: Cast iron helps develop a crusty exterior that rivals bakery bread.
Flexible Recipes: Works for focaccia, flatbreads, cornbread, and rustic loaves.
Great for Beginners: It’s forgiving and easy to manage.
Fast Bake Time: Especially with stovetop versions or smaller loaves.
Visually Appealing: It just looks rustic and cozy, great for serving straight from the skillet.
Honey-Cardamom Apple Clafoutis Squares
There’s something irresistible about the fragrant combination of honey, cardamom, and fresh apples baked into a delicate custard. This Honey-Cardamom Apple Clafoutis takes the traditional French dessert and transforms it into convenient squares perfect for serving at brunches, afternoon teas, or as a not-too-sweet dessert. The cardamom adds an exotic, aromatic dimension that elevates this apple-studded treat beyond the ordinary, while the honey contributes natural sweetness and a subtle floral note that perfectly complements the fruit.
Ingredients
For the Batter
2 large eggs
¾ cup (95g) all-purpose flour
½ cup (120ml) whole milk
⅓ cup (80ml) honey, plus 1 tablespoon (15ml) for drizzling
3 tablespoons (42g) melted butter, cooled
1 teaspoon (5ml) vanilla extract
½ teaspoon ground cardamom
¼ teaspoon salt
For the Apple Layer
3 medium Honeycrisp or Pink Lady apples (about 1½ pounds/680g total)
1 tablespoon (15ml) lemon juice
For Garnish
Powdered sugar for dusting
2 tablespoons (15g) sliced almonds (optional)
Instructions
Preparation
Preheat your oven to 375°F (190°C). Line an 8×8-inch baking dish with parchment paper, leaving some overhang on two sides for easy removal later.
Preparing the Apples
Core the apples and slice them thinly (about ⅛ inch thick). You can peel them if preferred, but the skin adds nice color and texture.
Place the apple slices in a bowl and toss gently with the lemon juice to prevent browning and add a touch of brightness to the flavor.
Making the Batter
In a large mixing bowl, whisk the eggs until frothy, about 1 minute.
Add the milk, ⅓ cup honey, melted butter, and vanilla extract. Whisk until well combined and smooth.
In a separate bowl, whisk together the flour, cardamom, and salt to ensure even distribution of the spice.
Gradually add the dry mixture to the wet ingredients, whisking continuously to prevent lumps from forming. Continue whisking until you have a smooth, pourable batter.
Assembling the Clafoutis
Pour half of the batter into the prepared baking dish, spreading it evenly across the bottom.
Arrange about half of the apple slices in an overlapping pattern on top of the batter, creating a beautiful layer.
Gently pour the remaining batter over the apples, trying to cover most of them.
Arrange the remaining apple slices on top in a decorative pattern. You can create concentric circles, rows, or any design you prefer.
Drizzle the remaining tablespoon of honey evenly over the arranged apples.
If using, sprinkle the sliced almonds across the top for added texture and visual appeal.
Baking
Bake in the preheated oven for 35-40 minutes. The clafoutis is done when the edges are golden brown and puffed up, and the center is set but still has a slight jiggle when the pan is gently shaken.
Allow to cool in the pan for 15 minutes. The clafoutis will deflate slightly as it cools – this is completely normal.
Serving
Once slightly cooled, use the parchment paper overhang to carefully lift the entire dessert out onto a cooling rack.
Allow to cool to room temperature, which will make it easier to cut cleanly.
Just before serving, dust generously with powdered sugar using a fine-mesh sieve.
Cut into 9 squares and serve alone or with a dollop of whipped cream or a small scoop of vanilla ice cream.
Nutritional Information
Per square (based on 9 servings):
The Power of Parsley Tea: Natural Relief for Swelling in Legs, Ankles, and Feet
Calories: 190
Total Fat: 6g
Saturated Fat: 3.5g
Cholesterol: 55mg
Sodium: 115mg
Total Carbohydrates: 32g
Dietary Fiber: 2g
Sugars: 20g
Protein: 3g
Preparation Time: 20 minutes Cooking Time: 35-40 minutes Total Time: Approximately 1 hour, plus cooling time
Cooking Tips and Tricks
Apple selection: Choose firm, crisp apples that hold their shape when baked. Honeycrisp and Pink Lady are excellent choices, but Granny Smith, Braeburn, or Jonagold work well too.
Slicing consistency: Try to slice the apples to a uniform thickness so they cook evenly. A mandoline slicer works wonderfully for this if you have one.
Cardamom freshness: Ground cardamom loses its potency quickly. For the best flavor, purchase small quantities or grind your own from cardamom pods.
Batter rest: For an even silkier texture, allow the batter to rest for 15 minutes before pouring it into the baking dish.
Visual cue for doneness: The edges should be golden and set, while the center should be just set but with a slight wobble when gently shaken.
Temperature control: If the top is browning too quickly but the center isn’t set, cover loosely with aluminum foil and continue baking.
Variations and Substitutions
Fruit Alternatives:
Pear Variation: Substitute firm pears (like Bosc or Anjou) for a delicate flavor that pairs beautifully with cardamom.
Mixed Fruit: Add a handful of fresh or frozen berries scattered among the apple slices.
Stone Fruit: In summer, try this with sliced plums, peaches, or nectarines instead of apples.
Flavor Adaptations:
Spice Blends: Replace the cardamom with cinnamon, nutmeg, or pumpkin pie spice for a different flavor profile.
Citrus Twist: Add 1 teaspoon of orange or lemon zest to the batter for a bright citrusy note.
Almond Flavor: Substitute almond extract for half of the vanilla extract and use almond milk instead of whole milk.
Dietary Modifications:
Gluten-Free: Substitute a 1:1 gluten-free flour blend for the all-purpose flour.
Dairy-Free: Use a plant-based milk (almond or oat work well) and substitute coconut oil for the butter.
Lower Sugar: Reduce the honey to ¼ cup and use naturally sweeter apples like Fuji or Gala.
Textural Variations:
Nutty Crunch: Add ¼ cup of chopped walnuts or pecans to the batter for added texture.
Oat Topping: Sprinkle 2 tablespoons of rolled oats mixed with a little honey on top before baking.
Caramel Drizzle: After baking and cooling, drizzle with a simple caramel sauce for added decadence.
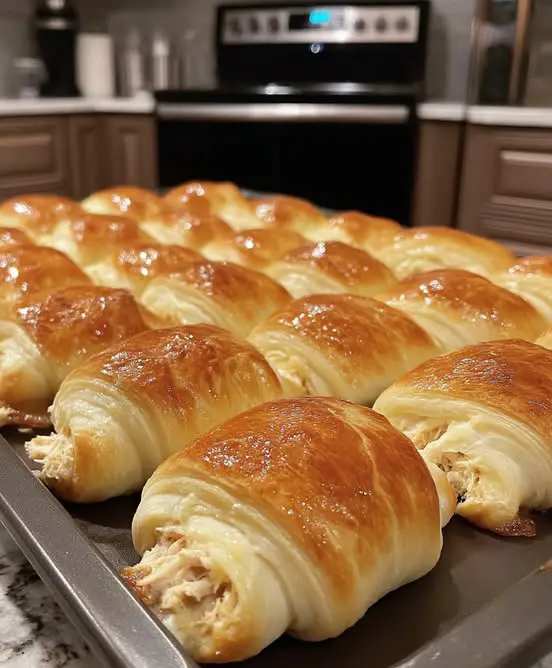
This quick dinner roll recipe will help you make super soft and fluffy dinner rolls in less than two hours. They have a rich buttery smell and flavour with a very simple recipe. Add milk to a large mixing bowl, sugar and a teaspoon of yeast. Add in one egg and softened butter, and make sure all your ingredients are at room temperature.
Use a spatula or wooden spoon to mix everything. For the dry ingredients, you can use cake flour or all-purpose flour, combine everything until they are well mixed then move the dough to a floured work surface and start to knead it by hand.
The dough will be a little sticky at the beginning but as you continue to knead it, the texture will start to change. Knead the dough until you get a soft and elastic texture that springs back when you press on with your fingers and it is no longer sticky.
You can also check the doneness of your dough with the windowpane test which is to pull a small portion of the dough and stretch it with your hands. It should stretch to form a very thin sheet without tearing. To divide and shape the dough, roll the dough into a log shape then divide the dough into equal pieces.
To roll the dough flatten each of the dough pieces and then tuck in the edges towards the centre and then roll it into the shape of a round ball then place them into a baking dish lined with a parchment paper. Once you are done, cover the tray with a plastic film then let the dough sit and rise in a warm environment for about 60 minutes.
Brush the top of the rolls with egg wash then bake at 375 degrees Fahrenheit preheated oven for 18 to 20 minutes or until they are golden brown on top. Once done, take the tray out of the oven and let them cool before serving. These will be some of the best dinner rolls you will ever have.
Discover the incredible health benefits of a natural concoction that’s gaining popularity among health enthusiasts. This powerful combination of ginger and aloe vera is not your average health booster – it’s a potent force in the world of natural health. In fact, it’s even 150 times stronger than the classic combination of garlic and lemon when it comes to fighting bacteria. Let’s explore how to make this “Natural Bomb” and understand why it’s highly regarded as a bacteria destroyer.
Ginger is not only delicious, but it also has anti-inflammatory, antioxidant, and antimicrobial properties. For centuries, ginger has been used to combat various ailments, including colds and nausea. Its natural compounds can soothe the digestive tract, reduce inflammation, and promote healthy digestion.
Beyond its well-known topical uses for burns and skin issues, aloe vera is also consumed for its numerous health benefits. It can provide digestive support, strengthen the immune system, and act as a natural antibacterial agent. Aloe vera is hydrating and packed with antioxidants, benefiting your skin’s health. When combined with ginger, these two ingredients create a powerful synergy that amplifies their individual antibacterial and health-promoting properties.
Ingredients:
Powerful Antibacterial Properties: Both ginger and aloe vera possess powerful antibacterial properties that can help fight off infections and strengthen the immune system.
Improved Digestive Health: This tonic can soothe the digestive tract, reduce inflammation, and promote healthy digestion.
Healthy Skin and Overall Well-being: Aloe vera is hydrating and packed with antioxidants, benefiting your skin’s health. Ginger’s anti-inflammatory properties can assist with various inflammatory conditions throughout the body.
Incorporating this ginger and aloe vera tonic into your daily routine can provide a significant boost to your immune system, support digestive health, and contribute to your overall well-being. Nature’s pharmacy offers remarkable remedies, and this dynamic duo stands out as a particularly strong contender in the world of natural health. Embrace the power of nature and make this “Natural Bomb” a part of your wellness journey!
600g biscuits
120 grams of sugar
250ml milk
10 grams of vanilla sugar
150 grams of butter
60 grams of cocoa powder
100 grams of chocolate
100g cream (33% fat)
Crush the biscuits into fine crumbs using a food processor or by placing them in a plastic bag and using a rolling pin.
In a saucepan, combine sugar, milk, vanilla sugar, butter, and cocoa powder. Heat over low heat until everything is melted and well combined, stirring continuously.
Add the crushed biscuits to the mixture and stir until they are fully coated.
Press the mixture into a cake pan or mold, creating an even layer.
In a microwave or on the stovetop, melt the chocolate and cream until smooth. Pour this chocolate ganache over the biscuit base, spreading it evenly.
Refrigerate the cake for a few hours or until it’s set.
Enjoy this quick and no-bake chocolate cake! It’s a real crowd-pleaser!
Table of Contents