Category: chicken

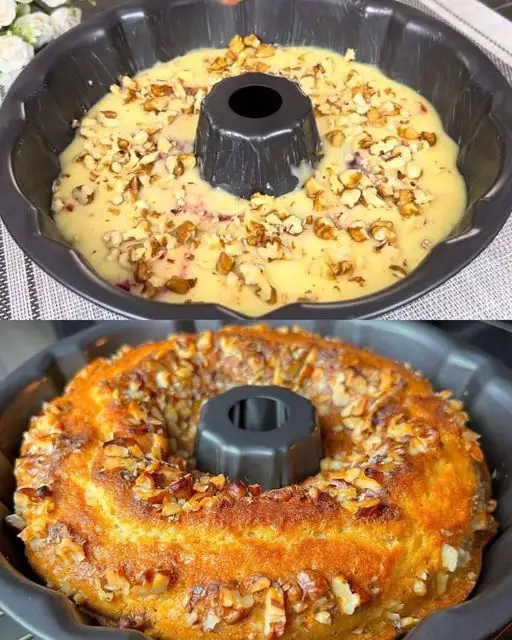
  • Nutty Cinnamon Swirl Bread

    Nutty Cinnamon Swirl Bread

    Nutty Cinnamon Swirl Bread

    Table of Contents

    Ingredients:

    For the Dough:

      • Flour: 650 g (about 5 cups)
      • Sugar: 1/2 cup (100 g)


      • Dry Yeast: 1.5 tsp (6 g)
      • Salt: 1 tsp (4 g)
      • Lukewarm Milk: 300 ml


    • Vegetable Oil: 2 Tbsp (30 ml)
    • Egg White: 1, beaten

    For the Filling:

      • Crushed Walnuts: 200 g (about 2 cups)


      • Sugar: 80 g (about 1/3 cup)
      • Cinnamon: to taste (usually about 1 tsp)
      • Butter: 5 Tbsp, melted


    For the Glaze:

    Steps How to Make It:

    Step 1: Prepare the Dough

      1. Activate the Yeast: In a small bowl, combine the lukewarm milk (about 37-40°C or 98-104°F) with the dry yeast and a teaspoon of sugar. Let it sit for about 5-10 minutes, until it becomes frothy.


      1. Mix Dry Ingredients: In a large mixing bowl, combine the flour, the remaining sugar, and salt. Mix well to ensure the salt and sugar are evenly distributed throughout the flour.
      2. Combine Wet Ingredients: Once the yeast mixture is frothy, add it to the flour mixture along with the vegetable oil and the beaten egg white.
      3. Knead the Dough: Mix the ingredients until a shaggy dough forms, then transfer it to a floured surface. Knead the dough for about 10 minutes until it is smooth and elastic. If the dough is too sticky, you can add a little extra flour as needed.
    See also  AIR FRYER BLUEBERRY MUFFINS


    1. First Rise: Place the kneaded dough in a greased bowl, cover it with a clean kitchen towel or plastic wrap, and let it rise in a warm place for about 1 to 1.5 hours, or until it has doubled in size.

    Step 2: Prepare the Filling

    1. Mix Filling Ingredients: In a medium bowl, combine the crushed walnuts, sugar, and cinnamon. Stir in the melted butter until the mixture is well combined and crumbly.

    Step 3: Shape the Bread

      1. Roll Out the Dough: Once the dough has risen, punch it down to release the air. Turn it out onto a floured surface and roll it into a rectangle approximately 1 cm thick (about 0.4 inches).


      1. Add the Filling: Evenly sprinkle the walnut mixture over the rolled-out dough, leaving a small border around the edges.
      2. Roll the Dough: Starting from one of the long edges, carefully roll the dough tightly into a log. Pinch the seams to seal the dough.
      3. Shape the Loaf: Gently twist the dough log and tuck the ends under to fit into a greased loaf pan. You can also place the dough into a round baking pan for a more rustic look.


    Step 4: Second Rise

    1. Let it Rise Again: Cover the loaf with a towel or plastic wrap and let it rise for another 30-45 minutes, until it has risen slightly above the edge of the pan.

    Step 5: Prepare the Glaze

    1. Make the Egg Wash: In a small bowl, whisk together the egg yolk and milk. This will give the bread a beautiful golden color when baked.

    Step 6: Bake the Bread

      1. Preheat the Oven: Preheat your oven to 180°C (350°F) during the second rise.
    See also  Baked Vegetable Frittata


      1. Glaze the Loaf: Once the dough has risen, brush the top with the egg wash.
      2. Bake: Bake the bread in the preheated oven for about 30-35 minutes, or until the bread is golden brown and sounds hollow when tapped on the bottom.
      3. Cool: Remove the bread from the oven and allow it to cool in the pan for about 10 minutes, then transfer it to a wire rack to cool completely.


    Nutrition Facts (per serving, based on 12 servings):

      • Calories: 250 kcal
      • Protein: 5 g
      • Fat: 9 g


      • Carbohydrates: 40 g
      • Fiber: 1 g
      • Sugar: 9 g


    • Calcium: 30 mg
  • 3-Ingredient Greek Yogurt Cake

    3-Ingredient Greek Yogurt Cake

    3-Ingredient Greek Yogurt Cake

    Table of Contents

    Ingredients

      • 400 grams (1 3/4 cups) Greek yogurt with sugar (about 3 small cups of yogurt)
      • 4 large eggs


    • 4 tablespoons (40 grams) cornstarch

    Directions

      1. Preheat the Oven
        • Preheat your oven to 170°C (340°F).


      1. Prepare the Batter
        • In a mixing bowl, combine Greek yogurt, eggs, and cornstarch.
        • Whisk thoroughly until the batter is smooth and free of lumps.


      1. Prepare the Pan
        • Line a 20 cm (8-inch) round baking pan with parchment paper.
        • Pour the yogurt mixture into the prepared pan.


      1. Bake the Cake
        • Place the pan in the preheated oven and bake for 35 minutes or until the top is lightly golden and the cake is set.
        • Remove from the oven and allow it to cool slightly before slicing.


    Serving Suggestions

      • Top with Fresh Berries for a burst of color and flavor.
      • Add a Drizzle of Honey for extra sweetness.
      • Serve with Whipped Cream for a creamy contrast.


    • Dust with Powdered Sugar for a decorative touch.
    • Add Lemon Zest for a hint of citrus freshness.

    Cooking Tips

      • Use Greek yogurt with sugar for optimal sweetness.


      • Room temperature eggs will mix more smoothly.
      • Sift the cornstarch to avoid clumps in the batter.
      • For an added flavor boost, add a teaspoon of vanilla extract.


    • Test doneness by lightly pressing the top; it should feel springy.

    Nutritional Benefits

      • High in Protein from Greek yogurt and eggs.
      • Lower Sugar Option if using Greek yogurt with minimal added sugars.


      • Low in Fat compared to butter-based cakes.
      • Good Source of Calcium from the yogurt.
      • Simple Ingredients mean fewer preservatives or additives.
    See also  3-Ingredient Chocolate Brownies (No Flour, Sugar-Free, No Oil)


    Dietary Information

      • Vegetarian: Yes
      • Gluten-Free: Yes
      • Dairy-Free: No (contains yogurt)


    • Nut-Free: Yes

    Nutritional Facts (per slice, estimated)

      • Calories: 120
      • Fat: 3g


      • Carbohydrates: 12g
      • Protein: 6g
      • Sugar: 8g


    Storage

    • Room Temperature: Store in an airtight container for up to 1 day.
    • Refrigerator: Store in the fridge for up to 4 days.
    • Freezer: Not recommended for this cake.
  • Lemon Mascarpone Tart Recipe

    Lemon Mascarpone Tart Recipe

    Lemon Mascarpone Tart Recipe

    Table of Contents

    Ingredients

    For the Lemon Filling:


      • 2 eggs
      • 120 g (4 oz) sugar
      • 10 g (0.35 oz) vanilla sugar


      • 60 g (2 oz) cornstarch
      • 500 ml (17 fl oz) milk
      • Grated peel of 1 lemon


    • Juice of 1 lemon
    • 90 g (3 oz) mascarpone cheese

    For the Crust:


      • 320 g (11.5 oz) flour
      • 140 g (5 oz) butter, at room temperature
      • 1 egg


      • 120 g (4 oz) sugar
      • Grated peel of 1 lemon
      • A pinch of salt

    For Decoration:

    • 1 teaspoon powdered sugar

    Directions

    1. Prepare the Lemon Filling:

      • In a medium saucepan, whisk together eggs, sugar, vanilla sugar, and cornstarch until smooth.
      • Gradually add the milk while stirring constantly.


      • Add the grated lemon peel and lemon juice to the mixture.
      • Cook over medium heat, stirring constantly, until the mixture thickens.
      • Remove from heat and allow to cool slightly. Stir in the mascarpone cheese until smooth and creamy.

    2. Prepare the Crust:

      • In a large mixing bowl, combine flour, butter, egg, sugar, grated lemon peel, and a pinch of salt.
      • Mix until a soft dough forms.


    • Divide the dough, reserving 1/3 for the topping. Wrap both portions in plastic wrap and refrigerate for 15 minutes.

    3. Assemble the Tart:

      • Preheat your oven to 180°C (355°F).


      • Roll out 2/3 of the dough and press it into a 24 cm (9.5-inch) tart mold, covering the bottom and sides evenly.
      • Pour the lemon filling into the prepared crust.
      • Roll out the reserved 1/3 of the dough and cut it into strips. Arrange the strips in a lattice pattern over the filling.
    See also  Strawberry Pop-Tart Cheesecake

    4. Bake the Tart:

      • Bake in the preheated oven for 35 minutes or until the crust is golden brown.
      • Remove from the oven and let cool completely.

    5. Decorate and Serve:

    • Dust the tart with powdered sugar before serving.

    Serving Suggestions


      • Serve chilled or at room temperature.
      • Pair with a cup of tea or coffee for a refreshing afternoon treat.
      • Add a dollop of whipped cream or a few fresh berries for extra indulgence.

    Cooking Tips

      • Stir the filling constantly while cooking to prevent lumps.
      • Chill the dough for easier handling and a flakier crust.


    • Use a springform pan for easier tart removal.

    Nutritional Benefits

      • Lemon adds vitamin C and antioxidants.


    • Mascarpone provides protein and a creamy texture.
    • Eggs and milk are excellent sources of calcium and protein.

    Dietary Information


    • Contains gluten, dairy, and eggs; not suitable for those with allergies.

    Nutritional Facts (Per Slice)

      • Calories: ~300


      • Protein: 5 g
      • Carbohydrates: 30 g
      • Fat: 16 g


    • Fiber: 1 g
    • Sugar: 18 g
  • Baked chicken drumsticks: the recipe to make them savory and juicy

    Baked chicken drumsticks: the recipe to make them savory and juicy

    Ingredients:
    7-8 chicken drumsticks
    Salt, pepper, Sweet paprika
    1 cup of white yogurt
    1 tbsp of parsley
    1 tsp of lemon juice
    3 garlic cloves
    1 tsp of mustard
    A pinch of salt
    80 g of butter
    Breadcrumbs
    Directions: 
    1. Season the chicken with salt, pepper and paprika.
    2. Put it into a bowl and let marinate for 20 minutes.
    3. In a bowl mix yogurt, chopped parsley, lemon juice, garlic and mustard.
    4. Dip the chicken into the yogurt sauce, then coat it with breadcrumbs.
    5. Place the chicken in a baking tray and put a piece of butter on each chicken drumstick.
    6. Bake at 200 degrees for 40 to 45 minutes.
  • Caramelized Banana Chocolate Cake

    Caramelized Banana Chocolate Cake

    Caramelized Banana Chocolate Cake

    Table of Contents

    Ingredients

    For the Caramelized Bananas:

      • 20 g (1 tablespoon) butter
      • 20 g (1 tablespoon) sugar


    • 2 ripe bananas (or plantains)

    For the Cake Batter:

      • 1 egg
      • 50 g (¼ cup) sugar


      • 8 g (1 teaspoon) vanilla sugar
      • 50 ml (¼ cup) oil
      • 100 ml (⅓ cup) milk


      • 130 g (1 cup) wheat flour
      • 20 g (2 tablespoons) cocoa powder
      • 8 g (1 teaspoon) baking powder


    Instructions

    Caramelize the Bananas:

    1. In a pan, melt 20 g of butter over medium-low heat. Add 20 g of sugar and stir until it begins to caramelize (about 2 minutes).
    2. Peel and slice the 2 bananas (or plantains) into thin slices and add them to the pan. Cook for about 15-20 minutes until they are golden and soft, turning them halfway through. Once the bananas are caramelized, set them aside to cool slightly.

    Prepare the Cake Batter:

      1. In a large bowl, whisk together 1 egg50 g sugar, and 8 g vanilla sugar until well combined.


    1. Add 50 ml oil and 100 ml milk to the mixture and stir until smooth.
    2. Sift together 130 g wheat flour20 g cocoa powder, and 8 g baking powder. Gradually fold the dry ingredients into the wet ingredients until a smooth batter forms.

    Assemble the Cake:

      1. Preheat your oven to 350°F (180°C).


      1. In a greased cake pan, layer the caramelized bananas evenly across the bottom.
      2. Pour the cake batter over the bananas and smooth it out evenly.
      3. Bake in the preheated oven for 25 minutes, or until a toothpick inserted into the center comes out clean.
    See also  Cheesy Spinach and Bacon Flatbread Pizza


    Serve:

    1. Allow the cake to cool for 10 minutes before transferring it to a wire rack to cool completely.
    2. Serve warm or at room temperature. The caramelized bananas on the bottom will have created a delightful, sweet topping once flipped.

    Why You’ll Love This Recipe:


      • The caramelized bananas add a deliciously sweet, rich flavor to the cake.
      • It’s a simple recipe that doesn’t require any special equipment or ingredients.
      • The combination of cocoa and bananas makes it a perfect dessert for chocolate and fruit lovers alike.


    • It’s quick and easy to prepare, making it a great choice for a last-minute treat.
  • Toasted Oat Energy Bars – No-Bake Recipe

    Toasted Oat Energy Bars – No-Bake Recipe

    Toasted Oat Energy Bars – No-Bake Recipe

    Table of Contents

    Ingredients

      • 150 g (5.3 oz) toasted oats
      • 60 g (2 oz) raisins
      • Spices to taste (e.g., cinnamon, nutmeg, or vanilla powder)
      • 1 pinch of salt
      • 60 g (2 oz) mixed nuts (e.g., almonds, walnuts, hazelnuts), roughly chopped
      • 30 g (1 oz) dried cranberries, chopped
      • 200 g (7 oz) roasted peanuts, ground into paste (or peanut butter)
      • Melted dark chocolate (optional, for decoration)
      • Frozen cherries or dried oranges (optional, for serving)

    Directions

      • Step 1: Toast the Oats
        • Toast the oats in a dry pan over medium heat until golden and fragrant. Let them cool completely.
      • Step 2: Prepare the Dried Fruits and Nuts
        • Chop the raisins and cranberries.
        • Roughly chop the mixed nuts for added texture.
      • Step 3: Make Peanut Paste
        • Roast the peanuts in a pan until aromatic.
        • Blend them in a food processor until they form a smooth paste, or use store-bought peanut butter.
      • Step 4: Mix the Ingredients
        • In a large bowl, combine the toasted oats, raisins, cranberries, chopped nuts, salt, and spices.
        • Add the peanut paste and mix thoroughly until the mixture sticks together.
        • Line a baking dish with plastic wrap or parchment paper.
        • Press the mixture firmly into the dish, smoothing the top with a spatula.
        • Place it in the freezer for at least 30 minutes to set.

    Step 5: Shape and Chill

    • Step 6: Slice and Decorate
        • Once chilled, slice into bars or squares.
        • Drizzle with melted dark chocolate for extra flavor.


      • Decorate with frozen cherries or dried oranges if desired.
    See also  Cripta chicken strips

    5 Serving Suggestions


      • Enjoy as a quick breakfast with yogurt and fruit.
      • Pair with a cup of green tea or coffee for a midday snack.
      • Serve as an energy bar before or after workouts.


    • Pack as a lunchbox snack for school or work.
    • Use as a dessert substitute for a healthier sweet option.

    Cooking Tips


      • Toast the nuts and seeds for extra flavor.
      • If the mixture feels too dry, add a tablespoon of honey, maple syrup, or warm water.
      • Store in the fridge for up to 1 week or freeze for longer shelf life.


    • Add protein powder for a post-workout snack boost.
    • Experiment with spices like ginger, cardamom, or cocoa powder for unique flavors.

    Nutritional Benefits


      • Oats: Rich in fiber for digestion and energy.
      • Nuts and Seeds: Packed with healthy fats, protein, and antioxidants.
      • Dried Fruits: Provide natural sweetness and essential vitamins.
    • Peanuts: High in protein for muscle recovery and sustained energy.

    Dietary Information

      • Vegan (when using dairy-free chocolate).
    • Gluten-free (use certified gluten-free oats).
    • Refined sugar-free.

    Nutritional Facts (Per Bar)


      • Calories: 160
      • Protein: 6 g
      • Carbohydrates: 18 g


      • Fat: 8 g
      • Fiber: 3 g
      • Sugar: 7 g
  • Ultimate Apple Cake Extravaganza

    Ultimate Apple Cake Extravaganza

    Ultimate Apple Cake Extravaganza

    Table of Contents

    Get ready for an apple cake experience like no other! This recipe guarantees the BEST apple cake you will EVER eat. Forget the rest and indulge in the sweetness of perfection.

    Ingredients for a 19 cm Baking Pan:
    For the Cake Batter:

    – 3 eggs (room temperature)
    – 75 grams sugar (2.64 oz.)
    – 8 g vanilla sugar (0.28 oz.)
    – 150 grams flour (5.29 oz.)
    – 10 g baking powder (0.35 oz.)
    – 100 g melted butter (3.5 oz.)

    For Topping:

    – 3 apples
    – 3 tablespoons sugar for sprinkling
    – Cinnamon to taste

    ‍ Instructions:

    Prepare the Cake Batter:

    – In a bowl, whisk together eggs, sugar, and vanilla sugar until fluffy.
    – Sift in the flour and baking powder, gently folding them into the batter.
    – Incorporate melted butter into the mixture until smooth.

    Assemble and Bake:

    – Pour the batter into a greased 19 cm baking pan.

    Prepare the Apples:

    – Peel and thinly slice the apples.
    – Arrange apple slices on top of the batter.

    Sweet Finishing Touch:

    – Sprinkle sugar generously over the apples.
    – Dust the top with cinnamon for that extra layer of flavor.

    Bake to Perfection:

    – Bake in a preheated oven at 180°C (356°F) for 35 minutes.
    – After turning, switch to the grill function and bake for an additional 3 minutes until the top achieves a golden finish.

    See also  5-Minute Homemade Cake That Melts in Your Mouth!
    Serve and Enjoy:

    – Allow the cake to cool slightly before serving. Slice into perfection and savor the best apple cake you’ll ever taste!

    Ready for a taste sensation? Bake this Ultimate Apple Cake, and your taste buds will thank you! Share your delightful creation with the world.

  • Zucchini Vegetable Fritters

    Zucchini Vegetable Fritters

    Zucchini Vegetable Fritters

    Table of Contents

    Ingredients:


      • 1 zucchini
      • 1/2 teaspoon salt
      • 1/2 onion, finely chopped


      • 1 carrot, grated
      • Green onion, chopped
      • 2-3 eggs


      • Black pepper, to taste
      • 1/4 teaspoon salt
      • 2 tablespoons oatmeal


      • 2-3 tablespoons flour
      • 3 tablespoons water
      • 1/2 bell pepper, finely chopped


    • Olive oil, for frying

    Directions:

      1. Prepare the Zucchini:
          • Grate the zucchini and place it in a colander. Sprinkle with 1/2 teaspoon salt and let it sit for 10 minutes to draw out excess moisture. After 10 minutes, squeeze out as much liquid as possible.


      2. Mix the Vegetables:
        • In a large bowl, combine the grated zucchini, finely chopped onion, grated carrot, chopped green onion, and finely chopped bell pepper.


    1. Add the Wet Ingredients:
      • Beat the eggs and add them to the vegetable mixture. Stir well to combine.
    2. Add the Dry Ingredients:
        • Stir in the black pepper, 1/4 teaspoon salt, oatmeal, flour, and water. Mix until everything is well incorporated.


    3. Fry the Fritters:
        • Heat a few tablespoons of olive oil in a large frying pan over medium heat.
        • Spoon the batter into the pan to form small fritters. Flatten them slightly with the back of the spoon.


      • Cover and fry for 2-3 minutes on each side, or until golden brown on both sides.
    4. Serve:
        • Transfer the fritters to a plate lined with paper towels to drain any excess oil.


      • Serve warm and enjoy!

    Serving Suggestions: Serve these fritters with a side of sour cream or yogurt for dipping. They also pair well with a fresh salad or as a side dish to grilled meat.

    Cooking Tips:

      • Make sure to squeeze out as much moisture from the zucchini as possible to ensure the fritters hold together well.
      • You can add your favorite herbs or spices to the batter for extra flavor.

    Nutritional Benefits:

      • High in vitamins and fiber from the vegetables.
      • Provides protein from the eggs.


    • Oatmeal adds a healthy dose of whole grains and fiber.

    Dietary Information:

      • This recipe can be made gluten-free by using gluten-free flour and oats.


    • For a dairy-free option, serve with a dairy-free yogurt or dip.

    Storage:

      • Store any leftover fritters in an airtight container in the refrigerator for up to 3 days.


    • Reheat in a frying pan or in the oven until warmed through.

    Why You’ll Love This Recipe:

      • Quick and easy to prepare.


    • Packed with nutritious vegetables.
    • Versatile and can be enjoyed as a snack, appetizer, or main course.
    • Deliciously crispy on the outside and tender on the inside.
  • Easy Banana Oatmeal Pancakes

    Easy Banana Oatmeal Pancakes

    Easy Banana Oatmeal Pancakes

    Table of Contents

    Ingredients:

      • 1 ripe banana (mashed)
      • 2 eggs
      • 5 tablespoons yogurt (75g)
      • 1/2 cup (45g) rolled oats
    • Olive oil (for cooking)

    Directions:

      1. Prepare the batter: In a bowl, mash the banana and whisk in the eggs. Add the yogurt and rolled oats, mixing well.
      2. Heat the pan: Add a small amount of olive oil to a non-stick skillet and heat over low heat.
    1. Cook the pancakes: Pour a small amount of batter into the skillet to form pancakes. Cook each side for 2-3 minutes until golden brown and cooked through.
    2. Serve warm: Once cooked, serve immediately with your favorite toppings.

    Serving Suggestions:

      • Top with fresh fruit like berries or sliced bananas.
      • Drizzle with honey, maple syrup, or peanut butter for added flavor.
      • Serve with a dollop of Greek yogurt for extra protein.
      • Sprinkle with cinnamon or nuts for a crunchy texture.

    Cooking Tips:

      • Use a ripe banana for extra sweetness and moisture in the pancakes.
      • Cook on low heat to ensure the pancakes cook evenly without burning.
      • For a smoother texture, blend the oats before mixing them into the batter.
    • Let the batter sit for a few minutes to thicken before cooking.

    Nutritional Benefits:

      • High in Fiber: The oats and banana provide a good source of dietary fiber to support digestion.
      • Protein-Packed: Eggs and yogurt add a significant protein boost, keeping you fuller for longer.
    • Naturally Sweetened: No need for added sugars, as the ripe banana provides natural sweetness.
    • Healthy Fats: Olive oil adds heart-healthy fats to the recipe.
    See also  Vanilla Almond Cream Cake

    Dietary Information:

      • Gluten-Free (if using certified gluten-free oats)
    • Vegetarian
    • Low Sugar

    Nutritional Facts (per serving):

      • Calories: 220
      • Protein: 10g
      • Carbohydrates: 28g
      • Fat: 8g
    • Fiber: 4g
    • Sugars: 8g

    Storage:

      • Store leftover pancakes in an airtight container in the refrigerator for up to 2 days.
    • Reheat in a pan on low heat or in the microwave for 15-20 seconds before serving.
  • Irresistible Condensed Milk & Chocolate Desserts in Just 10 Minutes!

    Irresistible Condensed Milk & Chocolate Desserts in Just 10 Minutes!

    Irresistible Condensed Milk & Chocolate Desserts in Just 10 Minutes!

    Table of Contents

    Ingredients:

    For the Chocolate Sponge Cake:

    – 5 eggs
    – A pinch of salt
    – 150 grams of sugar
    – 250g Nutella
    – 50 grams of butter
    – 80 grams of flour
    – 30g starch

    For the Caramel Sauce:

    – 40ml of water
    – 200 grams of sugar
    – 100 grams of butter
    – 100ml cream
    – 50 grams of peanuts

    For the Cream Cheese Topping:

    – 250 grams of cream cheese
    – 100ml cream
    – 50 grams of condensed milk

    For the Chocolate Ganache:

    – 180 grams of chocolate
    – 50 grams of vegetable oil
    – 20 grams of crushed peanuts

    Instructions:
    For the Chocolate Sponge Cake:

    1. Preheat your oven to 180°C (360°F).
    2. In a bowl, beat 5 eggs with a pinch of salt until frothy.
    3. Gradually add 150 grams of sugar while continuing to beat until the mixture is thick and pale.
    4. Melt Nutella and butter together and add them to the egg mixture, folding gently.
    5. Sift in 80 grams of flour and 30 grams of starch, folding until just combined.
    6. Pour the batter into a greased and lined baking dish.
    7. Bake for 10 minutes or until a toothpick comes out clean.
    8. Let the cake cool.

    For the Caramel Sauce:

    9. In a saucepan, combine water and 200 grams of sugar over medium heat.
    10. Let it caramelize until it turns golden brown.
    11. Add butter, cream, and peanuts. Stir until it thickens.
    12. Pour the caramel sauce over the cooled cake.

    See also  Oatmeal, Apple, and Banana Pancakes
    For the Cream Cheese Topping:

    13. In a bowl, combine cream cheese, cream, and condensed milk. Mix until smooth.
    14. Spread this mixture evenly over the caramel layer.

    For the Chocolate Ganache:

    15. Melt chocolate and vegetable oil together until smooth.
    16. Pour the chocolate ganache over the cream cheese layer.
    17. Sprinkle with crushed peanuts.

    Chill the dessert in the fridge.

    Enjoy your amazing condensed milk and chocolate dessert creations!

    Try these quick and delightful desserts, and share your sweet moments!

  • I Don’t Buy Pizza Anymore! Discover a Healthier and Tastier Alternative

    I Don’t Buy Pizza Anymore! Discover a Healthier and Tastier Alternative

    I Don’t Buy Pizza Anymore! Discover a Healthier and Tastier Alternative

    Table of Contents

    Pizza, with its gooey cheese, flavorful toppings, and crispy crust, has long been a favorite indulgence for many. However, as people become more health-conscious, they’re seeking alternatives that satisfy their cravings without sacrificing nutrition.

    Ingredients You’ll Need
    • 1 zucchini
    • 4 tablespoons of oat flour
    • 3.5 ounces (100g) grated mozzarella cheese
    • 2 eggs
    • Salt and black pepper to taste
    Preparing the Zucchini Pizza Crust
    1. Grating the Zucchini: Begin by washing the zucchini thoroughly and grating it using a coarse grater, leaving the skin on for added texture and nutrients.
    2. Draining Excess Liquid: Transfer the grated zucchini to a bowl, season it with salt, and let it rest for 5 minutes. Afterward, squeeze handfuls of the zucchini to remove excess liquid, ensuring a crispier crust.
    3. Mixing the Ingredients: In another bowl, combine the drained zucchini with oat flour, grated cheese, eggs, and freshly ground black pepper. Mix the ingredients thoroughly until well combined.
    4. Shaping the Crust: Spread the zucchini mixture evenly onto a round pizza pan that has been lightly greased or lined with parchment paper. Ensure the crust is uniform in thickness for even baking.
    5. Baking to Perfection: Preheat your oven to 180°C and bake the zucchini pizza crust for approximately 20 minutes or until golden brown. Keep an eye on it to prevent burning.
    The Taste Test
    Satisfying Cravings Without Sacrifice

    Despite its unconventional ingredients, zucchini pizza crust delivers a satisfying pizza experience without the guilt. The crust maintains a crispy texture while providing a subtle hint of zucchini flavor, making each bite a delightful surprise.

    See also  Apple Cream Cake
    Nutritional Benefits That Can’t Be Beat

    Compared to traditional pizza dough, zucchini pizza crust is significantly lower in carbohydrates and calories, making it an ideal choice for those watching their waistlines. Additionally, zucchini is packed with essential vitamins and minerals, adding nutritional value to every slice.

    Conclusion

    In conclusion, zucchini pizza crust offers a delicious and nutritious alternative to traditional pizza dough. With its simple preparation and satisfying flavor, it’s no wonder that more pizza lovers are making the switch. So the next time you’re craving a slice, consider giving zucchini pizza crust a try—you won’t be disappointed!

  • I CAN’T Stop Making It! NO FRYING OR FUSSING. Tastier than MEAT!

    I CAN’T Stop Making It! NO FRYING OR FUSSING. Tastier than MEAT!

    NO FRYING OR FUSSING. Tastier than MEAT!

    Table of Contents

    Are you ready to revolutionize your cooking routine? Say goodbye to frying and fussing and hello to a healthier, tastier alternative! This recipe is a game-changer for anyone looking to whip up something delicious without spending hours in the kitchen.

    Ingredients

    ingredients to get started:

    • 12 ounces (about 0.8 pounds) of carrots, potatoes, and zucchini
    • 5.5 ounces of onions
    • 3 eggs
    • 2-3 cloves of garlic
    • 2 tablespoons of vegetable oil
    • 1 teaspoon of salt
    • Pepper to taste
    • Fresh herbs (e.g., parsley)
    • 3 tablespoons of ready-made breadcrumbs or 2 slices of bran bread

    Preparation

    • Wash and Peel: Clean and peel all vegetables (except garlic), then grate them on a coarse grater.
    • Preheat Oven: Set your oven to 200 degrees Celsius.
    • Grease Baking Dish: Prepare a baking dish by greasing its bottom and walls with oil.
    Breading
    • Prepare Bread Crumbs: Blend 2 slices of bran bread into crumbs.
    • Bake Crumbs: Spread crumbs on a baking sheet and bake for about 5 minutes at 200 degrees Celsius.
    Mixing it up
    • Combine Ingredients: Mix grated vegetables, breadcrumbs (or ready-made breadcrumbs), squeezed garlic, and finely chopped fresh herbs in a bowl.
    • Beat Eggs: In a separate bowl, beat 3 eggs and season with salt, pepper, and oil.
    • Mix Well: Combine the egg mixture with the vegetable mixture until smooth.
    Baking the Dish
    • Assemble: Spread the vegetable mixture into the prepared baking dish, compacting it slightly and leveling the top.
    • Bake: Place the dish in the preheated oven at 180 degrees Celsius for 50 minutes or until golden brown.
    See also  Homemade Chicken Broth Without Chemicals: This is the Best Way to Prepare It!
    Serving Suggestions

    Once baked, you can serve this dish hot or cold, as a main course or a side dish. It pairs perfectly with a fresh salad or some crusty bread. Get creative with your toppings or sauces to enhance the flavor even more!

    Nutritional Benefits

    Not only is this dish incredibly tasty, but it’s also packed with nutrients. Carrots, potatoes, and zucchini are rich in vitamins and minerals, while eggs provide protein. Plus, with no frying involved, you’ll save on unnecessary calories and fat.

    Variations

    Feel free to customize this recipe to suit your taste preferences. You can swap out the vegetables for your favorites or add in extra ingredients like cheese or diced ham for an extra burst of flavor. The possibilities are endless!

    Tips and Tricks
    • Use Fresh Ingredients: Opt for fresh, locally sourced ingredients for the best flavor.
    • Experiment with Seasonings: Don’t be afraid to get creative with your seasonings. Try adding different herbs and spices to customize the flavor.
    • Double the Recipe: This dish freezes well, so why not make a double batch and save some for later? Simply reheat in the oven for a quick and easy meal.


    ENJOY!

  • APPLE CAKE: No sugar, no flour, just mix the ingredients and immediately put it to bake

    APPLE CAKE: No sugar, no flour, just mix the ingredients and immediately put it to bake

    APPLE CAKE: No sugar, no flour, just mix the ingredients and immediately put it to bake

    Table of Contents

    Ingredients

    • 3 large apples (preferably softer varieties)
    • Juice of half a lemon
    • 100 ml of water
    • 80 g of raisins
    • 80 g of chopped walnuts
    • 1 pinch of salt
    • 3 eggs
    • 100 ml of vegetable oil
    • 220 g of oat flakes
    • 1 bag baking powder (10 g)

    Step-by-Step Guide

    Preparing the Apples

    Start by giving your apples a good wash. If needed, peel them, then slice them thinly into bite-sized pieces. Squeeze the juice of half a lemon over them to prevent browning and mix well.

    Adding the Goodies

    Toss in the raisins, giving them a soak in orange juice or rum for an extra flavor boost if desired. Add the water and stir. Then, sprinkle in the chopped walnuts for that irresistible crunch.

    Mixing the Batter

    In a separate bowl, crack open those eggs and beat them lightly. Pour them into the apple mixture along with the vegetable oil. Give it all a good stir until everything is evenly combined.

    Adding the Final Touches

    Now, it’s time to add our dry ingredients. Sprinkle in the oat flakes, followed by the baking powder. Mix gently until the batter is smooth and well incorporated.

    Baking to Perfection

    Prepare your cake mold by greasing it with butter. Pour the batter in gradually, ensuring it’s evenly spread out. Pop it into a preheated oven at 180 degrees Celsius for 40-45 minutes until golden brown and a toothpick inserted comes out clean.

    Serving Up

    Once baked, allow your cake to cool slightly before dusting it with powdered sugar. Slice it up, serve, and watch it disappear within seconds!

    See also  Oatmeal Dessert Cake (No Flour, No Eggs, No Added Sugar)
    Conclusion

    In conclusion, this apple-based recipe is a testament to the natural sweetness and versatility of this beloved fruit. With simple ingredients and easy preparation, you can enjoy a delicious treat that’s both wholesome and satisfying.

  • Cheese and Oregano Stuffed Flatbread Recipe

    Cheese and Oregano Stuffed Flatbread Recipe

    Cheese and Oregano Stuffed Flatbread Recipe

    Table of Contents

    This cheese and oregano stuffed flatbread is a delicious, easy-to-make dish perfect for a quick snack or light meal. The combination of cheese and oregano offers a delightful flavor that’s sure to please.

    Preparation Time

    Total time: 1 hour
    Preparation: 30 minutes
    Cooking: 30 minutes

    Ingredients

    For the Dough:

    350 g (3 cups) of flour
    150 ml of warm water
    1 tablespoon of salt
    75 ml of vegetable oil
    6 g of baking powder
    Oil for frying

    For the Stuffing:

    200 g of cheese (e.g., mozzarella or your favorite melting cheese)
    1 teaspoon of dried oregano

    Directions

    Prepare the Dough:
    In a large mixing bowl, combine the flour, salt, and baking powder.
    Add the vegetable oil and mix well until the flour has absorbed the oil.
    Gradually add the warm water, mixing continuously until a dough forms.
    Knead the dough well for about 10 minutes until it becomes smooth and elastic. This step is crucial for the texture of the flatbread.
    Cover the dough with a damp cloth and let it rest for 15-20 minutes.

    Prepare the Stuffing:

    Grate or finely chop the cheese.
    Mix the cheese with dried oregano in a bowl.

    Assemble the Flatbreads:

    Divide the dough into equal portions, depending on the size of the flatbreads you prefer.

    Roll each portion into a ball.
    Flatten each ball into a circle using a rolling pin.
    Place a portion of the cheese and oregano mixture in the center of each circle.
    Fold the dough over the filling, sealing the edges well. You can use a little water to help seal the edges.

    See also  No-Bake Strawberry Peach Cake Recipe

    Cook the Flatbreads:
    Heat oil in a frying pan over medium heat.
    Place the stuffed flatbreads in the pan and fry until golden brown on both sides, about 3-4 minutes per side.
    Remove from the pan and drain on paper towels to remove excess oil.

    Serving Suggestions
    Serve the flatbreads hot, with a side of fresh salad or a dipping sauce like tzatziki or marinara.
    These flatbreads also pair well with soups or can be enjoyed on their own as a snack.

    Cooking Tips
    Ensure the dough is kneaded well to develop the gluten, which helps in achieving a soft and chewy texture.
    Adjust the amount of oregano according to your taste preference.
    Use any cheese that melts well; a mix of cheeses can also be used for a richer flavor.

    Nutritional Benefits
    This recipe provides a good source of carbohydrates and fats, with the cheese adding protein and calcium.
    Oregano adds a boost of antioxidants and has anti-inflammatory properties.

    Dietary Information
    This recipe can be made vegetarian by ensuring the cheese used is suitable for vegetarians.
    To make it vegan, use a dairy-free cheese alternative.

    Storage Tips

    Store any leftover flatbreads in an airtight container in the refrigerator for up to 3 days.
    Reheat in a pan or microwave before serving.

    Why You’ll Love This Recipe
    It’s easy to make and customizable with your favorite cheese and herbs.
    The flatbreads are perfect for any time of the day and can be a great addition to any meal.

    Conclusion
    Enjoy the delightful taste of cheese and oregano stuffed flatbreads, a simple yet flavorful recipe that’s sure to become a favorite in your kitchen.

  • Cinnamon Roll Peach Cobbler Delight

    Cinnamon Roll Peach Cobbler Delight

    Merging the warm comfort of cinnamon rolls with the fresh, tangy sweetness of peaches, this Cinnamon Roll Peach Cobbler Delight is the perfect treat for any cozy gathering or family dessert. The classic taste of cinnamon rolls is elevated by juicy summer peaches, all topped with a sweet, luscious glaze. This dessert is sure to impress and bring warmth to any occasion!

    Ingredients:

    • 2 cans of cinnamon roll dough (with icing)
    • 6 cups fresh peaches, sliced
    • 1/4 cup granulated sugar
    • 1 teaspoon vanilla extract
    • 1 teaspoon cinnamon
    • 1/2 teaspoon nutmeg
    • 1 tablespoon cornstarch
    • 1/4 cup unsalted butter, melted

    Preparation Time: 15 minutes

    Cooking Time: 30-35 minutes

    Total Time: 45-50 minutes

    Instructions

    1. Preheat Oven and Prepare Dish:
      • Preheat your oven to 375°F (190°C).
      • Grease a 9×13 inch baking dish with butter or non-stick spray.
    2. Prepare the Peaches:
      • In a large bowl, mix the sliced peaches with sugarvanilla extractcinnamonnutmeg, and cornstarch. Toss until the peaches are well coated.
      • Spread the peach mixture evenly into the prepared baking dish.
    3. Prepare Cinnamon Rolls:
      • Separate the cinnamon roll dough into individual rolls. Cut each roll into quarters.
      • Scatter the quartered cinnamon roll pieces over the peach mixture in the baking dish.
    4. Add Butter and Bake:
      • Pour the melted butter evenly over the top of the cinnamon rolls and peach mixture.
      • Place the dish in the preheated oven and bake for 30-35 minutes or until the cinnamon rolls are golden brown and the peach filling is bubbling.
    5. Add Icing and Serve:
      • Once out of the oven, drizzle the reserved icing from the cinnamon roll packages over the top while the cobbler is still warm.
      • Allow the cobbler to cool slightly before serving.

    Serve warm and enjoy the delightful mix of sweet, tangy, and comforting flavors. This Cinnamon Roll Peach Cobbler is even better with a scoop of vanilla ice cream. It’s a perfect dessert to enjoy with loved ones, bringing together the warmth of cinnamon and the freshness of peaches in every bite!