Category: cake

  • Easy Watermelon Ice Cream Recipe

    Easy Watermelon Ice Cream Recipe

    Easy Watermelon Ice Cream Recipe


    Ingredients:

    • 4 cups watermelon (seedless, chopped into chunks)
    • 1 cup heavy cream
    • 1/2 cup sweetened condensed milk
    • 1 tablespoon lime juice (optional, for a zesty flavor)

    Instructions:

    1. Prepare the Watermelon:
      Start by cutting the watermelon into chunks, removing any seeds if necessary. For the best results, use seedless watermelon. Puree the chunks in a blender or food processor until smooth. You should end up with about 3 to 4 cups of watermelon puree.
    2. Combine Ingredients:
      In a large mixing bowl, combine the watermelon puree, heavy cream, sweetened condensed milk, and lime juice (if using). Stir until the mixture is well combined and smooth.
    3. Freeze the Mixture:
      Pour the mixture into a freezer-safe container, spreading it out evenly. Cover with a lid or plastic wrap. Freeze for 4-6 hours, or until the ice cream is firm and scoopable.
    4. Serve and Enjoy:
      Once the ice cream is fully frozen, scoop it into bowls or cones and serve immediately. Garnish with mint leaves or lime zest for a fresh touch, if desired.

    Description:
    This easy watermelon ice cream is incredibly creamy, refreshing, and a perfect treat for warm summer days. With just four ingredients and no ice cream machine required, it’s a quick and simple dessert to prepare. The natural sweetness of the watermelon pairs beautifully with the creamy, rich texture of the heavy cream and sweetened condensed milk, while the lime juice adds a zesty kick that enhances the flavors.


    Notes:

    • For best results, use ripe watermelon for maximum sweetness.
    • If you prefer a lighter texture, you can replace some of the heavy cream with whole milk or coconut milk, but the consistency will be slightly different.
    • This recipe can be made without an ice cream maker, making it perfect for a no-fuss treat.

    Tips:

    • Blending Tip: If you want a smoother texture, you can strain the watermelon puree through a fine-mesh sieve to remove any pulp before mixing it with the cream.
    • Topping Ideas: Add toppings like fresh mint, chocolate chips, or crushed nuts for extra texture and flavor.
    • Storage: Store leftover ice cream in an airtight container in the freezer for up to 1 week. If it becomes too hard, let it sit at room temperature for a few minutes to soften before serving.

    Servings:
    This recipe yields 4-6 servings, depending on portion size. It’s perfect for sharing on a warm day or for a refreshing dessert after dinner.


    Nutritional Information (Per Serving, Approx.):

    • Calories: 210
    • Carbohydrates: 27g
    • Protein: 2g
    • Fat: 11g
    • Sugar: 22g
    • Fiber: 1g
    • Sodium: 30mg

    (Note: Nutritional values are approximate and may vary depending on specific ingredient brands.)


    Benefits:

    • Hydrating: Watermelon is about 90% water, making this ice cream a hydrating treat.
    • Rich in Vitamins: Watermelon is a good source of vitamin C and A, which supports skin health and boosts the immune system.
    • No Artificial Additives: This recipe uses natural ingredients, so it’s free from artificial preservatives or flavors.
    • Low in Fat: By using only a small amount of heavy cream and relying on watermelon for natural sweetness, this ice cream is lower in fat compared to traditional cream-heavy recipes.

    Q&A:

    Q: Can I make this recipe without heavy cream?
    A: Yes, you can substitute heavy cream with coconut cream or a dairy-free option like almond milk or oat milk for a lighter version. The texture may be slightly less creamy but still delicious.

    Q: How can I make this recipe vegan?
    A: To make it vegan, substitute the heavy cream with coconut cream or a plant-based alternative and replace the sweetened condensed milk with a dairy-free version of condensed milk.

    Q: Can I add mix-ins to the watermelon ice cream?
    A: Absolutely! You can stir in mix-ins like chocolate chips, chopped nuts, or even small pieces of fresh fruit after blending the base. Just be sure to fold them in gently before freezing.

    Q: Is there a way to make this recipe without a blender?
    A: While a blender makes it easier to puree the watermelon, you could also mash the watermelon by hand using a potato masher or fork, but the texture may be a bit chunkier.

    Q: How long does this ice cream last in the freezer?
    A: This ice cream will stay fresh in the freezer for up to a week. After that, it might become a bit icy, so it’s best enjoyed within a few days.

    Yields: About 4-6 servings
    Prep Time: 10 minutes
    Freeze Time: 4-6 hours
    Total Time: 4-6 hours 10 minutes


    This Easy Watermelon Ice Cream recipe is the perfect treat for a hot day, offering a refreshing taste with minimal effort. Its creamy texture and light sweetness will surely make it a favorite among kids and adults alike!

  • Chocolate Peanut Butter Protein Bars – No-Bake, Healthy & Viral Dessert

    Chocolate Peanut Butter Protein Bars – No-Bake, Healthy & Viral Dessert

    Chocolate Peanut Butter Protein Bars – No-Bake, Healthy & Viral Dessert

    If you’re looking for a healthy, no-bake, and protein-packed dessert, these Chocolate Peanut Butter Protein Bars are a must-try. They taste just like a homemade Snickers bar, but they’re made with wholesome ingredients and packed with protein to keep you full and energized.

    Why Are These Protein Bars Viral-Worthy?

    • Tastes Like a Snickers, But Healthier – Creamy peanut butter, rich chocolate, and a soft, chewy texture
    • No-Bake & Super Easy – Just mix, chill, and enjoy
    • High-Protein & Refined Sugar-Free – A perfect post-workout snack or healthy dessert
    • Gluten-Free & Customizable – Easy to make with different flavors and mix-ins
    • Meal Prep Friendly – Make a batch and enjoy all week

    Ingredients

    To make these Chocolate Peanut Butter Protein Bars, you’ll need:

    • 1 cup oat flour (blend oats into a fine flour if needed)
    • ½ cup peanut butter (creamy, natural preferred)
    • 2 tablespoons honey or maple syrup
    • ½ cup vanilla protein powder (use plant-based or whey protein)
    • ¼ cup almond milk (adjust as needed for consistency)
    • ½ cup dark chocolate chips, melted

    Optional Add-Ins for Extra Flavor

    • ¼ teaspoon sea salt – Enhances the sweet and salty contrast
    • 1 teaspoon vanilla extract – Adds depth to the flavor
    • 1 tablespoon chia seeds or flaxseeds – For added fiber and healthy fats
    • Crushed peanuts – Sprinkle on top for extra crunch

    Step-by-Step Instructions

    Step 1: Make the Dough

    • In a large mixing bowl, combine oat flour, peanut butter, honey (or maple syrup), protein powder, and almond milk.
    • Stir until a thick dough forms. If it’s too dry, add a bit more almond milk; if too sticky, add more oat flour.

    Step 2: Shape & Chill

    • Line a small baking pan or dish with parchment paper.
    • Press the mixture firmly into the pan, smoothing the top with a spatula.
    • Refrigerate for 30 minutes to firm up.

    Step 3: Add the Chocolate Coating

    • Melt the dark chocolate chips in a microwave or double boiler.
    • Pour the melted chocolate evenly over the chilled protein bar layer.
    • Spread it out smoothly and return to the fridge for another 10-15 minutes until the chocolate is set.

    Step 4: Slice & Enjoy

    • Once firm, remove from the pan and slice into bars or squares.
    • Enjoy immediately, or store for later!

    Serving Suggestions

    These Chocolate Peanut Butter Protein Bars are great:

    • As a Post-Workout Snack – Packed with protein for muscle recovery
    • With a Cup of Coffee – A perfect afternoon pick-me-up
    • As a Healthy Dessert – A guilt-free way to satisfy chocolate cravings
    • With Yogurt or a Smoothie – For a balanced breakfast

    Storage & Meal Prep Tips

    • Refrigeration: Store in an airtight container in the fridge for up to 7 days.
    • Freezing: Freeze individually wrapped bars for up to 3 months.
    • To Serve: Enjoy straight from the fridge, or let them soften for a minute if frozen.

    Final Thoughts

    These No-Bake Chocolate Peanut Butter Protein Bars are a healthy, delicious, and easy-to-make treat. Whether you need a quick protein boost, meal prep snack, or a healthier dessert option, these bars are sure to hit the spot.

  • Crispy Baked Potato Rounds

    Crispy Baked Potato Rounds

    Crispy Baked Potato Rounds

    Ingredients:

    • 2 pounds small to medium potatoes (Yukon Gold or red potatoes work well)
    • 3 tablespoons olive oil
    • 1 teaspoon garlic powder
    • ½ teaspoon onion powder
    • ½ teaspoon paprika
    • ½ teaspoon dried thyme
    • Salt and pepper to taste
    • ½ cup shredded cheddar cheese (or a blend of cheddar and mozzarella)
    • Fresh parsley, chopped (for garnish)

    Instructions:

    1. Preheat Oven and Prepare Potatoes:
      Preheat your oven to 400°F (200°C). Thoroughly wash the potatoes and scrub them clean. You can peel them if you prefer, but leaving the skins on adds fiber and nutrients.
    2. Slice the Potatoes:
      Slice the potatoes into ½-inch to ¾-inch thick rounds. Try to keep the slices as uniform as possible for even cooking.
    3. Season the Potatoes:
      In a large mixing bowl, toss the potato slices with olive oil, garlic powder, onion powder, paprika, thyme, salt, and pepper. Ensure the potatoes are well-coated with the oil and seasonings.
    4. Arrange on Baking Sheet:
      Line a baking sheet with parchment paper or a silicone mat. Arrange the potato slices in a single layer, making sure they’re not overlapping, to help them crisp up during baking.
    5. Bake the Potatoes:
      Bake the potato rounds for 20-25 minutes, then flip them over to ensure even crisping. Sprinkle the shredded cheddar cheese evenly over the potatoes. Continue baking for an additional 10-15 minutes, or until the potatoes are tender, and the cheese has melted and is bubbly. The edges should be golden brown and crispy.
    6. Garnish and Serve:
      Once the potatoes are done baking, remove them from the oven and let them cool slightly. Garnish with freshly chopped parsley and serve immediately.

    Tips and Variations:

    • Soaking: For extra crispy potatoes, soak the sliced potatoes in cold water for 30 minutes before seasoning. This helps to remove excess starch. Be sure to pat them dry thoroughly before tossing with oil and seasonings.
    • Cheese: Experiment with different cheeses like Monterey Jack, pepper jack, or even a sprinkle of Parmesan for a flavor twist.
    • Herbs: Feel free to swap the thyme for oregano, rosemary, or any of your favorite herbs.
    • Spices: Add red pepper flakes or chili powder for a little extra heat.
    • Garlic: If you prefer fresh garlic, substitute the garlic powder with minced garlic, but add it during the last 10 minutes of baking to prevent burning.
    • Toppings: After baking, get creative with toppings! Add bacon crumbles, caramelized onions, sour cream, or a drizzle of your favorite dipping sauce for extra flavor.
    • Yields: About 24-30 rounds, depending on size
      Prep Time: 20 minutes
      Cook Time: 30-40 minutes

    These crispy baked potato rounds are a delicious, easy-to-make treat that’s perfect as an appetizer, side dish, or snack. Enjoy them with your favorite toppings for a satisfying bite!

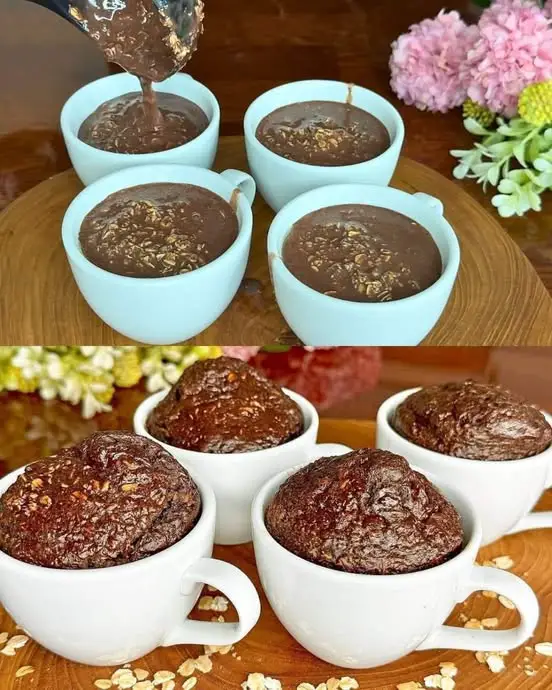
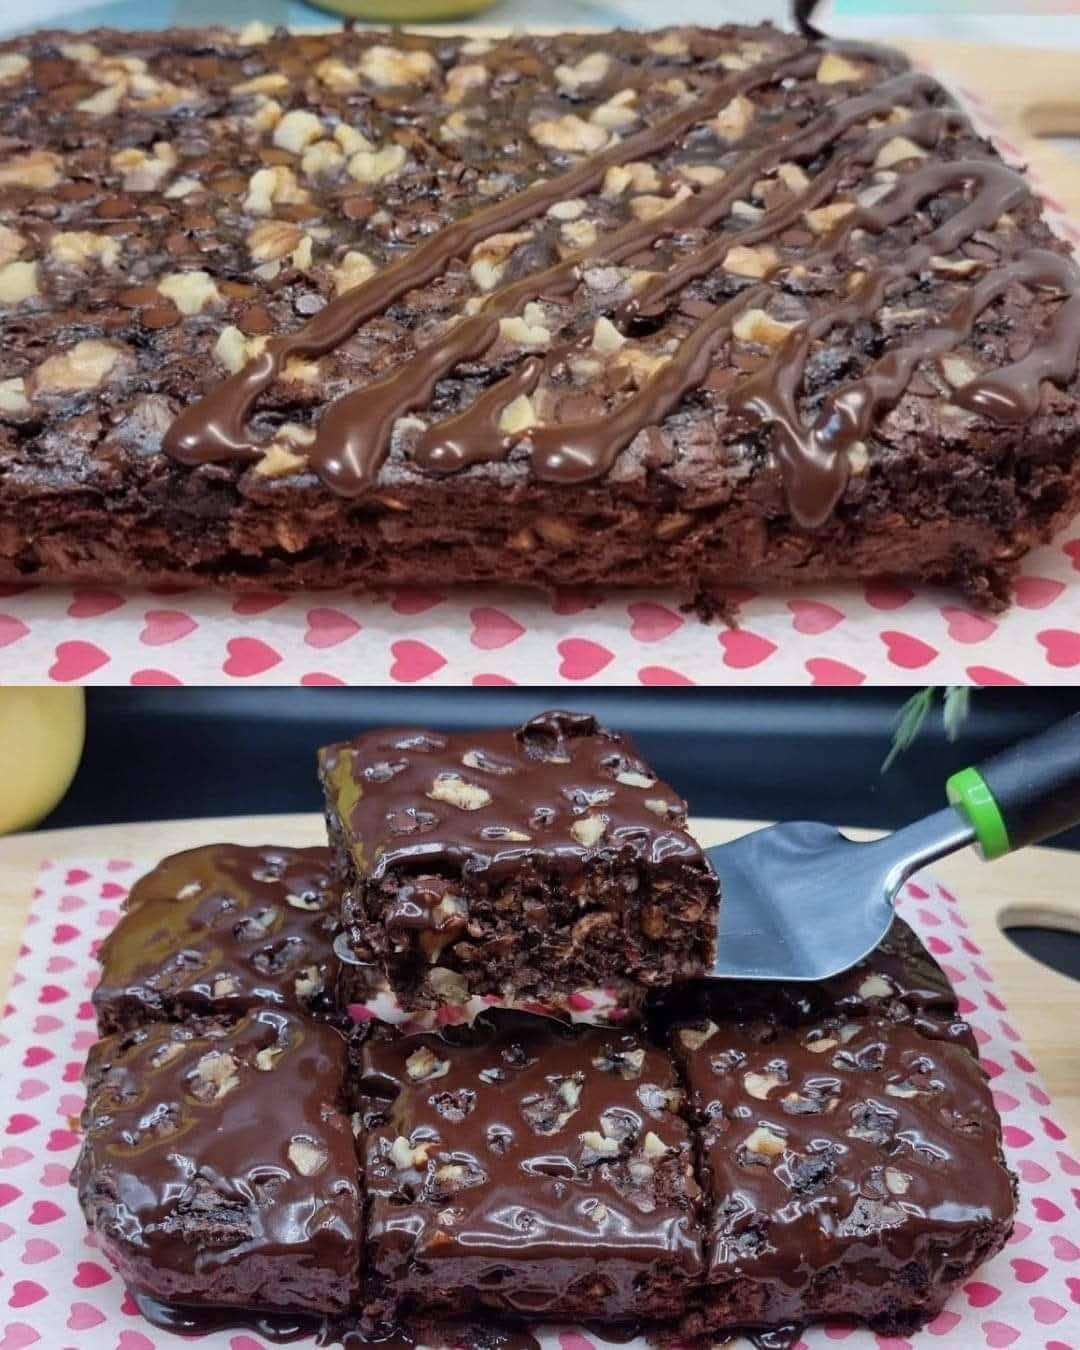
  • Healthy Oatmeal Cocoa cups

    Healthy Oatmeal Cocoa cups

    Healthy Oatmeal Cocoa cups

    Ingredients:

      • 1 cup (100 g) oatmeal
      • 1 cup (240 ml) milk of your choice
      • 2 eggs
      • 1/3 cup (100 g) Greek yogurt
      • 1 tablespoon stevia or any other sweetener of your choice
      • 1 teaspoon baking powder
    • A pinch of salt
    • 1 tablespoon unsweetened cocoa powder

    Directions:

      1. Preheat the Oven:
        • Preheat your oven to 360°F (180°C).
      2. Prepare the Oat Mixture:
          • In a bowl, combine 1 cup of oatmeal and 1 cup of milk. Let it sit for a few minutes to allow the oats to soak.


      3. Combine Ingredients:
        • Add 2 eggs, 1/3 cup of Greek yogurt, 1 tablespoon of stevia, 1 teaspoon of baking powder, a pinch of salt, and 1 tablespoon of unsweetened cocoa powder to the oat mixture. Mix well until all ingredients are combined.
      1. Pour into Baking Dish:
        • Pour the mixture into greased muffin cups or a baking dish.
      2. Bake:
          • Bake in the preheated oven for 20-25 minutes, until the tops are set and a toothpick inserted into the center comes out clean.


      3. Cool and Serve:
        • Allow to cool slightly before serving.

    Serving Suggestions:

      • Serve these muffins warm with a dollop of Greek yogurt or a drizzle of honey.
      • Pair with a cup of coffee or tea for a delightful breakfast or snack.
    • Top with fresh berries or a sprinkle of nuts for added texture and flavor.

    Cooking Tips:

      • Ensure the oats are fully soaked in the milk for a moist and tender muffin texture.
    • Use silicone muffin cups or line your baking dish with parchment paper to prevent sticking.
    • Experiment with add-ins like chocolate chips, nuts, or dried fruits for a personalized touch.

    Nutritional Benefits:

      • High in protein from the eggs and Greek yogurt, supporting muscle repair and growth.
      • Rich in fiber from the oats, promoting healthy digestion.
      • Low in added sugars, thanks to the use of stevia as a sweetener.

    Dietary Information:

      • This recipe is vegetarian.
      • Can be made dairy-free by using a plant-based milk and dairy-free yogurt.

    Storage:

    • Store in an airtight container at room temperature for up to 3 days.
    • For longer storage, refrigerate for up to a week or freeze for up to a month. Thaw before serving.
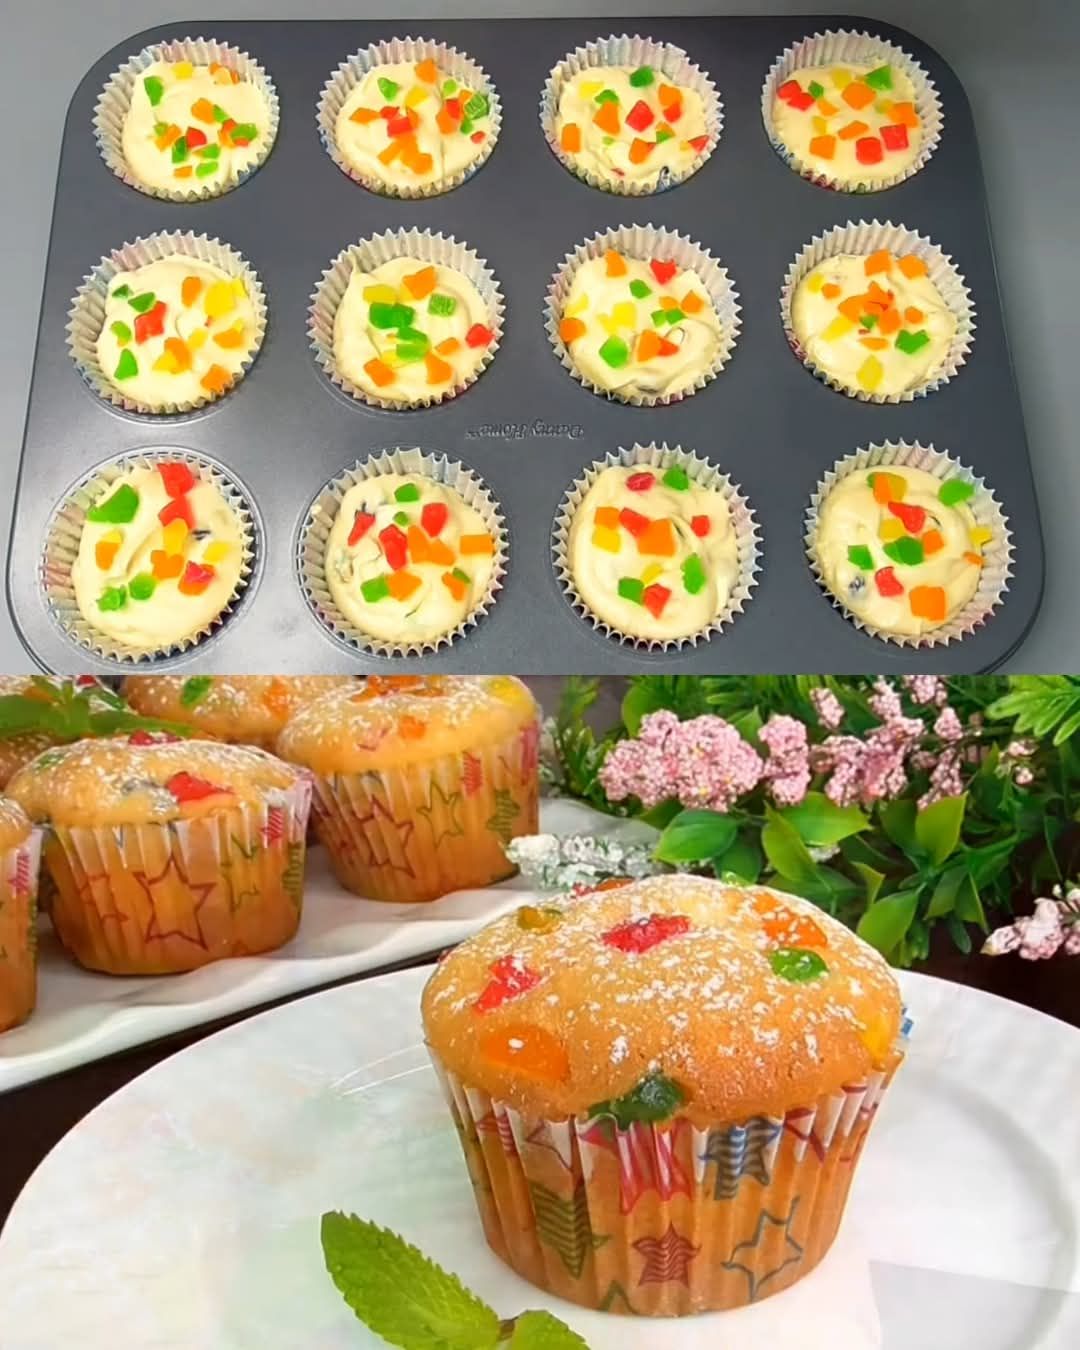
  • Quick and Easy Muffins with Candied Fruits and Raisins

    Quick and Easy Muffins with Candied Fruits and Raisins

    Quick and Easy Muffins with Candied Fruits and Raisins

    Table of Contents

    Ingredients


      • Butter (soft): 100 g (½ cup)
      • Sugar: 120 g (⅔ cup)
      • Eggs: 2 large


      • Vanilla or vanilla sugar: To taste
      • Salt: A pinch
      • Milk: 50 ml (¼ cup)


      • Sour cream or natural yogurt: 70 g (⅓ cup)
      • Wheat flour: 180 g (1½ cups)
      • Baking powder: 1 tsp


    • Candied fruits and raisins: 140 g (1 cup)

    Directions

    Preheat the Oven:


    • Preheat your oven to 180°C (356°F). Line a muffin tin with paper liners or grease lightly.

    Prepare the Batter:

      1. In a mixing bowl, beat the softened butter and sugar together until light and fluffy.


      1. Add the eggs one at a time, mixing well after each addition.
      2. Stir in the vanilla and a pinch of salt.
      3. Mix in the milk and sour cream (or yogurt) until well combined.

    Combine Dry Ingredients:
    5. In a separate bowl, sift together the flour and baking powder.
    6. Gradually add the dry ingredients to the wet mixture, stirring until just combined.

    Add Candied Fruits and Raisins:
    7. Fold in the candied fruits and raisins, ensuring they are evenly distributed throughout the batter.

    Portion the Batter:
    8. Spoon the batter into the prepared muffin tin, filling each cup about ¾ full.

    Bake:
    9. Bake in the preheated oven for 25 minutes or until a toothpick inserted into the center of a muffin comes out clean.

    Cool and Serve:
    10. Allow the muffins to cool in the tin for 5 minutes, then transfer to a wire rack to cool completely.

    Serving Suggestions


    • Dust with powdered sugar for a finishing touch.
    • Serve warm with a dollop of whipped cream or butter.
    See also  Gooey Chocolate Fudge Cookies

    Cooking Tips


    • Coat the candied fruits and raisins with a little flour before folding them into the batter to prevent sinking.
    • Adjust the sweetness by reducing or increasing sugar based on your taste.

    Nutritional Benefits


    • Contains fiber from raisins and candied fruits.
    • Provides energy from carbohydrates and healthy fats.

    Dietary Information


    • Vegetarian-friendly
    • Can be made dairy-free by substituting butter and milk with plant-based alternatives.

    Nutritional Facts (per muffin, assuming 12 muffins)


      • Calories: 200
      • Protein: 3g
      • Carbohydrates: 30g


    • Fats: 8g
    • Fiber: 1g
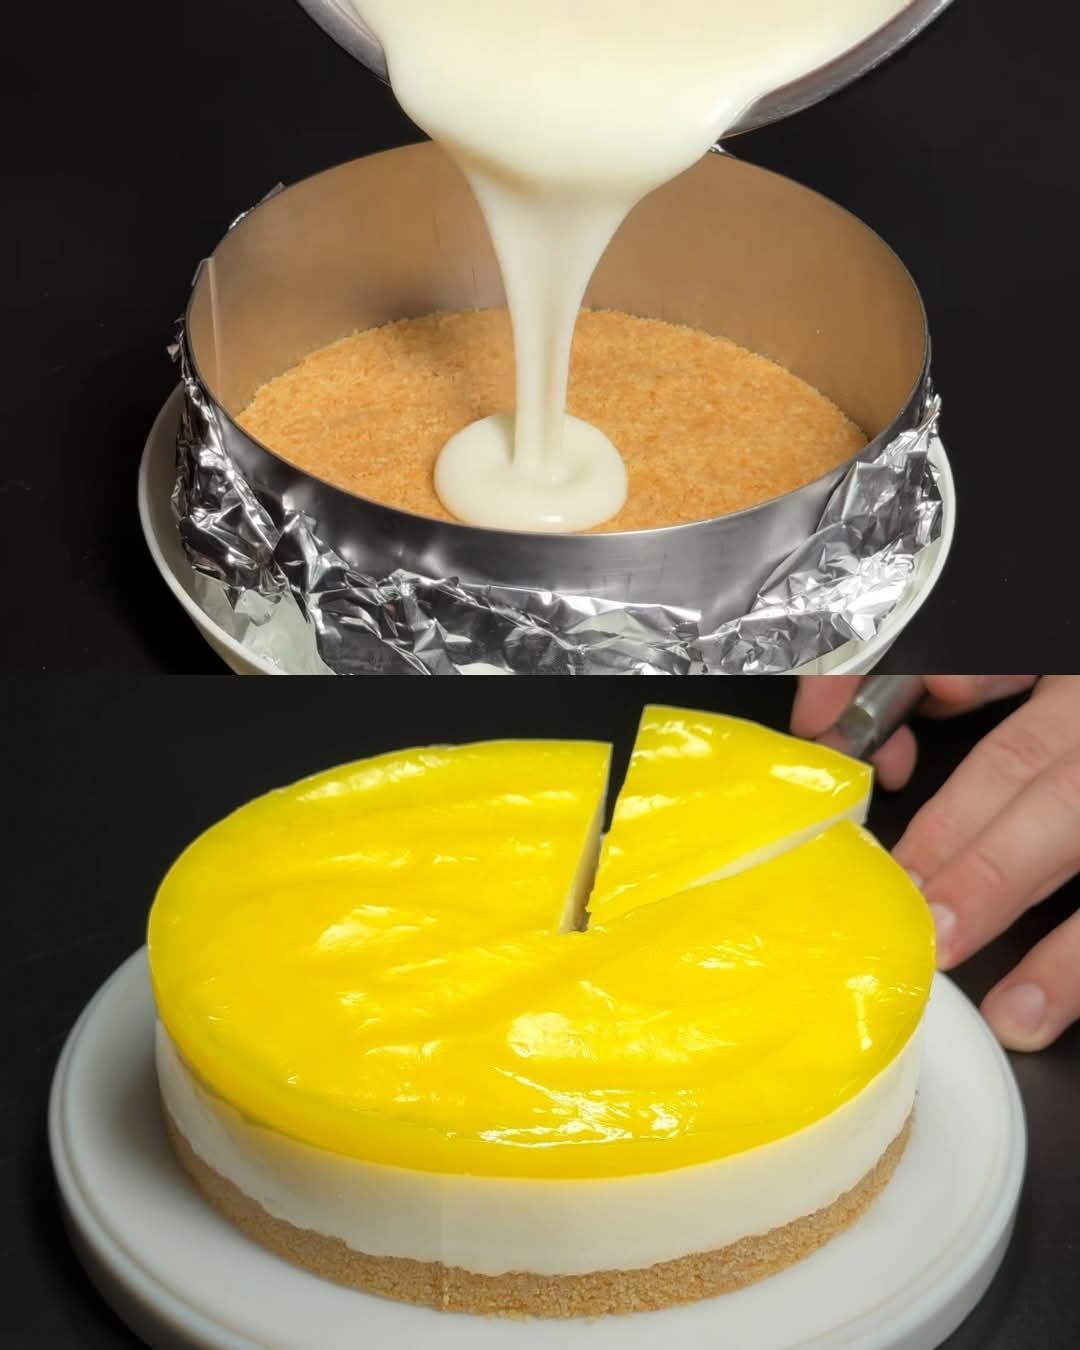
  • Layered Lemon Vanilla Dessert

    Layered Lemon Vanilla Dessert

    Layered Lemon Vanilla Dessert

    Table of Contents

    This No-Bake Creamy Waffle Cake is a delightful and easy dessert that combines layers of crushed waffles with a rich, velvety cream filling. Perfect for any occasion, it’s quick to prepare, requires no baking, and is sure to impress your family and friends with its taste and presentation.

    Ingredients


      • Waffles: 250 g (about 8.8 oz)
      • Cream cheese: 220 g (8 oz)
      • Sweetened condensed milk: 220 g (¾ cup)


      • Heavy cream (33%): 500 ml (2 cups)
      • Vanilla sugar: 10 g (2 teaspoons)
      • Chocolate: For decoration


    Directions

      • Prepare the Base:
          • Chop the waffles in a blender until fine crumbs form.
          • Line a round or rectangular mold with foil. Pour the crushed waffles into the mold and tamp down firmly to create an even base.


      • Prepare the Cream Filling:
          • In a bowl, stir the cream cheese until smooth.
          • Add the condensed milk and mix until well combined.


        • In a separate bowl, beat the heavy cream and vanilla sugar with a hand mixer until stiff peaks form.
        • Gently fold the whipped cream into the cream cheese mixture, stirring until smooth and creamy.


    • Assemble the Cake:
      • Spread the cream filling evenly over the waffle base, smoothing the top with a spatula.
    • Chill:
        • Place the cake in the refrigerator for 3 hours to set. Then, transfer it to the freezer for 1 hour to firm up.


    • Decorate and Serve:
        • Remove the cake from the mold and peel off the foil.
        • Decorate the top with grated chocolate, chocolate shavings, or melted chocolate.


      • Slice and serve chilled.

    Serving Suggestions


    • Garnish with fresh berries or a drizzle of caramel sauce for added flavor.
    • Serve with a dollop of whipped cream on the side.

    Cooking Tips


      • Ensure the heavy cream is well-chilled before whipping for the best results.
      • For added texture, sprinkle chopped nuts or cookie crumbs between the cream layers.
      • Use flavored waffles like chocolate or caramel for a fun variation.

    Nutritional Benefits

      • Provides a good source of calcium from the cream cheese and heavy cream.
      • Sweetened condensed milk adds energy from natural sugars.

    Dietary Information

    • Contains gluten from the waffles.
    • Contains dairy; not suitable for lactose-intolerant individuals unless substitutions are made.
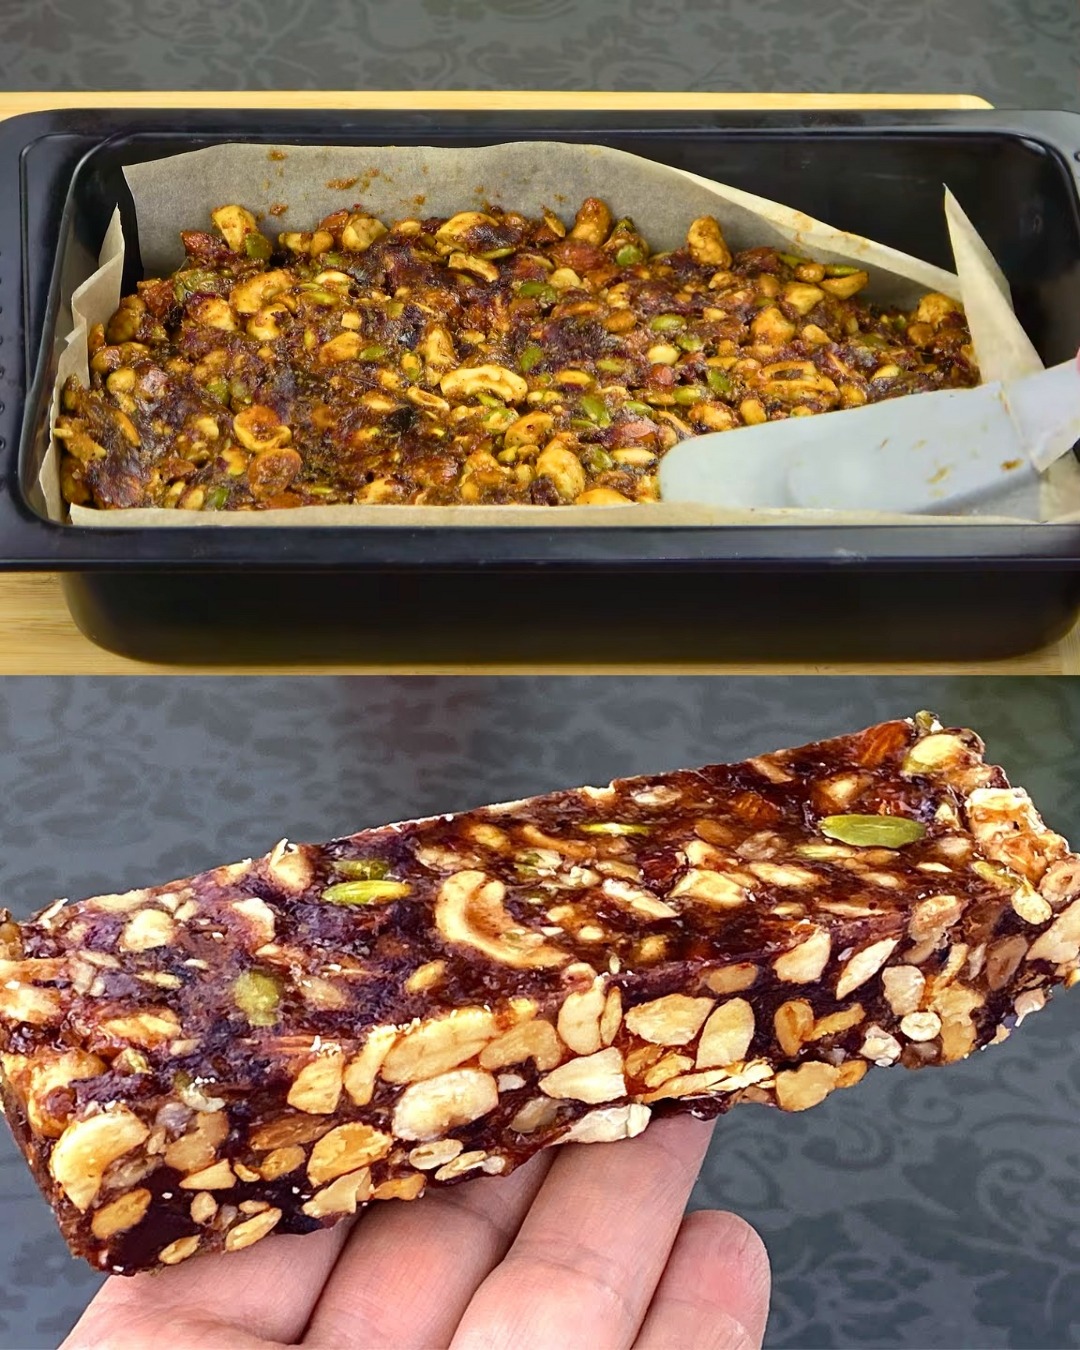
  • Homemade Nut and Date Energy Bars

    Homemade Nut and Date Energy Bars

    Homemade Nut and Date Energy Bars

    Table of Contents

    Ingredients:

    Cashews: 70 g (1/2 cup)
    Walnuts: 70 g (1/2 cup)
    Almonds: 70 g (1/2 cup)
    Pine nuts: 40 g (1/4 cup)
    Hazelnuts: 70 g (1/2 cup)
    Pumpkin seeds: 70 g (1/3 cup)
    Dates: 150 g (1 cup), soaked in cold water for 15 minutes
    Oatmeal: 50 g (1/2 cup), chopped
    Olive oil: 3 tablespoons
    Salt: 1/2 teaspoon
    Honey: 160 ml (1/2 cup)

    Directions:

    Toast the nuts and seeds:
    In a frying pan over medium heat, lightly toast the cashews, walnuts, almonds, pine nuts, and hazelnuts until they are fragrant and slightly golden. Set aside.
    Toast the pumpkin seeds separately in the same pan until they start to pop. Set aside.

    Prepare the dates:
    Drain the soaked dates, remove the pits, and chop them into small pieces.

    Cook the dates:
    Heat the olive oil in a frying pan over medium heat. Add the chopped dates and cook, stirring occasionally, until they are soft and slightly caramelized.

    Combine all ingredients:
    Add the toasted nuts, seeds, and oats to the pan with the dates. Season with salt and mix well.
    Pour in the honey, stir to combine, and remove from heat. Continue mixing until everything is evenly coated.

    Shape the bars:
    Line a mold or baking dish with parchment paper or grease it lightly with olive oil. Transfer the mixture into the dish, pressing down firmly with the back of a spoon to pack it tightly.

    Chill and cut:
    Allow the mixture to cool slightly at room temperature, then refrigerate for 1 hour.
    Once firm, use a wet knife to cut the mixture into bars or squares. Return to the refrigerator for another 30 minutes before serving.

    See also  Delicious Sweet Dough Cake with Dried Fruits and Nuts

    Store:
    Wrap each bar in cling film or parchment paper for easy storage and portability.

    Serving Suggestions:
    Enjoy these bars as a quick breakfast on busy mornings.
    Perfect as a pre-workout snack or post-workout recovery bite.
    Pair with a cup of aromatic tea for a relaxing and energizing treat.

    Cooking Tips:
    Ensure the nuts are toasted lightly to enhance their flavor without burning them.
    Avoid overheating the honey to retain its natural nutrients and sweetness.
    Wetting the knife before cutting will help achieve clean slices without sticking.

    Nutritional Benefits:
    Rich in healthy fats from nuts, providing essential omega-3 fatty acids.
    High in fiber from oats and dates, supporting digestive health.
    Natural sweeteners like dates and honey offer a healthier alternative to refined sugar.
    Great source of protein and energy to keep you satisfied between meals.

  • Chocolate Banana Oatmeal M

    Chocolate Banana Oatmeal M

    Chocolate Banana Oatmeal M

    Table of Contents

    These Chocolate Banana Oatmeal Muffins are a delightful treat that combines the wholesome goodness of oats with the sweetness of ripe bananas and rich chocolate. Perfect for breakfast or a snack, these muffins are not only delicious but also nutritious, providing a good balance of carbohydrates, fiber, and protein. With the added crunch of walnuts and the indulgence of chocolate chips, they make a fantastic option for both adults and kids alike. Whether you’re starting your day or need a midday pick-me-up, these muffins will satisfy your cravings while keeping you energized.


    Serving Size

    This recipe yields approximately 12 muffins.

    Ingredients

    For the Muffins:

      • 120 grams of oat flakes (3/4 cup + 1 tbsp)


      • 200 ml of hot milk (5/6 cup)
      • 2 eggs
      • 2 ripe bananas


      • 1 teaspoon of vanillin (or 1 tsp vanilla extract)
      • 40 grams of bitter cocoa (1/2 cup)
      • 1 teaspoon of baking powder


    • A handful of walnuts, chopped (optional)
    • Chocolate chips (to taste)

    For the Topping:

      • 100 grams of chocolate (1/2 cup + 2 tbsp), for melting


    • 40 ml of boiling milk (3 tbsp), for mixing with melted chocolate

    Step-by-Step Instructions

    Step 1: Prepare the Ingredients

      1. Preheat the oven: Start by preheating your oven to 180°C (350°F). Prepare a muffin tin by greasing it lightly or lining it with muffin liners.
      2. Prepare the oats: In a mixing bowl, combine the oat flakes and hot milk. Let it sit for about 10 minutes to allow the oats to soften.
    See also  Get Ready to Devour These Irresistible Banana Pudding Cheesecake Squares!


    Step 2: Make the Muffin Batter

      1. Mash the bananas: In another bowl, mash the ripe bananas with a fork until they are smooth. This will add moisture and sweetness to the muffins.
      2. Combine wet ingredients: Add the eggs and vanillin to the mashed bananas. Mix well until everything is well combined.
      3. Combine dry ingredients: In a separate bowl, mix together the oat mixture, cocoa powder, baking powder, and a pinch of salt. If you’re adding walnuts, fold them in at this stage.


    1. Combine wet and dry mixtures: Pour the wet banana mixture into the dry oat mixture. Stir gently until just combined; be careful not to overmix, as this can make the muffins dense. If desired, fold in chocolate chips for added sweetness.

    Step 3: Bake the Muffins

      1. Fill the muffin tins: Divide the batter evenly among the muffin cups, filling each cup about 3/4 full.
      2. Bake: Place the muffin tin in the preheated oven and bake for 20–25 minutes, or until a toothpick inserted into the center of a muffin comes out clean.


    1. Cool: Once baked, remove the muffins from the oven and allow them to cool in the pan for about 5 minutes before transferring them to a wire rack to cool completely.

    Step 4: Prepare the Chocolate Topping

      1. Melt the chocolate: In a small saucepan over low heat, combine the chopped chocolate and boiling milk. Stir continuously until the chocolate is fully melted and smooth.
      2. Drizzle on muffins: Once the muffins are cool, drizzle the melted chocolate over the top of each muffin. You can use a spoon or a piping bag for a more decorative effect.
    See also  CAKE WITH ONLY 3 INGREDIENTS


    Step 5: Serve and Enjoy

    1. Garnish (optional): If desired, sprinkle additional chopped walnuts or chocolate chips on top of the muffins while the chocolate is still warm to create a beautiful presentation.
    2. Serve: These muffins can be enjoyed warm or at room temperature. Pair them with a cup of coffee or tea for a perfect snack!

    Cooking Tips

      • Ripe Bananas: The riper the bananas, the sweeter and more flavorful your muffins will be. Look for bananas with plenty of brown spots for the best results.


      • Substitutions: You can substitute the cocoa powder with carob powder for a caffeine-free option. Similarly, you can use almond milk or any non-dairy milk instead of cow’s milk.
      • Nut Allergies: If you’re making these muffins for someone with a nut allergy, you can omit the walnuts entirely or replace them with seeds like sunflower seeds for added crunch.
      • Storing Muffins: These muffins can be stored at room temperature for up to 3 days. For longer storage, keep them in an airtight container in the refrigerator for up to a week.


    Storage

      • Room Temperature: Store in an airtight container at room temperature for 2-3 days.
      • Refrigerator: For longer freshness, keep in the fridge for up to a week.
      • Freezer: To freeze, wrap muffins individually in plastic wrap and place them in a freezer-safe bag. They can be frozen for up to 3 months. To thaw, leave them at room temperature or microwave for a few seconds.


    Nutritional Facts (Per Muffin)

      • Calories: 170 kcal
      • Protein: 4g
      • Fat: 7g


      • Carbohydrates: 24g
      • Fiber: 3g
      • Sugar: 6g


    • Sodium: 90mg
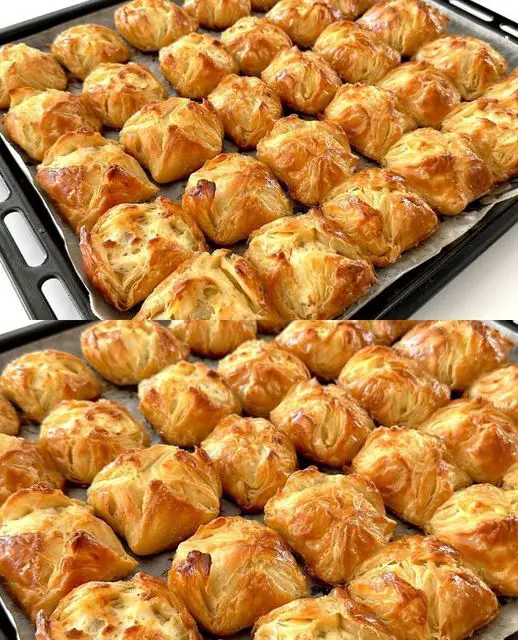
  • Embrace the Art of Hand-Rolled Crispy Pastries: A Timeless Recipe

    Embrace the Art of Hand-Rolled Crispy Pastries: A Timeless Recipe

    Embrace the Art of Hand-Rolled Crispy Pastries

    Table of Contents

    Have you ever craved a crispy, golden pastry that melts in your mouth with each bite? Join me in uncovering the magic of hand-rolled crispy pastries, a culinary adventure that combines simplicity with irresistible flavor.

    Ingredients

    Gather these simple yet essential ingredients to embark on your pastry-making journey:

    • 2 cups of water
    • 2 eggs
    • 1 egg yolk for spreading
    • 1 teaspoon of salt
    • 5.5 teaspoons of flour
    • 125 grams of cow butter or margarine
    • 200 grams of cow’s cheese

    Mixing the Dough

    1. In a bowl, combine the water and eggs, then gradually add the sifted flour and salt. Mix until a cohesive dough forms. Knead by hand until the dough becomes smooth and no longer sticks to your hands or the bowl.
    2. Divide the dough into two equal parts and roll each into thin crusts. Spread softened butter or margarine evenly over the surface, then fold the dough like an envelope. Repeat the folding process, ensuring to butter between each fold, until you achieve a compact rectangle. Refrigerate the dough for an hour.

    Preparing the Filling

    Roll out the dough into a large rectangle and cut into squares. Crumble the cheese and place it in the center of each square.

    Assembly
    • Enclose the cheese with the dough squares, pressing firmly to seal the edges. Arrange the pastries on a baking dish lined with parchment paper.
    Baking
    • Beat the egg yolk and brush it over each pastry for a golden finish. Bake in a preheated oven at 200 degrees Celsius for 20-25 minutes or until they turn golden brown.
    See also  Homemade Sesame Rolls
    Serving
    • Serve the crispy pastries warm, allowing the irresistible aroma to tantalize your senses. Pair with your favorite beverage and enjoy every crispy, cheesy bite.
    Conclusion
    • Hand-rolled crispy pastries are more than just a recipe; they’re a testament to tradition, craftsmanship, and the joy of savoring simple pleasures. Embrace the art of pastry-making and delight in the satisfaction of creating something truly special.
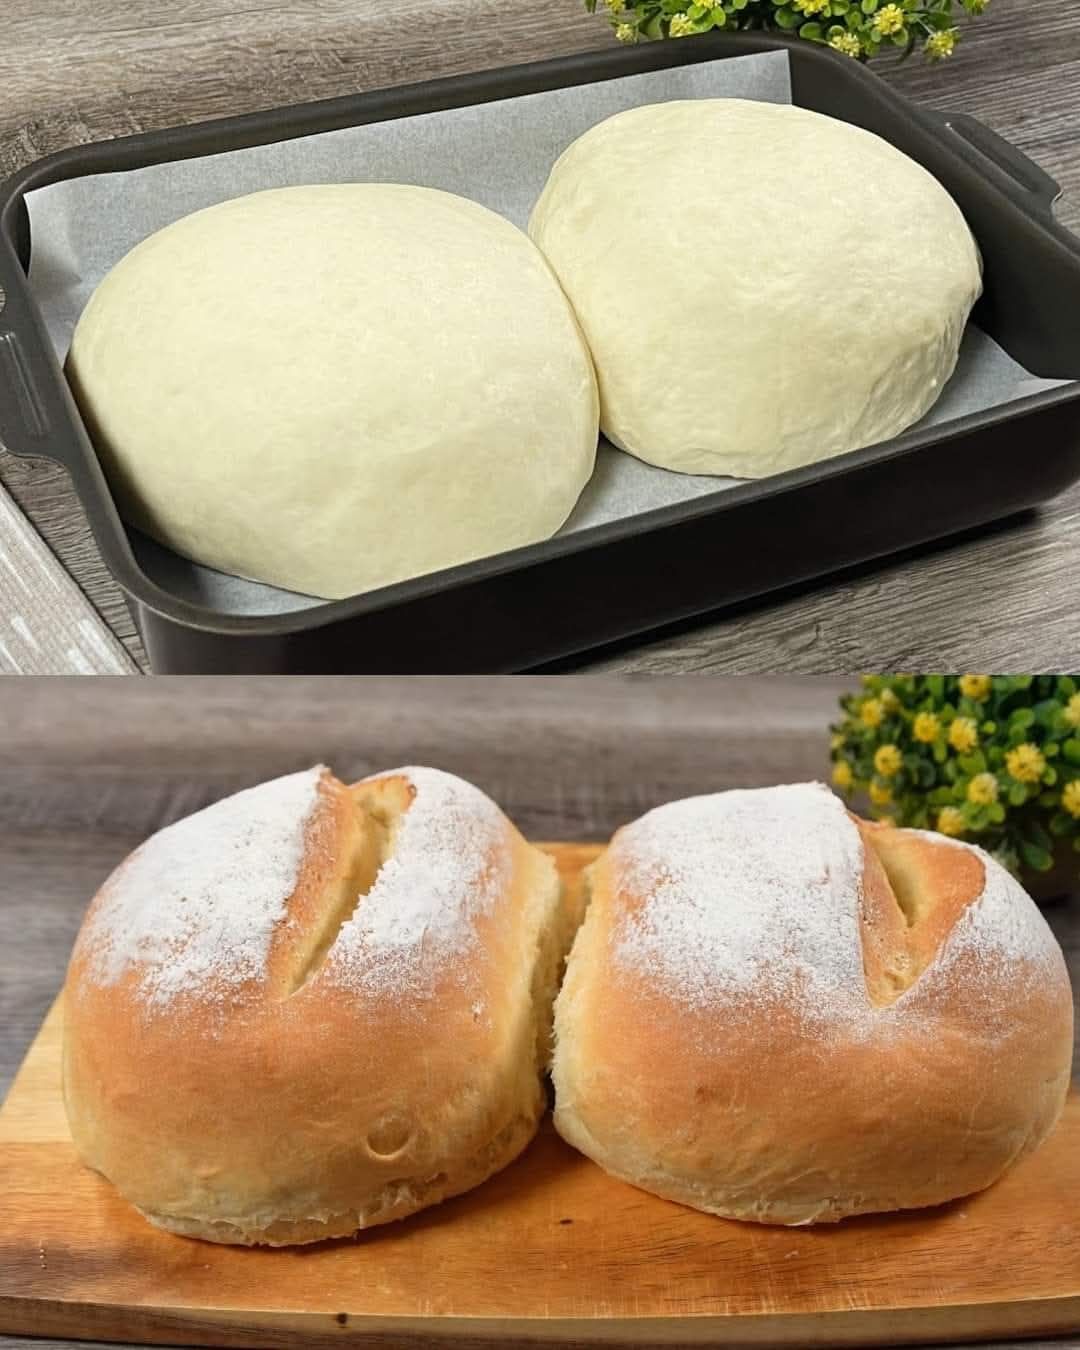
  • Soft and Fluffy Homemade Bread

    Soft and Fluffy Homemade Bread

    Soft and Fluffy Homemade Bread

    Table of Contents


    Ingredients

      • Wet Ingredients:
          • 200 ml warm milk
          • 200 ml warm water
          • 1 tablespoon sugar


        • 7 g dry yeast
        • 30 ml vegetable oil


    • Dry Ingredients:
        • 500 g all-purpose flour (first addition)
        • 100 g all-purpose flour (second addition)
        • 1 teaspoon salt


    Directions

      1. Activate the Yeast:
          • In a large mixing bowl, combine 200 ml warm milk, 200 ml warm water, 1 tablespoon sugar, and 7 g dry yeast. Stir well until the yeast and sugar are dissolved.
          • Cover the bowl with a kitchen towel and let it sit for 5-10 minutes until the mixture becomes frothy.


      2. Prepare the Dough:
          • Once the yeast is activated, add 30 ml vegetable oil and mix again.
          • Sift 500 g of flour into the bowl, then add 1 teaspoon salt. Mix with a spatula until the dough begins to come together.


        • Sift another 100 g of flour into the mixture and continue mixing with your hands until the dough is medium soft and forms a ball.
      3. Knead the Dough:
          • Lightly flour your work surface and knead the dough for about 5-7 minutes until it becomes smooth and elastic.


        • Form the dough into a ball and place it in a lightly oiled bowl. Cover with cling film or a kitchen towel and let it rise in a warm place for about 45 minutes, or until it doubles in size.
      4. Shape the Dough:
          • After the dough has risen, punch it down gently to release the air and knead it briefly until smooth.


        • Divide the dough into 2 equal parts and form each piece into a ball. Cover and let them rest for another 20 minutes.
        • Dust your work surface with flour and roll out each ball into a rectangular shape as shown in the video. Fold the edges inward and roll the dough tightly into a log. Shape it into a ball and place it on a baking sheet lined with parchment paper. Repeat with the second dough ball.


      1. Final Rise and Bake:
          • Cover the shaped loaves with a towel and let them rise for another 20 minutes.
          • Preheat the oven to 180°C (356°F). Brush the surface of each loaf with water and dust lightly with flour. Make a shallow incision on top with a sharp knife or blade.
          • Bake in the preheated oven for 30-35 minutes or until golden brown and cooked through. Let the loaves cool slightly on a wire rack before slicing.


      2. Serve and Enjoy:
        • Slice the bread once it has cooled down a bit. Enjoy this soft and fluffy bread with your favorite spreads, soups, or as a sandwich base.


    Serving Suggestions

    • Serve warm with butter, jam, or honey for a delicious breakfast treat.
    • Perfect for making sandwiches or dipping into soups and stews.

    Cooking Tips

      • Proper Kneading: Ensure the dough is kneaded well until smooth; this helps develop the gluten, making the bread light and fluffy.


    • Accurate Temperature: Use a kitchen thermometer to ensure the milk and water are at the correct temperature (about 37-40°C / 98-104°F) for optimal yeast activation.
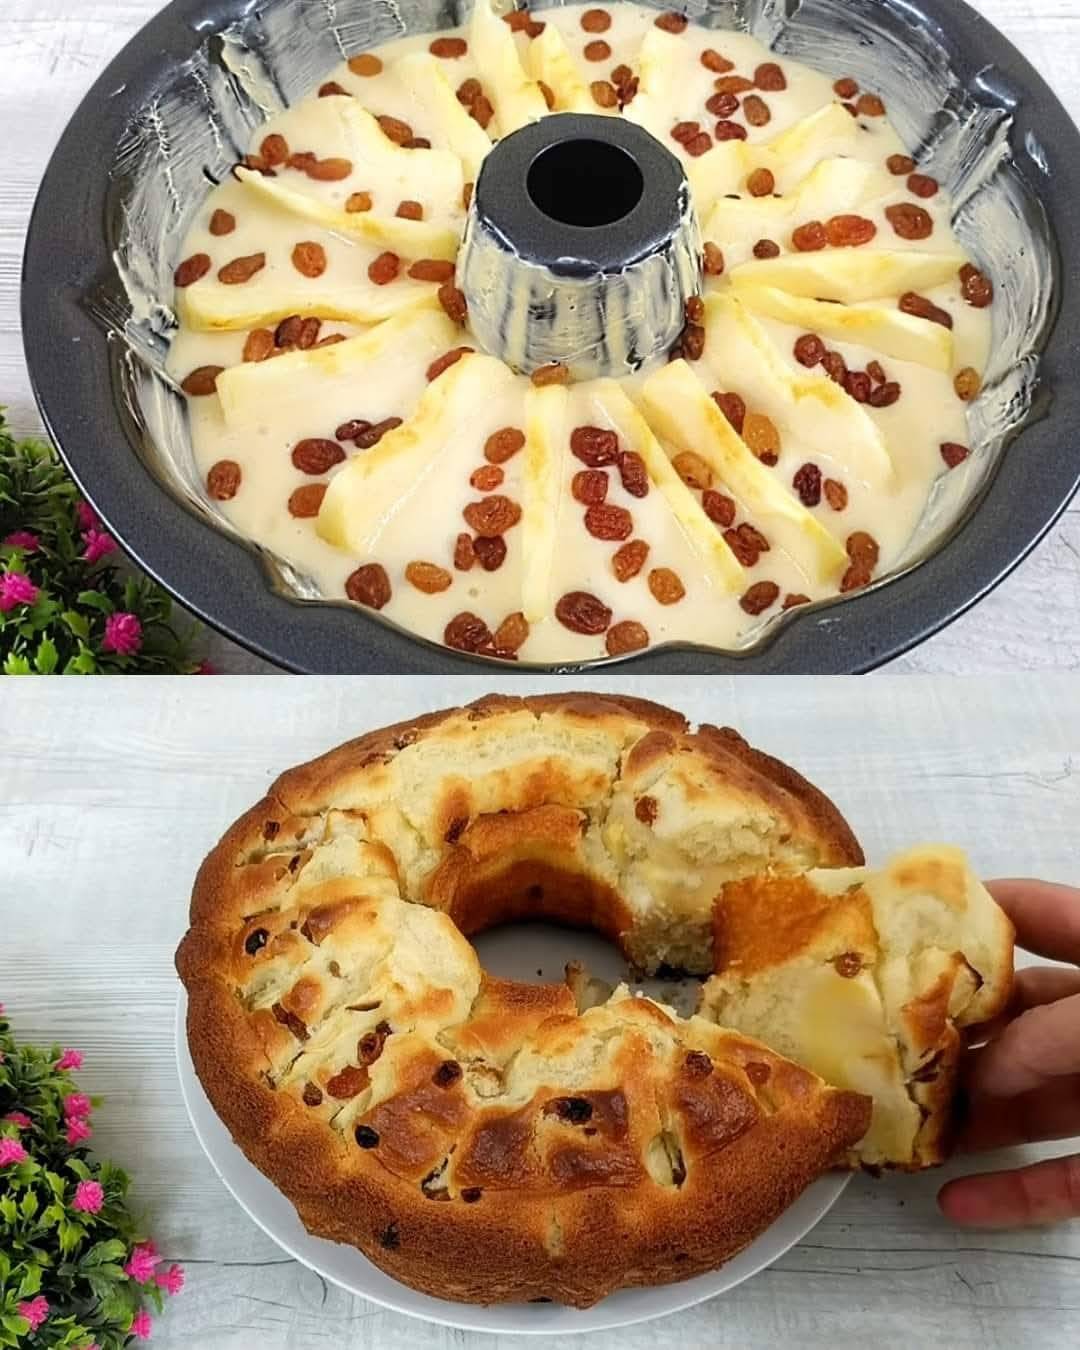
  • Apple and Raisin Cake

    Apple and Raisin Cake

    Apple and Raisin Cake

    Table of Contents

    Ingredients

      • 3 eggs
      • 150 grams sugar


      • 200 ml milk
      • 370 grams flour
      • 20 grams baking powder


      • 1 apple (peeled and sliced)
      • Juice of 1 lemon
      • 50 grams raisins


    • Butter (for greasing the cake mold)

    Instructions

    Prepare the Batter

      1. Preheat the Oven: Preheat your oven to 170°C (340°F).
      2. Mix Eggs and Sugar: In a mixing bowl, beat 3 eggs with 150 grams of sugar until well combined.


    1. Add Milk: Add 200 ml of milk and mix well.

    Add Dry Ingredients

      1. Combine Flour and Baking Powder: Gradually add 370 grams of flour and 20 grams of baking powder to the mixture, stirring continuously.
      2. Add Lemon Juice: Add the juice of 1 lemon and mix until the batter is smooth.


    Prepare the Apple and Raisins

      1. Peel and Slice Apple: Peel and slice 1 apple.
      2. Grease the Cake Mold: Grease the cake mold with butter.
      3. Arrange Apple Slices: Place the apple slices on the bottom of the cake mold.


    1. Pour Batter: Pour the batter over the apple slices.
    2. Add Raisins: Sprinkle 50 grams of raisins on top of the batter.

    Bake the Cake

      1. Bake: Place the cake mold in the preheated oven. Bake at 170°C (340°F) for 30 minutes.


    Serve

    1. Cool and Serve: Remove the cake from the oven and let it cool slightly before serving. Enjoy this delicious apple and raisin cake warm or at room temperature.

    Serving Suggestions

      • With Ice Cream: Serve with a scoop of vanilla ice cream or a dollop of whipped cream.
      • With Beverages: Enjoy with a cup of hot tea or coffee for a delightful treat.
    See also  Whipping Up Magic: A Quick Fix with 4 Yogurt, Ready in 2 Minutes, Sans Wheat!


    Cooking Tips

    • Even Apple Distribution: Ensure the apple slices are evenly distributed on the bottom of the cake mold for even baking.
    • Plumper Raisins: Soak the raisins in warm water for a few minutes before adding to the batter for a plumper texture.
  • Cheap and Delicious Tuna Casserole Dinner

    Cheap and Delicious Tuna Casserole Dinner

    Cheap and Delicious Tuna Casserole Dinner

    Table of Contents

    Ingredients
    • 2 cans of tuna (about 280 g each)
    • 1 onion, cut into slices
    • 5 medium potatoes, cut into large chunks
    • 2 tablespoons (30 g) tomato paste
    • 3/4 cup (180 ml) hot milk
    • 1 1/2 tablespoons (25 g) butter
    • 1/4 cup (25 g) shredded Parmesan cheese
    • Olive oil, as needed
    • Salt, to taste
    • Black pepper, to taste

    Directions

    Step 1: Prepare the Potatoes
    1. Cut the potatoes into large chunks and place them in a pot of salted water.
    2. Cook the potatoes until tender, about 15 to 20 minutes.
    3. Drain the potatoes and transfer them to a mixing bowl.
    4. Add 1 1/2 tablespoons of butter, salt, and black pepper to taste. Mash the potatoes until smooth.
    5. Gradually add 3/4 cup of hot milk while mashing until the mixture is smooth and creamy.
    Step 2: Prepare the Tuna Mixture
    1. Heat some olive oil in a large pan over medium heat.
    2. Add the sliced onion and sauté until browned.
    3. Add the two cans of tuna and 2 tablespoons of tomato paste mixed with one ladle of potato broth.
    4. Mix well and cook for two to three minutes on low heat.
    Step 3: Assemble the Casserole
    1. Preheat your oven to 375°F (190°C).
    2. Add half of the mashed potatoes to the bottom of a casserole dish and spread it out evenly.
    3. Layer half of the tuna mixture over the mashed potatoes.
    4. Add the remaining mashed potatoes over the tuna, followed by the remaining tuna mixture.
    5. Top with 1/4 cup of shredded Parmesan cheese.
    See also  Apple and Banana Baked Oatmeal with Nuts
    Step 4: Bake the Casserole
    1. Place the casserole dish in the preheated oven.
    2. Bake for 10 to 15 minutes, or until the top is golden brown and the cheese is melted.
    Nutrition Information (Per Serving):
    • Calories: 350
    • Protein: 25g
    • Carbohydrates: 30g
    • Fat: 15g
    • Fiber: 4g
    • Sugar: 3g
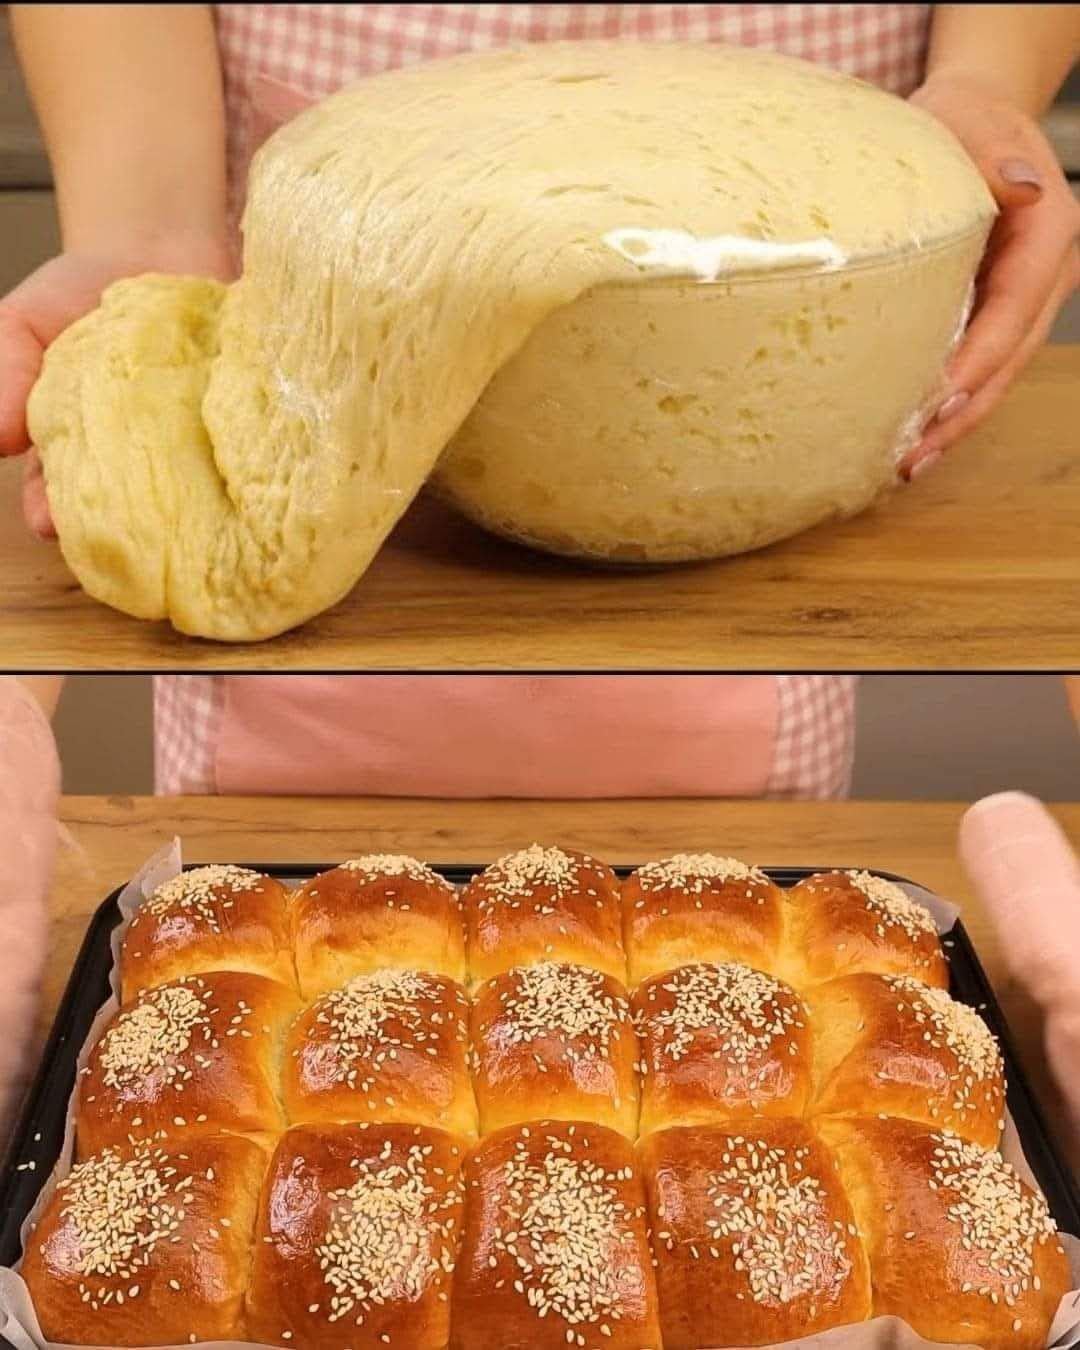
  • White Bun Recipe

    White Bun Recipe

    White Bun Recipe

    Table of Contents

    Ingredients

      • 700 grams of wheat flour
      • 1 teaspoon of salt
      • 400 ml warm milk
      • 4 tablespoons of sugar
      • 8 grams of dry yeast
      • 2 eggs
      • 80 ml sunflower oil
      • 10 grams of baking powder
      • 10 ml apple cider vinegar
      • 50 grams of butter, melted
      • 1 egg yolk
    • Milk (for brushing)
    • Sesame seeds (for topping)

    Directions

      1. Activate Yeast: In a small bowl, mix the warm milk and sugar. Sprinkle the dry yeast over the top and let it sit for 5-10 minutes until it becomes frothy.
      1. Mix Dry Ingredients: In a large mixing bowl, combine the wheat flour, salt, and baking powder.
      2. Combine Wet Ingredients: In a separate bowl, whisk the eggs, sunflower oil, and apple cider vinegar. Add the melted butter and mix well.
      3. Form Dough: Add the yeast mixture and the wet ingredients to the dry ingredients. Mix until a dough forms.
      1. Knead Dough: Turn the dough onto a floured surface and knead for about 10 minutes until smooth and elastic.
      2. First Rise: Place the dough in a greased bowl, cover it with a clean towel, and let it rise in a warm place for about 1 hour, or until it has doubled in size.
      3. Shape Buns: Punch down the dough and divide it into equal portions. Shape each portion into a bun and place them on a baking sheet lined with parchment paper.
      1. Second Rise: Cover the buns with a towel and let them rise for another 30 minutes.
      2. Preheat Oven: Preheat your oven to 180°C (350°F).
      3. Prepare for Baking: In a small bowl, beat the egg yolk with a little milk. Brush the tops of the buns with this mixture and sprinkle with sesame seeds.
    1. Bake: Bake the buns in the preheated oven for 30-35 minutes, or until golden brown.
    2. Cool: Let the buns cool on a wire rack before serving.
    See also  Super Moist Banana Bread Recipe

    Serving Suggestions

    Enjoy these white buns fresh out of the oven with butter, or use them for sandwiches and burgers. They also make a great accompaniment to soups and stews.

    Cooking Tips

      • Ensure the milk is warm, not hot, to activate the yeast properly.
      • For a richer flavor, you can replace some of the milk with cream.
      • Knead the dough well to develop gluten, which helps the buns rise and become fluffy.

    Nutritional Benefits

    These white buns provide carbohydrates for energy and some protein from the eggs. Using sunflower oil and butter adds healthy fats, making these buns a more nutritious option compared to store-bought varieties.

    Dietary Information

    • Vegetarian: This recipe is suitable for vegetarians.
    • Nut-Free: There are no nuts in this recipe, making it safe for those with nut allergies.
  • Cream Puff Pastry with Rich Cream Filling

    Cream Puff Pastry with Rich Cream Filling

    Cream Puff Pastry with Rich Cream Filling

    Table of Contents

    Ingredients

    The Dough:

      • 200g flour
      • 100ml milk
      • 100ml water
      • 100g butter
      • 1/2 tsp baking powder
      • Pinch of salt
      • 4 eggs

    The Cream:

      • 2 eggs
      • 180g sugar
      • 100g flour
      • 500ml milk
      • 200g butter

    Directions

    Prepare the Dough:

      1. Heat Liquid Ingredients:
        • In a medium saucepan, combine the milk, water, and butter. Heat over medium heat until the butter melts and the mixture begins to boil.
      2. Mix the Dough:
          • Remove the saucepan from the heat and add the flour all at once, stirring vigorously until the mixture forms a ball and pulls away from the sides of the pan.


      3. Cool and Add Eggs:
        • Let the dough cool for about 5 minutes. Add the baking powder and salt, then beat in the eggs one at a time, mixing well after each addition until the dough is smooth and glossy.
        • Preheat the oven to 200°C (400°F). Line a baking sheet with parchment paper.
        • Using a spoon or piping bag, place small mounds of dough onto the prepared baking sheet.
        • Bake for 20-25 minutes, or until the puffs are golden brown and firm. Allow them to cool completely on a wire rack.
    1. Bake the Puffs:

    Prepare the Cream Filling:

      1. Heat the Milk:
        • In a medium saucepan, heat the milk over medium heat until it just begins to simmer. Remove from heat.
    1. Mix the Eggs and Sugar:
      • In a separate bowl, whisk together the eggs and sugar until well combined. Gradually add the flour, mixing until smooth.
    2. Combine and Cook:
        • Slowly pour the hot milk into the egg mixture, whisking constantly to prevent curdling.


      • Return the mixture to the saucepan and cook over medium heat, stirring constantly, until it thickens and comes to a boil. Remove from heat and let cool slightly.
    3. Add Butter:
        • Once the mixture has cooled, beat in the butter until smooth and creamy.


    Assemble the Cream Puffs:

      1. Fill the Puffs:
        • Slice each puff in half and fill with the prepared cream using a spoon or piping bag.
    1. Serve:
      • Arrange the filled cream puffs on a serving plate and dust with powdered sugar if desired. Enjoy your meal!

    Serving Suggestions

      • Serve these cream puffs as a dessert at parties or gatherings.
    • Pair with a cup of coffee or tea for a delightful afternoon treat.

    Cooking Tips

      • Ensure the dough is cool before adding the eggs to prevent them from cooking.
      • Use a piping bag for a more uniform and professional appearance of the cream puffs.
    • Allow the cream to cool completely before filling the puffs to ensure it holds its shape.

    Nutritional Benefits

    • Eggs: Provide high-quality protein and essential vitamins.
    • Milk: Adds calcium and a creamy texture to both the dough and filling.
  • You only need 4 ingredients, puff pastry sticks with ham and cheese

    You only need 4 ingredients, puff pastry sticks with ham and cheese

    You only need 4 ingredients, puff pastry sticks with ham and cheese

    Table of Contents

    Ingredients

    1 pack of puff pastry from the refrigerated shelf, rectangular

    250 g sour cream

    120 g smoked ham, diced

    150 g cheese, grated

    preparation

    1. This is how it works: First, roll out the puff pastry and spread half of the sour cream on one half of the dough. Spread half of the diced ham and cheese on top. Fold the unlined side of the puff pastry over the other side.

    2. Spread half of the dough again with the remaining sour cream and add the diced ham and grated cheese on top. Fold the uncoated half of the dough over it.

    3. Now cut the puff pastry into strips. Carefully twist in a spiral and place on a baking tray lined with baking paper. Bake at 190° for about 20 minutes.

    4. Another variant: These sticks also taste very good if you use smoked salmon instead of ham. For this you need approx. 200 g.