Category: cake

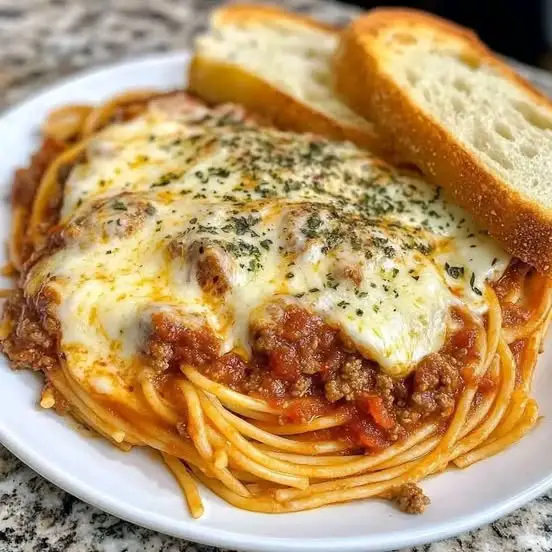
  • Cheesy Baked Spaghetti with Alfredo & Meat Sauce

    Cheesy Baked Spaghetti with Alfredo & Meat Sauce

    Yield: 6–8 servings
    Prep Time: 25 minutes
    Cook Time: 25 minutes
    Total Time: ~50 minutes


    Ingredients

    For the Alfredo Spaghetti:

    • 12 oz spaghetti, cooked al dente

    • 1½ cups heavy cream

    • 1 stick (½ cup) unsalted butter

    • 1 cup grated parmesan cheese

    • ½ teaspoon garlic powder

    • Salt and pepper, to taste

    For the Meat Sauce:

    • 1 lb ground beef or Italian sausage

    • ½ onion, finely diced

    • 2 garlic cloves, minced

    • 1½ cups marinara or pasta sauce

    • 1 tablespoon tomato paste

    • 1 teaspoon Italian seasoning

    • Salt, pepper, and a pinch of sugar (to balance acidity)

    Cheese Topping:

    • 1½ cups shredded mozzarella cheese

    • Optional: A handful of cheddar or provolone for cheese blend

    • Dried parsley or fresh basil for garnish

    For Garlic Bread (Side):

    • 1 French baguette or Texas toast slices

    • ¼ cup butter, softened

    • ½ teaspoon garlic powder

    • ½ teaspoon dried parsley

    • Optional: shredded mozzarella or parmesan for cheesy garlic bread


    Instructions

    1. Cook Pasta & Make Alfredo

    1. Cook spaghetti in salted water until al dente, drain, and set aside.

    2. In a large saucepan, melt butter over medium heat. Add heavy cream and garlic powder; simmer gently for 2–3 minutes (do not boil).

    3. Stir in parmesan, whisking until smooth and creamy. Add salt and pepper to taste.

    4. Toss the cooked spaghetti in the Alfredo sauce until well coated.

    2. Prepare the Meat Sauce

    1. In a skillet over medium-high heat, cook ground beef or sausage until browned. Drain excess fat if needed.

    2. Add onion and garlic; sauté for 2–3 minutes until soft and fragrant.

    3. Stir in tomato paste, then add marinara sauce, Italian seasoning, salt, pepper, and a pinch of sugar.

    4. Simmer for 10–15 minutes until thickened and rich.

    3. Assemble & Bake

    1. Preheat oven to 375°F (190°C).

    2. In a greased 9×13-inch baking dish, layer:

      • Half of the Alfredo spaghetti

      • All of the meat sauce

      • The remaining spaghetti

    3. Top generously with shredded mozzarella (and any extra cheese blend, if using).

    4. Bake for 20–25 minutes, until cheese is melted and bubbling.

    5. For a golden crust, broil on high for 2–3 minutes — watch closely!

    4. Make the Garlic Bread

    1. Preheat oven to 400°F (or use broiler).

    2. Mix softened butter, garlic powder, and parsley in a bowl.

    3. Spread onto sliced bread or toast. Add cheese if using.

    4. Bake for 8–10 minutes or broil for 2–3 minutes until golden and crispy.


    ✨ Final Touches

    • Garnish pasta bake with dried parsley or fresh basil.

    • Serve hot alongside garlic bread and maybe a crisp salad.


    Leftovers & Reheating

    • Store: Refrigerate in an airtight container for up to 4 days.

    • Reheat: In oven at 350°F or microwave with a splash of cream to rehydrate.

    • Freeze: Yes! Assemble and freeze before baking for up to 2 months. Thaw overnight and bake as directed.


    Optional Upgrades

    • Add spinach or mushrooms to the meat sauce for veggies.

    • Use penne or rotini instead of spaghetti for easier layering.

    • Stir in a bit of ricotta or cream cheese to the Alfredo for extra richness.


    Why This Slaps:

    • Double sauces = double flavor (creamy + meaty = ultimate comfort)

    • The crispy golden cheese top + garlic bread = pure satisfaction

    • Feeds a crowd, wows a date, or guarantees family silence at dinner
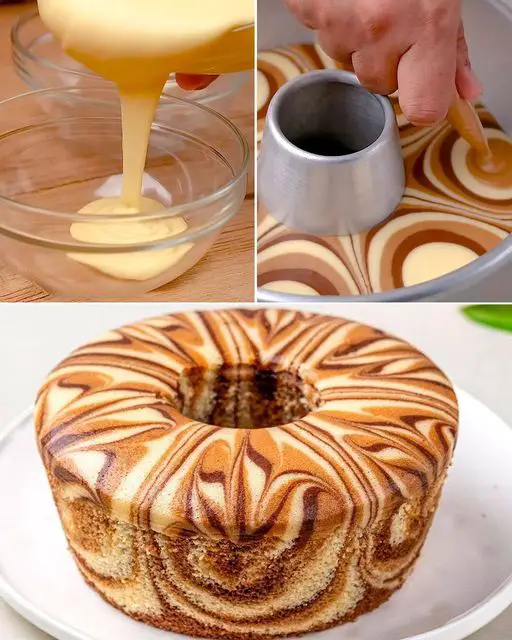
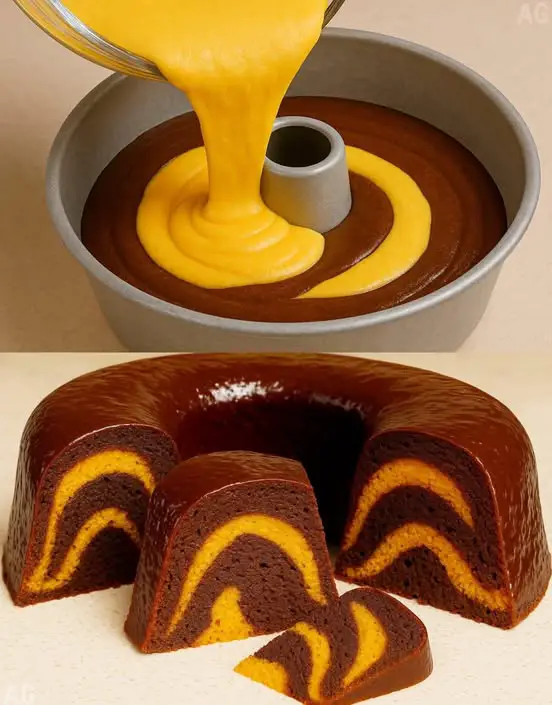
  • Marble Zebra Chiffon Cake

    Marble Zebra Chiffon Cake

    A stunningly patterned chiffon cake that’s as light as air and irresistibly soft, with delicate chocolate and vanilla layers swirling through every slice.


    ️ Yield: 1 tube pan (10-inch / 25 cm)

    ⏱️ Prep Time: 30 minutes

    ⏱️ Baking Time: 50–60 minutes

    Oven Temperature: 325°F (160°C)


    Ingredients

    Egg Yolk Batter (Base)

    • 6 large egg yolks (room temperature)

    • 80 g (6 tbsp) granulated sugar

    • 80 ml (1/3 cup) vegetable oil (neutral-flavored like canola or sunflower)

    • 100 ml (scant 1/2 cup) milk (room temperature)

    • 1 tsp vanilla extract

    • 130 g (1 cup) cake flour, sifted

    • 1 tsp baking powder

    • 1/4 tsp salt

    Egg White Meringue

    • 6 large egg whites (cold)

    • 1/2 tsp cream of tartar (or 1 tsp lemon juice)

    • 100 g (1/2 cup) granulated sugar

    Cocoa Batter

    • 2 tbsp unsweetened cocoa powder

    • 1 tbsp hot water (to dissolve cocoa)


    Instructions

    Step 1: Prepare the Pan

    • Use an un-greased chiffon tube pan (10-inch). Do not grease the pan—this helps the cake rise properly and cling to the sides.


    Step 2: Make the Egg Yolk Batter

    1. In a large bowl, whisk the egg yolks and 80 g sugar until pale and slightly thickened.

    2. Add oil, milk, and vanilla extract. Whisk until fully combined.

    3. Sift in cake flour, baking powder, and salt.

    4. Mix until smooth and lump-free, but don’t overmix.


    Step 3: Prepare the Cocoa Mixture

    • In a small bowl, mix 2 tbsp cocoa powder with 1 tbsp hot water until smooth.

    • Divide the egg yolk batter into two equal parts.

    • Stir the cocoa mixture into one half to make the chocolate batter, leaving the other half vanilla.


    Step 4: Make the Meringue

    1. In a clean, grease-free bowl, beat egg whites until frothy.

    2. Add cream of tartar and continue beating until soft peaks form.

    3. Gradually add 100 g sugar while beating.

    4. Beat until stiff peaks form—glossy and holds shape when lifted.


    Step 5: Fold Meringue Into Batters

    • Divide the meringue evenly between the vanilla and cocoa batters.

    • Gently fold in using a spatula in 3 additions, being careful not to deflate the mixture.


    Step 6: Create the Zebra Pattern

    1. In the center of your ungreased chiffon pan, spoon 2 tablespoons of vanilla batter.

    2. On top of that, spoon 2 tablespoons of chocolate batter.

    3. Continue alternating batters, always placing the new scoop directly in the center of the previous one. It will spread outward naturally to form the zebra pattern.

    4. Gently tap the pan once or twice to release air bubbles.


    Step 7: Bake

    • Bake in a preheated oven at 325°F (160°C) for 50–60 minutes.

    • The top should be golden and spring back to the touch. A skewer inserted should come out clean.


    Step 8: Cool Upside Down

    • Immediately invert the cake pan upside down using a bottle or pan’s feet to elevate.

    • Let the cake cool completely (about 1 hour) before removing.


    Step 9: Release the Cake

    • Use a thin knife or offset spatula to gently loosen the sides.

    • Remove the center tube, then run the knife along the bottom to release.


    Tips for Success

    • Room Temp Yolks, Cold Whites: Helps create a stable meringue and smooth yolk batter.

    • Do Not Grease Pan: Essential for chiffon cakes to rise.

    • Use Cake Flour: For a tender, airy crumb.

    • Sift Dry Ingredients: Prevents lumps and ensures a uniform batter.

    • Zebra Pouring: Keep spooning the batter into the center to maintain the zebra ripple effect.


    Optional Glaze (For Extra Flair)

    • 1/2 cup powdered sugar

    • 2–3 tsp milk

    • 1/2 tsp vanilla or coffee extract
      Whisk and drizzle over cooled cake.


    Storage

    • Store at room temperature for 2–3 days in an airtight container.

    • Refrigerate up to 5 days, but allow to come to room temp before serving.

    • Can be frozen for up to 1 month.

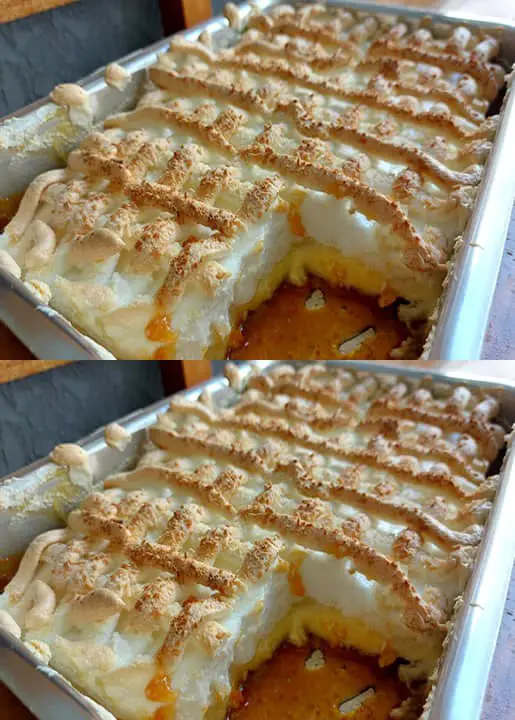
  • Chico Balanceado (Brazilian Layered Custard and Meringue Dessert)

    Chico Balanceado (Brazilian Layered Custard and Meringue Dessert)

    Chico Balanceado (Brazilian Layered Custard and Meringue Dessert)

    Also known regionally as “boneco de botas” or “Manezinho Araújo”

    What Is Chico Balanceado?

    Chico Balanceado is a nostalgic Brazilian dessert featuring three main layers:

    1. A luscious vanilla egg custard made from milk and cornstarch.

    2. A golden caramel syrup that lines the base of the dish.

    3. A fluffy meringue topping, baked until golden.

    This dessert is light yet satisfying, with a beautiful contrast of textures: smooth custard, sticky caramel, and airy meringue. Best served chilled for a refreshing treat.


    Ingredients

    For the Custard Cream:

    • 1.5 liters (6 ⅓ cups) whole milk

    • 5 large egg yolks (reserve the whites for the meringue)

    • 6 tablespoons sugar

    • 6 tablespoons cornstarch (e.g., Maizena)

    • 3 teaspoons pure vanilla extract or essence

    For the Caramel:

    • 1½ cups (300g) granulated sugar

    • 1 cup (240ml) water

    For the Meringue Topping:

    • 5 large egg whites

    • 6 tablespoons sugar


    Instructions

    Step 1: Make the Caramel Base

    1. In a heavy-bottomed saucepan or directly in a baking dish (metal or glass), add 1½ cups of sugar.

    2. Heat over medium, stirring occasionally, until the sugar melts and turns into a deep amber caramel.

    3. Carefully add 1 cup of water (stand back—it may bubble vigorously).

    4. Continue cooking until the caramel dissolves into a syrupy consistency, about 5–8 minutes.

    5. Pour or leave the caramel in the baking dish, tilting to coat the bottom evenly. Set aside to cool and firm slightly.


    Step 2: Make the Vanilla Custard

    1. In a large bowl, separate the eggs, placing the whites in a clean mixing bowl and the yolks in a medium saucepan.

    2. Sift or strain the egg yolks to remove the membrane (this reduces eggy flavor).

    3. To the yolks, add:

      • 1.5 liters of milk

      • 6 tablespoons sugar

      • 6 tablespoons cornstarch

      • 3 teaspoons vanilla

    4. Mix well until smooth and lump-free.

    5. Cook over medium heat, stirring constantly with a whisk or wooden spoon.

    6. Continue cooking until the mixture thickens to a pudding-like consistency (about 10–15 minutes).

    7. Pour the hot custard over the cooled caramel in the baking dish and smooth the top. Set aside while you prepare the meringue.


    Step 3: Prepare the Meringue

    1. In a clean, dry mixing bowl, beat the 5 egg whites with an electric mixer on medium-high speed until soft peaks form.

    2. Gradually add the 6 tablespoons sugar, one tablespoon at a time, beating until stiff, glossy peaks form.

    3. Spread the meringue evenly over the custard layer. Use a spatula or spoon to make decorative swirls, if desired.


    Step 4: Bake the Dessert

    1. Preheat the oven to 180ºC (350ºF).

    2. Bake the assembled dessert for 25–30 minutes, or until the meringue is firm and lightly golden.

    3. Remove from the oven and let it cool to room temperature.

    4. Chill in the refrigerator for at least 4 hours (overnight is best) to allow the layers to set and meld.


    ️ Serving Suggestions

    • Serve chilled directly from the dish.

    • Spoon carefully to get all three layers in each serving: caramel, custard, and meringue.

    • For an elegant presentation, serve in glass dessert cups.


    Tips and Variations

    • No-Waste Tip: Use the leftover eggshells to enrich your garden soil!

    • Flavor Boost: Add a strip of lemon or orange zest to the custard as it cooks for a citrusy twist.

    • Extra Smooth Custard: Strain the hot custard before pouring it over the caramel for a silkier finish.

    • Individual Servings: Prepare the dessert in ramekins or small glass cups for personal portions.


    ️ Storage

    • Store covered in the refrigerator for up to 3–4 days.

    • Not suitable for freezing, as meringue can lose its texture when thawed.


    ❤️ Why You’ll Love It

    Chico Balanceado is:

    • Creamy, comforting, and light

    • Made with pantry staples

    • A piece of Brazilian culinary heritage

    • Beautifully layered and crowd-pleasing


    Enjoy this time-honored treat and bring a taste of Brazilian tradition to your table. If your grandmother used to make this dessert, now you can too—with the same love, flavor, and simplicity.

  • 3-Ingredient Creamy Yogurt Cake

    3-Ingredient Creamy Yogurt Cake

    Prep Time: 10 minutes
    Bake Time: 35–50 minutes
    Chill Time: 1–2 hours
    Total Time: About 2.5 hours (with chilling)
    Yield: 6–8 slices
    Skill Level: Beginner

    Soft, velvety, and lightly tangy, this cake melts in your mouth and is made with just a few ingredients—no butter, flour, or complicated steps required.


    Ingredients:

    • 400 g (14 oz) sweetened or flavored yogurt (vanilla or fruit flavors work great)

    • 4 large eggs

    • 40 g (about 1/3 cup) cornstarch, sifted
      (Do not substitute with flour—it will change the texture.)

    Note: If using unsweetened yogurt, consider adding 2–3 tablespoons of a sweetener such as honey, stevia, or sugar to taste.


    Step-by-Step Instructions


    Step 1: Prepare the Batter

    1. Combine Yogurt and Eggs:
      In a large mixing bowl, whisk together the 400 g of yogurt and 4 eggs.
      Use a hand whisk or electric mixer until the mixture is smooth, well blended, and slightly frothy.

    2. Add Cornstarch:
      Sift 40 g of cornstarch over the bowl to prevent clumping.
      Gently fold or whisk it in until the mixture is silky and lump-free.


    Step 2: Prepare the Pan

    1. Preheat the Oven:
      Set your oven to 170°C (340°F).

    2. Line the Pan:
      Use a 18–20 cm (7–8 inch) springform pan.

      • Lightly moisten the inside with water (this helps the paper stick).

      • Line with parchment paper, allowing some overhang for easy removal.


    Step 3: Bake the Cake

    1. Pour the Batter:
      Gently pour the mixture into the lined pan.
      Tap the pan lightly on the counter to release any air bubbles.

    2. Bake:
      Place in the preheated oven and bake for 35–50 minutes, or until:

      • The top is lightly golden

      • The center is set but still slightly jiggly

      • A toothpick inserted comes out mostly clean

    Tip: Ovens vary—begin checking at 35 minutes, and loosely tent with foil if it browns too quickly.


    Step 4: Cool and Chill

    1. Cool in Pan:
      Remove from oven and let it rest in the pan for 10 minutes.

    2. Unmold Carefully:
      Use the parchment paper overhang to lift the cake out gently.
      Transfer to a wire rack and allow it to cool completely to room temperature.

    3. Refrigerate:
      Once cooled, refrigerate for 1 to 2 hours before serving.
      This helps the texture set, becoming creamy and easy to slice.


    Serving Suggestions

    • Top It Off:

      • Fresh berries

      • A dusting of powdered sweetener

      • A drizzle of honey or fruit syrup

      • A dollop of whipped cream or Greek yogurt

    • Serve Cold:
      This cake is best enjoyed chilled, which enhances its creamy texture and light flavor.


    Tips & Variations

    • Flavor Boosts:
      Add a splash of vanilla extract, lemon zest, or a pinch of cinnamon to the batter.

    • Fresh Fruit Add-Ins:
      Fold in chopped berries, diced mango, or thinly sliced apples for texture and natural sweetness.

    • Storage:
      Store in the fridge in an airtight container for 3–4 days.

    • Freezing:
      Slice and freeze individual pieces. Wrap well and thaw in the fridge overnight before enjoying.


    Why You’ll Love This Cake

    • Effortless Elegance: Looks and tastes gourmet with almost no prep.

    • Healthier Dessert: No butter, no flour, and low in sugar if using sweetened yogurt.

    • Crowd-Pleaser: Light, not overly sweet, and perfect for adults and kids alike.


    Final Thoughts

    This 3-ingredient yogurt cake is a beautiful example of how simplicity can result in extraordinary flavor and texture. Whether you serve it as a light dessert, an afternoon treat, or a no-fuss birthday cake, it’s sure to impress.

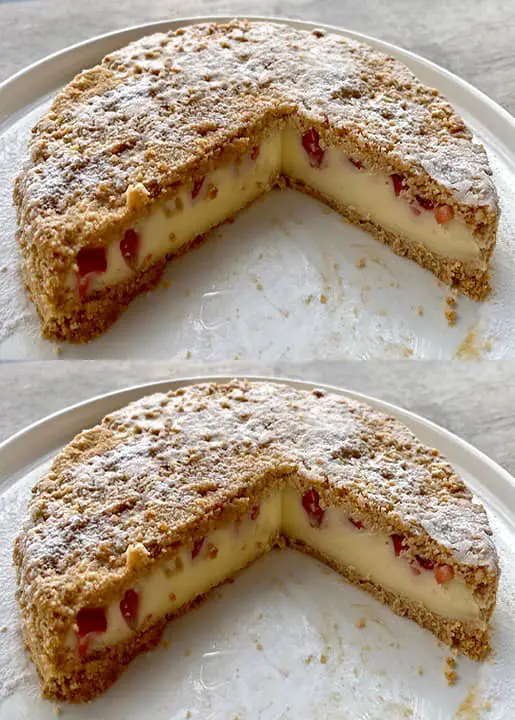
  • No oven and no flour! A quick and delicious dessert, ready in 10 minutes!

    No oven and no flour! A quick and delicious dessert, ready in 10 minutes!

    Make a creamy and refreshing fruit pie, without an oven and in no time.

    Have you ever found yourself in the situation of wanting to prepare a delicious dessert, but ending up going to the bakery due to lack of ideas?

    It’s time to take a break from classic recipes and try something new.

    How about learning how to make an easy dessert that will impress everyone?

    This no-bake fruit tart is the perfect choice for when you have last-minute guests or are short on time.

    There is no need to beat the filling, and the ingredients are usually items you already have at home.

    You can customize with the fruits of your choice; in this recipe, we used strawberries.

    Fruit pie

    Learn how to make a quick fruit pie that doesn’t require an oven, is ready in no time, and is extremely creamy and refreshing.

    Ingredients:

      • 300 g milk biscuits or ground cornstarch
      • 130 g melted butter
      • 500 ml of milk
    • 1 tablespoon (ha) of vanilla sugar
    • 1 egg yolk
    • 4 tablespoons of sugar
    • 4 tablespoons of cornstarch (maizena)
    • 1 tablespoon of butter at room temperature
    • Chopped strawberries to taste (you can also use cherries or raspberries)

    Preparation method:

    Mix the crushed biscuits with the melted butter until you get a uniform mixture.

    Note: Crush the cookies in a blender or food processor until you get a flour.

    Place half of the cookie mixture in a round pan, preferably with a removable bottom.

    Press this down with the bottom of a glass to compact and form an even crust.

    Moisten the top of the crust with 2 to 3 tablespoons of milk.

    Tip: If you don’t have a springform pan, line the bottom and sides of a baking sheet with parchment paper. This will make it easier to unmold.

    Prepare the filling:

    In a saucepan, combine the vanilla sugar, egg yolk, sugar, cornstarch and milk (500 ml). Mix well.

    Cook over low heat, stirring constantly, until it thickens and takes on a firm creamy consistency.

    At the end of cooking, add a spoonful of room temperature butter and mix well.

    Pie assembly:

    Pour the filling (cream) over the crust in the pan, add the chopped strawberries and spread the remaining biscuit mixture on top of the fruit.

    Drizzle 4 tablespoons of milk evenly over the cookie layer.

    Leave the pie in the fridge for about an hour to set.

    If desired, garnish with powdered sugar before serving.


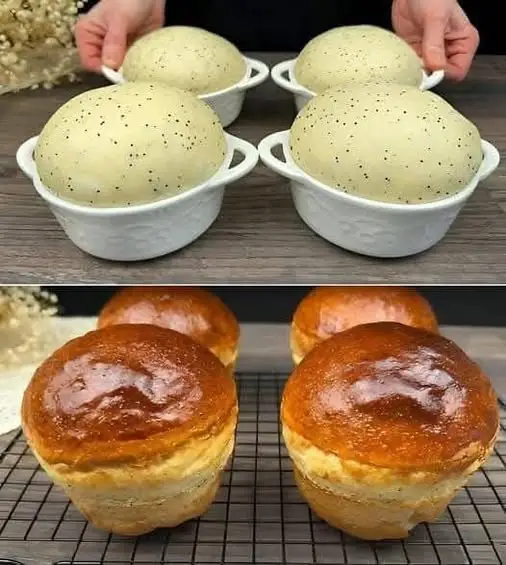
  • Mix milk with vinegar! Forgotten recipe from the 70s! This is how my grandmother used to make it

    Mix milk with vinegar! Forgotten recipe from the 70s! This is how my grandmother used to make it

    Making homemade bread is an art, but how about giving your traditional recipe a special touch?

    Mixing warm milk with vinegar is the secret to bread with an incredibly soft texture and a flavor that will delight everyone at the table.

    Surprisingly, the vinegar helps activate the yeast, creating a fluffy, airy crumb, while the milk adds smoothness to the dough.

    Follow the step-by-step instructions for this unique recipe and prepare perfect breads for any occasion.

    Ingredients

      • 250 ml warm milk
      • 1 tablespoon of red wine vinegar (You can use another vinegar, but red wine vinegar will give the bread a very special touch)
      • 25 g fresh yeast
      • 1 teaspoon vanilla sugar
      • 1 egg white
      • 80 ml vegetable oil
      • 1 teaspoon salt
    • Wheat flour (quantity required, as described in the preparation)

      Preparation Method

      1. Activate the Yeast

      1. In a small bowl, mix the warm milk with the wine vinegar.
      2. Add the fresh yeast and vanilla sugar. Stir gently and let sit for 10 minutes, until the mixture bubbles, a sign that the yeast is activated.

      2. Mix the Dry and Wet Ingredients

      1. In a large bowl, mix the flour (start with about 500g and adjust as needed) with the salt.
      2. Make a well in the center and pour in the milk, vinegar and yeast mixture.

      3. Incorporate the Liquids

      1. Add the egg white and vegetable oil to the bowl.
      2. Mix with a wooden spoon or with your hands until a homogeneous dough forms.
      3. If the dough is too sticky, add flour little by little until it reaches the desired consistency: soft and slightly sticky.

      4. Knead the Dough

      1. Transfer the dough to a lightly floured surface.
      2. Knead for 8-10 minutes, until smooth, elastic and a little sticky.

      5. Let it rest

        1. Place the dough in a lightly floured bowl.
      1. Cover with a clean, damp cloth and let rest in a warm place for about 1 hour, until doubled in size.

      6. Form the Loaves

      1. After the dough has risen, divide it into portions of the desired size.
      2. Shape the bread into balls or small cylinders and place them on a floured baking sheet.

      7. Let It Rest Again

      1. Cover the formed loaves with a cloth and let them rest for another 20-30 minutes.
      2. They should rise a little more before going into the oven.

      8. Bake

      1. Preheat the oven to 180°C.
      2. Bake the buns for 20-25 minutes, until golden brown on top.
      3. Tap the bottom of the loaves lightly; if they sound hollow, they are ready.

      9. Let it cool

      1. Remove the breads from the oven and place them on a rack to cool.
      2. Serve when warm or completely cool.

        Tips for Recipe Success

          • Flour at the right point: Add the flour little by little, always adjusting the texture of the dough.
        • Warm place to rise: If the environment is cold, place the dough inside the turned off oven with a bowl of hot water to create a favorable environment.
        • Even softer breads: You can brush the breads with milk before baking to ensure a softer, golden crust.
        • Adaptations: Try substituting lemon juice for the wine vinegar for a flavor variation.


  • 6-Inch Moist Vanilla Cake

    6-Inch Moist Vanilla Cake

    A soft, buttery, and perfectly moist single-layer cake scaled down for smaller servings—but full of rich vanilla flavour.

    Perfect for intimate celebrations, a cozy afternoon tea, or just a quiet indulgence.


    Recipe Overview

    • Yield: One 6-inch round cake (serves 4–6)

    • Prep Time: 15 minutes

    • Bake Time: 25–30 minutes

    • Total Time: ~45 minutes


    Ingredients

    Wet Ingredients:

    • ½ cup (113g) unsalted butter, softened

    • ½ cup (100g) granulated sugar

    • 1 large egg, room temperature

    • 1 tsp pure vanilla extract

    • ¼ cup (60g) full-fat sour cream (or plain full-fat Greek yogurt)

    Dry Ingredients:

    • ⅔ cup (80g) all-purpose flour

    • ½ tsp baking powder

    • ¼ tsp baking soda

    • ⅛ tsp fine salt

    Optional:

    • 1–2 tbsp milk (only if batter is too thick)

    • Vanilla buttercream or whipped cream, for topping


    Instructions

    1. Preheat and Prep

    • Preheat oven to 350°F (175°C).

    • Grease a 6-inch round cake pan with butter or non-stick spray.

    • Line the bottom with parchment paper for easy removal.


    2. Cream Butter and Sugar

    • In a medium bowl, beat ½ cup softened butter and ½ cup sugar using a hand or stand mixer on medium speed for 3–5 minutes, until the mixture is light, pale, and fluffy.

    This step incorporates air for better rise—don’t skip or rush it!


    3. Add Egg and Vanilla

    • Beat in 1 large egg and 1 tsp vanilla extract.

    • Mix until smooth and slightly thickened, about 30–60 seconds. Scrape the sides of the bowl as needed.


    4. Add Sour Cream

    • Add ¼ cup sour cream and beat until fully incorporated.

    Don’t worry if the batter looks a little curdled—that’s normal at this stage.


    5. Mix Dry Ingredients Separately

    In a small bowl, whisk together:

    • ⅔ cup flour

    • ½ tsp baking powder

    • ¼ tsp baking soda

    • ⅛ tsp salt


    6. Combine Wet and Dry

    • Gradually add dry ingredients to the wet mixture in two additions.

    • Fold gently with a spatula or mix on low speed just until no flour streaks remain.

    • If the batter feels overly thick (it should be scoopable, not pourable), add 1 tbsp milk and gently stir.


    7. Transfer and Bake

    • Spoon the batter into the prepared pan.

    • Smooth the top with a spatula or spoon.

    • Bake for 25–30 minutes, or until:

      • The top is golden and domed, and

      • A toothpick inserted in the center comes out clean or with a few moist crumbs.


    8. Cool

    • Let cake cool in the pan for 10–15 minutes.

    • Run a knife around the edge, then turn the cake out onto a wire rack to cool completely before frosting or slicing.


    Optional Small-Batch Vanilla Buttercream

    Ingredients:

    • ½ cup (1 stick) unsalted butter, softened

    • 1 cup powdered sugar, sifted

    • ½ tsp vanilla extract

    • Pinch of salt

    • 1–2 tbsp milk or cream

    Instructions:

    1. Beat butter on medium-high speed until smooth and creamy (about 2 minutes).

    2. Add powdered sugar in two additions, mixing on low until combined.

    3. Add vanilla, salt, and 1 tbsp milk. Beat on high for 1–2 minutes until light and fluffy.

    4. Add more milk if needed for a softer consistency.


    Tips for Success

    • Room Temp Ingredients: Ensure butter, egg, and sour cream are at room temperature for best texture.

    • Don’t Overmix: Once flour is added, mix only until combined to avoid a tough crumb.

    • For a Flatter Top: Bake at 325°F for slightly longer to prevent doming (ideal for frosting).


    Make-Ahead & Storage

    • Make Ahead: Bake the cake a day early and wrap tightly once cooled. Store at room temp.

    • Room Temp Storage: Keep frosted or unfrosted cake covered for up to 2–3 days.

    • Freezing: Wrap cooled cake in plastic wrap and foil. Freeze up to 2 months. Thaw at room temperature.


    Variations & Add-ins

    Flavour:

    • Add ½ tsp almond extract for a wedding cake vibe.

    • Add zest of 1 lemon or orange for a citrus twist.

    Texture:

    • Fold in ¼ cup mini chocolate chips or chopped berries.

    • Swirl in 1 tbsp jam or Nutella before baking.

    Dietary:

    • Gluten-Free: Use a 1:1 GF flour blend.

    • Dairy-Free: Substitute vegan butter and plant-based yogurt.


    Final Note

    This petite vanilla cake packs all the flavour and tenderness of a full-sized classic cake—without the leftovers! Enjoy it plain, with berries and cream, or frosted for a perfect little celebration.

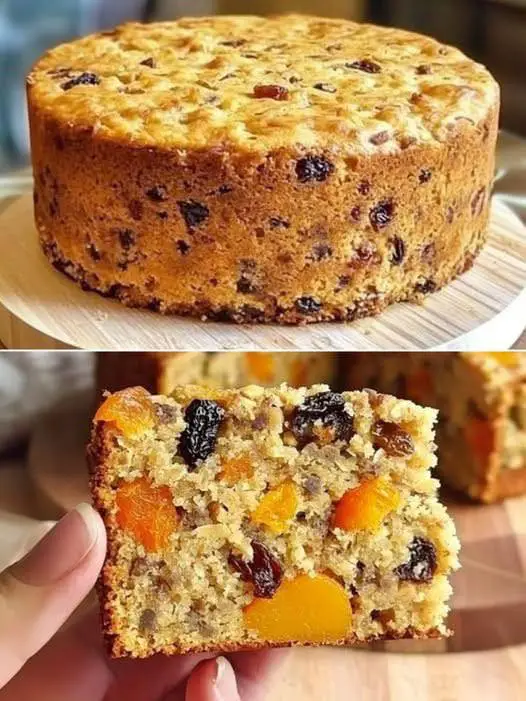
  • Oatmeal Apple-Carrot Breakfast Bake (No Sugar, No Flour)

    Oatmeal Apple-Carrot Breakfast Bake (No Sugar, No Flour)

    Gluten-free | No refined sugar | No flour | Naturally sweet

    ✅ Ingredients:

    • 2 cups (200 g) rolled oats, blended slightly into coarse flour

    • 1 tsp baking powder

    • 1 cup (240 ml) milk of your choice (dairy or plant-based)

    • 1 medium carrot, finely grated

    • 1 medium apple, grated (with skin for more fiber)

    • 9 dried apricots, rinsed in hot water and finely chopped

    • 4 tbsp raisins, rinsed in hot water

    • Optional: 1 tsp cinnamon or ½ tsp ground ginger for flavor

    • Optional: pinch of salt and 1 tsp vanilla extract


    Instructions:

    1. Preheat the oven to 350°F (175°C). Lightly grease a small baking dish (around 8×8 inch / 20×20 cm) or line with parchment paper.

    2. Prepare the oats: Blend your rolled oats in a blender or food processor for a few seconds until you have a coarse oat flour — not fully powdered, just broken down a bit.

    3. Mix dry ingredients: In a large bowl, combine the blended oats, baking powder, and any optional spices (like cinnamon, ginger, or salt).

    4. Add wet ingredients: Pour in the milk and mix well. Let it sit for 5–10 minutes to soften the oats.

    5. Add fruits and veggies: Fold in the grated carrot, grated apple, chopped apricots, and raisins. If using vanilla extract, add it here.

    6. Mix thoroughly: Stir everything until evenly combined. The batter will be thick and chunky.

    7. Transfer to baking dish: Spread the mixture evenly in your prepared dish. Press down slightly with a spatula to level it out.

    8. Bake for 35–40 minutes, or until the top is golden and the center is set. A toothpick should come out mostly clean.

    9. Cool and serve: Let it cool for at least 10 minutes before slicing. Enjoy warm or at room temperature.


    ️ Serving Ideas:

    • Warm with a dollop of plain yogurt or nut butter

    • Cold as an on-the-go breakfast or snack bar

    • Drizzle with unsweetened almond butter or tahini for extra richness


    Storage:

    • Fridge: Store in an airtight container for up to 5 days.

    • Freezer: Freeze slices for up to 2 months. Reheat in the oven or toaster.

  • Classic French Butter Croissants Recipe

    Classic French Butter Croissants Recipe

    Flaky, buttery, golden perfection — made from scratch at home.


    Ingredients

    Dough (Détrempe)

    • 500g all-purpose flour (preferably unbleached)

    • 60g sugar

    • 10g salt (about 1 ½ tsp)

    • 10g instant dry yeast (or 25g fresh yeast)

    • 300ml cold whole milk

    • 40g unsalted butter (softened)

    Butter for Lamination

    • 250g cold unsalted European-style butter (82% fat), shaped into a flat square block

    Egg Wash

    • 1 egg

    • 1 tbsp milk or cream

    • Pinch of salt


    ‍ Equipment

    • Rolling pin

    • Ruler (optional, for precision)

    • Sharp knife or pizza cutter

    • Baking sheet

    • Parchment paper

    • Plastic wrap or kitchen towel


    ⏳ Total Time

    • Prep: 45 minutes

    • Resting and proofing: 10–12 hours (overnight) + 2 hours

    • Baking: 20 minutes

    • Total: 13–14 hours (including overnight rest)


    Instructions

    Step 1: Make the Dough (Détrempe)

    1. In a mixing bowl or stand mixer, combine flour, sugar, salt, and yeast. (Keep salt and yeast separate at first if mixing by hand.)

    2. Add cold milk and softened 40g butter.

    3. Knead for 5–7 minutes until a smooth, elastic dough forms.

    4. Shape into a square, wrap in plastic, and refrigerate for at least 2 hours (or up to overnight).


    Step 2: Prepare the Butter Block

    1. Place the 250g cold butter between two sheets of parchment or plastic wrap.

    2. Using a rolling pin, pound and roll it into a flat square (about 15×15 cm / 6×6 inches).

    3. Chill until firm but pliable — not rock-hard. Ideally the butter and dough should be at similar temperatures before laminating.


    Step 3: Laminate the Dough

    First Fold (Single Turn)

    1. Roll out the chilled dough into a large square (about 30×30 cm / 12×12 inches).

    2. Place the butter block in the center diagonally (like a diamond shape on a square).

    3. Fold the dough corners over the butter to completely encase it, like an envelope.

    4. Roll the dough into a long rectangle (20×60 cm / 8×24 inches).

    5. Fold it into thirds (like a letter). This is the first turn.

    6. Wrap and chill for 30–45 minutes.

    Second Fold

    1. Rotate the dough 90°, roll it out again to 20×60 cm.

    2. Fold into thirds. This is the second turn.

    3. Chill again for 30–45 minutes.

    Third Fold (Final Turn)

    1. Repeat the rolling and folding one last time.

    2. Wrap and chill the dough for at least 1 hour, preferably overnight for best flavor and texture.


    Step 4: Shape the Croissants

    1. Roll the laminated dough into a large rectangle (approx. 25×60 cm / 10×24 inches) and about 3–4 mm thick.

    2. Use a ruler and sharp knife to cut isosceles triangles: 8–10 cm at the base and 20–25 cm tall.

    3. Gently stretch each triangle, then roll tightly from base to tip.

    4. Place on a parchment-lined baking sheet, tip side down to prevent unrolling.


    Step 5: Proof the Croissants

    1. Cover the tray loosely with plastic wrap or a damp towel.

    2. Let rise in a warm, draft-free place (24–27°C / 75–80°F) for 2 hours, or until doubled in size and puffy.

      • Do not overproof — they should jiggle but not collapse.


    Step 6: Egg Wash & Bake

    1. Preheat oven to 200°C (400°F).

    2. Mix 1 egg + 1 tbsp milk + pinch of salt.

    3. Gently brush croissants with egg wash (avoid drips on the cut edges — this can seal the layers).

    4. Bake for 18–22 minutes, or until deep golden brown and crisp.


    Step 7: Cool and Serve

    1. Let croissants cool on a rack for at least 15 minutes.

    2. Serve warm or room temperature. Best enjoyed fresh, but you can store them in an airtight container for up to 2 days or freeze for up to 1 month.


    Optional Fillings

    Before rolling, you can place:

    • A strip of dark chocolate (for pain au chocolat)

    • A spoonful of pastry cream

    • A slice of ham and cheese for savory croissants


    Tips for Success

    • Keep everything cold — chill between folds to maintain butter layers.

    • Use high-quality butter — it makes a huge difference in flavor and texture.

    • Handle the dough gently to avoid melting the butter.

    • If you notice butter oozing out while rolling, refrigerate immediately.

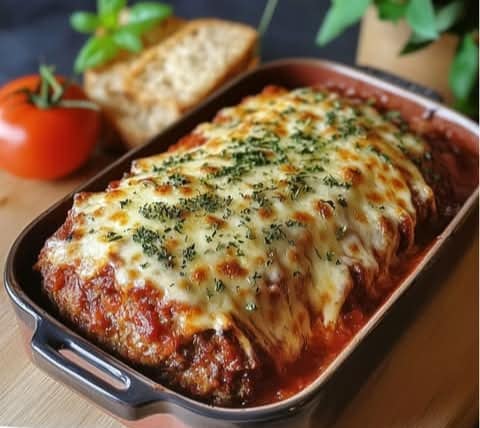
  • ️ Italian Meatloaf with Parmesan Cheese Gratin

    ️ Italian Meatloaf with Parmesan Cheese Gratin

    A hearty, flavor-packed Italian-inspired meatloaf combining ground beef, Italian sausage, and herbs, crowned with bubbling mozzarella and a golden Parmesan crust.


    Ingredients

    Meatloaf Base

    • 500g ground beef – opt for a blend with moderate fat content (around 80/20) for juicy texture.

    • 500g Italian sausage meat – use sweet or spicy depending on your preference; remove casings if using whole sausages.

    • 1 medium onion, finely chopped – sautéed slightly if you prefer milder onion flavor.

    • 2 garlic cloves, minced – fresh garlic adds a punch of flavor.

    • 1 large egg – acts as a binder for the loaf.

    • 50g breadcrumbs – plain or Italian-seasoned; helps hold moisture.

    • 50g grated Parmesan cheese – adds umami and savory depth.

    • 1 tbsp dried oregano – the classic Italian herb.

    • 1 tbsp dried basil – aromatic and sweet.

    • 1 tbsp fresh parsley, chopped – adds a burst of color and freshness.

    • Salt and freshly ground black pepper, to taste

    Topping

    • 400g tomato sauce – homemade marinara or a good-quality jarred sauce.

    • 200g shredded mozzarella cheese – for gooey, melty coverage.

    • Additional grated Parmesan cheese – for that golden gratin finish.

    • Olive oil – to grease the pan and drizzle if desired.


    Instructions

    Step 1: Preheat the Oven

    Preheat your oven to 180°C (350°F). Position a rack in the center of the oven. This ensures even cooking.

    Step 2: Prepare the Meat Mixture

    In a large mixing bowl, combine the following:

    • Ground beef

    • Italian sausage meat

    • Finely chopped onion

    • Minced garlic

    • One beaten egg

    • Breadcrumbs

    • 50g grated Parmesan cheese

    • Oregano

    • Basil

    • Chopped parsley

    • Salt and pepper to taste (start with 1 tsp salt and ½ tsp pepper, adjust as needed)

    Using clean hands or a sturdy spatula, mix everything together thoroughly. You’re aiming for a uniform consistency. Do not overmix — just until everything is well distributed.

    Tip: If the mixture feels too wet, add a bit more breadcrumbs (a tablespoon at a time). If too dry, add a splash of milk.

    Step 3: Shape and Place in Pan

    Grease a loaf pan (about 9×5 inches) or a medium baking dish with a little olive oil.

    Transfer the meat mixture into the pan and shape it into a compact loaf. Gently press down to remove air pockets but avoid compressing it too tightly — this helps it cook evenly.

    Step 4: Add Tomato Sauce

    Pour the 400g of tomato sauce evenly over the top of the loaf. Use a spoon or spatula to spread it to the edges. This keeps the meatloaf moist and infuses it with rich tomato flavor.

    Step 5: Cheese Topping

    Sprinkle the entire surface with shredded mozzarella cheese, creating a generous, even layer.

    Then, dust the top with an extra handful (about 2–3 tbsp) of grated Parmesan cheese. This forms the signature Parmesan cheese gratin — a crispy, golden crown when baked.

    Optional: For extra richness, drizzle a touch of olive oil over the cheese topping.

    Step 6: Bake Covered

    Cover the pan loosely with aluminum foil — this prevents the cheese from burning too early while allowing the loaf to steam and cook through.

    Bake in the preheated oven for 45 minutes.

    Step 7: Bake Uncovered

    After 45 minutes, carefully remove the foil. Continue baking for 15 more minutes, uncovered. This step browns the cheese and allows the gratin to develop its golden crust.

    Check internal temperature with a meat thermometer — it should reach at least 70°C (160°F) for food safety.

    Step 8: Rest and Serve

    Once baked, remove the meatloaf from the oven. Let it rest for 5–10 minutes. This helps the juices redistribute and makes slicing easier.

    Carefully slice into portions and serve hot — ideally with a spoonful of extra tomato sauce on the side, if desired.


    Suggested Serving Ideas

    • Side Dishes: Serve with garlic mashed potatoes, roasted vegetables, or a simple green salad.

    • Pasta Pairing: Excellent over spaghetti or penne for a hearty Italian meal.

    • Bread Option: Try it with warm ciabatta or a slice of focaccia to mop up the sauce.


    Time & Yield

    • Prep Time: 15 minutes

    • Cook Time: 60 minutes

    • Total Time: 1 hour 15 minutes

    • Servings: 6–8 generous slices


    Chef’s Tips

    • Make-Ahead: You can assemble the meatloaf a day in advance and refrigerate it covered. Bring to room temperature before baking.

    • Leftovers: Store in an airtight container in the fridge for up to 4 days. Reheat in the oven or microwave.

    • Freezer-Friendly: Freeze uncooked or cooked meatloaf wrapped tightly in foil. Thaw in the fridge overnight before baking or reheating.


    Wine Pairing

    A rich, meaty dish like this pairs beautifully with a Chianti, Barbera, or Zinfandel — anything with enough acidity to cut through the richness and complement the tomato sauce.

  • German Apple Oatmeal Cookies (No Sugar, Flour or Eggs)

    German Apple Oatmeal Cookies (No Sugar, Flour or Eggs)

    German Apple Oatmeal Cookies (No Sugar, Flour, or Eggs)

    A quick and easy cookie recipe made with just 2 healthy ingredients (plus optional nuts and butter), and absolutely no sugar, flour, or eggs. This traditional German treat is naturally sweet, wholesome, and perfect for any time of day.


    Table of Contents

    1. Introduction

    2. Health Benefits

    3. Ingredients

    4. Step-by-Step Preparation

    5. Tips and Variations

    6. Storage Suggestions

    7. Serving Ideas

    8. Conclusion


    Introduction

    If you’re searching for a healthy, practical, and delicious snack option, these apple oatmeal cookies are just what you need. Made with simple, clean ingredients and baked in minutes, they are ideal for families, health-conscious eaters, or anyone avoiding refined sugar and flour.

    This recipe has deep roots in German home baking and has become a favorite across the world thanks to its simplicity and nutritional value.


    Health Benefits

    • Oats: Rich in fiber, oats help regulate digestion, lower cholesterol, and keep you full longer.

    • Apples: Naturally sweet, full of antioxidants, and supportive of gut health.

    • Optional Walnuts/Chestnuts: Provide healthy fats, protein, and a wonderful nutty flavor.


    Ingredients

    • 1 cup of oats (old-fashioned or quick oats)

    • 2 medium apples (sweet variety preferred, like Fuji or Gala)

    • 50 g of walnuts or chestnuts (optional, adds crunch and flavor)

    • 50 ml of water

    • 1 tablespoon melted butter (optional, for added richness and texture)


    ‍ Preparation Method

    Step 1: Prepare the Oat and Nut Flour

    • Place the oats in a blender or food processor and grind until you get a fine flour.

    • Repeat the process with walnuts or chestnuts (if using).

    • Mix both flours in a medium bowl.

    Step 2: Make the Applesauce

    • Wash and quarter the apples. Remove the seeds and core.

    • Blend the apples with 50 ml of water until smooth and pulpy.

    Step 3: Combine the Dough

    • In the bowl with the oat-nut flour, add the applesauce.

    • Stir thoroughly with a spatula or spoon until the mixture becomes a thick, sticky dough.

    • Add the melted butter and stir again until well incorporated.

    Step 4: Shape and Bake

    • Preheat the oven to 180°C (350°F).

    • Line a baking tray with parchment paper.

    • With damp hands or a spoon, form round cookie shapes about the size of small hamburger patties.

    • Place them evenly spaced on the tray.

    • Bake for 35–40 minutes, or until firm and golden on the outside.


    Tips and Variations

    • For extra flavor: Add 1 tsp cinnamon or ¼ tsp nutmeg to the dough.

    • For texture: Mix in a few whole oats or chopped nuts before baking.

    • Vegan tip: Use coconut oil instead of butter or skip entirely.


    Storage Suggestions

    • Store in an airtight container at room temperature for up to 3 days.

    • Refrigerate for up to 7 days.

    • For longer storage, freeze baked cookies in a sealed bag for up to 2 months. Reheat in the oven for a few minutes before serving.


    ☕ Serving Ideas

    • Enjoy warm with herbal tea or black coffee.

    • Spread with almond butter or Greek yogurt for a more filling snack.

    • Serve to kids as a healthy lunchbox treat or afternoon bite.


    ✅ Conclusion

    With just oats and apples — and the optional bonus of nuts and butter — this German-inspired no-sugar cookie recipe is a game-changer for healthy baking lovers. It’s easy, delicious, naturally sweet, and perfect for those trying to reduce processed ingredients without giving up on flavor.

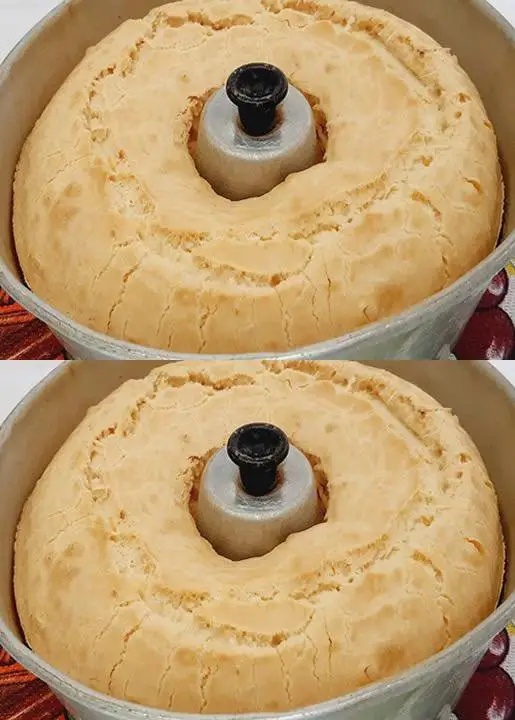
  • Gluten-Free, Sugar-Free Tapioca Cake

    Gluten-Free, Sugar-Free Tapioca Cake

    Wheat-free | Oil-free | Yeast-free | Ready in minutes

    If you’re looking for a light, wholesome snack that fits a clean diet and is free from gluten, sugar, oil, and yeast — this tapioca cake is a fantastic choice. With a crisp crust and a soft, fluffy inside, it’s ideal for those with dietary restrictions or simply anyone craving a healthier bite.


    Why You’ll Love This Cake

    • Ready with just 3 minutes of prep

    • No sugar, flour, oil, or yeast

    • Naturally gluten-free

    • Can be made with or without cheese

    • Great texture: crunchy outside, pillowy inside


    Ingredients

    • 3 eggs

    • 3 tablespoons butter, melted (or margarine)

    • ½ teaspoon salt

    • 3 tablespoons grated Parmesan cheese (optional, but recommended for flavor)

    • 1 cup sour cassava starch (polvilho azedo)

    • 1 cup tapioca flour (tapioca starch)


    Instructions

    1. Prepare the Batter

    In a large bowl, combine:

    • The eggs

    • Melted butter

    Whisk until smooth.

    Then add:

    • Salt

    • Grated Parmesan (if using)

    Stir well to incorporate.

    Add the sour cassava starch and stir until smooth. Finally, add the tapioca flour and mix thoroughly until you have a uniform, slightly thick batter.

    Tip: If your eggs are small and the batter is too thick, add a tablespoon or two of water to loosen it. The final batter should be spreadable but not runny.


    2. Bake

    • Preheat your oven to 180°C (350°F).

    • Grease a small loaf pan, round cake pan, or baking dish with butter or margarine.

    • Dust lightly with tapioca flour to prevent sticking.

    Pour in the batter and smooth out the top.

    Bake for 40–45 minutes, or until the top is golden and a toothpick inserted in the center comes out clean.


    3. Cool & Serve

    Let the cake cool slightly before unmolding. Slice and enjoy warm or at room temperature.


    Serving Suggestions

    • Pair with coffee, tea, or a smoothie for a satisfying snack.

    • Serve alongside soups or stews as a gluten-free bread alternative.

    • Add herbs or spices like oregano, paprika, or garlic powder to the batter for extra flavor.


    Notes & Variations

    • Butter Substitute: Use coconut oil or dairy-free margarine for a lactose-free version.

    • Dairy-Free: Skip the Parmesan or replace with a plant-based grated cheese.

    • Extra Flavor: Add chopped herbs, sun-dried tomatoes, or olives for a savory twist.


    Storage

    • Room temperature: Store in an airtight container for up to 2 days.

    • Fridge: Keeps well for 4–5 days.

    • To reheat: Toast lightly or warm in the oven for 5 minutes to revive the crispy crust.


    This tapioca cake is proof that wholesome can still be wonderfully delicious — no sugar, no gluten, no nonsense. Enjoy it as a quick snack, healthy side, or guilt-free indulgence!

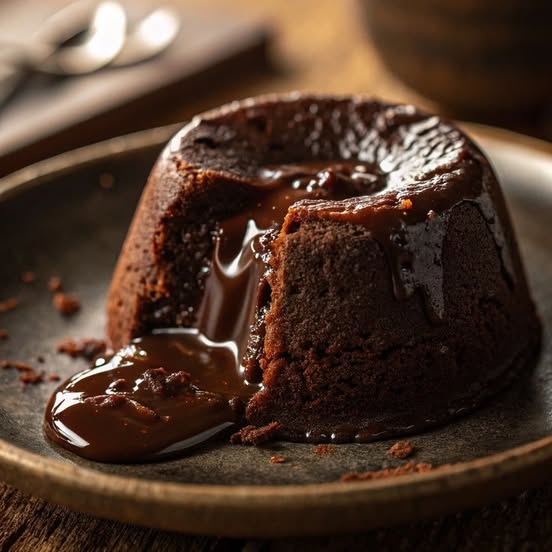
  • Quick and Easy Chocolate Lava Cake

    Quick and Easy Chocolate Lava Cake

    Rich, decadent, and irresistibly gooey in the center, these chocolate lava cakes come together in under 30 minutes. They’re the ultimate make-it-and-serve-it-hot dessert — perfect for date nights, dinner parties, or when that sudden chocolate craving strikes.


    Ingredients (Serves 6):

    • ½ cup (113g / 3.9 oz) unsalted butter, cut into small pieces

    • 6 oz (168g) bittersweet chocolate, finely chopped

    • 2 large eggs, at room temperature

    • 2 large egg yolks, at room temperature

    • ¼ cup (50g / 1.7 oz) granulated sugar

    • ⅛ tsp salt

    • 2 tbsp all-purpose flour, sifted

    • Butter and flour, for greasing ramekins

    • Optional toppings: Powdered sugar, raspberries, whipped cream, or ice cream


    Step-by-Step Instructions:

    1. Preheat and Prepare

    • Preheat your oven to 450°F (232°C).

    • Generously butter and flour six 4- to 5-ounce ramekins. Tap out the excess flour and set them aside on a baking sheet for easy transfer.

    2. Melt the Chocolate and Butter

    • Fill a medium saucepan with about 1½ inches of water and bring it to a simmer over medium heat.

    • Place a heatproof bowl over the pan (don’t let it touch the water). Add:

      • 6 oz chopped bittersweet chocolate

      • ½ cup unsalted butter

    • Let the mixture melt gently, stirring occasionally until smooth.

      • Alternative Method: Microwave in 30-second intervals, stirring between each, until melted.

    • Once melted, remove from heat and let it cool slightly so it doesn’t scramble the eggs.

    3. Whip Eggs and Sugar

    • In a large mixing bowl, combine:

      • 2 large eggs

      • 2 egg yolks

      • ¼ cup granulated sugar

      • ⅛ tsp salt

    • Using a hand mixer or stand mixer, beat on low to medium speed for 2–3 minutes until the mixture becomes thicker and pale yellow.

    4. Combine and Fold

    • Slowly pour the cooled chocolate mixture into the whipped eggs while mixing gently to avoid deflating the mixture.

    • Add 2 tbsp sifted flour, and fold gently until the batter is fully combined and smooth — no streaks!

    5. Fill and Bake

    • Divide the batter evenly between the prepared ramekins (they should be about ¾ full).

    • Place the ramekins on a baking sheet and bake in the preheated oven for 6 to 8 minutes:

      • The edges should look set, but the centers should still be soft and jiggly.

      • Do not overbake, or the centers will firm up and lose their signature molten texture.

    6. Unmold and Serve

    • Remove the ramekins from the oven and let them rest for 1 minute.

    • Carefully run a knife around the edges to loosen.

    • Place a dessert plate on top of each ramekin, then invert quickly and lift off the ramekin.


    Serving Suggestions:

    • Dust with powdered sugar

    • Garnish with fresh raspberries or strawberries

    • Add a scoop of vanilla ice cream or a swirl of whipped cream

    • Drizzle with chocolate sauce or raspberry coulis


    ✅ Tips for Success:

    • Use quality chocolate: The better the chocolate, the better the flavor. Go for 60–70% cacao bittersweet chocolate.

    • Don’t skip greasing the ramekins: It ensures easy unmolding.

    • Bake just before serving: These cakes are best enjoyed hot, right after baking.

    • Room temperature eggs mix more easily into the batter for a smoother texture.


    Make-Ahead Tip:

    You can prep the batter, pour it into ramekins, and refrigerate for a few hours. When ready to bake, let them sit at room temperature for about 20–30 minutes, then bake as directed.


    These lava cakes are pure chocolate magic — fudgy on the outside, with a luxurious molten center that oozes out with the first spoonful. Enjoy!

  • Marbled Carrot Cake

    Marbled Carrot Cake

    Yield: 1 Bundt Cake | Prep Time: 20 minutes | Cook Time: 45 minutes | Total Time: ~1 hour 15 minutes

    A soft, moist marbled cake that swirls sweet carrot flavor with rich cocoa and chocolate. This stunning dessert is topped with a glossy semisweet chocolate glaze and is perfect for brunches, birthdays, or any time you want to impress with something just a little different.


    Ingredients

    For the Cake:

    • 3 medium carrots, peeled and chopped

    • 4 eggs

    • 1½ cups granulated sugar

    • ⅓ cup vegetable oil (about 80 ml)

    • 2 tablespoons unsalted butter, melted (28 g)

    • 2 cups all-purpose flour

    • 1 tablespoon baking powder

    • 2 pinches salt

    • ½ cup unsweetened cocoa powder (preferably 50% cocoa)

    • 5 tablespoons water (75 ml)

    • 1 tablespoon honey or corn syrup

    • 100 g (3.5 oz) semisweet chocolate, finely chopped

    • Additional butter and flour for greasing the pan

    For the Chocolate Glaze:

    • 2 tablespoons unsalted butter (28 g)

    • 1 tablespoon honey or corn syrup

    • 100 g (3.5 oz) semisweet chocolate, chopped


    ‍ Instructions

    1. Prepare the Carrot Mixture

    • In a blender, combine the chopped carrots, eggs, vegetable oil, melted butter, and sugar.

    • Blend until completely smooth and creamy. Set aside.

    2. Make the Chocolate Mixture

    • In a small bowl, mix the cocoa powder with warm water. Stir well until the cocoa is fully dissolved. Set aside.

    3. Finish the Cake Batter

    • Transfer the blended carrot mixture to a large mixing bowl.

    • Sift in the all-purpose flour and add the salt. Mix until well combined.

    • Gently fold in the baking powder, being careful not to overmix.

    4. Divide and Marble the Batter

    • Divide the batter evenly between two bowls.

    • To one bowl, add the cocoa-water mixture and stir until fully incorporated to form the chocolate batter.

    • You now have one carrot batter and one chocolate batter.

    5. Assemble the Cake

    • Grease and flour a glass Bundt pan thoroughly.

    • Pour alternating layers of the batters into the pan:

      • Start with a layer of chocolate batter

      • Then a layer of carrot batter

      • Repeat until all batter is used, finishing with chocolate on top

    • Use a skewer or knife to lightly swirl the batters (optional) for a marbled effect.

    6. Bake

    • Preheat the oven to 356°F (180°C).

    • Bake the cake for 45 minutes, or until a toothpick inserted into the center comes out clean.

    • Let the cake cool in the pan for 15 minutes, then invert onto a wire rack and cool completely.


    Make the Chocolate Glaze

    • In a small saucepan, melt the butter and honey over medium heat.

    • Once melted, remove from heat and add the chopped chocolate.

    • Stir continuously until smooth and glossy. Let cool slightly before using.


    Finish and Serve

    • Pour the warm chocolate glaze evenly over the cooled cake.

    • Let the glaze set for 10–15 minutes before slicing.

    • Optional: garnish with grated chocolate, chopped nuts, or a dusting of powdered sugar.


    Tips & Variations

    • Make ahead: The cake keeps well for up to 3 days at room temperature or 5 days refrigerated.

    • For added crunch: Stir ½ cup chopped walnuts or pecans into the carrot batter.

    • Gluten-free option: Substitute a 1:1 gluten-free flour blend for the all-purpose flour.

    • Dairy-free tip: Use dairy-free butter and chocolate for a lactose-free version.


    This marbled carrot cake combines beauty with flavor—moist and tender with just enough richness from the chocolate. Let me know if you’d like a cream cheese glaze, loaf version, or even cupcake adaptation!

  • Instant Pot Beef Stew

    Instant Pot Beef Stew

    Rich. Hearty. Fall-apart tender in under an hour.
    This pressure-cooked classic is full of fork-tender beef, perfectly cooked vegetables, and a savory broth layered with herbs and deep umami flavor. It’s everything you love about beef stew—without the wait.


    Ingredients

    Meat & Oil

    • 2 lbs beef stew meat (chuck or round), cut into 1½-inch cubes

    • 2 tbsp olive oil

    Vegetables

    • 1 large yellow onion, diced

    • 3 cloves garlic, minced

    • 4 medium carrots, sliced into 1-inch rounds

    • 4 medium Yukon Gold or red potatoes, diced

    • 2 celery stalks, chopped

    • 1 cup frozen peas (optional, added at the end)

    Liquids & Base

    • 4 cups beef broth

    • 1 cup water

    • 2 tbsp tomato paste

    • 1 tbsp Worcestershire sauce

    Seasonings

    • 1 tsp salt (plus more to taste)

    • ½ tsp black pepper

    • ½ tsp dried thyme

    • ½ tsp dried rosemary

    • 2 bay leaves


    Instructions

    1. Prepare the Beef

    Pat the stew meat dry with paper towels. This removes excess moisture and helps develop a good sear. Season lightly with salt and pepper.

    2. Sear the Beef (Sauté Mode)

    Set the Instant Pot to Sauté mode. Once it reads “Hot”, add 2 tablespoons olive oil.
    Sear the beef in batches, avoiding overcrowding. Brown each side for 3–4 minutes until a deep crust forms. Transfer browned beef to a plate and set aside.

    Why sear? Browning the beef enhances the flavor through caramelization, creating that classic slow-simmered taste.

    3. Sauté the Aromatics

    In the same pot, add the diced onion. Sauté for 3–5 minutes until softened and golden. Add the minced garlic, stir for 30–60 seconds, just until fragrant.

    4. Deglaze

    Pour in ¼ cup of the beef broth, scraping up the browned bits from the bottom of the pot with a wooden spoon. These are flavor-packed and essential for a rich broth.

    5. Add Remaining Ingredients

    Return the beef (and juices) to the pot. Stir in:

    • Remaining 3¾ cups of beef broth

    • 1 cup water

    • 2 tbsp tomato paste

    • 1 tbsp Worcestershire sauce

    • Salt, pepper, thyme, rosemary, and bay leaves

    6. Layer the Vegetables

    Place the carrots, potatoes, and celery on top of the beef. Do not stir.

    Why layer? This keeps the vegetables from overcooking, allowing them to gently steam under pressure.


    Pressure Cook the Stew

    1. Secure the lid. Set the valve to Sealing.

    2. Select Pressure Cook (or Manual) and set to 35 minutes on High Pressure.

    3. When finished, let the pressure release naturally for 10 minutes, then carefully Quick Release the rest.

    35 minutes + 10 min release = fork-tender beef + intact vegetables.


    7. Finish with Peas (Optional)

    If using, turn on Sauté mode and stir in 1 cup frozen peas. Cook for 2–3 minutes until bright green and warmed through.

    8. Final Touches

    • Discard the bay leaves.

    • Taste and adjust salt and pepper to preference.

    • Add an extra splash of Worcestershire sauce for depth, if desired.


    Serving Suggestions

    • Crusty bread or garlic toast

    • Buttered egg noodles

    • Creamy mashed potatoes

    • Side salad for freshness


    Storage & Reheating

    • Refrigerate: Up to 4 days in an airtight container

    • Freeze: Up to 3 months (leave out potatoes for best texture)

    • Reheat: In microwave or stovetop with a splash of broth


    Nutrition (Est. per serving, 6 servings)

    • Calories: ~420

    • Protein: ~35g

    • Fat: ~20g

    • Carbs: ~25g

    • Fiber: ~3g


    Tips for Success

    • Use well-marbled beef chuck for best flavor and tenderness.

    • To thicken broth post-cooking, create a slurry: mix 1 tbsp cornstarch with 2 tbsp water, stir into stew while on Sauté, and simmer until thickened.

    • For added umami, stir in 1 tsp soy sauce or 1 tsp Dijon mustard at the end.


    ❤️ Why You’ll Love It

    ✔ Done in under an hour
    ✔ Incredible depth of flavor
    ✔ Budget-friendly ingredients
    ✔ Freezer-friendly
    ✔ Customizable (mushrooms, parsnips, red wine—go wild)