Category: cake

  • Don’t Let Your Tomatoes Go to Waste: Turn Them into Flavorful Tomato Powder!

    Don’t Let Your Tomatoes Go to Waste: Turn Them into Flavorful Tomato Powder!

    Don’t Let Your Tomatoes Go to Waste: Turn Them into Flavorful Tomato Powder!

    Tomatoes are a kitchen staple, but the excess supply can sometimes pose a challenge for both farmers and consumers. The surplus often results in significant post-harvest losses, leaving farmers with a conundrum and consumers missing out on their favorite tomato dishes. However, there’s a solution that can benefit both parties: transforming excess tomatoes into versatile tomato powder. In this article, we will explore why making tomato powder is a sustainable solution and how to creatively use this ingredient in your culinary endeavors.

    The Problem: Tomato Surpluses and Post-Harvest Losses

    Farmers often find themselves grappling with an oversupply of tomatoes, leading to substantial post-harvest losses. This surplus results in a significant portion of the fruit going to waste in fields or markets. The root of the problem lies in the limited knowledge regarding tomato preservation and value addition.

    The consequences are clear: farmers lose more than half of their total tomato production, which affects their livelihoods and disrupts the global food supply chain. Addressing this issue is pivotal for the sustainable and efficient utilization of resources.

    The Solution: Transforming Tomatoes into Powder

    One innovative solution to this problem is the transformation of surplus tomatoes into tomato powder. This process not only helps prevent wastage but also adds value to the produce. Here’s how you can make tomato powder:

    Step 1: Select the Best Tomatoes

    Start with ripe, high-quality tomatoes. While you can use any variety, Roma tomatoes are often preferred due to their meatiness and lower water content.

    Step 2: Wash and Slice the Tomatoes

    Thoroughly wash the tomatoes, remove any stems, and slice them into thin, uniform pieces. This will help speed up the drying process.

    Step 3: Dehydrate the Slices

    You can use a food dehydrator, an oven, or even the sun to dry the tomato slices. The key is to remove as much moisture as possible. The lower the moisture content, the longer the powder will last in storage.

    Step 4: Grind into Powder

    Once the tomato slices are completely dehydrated, use a grinder or blender to pulverize them into a fine powder. You now have your homemade tomato powder.

    How to Use Tomato Powder

    Tomato powder is a versatile ingredient that can elevate your culinary creations. Here are some practical ways to incorporate it into your cooking:

    Sauces and Soups: To make a quick tomato sauce or soup, simply mix tomato powder with hot water to achieve the desired consistency and flavor.
    Seasoning and Rubs: Add tomato powder to spice blends and rubs for meats, poultry, and vegetables. It imparts a rich tomato flavor that enhances your dishes.
    Baking: Enhance the flavor of bread, rolls, and pastries by adding tomato powder to the dough or batter.
    Salad Dressings: Create a unique twist on salad dressings by including a pinch of tomato powder for an extra layer of flavor.
    Instant Tomato Soup: For a speedy and flavorful tomato soup, rehydrate tomato powder with hot water. It’s perfect for a quick meal.
    Dips and Spreads: Mix tomato powder with dairy or plant-based alternatives to create delicious and unique dips and spreads.
    Marinades: Combine tomato powder with other spices to craft flavorful marinades for meats, tofu, or vegetables.
    Snacks: Sprinkle tomato powder on popcorn, chips, or roasted nuts to make savory snacks.
    Conclusion

    By transforming excess tomatoes into tomato powder, we can address the issue of tomato surplus, reduce post-harvest losses, minimize food waste, and enjoy the rich taste of tomatoes year-round. With a shelf life of more than a year, tomato powder is a valuable addition to your pantry. So, the next time you find yourself with surplus tomatoes, consider making tomato powder and unlock a world of culinary possibilities.

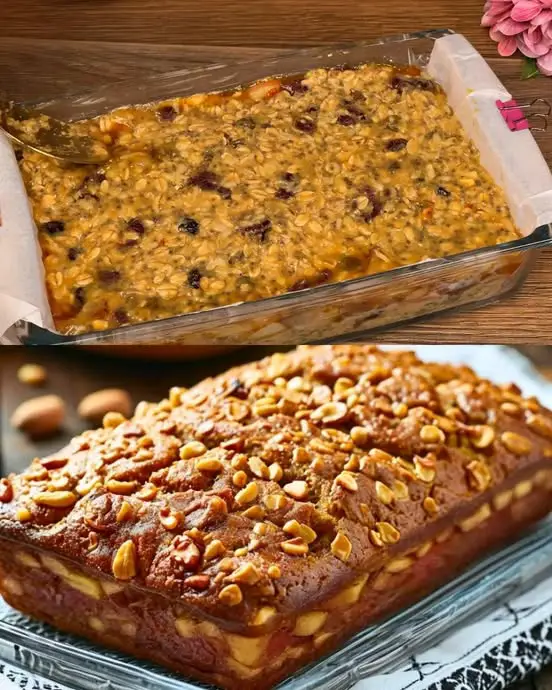
  • Healthy Chocolate Banana Oat Cake (No Added Sugar)

    Healthy Chocolate Banana Oat Cake (No Added Sugar)

    Healthy Chocolate Banana Oat Cake (No Added Sugar)

    Discover the perfect balance of indulgence and nutrition with this naturally sweetened chocolate banana cake. Made with wholesome ingredients like oats, cocoa, and bananas, this dessert proves that healthy can be heavenly. Perfect for health-conscious dessert lovers, diabetics, or anyone looking to reduce their sugar intake without sacrificing taste.

    Ingredients

    For the Cake

    • 120g (1½ cups) rolled oats
    • 250ml (1 cup) hot milk
    • 2 medium ripe bananas (approximately 200g/7oz)
    • 2 large eggs
    • 30g (⅓ cup) unsweetened cocoa powder
    • 5g (1 teaspoon) baking powder
    • Pinch of salt
    • Optional: 50g (⅓ cup) mixed dried fruits (sultanas, chopped apricots, or prunes)
    • Optional: 30g (¼ cup) chopped nuts for topping

    For the Chocolate Glaze

    • 50g (1.8oz) dark chocolate
    • 25ml (1.7 tablespoons) milk

    Instructions

    Preparing the Cake Batter

    1. Preheat your oven to 180°C (350°F). Line a 20cm (8-inch) square baking pan with parchment paper.
    2. Pour hot milk over the oats in a large bowl and let sit for 10 minutes until oats are softened.
    3. Mash the bananas thoroughly until smooth.
    4. Add mashed bananas and eggs to the soaked oats, mix well.
    5. In a separate bowl, combine cocoa powder, baking powder, and salt.
    6. Fold the dry ingredients into the wet mixture until well combined.
    7. If using, stir in dried fruits.
    8. Pour the batter into the prepared pan and smooth the top.
    9. Sprinkle with chopped nuts if desired.

    Baking

    1. Bake for 35-40 minutes, or until a toothpick inserted into the center comes out clean.
    2. Let cool in the pan for 10 minutes before transferring to a wire rack.

    Making the Chocolate Glaze

    1. Chop chocolate into small pieces.
    2. Heat milk until just before boiling.
    3. Pour hot milk over chocolate and stir until smooth.
    4. Pour over cooled cake and spread evenly.
    5. Let glaze set before serving.

    Nutritional Information

    Per serving (1/9 of cake):

    • Calories: 185
    • Protein: 6g
    • Carbohydrates: 28g
    • Fiber: 4g
    • Natural Sugars: 12g
    • Fat: 7g

    Prep Time: 15 minutes
    Cook Time: 35-40 minutes
    Total Time: 55 minutes
    Servings: 9 pieces

    Cooking Tips and Tricks

    • Use very ripe bananas for maximum natural sweetness
    • Let oats soak thoroughly for better texture
    • Don’t overbake to keep the cake moist
    • Cool completely before glazing
    • Use room temperature eggs for better mixing

    Variations and Substitutions

    • Replace milk with almond or oat milk for dairy-free version
    • Add cinnamon or vanilla extract for extra flavor
    • Use different nuts like walnuts, pecans, or almonds
    • Try adding orange zest for citrus twist
    • Substitute dark chocolate with sugar-free chocolate

    Common FAQs

    Can I make this gluten-free?

    Yes, use certified gluten-free oats and baking powder.

    How ripe should the bananas be?

    Very ripe bananas with brown spots are best for natural sweetness.

    Can I freeze this cake?

    Yes, freeze unglazed cake for up to 3 months, wrapped well.

    Why did my cake turn out dry?

    Either overbaking or not enough banana. Make sure to use ripe bananas and check doneness early.

    Storage and Make-Ahead Tips

    • Store at room temperature for up to 3 days in an airtight container
    • Refrigerate for up to a week
    • Freeze unglazed cake for up to 3 months
    • Thaw overnight in refrigerator
    • Warm slightly before serving for best texture

    This wholesome dessert is perfect for breakfast, afternoon tea, or a guilt-free dessert. The natural sweetness from bananas combined with rich cocoa creates a satisfying treat that’s both nutritious and delicious.

    1f447

  • Ginger Citrus Immunity Elixir

    Ginger Citrus Immunity Elixir

    Ginger Citrus Immunity Elixiron Ginger Citrus Immunity Elixir

    Ingredients

    1 teaspoon turmeric powder (or fresh turmeric root, grated)
    1-2 inches of fresh ginger root, peeled and grated
    Juice of 1 lemon (or lime for a milder taste)
    1 tablespoon honey (or maple syrup for a vegan alternative)
    1/4 teaspoon black pepper (to enhance turmeric absorption)
    1 cup warm water (not boiling)
    Optional: a pinch of cayenne pepper for an extra kick

    Instructions

    Start by grating the fresh ginger and turmeric into a small bowl or cup.
    Add warm water to the bowl, allowing the flavors to steep for about 5 minutes.
    Stir in the fresh lemon juice, honey, and black pepper until the honey dissolves completely.
    For an added zing, sprinkle a pinch of cayenne pepper.
    Strain the mixture into a glass if you prefer a smoother drink, or enjoy it as is for a little extra ginger.
    Serving Tips:
    You can drink it warm for a comforting, soothing effect or refrigerate it for a cool and refreshing treat.
    This elixir can also be made in larger batches to enjoy throughout the week.
    Enjoy.

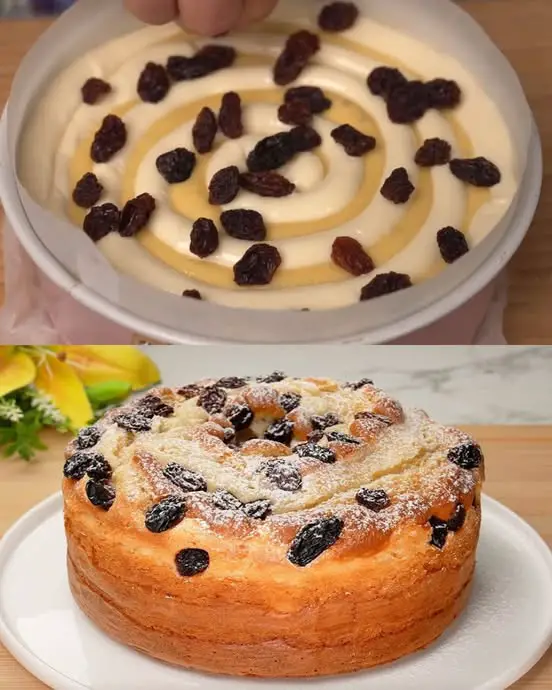
  • Traditional Christmas Spiral Bread with Fruits and Nut

    Traditional Christmas Spiral Bread with Fruits and Nut

    Traditional Christmas Spiral Bread with Fruits and Nut

    Ingredients

    For the Dough

    • 200ml lukewarm milk (¾ cup + 1 tablespoon)
    • 50g sugar (4 tablespoons)
    • 7g active dry yeast (1 tablespoon)
    • 2 large eggs, room temperature
    • 4g salt (1 teaspoon)
    • 550g all-purpose flour (4½ cups)
    • 85g unsalted butter, softened (6 tablespoons)
    • Zest of 1 lemon

    For the Filling

    • 30g golden raisins (2 tablespoons)
    • 30g brown raisins (2 tablespoons)
    • 75g chopped walnuts (6 tablespoons)
    • 25g sugar (2 tablespoons)

    For the Egg Wash

    • 1 egg yolk
    • 15ml milk (1 tablespoon)

    Instructions

    1. Begin with Yeast Activation:
    • Combine lukewarm milk, 1 tablespoon sugar, and yeast in a bowl
    • Let the mixture rest for 5-10 minutes until foamy and fragrant
    1. Create the Dough Base:
    • In a large mixing bowl, whisk together remaining sugar, eggs, and salt
    • Pour in the activated yeast mixture
    • Gradually incorporate flour while mixing
    • Add softened butter and lemon zest
    • Knead for 8-10 minutes until you achieve a smooth, elastic dough
    1. First Rise:
    • Place dough in a greased bowl
    • Cover with a clean kitchen towel
    • Allow to rise in a warm spot for 1 hour or until doubled
    1. Shape with Precision:
    • Roll dough into a large rectangle (approximately 24×16 inches)
    • Distribute sugar, both types of raisins, and walnuts evenly
    • Roll tightly from the long side, similar to a Swiss roll
    1. Create the Signature Spiral:
    • Position a small bowl in the center of a 9-inch round baking dish
    • Carefully coil the rolled dough around the bowl, starting from the outer edge
    • Gently remove the bowl when finished
    1. Second Rise and Preparation:
    • Cover and let rise for 30-40 minutes
    • Preheat oven to 175°C (350°F)
    • Mix egg yolk with milk for the egg wash
    • Brush the bread surface gently with egg wash
    1. Baking to Perfection:
    • Bake for 30-35 minutes until achieving a rich golden brown
    • If browning too quickly, cover with foil
    • Test doneness with a skewer or thermometer (internal temperature should reach 190°F/88°C)

    Professional Tips for Success

    • Room temperature ingredients are crucial for optimal dough development
    • The dough should feel soft and supple but not stick to your hands
    • Soak raisins in warm water for 10 minutes before use for maximum plumpness
    • Allow complete cooling before slicing to maintain structure

    Storage and Serving

    • Store in an airtight container at room temperature for up to 3 days
    • Best served slightly warm
    • Can be reheated briefly in a low-temperature oven
    • Freezes well for up to 1 month when wrapped properly

    Nutritional Information (per serving, makes 12 servings)

    • Calories: 320
    • Protein: 8g
    • Carbohydrates: 48g
    • Fat: 12g
    • Fiber: 2g
  • 5-Minute Healthy Christmas Brownies (Sugar-Free & Flour-Free)

    5-Minute Healthy Christmas Brownies (Sugar-Free & Flour-Free)

    5-Minute Healthy Christmas Brownies (Sugar-Free & Flour-Free)

    Ingredients

    For the Base

    • 150g old-fashioned oats (1½ cups), ground into flour
    • 35g stevia powder (¼ cup)
    • 1 teaspoon baking powder
    • ¼ teaspoon salt
    • 300ml milk (1¼ cups)
    • 65g natural peanut butter (⅓ cup)
    • 1 teaspoon vanilla extract

    For the Chocolate Marble

    • 1 tablespoon unsweetened cocoa powder
    • 60ml milk (¼ cup)
    • 85g sugar-free chocolate chips (½ cup)

    Instructions

    1. Begin by preheating your oven to 175°C (350°F). Prepare an 8×8 inch (20x20cm) baking dish by greasing it thoroughly.
    2. Transform your oats into flour by processing them in a blender or food processor until you achieve a fine, powdery consistency.
    3. In a spacious mixing bowl, combine your freshly ground oat flour with stevia powder, baking powder, and salt. Whisk these dry ingredients together to ensure even distribution.
    4. Pour in the milk (1¼ cups), followed by the natural peanut butter and vanilla extract. Mix thoroughly until you achieve a smooth, consistent batter.
    5. Transfer approximately three-quarters of your batter into the prepared baking dish, spreading it evenly.
    6. Create the chocolate marble mixture by combining the remaining batter with cocoa powder and the additional ¼ cup of milk. Stir until well incorporated.
    7. Pour this chocolate mixture over the base batter in a decorative swirling pattern.
    8. Using a knife or skewer, create artistic marble effects by gently swirling the two batters together.
    9. Finish by sprinkling sugar-free chocolate chips evenly across the top.
    10. Bake for 20-25 minutes, or until a toothpick test comes out clean.
    11. Allow to cool for at least 10 minutes before cutting into squares.

    Nutrition Information (per serving, makes 16 squares)

    • Calories: 115
    • Protein: 4g
    • Total Carbohydrates: 15g
    • Dietary Fiber: 2g
    • Net Carbs: 13g
    • Fat: 5g
    • Sugar: 0g

    Storage and Serving Tips

    • Keep fresh in an airtight container in the refrigerator for up to 5 days
    • Can be frozen for up to 3 months
    • Best served slightly warm
    • Delicious paired with sugar-free whipped cream or a glass of almond milk
    • Perfect for holiday gatherings or as a thoughtful homemade gift

    Recipe Notes and Variations

    • For gluten-free brownies, ensure you use certified gluten-free oats
    • The sweetness can be adjusted by modifying the amount of stevia
    • Try different nut butters like almond or cashew for variety
    • Add a pinch of cinnamon or nutmeg for festive flavor
    • The texture should be fudgy and moist when properly baked

    These brownies prove that holiday treats can be both nutritious and delicious. Perfect for anyone following a sugar-conscious diet or simply looking to make healthier choices during the festive season without sacrificing taste or texture.

  • Irresistible Apple Cheese Pastries: A Homemade Delight

    Irresistible Apple Cheese Pastries: A Homemade Delight

    Irresistible Apple Cheese Pastries: A Homemade Delight

    The Heartwarming Story Behind Apple Cheese Pastries

    There’s something magical about a pastry that combines the comfort of homemade baking with the perfect balance of sweet and tangy flavors. These Apple Cheese Pastries are more than just a dessert—they’re a culinary embrace that brings together the creamy richness of cottage cheese and the warm, spiced essence of caramelized apples.

    Inspired by traditional home baking, this recipe transforms simple ingredients into little pockets of pure joy. Each pastry is a testament to the art of creating something extraordinary from everyday components, promising to fill your kitchen with the most inviting aroma and your heart with warmth.

    Ingredients

    For the Pastry Dough

    • Cottage Cheese: 200g (3/4 cup)
    • Egg: 1 large
    • Granulated Sugar: 2 tablespoons
    • Salt: 1 pinch
    • Vegetable Oil: 50ml (1/4 cup)
    • All-Purpose Flour: 200g (1 2/3 cups)
    • Baking Powder: 1 teaspoon

    For the Apple Filling

    • Apples: 3 medium (about 400g / 14 oz)
    • Butter: 20g (1.5 tablespoons)
    • Ground Cinnamon: To taste (about 1 teaspoon)
    • Cornstarch: 1 tablespoon
    • Milk: 2 tablespoons (for brushing)

    For Finishing

    • Butter: For brushing
    • Granulated Sugar: 2 tablespoons
    • Ground Cinnamon: To taste

    Step-by-Step Cooking Instructions

    Preparing the Pastry Dough

    1. Create the Cheese Dough
      • In a large mixing bowl, combine cottage cheese
      • Add egg
      • Mix in sugar and salt
      • Pour in vegetable oil
      • Whisk until smooth and well combined
      • Sift flour and baking powder together
      • Gradually fold dry ingredients into wet mixture
      • Mix until a soft dough forms
      • Place dough in a sealed bag or wrap in plastic
      • Let rest at room temperature for 20 minutes

    Preparing the Apple Filling

    1. Cook the Apple Filling
      • Peel and chop apples into small, uniform pieces
      • Melt butter in a skillet over medium heat
      • Add chopped apples to the pan
      • Sprinkle with cinnamon
      • Dust with cornstarch
      • Cook for 3-4 minutes, stirring occasionally
      • Apples should be slightly softened but not mushy
      • Remove from heat
      • Let filling cool completely
    2. Shape the Pastries
      • Preheat oven to 180°C (350°F)
      • Line a baking sheet with parchment paper
      • Divide dough into 10 equal pieces
      • Roll each piece into a thin oval (about 0.5 cm thick)
      • Place a spoonful of cooled apple filling in the center of each
      • Fold edges over to create a sealed pocket
      • Pinch edges to ensure filling doesn’t leak
    3. Bake to Golden Perfection
      • Arrange pastries on prepared baking sheet
      • Brush each pastry with milk
      • Bake for 15-20 minutes
      • Look for golden-brown color
      • Pastries should be puffy and crisp
    4. Finish and Serve
      • Remove from oven
      • Brush warm pastries with melted butter
      • Sprinkle with sugar and cinnamon
      • Let cool on a wire rack
      • Serve warm or at room temperature

    Nutritional Information

    Serving Size: 1 pastry

    • Calories: 180-220
    • Protein: 5-6g
    • Carbohydrates: 25-30g
    • Fat: 8-10g
    • Fiber: 2-3g
    • Calcium: 4-5% of daily value

    Preparation Time: 30 minutes Resting Time: 20 minutes Cooking Time: 15-20 minutes Total Time: Approximately 1 hour Servings: 10 pastries

    Pro Cooking Tips and Tricks

    • Dough Texture: Let dough rest to improve elasticity
    • Apple Selection: Use firm, slightly tart apples like Granny Smith
    • Filling Tip: Cool filling prevents soggy pastry
    • Sealing Technique: Use a fork to crimp edges
    • Even Baking: Rotate baking sheet halfway through cooking

    Recipe Variations and Substitutions

    • Gluten-Free Option: Use gluten-free flour blend
    • Dairy-Free Variation: Replace cottage cheese with plant-based alternative
    • Fruit Alternatives: Try pears, peaches, or mixed berries
    • Spice It Up: Add nutmeg or cardamom to the filling
    • Nut Upgrade: Sprinkle chopped nuts on top before baking

    Frequently Asked Questions

    Q1: Can I make these pastries ahead of time? A: Yes! Prepare and refrigerate unbaked, then bake just before serving.

    Q2: How do I store leftover pastries? A: Store in an airtight container at room temperature for 2-3 days.

    Q3: Can I freeze these pastries? A: Freeze unbaked pastries for up to 1 month. Bake directly from frozen.

    Q4: My dough is too sticky. What should I do? A: Add a little more flour, one tablespoon at a time.

    Q5: Can I use a different type of cheese? A: Ricotta or cream cheese can work as substitutes.

    Storage and Make-Ahead Tips

    • Room Temperature: Store for 2-3 days
    • Refrigeration: Keep in airtight container
    • Freezing: Freeze unbaked for up to 1 month
    • Reheating: Warm in oven at 160°C (320°F) for 5-7 minutes
    • Prep Ahead: Make filling and dough in advance
  • Deliciously Healthy Apple Muffins: A Guilt-Free Treat

    Deliciously Healthy Apple Muffins: A Guilt-Free Treat

    Deliciously Healthy Apple Muffins: A Guilt-Free Treat

    Ingredients

    Dry Ingredients:

    • 1 1/4 cups oat flour (150g)
    • 2 tsp baking powder (8g)
    • 1 tsp cinnamon powder (2.5g)
    • 1/4 tsp salt (1.5g)

    Wet Ingredients:

    • 1/2 cup applesauce (120ml)
    • 1/4 cup honey (60ml)
    • 1/4 cup milk, room temperature (60ml)
    • 1 tsp vanilla extract (5ml)
    • 1 large egg, room temperature
    • 1 Golden apple, peeled and diced

    Crumble:

    • 1/2 cup oat flour (60g)
    • 3 tbsp melted coconut oil, or any oil or melted butter (45ml)
    • 2 tbsp unrefined brown sugar (25g)

    Nutrition Information

    • Serving Size: 1 muffin
    • Number of Servings: 10 muffins
    • Calories: 160
    • Total Fat: 7g
    • Saturated Fat: 4g
    • Cholesterol: 20mg
    • Sodium: 160mg
    • Total Carbohydrates: 22g
    • Dietary Fiber: 2g
    • Sugars: 12g
    • Protein: 3g

    Instructions

    Preheat the Oven

    1. Preheat the oven to 400ºF (200ºC), with no fan. Line a muffin tin with 10 muffin liners.

    Dry Ingredients

    1. Mix the dry ingredients: In a bowl, combine oat flour, cinnamon powder, baking powder, and salt. Mix very well using a spoon, and set aside.

    Wet Ingredients

    1. Combine the wet ingredients: In another larger bowl, whisk together applesauce, honey, milk, vanilla extract, and egg until well combined.
    2. Incorporate the dry ingredients: Pour the dry ingredients into the wet ingredients and whisk until there are no lumps. Fold the diced apple into the batter using a spatula. Set aside.

    Crumble Topping

    1. Prepare the crumble: In a small bowl, mix oat flour, coconut oil, and brown sugar using a fork.
    2. Divide the batter: Using an ice cream scoop, divide the batter evenly into the 10 muffin liners. Sprinkle the crumble on top.

    Baking in the Oven

    1. Bake in the oven: Place the muffin tin on the middle rack and bake for 18-20 minutes, or until a skewer inserted in the center comes out clean. Enjoy!

    Baking in the Air-Fryer

    1. Prepare the air-fryer: Use silicon muffin casings or any sturdy casings to ensure the muffins hold their shape. Preheat the air-fryer to 320ºF (160ºC) for 5 minutes.
    2. Bake in the air-fryer: Place the muffins into the air-fryer basket and bake for 13 minutes, or until a skewer inserted in the center comes out clean.
    3. Cool the muffins: Let the muffins sit for 1-2 minutes before carefully removing them onto a rack. Continue baking the rest if needed. Let the muffins cool for 10 minutes before removing them from the silicon casings, and then cool completely. Enjoy!

    Notes

    • Use the spoon and level method for cup measurements to ensure accuracy.
    • Measure oat flour after grinding if you are making your own.
    • Use a portable oven thermometer for accurate oven temperature. It ensures consistency in baking.
    • Cooking time may vary slightly depending on the size of your air-fryer basket and the type of muffin casings used. Always check for doneness with a skewer.

    Conclusion

    These Deliciously Healthy Apple Muffins are a wonderful treat that you can enjoy without guilt. With the natural sweetness of apples and honey, combined with the wholesome goodness of oats, they are perfect for breakfast or a snack. Enjoy baking and sharing these delightful muffins with your loved ones!

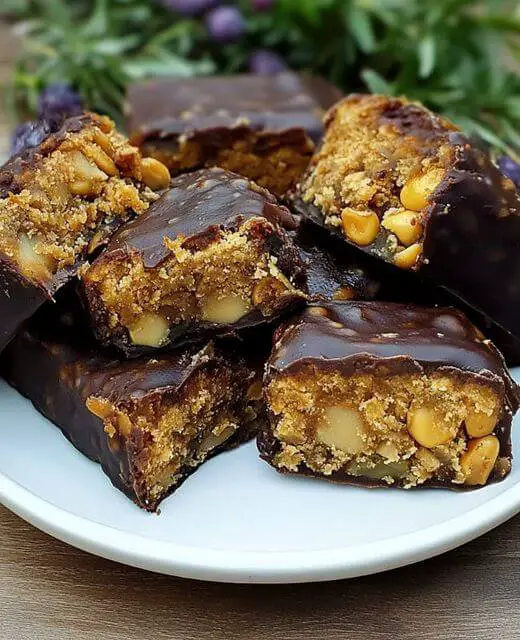
  • Luxurious Chocolate-Dipped Apricot Jewels

    Luxurious Chocolate-Dipped Apricot Jewels

    Luxurious Chocolate-Dipped Apricot Jewels

    Luxurious Chocolate-Dipped Apricot Jewels

    Ingredients

    For the Base

    • 200g (7 oz) high-quality dark chocolate
    • 20g (0.7 oz) white chocolate
    • 60g (2.1 oz) hazelnuts
    • 50g (1.75 oz) peanuts
    • 50g (1.75 oz) dried apricots
    • 15ml (1 tablespoon) honey

    Step-by-Step Instructions

    Preparation

    1. Line a baking sheet with parchment paper
    2. Finely chop hazelnuts and peanuts, keeping them separate
    3. Finely chop dried apricots

    Creating the Apricot Filling

    1. Place chopped apricots and honey in a food processor
    2. Process until a smooth, pliable paste forms
    3. Form mixture into small balls or logs (about 1 inch long)
    4. Place shaped pieces on lined baking sheet
    5. Refrigerate for 15 minutes to firm up

    Tempering the Chocolate

    1. Chop dark chocolate into small, uniform pieces
    2. Place 3/4 of the chocolate in a heatproof bowl
    3. Heat using double boiler method or microwave in 30-second intervals
    4. Stir frequently until chocolate reaches 115°F (46°C)
    5. Remove from heat and add remaining chocolate
    6. Stir continuously until temperature drops to 88°F (31°C)

    Assembly

    1. Dip each chilled apricot piece into tempered dark chocolate
    2. Use a fork to ensure complete coverage
    3. Tap fork gently to remove excess chocolate
    4. Place dipped pieces on parchment paper
    5. Immediately sprinkle with chopped nuts
    6. Melt white chocolate and drizzle over pieces for decoration
    7. Allow to set completely in a cool place

    Pro Tips for Perfect Results

    • Use high-quality chocolate with at least 70% cocoa content
    • Ensure all tools are completely dry before working with chocolate
    • Keep white chocolate separate to prevent mixing with dark chocolate
    • Work quickly when coating to prevent chocolate from setting prematurely
    • If chocolate becomes too thick, gently rewarm to maintain proper consistency

    Storage and Serving

    • Store in an airtight container in a cool, dry place
    • Can be refrigerated for up to 2 weeks
    • Bring to room temperature before serving
    • Arrange on a platter for elegant presentatio
  • How to Make Mosaic jelly with 4 ingredients

    How to Make Mosaic jelly with 4 ingredients

    How to Make Mosaic jelly with 4 ingredients


    How to Make One 14-ounce can of heavy cream is required.

    one fourteen-ounce can of sweetened condensed milk

    five flavored gelatin packets, each containing three and a half ounces

    two 0.3-ounce packages of pineapple-flavored gelatin

    Instructions:

    Half a cup (125 ml) of boiling water is all you need to dissolve the five flavored gelatins. Next, fill each with half a cup (125 ml) of ice water. Put each one in its own container and put it in the fridge until it sets completely.

    Prepare the Gelatin by cutting it into cubes or any other form you choose after it has firmed up.

    Next, in 3/4 cup (175 ml) of boiling water for each package of pineapple gelatin, dissolve the gelatin. Next, whisk in 3/4 cup (175 ml) of chilled water.

    After the pineapple gelatin has cooled, add the chilled heavy cream and sweetened condensed milk; stir until combined. This will make the cream.

    Finishing the Gelatin Salad: Lastly, add the pineapple cream mixture and gently fold in the gelatin cubes. Place in the fridge until completely set, then transfer to a glass dish.

    Some pointers:

    If you want your dessert to stand out more, try using different tastes of gelatin.

    Before combining the gelatins with the cream, let them cool completely so they don’t melt.

    For an added burst of flavor, include sliced strawberries, kiwis, or pineapple.

    Serve chilled with a garnish of fresh mint leaves.

  • Cozy Baked Cinnamon Apple Crisp (Gluten-Free & Dairy-Free)

    Cozy Baked Cinnamon Apple Crisp (Gluten-Free & Dairy-Free)

    Cozy Baked Cinnamon Apple Crisp (Gluten-Free & Dairy-Free)

    Nothing says comfort quite like the aroma of baked apples and warm cinnamon wafting through your home. This gluten-free and dairy-free apple crisp combines tender, spiced apples with a perfectly crispy oat topping, creating a dessert that’s both nostalgic and allergy-friendly. Perfect for fall gatherings, holiday celebrations, or anytime you crave a wholesome, comforting dessert.

    Ingredients

    Serves 6-8

    For the Apple Filling

    • 4 large apples (about 800g), cored and sliced ¼-inch thick
    • 15ml (1 tablespoon) fresh lemon juice
    • 5g (1 teaspoon) ground cinnamon
    • 30g (2 tablespoons) coconut sugar (optional)
    • 5g (1 teaspoon) vanilla extract

    For the Crisp Topping

    • 50g (½ cup) certified gluten-free rolled oats
    • 30g (¼ cup) almond flour
    • 30ml (2 tablespoons) melted coconut oil
    • 30ml (2 tablespoons) pure maple syrup
    • 2g (½ teaspoon) ground cinnamon
    • Pinch of sea salt

    Instructions

    1. Prepare (10 minutes)
    • Preheat oven to 190°C (375°F)
    • Grease a 9-inch square baking dish or 2-quart casserole
    • Core and slice apples uniformly
    1. Season Apples (5 minutes)
    • In a large bowl, toss sliced apples with lemon juice
    • Add cinnamon, vanilla, and coconut sugar if using
    • Mix until evenly coated
    • Transfer to prepared baking dish
    1. Make Topping (5 minutes)
    • Combine gluten-free oats and almond flour in a bowl
    • Add melted coconut oil and maple syrup
    • Mix until crumbly texture forms
    • Sprinkle with cinnamon and salt, mix well
    1. Assemble and Bake (25-30 minutes)
    • Spread topping evenly over seasoned apples
    • Bake until apples are tender and topping is golden
    • Check doneness by inserting a knife into apples

    Nutritional Information (per serving, based on 8 servings)

    • Calories: 185
    • Fat: 8g
    • Carbohydrates: 28g
    • Fiber: 4g
    • Protein: 2g
    • Sugar: 20g

    Total Time

    • Prep Time: 20 minutes
    • Bake Time: 25-30 minutes
    • Total Time: 45-50 minutes

    Pro Tips and Tricks

    1. Apple Selection
    • Use a mix of sweet and tart apples
    • Honeycrisp, Granny Smith, Pink Lady work well
    • Choose firm apples that hold shape when baked
    1. Texture Tips
    • Slice apples uniformly for even cooking
    • Don’t overmix topping to maintain crumbly texture
    • Cover with foil if topping browns too quickly
    1. Serving Suggestions
    • Serve warm for best texture and flavor
    • Top with dairy-free vanilla ice cream
    • Drizzle with additional maple syrup
    1. Preparation
    • Prepare topping in advance
    • Store in refrigerator until ready to use
    • Bring to room temperature before baking

    Variations and Substitutions

    1. Fruit Options
    • Mix in pears for variety
    • Add berries for extra tartness
    • Include cranberries during holiday season
    1. Topping Alternatives
    • Use coconut flour instead of almond flour
    • Try pecans or walnuts for crunch
    • Substitute honey for maple syrup (not vegan)
    1. Spice Variations
    • Add nutmeg for warmth
    • Include ginger for zing
    • Mix in cardamom for complexity
    1. Sweetener Options
    • Use date syrup instead of maple syrup
    • Try coconut sugar in topping
    • Reduce sweetener for tart preference

    Common FAQs

    Q: Can I prepare this in advance?
    A: Yes, assemble up to 24 hours ahead and refrigerate unbaked. Bring to room temperature before baking.

    Q: Why is my topping not crispy?
    A: Ensure coconut oil is properly incorporated and avoid overcrowding the topping.

    Q: How do I store leftovers?
    A: Cover and refrigerate for up to 5 days. Reheat in oven for best results.

    Q: Can I freeze this dessert?
    A: Yes, freeze unbaked for up to 3 months. Bake directly from frozen, adding 10-15 minutes.

    Storage and Make-Ahead Tips

    Refrigerator Storage

    • Cover tightly and store up to 5 days
    • Best reheated in 350°F oven for 15 minutes
    • Avoid microwave to maintain crispy topping

    Freezer Instructions

    • Wrap unbaked crisp tightly
    • Store up to 3 months
    • Thaw overnight in refrigerator
    • Bake as directed, adding extra time if needed

    Make-Ahead Options

    • Prepare filling and topping separately
    • Store in refrigerator up to 24 hours
    • Assemble just before baking
    • Allow ingredients to reach room temperature

    Reheating Tips

    • Preheat oven to 350°F
    • Cover loosely with foil
    • Heat 15-20 minutes until warm
    • Remove foil for final 5 minutes to re-crisp topping
  • Famous Chocolate Depression Cake

    Famous Chocolate Depression Cake

    The Depression Cake began in the Depression era. The cake itself has no eggs or dairy in it. The plan for those times was to make food stretch as far as they could without using any of the ration coupons.

    MY LATEST VIDEOS

    Chocolate Depression Cake 23 min scaled

    Want to save this recipe? Enter your email below and we’ll send the recipe straight to your inbox!


    NOTE: By saving this recipe, you agree to join our weekly recipes newsletter.

    The coupons allowed them to get so much sugar or other items that were needed. The women wanted to be able to feed their families and still give them cakes or desserts, they found ways to do so when money was scarce or non-existent.

    Chocolate Depression Cake 19 min scaled

    This chocolate cake is moist, fluffy and very chocolatey. Very seldom would this cake have frosting on it back in those times. The Dairy, the powdered sugar were not items that were of importance when it came to feeding a hungry family in hard times.

    Chocolate Depression Cake 22 min scaled

    REMEMBER

    WANT TO SAVE THIS RECIPE? CLICK BELOW AND PIN IT

    Pin

    You can make this cake plain and enjoy it just as much as you would with the frosting.

    Chocolate Depression Cake 21 min scaled

    Frequently Asked Questions:

                How can a Cake have no eggs?

    I seriously cannot explain it in a way that would make sense. However, I will tell you it has to do with the way the vinegar and baking soda react with each other. All I will say definitively is that this cake is the perfect cake! I seldom buy box mixes anymore.

                Could I leave the Cocoa Powder out of the recipe?

    I imagine that would be okay, but you will need to replace at least some of the dry ingredients from the cocoa with flour.

                Do I need to refrigerate this cake?

    There is no dairy in the cake, so it would be perfectly okay sitting covered on your counter. Remember, not all families had refrigerators or ice boxes back in the Depression times.

                Could I add nuts or chips to the cake?

    You could definitely add nuts or cherries, or chocolate chips or whatever pleases you in this recipe. Share what you added so we all can try.

    Chocolate Depression Cake 19 min scaled

    What do you need to make Famous Chocolate Depression Cake

                1 cup water

    1 cup Granulated Sugar

    ⅓ cup Vegetable Oil

    1 tsp Vanilla Extract

    1 tsp White Vinegar

    ½ tsp Salt

    1 tsp Baking Soda

    ¼ cup Cocoa Powder, unsweetened

    1 ½ cups Flour

    Frosting:

    2 tbsp butter, softened

    ¼ cup Cocoa Powder, unsweetened

    1 cup Powdered Sugar

    ½ tsp Vanilla Extract

    1 tbsp Heavy cream(you can use milk if you have no cream)

    Chocolate Depression Cake min scaled

    How to make Famous Chocolate Depression Cake

    Cake:

    Preheat the oven to 350*

    Combine the flour, sugar, cocoa powder, salt and baking soda in a bowl

    a)

    Chocolate Depression Cake 2 min scaled

    b)

    Chocolate Depression Cake 3 min scaled

    In another bowl combine the water, vinegar, vanilla and oil

    Chocolate Depression Cake 4 min scaled

    Slowly add the wet ingredients to the bowl with the dry mix

    Chocolate Depression Cake 5 min scaled

    Mix until all lumps are removed

    Chocolate Depression Cake 6 min scaled

    Grease a 9×9 baking pan

    Spread the batter into the prepared pan evenly

    Chocolate Depression Cake 7 min scaled

    Bake for 30 to 35 minutes, until the center bounces back or a toothpick comes out clean

    Remove from the oven and set aside to cool

    Chocolate Depression Cake 8 min scaled

    Frosting:

    Melt the butter in a saucepan

    Stir in the cocoa powder, the mixture will be thick

    Transfer the mixture to a medium sized bowl

    Using an electric hand mixer, beat in the milk, vanilla and powdered sugar

    a)

    Chocolate Depression Cake 9 min scaled

    b)

    Chocolate Depression Cake 10 min scaled

    c)

    Chocolate Depression Cake 11 min scaled

    Once combined, beat on high until the frosting is light and fluffy, smooth and creamy

    Chocolate Depression Cake 12 min scaled

    Spread over the cooled cake

    a)

    Chocolate Depression Cake 13 min scaled

    b)

    Chocolate Depression Cake 14 min scaled

    c)

    Chocolate Depression Cake 15 min scaled

    d)

    Chocolate Depression Cake 16 min scaled

    e)

    Chocolate Depression Cake 17 min scaled

    Enjoy!

  • Crustless German Quark Cheesecake

    Crustless German Quark Cheesecake

    Crustless German Quark Cheesecake

    Discover this authentic German-style cheesecake that skips the traditional graham cracker crust in favor of a pure, creamy filling. This simplified version highlights the unique properties of quark, creating a lighter, protein-rich dessert that’s both elegant and surprisingly simple to make. Popular throughout Central Europe, this crustless cheesecake offers a delightful alternative to traditional American versions.

    Ingredients

    For the Filling

    • 28 ounces (800g) quark cheese (20% fat content)
    • 7 ounces (200g) margarine
    • 3.5 ounces (100g) granulated sugar
    • 3 large eggs, room temperature
    • 1 packet (0.3 oz/8g) vanilla sugar (or 2 teaspoons vanilla extract)
    • 1 packet (0.5 oz/15g) baking powder
    • Fresh lemon juice to taste (approximately 1-2 tablespoons)

    For the Pan

    • Butter or cooking spray for greasing

    Detailed Instructions

    1. Preparation Phase (15 minutes)
    • Place oven rack in the middle position
    • Preheat the oven to 356°F (180°C)
    • Grease a 9-inch (23cm) springform pan thoroughly
    • Remove eggs and quark from refrigerator to reach room temperature
    1. Melting the Margarine (5 minutes)
    • Melt margarine in a small saucepan over low heat
    • Remove from heat and let cool slightly
    • Do not allow it to brown or bubble
    1. Making the Batter (10 minutes)
    • In a large mixing bowl, combine quark and melted margarine
    • Add sugar and vanilla sugar, mix until well combined
    • Beat in eggs one at a time until fully incorporated
    • Add lemon juice to taste
    • Fold in baking powder gently but thoroughly
    1. Baking Process (45-50 minutes)
    • Pour batter into prepared springform pan
    • Smooth the top with a spatula
    • Bake for 45-50 minutes until golden brown
    • The center should still have a slight wobble
    • Test with a toothpick – it should come out mostly clean
    1. Cooling Phase (2 hours)
    • Let cool in the pan for 15 minutes
    • Run a knife around the edge
    • Release springform slowly
    • Cool completely on a wire rack

    Nutritional Information

    (Per slice, serves 12)

    • Calories: 285
    • Protein: 12g
    • Carbohydrates: 15g
    • Fat: 20g
    • Saturated Fat: 5g
    • Cholesterol: 62mg
    • Sodium: 250mg
    • Calcium: 120mg

    Total Time:

    • Preparation: 30 minutes
    • Baking: 45-50 minutes
    • Cooling: 2 hours
    • Total: 3 hours 20 minutes

    Pro Baking Tips

    • Room temperature ingredients are crucial for a smooth batter
    • Don’t overmix after adding baking powder
    • Place a water bath on the bottom rack of the oven to prevent cracking
    • Check the cake 5 minutes before the recommended baking time
    • The cake will continue cooking slightly as it cools
    • A slightly wobbly center is perfect – it will set while cooling

    Variations and Substitutions

    • Quark Alternatives:
    • Greek yogurt (strained overnight)
    • Combination of cream cheese and sour cream
    • Fromage blanc
    • Fat Content Options:
    • Butter instead of margarine
    • Low-fat quark (adjust baking time)
    • Flavoring Ideas:
    • Orange zest instead of lemon
    • 1 teaspoon almond extract
    • Vanilla bean paste
    • Light rum or brandy (1 tablespoon)

    Common FAQs

    Q: What if I can’t find quark in my local store?
    A: Make your own by straining plain yogurt overnight, or substitute with a mixture of cream cheese and Greek yogurt (equal parts).

    Q: Why did my cheesecake crack?
    A: Usually due to rapid temperature changes. Use a water bath and cool gradually in the oven with the door slightly open.

    Q: Can I make this cheesecake ahead of time?
    A: Yes, it actually improves after 24 hours in the refrigerator as flavors develop.

    Q: Why is my cheesecake too dense?
    A: Likely due to cold ingredients or overmixing. Ensure all ingredients are at room temperature before starting.

    Storage and Make-Ahead Tips

    • Refrigerator Storage:
    • Keeps fresh for up to 5 days
    • Store in an airtight container
    • Let sit at room temperature for 30 minutes before serving
    • Freezer Storage:
    • Can be frozen for up to 3 months
    • Wrap tightly in plastic wrap and aluminum foil
    • Thaw overnight in refrigerator
    • Make-Ahead Tips:
    • Prepare 1-2 days in advance for best flavor
    • Bring ingredients to room temperature the night before
    • Can be served chilled or at room temperature
    • Serving Suggestions:
    • Fresh berries
    • Whipped cream
    • Berry compote
    • Dusting of powdered sugar
  • flaky, layered flatbread

    flaky, layered flatbread

    This is a type of flaky, layered flatbread, possibly a Chinese-style pancake (shou zhua bing) or a Middle Eastern/Mediterranean-style flatbread. Here’s a simple recipe to make it at home:

    Ingredients:

    • 2 cups all-purpose flour
    • ¾ cup warm water
    • 1 teaspoon salt
    • 2 tablespoons vegetable oil (or melted butter)
    • Extra flour for dusting
    • Oil or butter for cooking

    Instructions:

    Step 1: Make the Dough

    1. In a mixing bowl, combine the flour and salt.
    2. Slowly add warm water while mixing until a soft dough forms.
    3. Knead the dough for about 8-10 minutes until it becomes smooth.
    4. Cover the dough and let it rest for 30 minutes.

    Step 2: Roll and Layer

    1. Divide the dough into small equal portions.
    2. Roll each portion into a thin circle using a rolling pin.
    3. Brush the surface with oil or melted butter.
    4. Fold or roll the dough to create layers (you can roll it up like a Swiss roll and flatten it again).
    5. Let the layered dough rest for another 10 minutes.

    Step 3: Cook the Flatbreads

    1. Heat a non-stick pan over medium heat.
    2. Place the rolled-out dough onto the pan and cook for about 2-3 minutes on each side, flipping occasionally.
    3. Press gently to encourage even cooking until golden brown spots appear.

    Step 4: Serve and Enjoy

    1. Once cooked, stack the breads and gently separate the layers by hand for extra fluffiness.
    2. Serve warm with curries, dips, or enjoy it on its own!

    Would you like variations or more detailed tips?

  • That’s Enough, The Belly Must Go! Try This Lemon Drink for Weight Loss

    That’s Enough, The Belly Must Go! Try This Lemon Drink for Weight Loss

    That’s Enough, The Belly Must Go! Try This Lemon Drink for Weight Loss

    If you’re looking for a natural way to shed stubborn belly fat, this refreshing lemon drink might be just what you need. Packed with metabolism-boosting ingredients, it helps cleanse the body, improve digestion, and support weight loss—all while keeping you hydrated and refreshed!

    Why Lemon?

    Lemon is one of the best natural fat-burning ingredients. It contains vitamin C, antioxidants, and compounds that aid digestion, reduce bloating, and support the body’s detoxification process.

    The Ultimate Belly Fat Burner Drink

    Ingredients:

    • 1 glass of warm water (about 250ml)
    • Juice of ½ lemon
    • 1 teaspoon honey (optional)
    • A pinch of cinnamon or ginger (optional, for extra fat-burning effects)

    How to Prepare:

    1. Squeeze the lemon juice into a glass of warm water.
    2. Stir in honey if you want a slightly sweet taste.
    3. Add cinnamon or ginger for an extra metabolism boost.
    4. Mix well and drink on an empty stomach every morning.

    How This Drink Helps Burn Belly Fat

    ✔ Boosts metabolism – Warm water with lemon helps kickstart digestion and fat-burning processes.
    ✔ Reduces bloating – Lemon acts as a natural diuretic, helping to flush out excess water weight.
    ✔ Improves digestion – Supports gut health and prevents constipation.
    ✔ Curbs cravings – Helps you feel full and reduces unnecessary snacking.

    Additional Tips for Faster Results

    • Stay active – Combine this drink with light exercises like walking or stretching.
    • Eat clean – Focus on whole foods, lean proteins, and fiber-rich vegetables.
    • Stay hydrated – Drink plenty of water throughout the day to help flush out toxins.
    • Get enough sleep – Proper rest is essential for weight loss and metabolism regulation.

    This simple lemon drink is an easy and effective way to support your weight loss journey. Try it daily and watch the belly fat melt away naturally!

  • The Seed That Strengthens Bones, Eases Pain, and Helps You Lose Weight: Flaxseed and Papaya

    The Seed That Strengthens Bones, Eases Pain, and Helps You Lose Weight: Flaxseed and Papaya

    The Seed That Strengthens Bones, Eases Pain, and Helps You Lose Weight: Flaxseed and Papaya


    Combining flaxseed and papaya creates a nutrient-packed powerhouse that supports bone health, reduces inflammation, and aids weight loss. This natural remedy is easy to prepare and offers numerous health benefits. Let’s explore why this combination works wonders and how to include it in your daily routine!


    Why Flaxseed and Papaya Are So Effective

    FLAXSEED

    • Rich in Omega-3 Fatty Acids: Reduces inflammation and supports joint health.
    • High in Fiber: Aids digestion, promotes satiety, and helps with weight loss.
    • Packed with Lignans: Supports bone density and hormonal balance.
    • Loaded with Nutrients: Provides calcium, magnesium, and phosphorus for strong bones.

    PAPAYA

    • Rich in Vitamin C: Boosts collagen production for healthier bones and joints.
    • Contains Papain: A natural enzyme that reduces pain and inflammation.
    • High in Fiber: Improves digestion and prevents bloating.
    • Low in Calories: Perfect for weight management while providing essential nutrients.

    Health Benefits

    1. Strengthens Bones: The calcium, magnesium, and vitamin C in this combination improve bone density and prevent osteoporosis.
    2. Reduces Inflammation and Pain: Omega-3s from flaxseed and papain from papaya work together to ease joint and muscle discomfort.
    3. Aids Weight Loss: High fiber content helps you feel fuller for longer, reduces cravings, and supports a healthy metabolism.
    4. Improves Digestion: Both ingredients support gut health, relieving constipation and promoting regularity.
    5. Boosts Immunity: Rich in antioxidants and vitamins, this mix strengthens your immune system.

    How to Prepare Flaxseed and Papaya Smoothie

    INGREDIENTS:

    • 1 cup fresh papaya, diced
    • 1 tablespoon flaxseeds (ground for better absorption)
    • 1 cup water, milk, or plant-based milk (e.g., almond or coconut)
    • 1 teaspoon honey (optional, for sweetness)

    INSTRUCTIONS:

    1. Add the diced papaya, ground flaxseeds, and liquid to a blender.
    2. Blend until smooth and creamy.
    3. Taste and add honey if desired.
    4. Serve immediately and enjoy!

    When to Drink It

    • Enjoy this smoothie in the morning on an empty stomach for maximum benefits.
    • Drink it 3–4 times a week to see noticeable improvements in your health.

    Tips

    • For Variety: Add a pinch of cinnamon or a squeeze of lemon for extra flavor and health benefits.
    • Storage: If you’re short on time, prep the ingredients the night before and blend them in the morning.

    This simple combination of flaxseed and papaya is not only delicious but also a natural way to boost your health, ease pain, and support weight loss. Try it today and feel the difference!